uni-app学习笔记十三-vue3中slot插槽的使用
在页面开发中,通常一个页面分为头部,尾部,和中心内容区。其中头部,尾部一般比较固定,而中心区域往往是多样的,需要自定义开发。此时,我们可以引入slot(插槽)来实现这一目标。<slot> 作为一个占位符,父组件传递进来的内容就会渲染在这里。
下面使用slot来实现2个页面中心区域的差异化开发:
项目结构如下:
1.在项目组件components文件夹里新建一个组件:xxy-layout,在xxy-layout.vue文件写入下面的代码:
<template><view class="layout"><view class="header">header区</view><view class="main"><slot></slot></view><view class="footer">底部区</view></view>
</template><script setup></script><style lang="scss" scoped>.layout{.header{height: 100px;background: #cfcfcf;}.main{min-height: 200px;}.footer{height: 120px;background: orange;}}
</style>
2.在demo1和demo2分别引入xxy-layout组件
demo1:
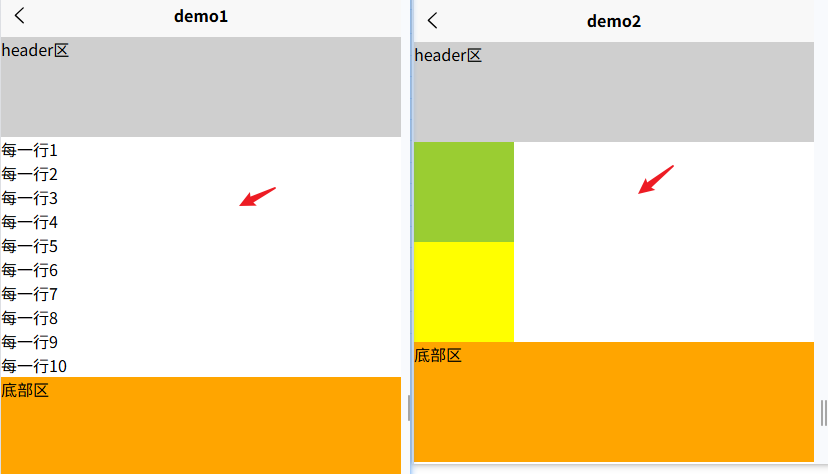
<template><view><xxy-layout><view class="row" v-for="item in 10">每一行{{item}}</view></xxy-layout></view>
</template>
demo2:
<template><view><xxy-layout><view class="box1"></view><view class="box2"></view></xxy-layout></view>
</template><script setup></script><style lang="scss" scoped>.box1{width: 100px;height: 100px;background: yellowgreen;}.box2{width: 100px;height: 100px;background: yellow;}
</style>
从而实现中心区域的差异化
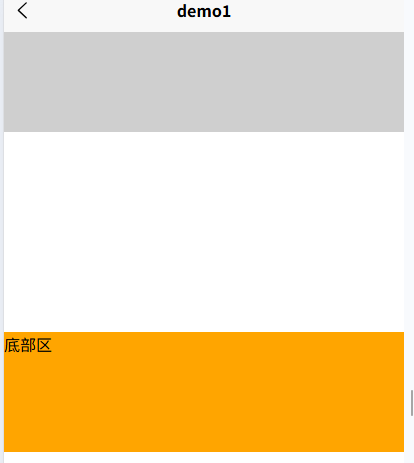
如果一个页面多处需要用到slot,就需要用到具名插槽。此时demo1和demo2还像上面写,将会失效。对上面xxy-layout.vue进行调整,分别在header和main引入slot,此时需要添加name以示区分。
<view class="header"><slot name="header"></slot>
</view>
<view class="main"><slot name="main"></slot>
</view>
此时再来看页面,中间的内容消失了,demo2也是一样。
因此使用具名插槽后,需要对引入子组件部分进行调整,
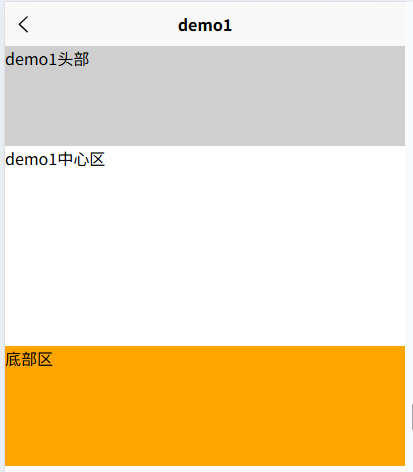
方法1:通过template v-slot来实现
<xxy-layout><template v-slot:header>demo1头部</template><template v-slot:main>demo1中心区</template>
</xxy-layout>
效果:
方法2:使用#插槽名称
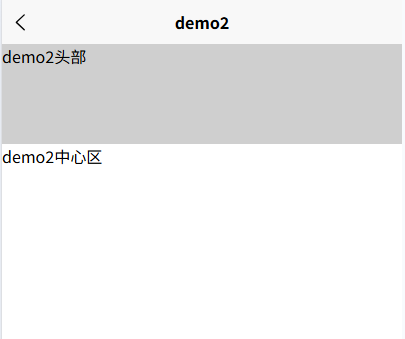
<xxy-layout><template #header>demo2头部</template><template #main>demo2中心区</template>
</xxy-layout>
效果: