uni-app学习笔记十四-vue3中emit的使用
在组件传值中,无论是props还是slot都是单向数据流,父组件向子组件传值,子组件不能直接对父组件传过来的值进行重新赋值。
下面学习子组件向父组件传值的工具--emit。
在子组件emit设置传递的函数名和值
<template><view>子组件<button @click="$emit('add',Math.random())">提交</button></view>
</template>
子组件设置传递过去的函数名为add,值为一个随机数
在父组件中接收:
通过@add="onAdd",其中add就是子组件的函数名
<template><view><xxm-child @add="onAdd"></xxm-child><view class="box" :style="{background:color}">{{num}}</view></view>
</template><script setup>import {ref} from "vue"const num = ref(0)const color = ref("#ccc")const onAdd =function onAdd(e){console.log(e)num.value=ecolor.value="#"+String(e).substring(3,6)}
</script><style lang="scss" scoped>.box{width: 100%;height: 50px;}
</style>
在父组件中,onAdd接收子组件传递过来的随机数并转化为字符串进行截取,得到一个颜色的随机数。效果如下:
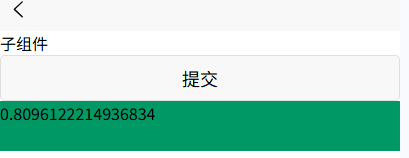
当点击提交按钮时,随机数发生变化,颜色也随之改变。
在实际开发中,emit通常需要在JS部分进行处理,上面的
@click="$emit('add',Math.random())"
在JS部分需要这样写
<template><view>子组件<button @click="onClick">提交</button></view>
</template><script setup>const emit = defineEmits(["add"])function onClick(){emit('add',Math.random())}
</script>
可以实现一样的效果。
如果子组件中涉及多个 ,可参照下面的方式进行处理:
子组件
<template><view>子组件<button @click="onClick">提交</button></view><view>------------</view><view><input type="text" @input="onInput" /></view>
</template><script setup>const emit = defineEmits(["add","change"])function onClick(){emit('add',Math.random())}function onInput(e){console.log(e.detail.value)emit("change",e.detail.value)}
</scipt>
父组件
<template><view><xxm-child @add="onAdd" @change="onChange"></xxm-child><view class="box" :style="{background:color,fontSize:size+'px'}">num:{{num}} </view></view>
</template><script setup>import {ref} from "vue"const num = ref(0)const size = ref(12)const color = ref("#ccc")const onAdd =function onAdd(e){console.log(e)num.value=ecolor.value="#"+String(e).substring(3,6)}function onChange(e){console.log(e)size.value=e}
</script>