使用web3工具结合fiscobcos网络部署调用智能合约
借助 web3 工具,在 FISCO BCOS 网络上高效部署与调用智能合约,解锁区块链开发新体验。
搭建的区块链网络需要是最新的fiscobcos3.0,最新的才支持web3调用
现在分享踩坑经验,希望大家点赞
目录
1.搭建fiscobcos节点(3.0Air版本)
2.修改网络配置使外部能够连接web3网络
3.搭建控制台console
ubuntu下载配置java
下载配置console
4.启动并使用控制台
5.链接metamask并在remix里编译部署一个智能合约
6.编译部署合约:
1.搭建fiscobcos节点(3.0Air版本)
安装ubuntu依赖
sudo apt install -y curl openssl wget创建操作目录,下载建链脚本
# 创建操作目录
cd ~ && mkdir -p fisco && cd fiscocurl -#LO https://gitee.com/FISCO-BCOS/FISCO-BCOS/releases/download/v3.11.0/build_chain.sh && chmod u+x build_chain.sh
首先需要在github下载fisco-bcos二进制文件,然后传到fisco文件夹下面,然后尝试执行:
bash build_chain.sh -l127.0.0.1:4 -p30300,20200 -e ./fisco-bcos这个时候你会发现因为github原因还是拉取不下来
解决:
打开host文件: sudo gedit /etc/hosts,然后输入#github
140.82.114.4 github.com
151.101.1.6 github.global.ssl.fastly.net
151.101.65.6 github.global.ssl.fastly.net
151.101.129.6 github.global.ssl.fastly.net
151.101.193.6 github.global.ssl.fastly.net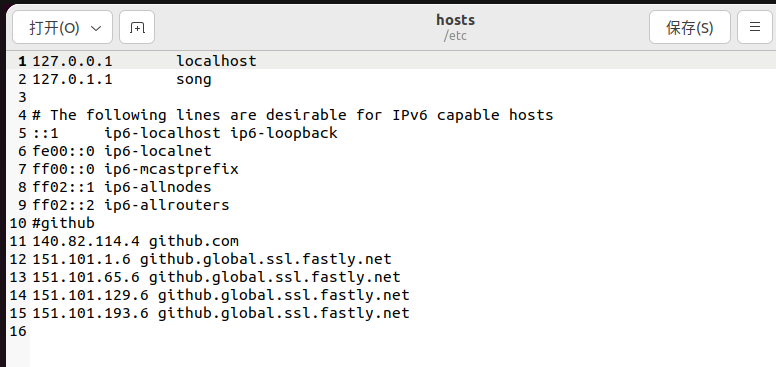
#保存退出并重启服务
sudo systemctl restart NetworkManager重新执行搭建区块链网络
bash build_chain.sh -l127.0.0.1:4 -p30300,20200 -e ./fisco-bcos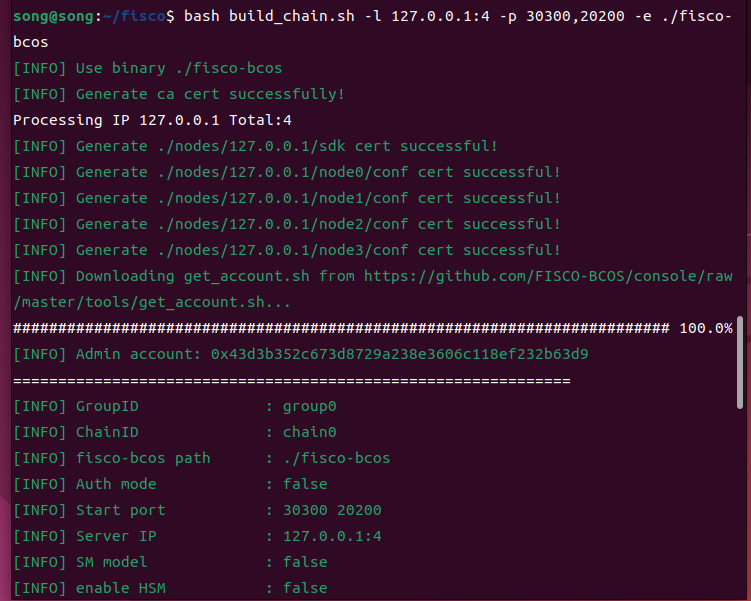
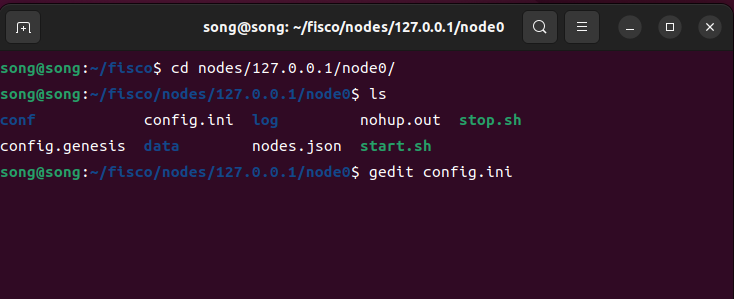
2.修改网络配置使外部能够连接web3网络
[web3_rpc]enable=false //将false改为truelisten_ip=0.0.0.0listen_port=8545thread_count=8
在节点0的相关配置下面

启动节点
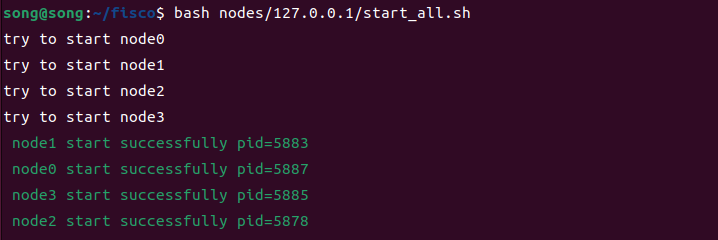
检查是否启动
ps -ef | grep -v grep | grep fisco-bcos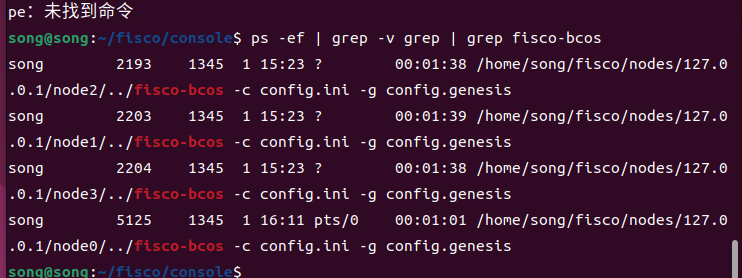
3.搭建控制台console
fiscobcos可以通过控制台设置账户金额
ubuntu下载配置java
首先需要下载java14(这个是官方推荐,我试了也没问题)
下载地址:Java Archive Downloads - Java SE 14 | Oracle Singapore
下载的时候需要登录,这里附上一个 oracle 账号密码:
账号:`83926039@qq.com`
密码:`Oracle0.`
创建安装目录:
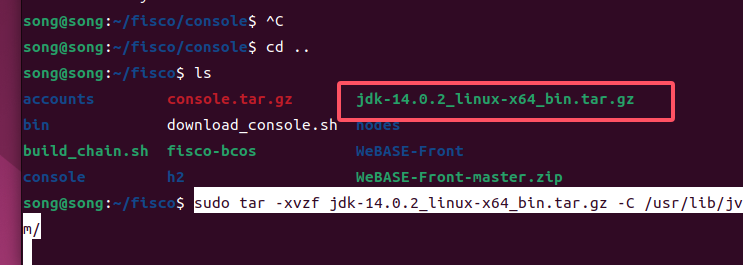
sudo mkdir -p /usr/lib/jvm/把下载的文件拖进fisco目录下然后解压缩:
sudo tar -xvzf jdk-14.0.2_linux-x64_bin.tar.gz -C /usr/lib/jvm/
将 JAVA_HOME 添加到环境变量中:
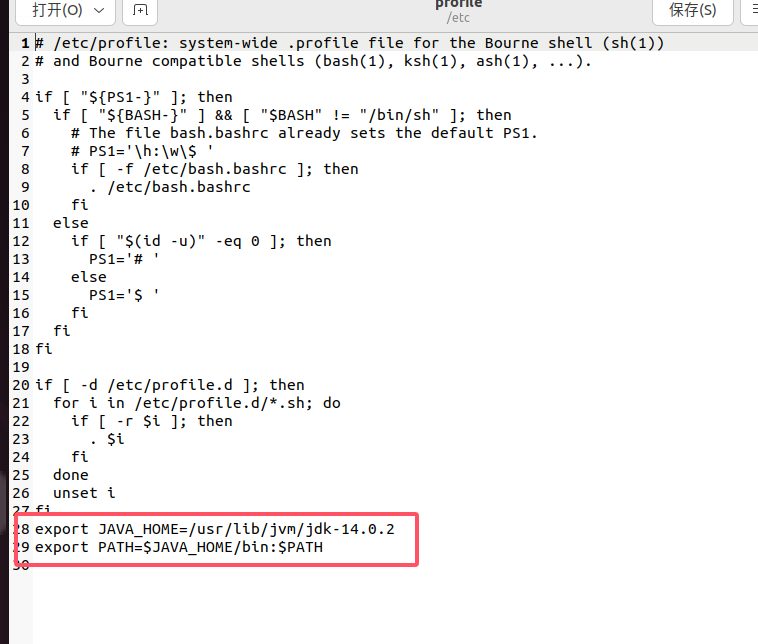
sudo gedit /etc/profile
添加以下内容:
export JAVA_HOME=/usr/lib/jvm/jdk-14.0.2
export PATH=$JAVA_HOME/bin:$PATH
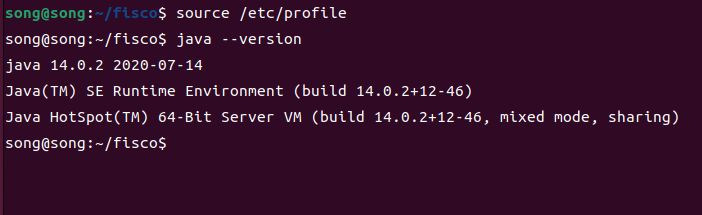
保存并退出后,运行以下命令使更改生效:
source /etc/profile查看java是否成功
下载配置console
curl -#LO https://gitee.com/FISCO-BCOS/console/raw/master/tools/download_console.sh && bash download_console.sh拷贝控制台配置文件
cp -n console/conf/config-example.toml console/conf/config.toml
配置控制台证书
控制台与节点之间默认开启 SSL 连接,控制台需要配置证书才可连接节点。开发建链脚本在生成节点的同时,生成了 SDK 证书,可直接拷贝生成的证书供控制台使用:
cp -r nodes/127.0.0.1/sdk/* console/conf4.启动并使用控制台
cd ~/fisco/console && bash start.sh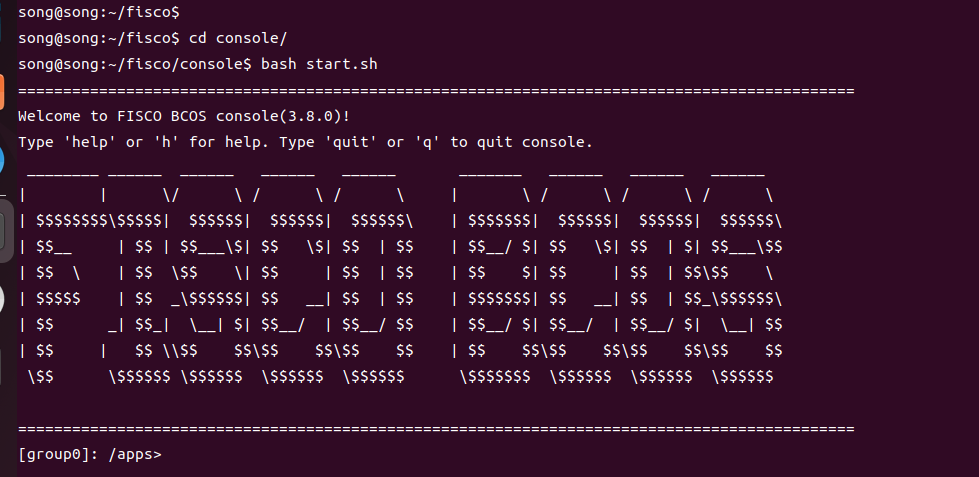
启动完控制台后,可以选择把余额功能打开:
# 开启总体功能
setSystemConfigByKey feature_balance 1
# 开启Balance预编译功能
setSystemConfigByKey feature_balance_precompiled 1 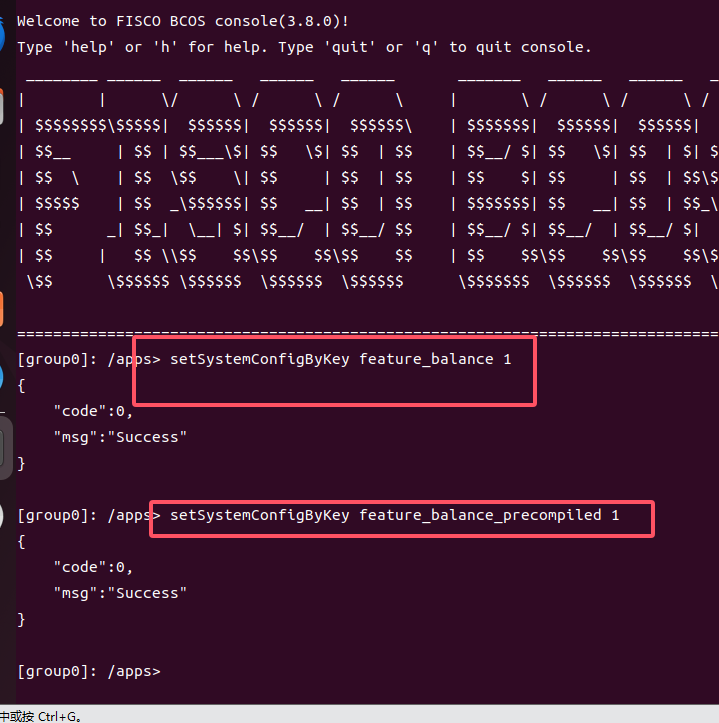
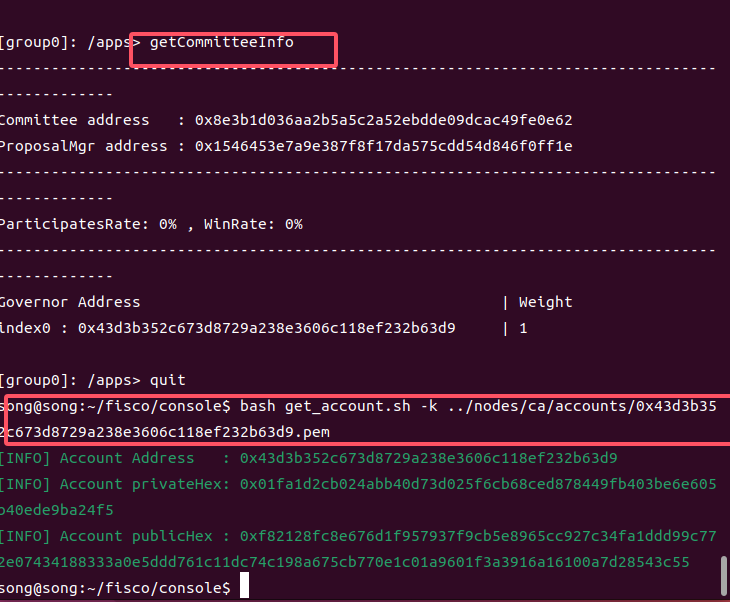
查看admin账户,记住当前账号的私钥。等会导入小狐狸钱包的时候有用
bash get_account.sh -k ../nodes/ca/accounts/0x43d3b352c673d8729a238e3606c118ef232b63d9.pem
为了能在控制台使用治理委员的功能,所以我们需要把账户私钥对放在 ~/fisco/console/account/ecdsa/ 目录下。
sudo cp -r ../nodes/ca/accounts/0x43d3b352c673d8729a238e3606c118ef232b63d9.pem account/ecdsa/
修改私钥文件的权限:
sudo chmod 777 0x43d3b352c673d8729a238e3606c118ef232b63d9.pem
重新进入控制台,输入命令,查看文件中可用的地址:
listAccount
切换账号成 admin :
[group0]: /apps> loadAccount 0x43d3b352c673d8729a238e3606c118ef232b63d9
Load account 0x43d3b352c673d8729a238e3606c118ef232b63d9 success!
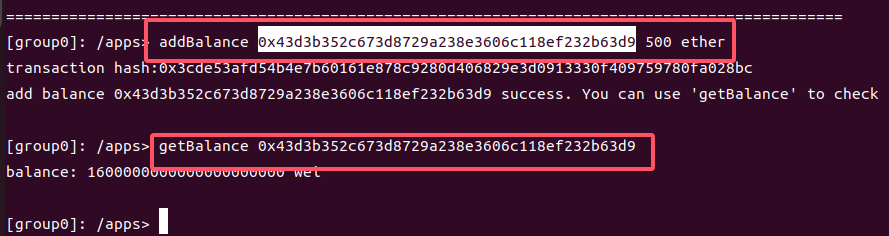
试试管理员才能使用的增加余额:
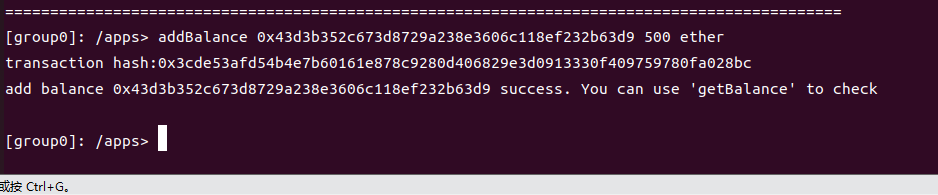
查看余额
5.链接metamask并在remix里编译部署一个智能合约
metamask如何使用,网上有很多详细的介绍,在这里不在具体讲解
配置网络(ip要替换为你的虚拟机ip)
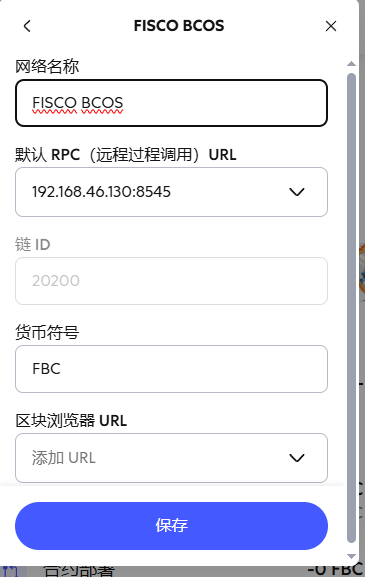
我这里添加了两个账户,均可以正常显示
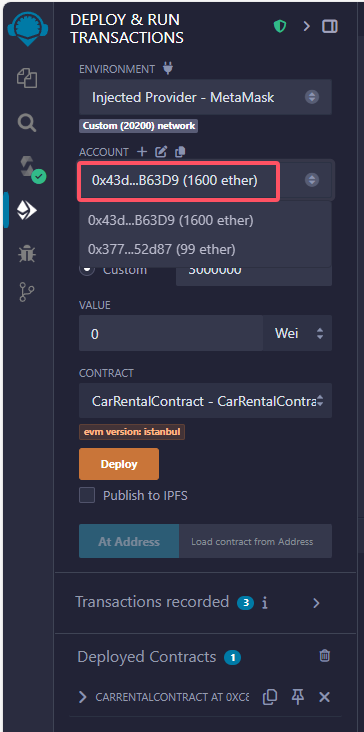
6.编译部署合约:
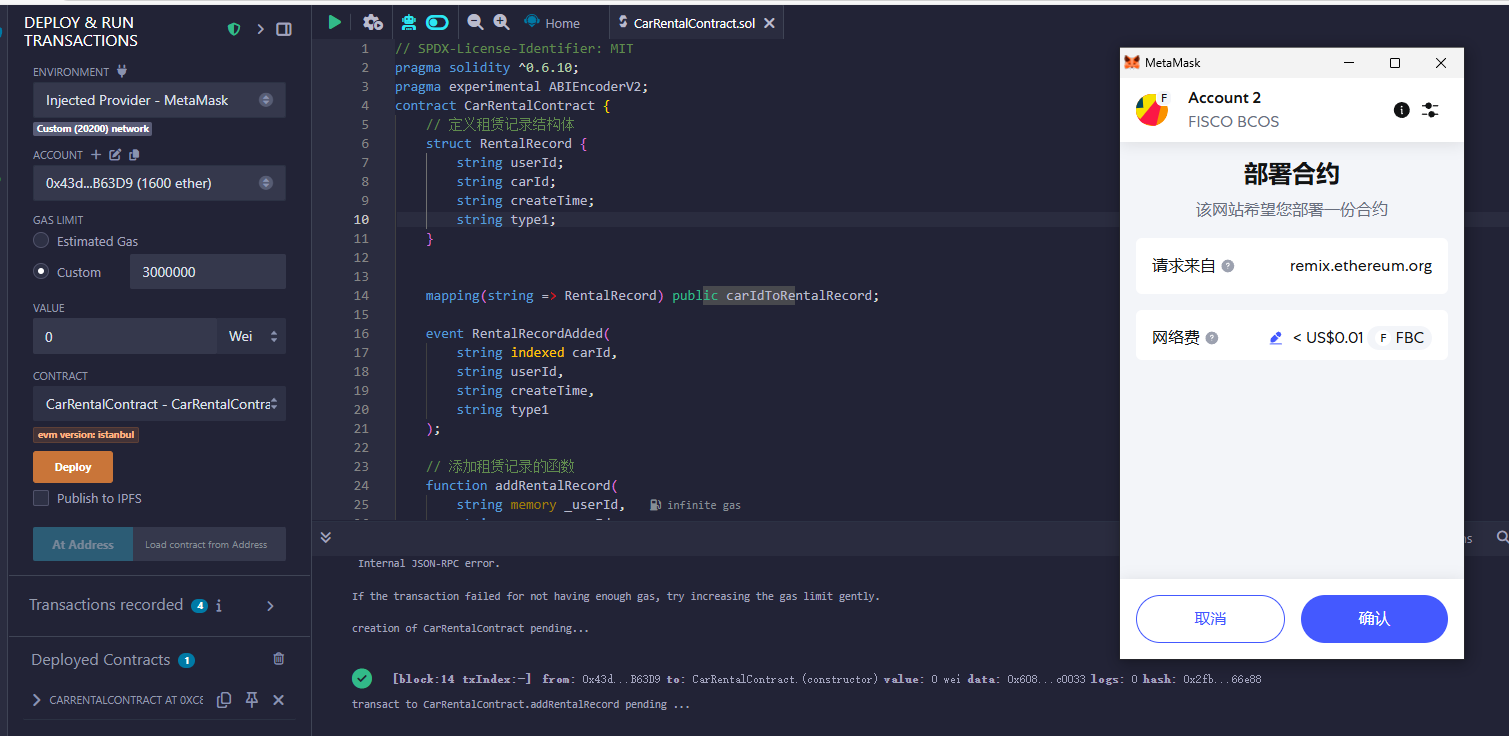
每次执行合约操作时会调出小狐狸钱包进行交换,点击确认。
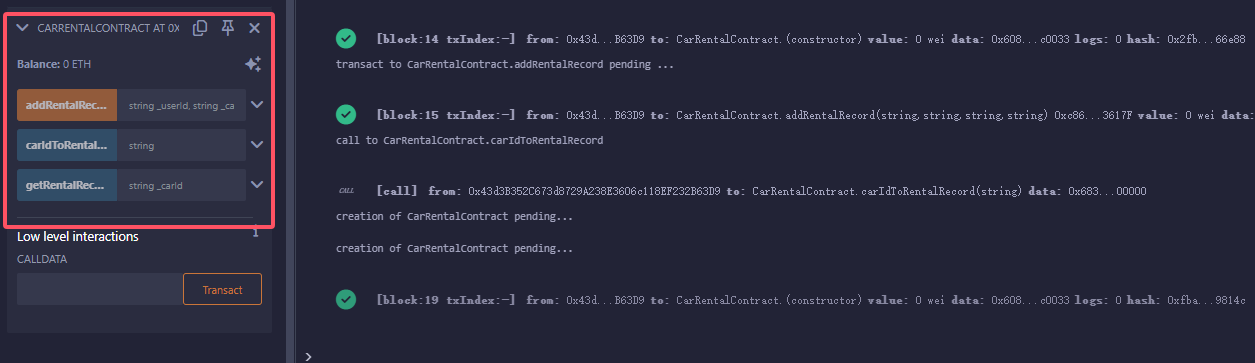
部署成功!调用其他功能也是可以的。
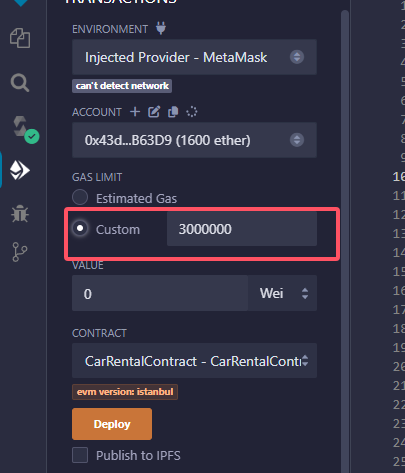
7.调用合约可能出现的报错
If the transaction failed for not having enough gas, try increasing the gas limit gently.
解决:选中Custom,增大Gas限制
附上我测试使用的合约
// SPDX-License-Identifier: MIT
pragma solidity ^0.6.10;
pragma experimental ABIEncoderV2;
contract CarRentalContract {// 定义租赁记录结构体struct RentalRecord {string userId;string carId;string createTime;string type1;}mapping(string => RentalRecord) public carIdToRentalRecord;event RentalRecordAdded(string indexed carId,string userId,string createTime,string type1);// 添加租赁记录的函数function addRentalRecord(string memory _userId,string memory _carId,string memory _createTime,string memory _type) public {RentalRecord memory newRecord = RentalRecord({userId: _userId,carId: _carId,createTime: _createTime,type1: _type});carIdToRentalRecord[_carId] = newRecord;emit RentalRecordAdded(_carId, _userId, _createTime, _type);}// 查询租赁记录的函数function getRentalRecord(string memory _carId)publicviewreturns (string memory userId,string memory carId,string memory createTime,string memory type1){require(bytes(carIdToRentalRecord[_carId].carId).length != 0,"Car ID does not exist");RentalRecord storage record = carIdToRentalRecord[_carId];return (record.userId, record.carId, record.createTime, record.type1);}
}
如果大家还是下载不下来,私聊我给你安装包文件!
都看到这里了,还不快点赞!