【YOLOs-CPP-图像分类部署】01-构建项目
项目说明
为啥要写这篇文章呢?
前面我们其实已经实现了这个系列的文章:【git-hub项目:YOLOs-CPP】。但是呢,那时候,这个项目还不支持图像分类,所以我们用这个系列的文章:【UltralyticsYolo11图像分类完整项目】实现了图像分类的cpu版本部署。
如今(2025年5月30日),YOLOs-CPP实现了对图像分类模型的部署支持,因此,我们需要写一篇新的系列文章,来实现!
环境搭建
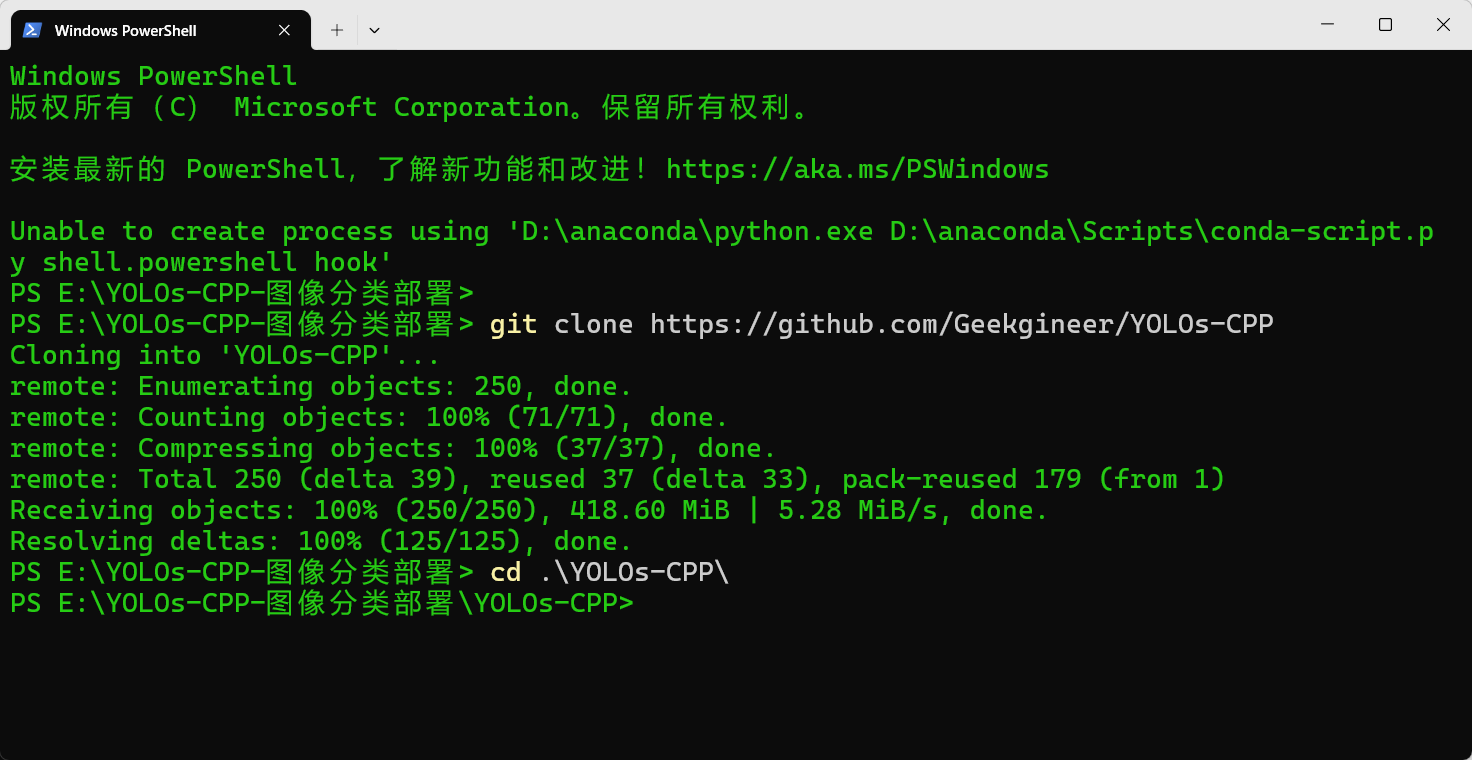
克隆代码仓库
首先,将代码仓库克隆到您的本地机器:
git clone https://github.com/Geekgineer/YOLOs-CPP
cd YOLOs-CPP
修改image_inference.cpp文件
注释掉不需要的YOLO 12版本,并取消注释需要的YOLO 11版本:
/*** @file image_inference.cpp* @brief Object detection in a static image using YOLO models (v5, v7, v8, v9, v10, v11, v12).* * This file implements an object detection application that utilizes YOLO * (You Only Look Once) models, specifically versions 5, 7, 8, 9, 10, 11 and 12. * The application loads a specified image, processes it to detect objects, * and displays the results with bounding boxes around detected objects.** The application supports the following functionality:* - Loading a specified image from disk.* - Initializing the YOLO detector with the desired model and labels.* - Detecting objects within the image.* - Drawing bounding boxes around detected objects and displaying the result.** Configuration parameters can be adjusted to suit specific requirements:* - `isGPU`: Set to true to enable GPU processing for improved performance; * set to false for CPU processing.* - `labelsPath`: Path to the class labels file (e.g., COCO dataset).* - `imagePath`: Path to the image file to be processed (e.g., dogs.jpg).* - `modelPath`: Path to the desired YOLO model file (e.g., ONNX format).** The application can be extended to use different YOLO versions by modifying * the model path and the corresponding detector class.** Usage Instructions:* 1. Compile the application with the necessary OpenCV and YOLO dependencies.* 2. Ensure that the specified image and model files are present in the * provided paths.* 3. Run the executable to initiate the object detection process.** @note The code includes commented-out sections to demonstrate how to switch * between different YOLO models and image inputs.** Author: Abdalrahman M. Amer, www.linkedin.com/in/abdalrahman-m-amer* Date: 29.09.2024*/// Include necessary headers
#include <opencv2/highgui/highgui.hpp>
#include <iostream>
#include <string>// #include "det/YOLO5.hpp" // Uncomment for YOLOv5
// #include "det/YOLO7.hpp" // Uncomment for YOLOv7
// #include "det/YOLO8.hpp" // Uncomment for YOLOv8
// #include "det/YOLO9.hpp" // Uncomment for YOLOv9
// #include "det/YOLO10.hpp" // Uncomment for YOLOv10
#include "det/YOLO11.hpp" // Uncomment for YOLOv11
// #include "det/YOLO12.hpp" // Uncomment for YOLOv12int main(){// Paths to the model, labels, and test imageconst std::string labelsPath = "../models/coco.names";const std::string imagePath = "../data/dog.jpg"; // Primary image path// Uncomment the desired image path for testing// const std::string imagePath = "../data/happy_dogs.jpg"; // Alternate image// const std::string imagePath = "../data/desk.jpg"; // Another alternate image// Model paths for different YOLO versions// Uncomment the desired model path for testing// const std::string modelPath = "../models/yolo5-n6.onnx"; // YOLOv5// const std::string modelPath = "../models/yolo7-tiny.onnx"; // YOLOv7// const std::string modelPath = "../models/yolo8n.onnx"; // YOLOv8// const std::string modelPath = "../models/yolov9s.onnx"; // YOLOv9 // const std::string modelPath = "../models/yolo10n.onnx"; // YOLOv10 // const std::string modelPath = "../quantized_models/yolo10n_uint8.onnx"; // Quantized YOLOv10const std::string modelPath = "../models/yolo11n.onnx"; // YOLOv11 // const std::string modelPath = "../models/yolo12n.onnx"; // YOLOv12 // Initialize the YOLO detector with the chosen model and labelsbool isGPU = true; // Set to false for CPU processing// YOLO7Detector detector(modelPath, labelsPath, isGPU);// YOLO5Detector detector(modelPath, labelsPath, isGPU); // Uncomment for YOLOv5// YOLO8Detector detector(modelPath, labelsPath, isGPU); // Uncomment for YOLOv8// YOLO9Detector detector(modelPath, labelsPath, isGPU); // Uncomment for YOLOv9// YOLO10Detector detector(modelPath, labelsPath, isGPU); // Uncomment for YOLOv10YOLO11Detector detector(modelPath, labelsPath, isGPU); // Uncomment for YOLOv11// YOLO12Detector detector(modelPath, labelsPath, isGPU); // Uncomment for YOLOv12// Load an imagecv::Mat image = cv::imread(imagePath);if (image.empty()){std::cerr << "Error: Could not open or find the image!\n";return -1;}// Detect objects in the image and measure execution timeauto start = std::chrono::high_resolution_clock::now();std::vector<Detection> results = detector.detect(image);auto duration = std::chrono::duration_cast<std::chrono::milliseconds>(std::chrono::high_resolution_clock::now() - start);std::cout << "Detection completed in: " << duration.count() << " ms" << std::endl;// Draw bounding boxes on the imagedetector.drawBoundingBox(image, results); // simple bbox drawing// detector.drawBoundingBoxMask(image, results); // Uncomment for mask drawing// Display the imagecv::imshow("Detections", image);cv::waitKey(0); // Wait for a key press to close the windowreturn 0;
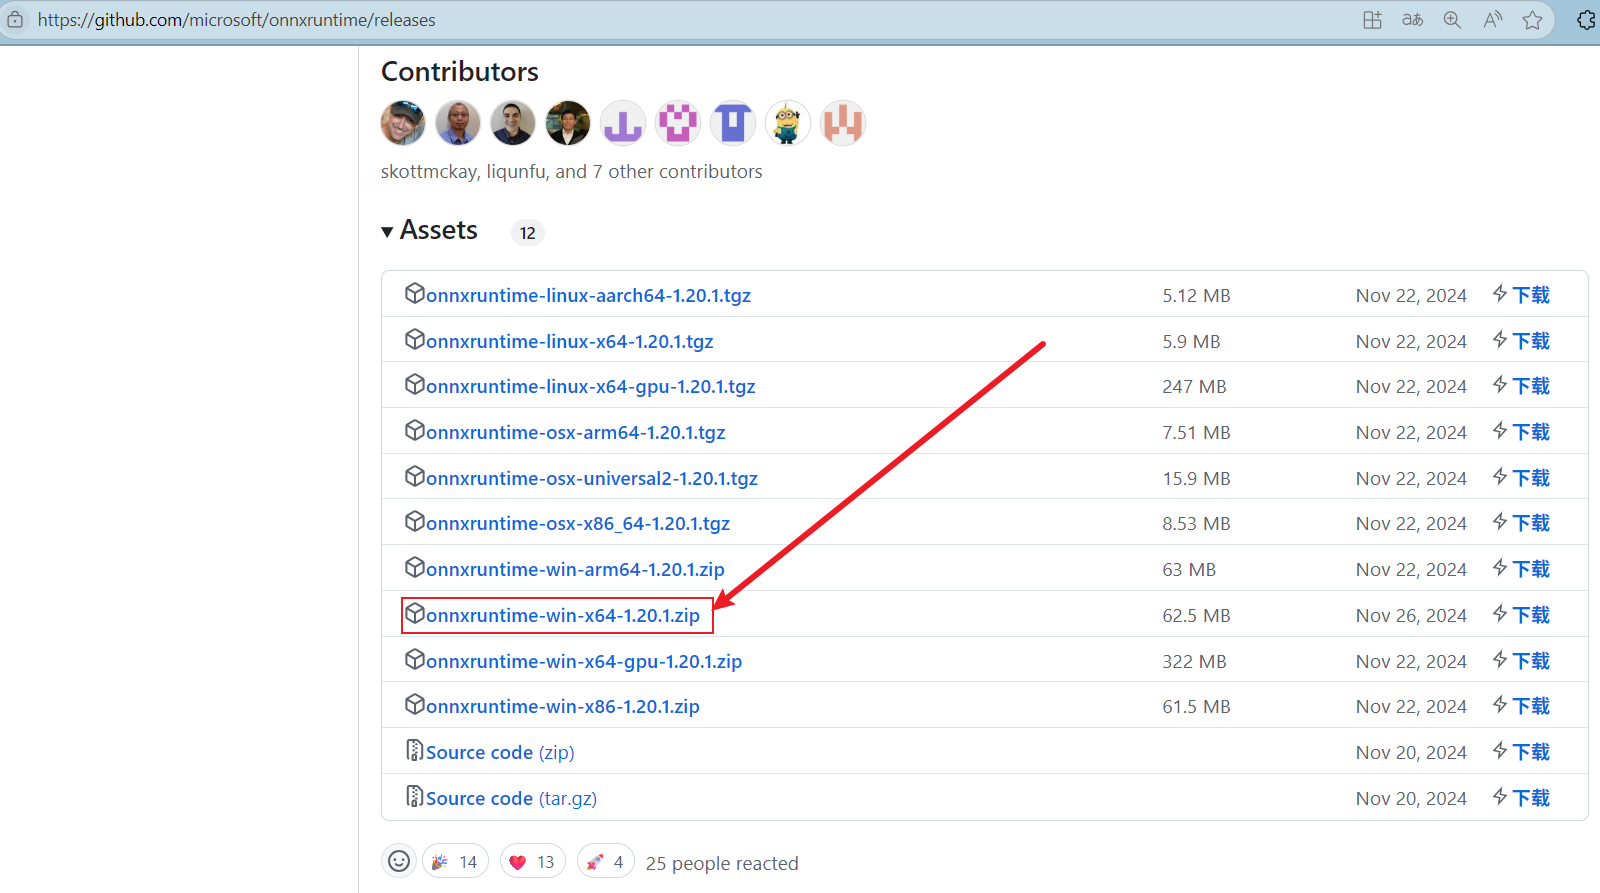
}下载onnxruntime
从官网中下载onnxruntime-win-x64-1.20.1.zip,或者直接点击链接。
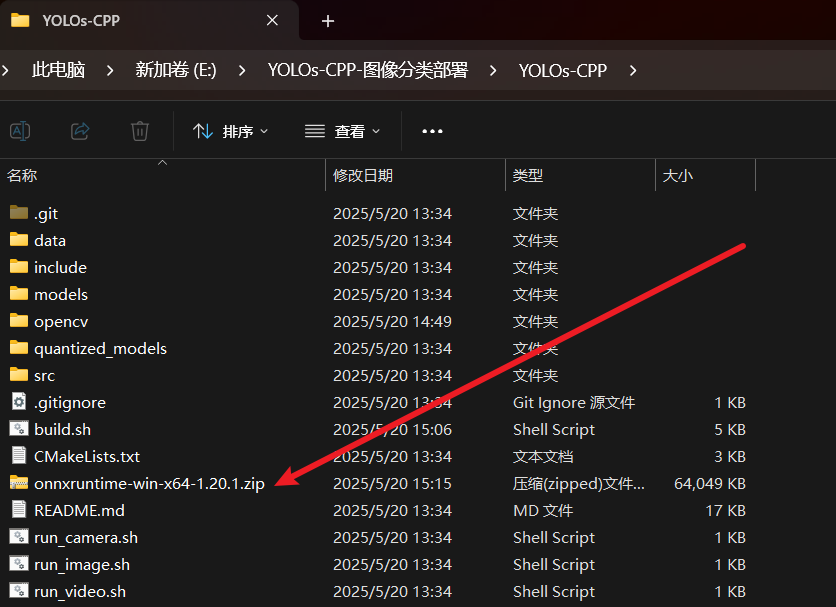
下载完成后,拷贝zip文件到项目中:
把OpenCV加入项目
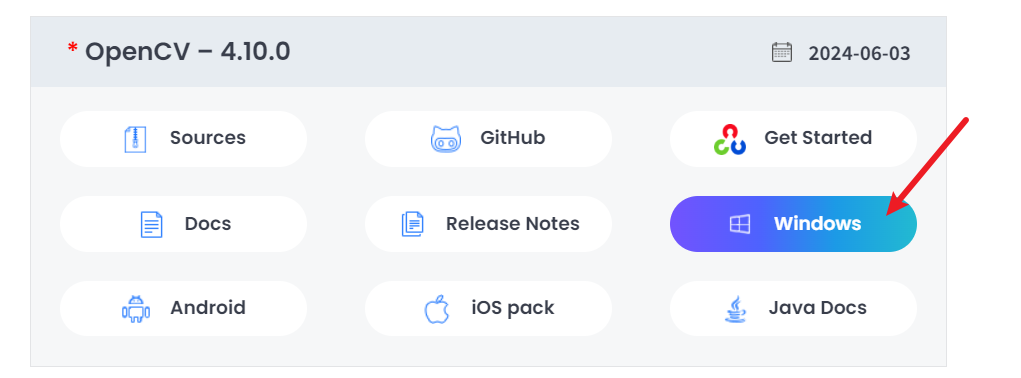
从官网下载OpenCV,比如,我这里下载4.10.0版本。
双击运行后,得到解压后的文件:
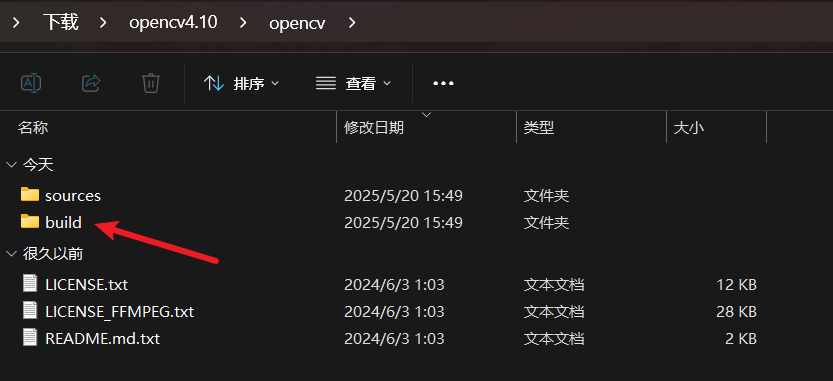
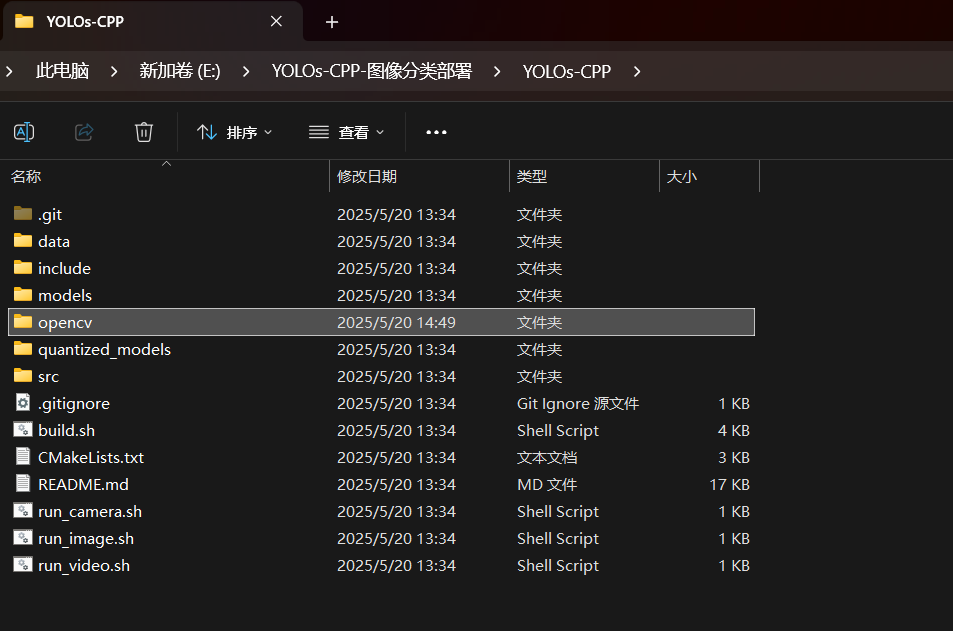
将build文件夹,完整复制到项目中。如下图所示:
修改build.sh
#!/bin/bashset -euo pipefailCURRENT_DIR=$(cd "$(dirname "$0")" && pwd)# Default values
ONNXRUNTIME_VERSION="${1:-1.20.1}"
ONNXRUNTIME_GPU="${2:-0}"# 新增:OpenCV路径配置(根据实际安装位置修改)
OPENCV_DIR="E:/YOLOs-CPP-image-clas/YOLOs-CPP/opencv/build"  # Windows路径使用正斜杠usage() {echo "Usage: $0 [ONNXRUNTIME_VERSION] [ONNXRUNTIME_GPU]"echo "This script builds YOLOs-CPP using local ONNX Runtime and OpenCV."echo "Arguments:"echo "  ONNXRUNTIME_VERSION   Version of ONNX Runtime (default: 1.20.1)"echo "  ONNXRUNTIME_GPU       Use GPU support (0=CPU, 1=GPU, default: 0)"exit 1
}[[ "${1:-}" =~ ^-h|--help$ ]] && usage# 平台检测
platform=$(uname -s)
case "$platform" inDarwin* | Linux*) ONNXRUNTIME_PLATFORM="linux" ;;MINGW*)          ONNXRUNTIME_PLATFORM="win" ;;*)               echo "Unsupported platform: $platform"; exit 1 ;;
esac# 架构检测
architecture=$(uname -m)
case "$architecture" inaarch64|arm64)  ONNXRUNTIME_ARCH="aarch64"; ONNXRUNTIME_GPU=0 ;;x86_64)         ONNXRUNTIME_ARCH=$([[ "$ONNXRUNTIME_PLATFORM" == "win" ]] && echo "x64" || echo "x86_64") ;;arm*)           ONNXRUNTIME_ARCH="arm"; ONNXRUNTIME_GPU=0 ;;i*86)           ONNXRUNTIME_ARCH="x86"; ONNXRUNTIME_GPU=0 ;;*)              echo "Unsupported architecture: $architecture"; exit 1 ;;
esac# ONNX Runtime路径配置
ONNXRUNTIME_PATH="onnxruntime-${ONNXRUNTIME_PLATFORM}-${ONNXRUNTIME_ARCH}"
[[ "$ONNXRUNTIME_GPU" -eq 1 ]] && ONNXRUNTIME_PATH="${ONNXRUNTIME_PATH}-gpu"
ONNXRUNTIME_PATH="${ONNXRUNTIME_PATH}-${ONNXRUNTIME_VERSION}"ONNXRUNTIME_DIR="${CURRENT_DIR}/${ONNXRUNTIME_PATH}"
ONNXRUNTIME_TGZ="${ONNXRUNTIME_DIR}.tgz"
ONNXRUNTIME_ZIP="${ONNXRUNTIME_DIR}.zip"build_project() {local build_type="${1:-Release}"local build_dir="${CURRENT_DIR}/build"echo "=== 构建配置 ==="echo "构建类型: $build_type"echo "ONNX Runtime路径: $ONNXRUNTIME_DIR"echo "OpenCV路径: $OPENCV_DIR"echo "================="[[ -d "$build_dir" ]] && rm -rf "$build_dir"mkdir -p "$build_dir" && cd "$build_dir"# 关键修改:添加详细的CMake配置和错误检查echo "正在配置CMake..."if ! cmake .. \-D ONNXRUNTIME_DIR="$ONNXRUNTIME_DIR" \-D OpenCV_DIR="$OPENCV_DIR" \-D CMAKE_BUILD_TYPE="$build_type" \-D CMAKE_CXX_FLAGS_RELEASE="-O3 -march=native"; thenecho "CMake配置失败!请检查错误信息"exit 1fiecho "正在编译项目..."cmake --build . --config "$build_type" || {echo "编译失败!"exit 1}
}# 主执行流程
if [[ -f "$ONNXRUNTIME_TGZ" ]]; thenecho "发现本地ONNX Runtime .tgz文件"if ! tar -zxvf "$ONNXRUNTIME_TGZ"; thenecho "解压失败!请检查文件完整性"exit 1fi
elif [[ -f "$ONNXRUNTIME_ZIP" ]]; thenecho "发现本地ONNX Runtime .zip文件"if ! unzip "$ONNXRUNTIME_ZIP"; thenecho "解压失败!请检查文件完整性"exit 1fi
elseecho "错误:未找到ONNX Runtime压缩文件"echo "请确保以下文件存在:"echo "  - $ONNXRUNTIME_TGZ"echo "  - $ONNXRUNTIME_ZIP"exit 1
fi# 验证OpenCV目录
if [[ ! -f "${OPENCV_DIR}/OpenCVConfig.cmake" ]]; thenecho "错误:OpenCV配置未找到!"echo "请确保以下路径有效且包含OpenCVConfig.cmake:"echo "  $OPENCV_DIR"echo "您可以通过以下方式解决:"echo "1. 从 https://opencv.org/releases/ 下载预编译版"echo "2. 或设置环境变量 OPENCV_DIR 指向正确路径"exit 1
fibuild_project "Release"echo "构建成功完成!"
read -p "按回车键退出..."
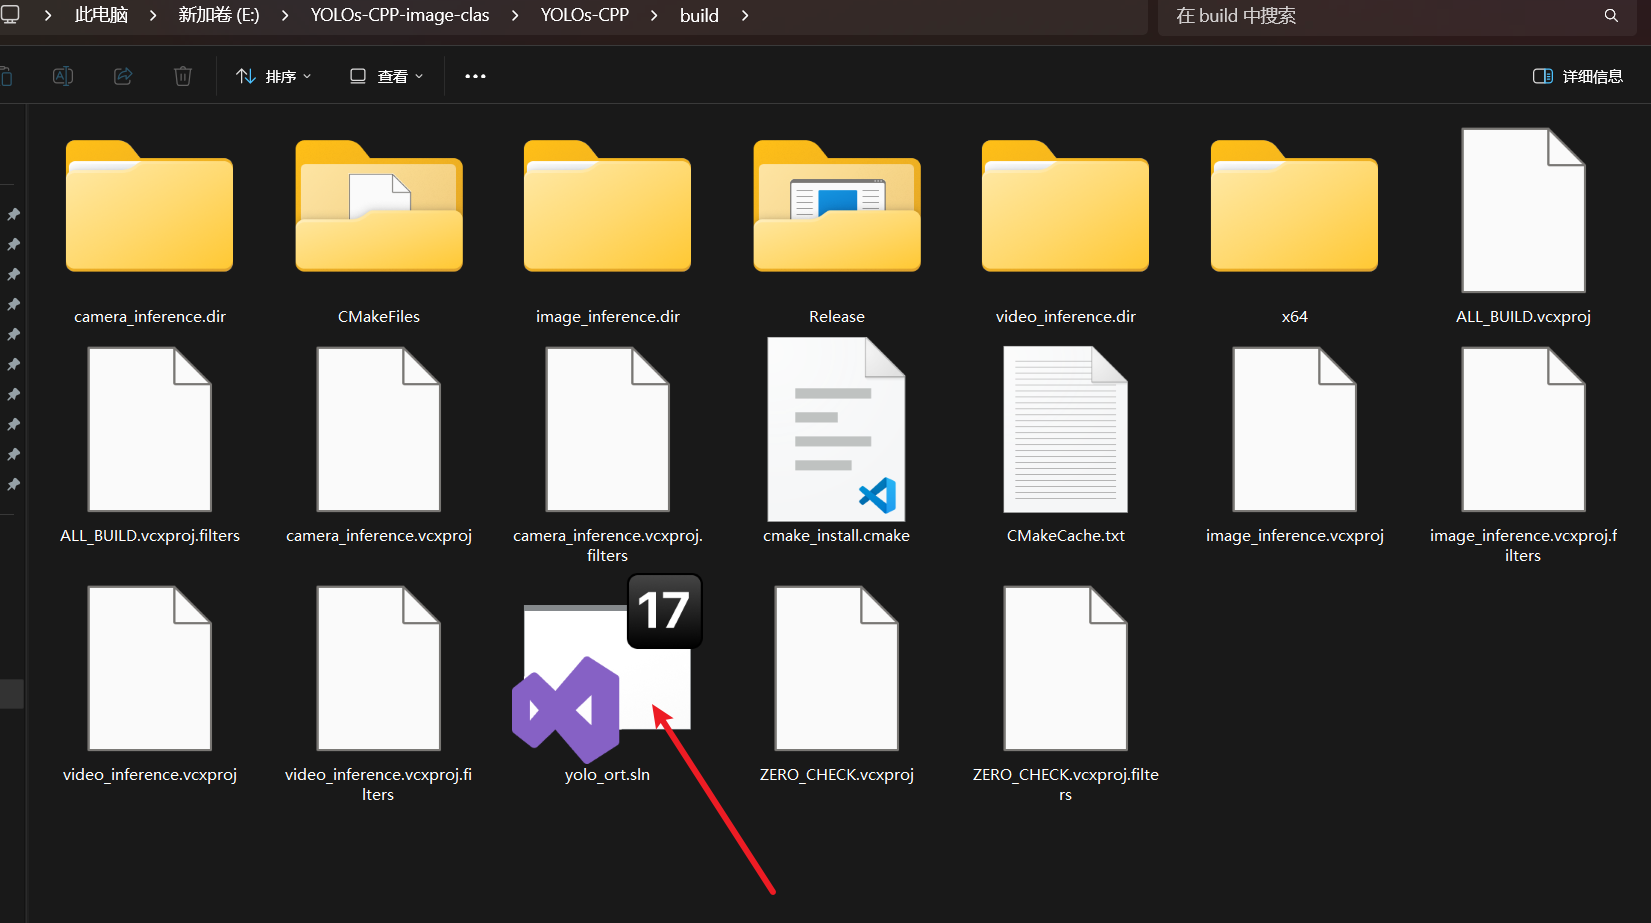
构建项目
执行构建脚本,以使用 CMake 编译项目:
./build.sh
就会输出如下结果:
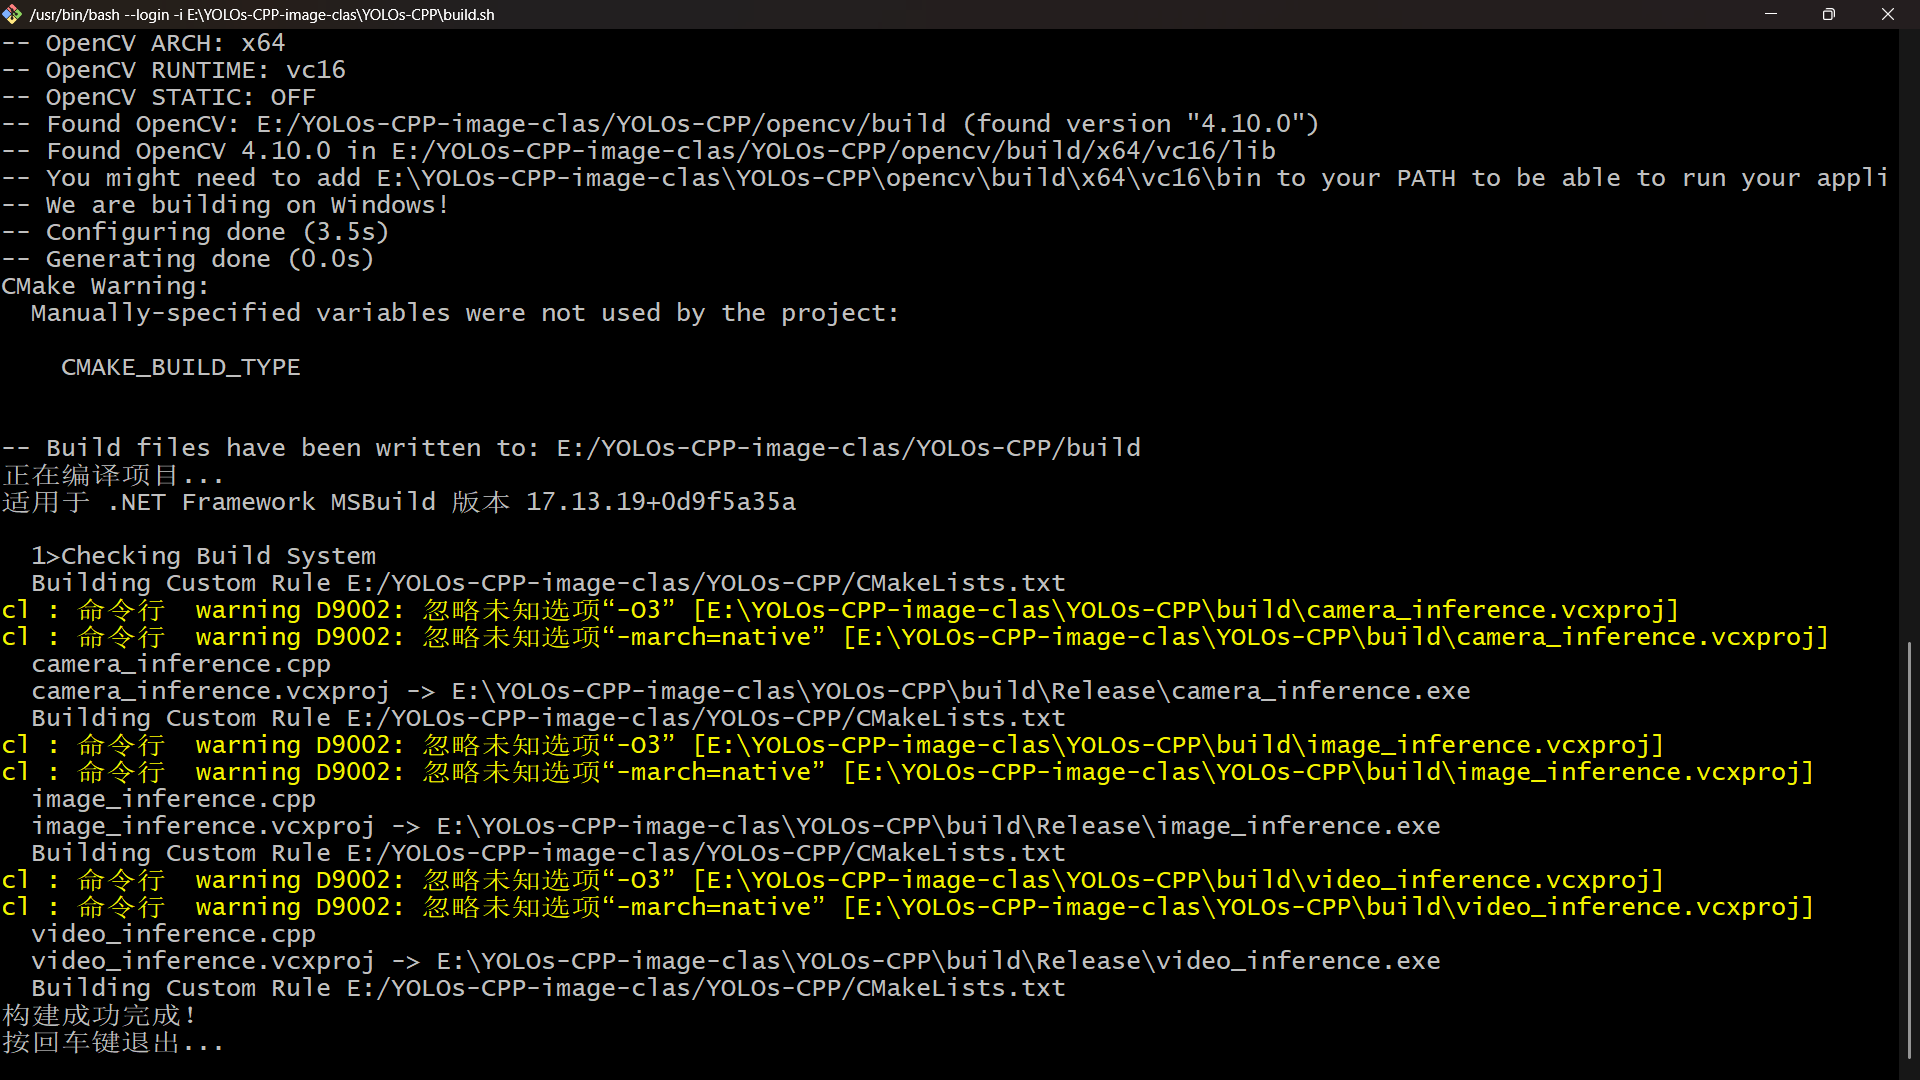
完整输出如下:
发现本地ONNX Runtime .zip文件
Archive:  /e/YOLOs-CPP-image-clas/YOLOs-CPP/onnxruntime-win-x64-1.20.1.zip
replace onnxruntime-win-x64-1.20.1/CodeSignSummary-373f1b20-cf8e-4286-b565-e629e70f1661.md? [y]es, [n]o, [A]ll, [N]one, [r]ename: Ainflating: onnxruntime-win-x64-1.20.1/CodeSignSummary-373f1b20-cf8e-4286-b565-e629e70f1661.mdextracting: onnxruntime-win-x64-1.20.1/GIT_COMMIT_IDinflating: onnxruntime-win-x64-1.20.1/include/cpu_provider_factory.hinflating: onnxruntime-win-x64-1.20.1/include/onnxruntime_cxx_api.hinflating: onnxruntime-win-x64-1.20.1/include/onnxruntime_cxx_inline.hinflating: onnxruntime-win-x64-1.20.1/include/onnxruntime_c_api.hinflating: onnxruntime-win-x64-1.20.1/include/onnxruntime_float16.hinflating: onnxruntime-win-x64-1.20.1/include/onnxruntime_lite_custom_op.hinflating: onnxruntime-win-x64-1.20.1/include/onnxruntime_run_options_config_keys.hinflating: onnxruntime-win-x64-1.20.1/include/onnxruntime_session_options_config_keys.hinflating: onnxruntime-win-x64-1.20.1/include/onnxruntime_training_cxx_api.hinflating: onnxruntime-win-x64-1.20.1/include/onnxruntime_training_cxx_inline.hinflating: onnxruntime-win-x64-1.20.1/include/onnxruntime_training_c_api.hinflating: onnxruntime-win-x64-1.20.1/include/provider_options.hinflating: onnxruntime-win-x64-1.20.1/lib/onnxruntime.dllinflating: onnxruntime-win-x64-1.20.1/lib/onnxruntime.libinflating: onnxruntime-win-x64-1.20.1/lib/onnxruntime.pdbinflating: onnxruntime-win-x64-1.20.1/lib/onnxruntime_providers_shared.dllinflating: onnxruntime-win-x64-1.20.1/lib/onnxruntime_providers_shared.libinflating: onnxruntime-win-x64-1.20.1/lib/onnxruntime_providers_shared.pdbinflating: onnxruntime-win-x64-1.20.1/LICENSEinflating: onnxruntime-win-x64-1.20.1/Privacy.mdinflating: onnxruntime-win-x64-1.20.1/README.mdinflating: onnxruntime-win-x64-1.20.1/ThirdPartyNotices.txtextracting: onnxruntime-win-x64-1.20.1/VERSION_NUMBER
=== 构建配置 ===
构建类型: Release
ONNX Runtime路径: /e/YOLOs-CPP-image-clas/YOLOs-CPP/onnxruntime-win-x64-1.20.1
OpenCV路径: E:/YOLOs-CPP-image-clas/YOLOs-CPP/opencv/build
=================
正在配置CMake...
-- Building for: Visual Studio 17 2022
-- Selecting Windows SDK version 10.0.22621.0 to target Windows 10.0.26100.
-- The C compiler identification is MSVC 19.43.34809.0
-- The CXX compiler identification is MSVC 19.43.34809.0
-- Detecting C compiler ABI info
-- Detecting C compiler ABI info - done
-- Check for working C compiler: C:/Program Files/Microsoft Visual Studio/2022/Community/VC/Tools/MSVC/14.43.34808/bin/Hostx64
-- Detecting C compile features
-- Detecting C compile features - done
-- Detecting CXX compiler ABI info
-- Detecting CXX compiler ABI info - done
-- Check for working CXX compiler: C:/Program Files/Microsoft Visual Studio/2022/Community/VC/Tools/MSVC/14.43.34808/bin/Hostx
-- Detecting CXX compile features
-- Detecting CXX compile features - done
-- ONNXRUNTIME_DIR: E:/YOLOs-CPP-image-clas/YOLOs-CPP/onnxruntime-win-x64-1.20.1
-- OpenCV ARCH: x64
-- OpenCV RUNTIME: vc16
-- OpenCV STATIC: OFF
-- Found OpenCV: E:/YOLOs-CPP-image-clas/YOLOs-CPP/opencv/build (found version "4.10.0")
-- Found OpenCV 4.10.0 in E:/YOLOs-CPP-image-clas/YOLOs-CPP/opencv/build/x64/vc16/lib
-- You might need to add E:\YOLOs-CPP-image-clas\YOLOs-CPP\opencv\build\x64\vc16\bin to your PATH to be able to run your appli
-- We are building on Windows!
-- Configuring done (3.5s)
-- Generating done (0.0s)
CMake Warning:Manually-specified variables were not used by the project:CMAKE_BUILD_TYPE-- Build files have been written to: E:/YOLOs-CPP-image-clas/YOLOs-CPP/build
正在编译项目...
适用于 .NET Framework MSBuild 版本 17.13.19+0d9f5a35a1>Checking Build SystemBuilding Custom Rule E:/YOLOs-CPP-image-clas/YOLOs-CPP/CMakeLists.txt
cl : 命令行  warning D9002: 忽略未知选项“-O3” [E:\YOLOs-CPP-image-clas\YOLOs-CPP\build\camera_inference.vcxproj]
cl : 命令行  warning D9002: 忽略未知选项“-march=native” [E:\YOLOs-CPP-image-clas\YOLOs-CPP\build\camera_inference.vcxproj]camera_inference.cppcamera_inference.vcxproj -> E:\YOLOs-CPP-image-clas\YOLOs-CPP\build\Release\camera_inference.exeBuilding Custom Rule E:/YOLOs-CPP-image-clas/YOLOs-CPP/CMakeLists.txt
cl : 命令行  warning D9002: 忽略未知选项“-O3” [E:\YOLOs-CPP-image-clas\YOLOs-CPP\build\image_inference.vcxproj]
cl : 命令行  warning D9002: 忽略未知选项“-march=native” [E:\YOLOs-CPP-image-clas\YOLOs-CPP\build\image_inference.vcxproj]image_inference.cppimage_inference.vcxproj -> E:\YOLOs-CPP-image-clas\YOLOs-CPP\build\Release\image_inference.exeBuilding Custom Rule E:/YOLOs-CPP-image-clas/YOLOs-CPP/CMakeLists.txt
cl : 命令行  warning D9002: 忽略未知选项“-O3” [E:\YOLOs-CPP-image-clas\YOLOs-CPP\build\video_inference.vcxproj]
cl : 命令行  warning D9002: 忽略未知选项“-march=native” [E:\YOLOs-CPP-image-clas\YOLOs-CPP\build\video_inference.vcxproj]video_inference.cppvideo_inference.vcxproj -> E:\YOLOs-CPP-image-clas\YOLOs-CPP\build\Release\video_inference.exeBuilding Custom Rule E:/YOLOs-CPP-image-clas/YOLOs-CPP/CMakeLists.txt
构建成功完成!
按回车键退出...
这表示,成功构建项目啦!并且,在文件夹build下就会得到sln文件。