Linux(ubuntu18.04)下安装instant-ngp环境
Linux(ubuntu18.04)下安装instant-ngp环境
instant-ngp,我终于终于把这玩意给装好了!!!
1.instant-ngp的下载地址
https://github.com/NVlabs/instant-ngp
2.环境需求(必须全部符合,有一个错了就没了阿!!!)
(1)gpu;
(2)Linux: GCC/G++ 8 or higher;
(3)Linux: CUDA 10.2 or higher
(4)CMake v3.21 or higher.
(5)(optional) Python 3.7 or higher for interactive bindings. Also,
run pip install -r requirements.txt.
(6)(optional) OptiX 7.6 or higher for faster mesh SDF training.
(7)(optional) Vulkan SDK for DLSS support.
3.安装依赖
sudo apt-get install build-essential git python3-dev python3-pip libopenexr-dev libxi-dev \libglfw3-dev libglew-dev libomp-dev libxinerama-dev libxcursor-dev
4.CUDA路径(添加到末尾)
 gedit ~/.bashrc export PATH="/usr/local/cuda-11.3/bin:$PATH"
export LD_LIBRARY_PATH="/usr/local/cuda-11.3/lib64:$LD_LIBRARY_PATH"~/.bashrc
5.拖拽(直接clone会失败哦,会导致子模块不全)
git clone --recursive https://github.com/NVlabs/instant-ngp
或者
git clone --recursive https://github.com/bycloudai/instant-ngp-Windows.git
6.cuda环境
conda create -n npg2 python=3.7conda activate conda activate npg2conda install pytorch==1.8.1 torchvision==0.9.1 torchaudio==0.8.1 cudatoolkit=11.3 -c pytorch -c conda-forge之前
conda install pytorch==1.12.1 torchvision==0.13.1 torchaudio==0.12.1 cudatoolkit=11.3 -c pytorch
7.编译
cd instant-ngppip install -r requirements.txtcmake . -B build -DCMAKE_CUDA_COMPILER=/usr/local/cuda-11.3/bin/nvcc
或者(不链接GL)
cmake -DNGP_BUILD_WITH_GUI=OFF . -B build -DCMAKE_CUDA_COMPILER=/usr/local/cuda-11.3/bin/nvcccmake --build build --config RelWithDebInfo -j
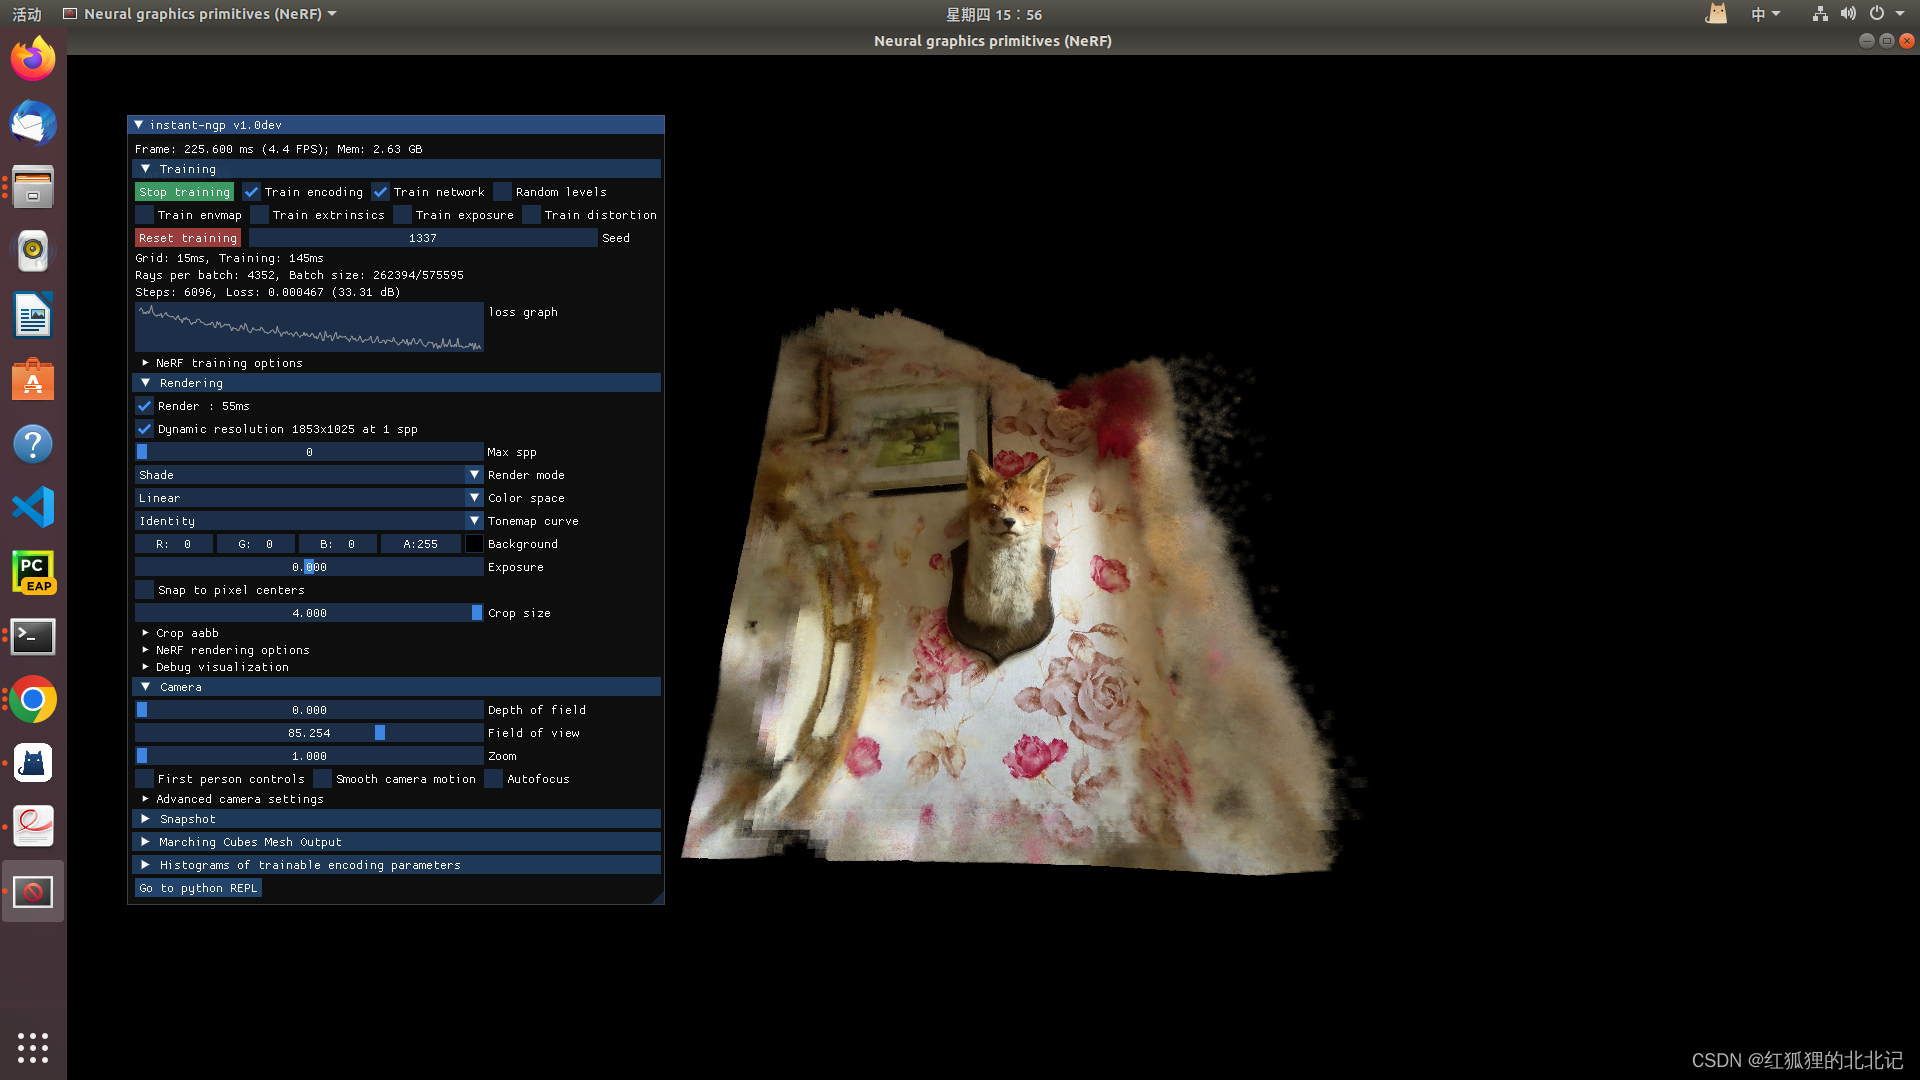
8.运行
./build/testbed --scene data/nerf/fox
9.报错
错误:
/usr/bin/ld: 找不到 -lGL
collect2: error: ld returned 1 exit status
CMakeFiles/testbed.dir/build.make:116: recipe for target 'testbed' failed
make[2]: *** [testbed] Error 1
CMakeFiles/Makefile2:228: recipe for target 'CMakeFiles/testbed.dir/all' failed
make[1]: *** [CMakeFiles/testbed.dir/all] Error 2
make[1]: *** 正在等待未完成的任务....
/usr/bin/ld: 找不到 -lGL
collect2: error: ld returned 1 exit status
CMakeFiles/pyngp.dir/build.make:116: recipe for target 'pyngp.cpython-38-x86_64-linux-gnu.so' failed
make[2]: *** [pyngp.cpython-38-x86_64-linux-gnu.so] Error 1
CMakeFiles/Makefile2:256: recipe for target 'CMakeFiles/pyngp.dir/all' failed
make[1]: *** [CMakeFiles/pyngp.dir/all] Error 2
Makefile:90: recipe for target 'all' failed
make: *** [all] Error 2
解决方案:
sudo apt-get install libglu1-mesa-dev freeglut3-dev mesa-common-dev libgl1 -y
sudo ln -s /usr/lib/x86_64-linux-gnu/libGL.so.1 /usr/lib/x86_64-linux-gnu/libGL.so
10.自己的数据集(只有图片时)
(1)在data文件夹下新建一个叫做“bears”的文件夹。(这是我自己的数据集);
(2)将自己数据集装入文件夹中;
(3)运行colmap2代码
python scripts/colmap2nerf.py --colmap_matcher exhaustive --run_colmap --aabb_scale 16 --images <image/path>
<image/path> -- 我这里是data/bearspython scripts/colmap2nerf.py --colmap_matcher exhaustive --run_colmap --aabb_scale 16 --images data/bears
(4)将根目录中的文件compal.db,transforms.json和images放到bears下组成一个新的文件夹,再移动到nerf下
(5)数据格式如下
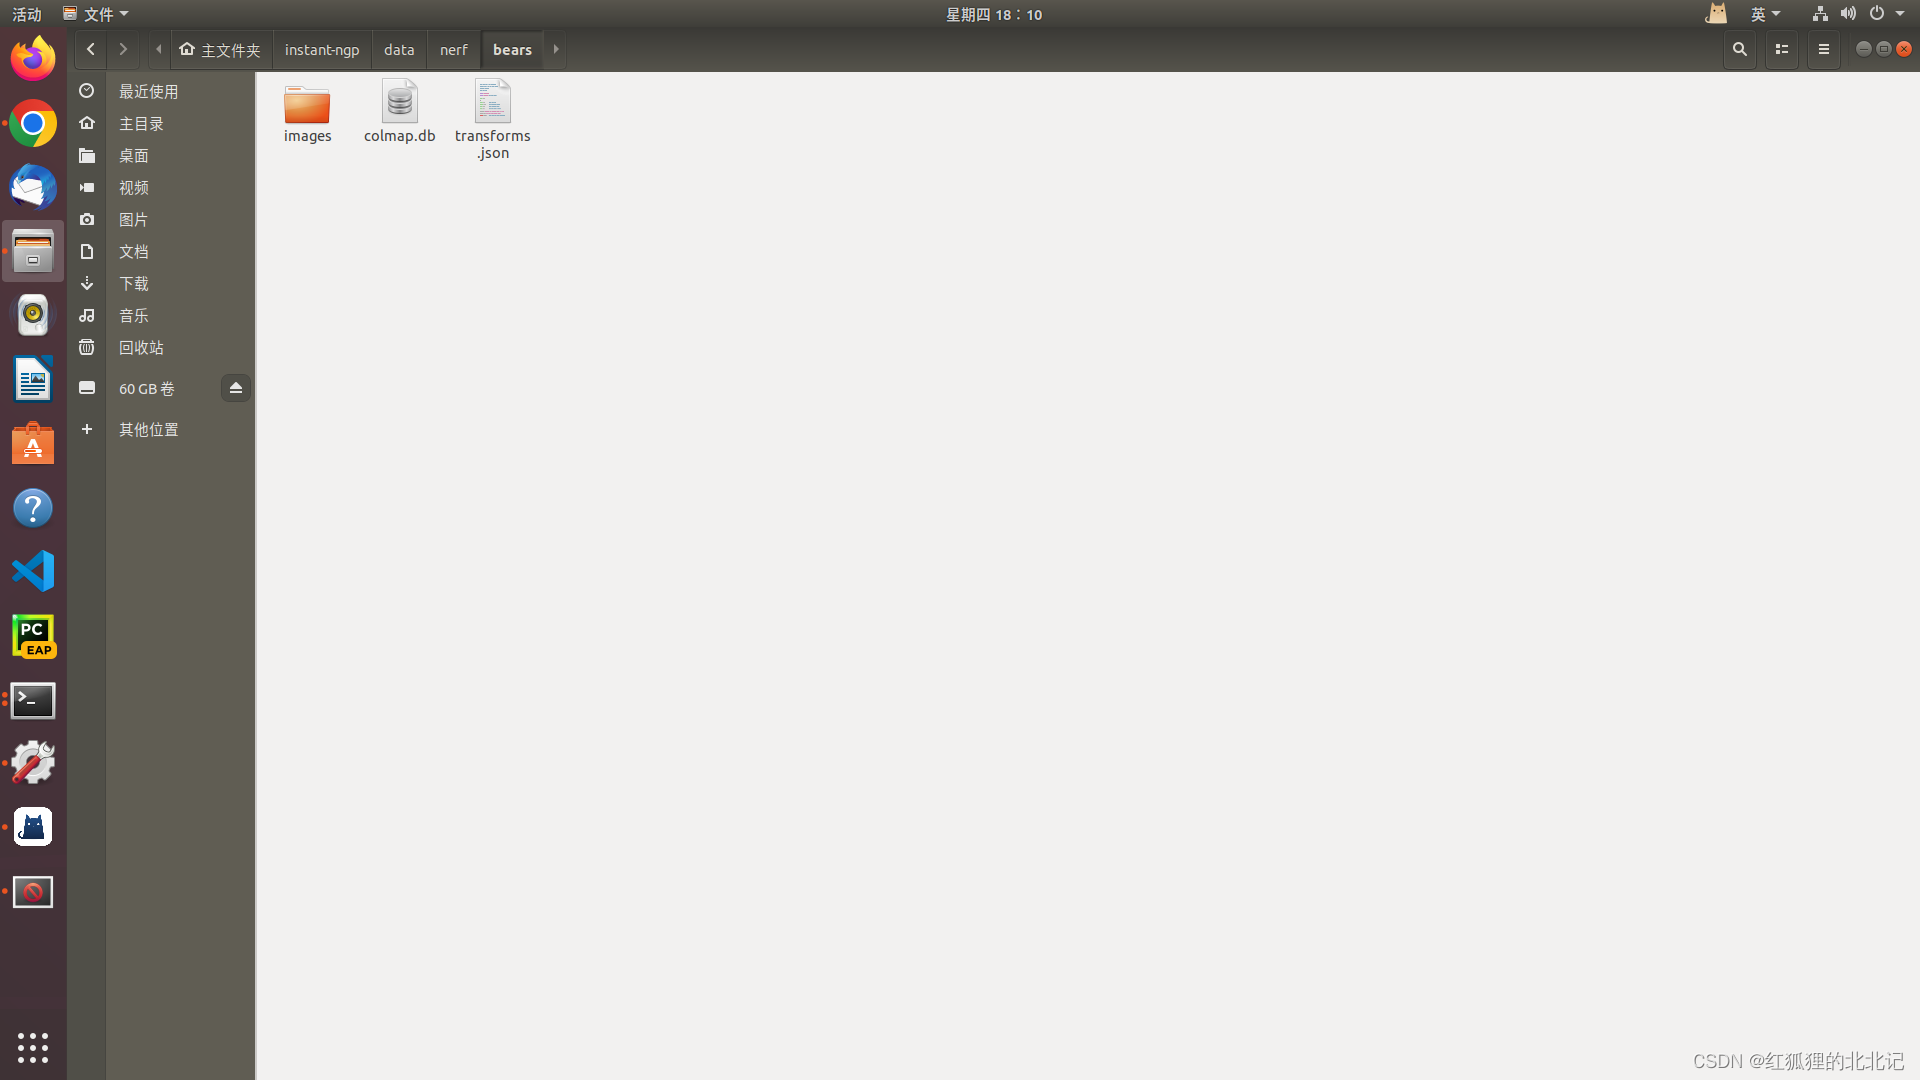
(6)修改transforms.json中的文件路径
将原来的的"file_path": "./data/instant-ngp/images/27.jpg"
修改为"file_path": "images/27.jpg"
也就是删掉前面的内容
(7)运行命令
./build/testbed --scene data/nerf/bears/
11.执行scripts/run.py
执行代码
python scripts/run.py --mode nerf --scene data/nerf/fox/python scripts/run.py --mode nerf --scene data/nerf/bears/ --test_transforms data/nerf/bears/transforms.jsonpython scripts/run.py --mode nerf --scene data/nerf/fox/ --test_transforms /home/hua/instant-ngp/data/nerf/fox/transforms.json
报错
(1)问题一:
No module named 'pyngp'
解决问题一:
查看build里面的pyngp.cpython-××m-x86_64-linux-gnu.so
对我而言:
pyngp.cpython-37m-x86_64-linux-gnu.so, which means it is compiled by python 3.7.
更改路径
pyngp_path = '/path/to/your/build'
sys.path.append(pyngp_path)
import pyngp as ngp
(2)问题二
Traceback (most recent call last):File "/home/hua/instant-ngp/scripts/run.py", line 28, in <module>import pyngp as ngp
ImportError: /home/hua/anaconda3/envs/npg2/bin/../lib/libstdc++.so.6: version `GLIBCXX_3.4.30' not found (required by /home/hua/instant-ngp/build/pyngp.cpython-37m-x86_64-linux-gnu.so)
解决问题二:
检查是否存在
strings /usr/lib/x86_64-linux-gnu/libstdc++.so.6 | grep GLIBCXX
建立软连接
cd /home/hua/anaconda3/envs/npg2/bin/../lib/
mv libstdc++.so.6 libstdc++.so.6.old
ln -s /usr/lib/x86_64-linux-gnu/libstdc++.so.6 libstdc++.so.6