vue2 切换主题色以及单页面好使方法
今天要新增一个页面要根据不同公司切换不同页面主题色,一点一点来,怎么快速更改 el-pagination 分页组件主题色。
<el-pagination :page-size="pageSize" :pager-count="pageCount"layout="sizes, prev, pager, next, jumper, ->, total, slot" :total="total">
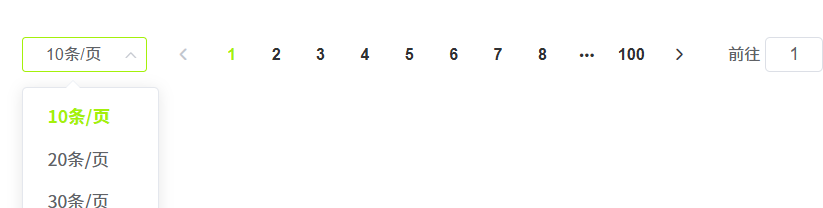
</el-pagination>默认样式是这样的

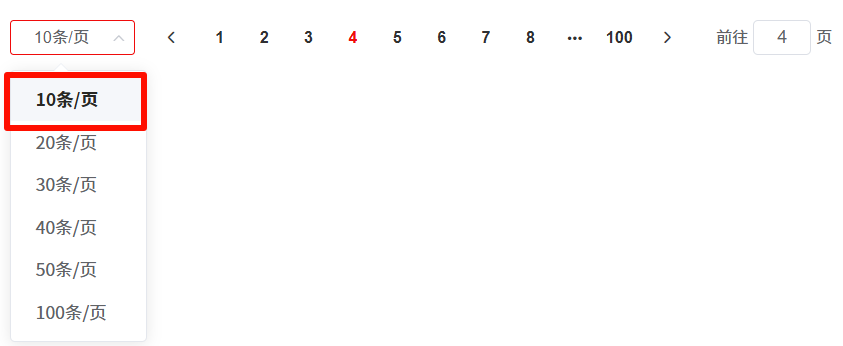
现在变成红色主题
<style lang="scss">
.el-pagination {.el-pager li.active {color: #de194d;cursor: default;}.el-pager li:not(.disabled):hover {color: #de194d;}button.btn-next:not(:disabled) .el-icon-arrow-right:not(.disabled):hover {color: #de194d;}button.btn-prev:not(:disabled) .el-icon-arrow-left:not(.disabled):hover {color: #de194d;}button.btn-prev:not(:disabled):hover {color: #de194d;}button.btn-next:not(:disabled):hover {color: #de194d;}.el-input__inner:hover {border-color: #de194d !important;}.el-input__inner:focus {border-color: #de194d !important;}.el-select .el-input.is-focus .el-input__inner {border-color: var(--theme-color);}
}.el-select-dropdown__item.selected {color: #de194d;
}
</style>

当然 style 不能加 scoped ,可以当独加一个不带 scoped 的 style。
如果加 scoped 用下面这种方式
<style lang="scss" scoped>
::v-deep.el-pagination {.el-pager li.active {color: #de194d;cursor: default;}.el-pager li:not(.disabled):hover {color: #de194d;}button.btn-next:not(:disabled) .el-icon-arrow-right:not(.disabled):hover {color: #de194d;}button.btn-prev:not(:disabled) .el-icon-arrow-left:not(.disabled):hover {color: #de194d;}button.btn-prev:not(:disabled):hover {color: #de194d;}button.btn-next:not(:disabled):hover {color: #de194d;}.el-input__inner:hover {border-color: #de194d !important;}.el-input__inner:focus {border-color: #de194d !important;}.el-select .el-input.is-focus .el-input__inner {border-color: var(--theme-color);}
}::v-deep.el-select-dropdown__item.selected.hover {color: #de194d !important;font-size: 50px
}
</style>
<style>
.el-select-dropdown__item.selected {color: #de194d !important;
}
</style>
自己写太麻烦,element-ui 提供更换主题方法
建一个 theme.scss 文件
/* 改变主题色变量 */
$--color-primary: #f0a70b;/* 改变 icon 字体路径变量,必需 */
$--font-path: '~element-ui/lib/theme-chalk/fonts';@import "~element-ui/packages/theme-chalk/src/index";
更改 main.js 注释 element-ui 样式的导入,改为 theme.scss。因为样式都是一样的,没有必要引入两次
// import 'element-ui/lib/theme-chalk/index.css';
import './theme.scss'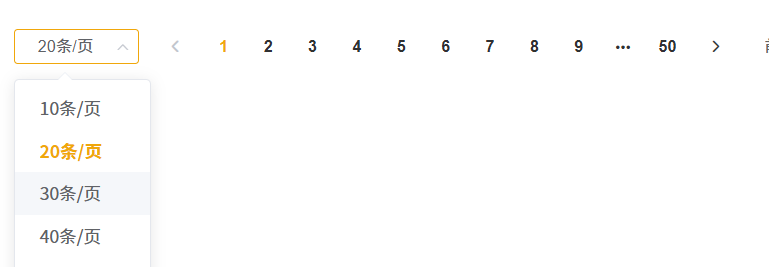
这是 element 组件可以简单设置更改,那么我自己写的组件怎么简单实现更改主题色呢?
vue2 可以 scss 的全局变量
在 src 目录新建全局变量文件 theme.scss
/* 改变主题色变量 */
$--theme-color: #e61111;
vue.config.js
module.exports = defineConfig({css: {loaderOptions: {scss: {additionalData: `@import "@/theme.scss";`}}}
})
路径一定要配置正确
然后页面就可以用 color: $--theme-color; 方式引用了。
另一种方式是使用 :root,:root 是一个伪类选择器,它用来匹配文档的根元素。在HTML文档中,:root 实际上总是指向 <html> 元素。:root 的主要用途是定义一个全局的CSS变量。
但是 :root 比设置 html 元素更好用,:root 是伪类选择器。html 是标签选择器。所以:root 的优先级大于 html。
theme.scss
/* 改变主题色变量 */
:root {--theme-color: #e61111;
}
引用
color: var(--theme-color);更改主题色,在任一页面都可以,但不能设置 scoped 不然不好使
<style lang="scss">
:root {--theme-color: rgb(164, 240, 11);
}
</style>
但这有个问题,他会把全站的样式都变更了,后加载的 :root 会把父组件或是先设置的组件样式覆盖了,如果只想在当前页面变更主题色可能不行。
解决办法,可以在子组件根元素中重新设置全局变量值,这样就只会在子组件生效不会影响用 :root 的其它父组件和兄弟组件了。
.hello {
--theme-color: rgb(164, 240, 11);
--font-size: 25px;
}
<template><div class="hello" style="margin-top: 50px; width: 850px"><el-pagination:page-size="pageSize":pager-count="pageCount"layout="sizes, prev, pager, next, jumper, ->, total, slot":total="total"></el-pagination></div>
</template><script>
export default {name: "About",data() {return {currentPage: 1,pageSize: 10,pageCount: 9,total: 1000,};},
};
</script><style lang="scss" scoped>
.hello {--theme-color: rgb(164, 240, 11);--font-size: 25px;
}::v-deep.el-pagination {.el-pager li.active {color: var(--theme-color);cursor: default;}.el-pager li:not(.disabled):hover {color: var(--theme-color);}button.btn-next:not(:disabled) .el-icon-arrow-right:not(.disabled):hover {color: var(--theme-color);}button.btn-prev:not(:disabled) .el-icon-arrow-left:not(.disabled):hover {color: var(--theme-color);}button.btn-prev:not(:disabled):hover {color: var(--theme-color);}button.btn-next:not(:disabled):hover {color: var(--theme-color);}.el-input__inner:hover {border-color: var(--theme-color);}.el-input__inner:focus {border-color: var(--theme-color);}.el-select .el-input.is-focus .el-input__inner {border-color: var(--theme-color);}
}::v-deep.el-select-dropdown__item.selected.hover {color: var(--theme-color);font-size: 50px;
}
</style>
<style lang="scss">
.el-select-dropdown__item.selected {color: var(--theme-color);
}
</style>
那么现在假设根据不同公司进入这个子组件画面,怎么根据 props 值运用不同样式。
  mounted() {const companyId = this.$route.query.companyId;if (companyId == 1) {document.querySelector(".hello").classList.add("company1");} else if (companyId == 2) {document.querySelector(".hello").classList.add("company2");}}<style lang="scss" scoped>.company1 {--theme-color: rgb(164, 240, 11);--font-size: 25px;}.company2 {--theme-color: rgb(240, 11, 11);--font-size: 25px;}
</style>
也可用下面这种方法直接设置 style
  mounted() {const companyId = this.$route.query.companyId;if (companyId == 1) {document.querySelector(".hello").style.setProperty("--theme-color", "rgb(164, 240, 11)");document.querySelector(".hello").style.setProperty("-font-size", "25px");} else if (companyId == 2) {document.querySelector(".hello").style.setProperty("--theme-color", "rgb(240, 11, 11)");document.querySelector(".hello").style.setProperty("-font-size", "25px");}},<style lang="scss" scoped>.company1 {--theme-color: rgb(164, 240, 11);--font-size: 25px;}.company2 {--theme-color: rgb(240, 11, 11);--font-size: 25px;}
</style>
这样 url 参数 companyId 传不同的值,页面就会显示不同颜色。但是有些弹出层什么的直接放到 body 或 app 下面的。如果设置到 body 或 app 上会怎么样
放到 app 都不好使(注意这里是加了 scoped 不好使,如果加 scoped,跳转会影响其它页面)
const companyId = this.$route.query.companyId;if (companyId == 1) {document.querySelector("#app").classList.add("company1");} else if (companyId == 2) {document.querySelector("#app").classList.add("company2");}下拉框样式没改过来
看源码发现下拉框 和 app 在同一级了,company2 设到 app 所以不好使
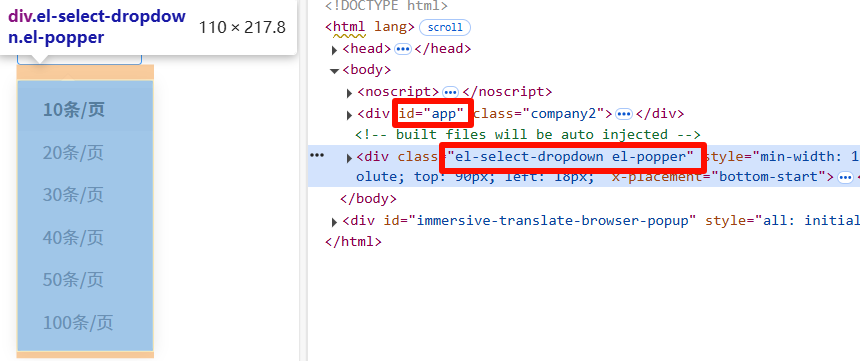
改为 body 下也不好使,组件切换时因为只是组件的显示或隐藏所以 body 和 app 的样式还在
解决方案一:可以在路由守卫里做处理,如果是当前子组件跳出那么就移除添加的样式。
router/index.js 路由文件
router.afterEach((to, from) => {if (from.path == '/about') {document.querySelector("body").classList.remove("company1");document.querySelector("body").classList.remove("company2");}
})解决方案二:使用 .has 选择器
<template><div class="hello" style="margin-top: 50px; width: 850px"><el-pagination:page-size="pageSize":pager-count="pageCount"layout="sizes, prev, pager, next, jumper, ->, total, slot":total="total"></el-pagination></div>
</template>mounted() {const companyId = this.$route.query.companyId;if (companyId == 1) {document.querySelector("body").classList.add("company1");} else if (companyId == 2) {document.querySelector("body").classList.add("company2");}},<style lang="scss">
.company1:has(.hello) {--theme-color: rgb(164, 240, 11);--font-size: 25px;
}
.company2:has(.hello) {--theme-color: rgb(240, 11, 11);--font-size: 25px;
}
</style>
给 body 添加样式,用 .has(.hello) 使这个样式只有在有 class="hello" 的页面生效,.has(.hello) 意思是存在 .hello 的子组件生效,即使下拉框不是 .hello 的子元素也会生效。.hello 是当前子组件唯一拥有的。
解决方案二:根据不同 companyId 给组件绑定 class
<template class="childHas"><div :class="themeClass" style="margin-top: 50px; width: 850px"><el-pagination:popper-class="themeClass":page-size="pageSize":pager-count="pageCount"layout="sizes, prev, pager, next, jumper, ->, total, slot":total="total"></el-pagination></div>
</template>computed: {themeClass() {const companyId = this.$route.query.companyId;let child = "";if (companyId == 1) {child = "childHas1";} else if (companyId == 2) {child = "childHas2";}return child;},},<style lang="scss">
.childHas1 {--theme-color: rgb(164, 240, 11);--font-size: 25px;
}
.childHas2 {--theme-color: rgb(240, 11, 11);--font-size: 25px;
}
</style>
完美解决