20250516使用TF卡将NanoPi NEO core开发板出厂的Ubuntu core22.04.3系统降级到Ubuntu core16.04.2
20250516使用TF卡将NanoPi NEO core开发板出厂的Ubuntu core22.04.3系统降级到Ubuntu core16.04.2
2025/5/16 10:58
缘起:NanoPi NEO core核心板出厂预制的OS操作系统为Ubuntu core22.04.3系统。
【虽然是友善之臂提供的最新的系统,但是缺少很多用用程序。新的程序可能并不一定那么稳定!】
由于Ubuntu core16.04.2久经考验,我们也在Ubuntu core16.04.2上做了很多开发了。
根据领导要求,降级了。
以前/生产线要求,插入TF卡,给一个时间点,多长时间断电拔卡。
为了满足它们的要求。现在开始琢磨升级卡了。
1、你们这个呼吸灯【快闪2次,然后等一秒^_】、 快闪【一秒2/3/5次】 慢闪【一秒一次?2秒一次】。没有量化指标。
2、大概知道了。你们 在后台自动升级的时候 ,前台的串口还是要输入 账号 密码的。
3、如果是 配置成为上电 自动刷机。我希望的是 刷机成功之后2-5秒钟?执行 poweroff操作。这样安全的关电 拔卡[表情]

https://wiki.friendlyelec.com/wiki/index.php/EFlasher/zh#.E5.BC.80.E6.9C.BA.E8.87.AA.E5.8A.A8.E7.83.A7.E5.86.99.E6.8C.87.E5.AE.9A.E7.9A.84.E7.B3.BB.E7.BB.9F
EFlasher/zh
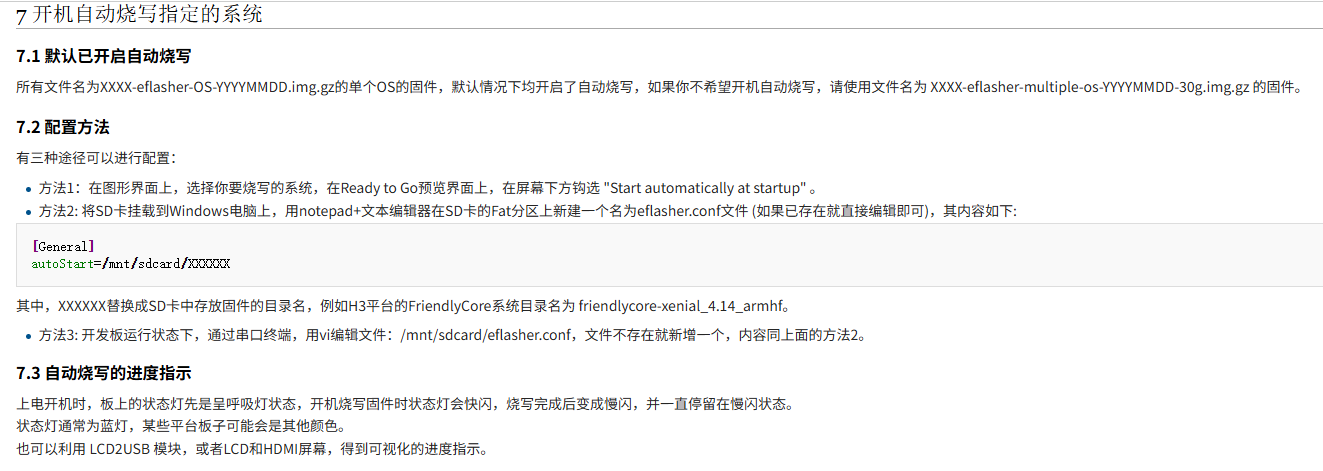
7 开机自动烧写指定的系统
7.1 默认已开启自动烧写
所有文件名为XXXX-eflasher-OS-YYYYMMDD.img.gz的单个OS的固件,默认情况下均开启了自动烧写,如果你不希望开机自动烧写,请使用文件名为 XXXX-eflasher-multiple-os-YYYYMMDD-30g.img.gz 的固件。
7.2 配置方法
有三种途径可以进行配置:
方法1:在图形界面上,选择你要烧写的系统,在Ready to Go预览界面上,在屏幕下方钩选 "Start automatically at startup" 。
方法2: 将SD卡挂载到Windows电脑上,用notepad+文本编辑器在SD卡的Fat分区上新建一个名为eflasher.conf文件 (如果已存在就直接编辑即可),其内容如下:
[General]
autoStart=/mnt/sdcard/XXXXXX
其中,XXXXXX替换成SD卡中存放固件的目录名,例如H3平台的FriendlyCore系统目录名为 friendlycore-xenial_4.14_armhf。
方法3: 开发板运行状态下,通过串口终端,用vi编辑文件:/mnt/sdcard/eflasher.conf,文件不存在就新增一个,内容同上面的方法2。
7.3 自动烧写的进度指示
上电开机时,板上的状态灯先是呈呼吸灯状态,开机烧写固件时状态灯会快闪,烧写完成后变成慢闪,并一直停留在慢闪状态。
状态灯通常为蓝灯,某些平台板子可能会是其他颜色。
也可以利用 LCD2USB 模块,或者LCD和HDMI屏幕,得到可视化的进度指示。
8 烧写或恢复系统完成后做些其他事情
在量产时,你可能会希望在烧写系统完成后做一些额外的事情,比如点亮某个LED,你可以修改 /opt/run-eflasher.sh 脚本,在 "./eflasher-gui" 开头这一行的后面加入代码,例如下面的示例,在烧写完成后,设置某个GPIO针脚:
./eflasher-gui -qws >/dev/null 2>&1
echo 13 > /sys/class/gpio/export
echo out > /sys/class/gpio/gpio13/direction
echo 0 > /sys/class/gpio/gpio13/value
echo 13 > /sys/class/gpio/unexport
以下脚本则演示在S5P4418/S5P6818平台上, 烧写系统后, 将cpu id写入到eMMC系统的 /etc/cpuid.txt 文件中:
./eflasher-gui -qws >/dev/null 2>&1
partprobe /dev/mmcblk1
mount /dev/mmcblk1p2 /media/
cat /sys/devices/platform/cpu/uuid > /media/etc/cpuid.txt
umount /media/
要让上面的脚本正常运作,我们还需要设置让 eflasher-gui 在烧写完成后自动退出,需要做以下设置:
用notepad+文本编辑器在SD卡的Fat分区上编辑并新建一个名为eflasher.conf文件,将AutoExit字段设置为True:
[General]
autoStart=/mnt/sdcard/friendlycore-xenial
autoExit=true
autoStart字段则是指定开机自动烧写指定的系统而无需交互, 如果没有连接屏幕, 可以通过 LED 烧来识别烧写状态, 默认情况下, 绿色LED快闪表示正在烧写.
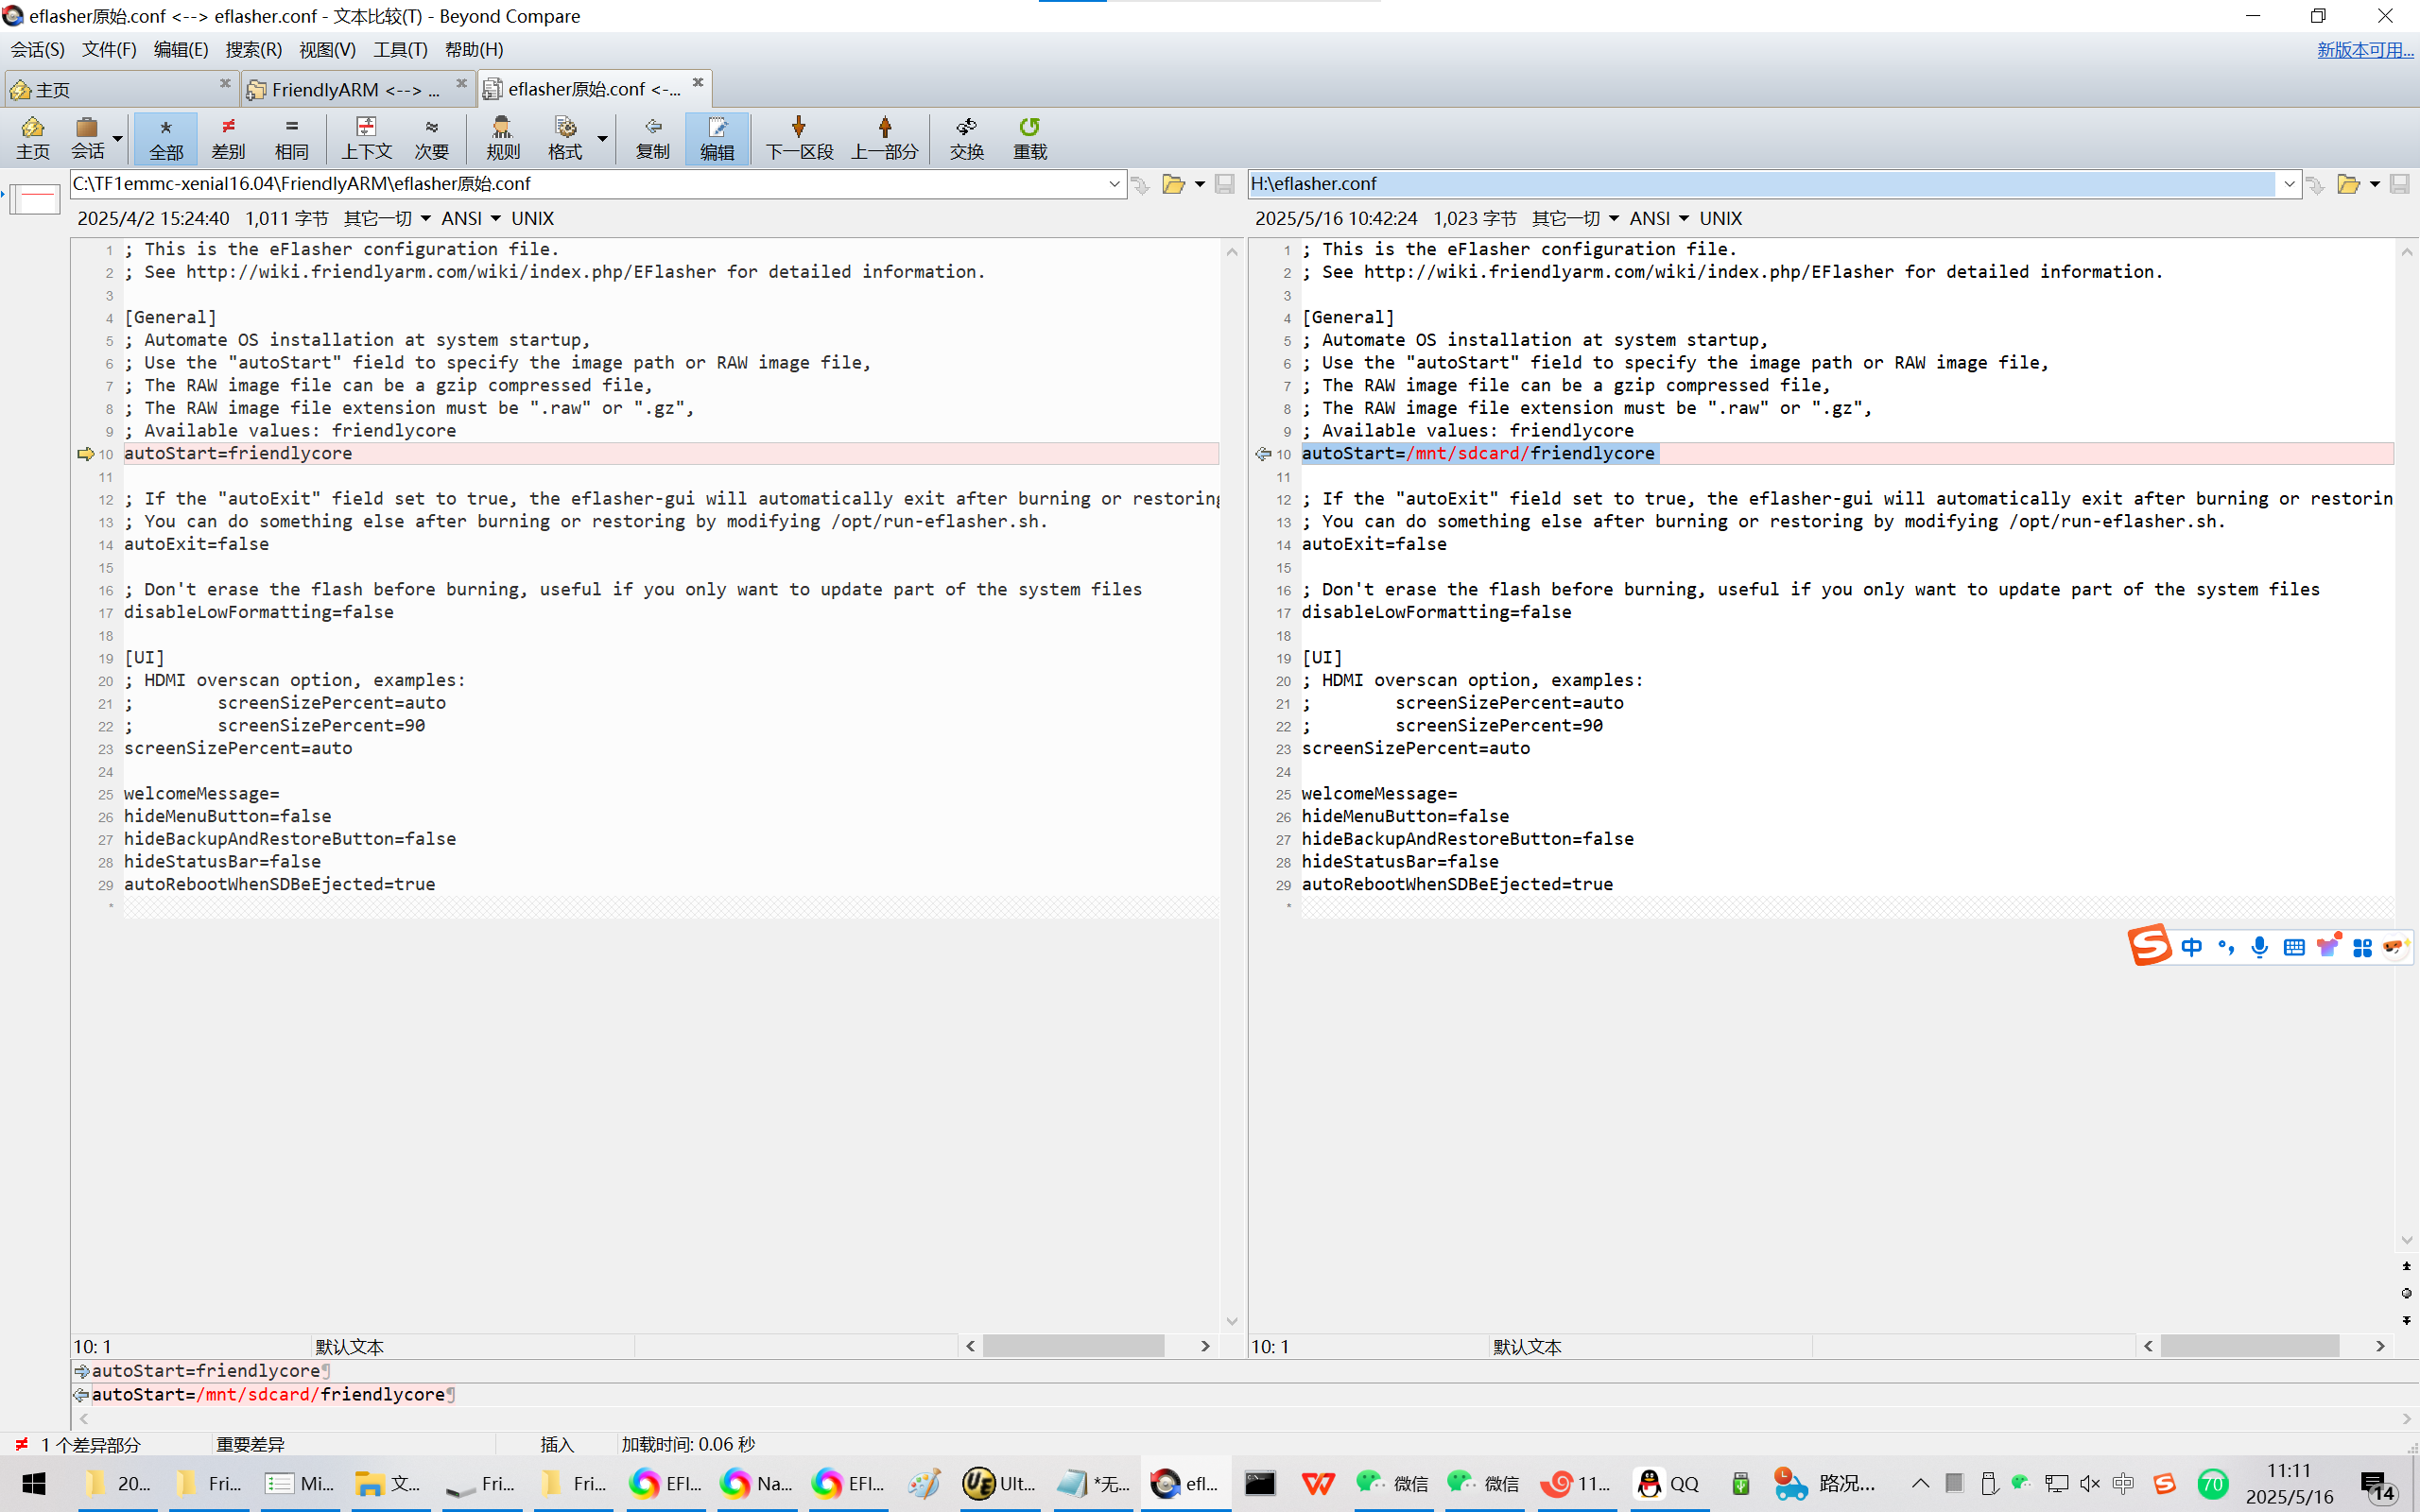
H:\eflasher.conf
; This is the eFlasher configuration file.
; See http://wiki.friendlyarm.com/wiki/index.php/EFlasher for detailed information.
[General]
; Automate OS installation at system startup,
; Use the "autoStart" field to specify the image path or RAW image file,
; The RAW image file can be a gzip compressed file,
; The RAW image file extension must be ".raw" or ".gz",
; Available values: friendlycore
autoStart=friendlycore
; If the "autoExit" field set to true, the eflasher-gui will automatically exit after burning or restoring is completed,
; You can do something else after burning or restoring by modifying /opt/run-eflasher.sh.
autoExit=false
; Don't erase the flash before burning, useful if you only want to update part of the system files
disableLowFormatting=false
[UI]
; HDMI overscan option, examples:
; screenSizePercent=auto
; screenSizePercent=90
screenSizePercent=auto
welcomeMessage=
hideMenuButton=false
hideBackupAndRestoreButton=false
hideStatusBar=false
autoRebootWhenSDBeEjected=true
修改:
; This is the eFlasher configuration file.
; See http://wiki.friendlyarm.com/wiki/index.php/EFlasher for detailed information.
[General]
; Automate OS installation at system startup,
; Use the "autoStart" field to specify the image path or RAW image file,
; The RAW image file can be a gzip compressed file,
; The RAW image file extension must be ".raw" or ".gz",
; Available values: friendlycore
autoStart=/mnt/sdcard/friendlycore
; If the "autoExit" field set to true, the eflasher-gui will automatically exit after burning or restoring is completed,
; You can do something else after burning or restoring by modifying /opt/run-eflasher.sh.
autoExit=false
; Don't erase the flash before burning, useful if you only want to update part of the system files
disableLowFormatting=false
[UI]
; HDMI overscan option, examples:
; screenSizePercent=auto
; screenSizePercent=90
screenSizePercent=auto
welcomeMessage=
hideMenuButton=false
hideBackupAndRestoreButton=false
hideStatusBar=false
autoRebootWhenSDBeEjected=true


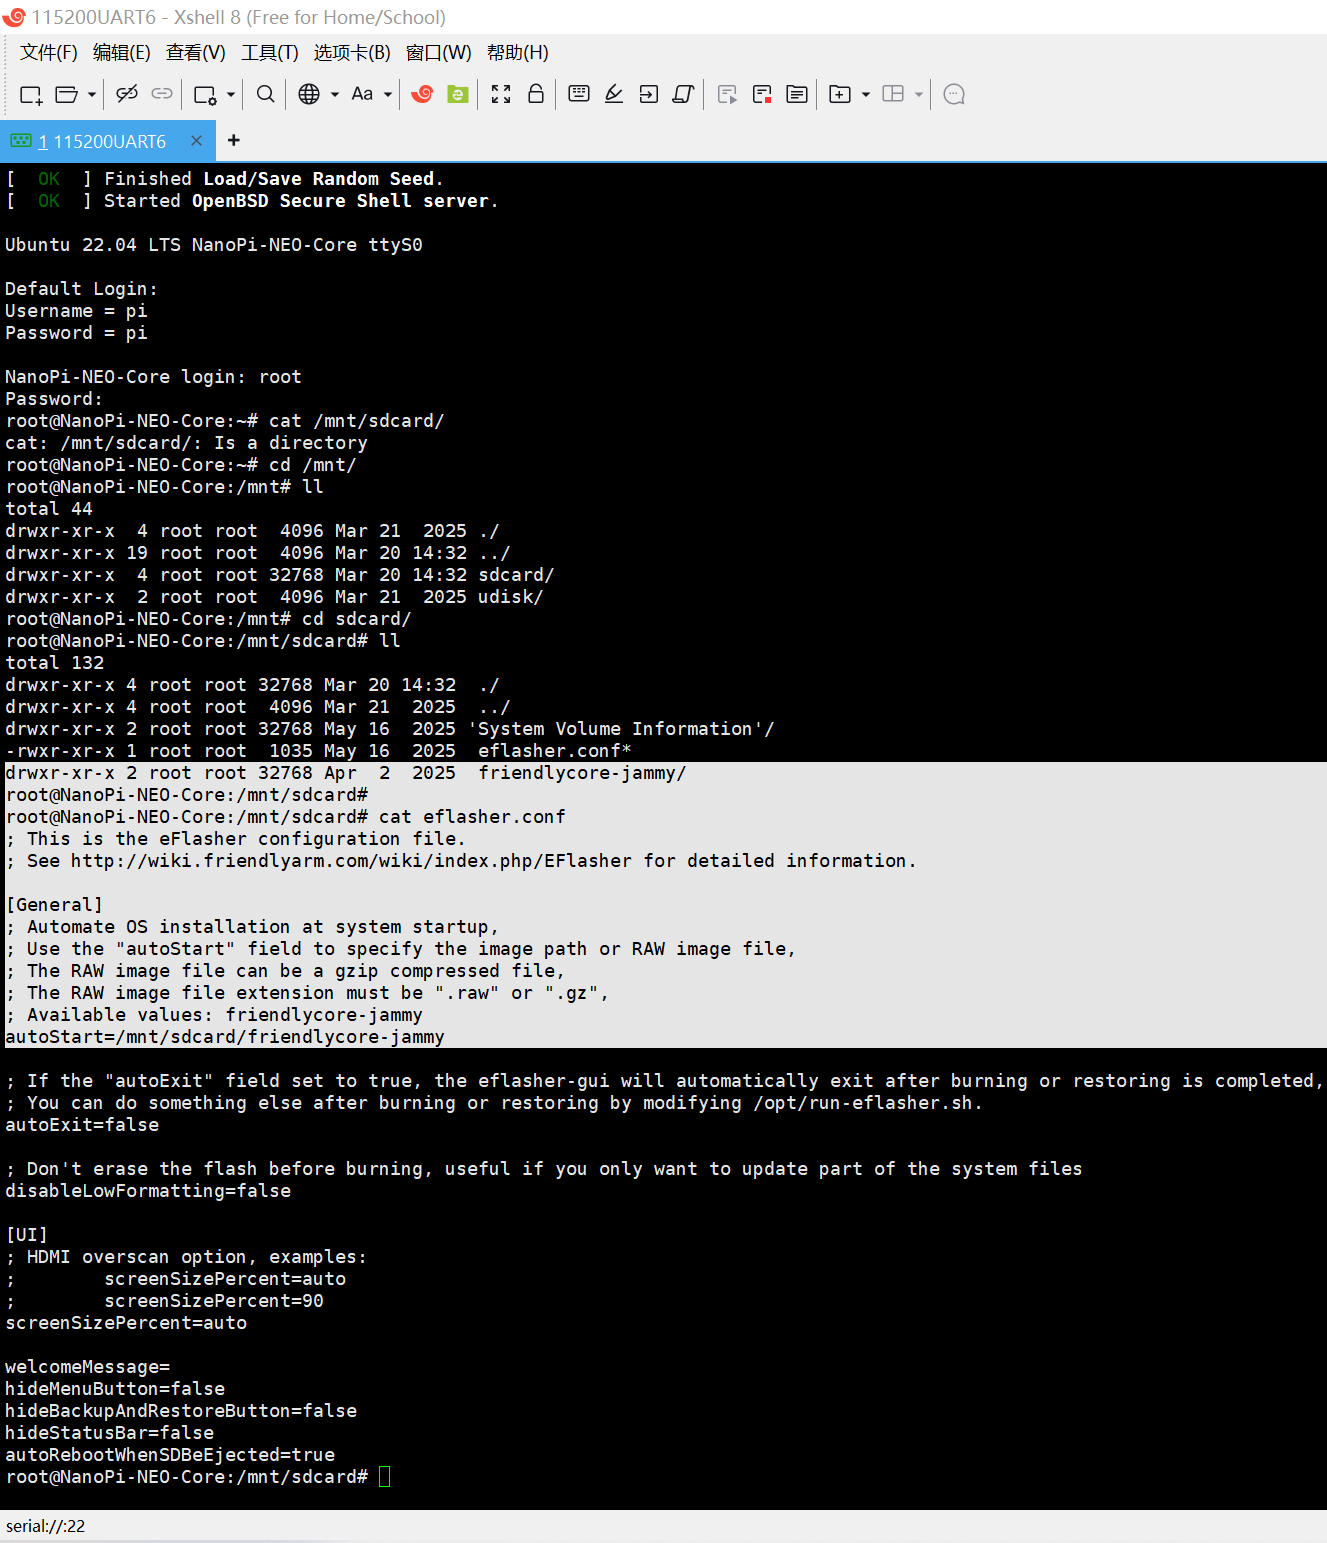
如果要升级到出厂的Ubuntu core22.04.3系统
H:\eflasher.conf
autoStart=friendlycore-jammy
修改为:
autoStart=/mnt/sdcard/friendlycore-jammy
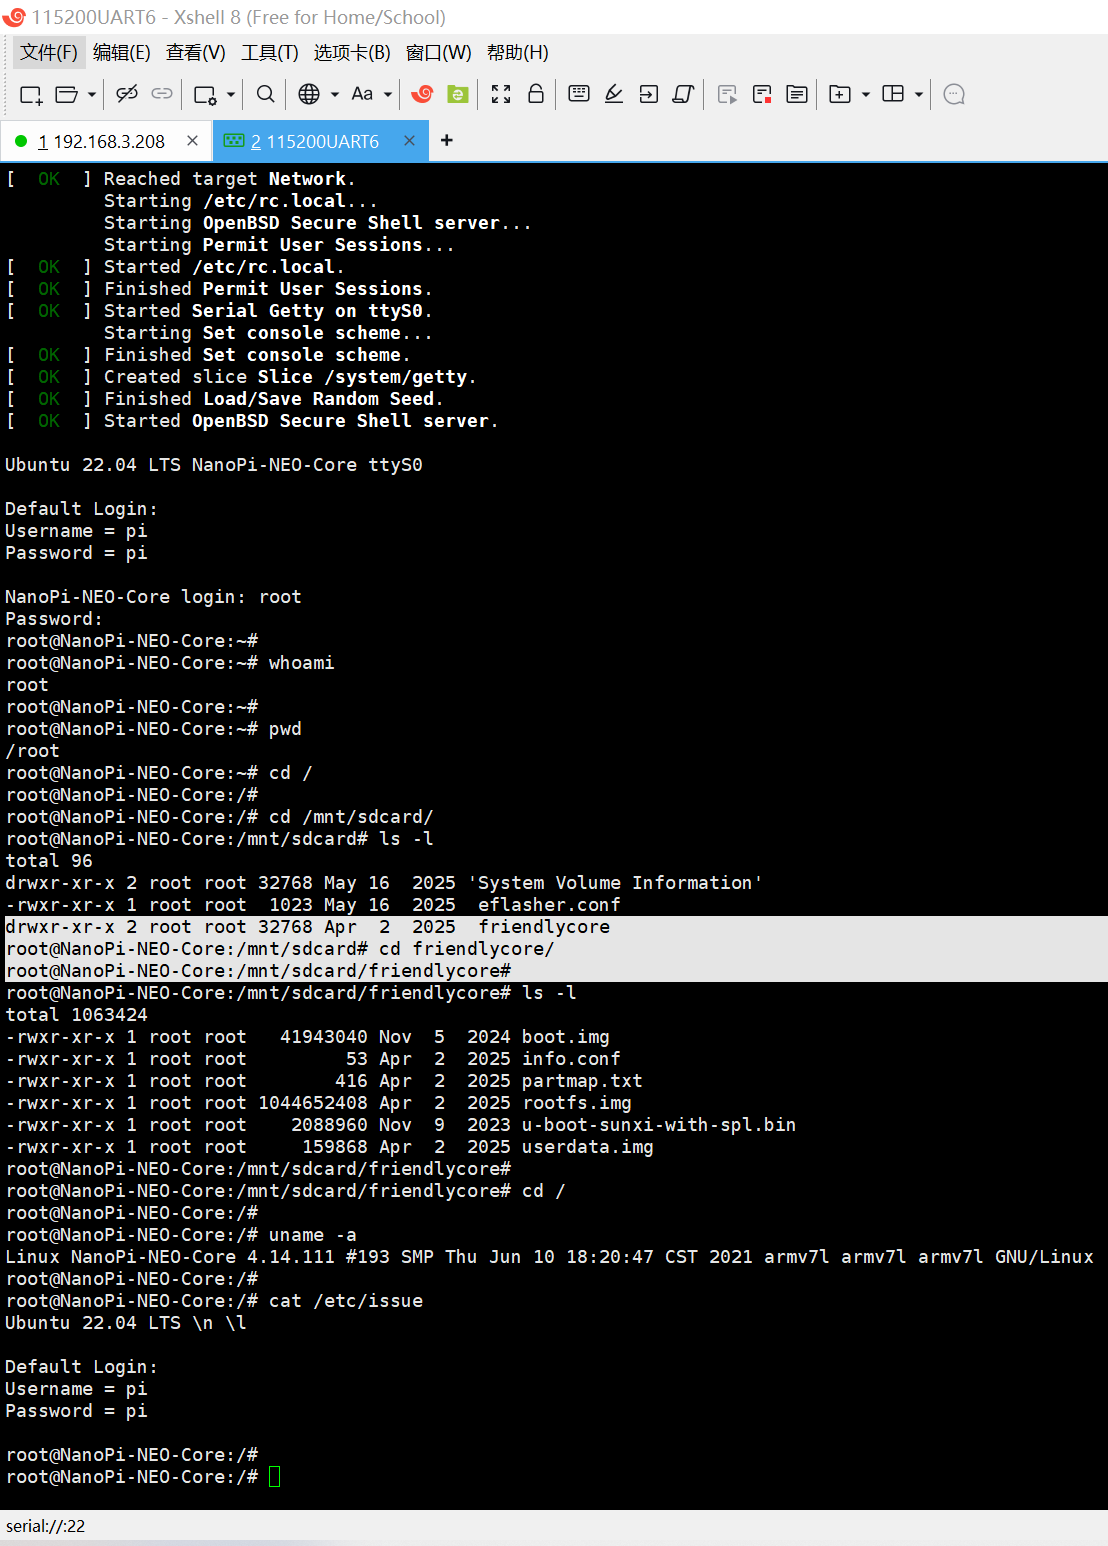
打印LOG:
[ OK ] Reached target Network.
Starting /etc/rc.local...
Starting OpenBSD Secure Shell server...
Starting Permit User Sessions...
[ OK ] Started /etc/rc.local.
[ OK ] Finished Permit User Sessions.
[ OK ] Started Serial Getty on ttyS0.
Starting Set console scheme...
[ OK ] Finished Set console scheme.
[ OK ] Created slice Slice /system/getty.
[ OK ] Finished Load/Save Random Seed.
[ OK ] Started OpenBSD Secure Shell server.
Ubuntu 22.04 LTS NanoPi-NEO-Core ttyS0
Default Login:
Username = pi
Password = pi
NanoPi-NEO-Core login: root
Password:
root@NanoPi-NEO-Core:~#
root@NanoPi-NEO-Core:~# whoami
root
root@NanoPi-NEO-Core:~#
root@NanoPi-NEO-Core:~# pwd
/root
root@NanoPi-NEO-Core:~# cd /
root@NanoPi-NEO-Core:/#
root@NanoPi-NEO-Core:/# cd /mnt/sdcard/
root@NanoPi-NEO-Core:/mnt/sdcard# ls -l
total 96
drwxr-xr-x 2 root root 32768 May 16 2025 'System Volume Information'
-rwxr-xr-x 1 root root 1023 May 16 2025 eflasher.conf
drwxr-xr-x 2 root root 32768 Apr 2 2025 friendlycore
root@NanoPi-NEO-Core:/mnt/sdcard# cd friendlycore/
root@NanoPi-NEO-Core:/mnt/sdcard/friendlycore#
root@NanoPi-NEO-Core:/mnt/sdcard/friendlycore# ls -l
total 1063424
-rwxr-xr-x 1 root root 41943040 Nov 5 2024 boot.img
-rwxr-xr-x 1 root root 53 Apr 2 2025 info.conf
-rwxr-xr-x 1 root root 416 Apr 2 2025 partmap.txt
-rwxr-xr-x 1 root root 1044652408 Apr 2 2025 rootfs.img
-rwxr-xr-x 1 root root 2088960 Nov 9 2023 u-boot-sunxi-with-spl.bin
-rwxr-xr-x 1 root root 159868 Apr 2 2025 userdata.img
root@NanoPi-NEO-Core:/mnt/sdcard/friendlycore#
root@NanoPi-NEO-Core:/mnt/sdcard/friendlycore# cd /
root@NanoPi-NEO-Core:/#
root@NanoPi-NEO-Core:/# uname -a
Linux NanoPi-NEO-Core 4.14.111 #193 SMP Thu Jun 10 18:20:47 CST 2021 armv7l armv7l armv7l GNU/Linux
root@NanoPi-NEO-Core:/#
root@NanoPi-NEO-Core:/# cat /etc/issue
Ubuntu 22.04 LTS \n \l
Default Login:
Username = pi
Password = pi
root@NanoPi-NEO-Core:/#
root@NanoPi-NEO-Core:/#