初始化一个Springboot项目
初始化一个Springboot项目
文章目录
- 初始化一个Springboot项目
- 1、新建项目
- 2、配置yml
- 3、自定义异常
- 4、通用相应类
- 5、全局跨域配置
- 6、总结
1、新建项目
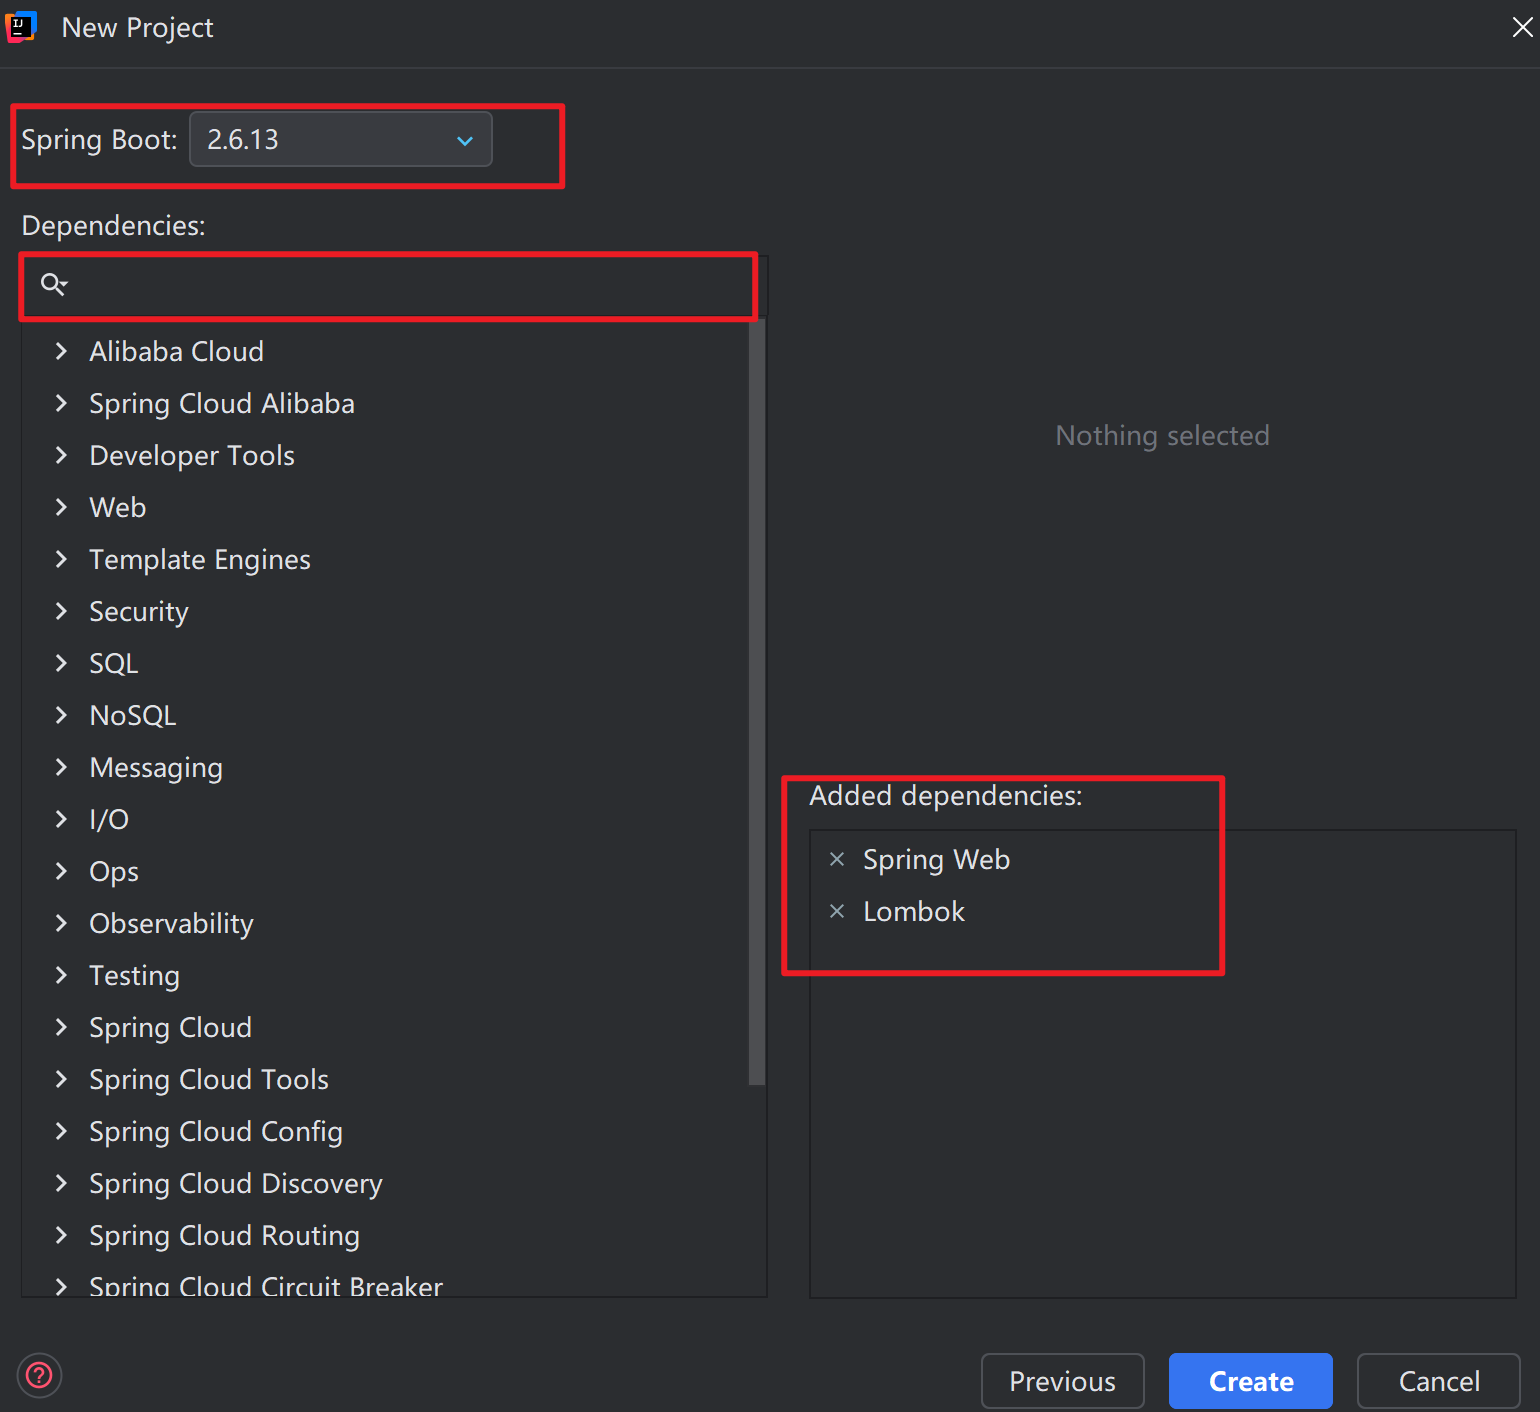
首先,我们需要创建一个新的 Spring Boot 项目。这里我们使用 IntelliJ IDEA 作为开发工具,它提供了方便的 Spring Initializr 集成。
打开 IntelliJ IDEA,选择
File->New->Project...。在弹出的窗口中,选择左侧的
Spring Boot。右侧的 Server URL 默认为start.spring.io,您也可以选择其他镜像源,例如阿里云的start.aliyun.com,这有助于加快依赖下载速度。
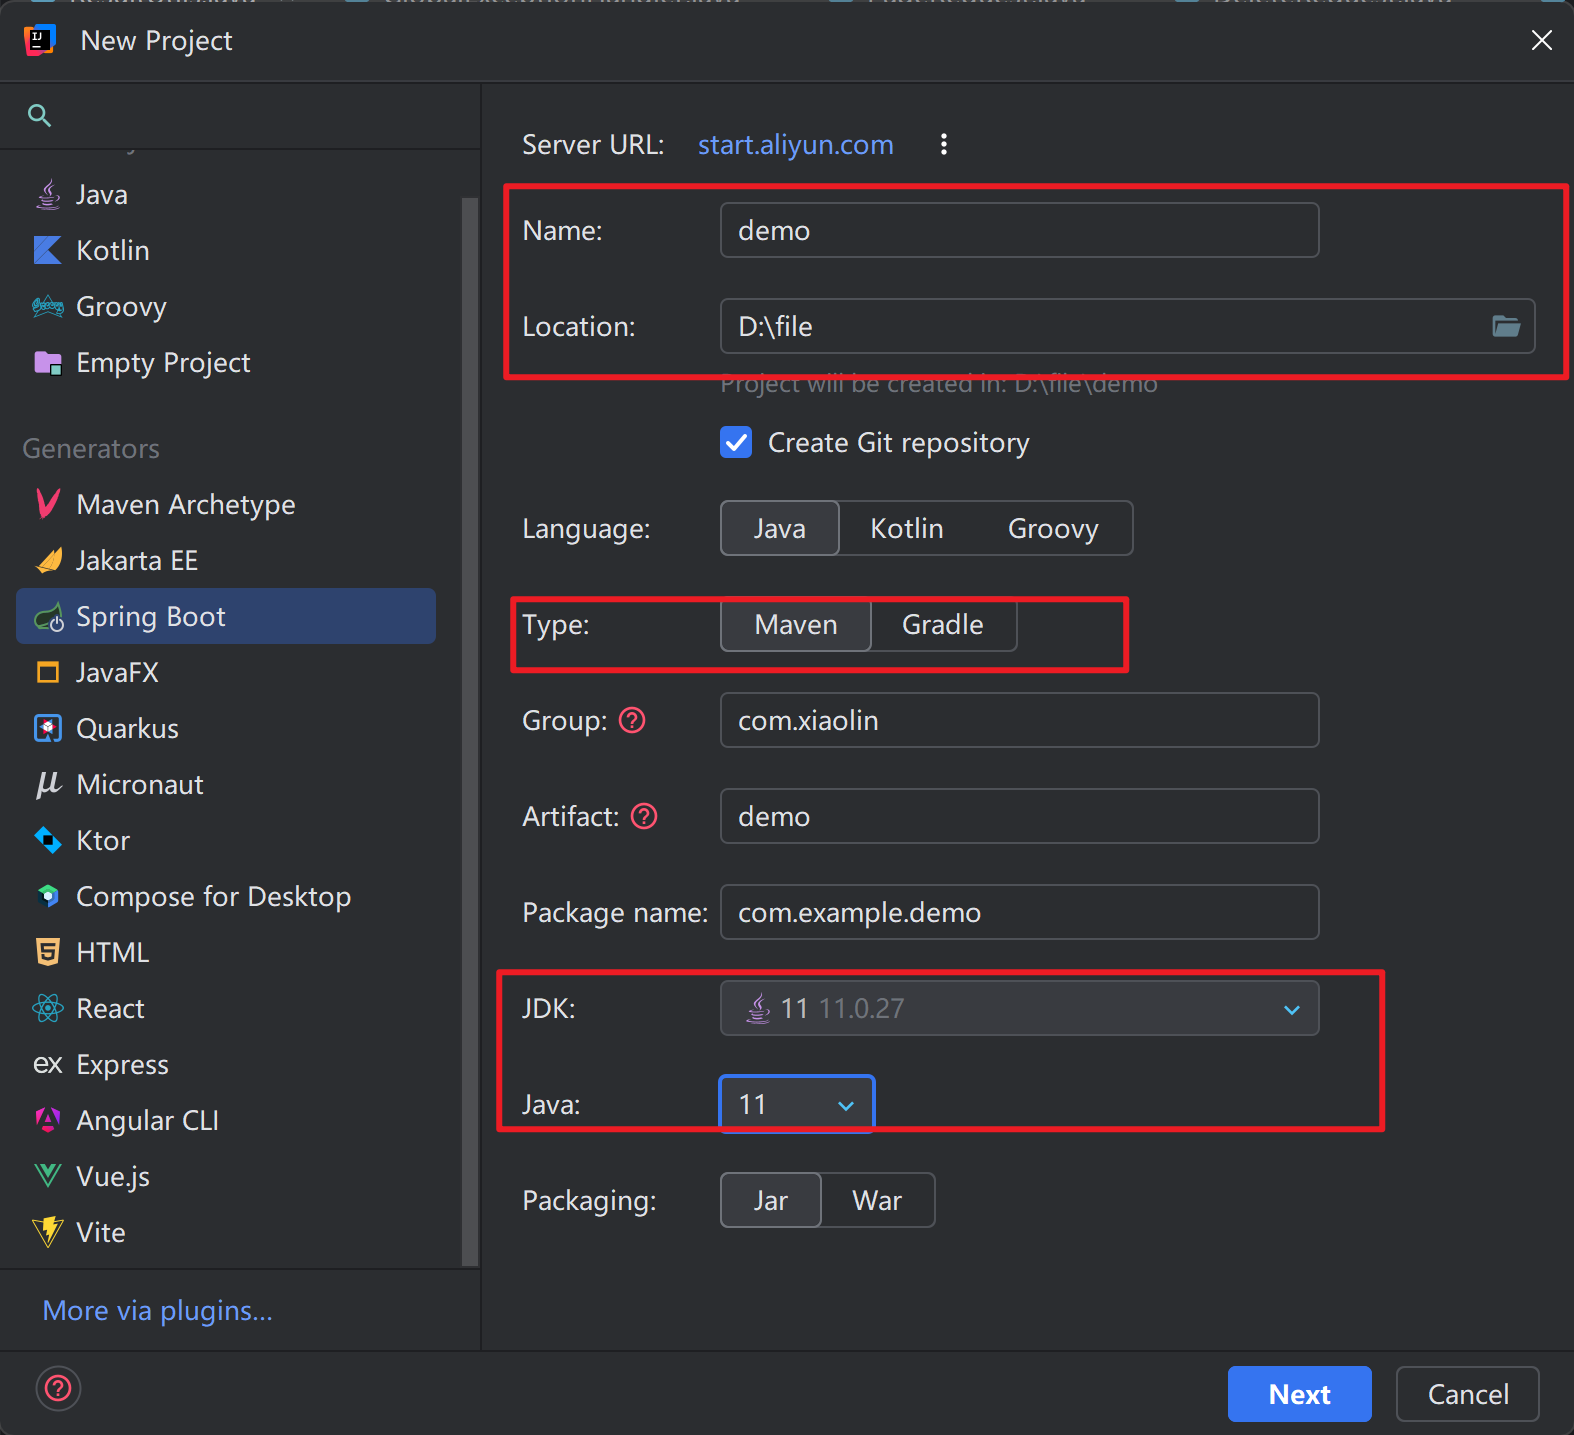
可以选择自己想要的版本和依赖
2、配置yml
application.yml或application.properties文件是 Spring Boot 项目的主要配置文件,用于配置各种属性,例如服务器端口、数据库连接、日志级别等。这里我们使用application.yml文件,它采用 YAML 格式,层级清晰,易于阅读。在
src/main/resources目录下找到application.yml文件(如果不存在,可以手动创建)
以下是一个示例 application.yml 文件,包含了服务器端口、上下文路径、应用名称、数据源以及 MyBatis-Plus 和 Knife4j 的配置:
server:port: 8123servlet:context-path: /api
spring:application:name: lin-picture-backenddatasource:driver-class-name: com.mysql.cj.jdbc.Driverurl: jdbc:mysql://localhost:3306/lin_pictureusername: rootpassword: 123456
mybatis-plus:configuration:# MyBatis 配置map-underscore-to-camel-case: false# 在开发环境打印日志log-impl: org.apache.ibatis.logging.stdout.StdOutImpl# 逻辑删除global-config:db-config:logic-delete-field: isDelete # 全局逻辑删除的实体字段名logic-delete-value: 1 # 逻辑已删除值logic-not-delete-value: 0 # 逻辑未删除值
# 接口文档配置
knife4j:enable: trueopenapi:title: "接口文档"version: 1.0group:default:api-rule: packageapi-rule-resources:- com.xiaolin.linpicturebackend.controller
配置说明:
server.port: 配置应用的端口号。server.servlet.context-path: 配置应用的上下文路径。spring.application.name: 配置应用的名称。spring.datasource: 配置数据源连接信息,包括驱动类、URL、用户名和密码。请根据您的实际数据库信息进行修改。mybatis-plus: 配置 MyBatis-Plus,包括驼峰命名转换、日志打印以及逻辑删除等。knife4j: 配置 Knife4j,用于生成接口文档。
使用了mybatisplus在包下创建mapper并在启动类添加注解
@SpringBootApplication
@MapperScan("com.xiaolin.linpicturebackend.mapper")
@EnableAspectJAutoProxy(exposeProxy = true)
public class LinPictureBackendApplication {public static void main(String[] args) {SpringApplication.run(LinPictureBackendApplication.class, args);}}
3、自定义异常
在实际开发中,我们经常需要处理各种异常。为了提供统一的异常处理机制,我们可以自定义异常类和全局异常处理器。
创建枚举类
@Getter
public enum ErrorCode {SUCCESS(0, "ok"),PARAMS_ERROR(40000, "请求参数错误"),NOT_LOGIN_ERROR(40100, "未登录"),NO_AUTH_ERROR(40101, "无权限"),NOT_FOUND_ERROR(40400, "请求数据不存在"),FORBIDDEN_ERROR(40300, "禁止访问"),SYSTEM_ERROR(50000, "系统内部异常"),OPERATION_ERROR(50001, "操作失败");/*** 状态码*/private final int code;/*** 信息*/private final String message;ErrorCode(int code, String message) {this.code = code;this.message = message;}}
创建自定义异常
接下来,创建一个自定义业务异常类 BusinessException,继承自 RuntimeException。该异常类包含错误码和错误信息。
/*** 自定义业务异常*/
@Getter
public class BusinessException extends RuntimeException {/*** 错误码*/private final int code;public BusinessException(int code, final String message) {super(message);this.code = code;}public BusinessException(ErrorCode errorCode) {super(errorCode.getMessage());this.code = errorCode.getCode();}public BusinessException(ErrorCode errorCode, String message) {super(message);this.code = errorCode.getCode();}
}
封装一个工具类
为了方便地抛出自定义异常,我们可以封装一个工具类 ThrowUtils。
/*** 异常处理工具类*/
public class ThrowUtils {/*** 条件成立抛异常* @param condition* @param runtimeException*/public static void throwIf(boolean condition,RuntimeException runtimeException) {if (condition) {throw runtimeException;}}/*** 条件成立抛异常* @param condition* @param errorCode*/public static void throwIf(boolean condition,ErrorCode errorCode) {throwIf(condition,new BusinessException(errorCode));}/*** 条件成立抛异常* @param condition* @param errorCode* @param message*/public static void throwIf(boolean condition,ErrorCode errorCode,String message) {throwIf(condition,new BusinessException(errorCode,message));}
}
创建全局异常处理器
最后,创建一个全局异常处理器 GlobalExceptionHandler,用于统一处理各种异常,并返回统一的响应格式。
/*** 全局异常处理器*/
@RestControllerAdvice
@Slf4j
public class GlobalExceptionHandler {@ExceptionHandler(BusinessException.class)public BaseResponse<?> businessExceptionHandler(BusinessException e) {log.error("BusinessException", e);return ResultUtils.error(e.getCode(), e.getMessage());}@ExceptionHandler(RuntimeException.class)public BaseResponse<?> runtimeExceptionHandler(RuntimeException e) {log.error("RuntimeException", e);return ResultUtils.error(ErrorCode.SYSTEM_ERROR, "系统错误");}
}
这里使用了 @RestControllerAdvice 注解,表示这是一个全局的 Controller 增强类,可以处理所有 Controller 抛出的异常。@ExceptionHandler 注解用于指定处理的异常类型。
4、通用相应类
为了提供统一的接口响应格式,我们可以定义一个通用的响应类。
全局响应封装类
创建一个 BaseResponse 类,用于封装接口返回的数据、状态码和消息。
/*** 全局响应封装类* @param <T>*/
@Data
public class BaseResponse<T> implements Serializable {private int code;private T data;private String message;public BaseResponse(int code, T data, String message) {this.code = code;this.data = data;this.message = message;}public BaseResponse(int code, T data) {this(code, data, "");}public BaseResponse(ErrorCode errorCode) {this(errorCode.getCode(), null, errorCode.getMessage());}
}
响应工具类
创建一个 ResultUtils 工具类,用于方便地构建 BaseResponse 对象。
public class ResultUtils {/*** 成功** @param data 数据* @param <T>  数据类型* @return 响应*/public static <T> BaseResponse<T> success(T data) {return new BaseResponse<>(0, data, "ok");}/*** 失败** @param errorCode 错误码* @return 响应*/public static BaseResponse<?> error(ErrorCode errorCode) {return new BaseResponse<>(errorCode);}/*** 失败** @param code    错误码* @param message 错误信息* @return 响应*/public static BaseResponse<?> error(int code, String message) {return new BaseResponse<>(code, null, message);}/*** 失败** @param errorCode 错误码* @return 响应*/public static BaseResponse<?> error(ErrorCode errorCode, String message) {return new BaseResponse<>(errorCode.getCode(), null, message);}
}
5、全局跨域配置
在前后端分离的应用中,由于同源策略的限制,前端无法直接访问不同域的后端接口。为了解决这个问题,我们需要进行跨域配置。
创建一个配置类 CorsConfig,实现 WebMvcConfigurer 接口,并重写 addCorsMappings 方法。
@Configuration
public class CorsConfig implements WebMvcConfigurer {@Overridepublic void addCorsMappings(CorsRegistry registry) {// 覆盖所有请求registry.addMapping("/**")// 允许发送 Cookie.allowCredentials(true)// 放行哪些域名(必须用 patterns,否则 * 会和 allowCredentials 冲突).allowedOriginPatterns("*").allowedMethods("GET", "POST", "PUT", "DELETE", "OPTIONS").allowedHeaders("*").exposedHeaders("*");}
}
配置说明:
registry.addMapping("/**"): 对所有路径进行跨域配置。.allowCredentials(true): 允许发送 Cookie。.allowedOriginPatterns("*"): 允许所有来源的请求。注意,如果设置了allowCredentials(true),这里不能直接使用allowedOrigins("*"),需要使用allowedOriginPatterns("*")。.allowedMethods(...): 允许的 HTTP 方法。.allowedHeaders("*"): 允许所有请求头。.exposedHeaders("*"): 允许所有响应头。
6、总结
通过以上步骤,我们成功初始化了一个 Spring Boot 项目,并进行了基础的依赖引入、配置文件编写、自定义异常处理以及全局跨域配置。这些基础配置为后续的开发奠定了坚实的基础。您可以根据自己的项目需求,进一步完善和扩展这些配置。