CentOS7离线安装Mysql8
第一步:对当前系统的软件环境做检查
检查是否存在已有的mysql相关服务
rpm -qa | grep mysql
如果存在使用rpm命令删除,后面的--nodeps是强制删除的意思
rpm –e 自带的mysqlrpm包 --nodeps
查找留存的残留文件,如有使用rm命令删掉
find / -name mysql
手动将系统自带的mysql配置文件删掉
rm -rf /etc/my.cnf
更新需要的yum环境
yum -y install autoconf libaio perl
删除系统自带的mysql-libs
yum remove mysql-libs
第二步:下载安装包
执行下面的命令,查看当前系统glibc版本
rpm -qa | grep glibc
进入官网的下载页面,选择符合版本的安装包,官网-》https://dev.mysql.com/downloads/mysql/
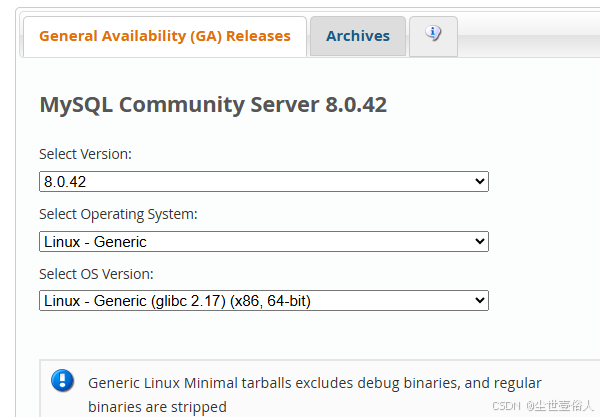
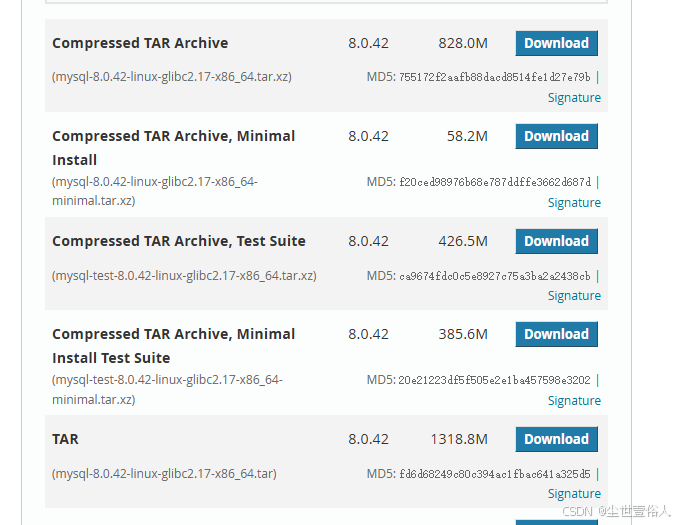
下载界面会看到如下包,一般情况下,用的最多的是Compressed TAR Archive和TAR,Compressed TAR Archive是完整的mysql安装文件,TAR比它多了一个测试用的资源包和一个mysql官方提供的负载均衡和故障转移的中间件,我们个人或非专业DBA不需要,下载Compressed TAR Archive即可
当然如果你的带宽足够,可以直接使用wget下载
wget https://dev.mysql.com/get/Downloads/MySQL-8.0/mysql-8.0.31-linux-glibc2.12-x86_64.tar.xz
第三步:解压mysql安装包
tar -xf mysql-8.0.42-linux-glibc2.17-x86_64.tar.xz
解压后得到的文件就是mysql服务的完全本体,按照个人需要放在合适的位置即可,这里正常放在 /opt 下 ,不过业内常规习惯是放在/usr/local/mysql
mv mysql-8.0.42-linux-glibc2.17-x86_64 /opt/mysql8
第四步:创建服务运维用户,以及数据储存路径
由于都是oracle下的东西,所以和oracle数据库一样最好是准备一个用户,当然mysql被没有和oracle那样强制不允许使用root用户
# 创建数据目录
mkdir -p /opt/mysqlData# 创建用户组和用户
groupadd mysql
useradd -r -g mysql mysqlchown mysql:mysql -R /opt/mysqlData
第五步:新建并编写配置文件 /etc/my.cnf,位置可以自定义
vi /etc/my.cnf# 添加以下内容
[mysqld]
#数据库监听的地址
bind-address = 0.0.0.0
#端口
port = 3306
#操作数据库的用户
user = mysql
#你mysql的本体放在哪里了
basedir = /opt/mysql8
#存储数据的路径
datadir = /opt/mysqlData
#mysql通讯文件存放位置
socket = /tmp/mysql.sock
#日志
log-error = /opt/mysqlData/mysql.err
#进程文件
pid-file = /opt/mysqlData/mysql.pid
#字符集
character_set_server = utf8mb4
symbolic-links = 0
explicit_defaults_for_timestamp = true
第六步:初始化
进入mysql解压路径的bin目录
cd /opt/mysql8/bin
使用下面的命令初始化mysql,注意参数需要和配置文件里面写的一样
./mysqld --defaults-file=/etc/my.cnf --basedir=/opt/mysql8 --datadir=/opt/mysqlData --user=mysql --initialize
正常执行不报错后,在/opt/mysqlData/mysql.err中的最后一行看初始密码
[root@node1 bin]# cat /opt/mysqlData/mysql.err
2025-05-11T09:40:51.434146Z 0 [Warning] [MY-011070] [Server] 'Disabling symbolic links using --skip-symbolic-links (or equivalent) is the default. Consider not using this option as it' is deprecated and will be removed in a future release.
2025-05-11T09:40:51.434353Z 0 [System] [MY-013169] [Server] /opt/mysql8/bin/mysqld (mysqld 8.0.42) initializing of server in progress as process 1315
2025-05-11T09:40:51.447481Z 1 [System] [MY-013576] [InnoDB] InnoDB initialization has started.
2025-05-11T09:40:51.684086Z 1 [System] [MY-013577] [InnoDB] InnoDB initialization has ended.
2025-05-11T09:40:53.168154Z 6 [Note] [MY-010454] [Server] A temporary password is generated for root@localhost: paz;aTt%<4Ko
将mysql本体中的启动脚本拷贝到linux系统的系统文件夹下面
cp /opt/mysql8/support-files/mysql.server /etc/init.d/mysql
随后就可以使得linux识别mysql的服务启动命令
[root@node1 bin]# service mysql start
Starting MySQL. SUCCESS!
第七步:配置环境变量,并按需使用mysql
服务启动后,将mysql本体的bin目录配置到环境变量里面
vi /etc/profile追加:
export PATH=$PATH:/opt/mysql8/binsource /etc/profile
使用初始密码登录mysql,并修改密码,注意!!!第一次连接不要显示的直接-p携带初始密码
直接执行:
mysql -uroot -p
随后在跳出的密码输入界面输入初始密码即可
[root@node1 bin]# mysql -uroot -p
Enter password:
Welcome to the MySQL monitor.  Commands end with ; or \g.
Your MySQL connection id is 9
Server version: 8.0.42Copyright (c) 2000, 2025, Oracle and/or its affiliates.Oracle is a registered trademark of Oracle Corporation and/or its
affiliates. Other names may be trademarks of their respective
owners.Type 'help;' or '\h' for help. Type '\c' to clear the current input statement.mysql>
修改初始密码
ALTER USER 'root'@'localhost' IDENTIFIED BY '新密码';
FLUSH PRIVILEGES;
更改连接域
use mysql;
UPDATE user SET host='%' WHERE user='root';
FLUSH PRIVILEGES;
让mysql随系统启动
chkconfig mysql on
到此安装就结束了