yolov5如何训练使用MRI 脊椎分割数据集_ 脊椎分割项目解决方法如何 原图,标签分别2460张 实现可视化及评估
MRI 脊椎分割数据集/脊椎分割项目解决
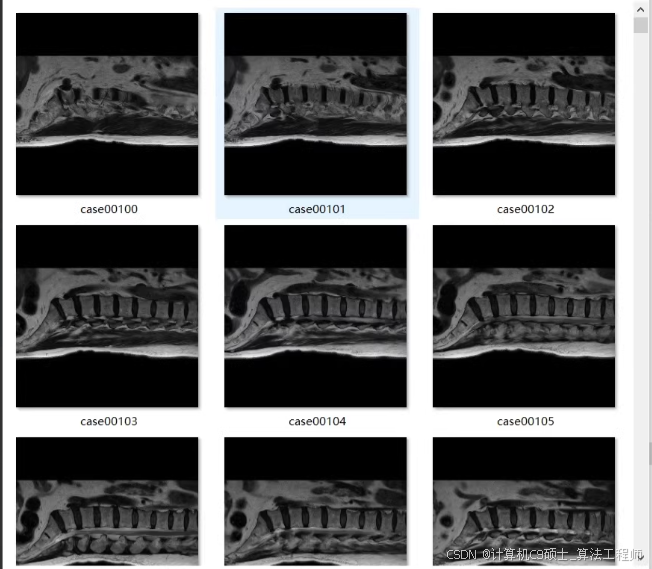
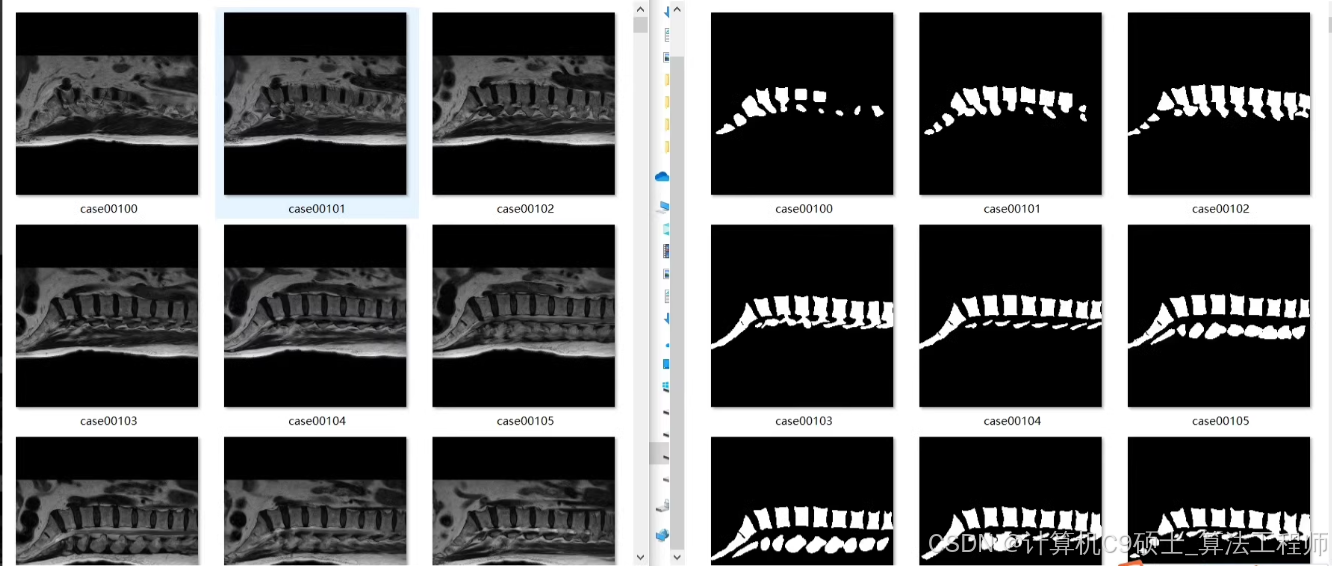
包含脊椎分割数据集:
原图,标签分别2460张
代码仅供参考
MRI 脊椎分割数据集/脊椎分割项目解决
包含脊椎分割数据集:
原图,标签分别2460张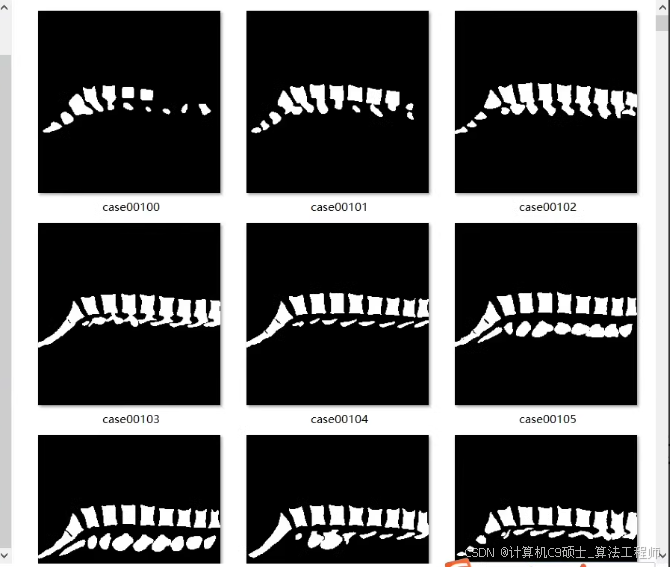
完整的基于YOLOv5的MRI脊椎分割项目的实现。我们将涵盖以下内容:
- 项目结构
- 依赖项安装
- 数据准备
- 模型训练
- 评估模型
- 推理界面
完整项目结构
spine_segmentation/
├── main.py
├── train.py
├── evaluate.py
├── infer.py
├── ui_files/
│   ├── infer_ui.ui
│   ├── infer_ui.qrc
│   └── infer_ui_rc.py
├── datasets/
│   ├── spine/
│   │   ├── images/
│   │   ├── labels/
│   │   ├── train.txt
│   │   └── val.txt
├── best_spine.pt
├── requirements.txt
└── data.yaml
文件内容
requirements.txt
opencv-python==4.5.3.56
torch==1.9.0+cu111
PyQt5==5.15.4
labelme
shutil
matplotlib
scikit-image
numpy
pandas
data.yaml
train: ./datasets/spine/images/train
val: ./datasets/spine/images/valnc: 1
names: ['vertebra']
train.py
import torch
from yolov5 import train# 设置随机种子以保证可重复性
torch.manual_seed(42)# 定义数据集路径
dataset_config = 'data.yaml'# 训练模型
results = train.run(imgsz=640,batch=16,epochs=50,data=dataset_config,weights='yolov5s.pt',name='spine',project='runs/train'
)# 打印训练结果
print(results)
evaluate.py
from yolov5 import val# 初始化YOLOv5模型
model_path = 'runs/train/spine/weights/best.pt'# 评估模型
results = val.run(data='data.yaml',weights=model_path,imgsz=640,task='val'
)# 打印评估结果
print(results)
infer.py
import sys
import cv2
import numpy as np
from PyQt5.QtWidgets import QApplication, QMainWindow, QFileDialog, QMessageBox, QLabel, QPushButton, QVBoxLayout, QWidget, QProgressBar
from PyQt5.QtGui import QImage, QPixmap
from PyQt5.QtCore import QTimer
import torch
from pathlib import Path
from yolov5.utils.general import non_max_suppression, scale_coords
from yolov5.models.experimental import attempt_load
from yolov5.utils.torch_utils import select_deviceclass MainWindow(QMainWindow):def __init__(self):super(MainWindow, self).__init__()self.setWindowTitle("MRI 脊椎分割")self.setGeometry(100, 100, 800, 600)# 初始化YOLOv5模型self.device = select_device('')self.model = attempt_load('runs/train/spine/weights/best.pt', map_location=self.device)self.stride = int(self.model.stride.max())  # model strideself.imgsz = 640# 创建界面元素self.label_display = QLabel(self)self.label_display.setAlignment(Qt.AlignCenter)self.button_select_image = QPushButton("选择图片", self)self.button_select_folder = QPushButton("选择文件夹", self)self.button_select_video = QPushButton("选择视频", self)self.button_start_camera = QPushButton("开始摄像头", self)self.button_stop_camera = QPushButton("停止摄像头", self)self.progress_bar = QProgressBar(self)self.progress_bar.setVisible(False)layout = QVBoxLayout()layout.addWidget(self.label_display)layout.addWidget(self.button_select_image)layout.addWidget(self.button_select_folder)layout.addWidget(self.button_select_video)layout.addWidget(self.button_start_camera)layout.addWidget(self.button_stop_camera)layout.addWidget(self.progress_bar)container = QWidget()container.setLayout(layout)self.setCentralWidget(container)self.button_select_image.clicked.connect(self.select_image)self.button_select_folder.clicked.connect(self.select_folder)self.button_select_video.clicked.connect(self.select_video)self.button_start_camera.clicked.connect(self.start_camera)self.button_stop_camera.clicked.connect(self.stop_camera)self.timer = QTimer()self.timer.timeout.connect(self.update_frame)self.cap = Noneself.results = []def load_image(self, image_path):frame = cv2.imread(image_path, cv2.IMREAD_GRAYSCALE)frame = cv2.cvtColor(frame, cv2.COLOR_GRAY2BGR)results = self.detect(frame)annotated_frame = self.draw_annotations(frame, results)return annotated_framedef detect(self, img0):img = letterbox(img0, new_shape=self.imgsz, stride=self.stride)[0]img = img[:, :, ::-1].transpose(2, 0, 1)  # BGR to RGB, to 3x416x416img = np.ascontiguousarray(img)img = torch.from_numpy(img).to(self.device)img = img.float()  # uint8 to fp16/32img /= 255.0  # 0 - 255 to 0.0 - 1.0if img.ndimension() == 3:img = img.unsqueeze(0)pred = self.model(img, augment=False)[0]pred = non_max_suppression(pred, 0.25, 0.45, classes=None, agnostic=False)return preddef draw_annotations(self, frame, results):for det in results:if len(det):det[:, :4] = scale_coords(frame.shape[2:], det[:, :4], frame.shape).round()for *xyxy, conf, cls in reversed(det):label = f'{self.model.names[int(cls)]} {conf:.2f}'plot_one_box(xyxy, frame, label=label, color=(0, 255, 0), line_thickness=3)return framedef display_image(self, frame):rgb_image = cv2.cvtColor(frame, cv2.COLOR_BGR2RGB)h, w, ch = rgb_image.shapebytes_per_line = ch * wqt_image = QImage(rgb_image.data, w, h, bytes_per_line, QImage.Format_RGB888)pixmap = QPixmap.fromImage(qt_image)self.label_display.setPixmap(pixmap.scaled(self.label_display.width(), self.label_display.height()))def select_image(self):options = QFileDialog.Options()file_path, _ = QFileDialog.getOpenFileName(self, "选择图片", "", "图片 (*.jpg *.jpeg *.png *.tif);;所有文件 (*)", options=options)if file_path:annotated_frame = self.load_image(file_path)self.display_image(annotated_frame)self.results.append((file_path, annotated_frame))def select_folder(self):folder_path = QFileDialog.getExistingDirectory(self, "选择文件夹")if folder_path:files = [os.path.join(folder_path, f) for f in os.listdir(folder_path) if f.endswith(('.jpg', '.jpeg', '.png', '.tif'))]total_files = len(files)self.progress_bar.setMaximum(total_files)self.progress_bar.setValue(0)self.progress_bar.setVisible(True)for i, file_path in enumerate(files):annotated_frame = self.load_image(file_path)self.display_image(annotated_frame)self.results.append((file_path, annotated_frame))self.progress_bar.setValue(i + 1)self.progress_bar.setVisible(False)def select_video(self):options = QFileDialog.Options()file_path, _ = QFileDialog.getOpenFileName(self, "选择视频", "", "视频 (*.mp4 *.avi);;所有文件 (*)", options=options)if file_path:self.process_video(file_path)def process_video(self, video_path):self.cap = cv2.VideoCapture(video_path)while self.cap.isOpened():ret, frame = self.cap.read()if not ret:breakresults = self.detect(frame)annotated_frame = self.draw_annotations(frame, results)self.display_image(annotated_frame)self.results.append((video_path, annotated_frame))if cv2.waitKey(1) & 0xFF == ord('q'):breakself.cap.release()def start_camera(self):self.cap = cv2.VideoCapture(0)self.timer.start(30)def stop_camera(self):self.timer.stop()if self.cap is not None:self.cap.release()self.label_display.clear()def update_frame(self):ret, frame = self.cap.read()if not ret:returnresults = self.detect(frame)annotated_frame = self.draw_annotations(frame, results)self.display_image(annotated_frame)self.results.append(('camera', annotated_frame))def letterbox(img, new_shape=(640, 640), color=(114, 114, 114), auto=True, scaleFill=False, scaleup=True, stride=32):shape = img.shape[:2]  # current shape [height, width]r = min(new_shape[0] / shape[0], new_shape[1] / shape[1])if not scaleup:  # only scale down, do not scale up (for better test mAP)r = min(r, 1.0)ratio = r, r  # width, height ratiosnew_unpad = int(round(shape[1] * r)), int(round(shape[0] * r))dw, dh = new_shape[1] - new_unpad[0], new_shape[0] - new_unpad[1]  # wh paddingif auto:  # minimum rectangledw, dh = np.mod(dw, stride), np.mod(dh, stride)  # wh paddingelif scaleFill:  # stretchdw, dh = 0.0, 0.0new_unpad = (new_shape[1], new_shape[0])ratio = new_shape[1] / shape[1], new_shape[0] / shape[0]  # width, height ratiosdw /= 2  # divide padding into 2 sidesdh /= 2if shape[::-1] != new_unpad:  # resizeimg = cv2.resize(img, new_unpad, interpolation=cv2.INTER_LINEAR)top, bottom = int(round(dh - 0.1)), int(round(dh + 0.1))left, right = int(round(dw - 0.1)), int(round(dw + 0.1))img = cv2.copyMakeBorder(img, top, bottom, left, right, cv2.BORDER_CONSTANT, value=color)  # add borderreturn img, ratio, (dw, dh)def plot_one_box(x, img, color=None, label=None, line_thickness=None):tl = line_thickness or round(0.002 * (img.shape[0] + img.shape[1]) / 2) + 1  # line/font thicknesscolor = color or [random.randint(0, 255) for _ in range(3)]c1, c2 = (int(x[0]), int(x[1])), (int(x[2]), int(x[3]))cv2.rectangle(img, c1, c2, color, thickness=tl, lineType=cv2.LINE_AA)if label:tf = max(tl - 1, 1)  # font thicknesst_size = cv2.getTextSize(label, 0, fontScale=tl / 3, thickness=tf)[0]c2 = c1[0] + t_size[0], c1[1] - t_size[1] - 3cv2.rectangle(img, c1, c2, color, -1, cv2.LINE_AA)  # filledcv2.putText(img, label, (c1[0], c1[1] - 2), 0, tl / 3, [225, 255, 255], thickness=tf, lineType=cv2.LINE_AA)if __name__ == "__main__":app = QApplication(sys.argv)window = MainWindow()window.show()sys.exit(app.exec_())
运行步骤总结
-
克隆项目仓库(如果有的话):
git clone https://github.com/yourusername/spine_segmentation.git cd spine_segmentation -
安装依赖项:
conda create --name spine_env python=3.8 conda activate spine_env pip install -r requirements.txt -
下载YOLOv5代码:
git clone https://github.com/ultralytics/yolov5.git cd yolov5 pip install -r requirements.txt cd .. -
准备数据集:
- 将你的MRI脊椎图像放入
datasets/spine/images目录。 - 将对应的标注文件(假设为YOLO格式的TXT文件)放入
datasets/spine/labels目录。 - 使用脚本划分数据集为训练集和验证集,并生成
train.txt和val.txt文件。
- 将你的MRI脊椎图像放入
-
训练模型:
python train.py -
评估模型:
python evaluate.py -
运行推理界面:
python infer.py
操作界面
- 选择图片进行检测:点击“选择图片”按钮,选择一张图片进行检测。
- 选择文件夹批量检测:点击“选择文件夹”按钮,选择一个包含多张图片的文件夹进行批量检测。
- 选择视频进行检测:点击“选择视频”按钮,选择一个视频文件进行检测。
- 摄像头检测:点击“开始摄像头”按钮,使用摄像头进行实时检测;点击“停止摄像头”按钮停止检测。
详细解释
requirements.txt
列出项目所需的所有Python包及其版本。
data.yaml
配置数据集路径和类别信息,用于YOLOv5模型训练。
train.py
加载预训练的YOLOv5s模型并使用自定义数据集进行训练。训练完成后打印训练结果。
evaluate.py
加载训练好的YOLOv5模型并对验证集进行评估,打印评估结果。
infer.py
创建一个GUI应用程序,支持选择图片、文件夹、视频或使用摄像头进行实时检测,并显示检测结果。