本地部署 MySQL + Qwen3-1.5B + Flask + Dify 工作流
一、 本地部署Dify
注意:v100显卡会出现不适配,不推荐使用
1. 安装 Docker
ubuntu 22.04 docker 安装&使用_ubuntu22.04 安装docker-CSDN博客
2. 安装vllm
pip install -U xformers torch torchvision torchaudio triton --index-url https://download.pytorch.org/whl/cu121
pip install modelscope vllm
3. 下载Qwen开源模型
#模型下载
from modelscope import snapshot_download
model_dir = snapshot_download('Qwen/Qwen2.5-0.5B-Instruct')
4. 部署Dify到本地
git clone https://github.com/langgenius/dify启动 Dify
-
进入 Dify 源代码的 Docker 目录
cd dify/docker -
复制环境配置文件
cp .env.example .env
修改端口:
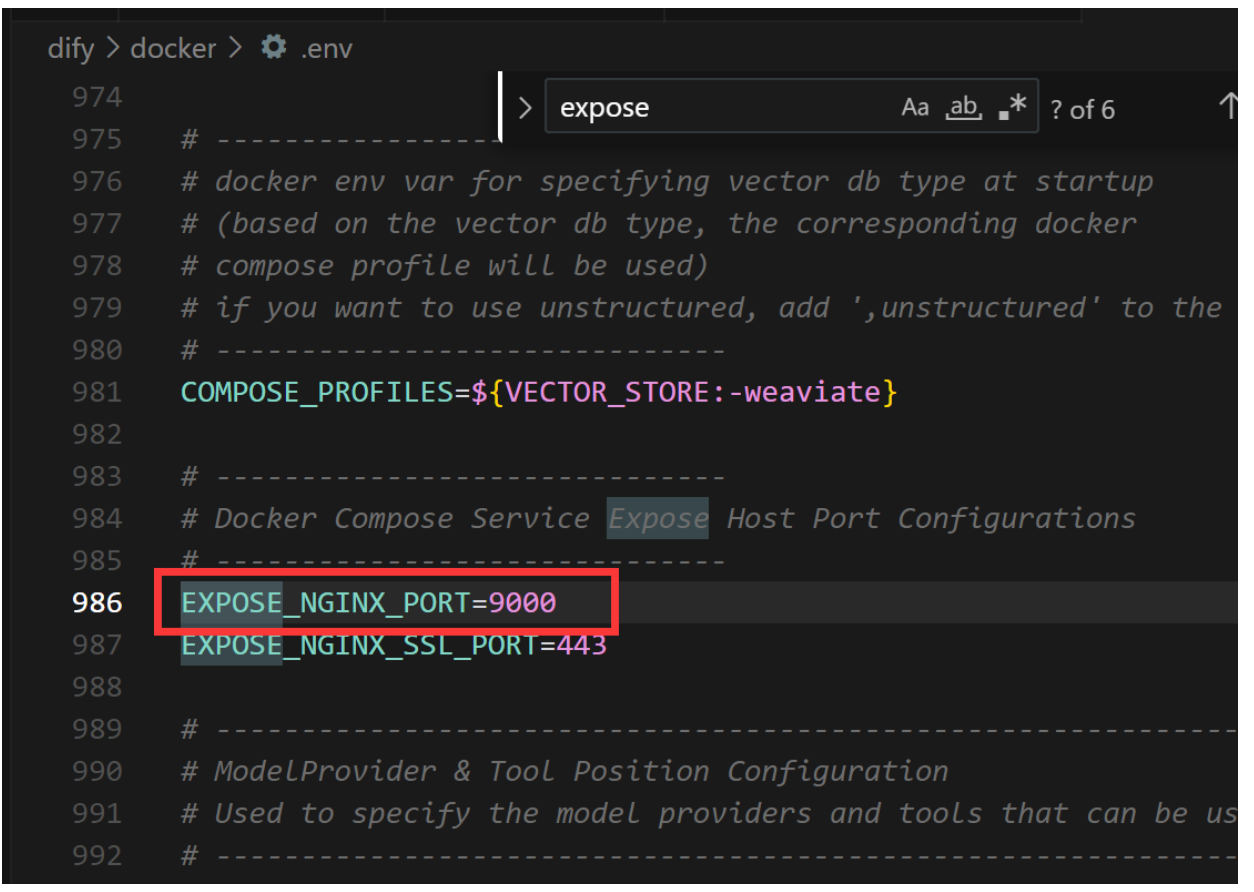
如果使用云服务器请先确认暴露端口
以闪电云为例:
sudo apt install rinetd
echo "0.0.0.0 8880 127.0.0.1 9000" > /etc/rinetd.conf
sudo systemctl restart rinetd
更新 Dify
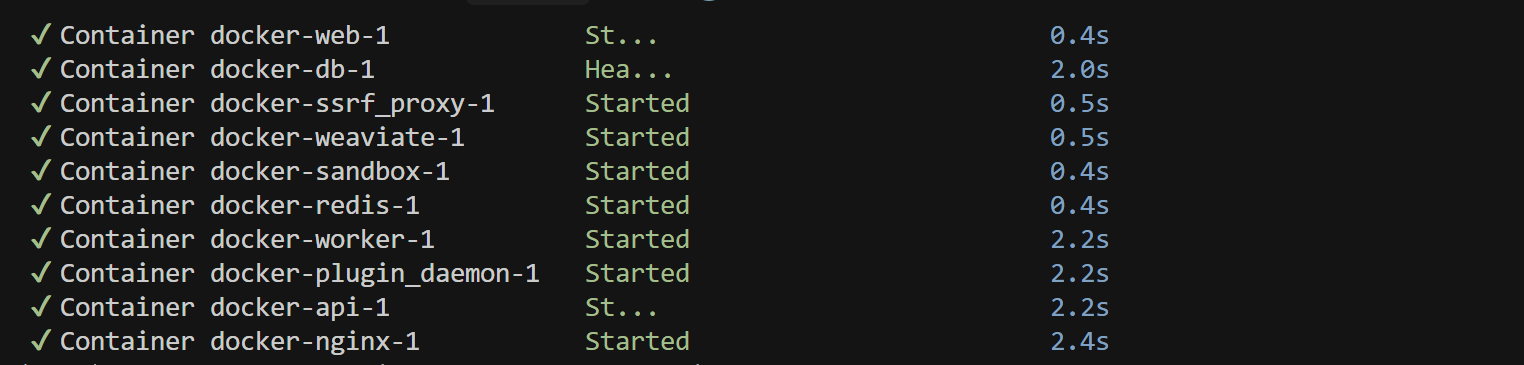
进入 dify 源代码的 docker 目录,按顺序执行以下命令:
cd dify/docker
docker compose down
git pull origin main
docker compose pull
docker compose up -d
访问 Dify
你可以先前往管理员初始化页面设置设置管理员账户:
# 本地环境
http://localhost/install# 服务器环境
http://your_server_ip/install
Dify 主页面:
# 本地环境
http://localhost# 服务器环境
http://your_server_ip
5. 启动 vLLM 的 OpenAI 兼容服务
启动vllm服务
命令行输入 vllm serve Qwen/Qwen2.5-1.5B-Instruct --port 9999 --dtype float16
# 使用绝对路径
 vllm serve /root/.cache/modelscope/hub/models/Qwen/Qwen2.5-0.5B-Instruct --port 8000 --dtype float16
二、 安装MySQL和PyMySQL
安装MySQL
# 在Ubuntu/Debian上安装
sudo apt update
sudo apt install mysql-server
sudo mysql_secure_installation# 启动MySQL服务
sudo systemctl start mysql
sudo systemctl enable mysql
安装PyMySQL
pip install pymysql
使用 apt 安装 MySQL 后,默认情况下 root 用户没有密码,但需要通过 sudo 权限访问。
如果希望设置密码(推荐)
使用 mysql_secure_installation
运行以下命令交互式设置密码:
sudo mysql_secure_installation
按照提示:
-
选择密码强度验证策略(通常选
0跳过) -
输入新密码并确认
-
后续选项建议全部选
Y(移除匿名用户、禁止远程 root 登录等)
用 sudo 登录 MySQL
sudo mysql -u root检查 MySQL 用户认证方式
登录 MySQL 后,执行:
SELECT user, host, plugin FROM mysql.user WHERE user='root';修改 root 用户认证方式为密码
假设你已经用 sudo mysql 进入了 MySQL,执行:
ALTER USER 'root'@'localhost' IDENTIFIED WITH mysql_native_password BY '12345678';
FLUSH PRIVILEGES;
创建数据库和表
import pymysql# 替换为你的MySQL root密码
MYSQL_PASSWORD = 'your_root_password'connection = pymysql.connect(host='localhost',user='root',password='12345678'
)try:with connection.cursor() as cursor:# 创建数据库cursor.execute("CREATE DATABASE IF NOT EXISTS qwen_demo")cursor.execute("USE qwen_demo")# 创建产品表cursor.execute("""CREATE TABLE IF NOT EXISTS products (id INT AUTO_INCREMENT PRIMARY KEY,name VARCHAR(100),category VARCHAR(50),price DECIMAL(10,2),stock INT)""")# 插入示例数据cursor.execute("""INSERT INTO products (name, category, price, stock)VALUES ('笔记本电脑', '电子产品', 5999.00, 50),('智能手机', '电子产品', 3999.00, 100),('平板电脑', '电子产品', 2999.00, 30),('办公椅', '家具', 899.00, 20),('书桌', '家具', 1299.00, 15)""")connection.commit()print("数据库和表创建成功,示例数据已插入!")
finally:connection.close()
三、构建text2SQL
# qwen_sql.py
from transformers import AutoModelForCausalLM, AutoTokenizermodel = AutoModelForCausalLM.from_pretrained("/root/.cache/modelscope/hub/models/Qwen/Qwen2.5-1.5B-Instruct", device_map="auto")
tokenizer = AutoTokenizer.from_pretrained("/root/.cache/modelscope/hub/models/Qwen/Qwen2.5-1.5B-Instruct")def generate_sql(query):prompt = f"""将中文转换为SQL查询。只返回SQL语句,不要有其他解释或说明。数据库表结构:表名:products字段:id, name, category, price, stock问题:{query}SQL:"""inputs = tokenizer(prompt, return_tensors="pt").to(model.device)outputs = model.generate(**inputs, max_new_tokens=300)# 先解码模型输出output_text = tokenizer.decode(outputs[0], skip_special_tokens=True)# print("模型输出:", output_text)  # 可调试用# 提取SQL部分if "SQL:" in output_text:sql = output_text.split("SQL:")[-1].strip()else:sql = output_text.strip()return sql
四、 启动FlakAPI
# api.py
from flask import Flask, request, jsonify
import pymysql
from qwen_sql import generate_sqlapp = Flask(__name__)@app.route('/sql', methods=['POST'])
def handle_sql():user_query = request.json['query']try:sql = generate_sql(user_query)conn = pymysql.connect(host='localhost', user='root', password='12345678', database='qwen_demo')with conn.cursor(pymysql.cursors.DictCursor) as cursor:cursor.execute(sql)result = cursor.fetchall()return jsonify({"sql": sql, "data": str(result)})except Exception as e:return jsonify({"error": str(e)}), 500if __name__ == '__main__':app.run(host='0.0.0.0', port=8000)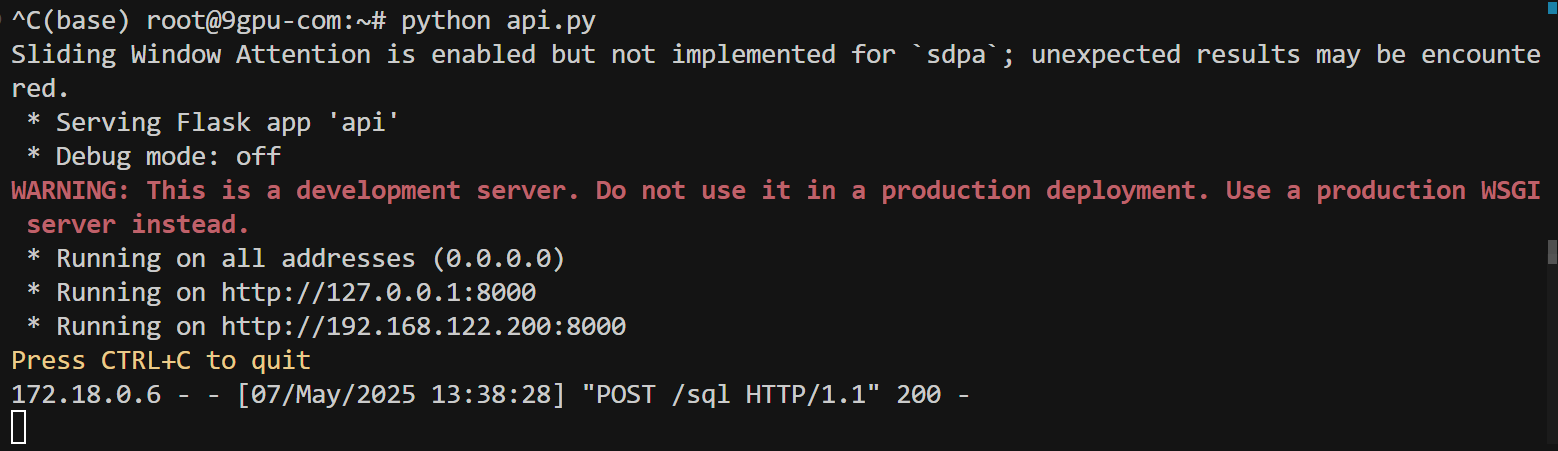
测试代码:
import requestsurl = "http://192.168.122.200:8000/sql"
data = {"query": "价格大于1000的产品"  # 这里可以换成你想测试的自然语言问题
}response = requests.post(url, json=data)
print("Status Code:", response.status_code)
print("Response:", response.json()) 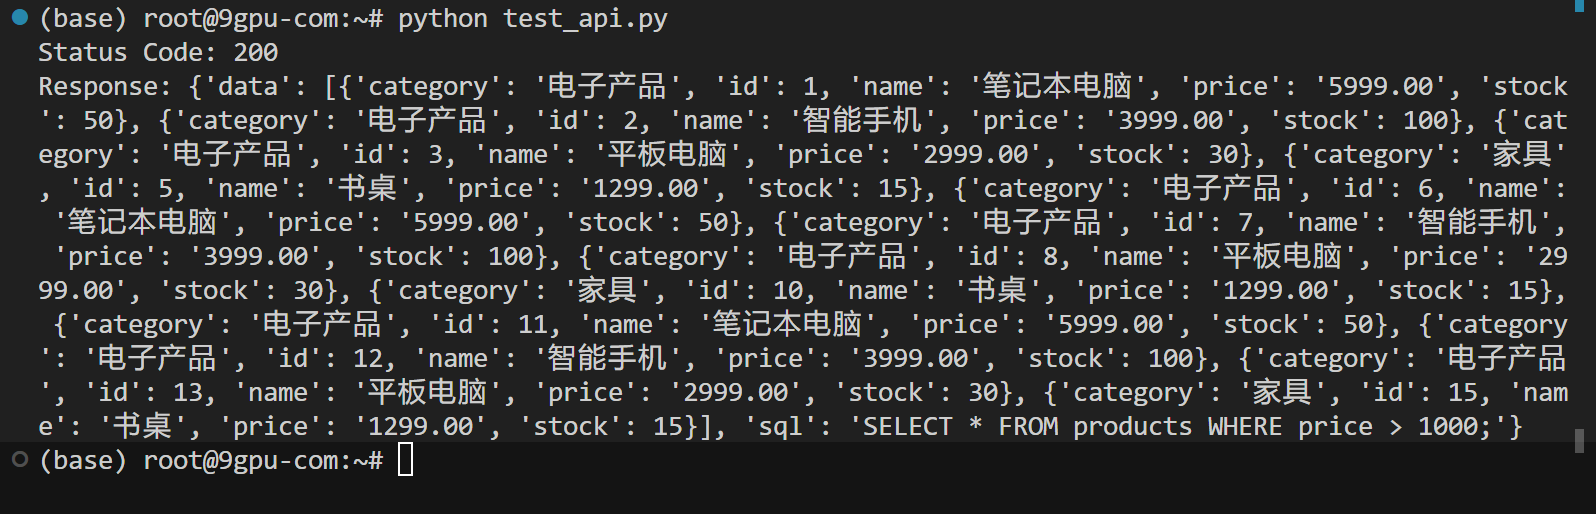
五、 Dify工作流
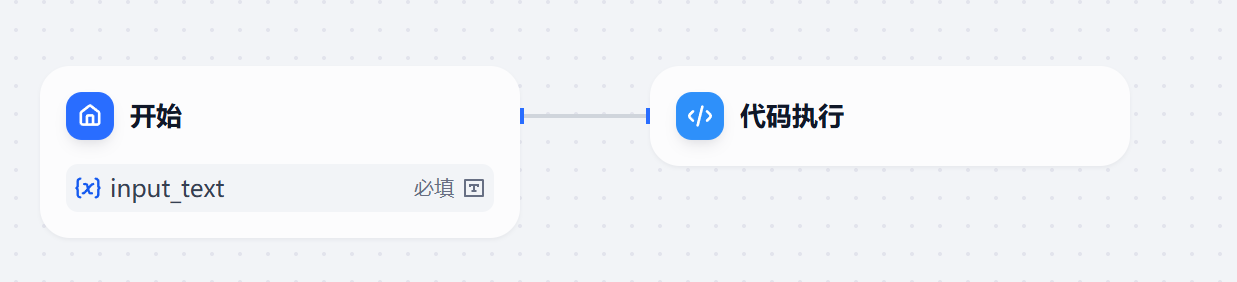
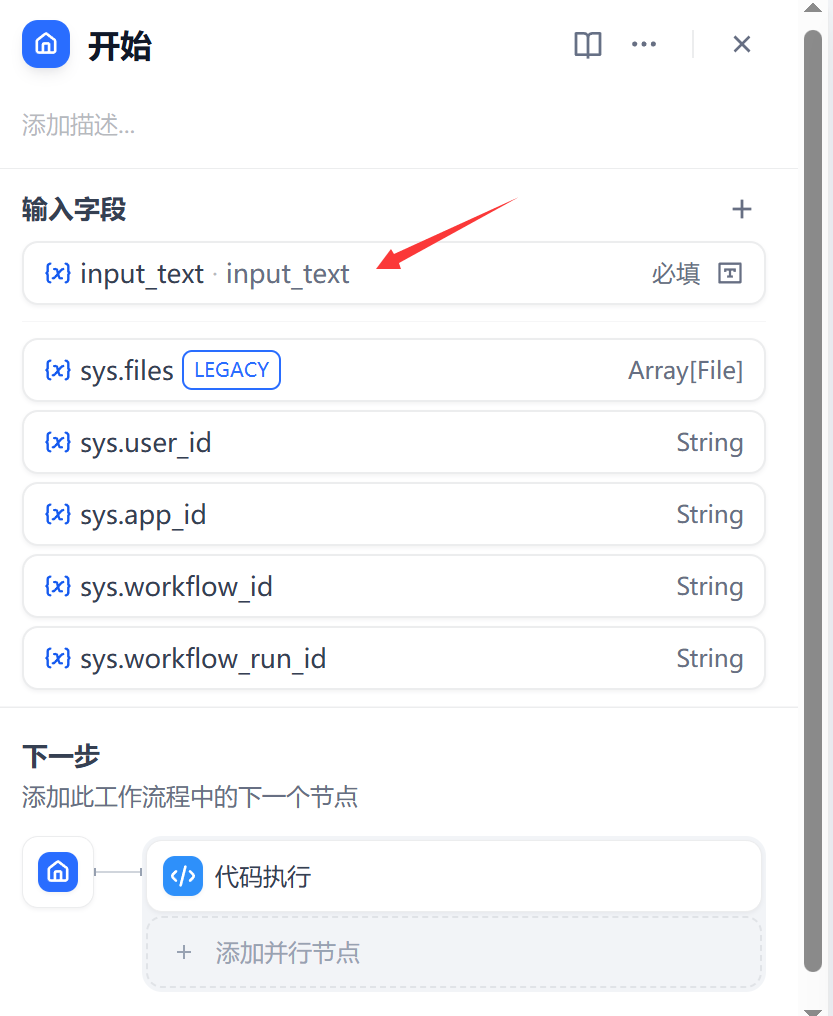
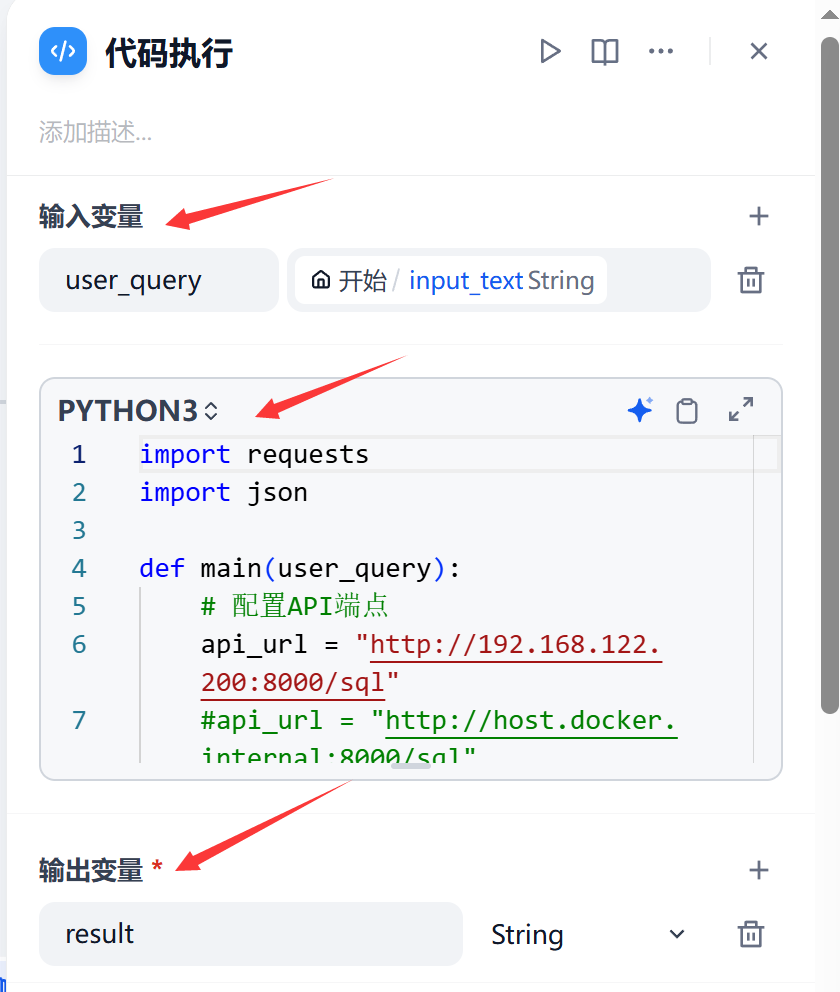
执行代码节点代码如下:
import requests
import jsondef main(user_query):# 配置API端点api_url = "http://192.168.122.200:8000/sql"#api_url = "http://host.docker.internal:8000/sql"# 1. 发送请求到SQL转换服务response = requests.post(api_url,json={"query": user_query},timeout=30  # 建议超时设置为30秒)result = response.json()# 5. 标准化输出格式(匹配Dify结束节点模板)return  {"result": result["data"]}