RHCE第七章:SElinux
一、SElinux
SELinux 是一套安全策略系统
1.作用:
(1)SELinux 域限制:对服务程序的功能进行限制,以确保服务程序做不了出格的事
(2)SELinux 安全上下文:对文件资源的访问限制,确保文件资源只能被其所属的服务程序访问
2.配置文件
[root@Server ~]# vim /etc/selinux/config #查看/编辑SELinux的配置文件
3 # SELINUX= can take one of these three values:
4 # enforcing - SELinux security policy is enforced. #SELinux安全策略强制执行,强制模式
5 # permissive - SELinux prints warnings instead of enforcing. #宽松模式,日志模式
6 # disabled - No SELinux policy is loaded. #禁用模式
22 SELINUX=enforcing #SELinux的启动模式类型
23 # SELINUXTYPE= can take one of these three values:
24 # targeted - Targeted processes are protected, #默认策略,用于限制网络服务
25 # minimum - Modification of targeted policy. Only selected processes are protected.
26 # mls - Multi Level Security protection. #多级安全网络策略,限制更严格
27 SELINUXTYPE=targeted #策略类型
[root@Server ~]# ll /etc/selinux/config /etc/sysconfig/selinux
-rw-r--r--. 1 root root 1263 3月 20 21:52 /etc/selinux/config
lrwxrwxrwx. 1 root root 17 3月 20 21:52 /etc/sysconfig/selinux -> ../selinux/config #/etc/sysconfig/selinux 和 /etc/selinux/config 指向同一个配置文件,/etc/sysconfig/selinux 是 /etc/selinux/config 的软链接
3.安全上下文(Security Context)
所有进程、文件和目录都有自己的安全上下文
进程能否访问文件或目录,要与其安全上下文是否能匹配
[root@Server ~]# dnf install selinux-policy -y #安装SELinux策略
4.永久修改SELinux的模式
[root@Server ~]# vim /etc/selinux/config
22 SELINUX=permissive #修改为宽松模式
[root@Server ~]# touch /.autorelabel #让SELinux根据策略信息重建系统安全上下文
[root@Server ~]# reboot #reboot——重启,poweroff——关机
5.查看安全上下文
[root@Server ~]# ls -Z anaconda-ks.cfg #ls——查看文件,-Z——查看安全上下文
system_u:object_r:admin_home_t:s0 anaconda-ks.cfg
#用户:system_u系统用户身份;unconfined_u未联系的用户身份
#角色:object_r表示文件或目录;system_r表示进程
#admin_home_t表示该文件/目录/进程 所使用的策略规则(策略规则有很多,不用记)
#安全级别:s0(数字越小,安全级别越低)
[root@Server ~]# ps -ef |grep ssh #ps——查看进程;查看ssh的进程
root 2241 1050 0 15:41 ? 00:00:00 sshd: root [priv]
root 2249 1050 0 15:41 ? 00:00:00 sshd: root [priv]
······
[root@Server ~]# ps aux |grep ssh #查看ssh的进程
root 2241 0.0 0.3 19336 12428 ? Ss 15:41 0:00 sshd: root [priv]
root 2249 0.0 0.3 19304 12476 ? Ss 15:41 0:00 sshd: root [priv]
······
[root@Server ~]# ps auZ |grep ssh #auZ——查看安全上下文;查看ssh进程的安全上下文
unconfined_u:unconfined_r:unconfined_t:s0-s0:c0.c1023 root 2360 0.0 0.0 221680 2360 pts/0 S+ 15:45 0:00 grep --color=auto ssh
[root@Server ~]# dnf install setools-console -y #安装seinfo服务,用于查看进程信息
[root@Server ~]# seinfo -u #查看SELinux的用户信息
Users: 8
root
unconfined_u
user_u
······
[root@Server ~]# seinfo -r #查看SELinux的角色信息
Roles: 15
auditadm_r
unconfined_r
user_r
······
[root@Server ~]# seinfo -t |grep ssh #查看ssh的策略类型
NetworkManager_ssh_t
sge_job_ssh_t
ssh_agent_exec_t
······
二、修改安全上下文
[root@Server ~]# vim /etc/nginx/nginx.conf
38 server {
39 listen 80;
40 listen [::]:80;
41 server_name _;
42 root /usr/share/nginx/html; #访问本机IP地址(192.168.153.100)时,默认打开/usr/share/nginx/html/index.html文件/网页
[root@Server ~]# systemctl stop firewalld.service #关闭网络防火墙
[root@Server ~]# setenforce 1 #开启内核防火墙,即安全上下文
[root@Server ~]# systemctl restart nginx.service #重启nginx服务
[root@Server ~]# vim /etc/nginx/nginx.conf #再次编辑nginx的配置文件
38 server {
39 listen 80;
40 listen [::]:80;
41 server_name _;
42 #root /usr/share/nginx/html; #注释掉web默认目录
43 root /myweb; #创建web访问的目录位置
44 index web1.html; #创建默认访问文件
[root@Server ~]# mkdir /myweb #创建目录
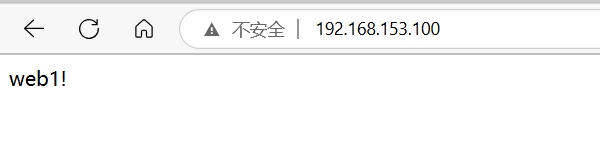
[root@Server ~]# echo "web1!" > /myweb/web1.html #创建web1.html文件,并写入'web1!'
[root@Server ~]# nginx -s reload #重新加载nginx服务

因为我们打开的/myweb/web1.html 的安全上下文与nginx进程的安全上下文不匹配,所以打不开网页;然后一开始nginx默认的/usr/share/nginx/html/index.html 与nginx进程的安全上下文匹配,能打开网页,所以把/myweb/web1.html 的安全上下文修改成和/usr/share/nginx/html/index.html 的安全上下文一样就能打开了
[root@Server ~]# ls -Z /usr/share/nginx/html/index.html /myweb/web1.html #同时查看两个文件的安全上下文
unconfined_u:object_r:default_t:s0 /myweb/web1.html
system_u:object_r:httpd_sys_content_t:s0 /usr/share/nginx/html/index.html
(1)临时(chcon)修改安全按上下文
chcon 修改的是文件上已经部署好的策略(文件系统),并不是修改SELinux的策略配置(策略系统)。重启也并不会触发重启上下文,即不会触发策略系统给文件系统重新部署策略
[root@Server ~]# chcon -R --reference=/usr/share/nginx/html /myweb #复制目标目录的安全上下文到指定目录上
[root@Server ~]# ls -Z /usr/share/nginx/html/index.html /myweb/web1.html #再次查看两个文件的安全上下文
system_u:object_r:httpd_sys_content_t:s0 /myweb/web1.html
system_u:object_r:httpd_sys_content_t:s0 /usr/share/nginx/html/index.html
[root@Server ~]# vim /etc/nginx/nginx.conf #编辑nginx配置文件
38 server {
39 listen 80;
40 listen [::]:80;
41 server_name _;
42 #root /usr/share/nginx/html;
43 root /myweb2; #指定web访问目录/myweb2
[root@Server ~]# mkdir /myweb2 #创建/myweb2
[root@Server ~]# echo "web2222" > /myweb2/index.html #写入'web2222'到默认文件index.html
[root@Server ~]# nginx -s reload #重新加载
[root@Server ~]# ls -dZ /usr/share/nginx/html /myweb2 #-d查看目录,查看目录的安全上下文
unconfined_u:object_r:default_t:s0 /myweb2
system_u:object_r:httpd_sys_content_t:s0 /usr/share/nginx/html
[root@Server ~]# chcon -R -t httpd_sys_content_t /myweb2 #-t指定策略类型,将策略类型复制到指定目录下
[root@Server ~]# ls -dZ /usr/share/nginx/html /myweb2
unconfined_u:object_r:httpd_sys_content_t:s0 /myweb2
system_u:object_r:httpd_sys_content_t:s0 /usr/share/nginx/html
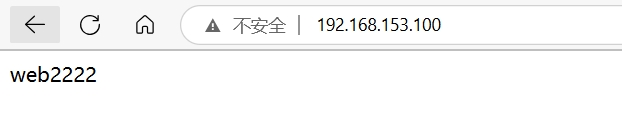
因为unconfined_u用户的权限比system_u用户的权限大,所以即使安全上下文不完全相同也能访问到网页
[root@Server ~]# chcon -R -u system_u /myweb2 #-u——将用户类型复制到指定目录下;-r——角色类型复制到指定目录下
[root@Server ~]# ls -dZ /usr/share/nginx/html/ /myweb2 #查看目录安全上下文
system_u:object_r:httpd_sys_content_t:s0 /myweb2
system_u:object_r:httpd_sys_content_t:s0 /usr/share/nginx/html/
(2)永久修改策略semanage
semanage修改策略本身
[root@Server ~]# ls -Z /myweb2 -D #查看目录下文件的原安全上下文
unconfined_u:object_r:default_t:s0 index.html
[root@Server ~]# restorecon -RvvF /myweb2 #恢复默认的SELinux策略,'F'表示显示详情
Relabeled /myweb2 from system_u:object_r:httpd_sys_content_t:s0 to system_u:object_r:default_t:s0
Relabeled /myweb2/index.html from system_u:object_r:httpd_sys_content_t:s0 to system_u:object_r:default_t:s0
[root@Server ~]# semanage fcontext -l | grep ssh #-l——查看,fcontext——上下文;查看ssh服务下的文件或目录使用哪些安全上下文
/etc/rc\.d/init\.d/sshd regular file system_u:object_r:sshd_initrc_exec_t:s0
/etc/ssh/primes regular file system_u:object_r:sshd_key_t:s0
······
[root@Server ~]# ls -Z /usr/share/nginx/html/ /myweb2 #查看目录下文件的安全上下文
/myweb2:
system_u:object_r:default_t:s0 index.html
/usr/share/nginx/html/:
system_u:object_r:httpd_sys_content_t:s0 404.html
system_u:object_r:httpd_sys_content_t:s0 50x.html
system_u:object_r:httpd_sys_content_t:s0 icons
system_u:object_r:httpd_sys_content_t:s0 index.html
······
[root@Server ~]# semanage fcontext -a -t httpd_sys_content_t "/myweb2(/.*)?" #-a添加,-t策略类型,"/myweb2(/.*)?"——正则表达式,将策略复制到目录以及目录下的文件
[root@Server ~]# ls -Z /myweb2 #查看目录的安全上下文,因为semanage修改的是策略本身(策略系统),所以需要重新下发SELinux策略
system_u:object_r:default_t:s0 index.html
[root@Server ~]# restorecon -RvvF /myweb2 #重新给/myweb 下发策略,('F')并显示详情
Relabeled /myweb2 from system_u:object_r:default_t:s0 to system_u:object_r:httpd_sys_content_t:s0
Relabeled /myweb2/index.html from system_u:object_r:default_t:s0 to system_u:object_r:httpd_sys_content_t:s0
三、修改端口
[root@Server ~]# semanage port -l |grep http #查看http下有哪些端口
http_cache_port_t tcp 8080, 8118, 8123, 10001-10010
http_cache_port_t udp 3130
http_port_t tcp 80, 81, 443, 488, 8008, 8009, 8443, 9000
·····
[root@Server ~]# semanage port -a -t http_port_t -p tcp 7777 #-a添加,-d删除,-t指定策略,-p指定协议及端口;添加端口号
[root@Server ~]# semanage port -l |grep http
http_cache_port_t tcp 8080, 8118, 8123, 10001-10010
http_cache_port_t udp 3130
http_port_t tcp 7777, 80, 81, 443, 488, 8008, 8009, 8443, 9000
······
[root@Server ~]# vim /etc/nginx/nginx.conf #编辑nginx配置文件
38 server {
39 listen 7777; #修改端口号
40 listen [::]:80;
41 server_name _;
42 #root /usr/share/nginx/html;
43 root /myweb2;
[root@Server ~]# nginx -s reload

四、布尔值的查询与修改
[root@Server ~]# getsebool -a |grep http #查看http的策略是否开启
httpd_anon_write --> off
httpd_builtin_scripting --> on
httpd_can_check_spam --> off
httpd_can_connect_ftp --> off
httpd_can_connect_ldap --> off
······
[root@Server ~]# setsebool -P httpd_anon_write=1 #开启httpd_anon_writec策略
[root@Server ~]# getsebool -a |grep http
httpd_anon_write --> on #策略已开启
httpd_builtin_scripting --> on
httpd_can_check_spam --> off
httpd_can_connect_ftp --> off
httpd_can_connect_ldap --> off
······