在vue3中vue-cropper的初使用
一、前言
在学习 Vue-Cropper 之前 先了解一下 Cropper,两者的关系与区别,避免在学习的时候踩坑和把它们搞混淆。
Cropper 是一个基于JavaScript 的图像剪切库,它可以在多种现代浏览器中运行工作。它提供了丰富的配置选项和事件,使得用户可以轻松地图像上传、剪切、旋转、缩放等功能。Cropper的设计目标是提供简单、灵活和强大的图像处理功能。
Cropper 的主要特性:
1、支持多种图片格式,如JPEG、PNG、GIF等。
2、提供多种剪切形状。
3、支持图片旋转。
4、支持多种语言和主体。
5、提供丰富的API和事件,便于自定义和集成。
6、Cropper 不依赖与 Vue.js环境,可以在其它环境中使用。
Vue-Cropper 是一个基于 Vue.js 的图像剪切组件,它是专门为 Vue.js应用程序设计的。Vue-Cropper 封装了 Cropper 库的许多功能,使其更易于在 Vue.js 项目中集成和使用。
Vue-Cropper 的主要特性:
1、简单易用:可以直接作为 vue 组件使用。
2、支持与 vue 的响应式数据绑定。
3、支持多种图像格式和剪切形状。
4、支持图像选装、缩放和翻转。
5、提供了一些 额外的功能,如图片预览、图片上传等。
6、只能在 vue.js 的环境中使用。
二、安装与使用
1、安装
# npm 安装
npm install vue-cropper@next -d --save
# yarn 安装
yarn add vue-cropper@next
2、引入
在组件中引入
import 'vue-cropper/dist/index.css';
import { VueCropper } from 'vue-cropper';
全局引入
在 main.js中
import VueCropper from 'vue-cropper';
import 'vue-cropper/dist/index.css'const app = createApp(App)
app.use(VueCropper)
app.mount('#app')
3、代码使用
重要: 需要关掉本地的 mock 服务, 不然图片转化会报错。
重要: 需要使用外层容器包裹并设置宽高。
<div style="width: 300px; height: 300px;">
<vueCropper
ref="cropper"
:img="option.img"
:outputSize="option.size"
:outputType="option.outputType">
</vueCropper>
</div>
三、文档
1、props 属性
| 名称 | 功能 | 默认值 | 可选值 |
|---|---|---|---|
| img | 裁剪图片的地址 | 空 | url 地址, base64, blob |
| outputSize | 裁剪生成图片的质量 | 1 | 0.1 ~ 1 |
| outputType | 裁剪生成图片的格式 | jpg (jpg 需要传入jpeg) | jpeg, png, webp |
| info | 裁剪框的大小信息 | true | true, false |
| canScale | 图片是否允许滚轮缩放 | true | true, false |
| autoCrop | 是否默认生成截图框 | false | true, false |
| autoCropWidth | 默认生成截图框宽度 | 容器的 80% | 0 ~ max |
| autoCropHeight | 默认生成截图框高度 | 容器的 80% | 0 ~ max |
| fixed | 是否开启截图框宽高固定比例 | false | true, false |
| fixedNumber | 截图框的宽高比例, 开启fixed生效 | [1, 1] | [ 宽度 , 高度 ] |
| full | 是否输出原图比例的截图 | false | true, false |
| fixedBox | 固定截图框大小 | 不允许改变 | false |
| canMove | 上传图片是否可以移动 | true | true, false |
| canMoveBox | 截图框能否拖动 | true | true, false |
| original | 上传图片按照原始比例渲染 | false | true, false |
| centerBox | 截图框是否被限制在图片里面 | false | true, false |
| high | 是否按照设备的dpr 输出等比例图片 | true | true, false |
| infoTrue | true 为展示真实输出图片宽高 false 展示看到的截图框宽高 | false | true, false |
| maxImgSize | 限制图片最大宽度和高度 | 2000 | 0 ~ max |
| enlarge | 图片根据截图框输出比例倍数 | 1 | 0 ~ max(建议不要太大不然会卡死的呢) |
| mode | 图片默认渲染方式 | contain | contain , cover, 100px, 100% auto |
| limitMinSize | 裁剪框限制最小区域 | 10 | Number, Array, String |
| fillColor | 导出时背景颜色填充 | 空 | #ffffff, white |
2、回调函数
@realTime实时预览事件@imgMoving图片移动回调函数@cropMoving截图框移动回调函数@imgLoad图片加载的回调, 返回结果success,error
// 实时预览事件
const realTime = (data) => {
previews.value = data;
};
3、内置方法和属性
在vue2中通过 this.$refs.cropper 调用,这里的this 表示当前实例,在vue3中,等同于下面的 proxy,或者cropper。
import { getCurrentInstance } from "vue";
const { proxy } = getCurrentInstance();
// cropper 是使用 ref 绑定到 vueCropper组将上的
const cropper = ref(null);
即在 vue3中,可以使用 proxy.$refs.cropper 或 cropper.value.调用。
属性
| 属性 | 说明 |
|---|---|
this.$refs.cropper.cropW / cropper.value.cropW | 截图框宽度 |
this.$refs.cropper.cropH / cropper.value.cropH | 截图框高度 |
方法
| 方法 | 说明 |
|---|---|
| this.$refs.cropper.startCrop() | 开始截图 |
| this.$refs.cropper.stopCrop() | 停止截图 |
| this.$refs.cropper.clearCrop() | 清除截图 |
| this.$refs.cropper.changeScale() | 修改图片大小 正数为变大 负数变小 |
| this.$refs.cropper.getImgAxis() | 获取图片基于容器的坐标点 |
| his.$refs.cropper.getCropAxis() | 获取截图框基于容器的坐标点 |
| this.$refs.cropper.goAutoCrop | 自动生成截图框函数 |
| this.$refs.cropper.rotateRight() | 向右边旋转90度 |
| this.$refs.cropper.rotateLeft() | 向左边旋转90度 |
获取截图数据
重点:在 vue-cropper中没有getCroppedCanvas(),没有任何带 canvas的函数方法,getCroppedCanvas()函数 cropper 中的。
// 获取 base64
cropper.value.getCropData((data) => {
console.log(data);
});
// 获取 blob
cropper.value.getCropBlob(((data ) => {
console.log(data);
});
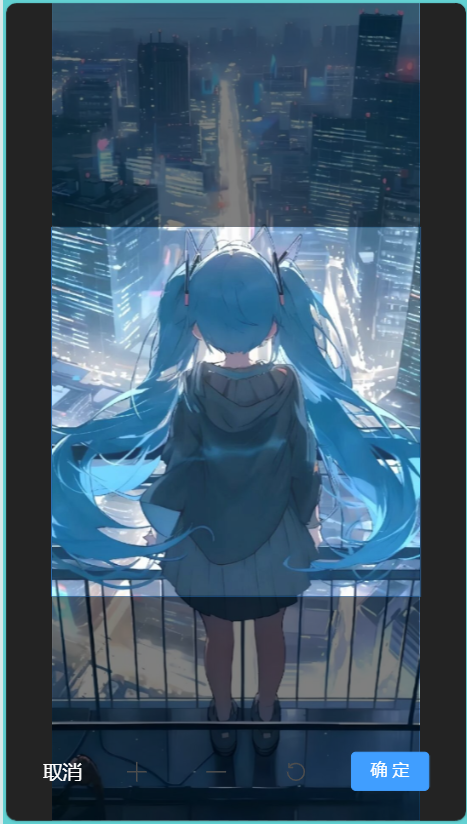
四、用例
1、效果
样式
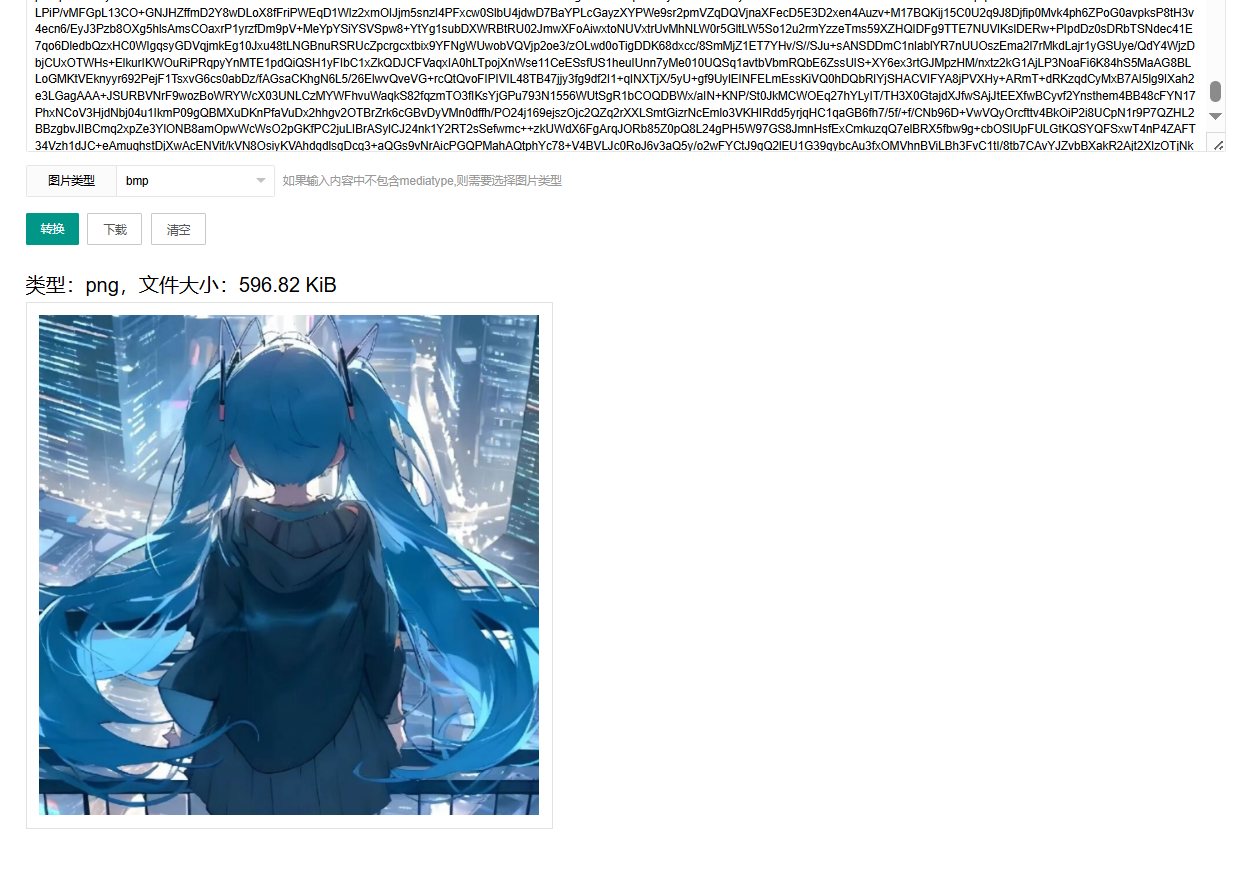
截切后的base64数据转图片
2、代码
<!-- 图片裁剪组件
    图片剪切使用 vue-cropper 工具剪切图片,读取图片后将图片转换成Base64格式,使用 getCropData函数获取剪切后的Base64格式的图片数据,
    getCropData函数是一个异步函数,不能在 data回调中直接使用 emit钩子,需要定义Promise,并在getCropData的回调函数中调用resolve来解析Promise,
    然后等待getCropData执行完成,才会继续往下执行,再通过 emit钩子将剪切后的图片数据传递到父组件。父组件再将Base64格式图片转换成file格式,
    上传到服务器。
 -->
<template>
    <div class="custom-dialog" :model-value="dialogVisibleCorpper" @opened="openDialog" :before-close="beforeClose">
        <div class="dialog">
            <div class="container">
                <div class="cropper-container">
                    <div class="cropper-box">
                        <div class="cropper-content" ref="cropperBox">
                            <vue-cropper id="imag" ref="cropper" :img="options.img" :outputType="options.outputType"
                                :autoCropHeight="options.autoCropHeight" :autoCropWidth="options.autoCropWidth"
                                :autoCrop="options.autoCrop" :aspectRation="options.aspectRation"
                                :infoTrue="options.infoTrue" :viewMode="options.viewMode" :dragMode="options.dragMode"
                                :guides="options.guides" :initialAspectRatio="options.initialAspectRatio"
                                :background="options.background" :cropBoxMovable="options.cropBoxMovable"
                                :cropBoxResizable="options.cropBoxResizable" :fixedBox="options.fixedBox"
                                :centerBox="options.centerBox" :original="options.original"
                                :canMoveBox="options.canMoveBox" :fixedNumber="options.fixedNumber" :mode="options.mode"
                                :enlarge="options.enlarge" :fixed="options.fixed" :info="options.info"
                                :fillColor="options.fillColor" @realTime="realTime" v-if="showCropper" />
                        </div>
                    </div>
                </div>
                <div class="btn-container">
                    <div class="item-btn">
                        <el-upload action="#" :http-request="() => { }" :before-upload="beforeUpload"
                            :show-file-list="false" style="display: none;">
                            <el-button></el-button>
                        </el-upload>
                        <div class="closeDialog" @click.stop="beforeClose">取消</div>
                    </div>
                    <div class="item-btn">
                        <el-icon class="btn" @click.stop="changeScale(1)">
                            <Plus />
                        </el-icon>
                    </div>
                    <div class="item-btn">
                        <el-icon class="btn" @click.stop="changeScale(-1)">
                            <Minus />
                        </el-icon>
                    </div>
                    <div class="item-btn">
                        <el-icon class="btn" @click.stop="rotateLeft()">
                            <RefreshLeft />
                        </el-icon>
                    </div>
                    <div class="item-btn">
                        <el-button type="primary" @click.stop="determine">确 定</el-button>
                    </div>
                </div>
            </div>
        </div>
    </div>
</template>

<script setup>
import { getCurrentInstance, ref, reactive, onMounted } from "vue";
import 'vue-cropper/dist/index.css';
import { VueCropper } from 'vue-cropper';
const { proxy } = getCurrentInstance();
const props = defineProps({
    dialogVisibleCorpper: {
        type: Boolean,
        default: false,
    },
});
// 使用 defineEmits 来声明组件可以抛出的事件
const emit = defineEmits(["update:dialogVisibleCorpper", "getImagValue"]);
const cropper = ref(null);
const cropperBox = ref(null);
const showCropper = ref(true);
const options = reactive({
    img: null, // 裁剪图片的地址
    autoCropWidth: 300, // 默认生成截图框宽度 默认容器的 80%
    autoCropHeight: 300, // 默认生成截图框高度 默认容器的 80%
    viewMode: 1, // 0-3,控制裁剪框的显示模式
    dragMode: "none", // 图片拖动模式
    guides: false, // 是否显示裁剪框内的虚线
    background: false, // 是否显示容器的网格背景
    initialAspectRatio: 1, // 裁剪框的宽高比(可选)
    aspectRation: 1, // 裁剪框的宽高比(可选)
    cropBoxMovable: false, // 截图框是否可拖动
    cropBoxResizable: false, // 截图框是否可调整大小
    outputType: "png", // 裁剪生成图片的格式 jpeg, png, webp
    autoCrop: true, // 是否默认生成截图框
    fixedBox: true, // 固定截图框大小 true:表示不能改变大小 false:表示可以改变大小
    canMoveBox: false, // 截图框不能拖动 true:表示可以拖动 false:表示不能拖动
    aspectRation: 1, // 裁剪框的宽高比(可选)
    fixedNumber: [1, 1], // 截图框的宽高比例
    enlarge: 1, // 图片根据截图框输出比例倍数
    fixed: true, // 是否开启截图框宽高固定比例
    centerBox: true, // 截图框是否限制在图片里(只有在自动生成截图框时才能生效)
    info: false, // 剪切框的大小信息
    original: false, // 上传图片按照原始比例渲染
    infoTrue: true, //
    mode: "cover auto", // 图片默认渲染方式
    fillColor: "#fff", // 裁剪框的背景色
});
const previews = ref(null);
// 打开裁剪弹窗
const openDialog = () => {
    showCropper.value = true;
};
// 修改图片大小 正数为变大 负数变小
const changeScale = (num) => {
    num = num || 1;
    proxy.$refs.cropper.changeScale(num);
};
// 向左边旋转90度
const rotateLeft = () => {
    proxy.$refs.cropper.rotateLeft();
};
// 选择图片
const beforeUpload = (rawFile) => {
    if (rawFile.type.indexOf("image/") == -1) {
        ElMessage.error("请上传图片文件!");
        return false;
    }
    if (rawFile.size / 1024 / 1024 > 5) {
        ElMessage.error("文件大小不能超过5MB!");
        return false;
    }
    const reader = new FileReader();
    reader.readAsDataURL(rawFile);
    reader.onload = () => {
        // 图片在这里
        options.img = reader.result;
    };
};
// 实时预览事件
const realTime = (data) => {
    previews.value = data;
};
// 关闭弹窗
const beforeClose = () => {
    options.img = null;
    previews.value = "";
    // 使用 emit 来更新父组件的 dialogVisibleCorpper 值
    emit("update:dialogVisibleCorpper", false);
};
// 提交图片
const determine = async () => {
    try {
        // getCropData是异步函数,需要定义Promise,并在getCropData的回调函数中调用resolve来解析Promise,
        // 然后等待getCropData执行完成,才会继续往下执行
        const imgBase64 = await new Promise((resolve) => {
            cropper.value.getCropData((data) => {
                resolve(data);
            });
        });
        emit("getImagValue", imgBase64);
    } catch (err) {
        ElMessage({
            message: 'err',
            type: 'error',
            plain: true,
        });
    }
    beforeClose();
};
onMounted(() => {
    // 在进入页面时,自动触发点 el-upload 的击事件
    const btn = document.querySelector(".el-button");
    if (btn) {
        btn.click();
    }
});
</script>

<style scoped>
.custom-dialog {
    width: 100%;
    height: 100vh;
    background-color: rgb(35, 35, 35);
}

.dialog {
    width: 80%;
    /* width: 100%; */
    height: 100vh;
    margin: 0 auto;
    padding: 0;
}

.container {
    width: 100%;
    height: 100vh;
    margin: 0;
    padding: 0;
}

.cropper-container {
    width: 100%;
    height: 100%;
    margin: 0;
    padding: 0;
}

.btn-container {
    margin: 0 auto;
    height: 40px;
    margin: 0;
    padding: 0;
    display: flex;
    justify-content: space-between;
    align-items: center;
    position: absolute;
    bottom: 20px;
    left: 30px;
    right: 30px;
    z-index: 1000;
}

.cropper-box {
    width: 100%;
    height: 100%;
    display: flex;
    justify-content: center;
    align-items: center;
}

.cropper-content {
    /* width: 100%;
    Aspect-ratio: 1/1; */
    width: 100%;
    height: 100%;
    margin: 0 auto;
    /* overflow: hidden; */
}

.closeDialog {
    color: white;
}

.btn {
    height: 40px;
    width: 40px;
    line-height: 40px;
    font-size: 20px;
    font-weight: 700;
    color: rgb(77, 77, 77);
}
</style>
参考文档:Vue-Cropper 文档
好记性不如烂笔头,在学习的路上留下痕迹。希望能给大家带来帮助,也期待您的点赞和讨论。
若有不足之处,还请斧正。