ROS2_control 对机器人控制(不完整,有时间再更新)
ROS2_control 对机器人控制
- 安装与介绍
- 安装
- 介绍
- 使用
- gz 中写法
- .yaml文件中写法
- type: joint_state_broadcaster/JointStateBroadcaster的来源
- 命令接口关节控制
- command_interface
- transmission
- CMakelist.txt与package.xml文件
- gz_ros2_control与自定义插件
- 例子描述
- 自定义插件使用
安装与介绍
安装
sudo apt install ros-humble-ros2-control
sudo apt install ros-humble-ros2-controllers
# 会提示安装好其他相应的东西
# 本来应该还要有ros-humble-gz-ros2-control,但是直接安装提示定位不到
介绍

ros2 control --help

# 输出
Commands:
  list_controller_types         输出可用的控制器类型及其基类
  list_controllers              输出已加载控制器的列表、类型和状态
  list_hardware_components      输出可用硬件组件列表
  list_hardware_interfaces      输出可用命令和状态接口列表
  load_controller               在控制器管理器中加载控制器
  reload_controller_libraries   重新加载控制器库
  set_controller_state          调整控制器的状态
  set_hardware_component_state  调整硬件组件的状态
  switch_controllers            在控制器管理器中切换控制器
  unload_controller             在控制器管理器中卸载控制器
  view_controller_chains        将加载的链式控制器的图表生成到/tmp/controller_digram.gv.pdf中

使用
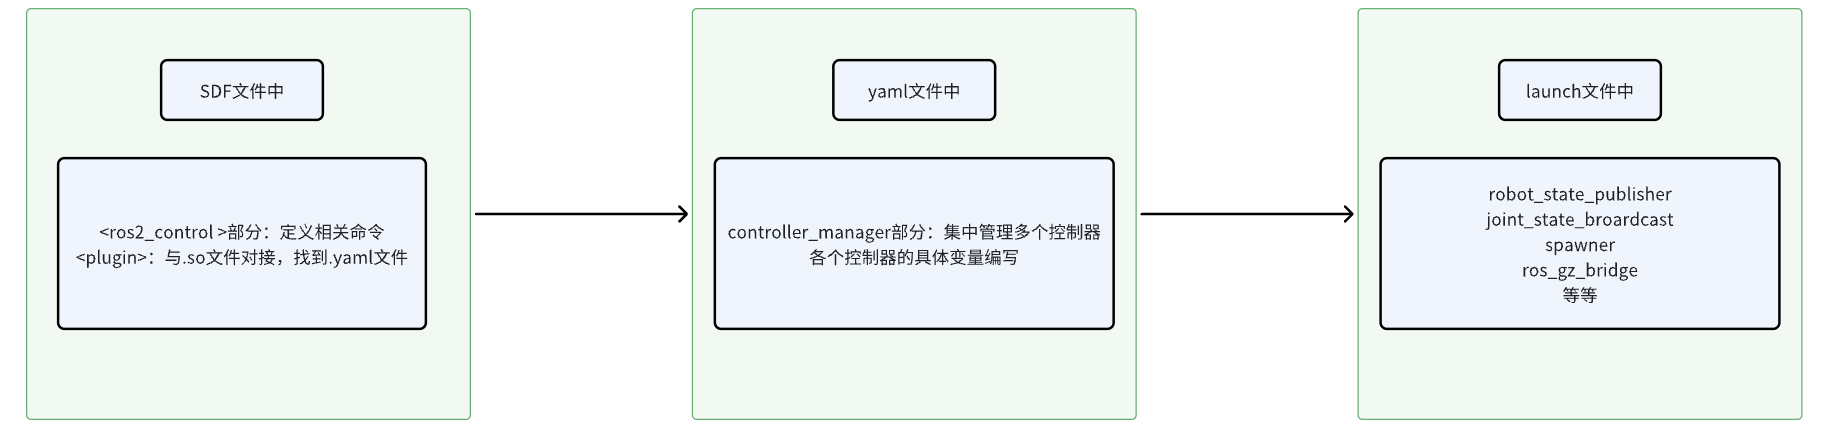
基本上就是写三个地方吧。
在github找到gz_ros2_control_demos这一栏的例子照着写就很舒服了,因为humble的例子还是和gazebo11版本使用,到ubuntu24.04才会完全使用ros2 和 gz sim版本联合,所以我在ubuntu 22.04下使用ros2 humble 和gazebo harmonic也是照着这个jazzy和harmonic的例子用了。
gz_ros2_control
gz 中写法
    <ros2_control name="FishBotGazeboSystem" type="system">
            <hardware>
                <plugin>gazebo_ros2_control/GazeboSystem</plugin>
            </hardware>
            <joint name="left_wheel_joint">
                <command_interface name="velocity">
                    <param name="min">-1</param>
                    <param name="max">1</param>
                </command_interface>
                <command_interface name="effort">
                    <param name="min">-0.1</param>
                    <param name="max">0.1</param>
                </command_interface>
                <state_interface name="position" />
                <state_interface name="velocity" />
                <state_interface name="effort" />
            </joint>
            <joint name="right_wheel_joint">
                <command_interface name="velocity">
                    <param name="min">-1</param>
                    <param name="max">1</param>
                </command_interface>
                <command_interface name="effort">
                    <param name="min">-0.1</param>
                    <param name="max">0.1</param>
                </command_interface>
                <state_interface name="position" />
                <state_interface name="velocity" />
                <state_interface name="effort" />
            </joint>
        </ros2_control>

        <!-- gz块是为了映射到gz仿真环境中 -->
        <plugin filename="libgazebo_ros2_control.so" name="gazebo_ros2_control">
        	<!-- parameters对应的是.yaml文件中相关的东西 -->
            <parameters>$(find fishbot_description)/config/fishbot_ros2_controller.yaml</parameters>
            <!--<ros>
                <remapping>/fishbot_diff_drive_controller/cmd_vel_unstamped:=/cmd_vel</remapping>
                <remapping>/fishbot_diff_drive_controller/odom:=/odom</remapping>
            </ros>-->
        </plugin>
< ros2_control>项要写在机器人模型文件中,也就是启动时的描述文件,这里就是在机器人xacro描述文件中判断使用gazebo11、gz、实物的ros2_control写法

<!-- gazebo11 -->
<ros2_control name="GazeboSystem" type="system">
		<hardware>
			<plugin>gazebo_ros2_control/GazeboSystem</plugin>
		</hardware>
</ros2_control>

<!-- gz -->
  <ros2_control name="GazeboSystem" type="system">
    <hardware>
      <plugin>gz_ros2_control/GazeboSimSystem</plugin>
    </hardware>
  </ros2_control>

<!-- 实物 -->
    <ros2_control name="HardwareSystem" type="system">
        <hardware>
            <plugin>hardware/Hardware</plugin>
        </hardware>
     </ros2_control>
.yaml文件中写法
- 首先写controller_manager,集中定义系统的东西
- 接着后面一个一个写控制器的具体内容
# 总起定义,集中管理
controller_manager:
  ros__parameters:
    update_rate: 100  # Hz
    use_sim_time: true
    fishbot_joint_state_broadcaster:	# 这个名字是随便取的
      type: joint_state_broadcaster/JointStateBroadcaster
      use_sim_time: true
    fishbot_effort_controller:
      type: effort_controllers/JointGroupEffortController
    fishbot_diff_drive_controller:
      type: diff_drive_controller/DiffDriveController

# 对应了上面的控制器名字了,这里详细定义
fishbot_effort_controller:
  ros__parameters:
    joints:
      - left_wheel_joint
      - right_wheel_joint
    command_interfaces:
      - effort
    state_interfaces:
      - position
      - velocity
      - effort


fishbot_diff_drive_controller:
  ros__parameters:
    left_wheel_names: ["left_wheel_joint"]
    right_wheel_names: ["right_wheel_joint"]

    wheel_separation: 0.17	# 轮距
    #wheels_per_side: 1  # actually 2, but both are controlled by 1 signal
    wheel_radius: 0.032		# 轮半径

    wheel_separation_multiplier: 1.0
    left_wheel_radius_multiplier: 1.0
    right_wheel_radius_multiplier: 1.0

    publish_rate: 50.0
    odom_frame_id: odom
    base_frame_id: base_footprint
    pose_covariance_diagonal : [0.001, 0.001, 0.0, 0.0, 0.0, 0.01]
    twist_covariance_diagonal: [0.001, 0.0, 0.0, 0.0, 0.0, 0.01]

    open_loop: true
    enable_odom_tf: true

    cmd_vel_timeout: 0.5
    #publish_limited_velocity: true
    use_stamped_vel: false
    #velocity_rolling_window_size: 10
type: joint_state_broadcaster/JointStateBroadcaster的来源
找到ros2的安装路径下的include
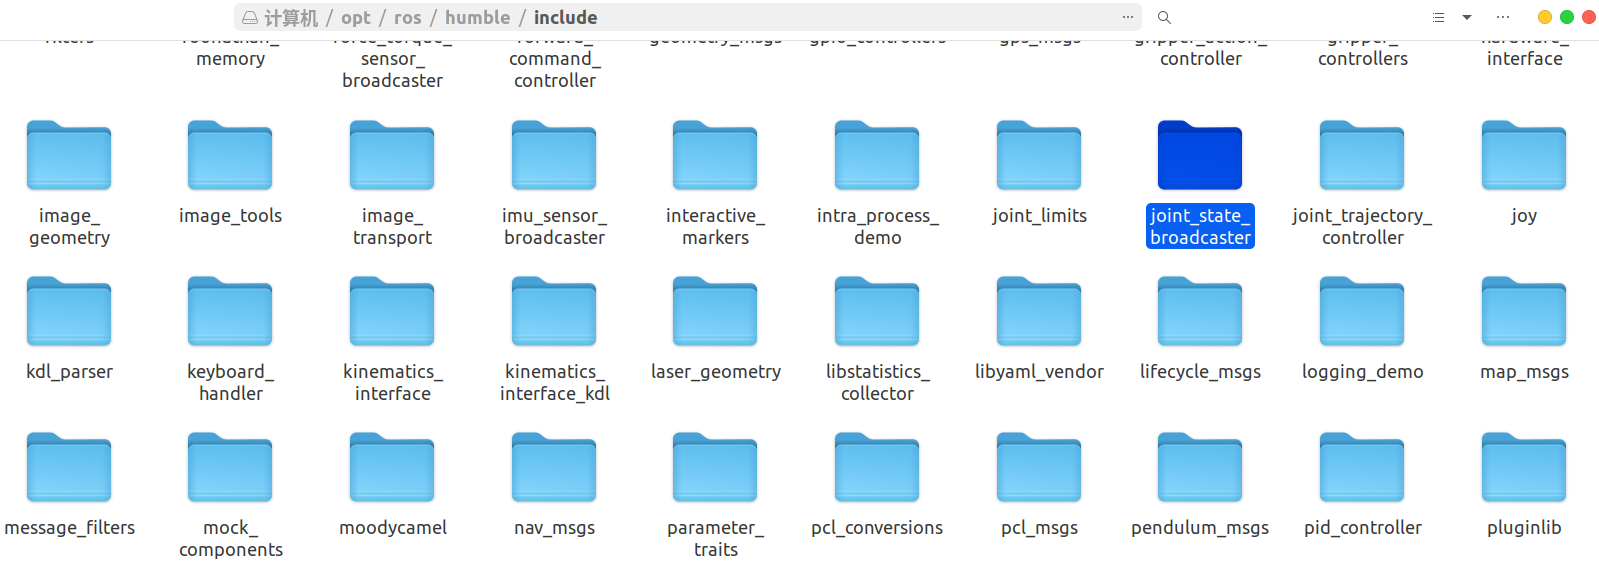

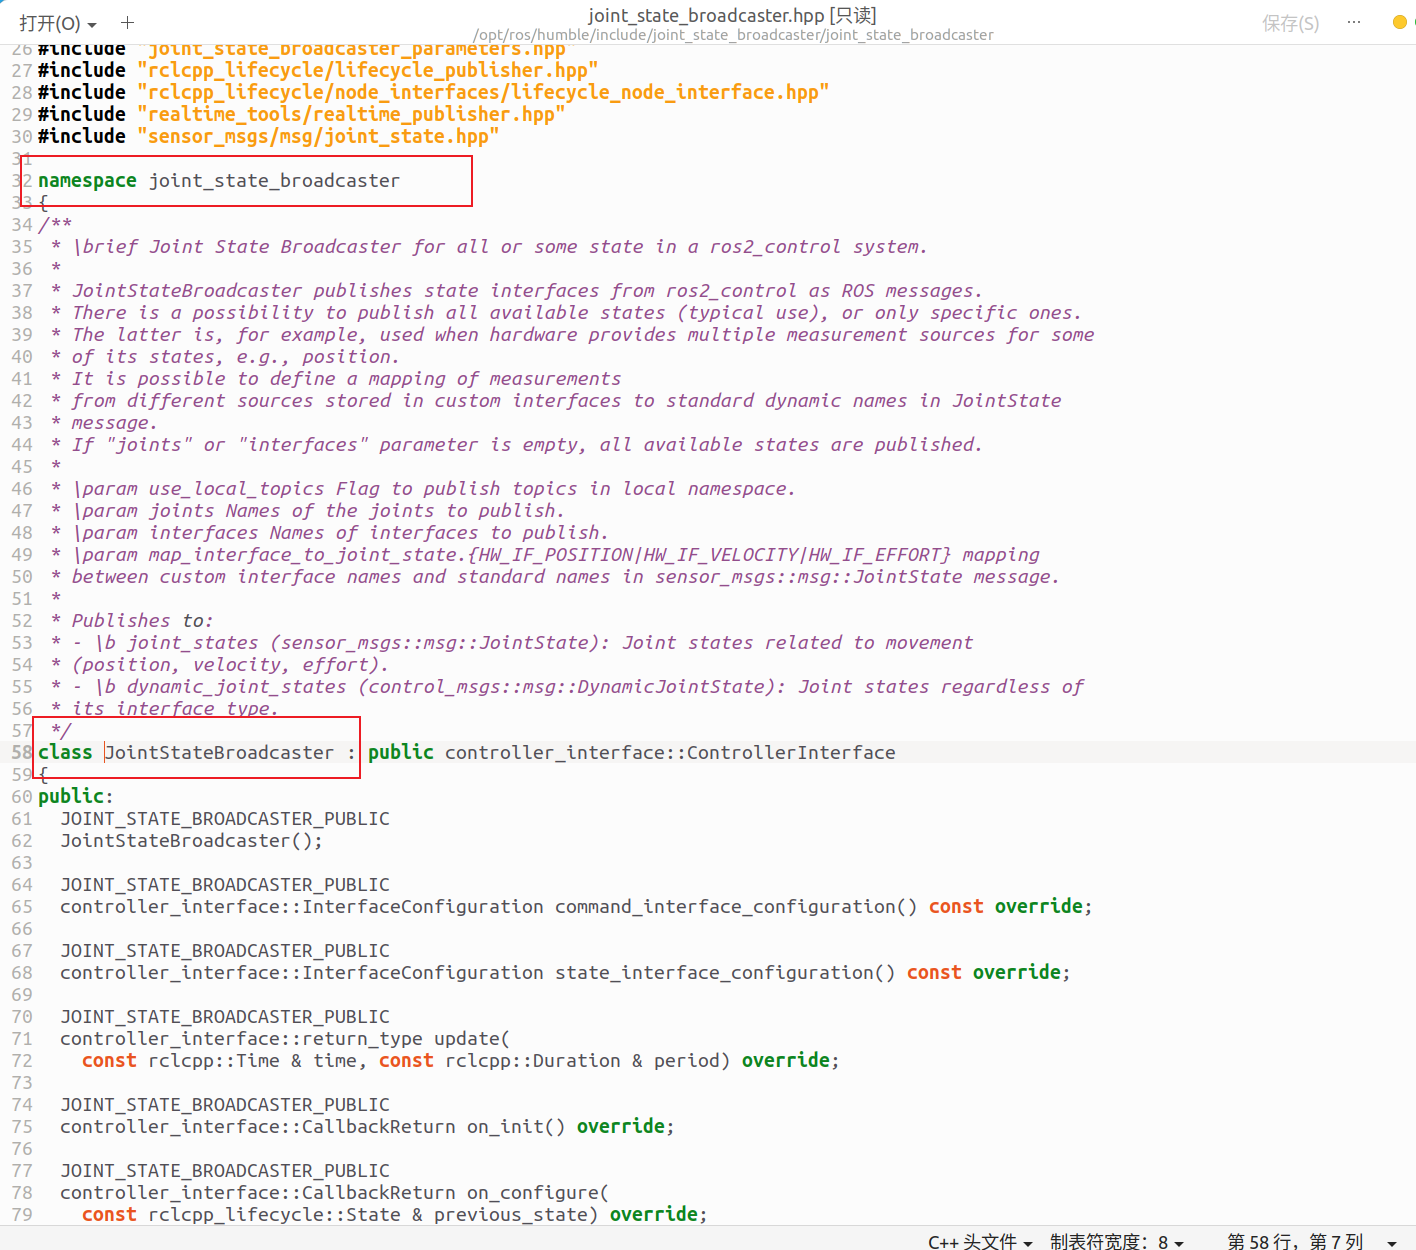
命名空间: joint_state_broadcaster,类名: JointStateBroadcaster
插件描述文件:

name: 插件在 YAML 文件中引用的名称,type: C++ 类的完整命名空间路径
通过 PLUGINLIB_EXPORT_CLASS 宏将控制器注册为插件,cpp文件是从github源码找来的,安装ros2_controllers有apt安装和源码编译两种,apt安装的话就会安装到/opt/ros/humble/下,功能集成到.so文件中了。
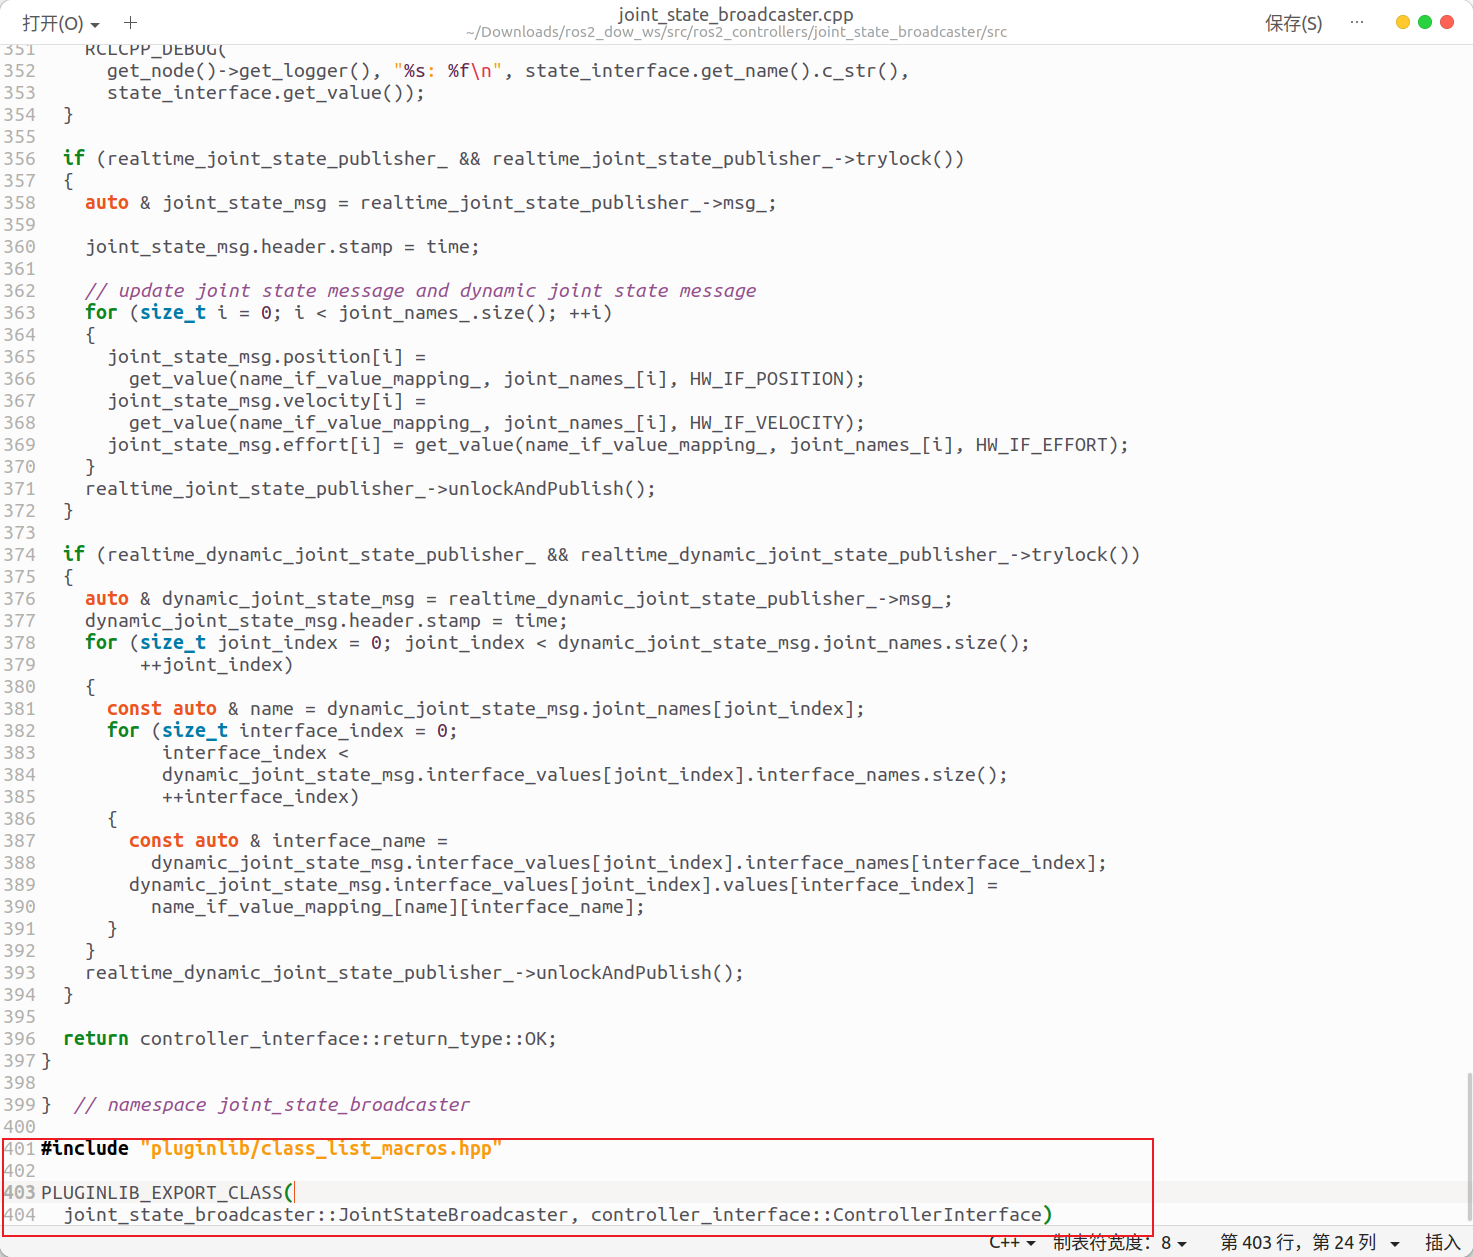
后面如果要自己编写插件,也基本按照这个形式,写hpp,写cpp,然后PLUGINLIB_EXPORT_CLASS注册为插件,然后用xml文件完成插件描述。
命令接口关节控制
对joint可以进行位置、速度、力控制,然后需要生成硬件接口。可以有command_interface和transmission两种方式,如果两个都写了,会发出警告说有重复,但不是报错。
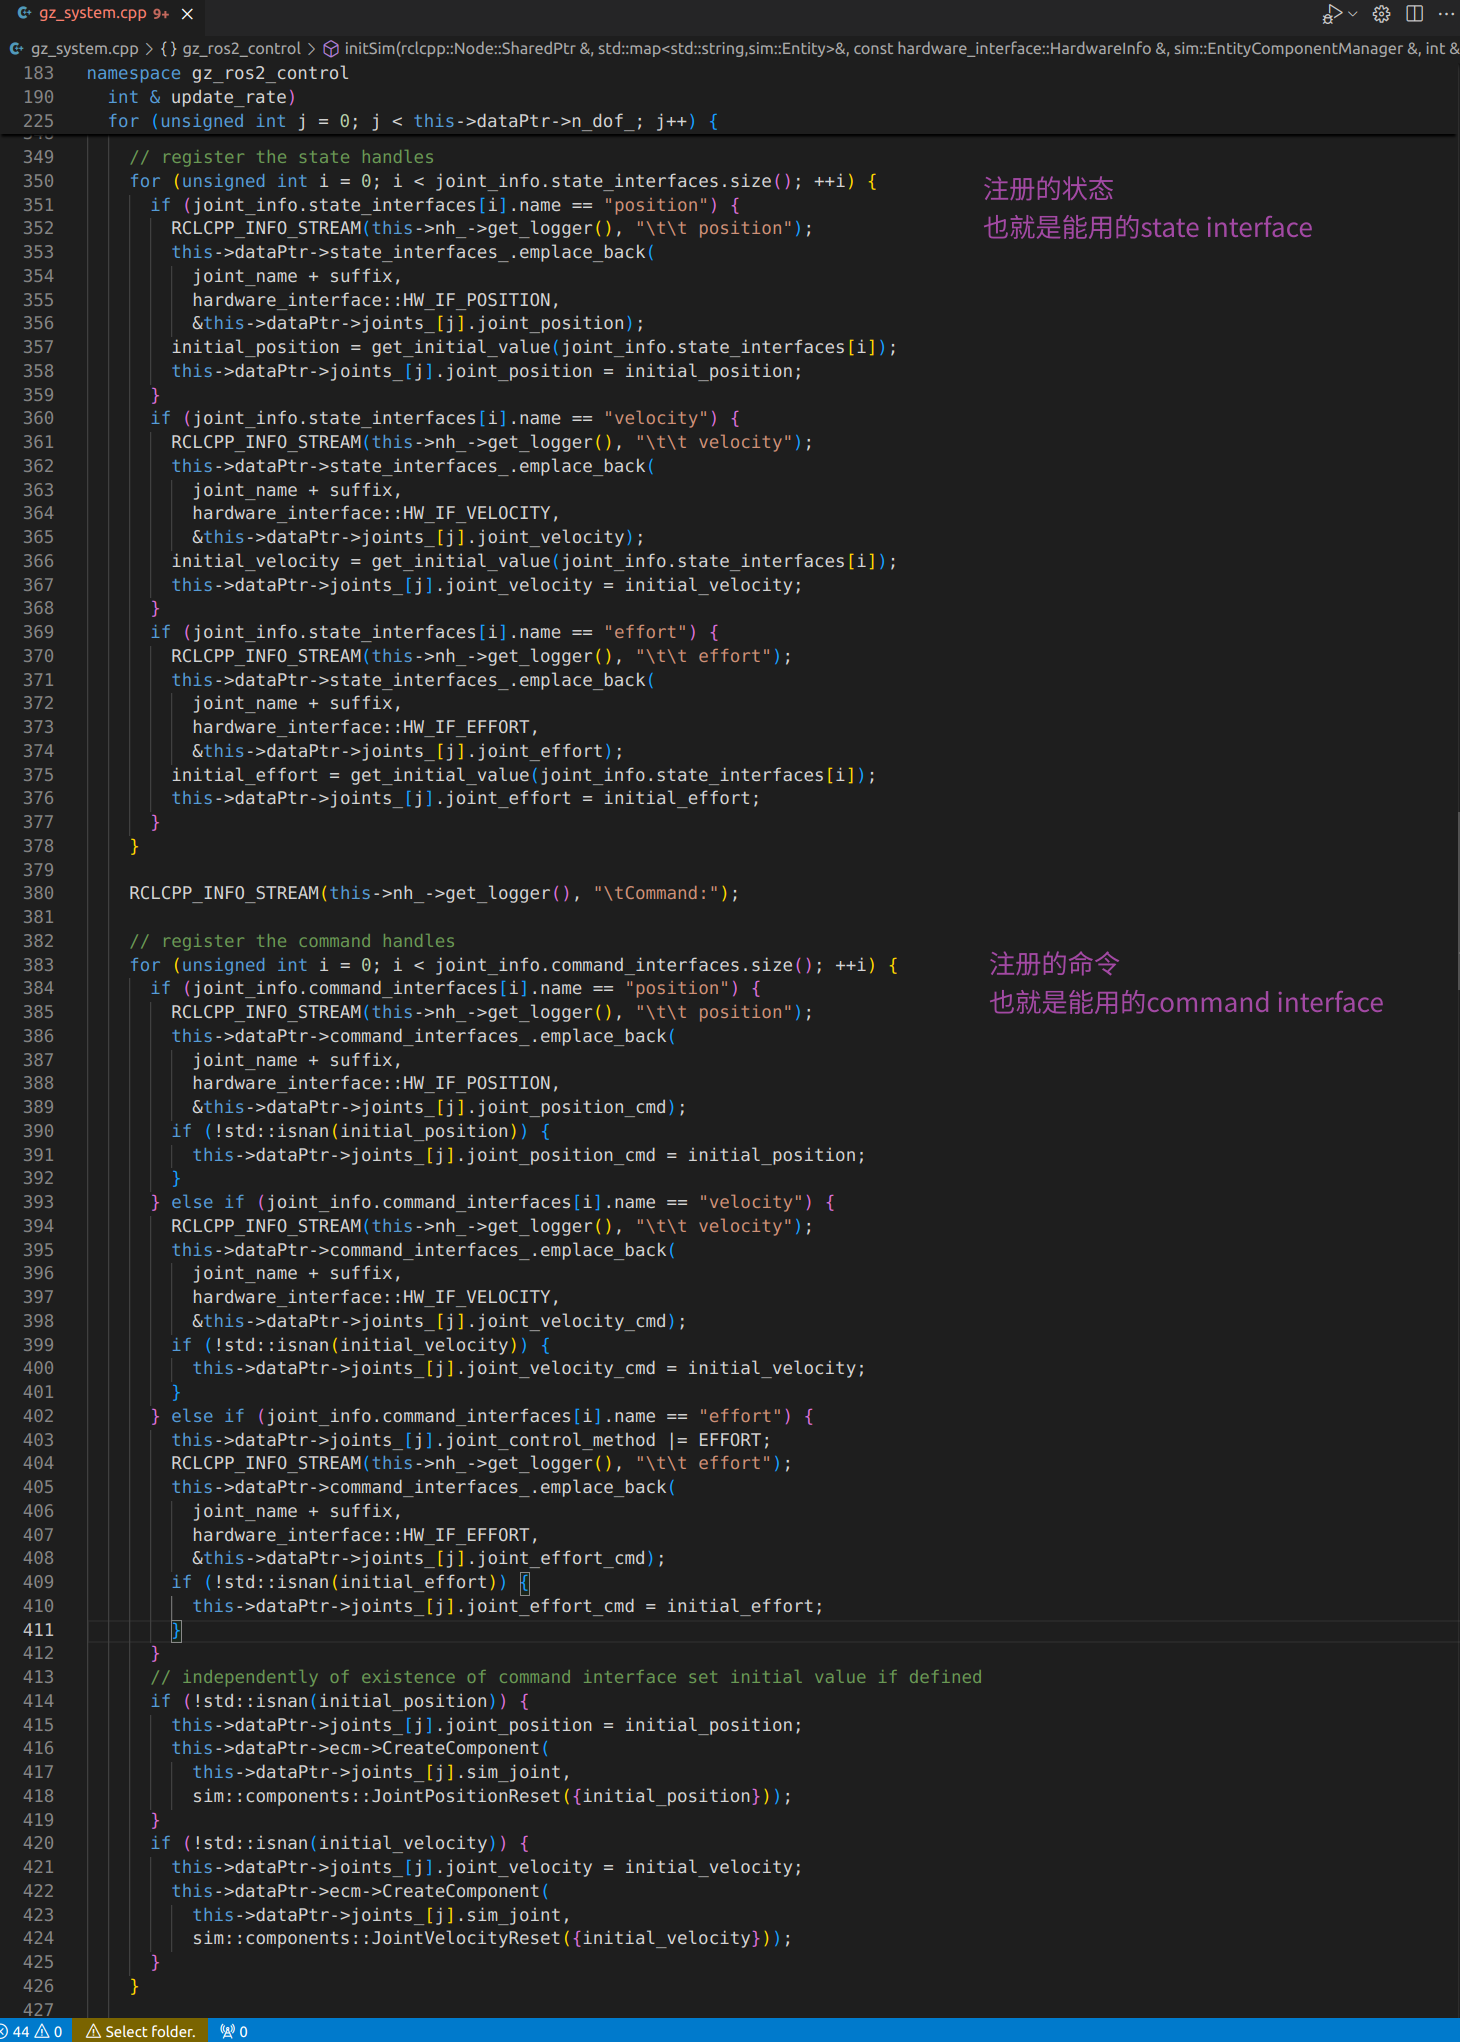
command_interface
<ros2_control> 标签,并根据 <command_interface> 和 <state_interface> 直接创建对应的硬件接口
    <joint name="joint">
      <command_interface name="position"/>
      <command_interface name="velocity"/>
      <command_interface name="effort"/>
      <command_interface name="kp"/>
      <command_interface name="kd"/>

      <state_interface name="position"/>
      <state_interface name="velocity"/>
      <state_interface name="effort"/>
    </joint>
看源码知道能写哪些东西
transmission
< transmission> 是 ROS2 Control框架中定义关节(Joint)与执行器(Actuator)之间传动关系的关键配置,将物理关节(如电机、舵机)与 ROS2 Control 的控制接口绑定,使控制器能通过硬件接口发送指令,通过 < hardwareInterface> 指定关节支持的控制接口类型(如力矩、位置、速度)。
一般来说transmission项多用于跟实物机器人的时候使用
        <transmission name="joint_tran">
            <type>transmission_interface/SimpleTransmission</type>
            <joint name="joint">
            	<hardwareInterface>hardware_interface/EffortJointInterface</hardwareInterface>
            </joint>
            <actuator name="joint_motor">
            	<hardwareInterface>hardware_interface/EffortJointInterface</hardwareInterface>
            	<!-- 减速比为0.5,执行器转动 1 圈,关节仅转动 0.5 圈 -->
            	<mechanicalReduction>0.5</mechanicalReduction>
            </actuator>
        </transmission>
CMakelist.txt与package.xml文件
例程中的package.xml使用了这些
  <buildtool_depend>ament_cmake</buildtool_depend>

  <build_depend>control_msgs</build_depend>
  <build_depend>geometry_msgs</build_depend>
  <build_depend>rclcpp</build_depend>
  <build_depend>rclcpp_action</build_depend>
  <build_depend>std_msgs</build_depend>

  <exec_depend>ament_index_python</exec_depend>
  <exec_depend>geometry_msgs</exec_depend>
  <exec_depend>launch_ros</exec_depend>
  <exec_depend>launch</exec_depend>
  <exec_depend>rclcpp</exec_depend>
  <exec_depend>robot_state_publisher</exec_depend>
  <exec_depend>ros_gz_bridge</exec_depend>
  <exec_depend>ros_gz_sim</exec_depend>
  <exec_depend>ros2launch</exec_depend>
  <exec_depend>std_msgs</exec_depend>
  <exec_depend>xacro</exec_depend>

  <!-- ros2_control -->
  <exec_depend>ackermann_steering_controller</exec_depend>
  <exec_depend>control_msgs</exec_depend>
  <exec_depend>diff_drive_controller</exec_depend>
  <exec_depend>effort_controllers</exec_depend>
  <exec_depend>gz_ros2_control</exec_depend>
  <exec_depend>hardware_interface</exec_depend>
  <exec_depend>imu_sensor_broadcaster</exec_depend>
  <exec_depend>joint_state_broadcaster</exec_depend>
  <exec_depend>joint_trajectory_controller</exec_depend>
  <exec_depend>mecanum_drive_controller</exec_depend>
  <exec_depend>ros2controlcli</exec_depend>
  <exec_depend>tricycle_controller</exec_depend>
  <exec_depend>velocity_controllers</exec_depend>

  <test_depend>ament_cmake_gtest</test_depend>
  <test_depend>ament_lint_auto</test_depend>
  <test_depend>ament_lint_common</test_depend>
gz_ros2_control与自定义插件
例子描述
看到插件的编写情况差不多都是这样,include,src写c++的实现部分以及注册插件,plugin.xml文件用来描述插件


在urdf中写的< plugin>gz_ros2_control/GazeboSimSystem< /plugin>就出自命名空间和类名
