网站制作评分标准长春seo网站排名
一、由eslint命名校验引发的问题
-
问题描述: 创建
Home.vue文件,并将其name设为Home,发现底下出现红色报错,鼠标悬浮时显示Component name “Home” should always be multi-word,这是eslint的命名校验,要求组件名写成驼峰结构或者pascal中划线连接形式 -
解决问题:在项目根目录找到
vue.config.js,加上lintOnSave: false
module.exports = defineConfig({lintOnSave: false
})
二、el-checkbox的indeterminate属性
- 代码
<el-checkboxsize="small":indeterminate="isIndeterminate"v-model="checkAll"@change="handleCheckAllChange">全选</el-checkbox>
indeterminate属性总结
checkAll为true则为全选
indeterminate 属性为true 为半选状态 、为false则以v-model的checkAll为主,根据用户点击选择框触发的函数修改checkAll和indeterminate值,从而改变选择框的状态(全选、半选、全不选)
三、el-table-horizontal-scroll插件
1. 使用
- 安装
npm install el-table-horizontal-scroll - 注册
import horizontalScroll from 'el-table-horizontal-scroll';
Vue.use(horizontalScroll);
- 组件中使用
<el-table:data="tableData":height="470"ref="scrollTable"v-horizontal-scroll="'always'"class="custom-table"></el-table>
2. 属性
v-horizontal-scroll有两个属性值:always或hoverhover:默认,当鼠标悬停在表格上时,滚动条显示always:滚动条始终显示
四、vue2项目中使用el-tabs,标签点击路由跳转配置
(1)下载vue-router:npm install vue-router,下载elementui:npm install element-ui
(2)router/index.js文件:
import VueRouter from "vue-router";
import Vue from 'vue'
import About from '@/pages/About.vue'
Vue.use(VueRouter)const routes=[{path: '/home',name: 'home',meta: {title: '首页'},// 这里两种写法component: ()=> import('@/pages/Home.vue')
},{path: '/about',name: 'about',component: About}]const router = new VueRouter({mode: 'history',routes
})export default router
(3)main.js文件:
import Vue from 'vue'
import App from './App.vue'import router from '@/router/index'import ElementUI from 'element-ui'
import 'element-ui/lib/theme-chalk/index.css';
Vue.config.productionTip = false
Vue.use(ElementUI)
new Vue({router,render: h => h(App),
}).$mount('#app')(4)app.vue文件:
v-model绑定的是 el-tab-pane的name属性,是哪个tab的name就跳到哪个路由
<template><div class="root"><el-container><el-header><el-tabs v-model="activeName" @tab-click="changePage"><el-tab-pane label="首页" name="/home" ><router-link to="/home"></router-link></el-tab-pane><el-tab-pane label="about" name="/about"><router-link to="/about"></router-link></el-tab-pane></el-tabs></el-header><el-main><!-- 路由出口 --><router-view></router-view></el-main>
</el-container></div>
</template><script>export default {name:'App',data(){return {activeName: '/home'}},methods: {// 当标签切换触发,当标签切换,让路由跳转到相应界面即可 changePage(tab) {console.log(tab, this.activeName);this.$router.push({path: this.activeName})}}}
</script>
<style >.el-header {/* background-color: #B3C0D1; */color: #333;text-align: center;line-height: 60px;}.el-main {/* background-color: #E9EEF3; */color: #333;text-align: center;line-height: 160px;}/* 以下样式确保el-container铺满整个屏幕 */body, .root {height: 100vh;margin: 0;padding: 0;width: 100vw;}.el-container {margin-bottom: 40px;height: 100vh;margin: 0;padding: 0;width: 100vw;}</style>
五、Vue项目中使用echarts图表
1.vue3项目使用
1. 下载及引入Echarts
(1)下载:npm install echarts、npm install echarts vue-echarts
(2)引入
main.js文件:代码行后面带//的都是引入的相关操作
import { createApp } from 'vue'
import App from './App.vue'
import router from '@/router/index'
import { createPinia } from 'pinia'import Echarts from 'vue-echarts' //
import * as echarts from 'echarts' //const app=createApp(App)const pinia=createPinia()app.component('e-charts', Echarts) //
app.config.globalProperties.$echarts=echarts // 全局挂载
app.use(router).use(pinia).mount('#app')
2. 在vue文件中使用
<template><div class="home"><e-charts class="chart" :option="option" /></div>
</template><script setup name="home">
import { ref, computed } from "vue";//模拟数据value的字段对应Y轴,name字段对应X轴
const data = ref([{ value: 11, name: "A" },{ value: 31, name: "B" },{ value: 75, name: "C" },{ value: 25, name: "D" },{ value: 16, name: "E" },
]);
const option = computed(() => {return {xAxis: {type: "category",data: data.value.map((v) => v.name),},yAxis: {type: "value",},series: [{type: "line",data: data.value.map((v) => v.value),},],};
});// 设置定时器定时更新数据 每一秒更新一次数据
setInterval(() => {data.value = data.value.map((item) => ({...item,value: Math.random() * 100,}));
}, 1000);
</script><style scoped>
.chart {height: 400px;
}
</style>
2. vue2项目使用
(1)下载:npm install echarts
(2)引入:main.js文件中
import * as echarts from 'echarts'
Vue.prototype.$echarts=echarts
(3)vue文件中使用
<template><!-- 放图表的容器 --><div id="orderline" style="width: 400px; height: 400px"></div>
</template><script>
export default {name: "echart",data() {return {};},mounted() {this.getOrderLine();},methods: {getOrderLine() {let myChart = this.$echarts.init(document.getElementById("orderline"));myChart.setOption({xAxis: {type: "category",data: ["1月","2月","3月","4月","5月","6月","7月","8月","9月","10月","11月","12月",],boundaryGap: false,nameTextStyle: {color: "#fff",},axisTick: {show: false,},axisLine: {show: true,lineStyle: {color: "#66FFFF",type: "solid", //设置坐标轴为实线},},axisLabel: {interval: 0,textStyle: {color: "#ccc",fontSize: "12",},},},yAxis: {type: "value",splitLine: {lineStyle: {type: "dashed", //设置刻度线条为虚线width: 1,color: "rgba(255,255,255,0.1)",},show: true,},axisLine: {show: false,},axisTick: {show: false,},axisLabel: {interval: 0,textStyle: {color: "rgba(255, 255, 255, 1)",fontSize: "12",},},},lineStyle: {color: {//设置线条渐变colorStops: [{offset: 0,color: "#0E5FFF",},{offset: 0.5,color: "#00F2EF",},{offset: 1,color: "#0E5FFF",},],},},series: [{symbol: "none",data: [202, 250, 100, 300, 280, 600, 300, 250, 180, 500, 400, 260,],type: "line",smooth: true,},],},true);},},
};
</script>
以下为饼图的配置,点开官网的示例 直接将等号右边的复制(包括{})放入setOption中
myChart.setOption({title: {text: "Referer of a Website",subtext: "Fake Data",left: "center",},tooltip: {// trigger: "none",trigger: "item",},legend: {orient: "vertical",left: "left",},series: [{name: "Access From", // tooltip显示type: "pie",radius: "50%",data: [{ value: 1048, name: "Search Engine" },{ value: 735, name: "Direct" },{ value: 580, name: "Email" },{ value: 484, name: "Union Ads" },{ value: 300, name: "Video Ads" },],emphasis: {itemStyle: {shadowBlur: 10,shadowOffsetX: 0,shadowColor: "rgba(0, 0, 0, 0.5)",},},},],});
六、背景、字体渐变问题
1. css相关属性
linear-gradient线性渐变repeating-linear-gradient重复线性渐变radial-gradient径向渐变repeating-linear-gradient重复径向渐变
2.渐变效果实现
(1)背景渐变
div {background: linear-gradient(to bottom, red, green);/*linear-gradient(to bottom right, red, green);linear-gradient(to bottom, rgb(), rgb());linear-gradient(to right, rgba(), rgba());linear-gradient(to bottom right, red, green);linear-gradient(30deg, red, green);linear-gradient(to right, red 10%, green 50%); 红色10% 绿色50%*/
}
(2)字体渐变
.text {font-size: 24px;font-weight: bolder;background-image: linear-gradient(to bottom right, red, green);-webkit-text-fill-color: transparent; /* 使用透明色填充文本 */ -webkit-background-clip: text; /* 用文本剪辑背景,用渐变色背景作为文本颜色填充 */
}
七、vue3使用 v-clipboard:copy
1. 安装
npm install --save @soerenmartius/vue3-clipboard
2.全局导入 在main.js文件
import { createApp } from 'vue'
import App from './App.vue'
import { VueClipboard } from '@soerenmartius/vue3-clipboard'const app = createApp(App)
app.use(VueClipboard)
app.mount('#app')
3. 组件中使用
<template><input v-model="value" /><button v-clipboard="value">复制</button>
</template><script lang="ts">
import { defineComponent, ref } from 'vue'export default defineComponent({setup() {const value = ref('lorem')return { value }},
})
</script>
4.处理成功、失败事件
<template><input v-model="value" /><buttonv-clipboard:copy="value"v-clipboard:success="onSuccess"v-clipboard:error="onError">复制</button>
</template><script lang="ts">
import { defineComponent, ref } from 'vue'export default defineComponent({setup() {const value = ref('lorem')const onSuccess = () => {console.log('成功')}const onError = () => {console.log('错误')}return { value, onSuccess, onError }},
})
</script>
5. 作用
将相关组件的内容通过点击复制到剪贴板
vue3-clipboard项目官网
作用相同另一插件-useClipboard
八、将el-dialog封装成组件并调用
1. 父组件 App.vue
<template><div class="root"><button @click="isShowDialog=true">点击打开对话框</button><childDialogv-show="isShowDialog":visible.sync="isShowDialog">
</childDialog></div>
</template><script>
import childDialog from './components/childDialog.vue';
export default{name: 'App',data() {return {isShowDialog: false}},components: {childDialog},
}
</script>
2. 子组件 childDialog.vue
<template><el-dialogtitle="标题":visible.sync="visible"fullscreen@close="closeDialog"></el-dialog>
</template><script>
export default {name: "childDialog",props: {visible: {type: Boolean,default: false,},},data() {return {};},methods: {closeDialog() {this.$emit('update:visible', false)}},
};
</script>
3. 注意事项
在对话框关闭的回调里面,使用this.$emit向父组件传值,父组件.sync触发父组件的update事件,改变了isShowDialog的值。
当使用 :prop.sync=“value” 时,等价于 :prop=“value” @update:prop=“value = $event”
父组件使用:prop.sync将属性传递给子组件,并监听 update:prop 事件。子组件使用 $emit(‘update:prop’, newValue) 来更新父组件的属性。
父组件:
<childDialog:visible.sync="isShowDialog">
</childDialog>
子组件:
this.$emit('update:visible', false)
九、vue2使用el-table+el-pagination展示数据、封装el-pagination组件
1. 基本使用
(1)el-table组件
data为表格要展示的数据,tableData.slice((currentPage-1)*pageSize, currentPage*pageSize)为当前页要展示的数据。例如当currentPage = 1,pageSize = 4,则会展示数组下标从 0 - 3 共4条数据。
arr.slice(start, end):截取数组元素,从(start, end] 包含下标start不包含end。
<el-table:data="tableData.slice((currentPage - 1) * pageSize, currentPage * pageSize)"stripestyle="width: 60%; margin: auto; margin-top: 20px"border><el-table-column prop="date" label="日期" width="180"></el-table-column><el-table-column prop="name" label="姓名" width="180"></el-table-column><el-table-column prop="address" label="地址"> </el-table-column></el-table>
(2)el-pagination组件
<el-paginationbackgroundlayout="sizes,prev, pager, next":total="tableData.length":current-page="currentPage":page-sizes="[4, 6, 8]":page-size="pageSize"@current-change="handleCurrentChange"@prev-click="handlePrevClick"@next-click="handleNextClick"@size-change="handleSizeChange"
>
</el-pagination>
total:数据总条目数
current-page:当前页数
page-sizes:int型数组,为一页可展示条目数 可选的数组
page-size:一页可展示条目数
current-change:当前页数改变触发,参数为当前页数
prev-click:前一页,参数为当前页数
next-click:下一页,参数为当前页
size-change:pageSize一页可展示数目改变时触发,参数为一页可展示条目数
(3)完整代码及运行效果
代码:
<template><div class="myTable" style="position: relative"><div class="data"><el-table:data="tableData.slice((currentPage - 1) * pageSize, currentPage * pageSize)"stripestyle="width: 60%; margin: auto; margin-top: 20px"border><el-table-column prop="date" label="日期" width="180"></el-table-column><el-table-column prop="name" label="姓名" width="180"></el-table-column><el-table-column prop="address" label="地址"> </el-table-column></el-table></div><divclass="page"style="margin-top: 10px;position: absolute;left: 50%;transform: translateX(-50%);">
<el-paginationbackgroundlayout="sizes,prev, pager, next":total="tableData.length":current-page="currentPage":page-sizes="[4, 6, 8]":page-size="pageSize"@current-change="handleCurrentChange"@prev-click="handlePrevClick"@next-click="handleNextClick"@size-change="handleSizeChange"
>
</el-pagination></div><!-- page-size 每页显示个数,total 总条目数, page-count 总页数.current-page 当前页数,  layout="prev, pager, next" --><!-- size-change pageSize改变触发(每页条数),currentChange current-page改变,prev-click next- click --></div>
</template>
<script>
export default {name: "myTable",data() {return {currentPage: 1, // 当前页pageSize: 4, // 每页显示的数据量tableData: [{date: "2016-05-02",name: "王小虎",address: "上海市普陀区金沙江路 1518 弄",},{date: "2016-05-03",name: "王小虎",address: "上海市普陀区金沙江路 1517 弄",},{date: "2016-05-04",name: "王小虎",address: "上海市普陀区金沙江路 1519 弄",},{date: "2016-05-05",name: "王小虎",address: "上海市普陀区金沙江路 1516 弄",},{date: "2016-05-06",name: "王小虎",address: "上海市普陀区金沙江路 1516 弄",},{date: "2016-05-07",name: "王小虎",address: "上海市普陀区金沙江路 1516 弄",},{date: "2016-05-08",name: "王小虎",address: "上海市普陀区金沙江路 1516 弄",},{date: "2016-05-09",name: "王小虎",address: "上海市普陀区金沙江路 1516 弄",},{date: "2016-05-10",name: "王小虎",address: "上海市普陀区金沙江路 1516 弄",},{date: "2016-05-11",name: "王小虎",address: "上海市普陀区金沙江路 1516 弄",},{date: "2016-05-12",name: "王小虎",address: "上海市普陀区金沙江路 1516 弄",},{date: "2016-05-13",name: "王小虎",address: "上海市普陀区金沙江路 1516 弄",},{date: "2016-05-14",name: "王小虎",address: "上海市普陀区金沙江路 1516 弄",},{date: "2016-05-15",name: "王小虎",address: "上海市普陀区金沙江路 1516 弄",},{date: "2016-05-16",name: "王小虎",address: "上海市普陀区金沙江路 1516 弄",},{date: "2016-05-17",name: "王小虎",address: "上海市普陀区金沙江路 1516 弄",},{date: "2016-05-18",name: "王小虎",address: "上海市普陀区金沙江路 1516 弄",},{date: "2016-05-19",name: "王小虎",address: "上海市普陀区金沙江路 1516 弄",},{date: "2016-05-20",name: "王小虎",address: "上海市普陀区金沙江路 1516 弄",},{date: "2016-05-21",name: "王小虎",address: "上海市普陀区金沙江路 1516 弄",},{date: "2016-05-22",name: "王小虎",address: "上海市普陀区金沙江路 1516 弄",},{date: "2016-05-23",name: "王小虎",address: "上海市普陀区金沙江路 1516 弄",},{date: "2016-05-24",name: "王小虎",address: "上海市普陀区金沙江路 1516 弄",},{date: "2016-05-25",name: "王小虎",address: "上海市普陀区金沙江路 1516 弄",},{date: "2016-05-26",name: "王小虎",address: "上海市普陀区金沙江路 1516 弄",},{date: "2016-05-27",name: "王小虎",address: "上海市普陀区金沙江路 1516 弄",},{date: "2016-05-28",name: "王小虎",address: "上海市普陀区金沙江路 1516 弄",},{date: "2016-05-29",name: "王小虎",address: "上海市普陀区金沙江路 1516 弄",},],};},components: {},methods: {handleCurrentChange(val) {this.currentPage = val;},handlePrevClick(val) {this.currentPage = val;},handleNextClick(val) {this.currentPage = val;},handleSizeChange(val) {this.pageSize = val;},},
};
</script>
运行效果:
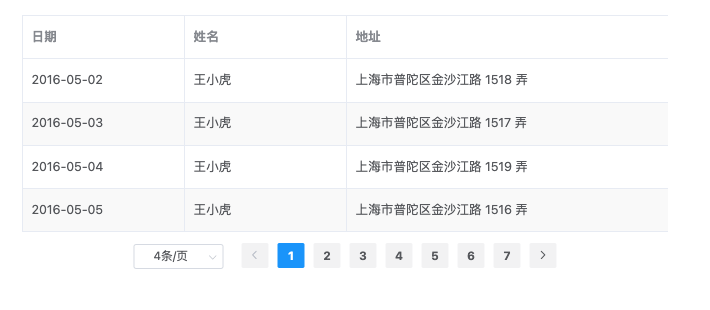
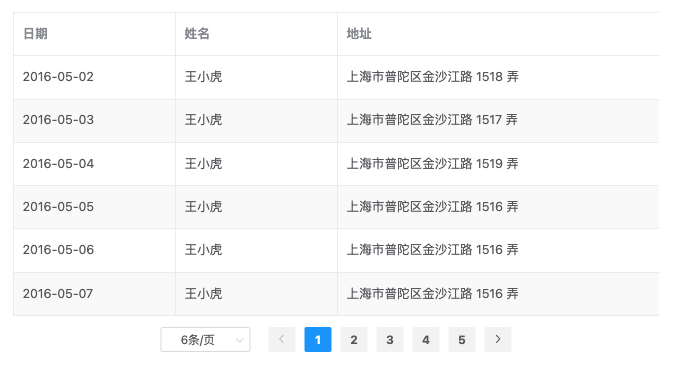
-
pageSize = 4
-
pageSize = 6
2. 封装el-pagination组件
(1)myPagination.vue文件
<template><div class="page"><el-paginationbackgroundlayout="sizes,prev, pager, next":total="totalData":current-page="currentPage":page-sizes="pageSizes":page-size="pageSize"@current-change="handleCurrentChange"@prev-click="handlePrevClick"@next-click="handleNextClick"@size-change="handleSizeChange"></el-pagination></div>
</template><script>
export default {name: "myPagination",data() {return {};},props: {//总条数totalData: {required: true,type: Number,},//当前页数currentPage: {type: Number,default: 1,},//当前条数pageSize: {type: Number,default: 10,},//选择每页显示的条数pageSizes: {type: Array,default() {return [10, 20, 50, 100];},},},methods: {handleCurrentChange(val) {this.$emit("update:currentPage", val);},handlePrevClick(val) {console.log(val);this.$emit("update:currentPage", val);},handleNextClick(val) {this.$emit("update:currentPage", val);},handleSizeChange(val) {this.$emit("update:pageSize", val);},},
};
</script>
(2) 父组件中调用
父组件的data中有要传递给子组件的数据
<myPagination
:totalData="tableData.length"
:currentPage.sync="currentPage"
:pageSizes="pageSizes"
:pageSize.sync="pageSize"
></myPagination>