大冶网站开发idea怎么做网站
9. idea中创建springboot项目
步骤 1:打开 IntelliJ IDEA 并创建新项目
- 启动 IntelliJ IDEA。
- 在欢迎界面,点击 New Project(或通过菜单栏
File>New>Project)。
步骤 2:选择 Maven 项目类型
- 在左侧菜单中,选择 Maven。
- 点击 Next。
步骤 3:配置项目元数据
- 输入项目的 GroupId 和 ArtifactId(例如,
com.example和demo)。 - 确保 Version 是
1.0-SNAPSHOT(或其他合适的版本)。 - 点击 Finish。
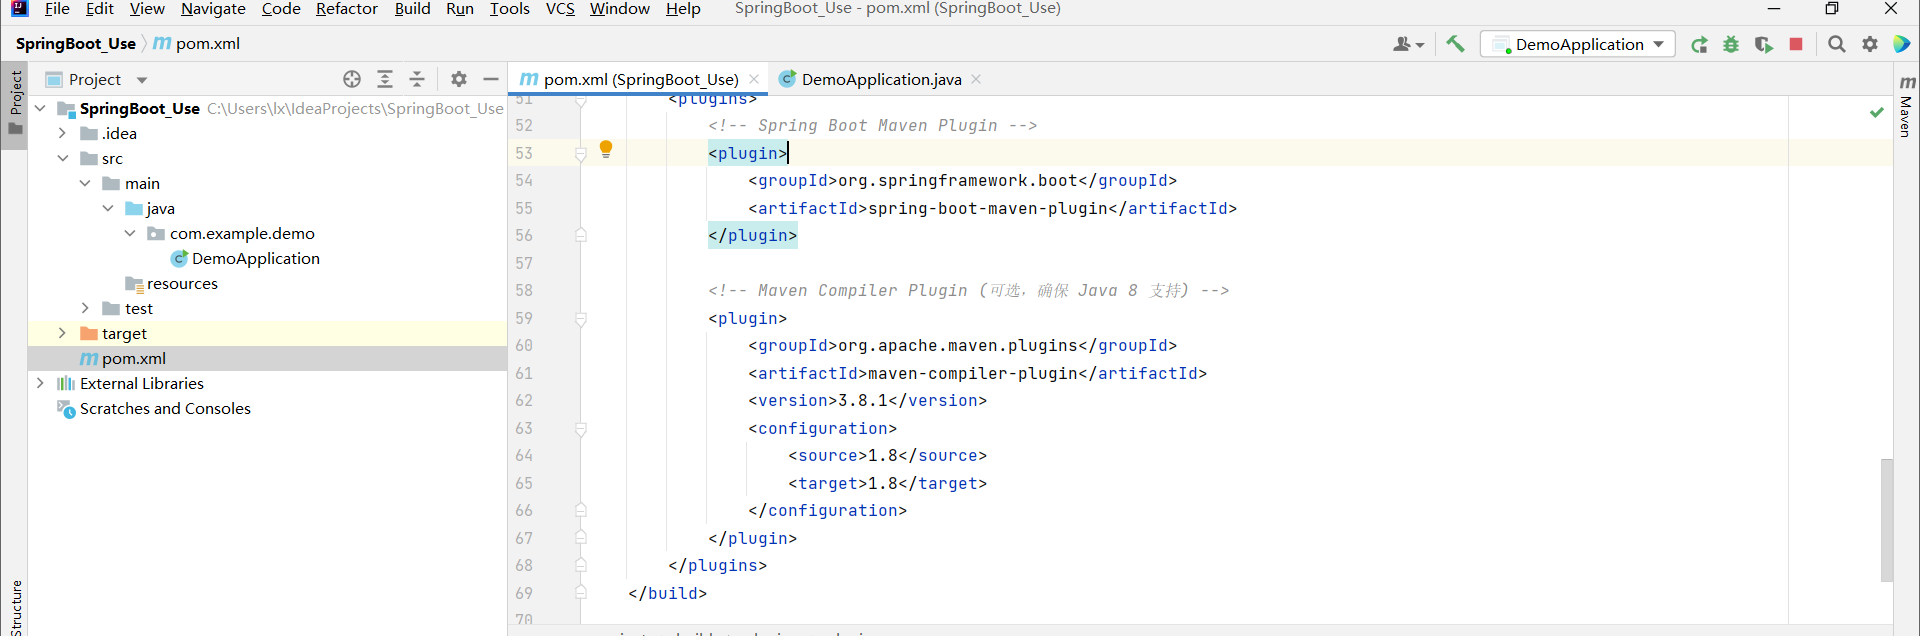
步骤 4:配置 pom.xml 文件
-
打开项目后,在项目目录中找到
pom.xml文件。 -
编辑
pom.xml,添加 Spring Boot 相关的依赖和插件。以下是一个基本的pom.xml示例:
此处用的是jdk 8
4.0.0
<groupId>org.example</groupId>
<artifactId>SpringBoot_Use</artifactId>
<version>1.0-SNAPSHOT</version><!-- Spring Boot 2.7.x 支持 Java 8 -->
<parent><groupId>org.springframework.boot</groupId><artifactId>spring-boot-starter-parent</artifactId><version>2.7.18</version><relativePath/> <!-- lookup parent from repository -->
</parent><properties><!-- 设置 Java 版本为 1.8 --><maven.compiler.source>1.8</maven.compiler.source><maven.compiler.target>1.8</maven.compiler.target><project.build.sourceEncoding>UTF-8</project.build.sourceEncoding>
</properties><dependencies><!-- Spring Boot Web Starter --><dependency><groupId>org.springframework.boot</groupId><artifactId>spring-boot-starter-web</artifactId></dependency><!-- Spring Boot Test Starter (optional) --><dependency><groupId>org.springframework.boot</groupId><artifactId>spring-boot-starter-test</artifactId><scope>test</scope></dependency><!-- 其他常用依赖可以根据需要添加 --><!-- 例如,Spring Data JPA --><!--<dependency><groupId>org.springframework.boot</groupId><artifactId>spring-boot-starter-data-jpa</artifactId></dependency>-->
</dependencies><build><plugins><!-- Spring Boot Maven Plugin --><plugin><groupId>org.springframework.boot</groupId><artifactId>spring-boot-maven-plugin</artifactId></plugin><!-- Maven Compiler Plugin (可选,确保 Java 8 支持) --><plugin><groupId>org.apache.maven.plugins</groupId><artifactId>maven-compiler-plugin</artifactId><version>3.8.1</version><configuration><source>1.8</source><target>1.8</target></configuration></plugin></plugins>
</build>
- 保存
pom.xml文件。
步骤 5:等待依赖下载
- IntelliJ IDEA 会自动下载
pom.xml中指定的依赖项。如果没有自动下载,可以手动触发下载:- 在 IDEA 右侧找到 Maven 面板。
- 点击刷新按钮(
↻)以下载依赖。
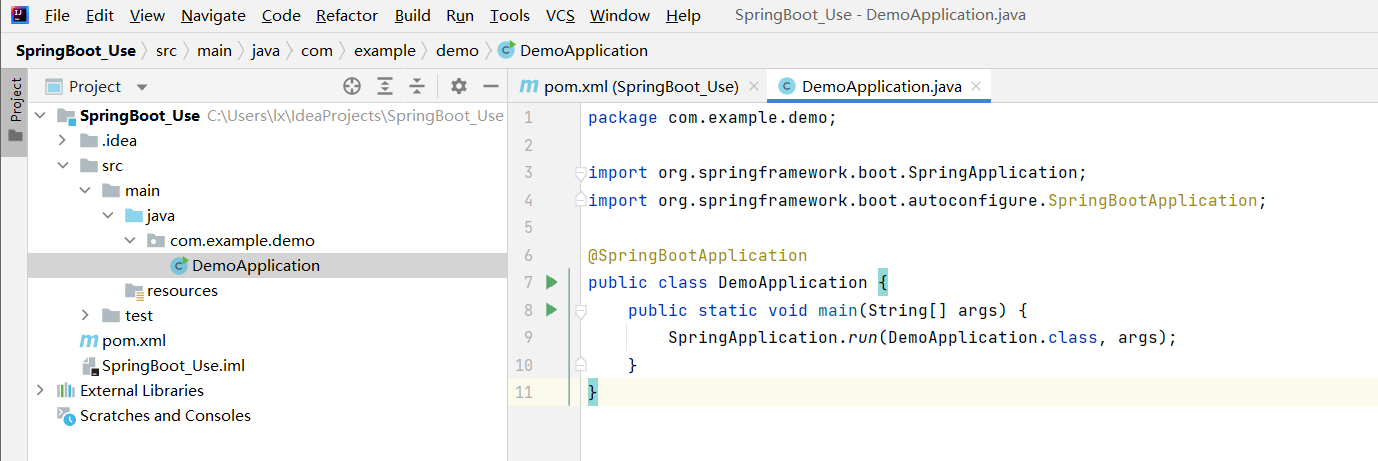
步骤 6:创建 Spring Boot 主启动类
-
在
src/main/java下创建包com.example.demo。 -
在
com.example.demo包下创建DemoApplication.java文件,并添加以下代码:package com.example.demo;import org.springframework.boot.SpringApplication; import org.springframework.boot.autoconfigure.SpringBootApplication;@SpringBootApplication public class DemoApplication {public static void main(String[] args) {SpringApplication.run(DemoApplication.class, args);} }
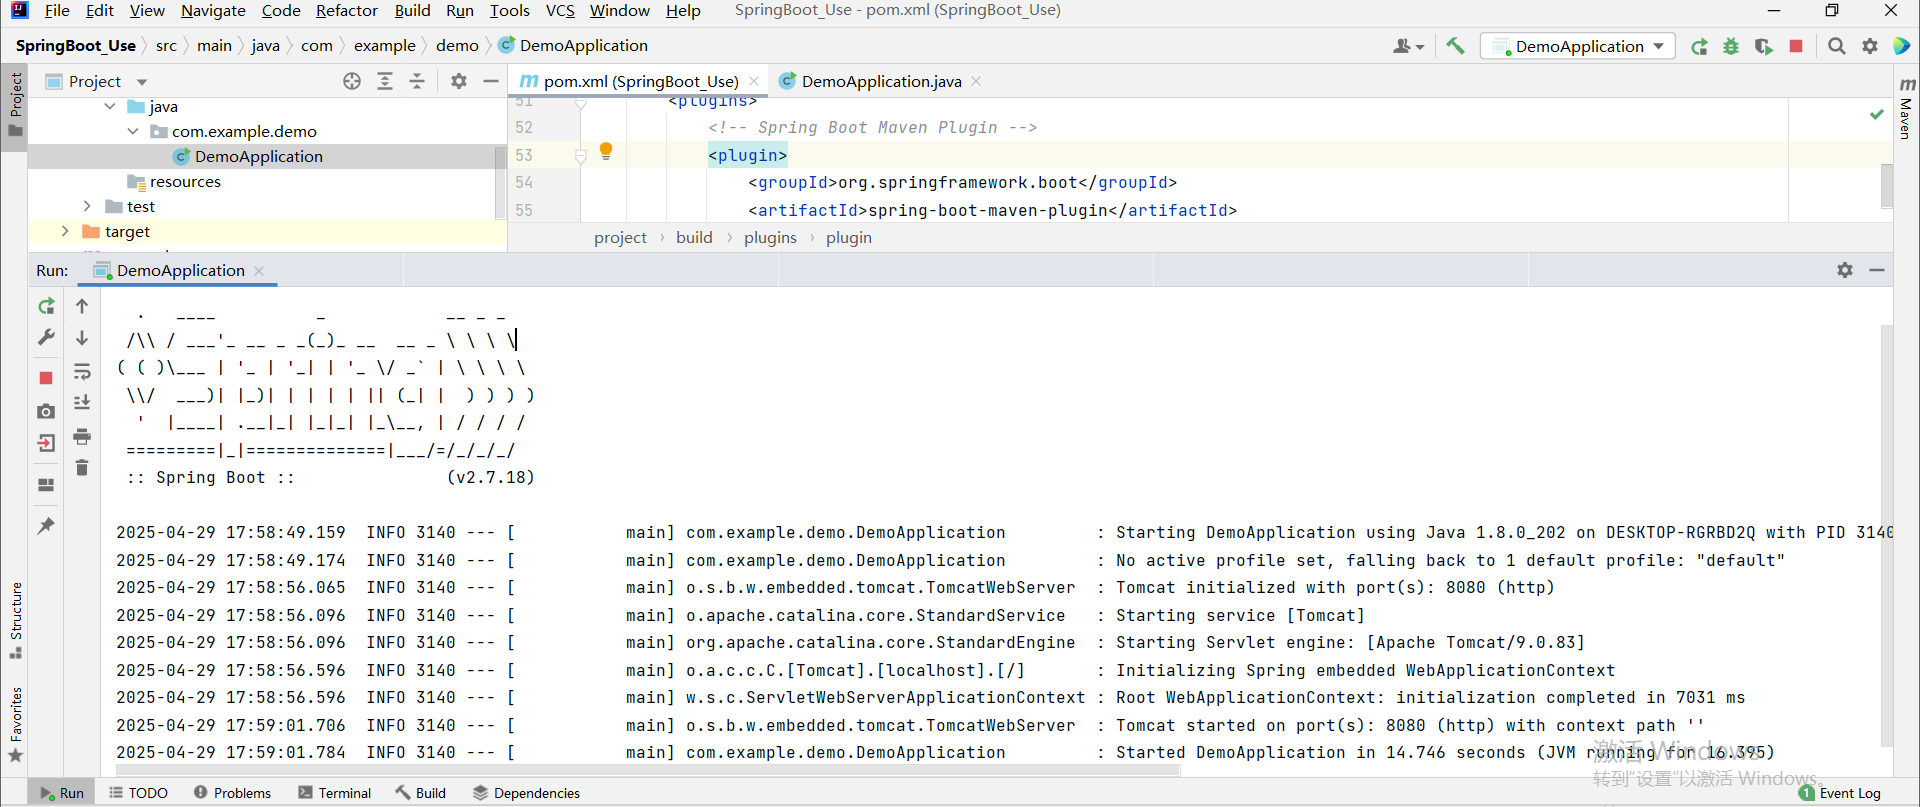
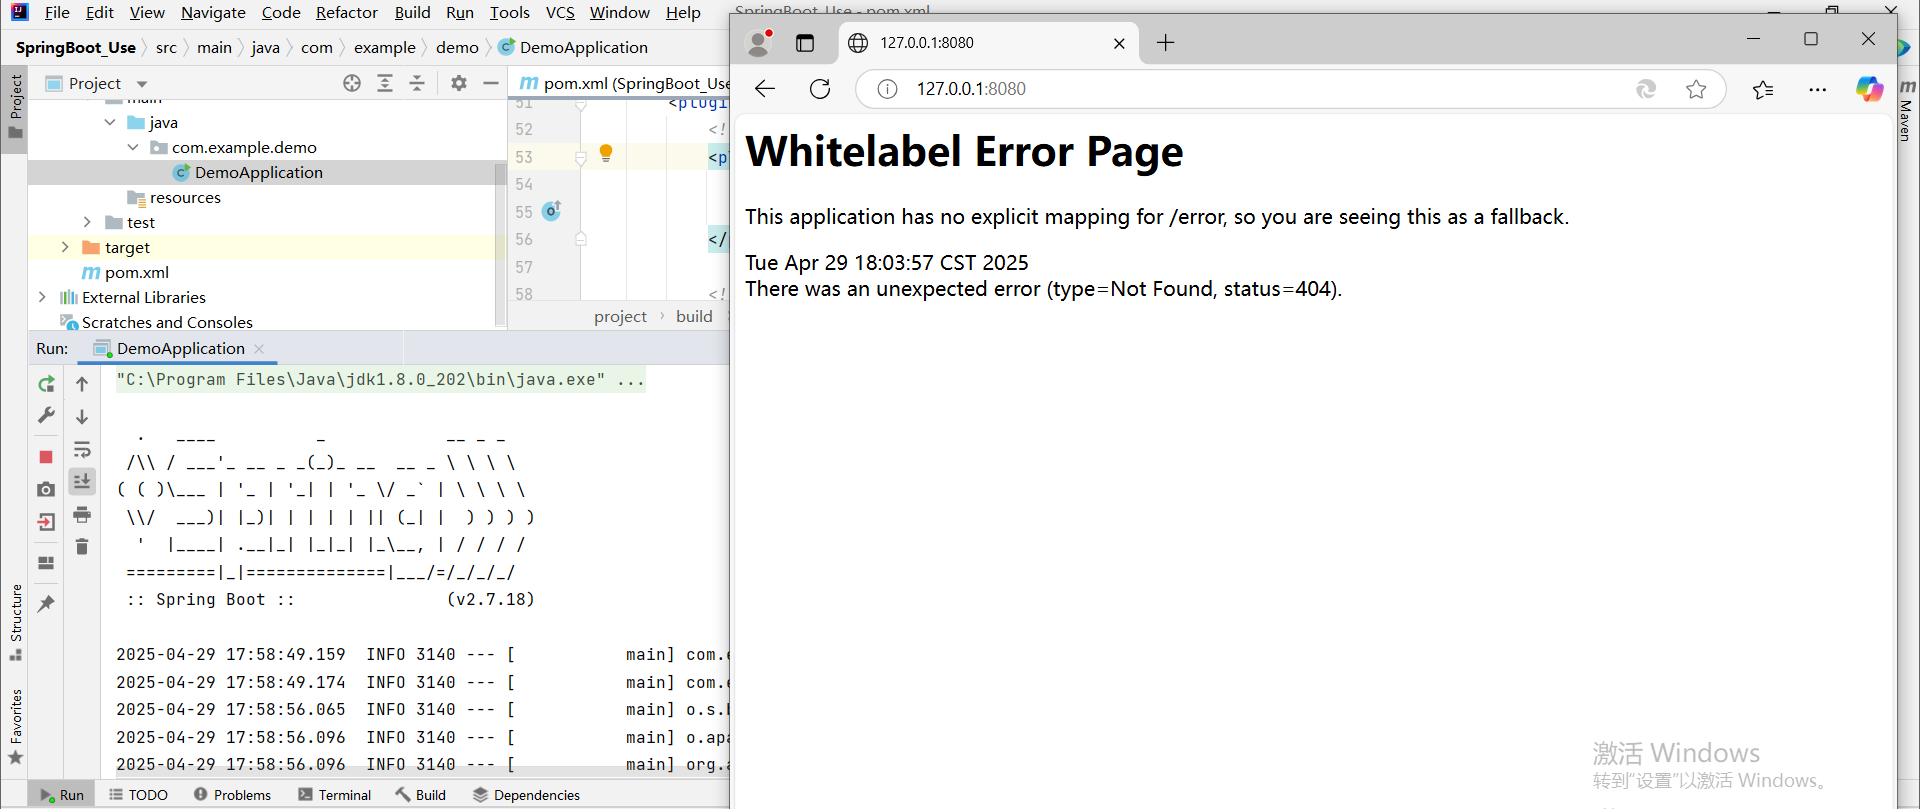
步骤 7:运行 Spring Boot 应用
- 打开
DemoApplication.java。 - 点击代码编辑器右上角的绿色箭头(或右键选择
Run DemoApplication.main())。 - 控制台会输出日志,显示 Tomcat 启动成功(默认端口
8080)。
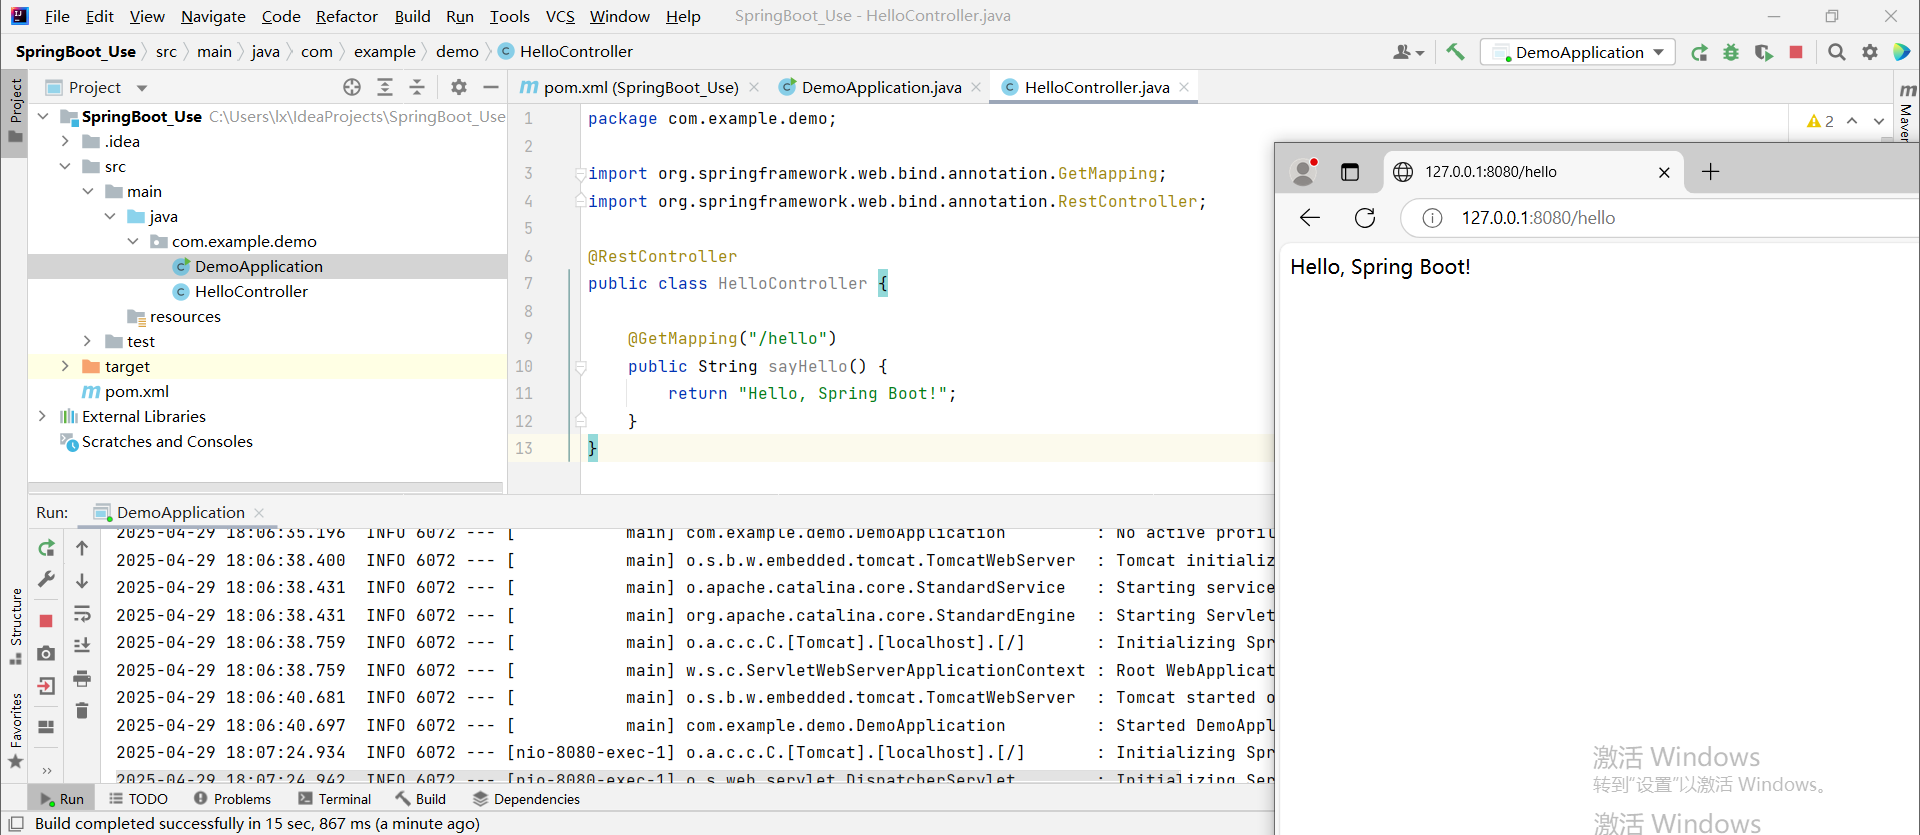
步骤 8:测试 REST API(可选)
如果需要测试 Spring Boot 的 REST API 功能,可以创建一个简单的控制器:
-
在
com.example.demo包下创建HelloController.java:package com.example.demo;import org.springframework.web.bind.annotation.GetMapping; import org.springframework.web.bind.annotation.RestController;@RestController public class HelloController {@GetMapping("/hello")public String sayHello() {return "Hello, Spring Boot!";} } -
访问
http://localhost:8080/hello,页面会显示Hello, Spring Boot!。