跟我一起学做网站windows优化大师值得买吗
前言
正在写一个 以taro3 + vue3 + webpack4为基础框架的微信小程序,之前一直没有记咋写的,现在总结记录一下。uniapp + vite 的后面出。
文章目录
- 前言
- 一、创建环境配置文件
- 二、 配置 Taro 环境变量
- 三、 创建请求封装
- 四、如何上传到微信小程序体验版
- 1.第二点的时候,咱们已经配置好了运行每个环境的命令了,这个之后,只需要执行命令,例如:
- 2.打开 微信开发者工具,打开 dist 文件夹
- 3. 检查上传的版本
一、创建环境配置文件
在 Taro3 框架中,区分环境并配置不同的请求域名(baseURL)可以结合 Taro 提供的环境变量和配置文件来实现。
详细配置,参考官网: 编译配置
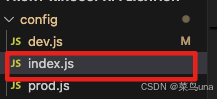
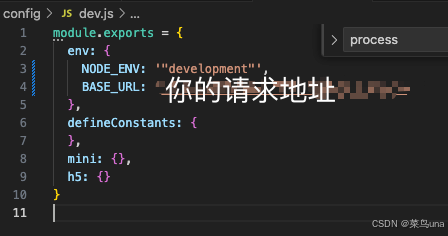
在项目根目录下创建 config 文件夹,并添加不同环境的配置文件:
二、 配置 Taro 环境变量
在 package.json 中添加环境变量配置:
一般我们是用命令行创建的项目,都会写好的,这个自己校对一下就好咯
{"scripts": {"dev:weapp": "taro build --type weapp --watch","build:weapp:dev": "cross-env NODE_ENV=development taro build --type weapp","build:weapp:test": "cross-env NODE_ENV=test taro build --type weapp","build:weapp:prod": "cross-env NODE_ENV=production taro build --type weapp"}
}
三、 创建请求封装
在 src/utils src/server目录下创建 request.ts 文件,使用 Taro 的 request 方法:
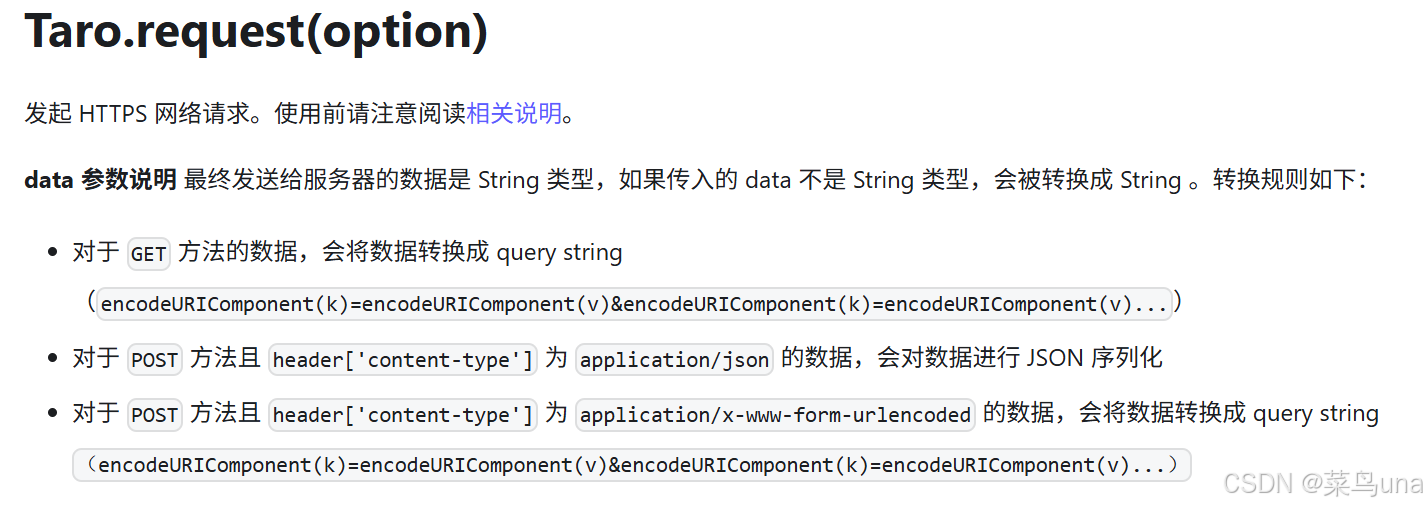
这里是基于
Taro.requestapi哈, 官网直通道:https://docs.taro.zone/docs/apis/network/request/
// src/utils/request.js
import Taro from '@tarojs/taro';
import { baseUrlMap } from '@/config'; // 环境配置映射表// 请求配置
const defaultConfig = {baseURL: baseUrlMap[process.env.NODE_ENV || 'development'],timeout: 10000,header: {'content-type': 'application/json','X-Requested-With': 'XMLHttpRequest'}
};// 请求队列,用于取消重复请求
const requestQueue = new Map();// 生成请求唯一标识
function generateRequestKey(config) {const { method, url, data } = config;return [method, url, JSON.stringify(data)].join('&');
}// 添加请求到队列
function addRequestToQueue(config) {const requestKey = generateRequestKey(config);const abortController = new AbortController();requestQueue.set(requestKey, abortController);return abortController;
}// 从队列中移除请求
function removeRequestFromQueue(config) {const requestKey = generateRequestKey(config);requestQueue.delete(requestKey);
}// 取消指定请求
function cancelRequest(config) {const requestKey = generateRequestKey(config);const abortController = requestQueue.get(requestKey);if (abortController) {abortController.abort();removeRequestFromQueue(config);}
}// 取消所有请求
function cancelAllRequests() {requestQueue.forEach(abortController => {abortController.abort();});requestQueue.clear();
}class Request {constructor(config) {this.config = config;this.interceptors = {request: [],response: []};}// 添加请求拦截器useRequestInterceptor(fulfilled, rejected) {this.interceptors.request.push({ fulfilled, rejected });return this;}// 添加响应拦截器useResponseInterceptor(fulfilled, rejected) {this.interceptors.response.unshift({ fulfilled, rejected });return this;}// 执行请求拦截器链async runRequestInterceptors(config) {let interceptedConfig = { ...config };for (const interceptor of this.interceptors.request) {try {if (interceptor.fulfilled) {interceptedConfig = await interceptor.fulfilled(interceptedConfig);}} catch (error) {if (interceptor.rejected) {await interceptor.rejected(error);}throw error;}}return interceptedConfig;}// 执行响应拦截器链async runResponseInterceptors(response) {let interceptedResponse = { ...response };for (const interceptor of this.interceptors.response) {try {if (interceptor.fulfilled) {interceptedResponse = await interceptor.fulfilled(interceptedResponse);}} catch (error) {if (interceptor.rejected) {await interceptor.rejected(error);}throw error;}}return interceptedResponse;}// 通用请求方法async request(options) {// 合并默认配置const mergedOptions = {...this.config,...options,url: this.config.baseURL + options.url};try {// 执行请求拦截器const interceptedOptions = await this.runRequestInterceptors(mergedOptions);// 处理取消请求逻辑const abortController = addRequestToQueue(interceptedOptions);interceptedOptions.signal = abortController.signal;// 发送请求const response = await Taro.request(interceptedOptions);// 从队列中移除请求removeRequestFromQueue(interceptedOptions);// 执行响应拦截器return await this.runResponseInterceptors(response);} catch (error) {// 从队列中移除请求removeRequestFromQueue(mergedOptions);// 处理取消请求错误if (error.name === 'AbortError') {console.log('请求已取消:', mergedOptions.url);return {statusCode: 499,errMsg: '请求已取消'};}// 处理其他错误throw error;}}// 快捷方法get(url, params = {}, config = {}) {return this.request({method: 'GET',url,data: params,...config});}post(url, data = {}, config = {}) {return this.request({method: 'POST',url,data,...config});}put(url, data = {}, config = {}) {return this.request({method: 'PUT',url,data,...config});}delete(url, params = {}, config = {}) {return this.request({method: 'DELETE',url,data: params,...config});}
}// 创建请求实例
const request = new Request(defaultConfig);// 添加请求拦截器 - 处理 token
request.useRequestInterceptor((config) => {// 添加 tokenconst token = Taro.getStorageSync('token');if (token) {config.header.Authorization = `Bearer ${token}`;}// 打印请求信息console.log(`[请求] ${config.method} ${config.url}`, config.data);return config;},(error) => {console.error('[请求错误]', error);return Promise.reject(error);}
);// 添加响应拦截器 - 处理业务状态码
request.useResponseInterceptor((response) => {console.log(`[响应] ${response.config.method} ${response.config.url}`, response.data);const { statusCode, data } = response;// 处理 HTTP 状态码if (statusCode < 200 || statusCode >= 300) {throw new Error(`HTTP错误 ${statusCode}`);}// 处理业务状态码 (根据后端规范调整)if (data.code === 200) {return data.data || true;} else if (data.code === 401) {// 未登录或 token 过期Taro.showToast({title: '请先登录',icon: 'none'});// 跳转到登录页setTimeout(() => {Taro.navigateTo({ url: '/pages/login/index' });}, 1000);return Promise.reject(new Error('未登录'));} else {// 其他业务错误Taro.showToast({title: data.message || '请求失败',icon: 'none'});return Promise.reject(new Error(data.message || '请求失败'));}},(error) => {console.error('[响应错误]', error);// 显示错误信息Taro.showToast({title: error.message || '网络请求失败',icon: 'none'});return Promise.reject(error);}
);export default request;
export { cancelRequest, cancelAllRequests };
从上面的代码可以看出来,我们在封装request的时候,要注意以下几点:
- 多环境支持:根据 process.env.NODE_ENV 自动切换 API 基础路径
- 请求拦截器:支持添加多个请求拦截器,可用于添加认证信息、日志记录等
- 响应拦截器:支持添加多个响应拦截器,可用于统一处理业务状态码、错误提示等
- 请求取消:支持取消单个请求或所有请求,防止重复请求
- 错误处理:统一处理网络错误、业务错误,并提供友好提示
- 扩展性:可根据需求灵活添加更多功能,如请求重试、缓存等
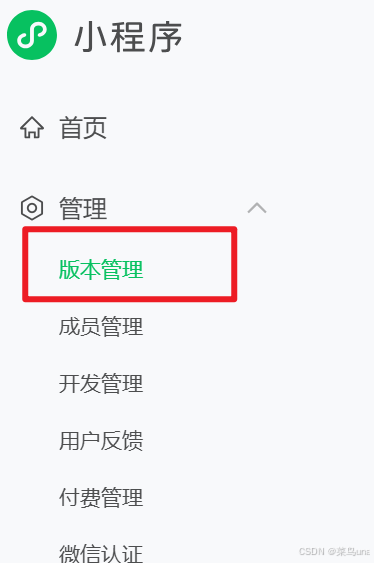
四、如何上传到微信小程序体验版
1.第二点的时候,咱们已经配置好了运行每个环境的命令了,这个之后,只需要执行命令,例如:
# 开发环境打包
npm run build:weapp:dev# 测试环境打包
npm run build:weapp:test# 生产环境打包
npm run build:weapp:prod
打包后的文件会生成在dist目录下。
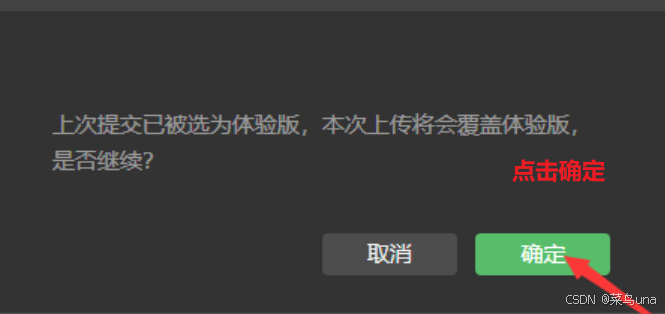
2.打开 微信开发者工具,打开 dist 文件夹

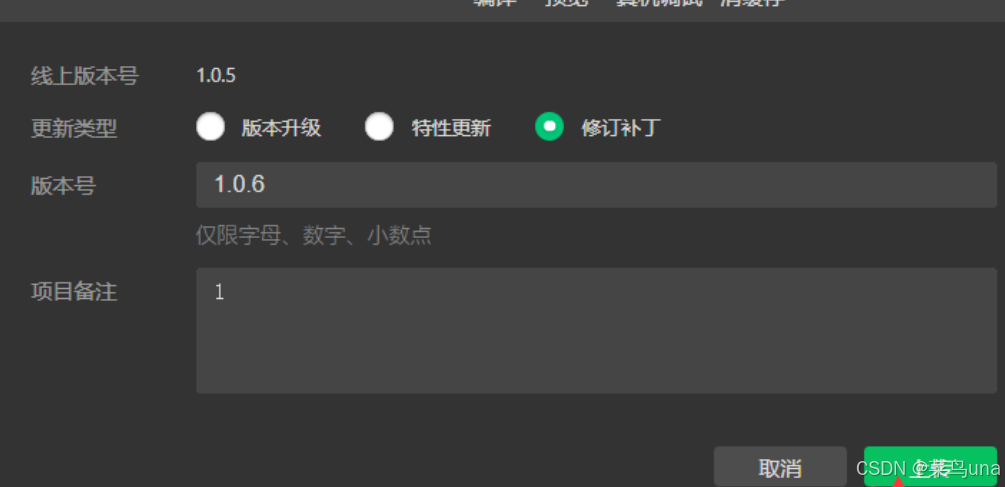
3. 检查上传的版本