做网站前没建images文件夹b站推广入口2023破解版
目录
- 关闭防火墙
- 修改yum镜像源
- 安装 php
- 安装mysql
- 安装nginx
- 关闭SELinux
- 配置nginx转发php文件到fpm服务
- 下载wordpress与配置
centos:
7
php:8.1.29
wordpress:6.8.1
nginx:1.26.1
mysql:5.6.51
关闭防火墙
# 停止防火墙
systemctl stop firewalld
# 禁止开启启动
systemctl disable firewalld
修改yum镜像源
centos默认yum镜像源已无法使用,当使用yum install 会报错:

# 1.备份原镜像源
mv /etc/yum.repos.d/CentOS-Base.repo /etc/yum.repos.d/CentOS-Base.repo.backup
# 2.下载阿里镜像源
curl -o /etc/yum.repos.d/CentOS-Base.repo https://mirrors.aliyun.com/repo/Centos-7.repo
# 3.刷新缓存
yum clean all
yum makecache
安装 php
-
将 yum 源更换为 aliyun 的 remi:
yum -y install https://mirrors.aliyun.com/remi/enterprise/remi-release-7.rpm yum -y install yum-utils -
为 PHP8.1 启用流模块:
yum-config-manager --enable remi-php81 -
安装 PHP8.1 及扩展:
yum install -y php sudo yum install -y php-cli php-fpm php-mysqlnd php-zip php-devel php-gd php-mbstring php-curl php-xml php-pear php-bcmath php-json php-redis php-common php-opcache php-memcached --skip-broken -
运行下面的命令,查看已安装的 PHP 版本,只要能显示版本,就证明 PHP 已经安装成功!
php -v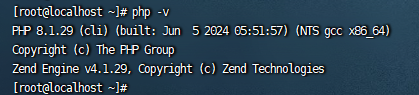
-
启动php服务
systemctl start php-fpm
systemctl enable php-fpm
# 配置文件地址 /etc/php-fpm.d# 日志 tail -f /var/log/php-fpm/error.log
安装mysql
-
在线安装mysql的repo源
# 1.下载mysql的repo源
wget http://repo.mysql.com/mysql-community-release-el7-7.noarch.rpm
# 注:如果没有wget下载命令就执行 yum install wget 进行安装# 2.安装mysql的repo源
rpm -ivh mysql-community-release-el7-7.noarch.rpm# 3.安装完成后 /etc/yum.repos.d/ 下会有多两个文件:mysql-community.repo , mysql-community-source.repo
-
安装mysql
yum install -y mysql-server -
重置mysql密码
# 启动mysql服务 systemctl start mysql # 运行以下脚本 mysql_secure_installation # 提示输入root密码,初始为null,回车就可以设置root密码了,其他选项回车即可 -
登录mysql
mysql -u root -p # 输入刚刚设置的密码即可进入 -
允许远程登录
# 授权 GRANT ALL PRIVILEGES ON *.* TO 'root'@'%' IDENTIFIED BY '密码'; # 刷新权限 FLUSH PRIVILEGES; # 退出 exit -
开机启动mysql
systemctl enable mysqld
安装nginx
-
在线安装nginx的repo源
rpm -Uvh http://nginx.org/packages/centos/7/noarch/RPMS/nginx-release-centos-7-0.el7.ngx.noarch.rpm -
安装nginx
yum install -y nginx -
启动Nginx
systemctl start nginx -
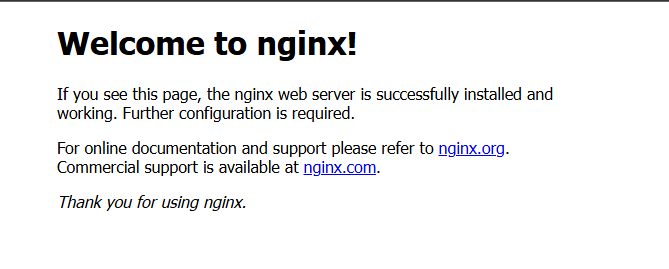
访问80端口:
-
设置开启启动
systemctl enable nginx# Nginx全局配置 cat /etc/nginx/nginx.conf # 网站默认站点配置 cat /etc/nginx/conf.d/default.conf# 网站文件存放默认目录 cd /usr/share/nginx/html# 打印nginx错误日志 tail -f /var/log/nginx/error.log # 重载nginx配置 cd /usr/sbin ./nginx -s reload
关闭SELinux
-
查看当前selinux的状态
/usr/sbin/sestatus -
关闭selinux
vi /etc/selinux/config #SELINUX=enforcing 修改为 SELINUX=disabled -
重启
reboot
配置nginx转发php文件到fpm服务
-
修改nginx配置:
cd /etc/nginx/conf.d# 修改default.conf文件server {listen 80;server_name localhost;root /usr/share/nginx/html;location / {index index.php index.html index.htm;}error_page 500 502 503 504 /50x.html;location = /50x.html {root /usr/share/nginx/html;}location ~ \.php$ {fastcgi_index index.php;fastcgi_pass 127.0.0.1:9000;include fastcgi_params;fastcgi_param SCRIPT_FILENAME $document_root$fastcgi_script_name;} } -
重载nginx配置
cd /usr/sbin ./nginx -s reload -
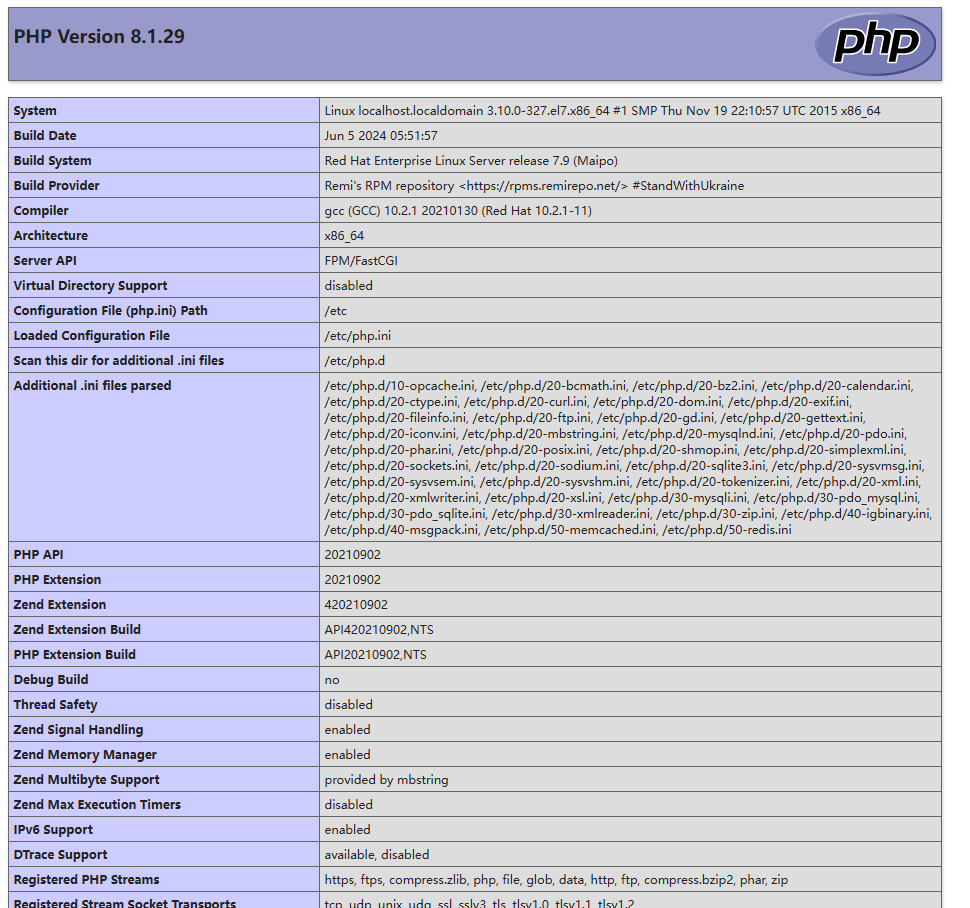
创建php测试页面
echo "<?php phpinfo(); ?>" > /usr/share/nginx/html/info.php -
访问http://ip/info.php,显示如下页面则表示nginx成功转发php文件到php-fpm服务
下载wordpress与配置
-
官网下载wordpress压缩包
# 我们统一放在/home/project下 cd /home mkdir project cd /project wget --no-check-certificate https://cn.wordpress.org/wordpress-6.8.1-zh_CN.tar.gz tar -zxvf wordpress-6.8.1-zh_CN.tar.gz -
修改nginx根目录路径到/home/project/wordpress
cd /etc/nginx/conf.d# 修改default.conf文件server {listen 80;server_name localhost;root /home/project/wordpress;#access_log /var/log/nginx/host.access.log main;location / {index index.php index.html index.htm;}#error_page 404 /404.html;# redirect server error pages to the static page /50x.html#error_page 500 502 503 504 /50x.html;location = /50x.html {root /usr/share/nginx/html;}# proxy the PHP scripts to Apache listening on 127.0.0.1:80##location ~ \.php$ {# proxy_pass http://127.0.0.1;#}# pass the PHP scripts to FastCGI server listening on 127.0.0.1:9000#location ~ \.php$ {fastcgi_index index.php;fastcgi_pass 127.0.0.1:9000;include fastcgi_params;fastcgi_param SCRIPT_FILENAME $document_root$fastcgi_script_name;}# deny access to .htaccess files, if Apache's document root# concurs with nginx's one##location ~ /\.ht {# deny all;#} } -
重载nginx配置
cd /usr/sbin ./nginx -s reload -
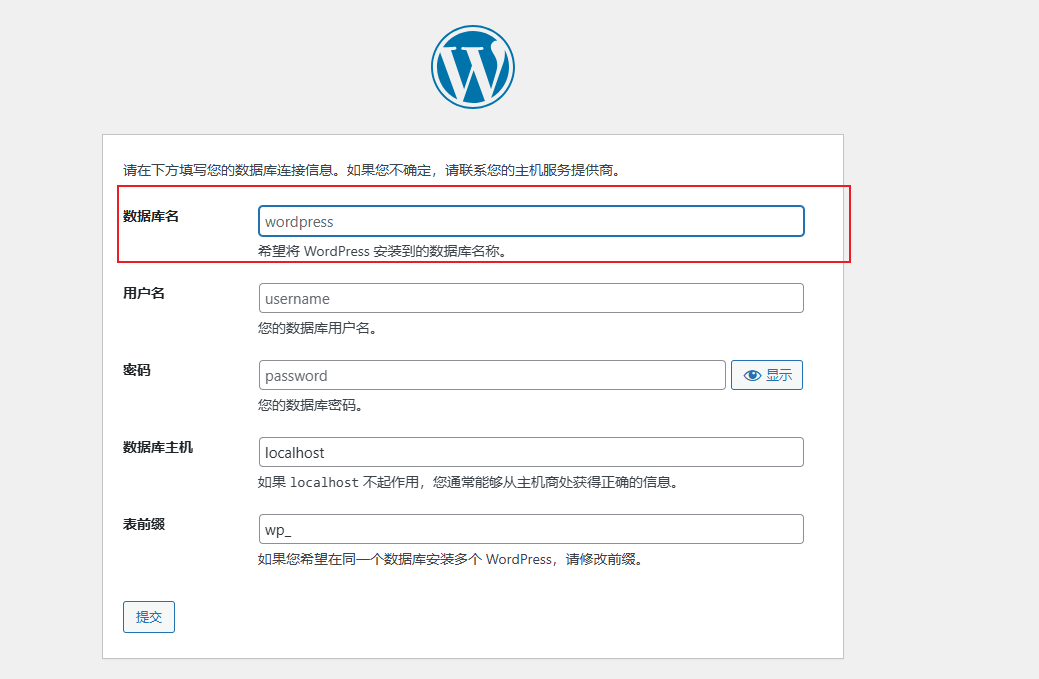
浏览器访问http://{ip}
-
出现这个页面就表示部署成功了
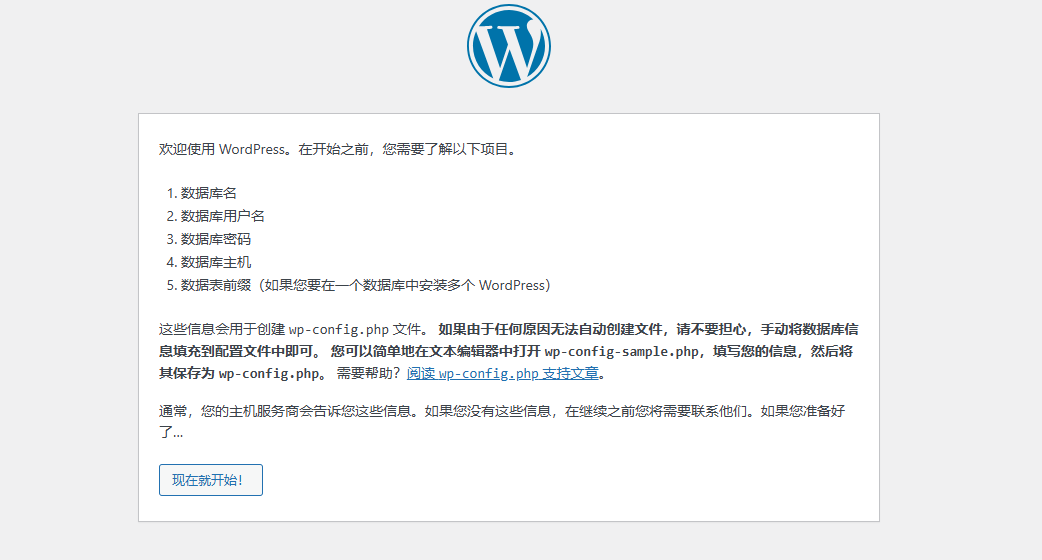
注意填写的数据库名需要提前在mysql中创建好对应的database
剩下的就根据wordpress的提示一步步配置即可完成部署