wordpress增加评论验证码兰州seo优化
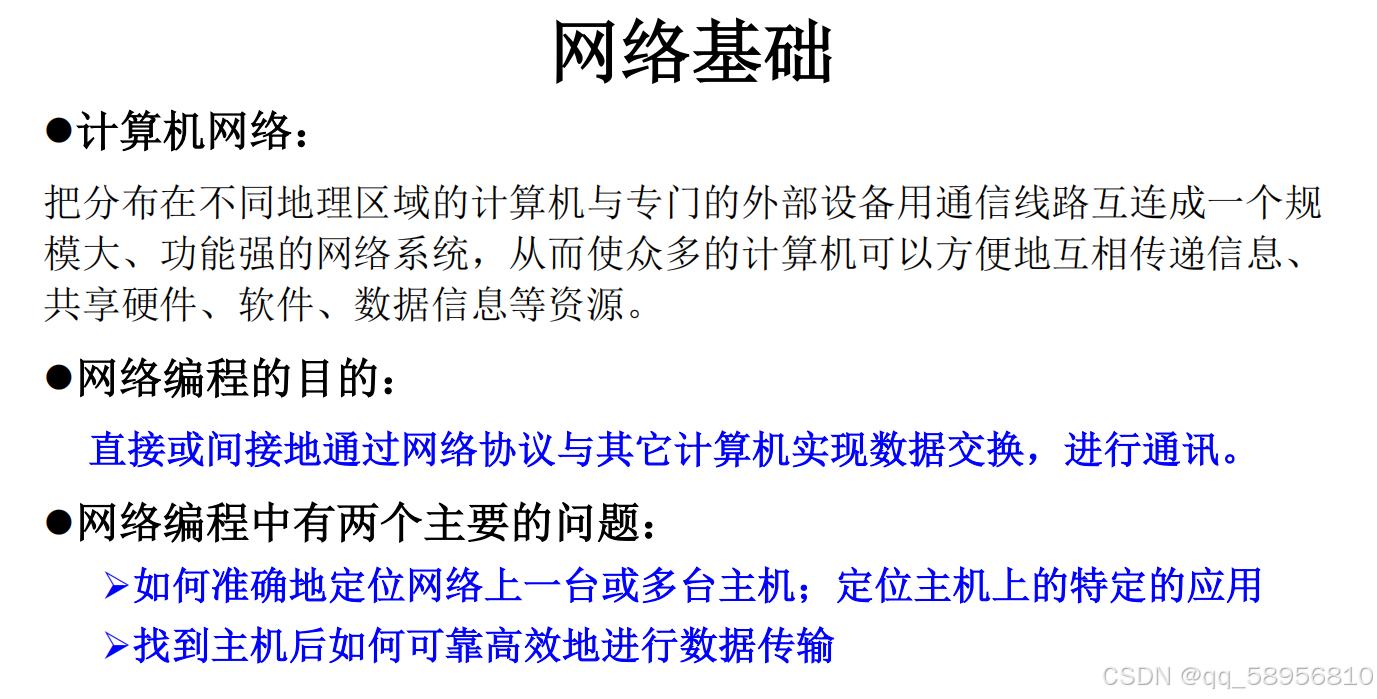
网络编程概述

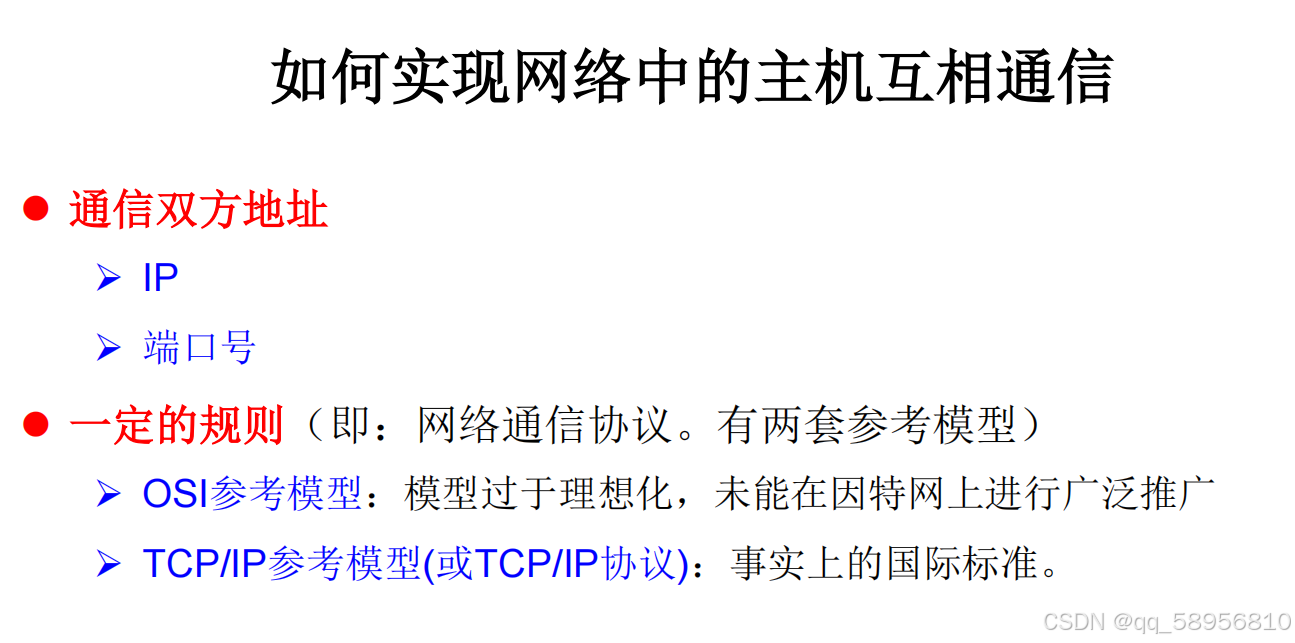
网络通信要素概述

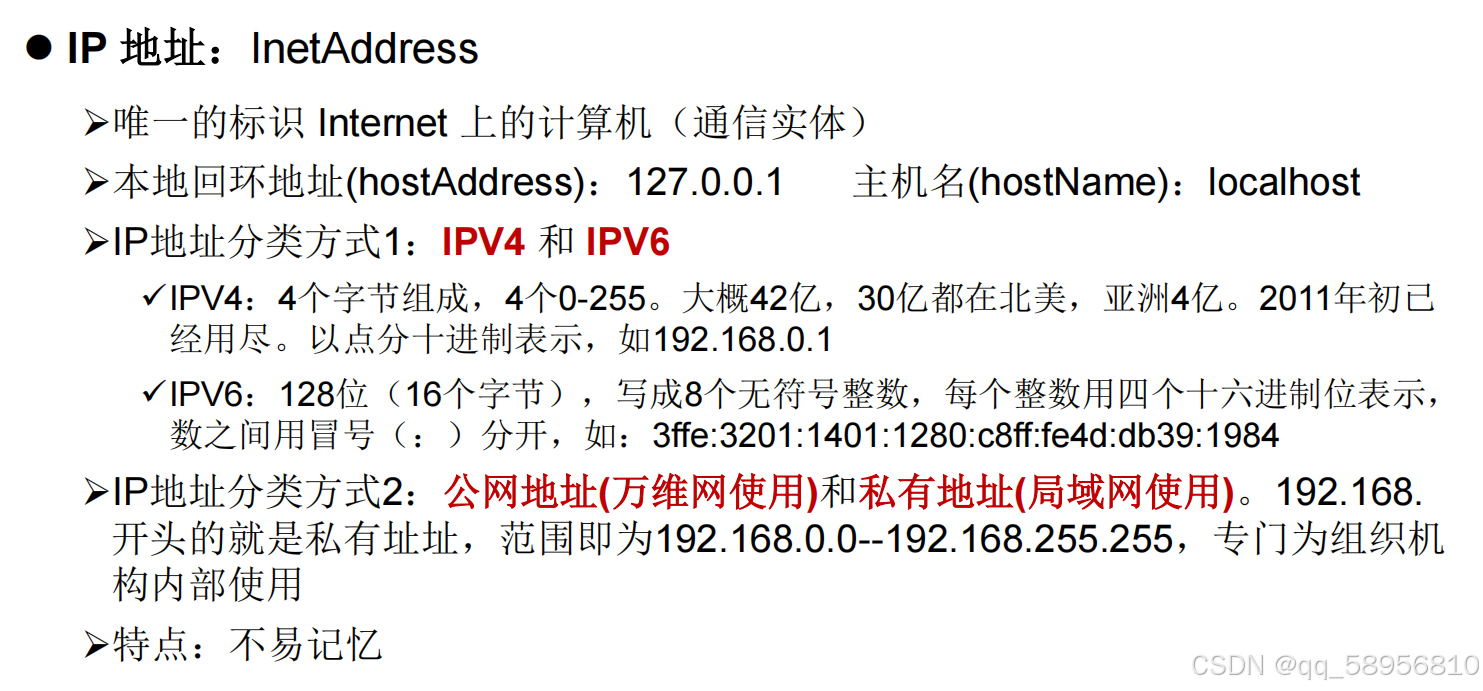
通信要素1:IP 和 端口号
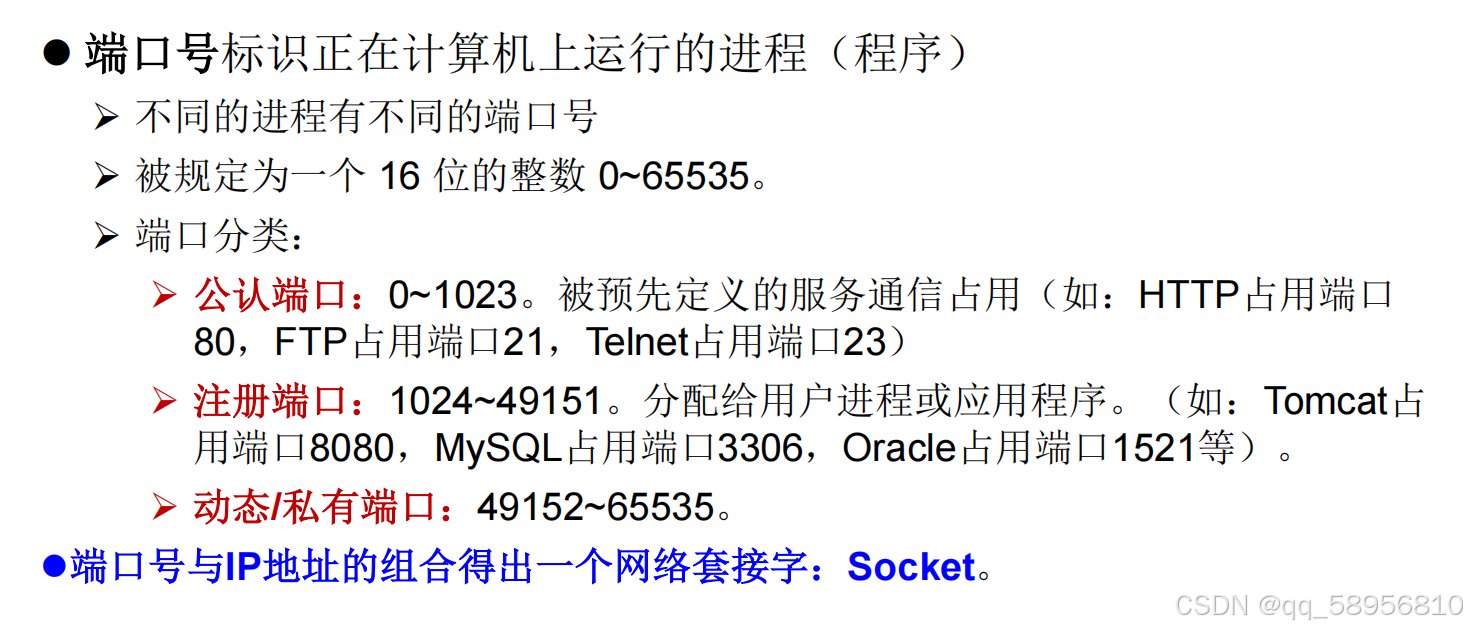
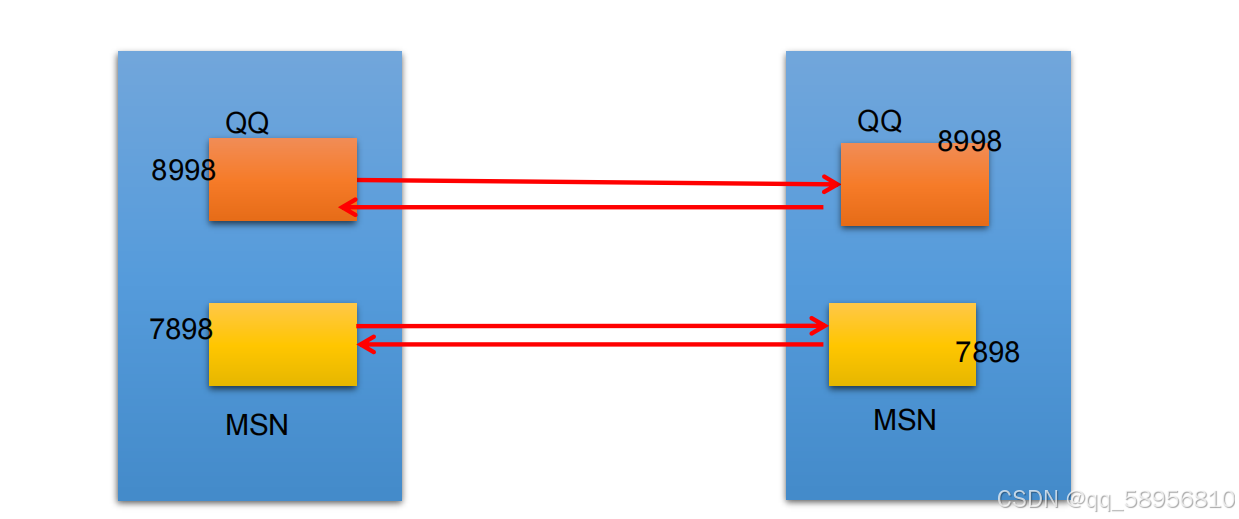
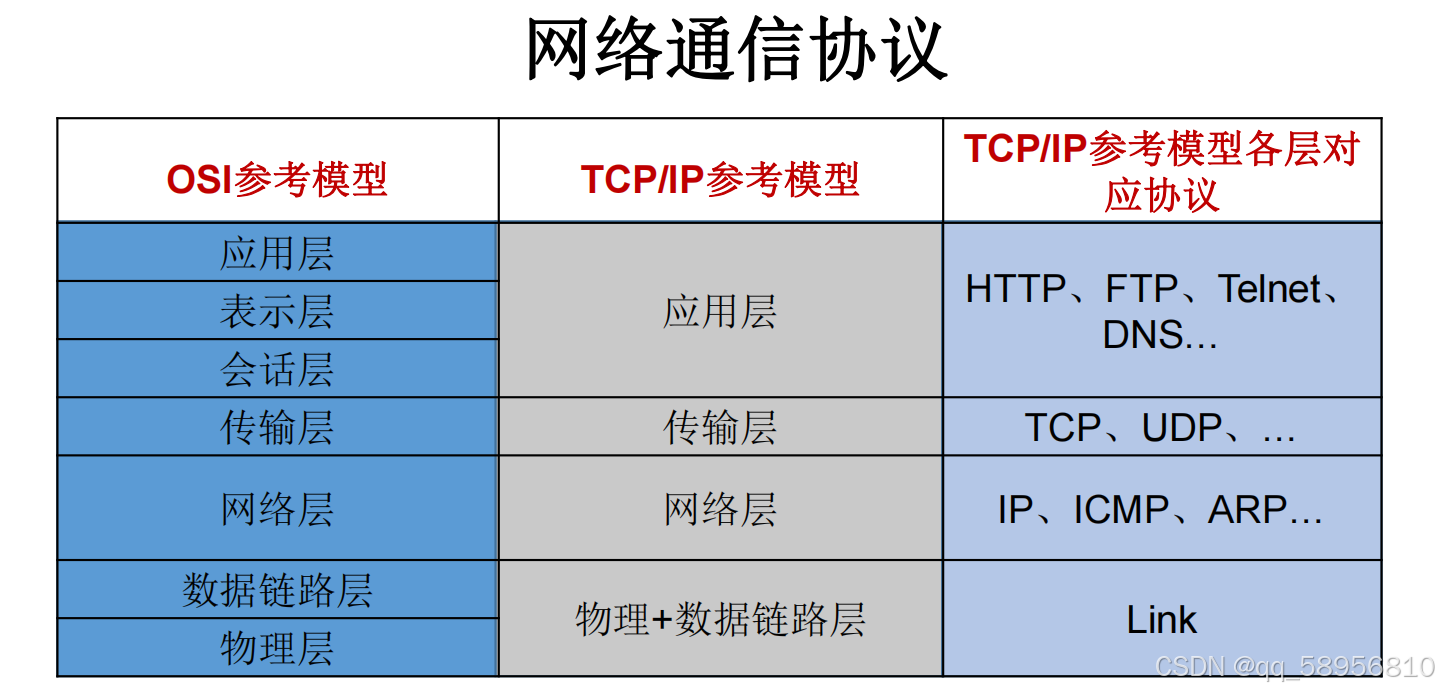
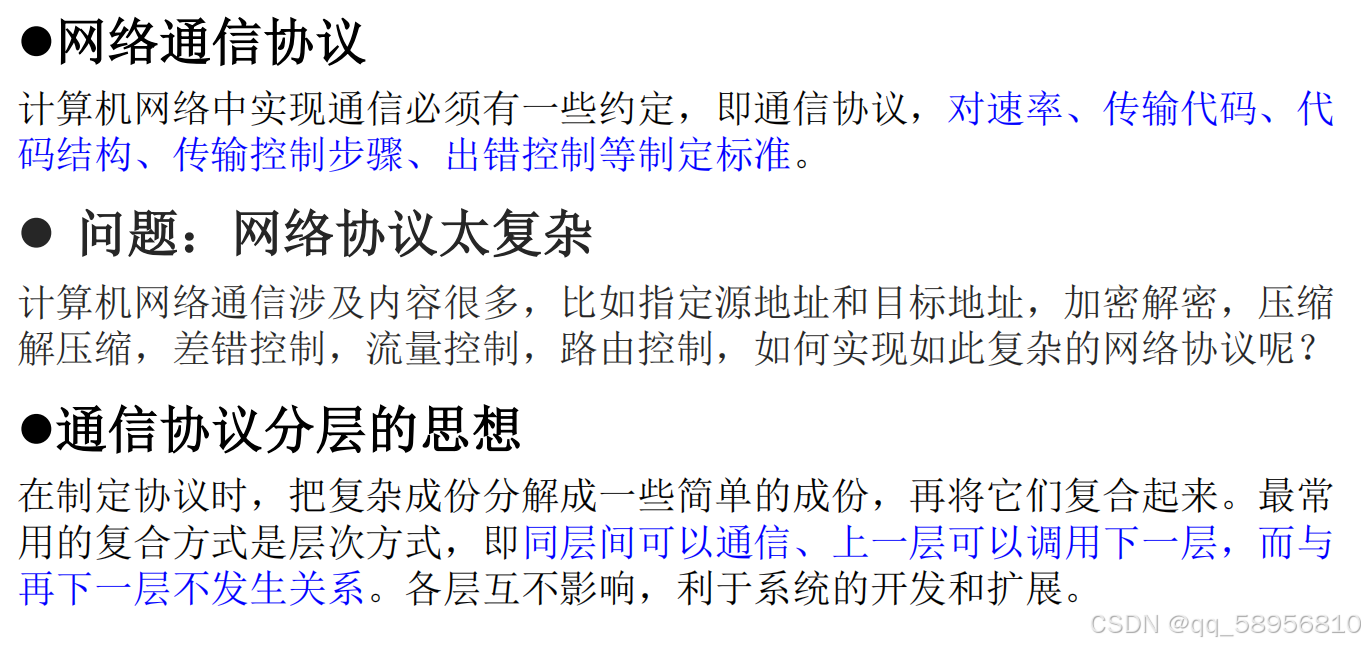
通信要素2:网络通信协议


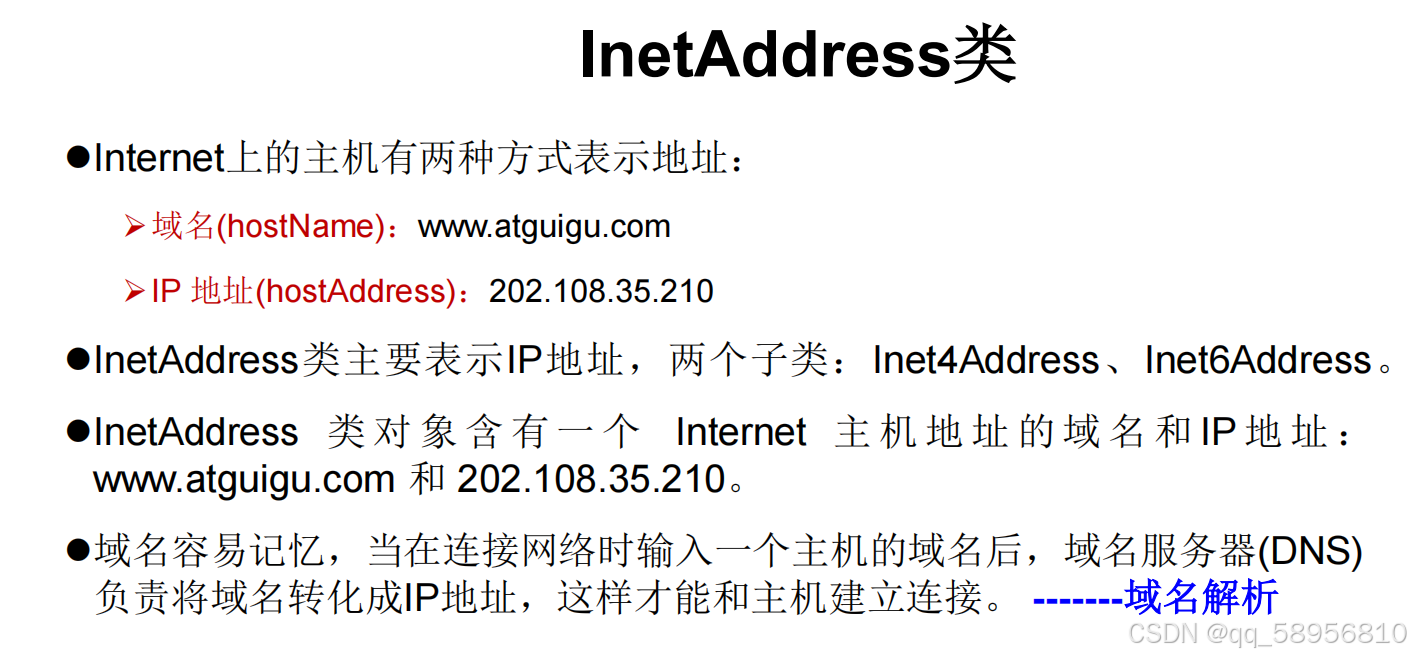
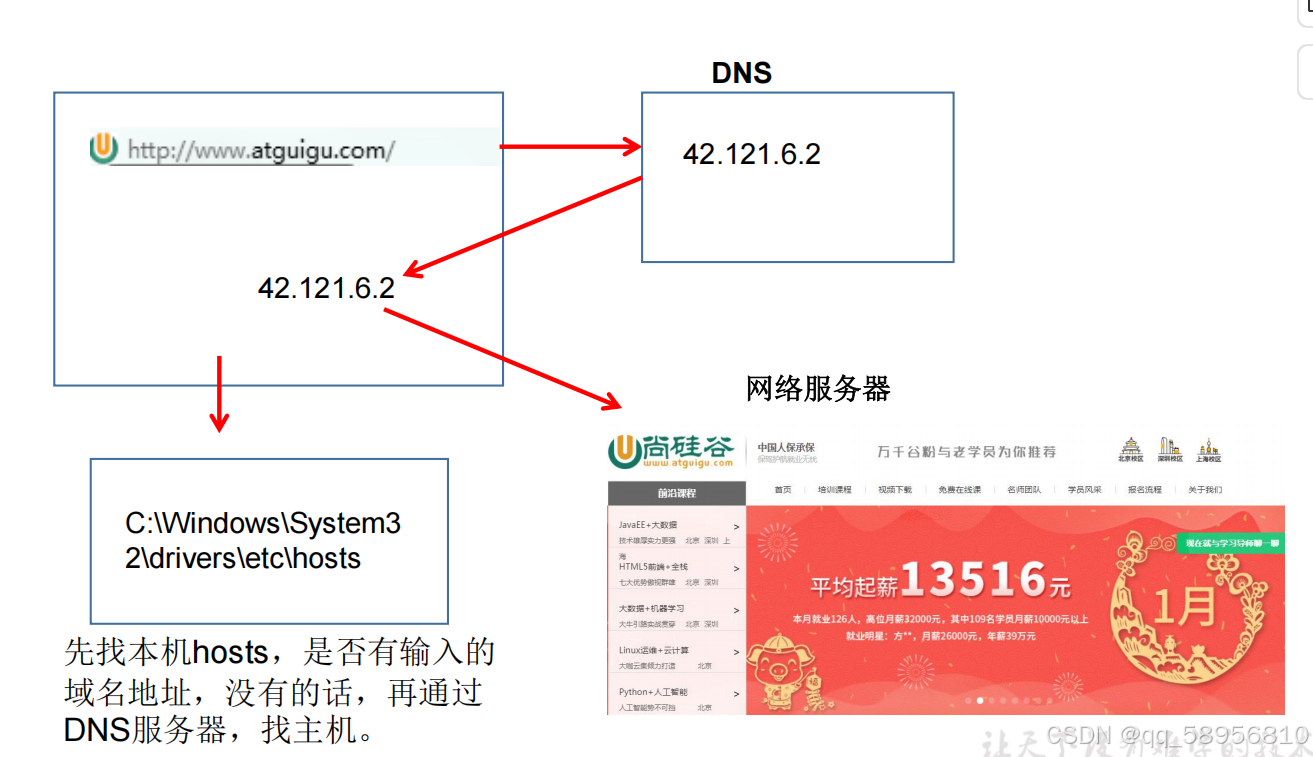
总结:
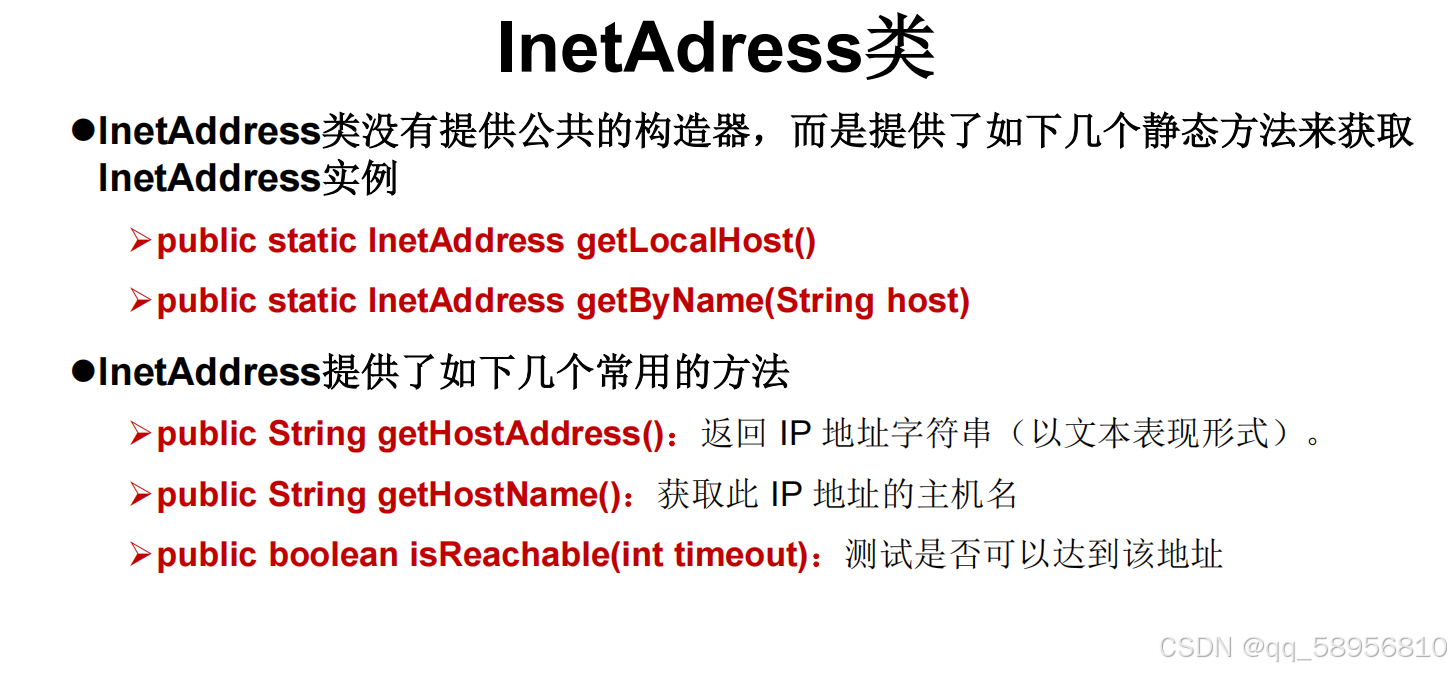
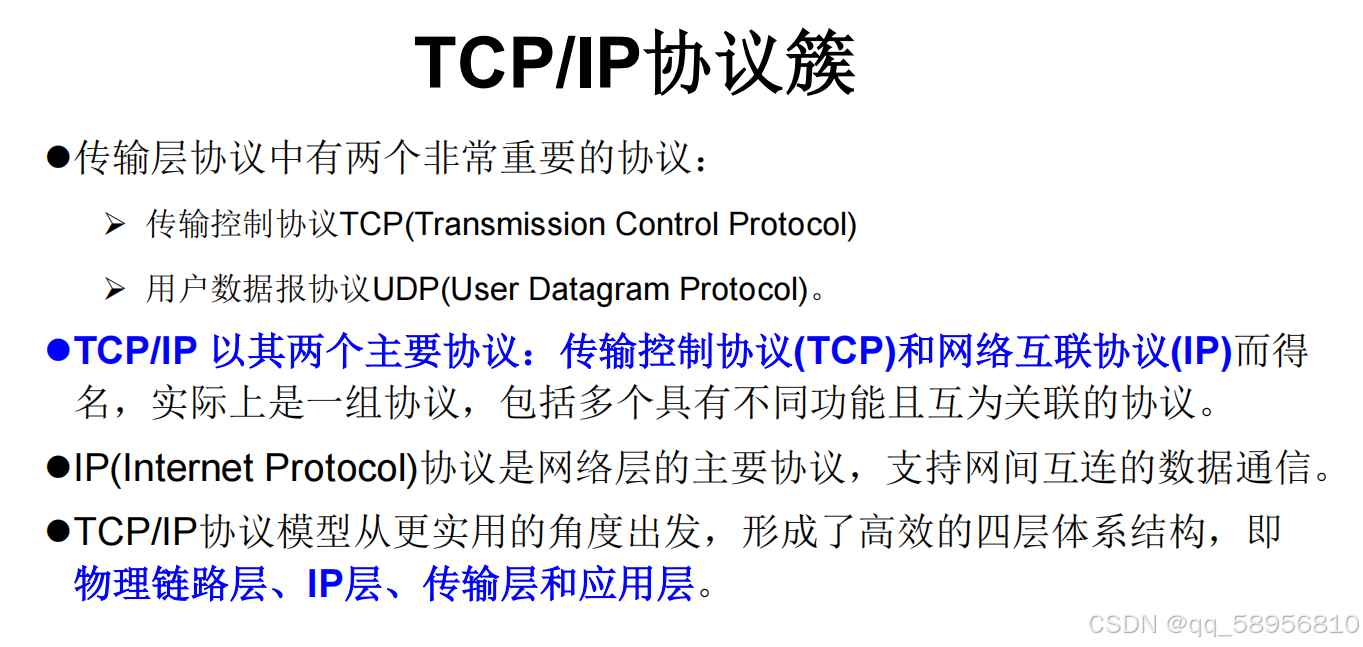
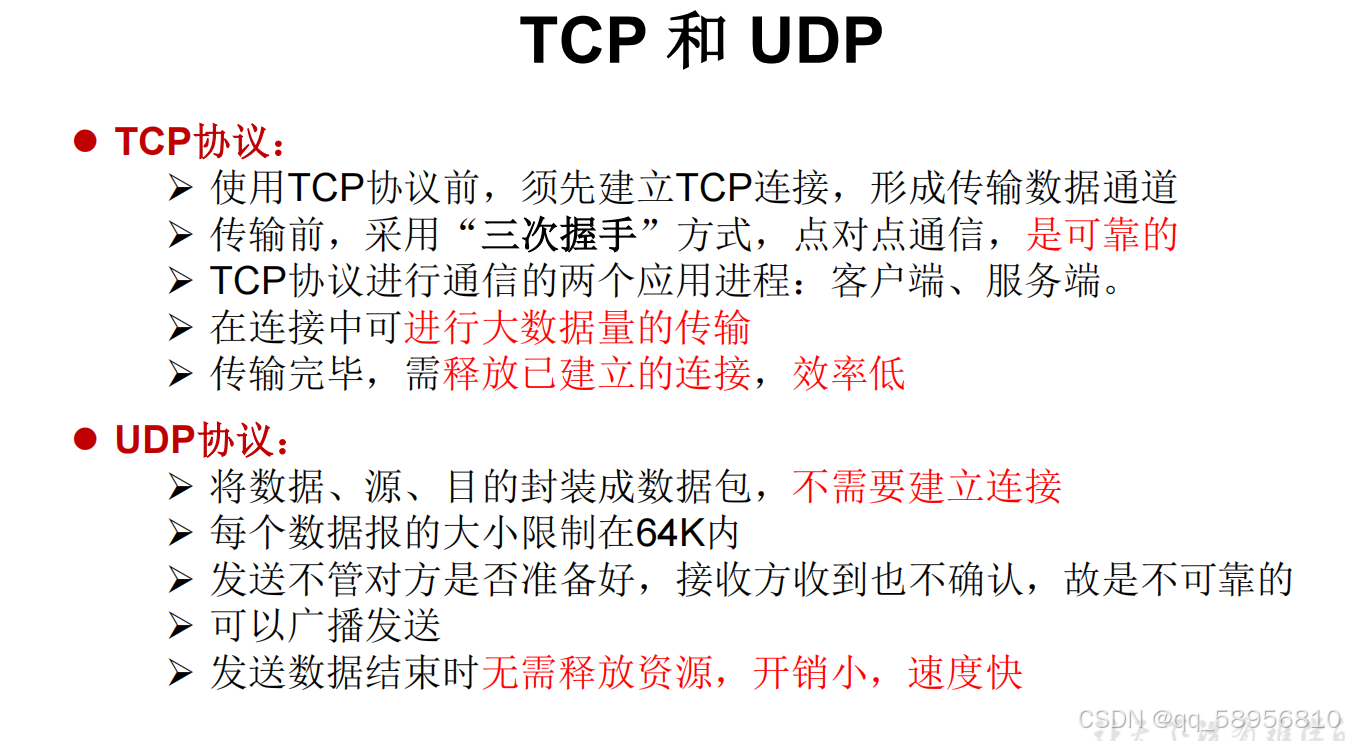
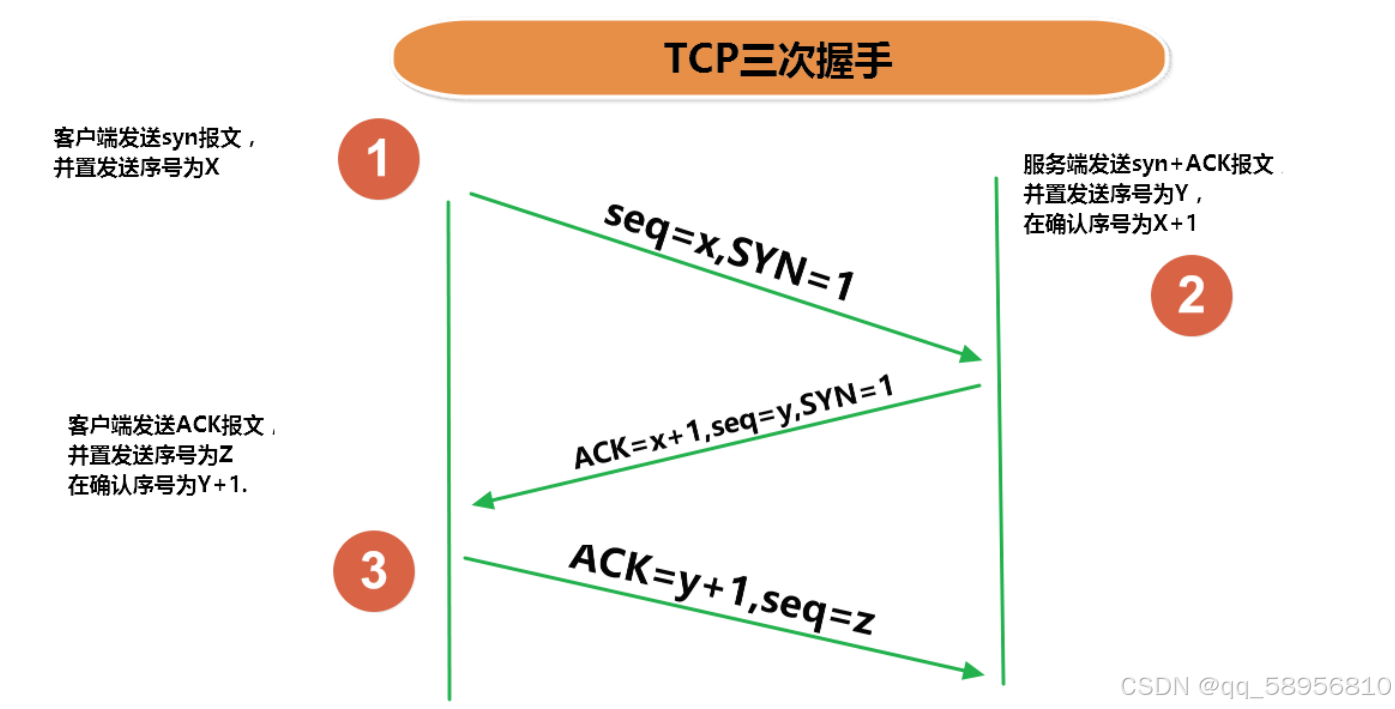
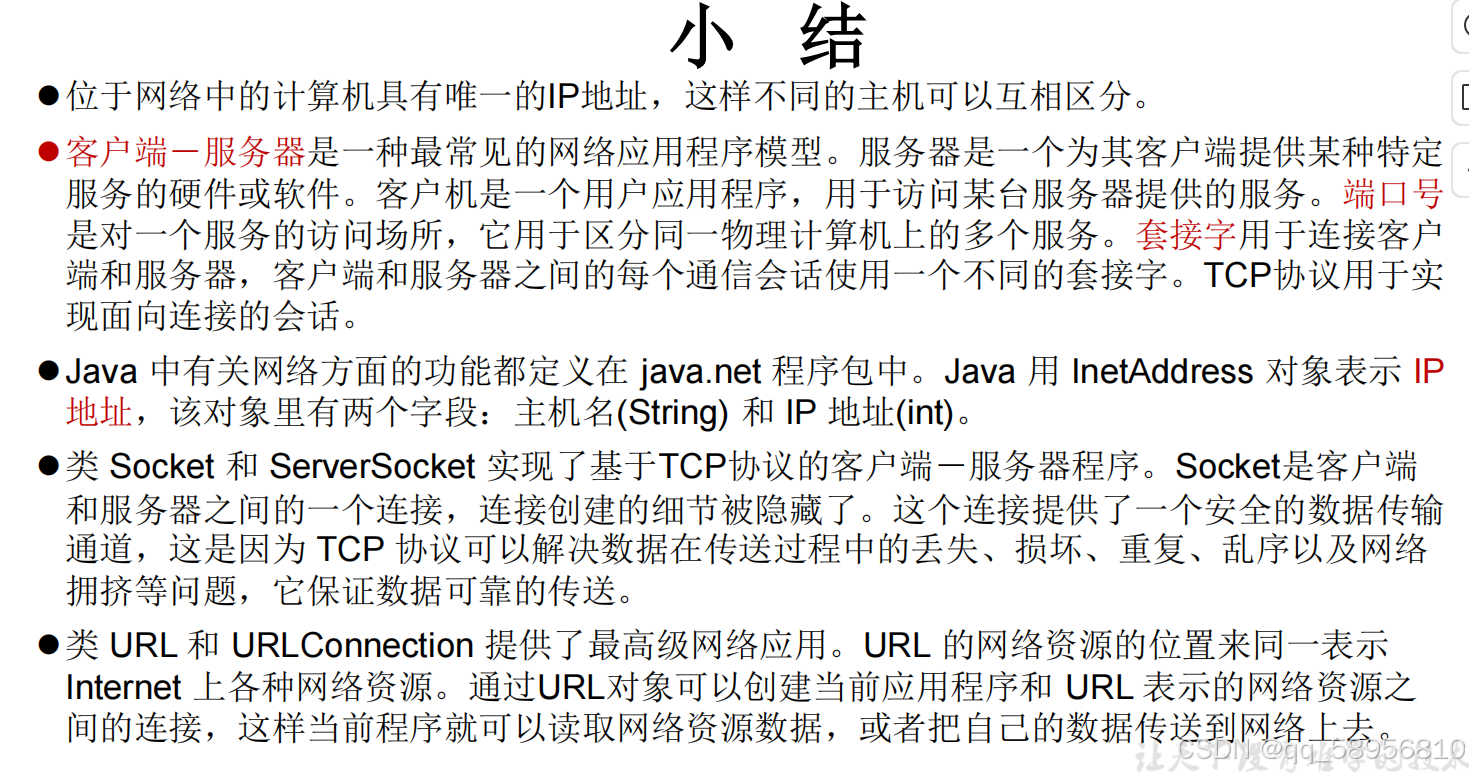
1.要想实现网络通信,需要解决的三个问题
- 问题1:如何准确地定位网络上一台或多台主机
- 问题2:如何定位主机上的特定的应用
- 问题3:找到主机后,如何可靠、高效地进行数据传输2.实现网络传输的三个要素:(对应解决三个问题)
> 使用IP地址(准确地定位网络上一台或多台主机)
> 使用端口号(定位主机上的特定的应用)
> 规范网络通信协议(可靠、高效地进行数据传输)3.通信要素1:IP地址
3.1 作用
IP地址用来给网络中的一台计算机设备做唯一的编号
3.2 IP地址分类
> IP地址分类方式1
IPv4(占用4个字节)
IPv6(占用16个字节)
> IP地址分类方式2
公网地址(万维网使用)和 私有地址(局域网使用。以192.168开头)
3.3 本地回路地址: 127.0.0.13.4 域名:便捷的记录ip地址
www.baidu.com  www.atguigu.com  www.bilibili.com
www.jd.com  www.mi.com  www.vip.com4.通信要素2:端口号
> 可以唯一标识主机中的进程(应用程序)
> 不同的进程分配不同的端口号
> 范围:0~655355.InetAddress的使用
5.1 作用
InetAddress类的一个实例就代表一个具体的ip地址。
5.2 实例化方式
InetAddress getByName(String host):获取指定ip对应的InetAddress的实例
InetAddress getLocalHost():获取本地ip对应的InetAddress的实例
5.3 常用方法
getHostName():获取域名,没有域名获取ip地址
getHostAddress():获取ip地址6.通信要素3:通信协议
6.1 网络通信协议的目的
为了实现可靠而高效的数据传输。
6.2 网络参考模型
0SI参考模型:将网络分为7层,过于理想化,没有实施起来。
TCP/IP参考模型:将网络分为4层:应用层、传输层、网络层、物理+数据链路层。事实上使用的标准。
代码:
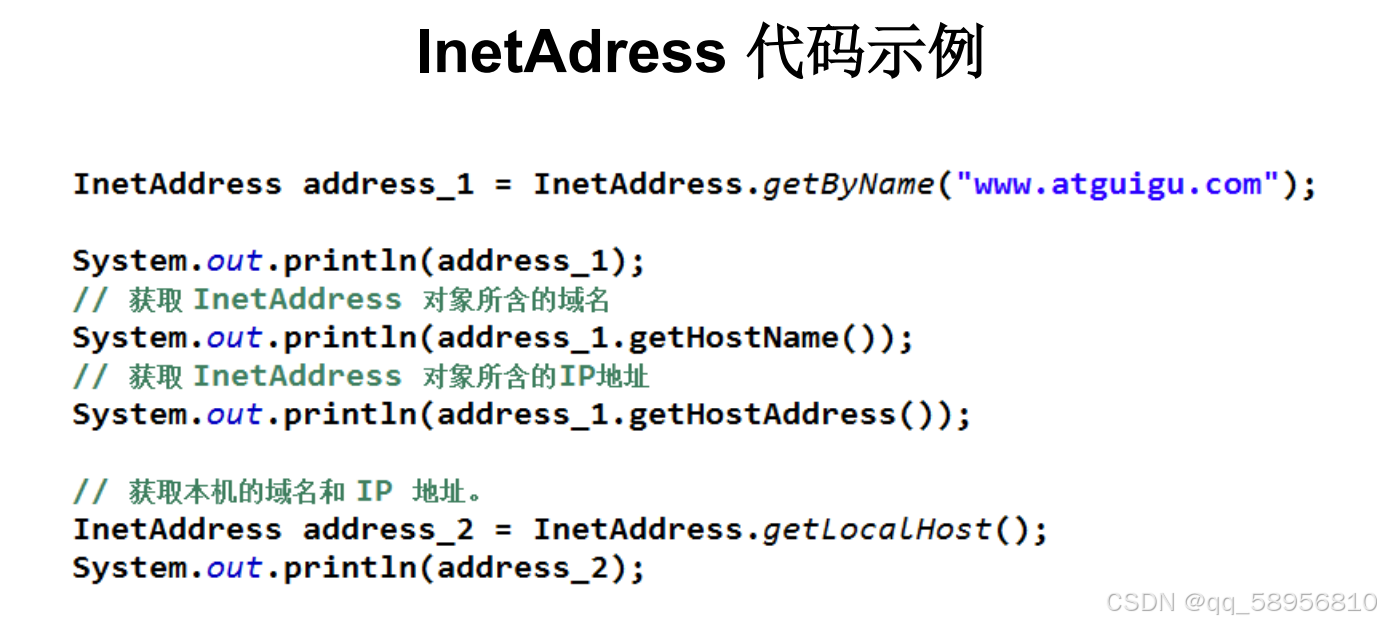
public class InetAddressTest {public static void main(String[] args) {//1.实例化//getByName(String host):获取指定ip对应的InetAddress的实例try {InetAddress inet1 = InetAddress.getByName("192.168.23.31");System.out.println(inet1); // /192.168.23.31InetAddress inet2 = InetAddress.getByName("www.atguigu.com");System.out.println(inet2); //www.atguigu.com/115.85.201.231//getLocalHost():获取本地ip对应的InetAddress的实例InetAddress inet3 = InetAddress.getLocalHost();System.out.println(inet3); //wen/192.168.100.102InetAddress inet4 = InetAddress.getByName("127.0.0.1");System.out.println(inet4); // /127.0.0.1//两个常用方法System.out.println(inet1.getHostName()); //192.168.23.31System.out.println(inet1.getHostAddress()); //192.168.23.31System.out.println(inet2.getHostName()); //www.atguigu.comSystem.out.println(inet2.getHostAddress()); //115.85.201.231} catch (UnknownHostException e) {e.printStackTrace();}}
}TCP网络编程
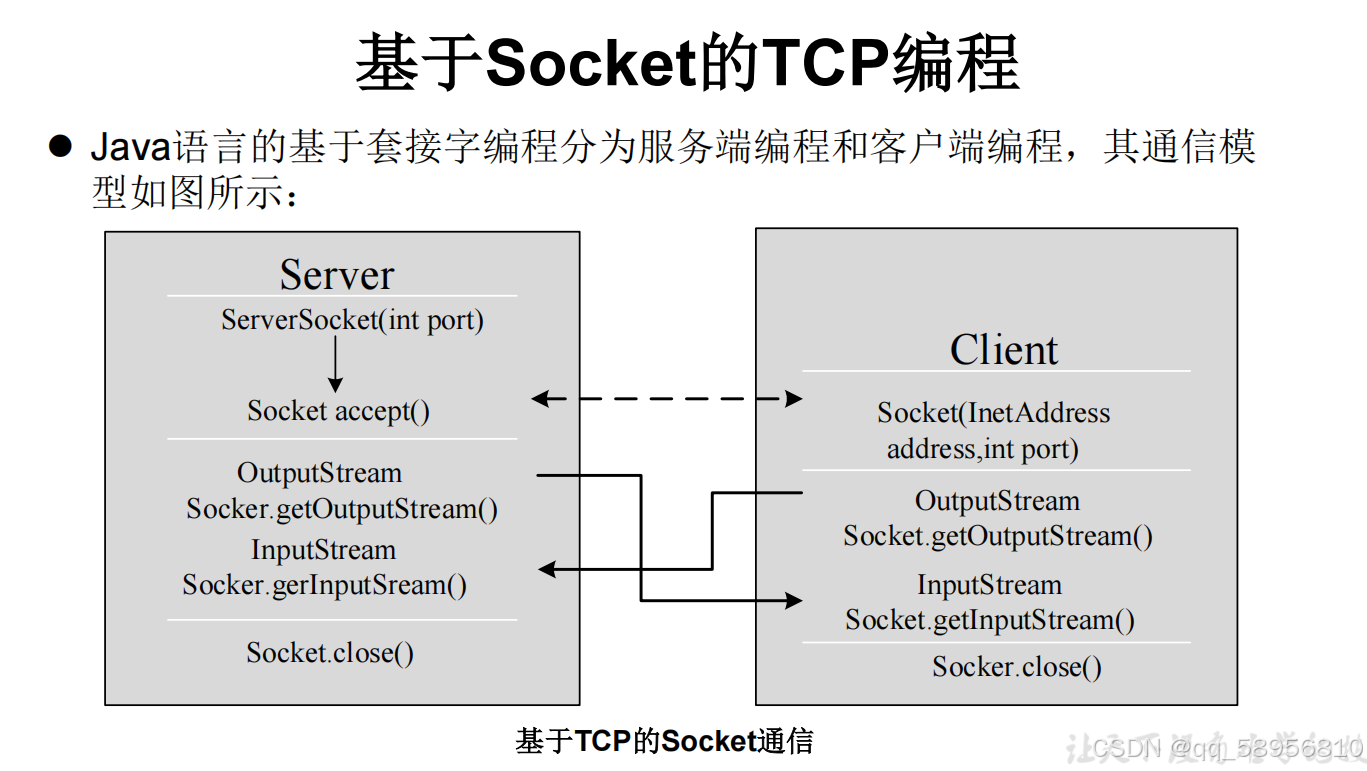
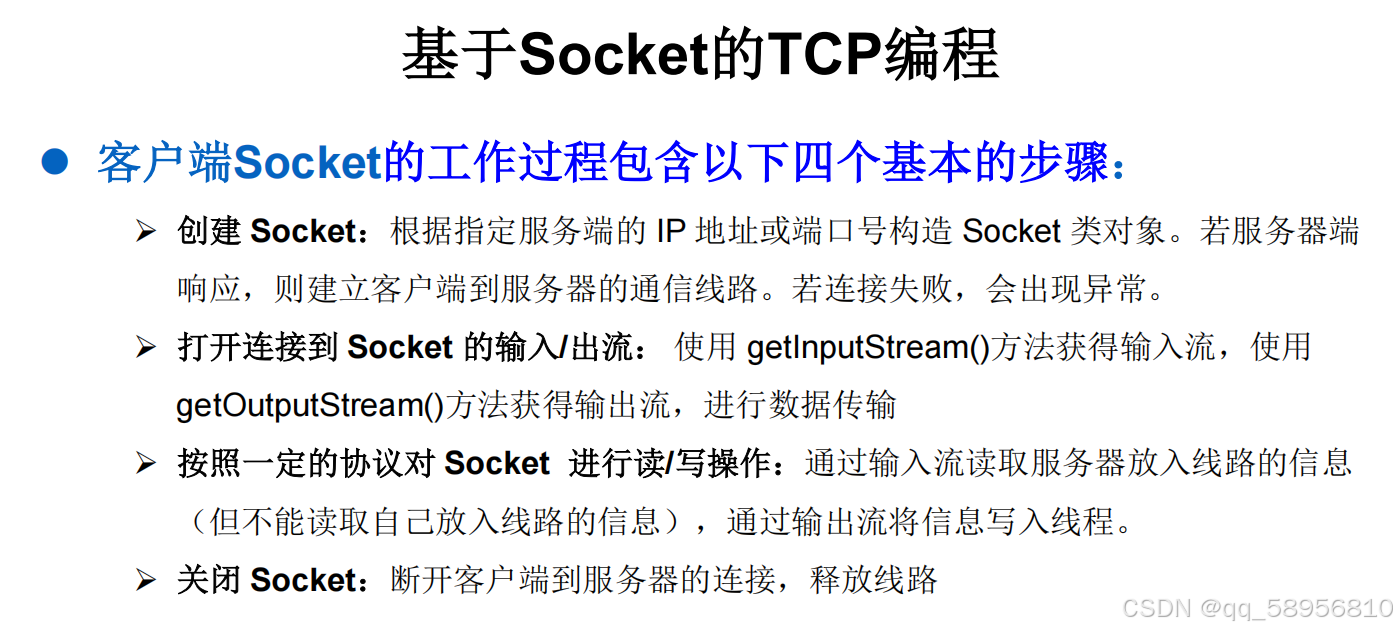
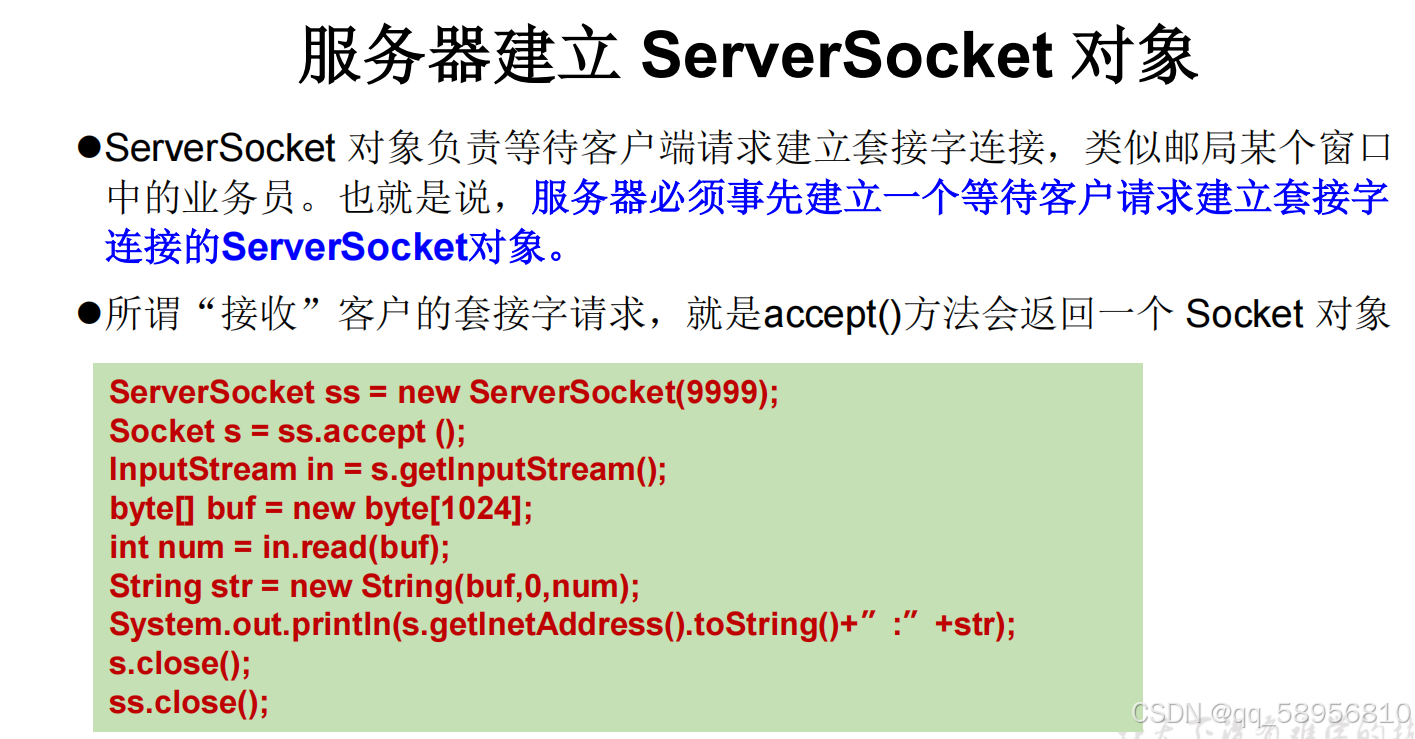
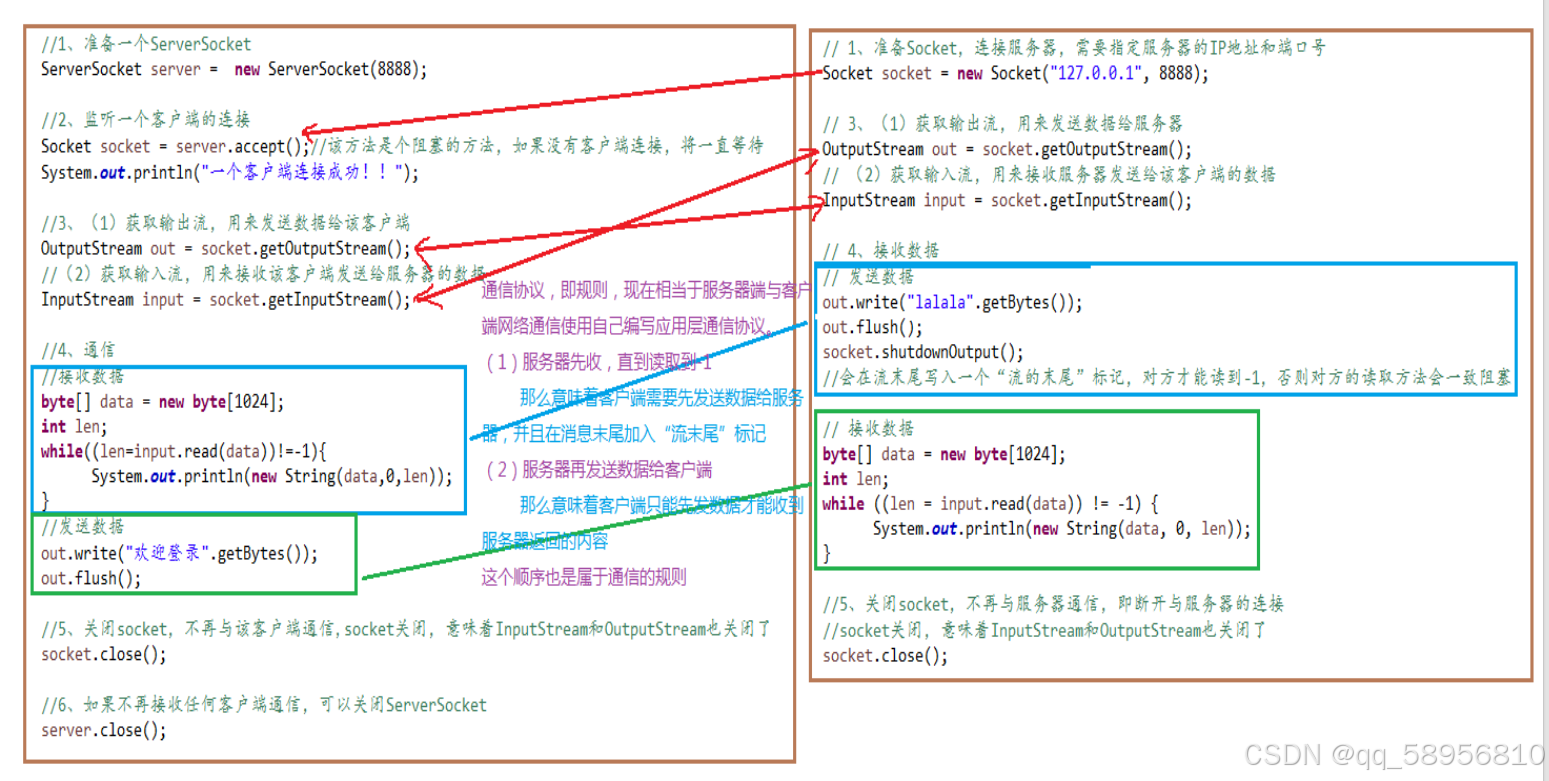
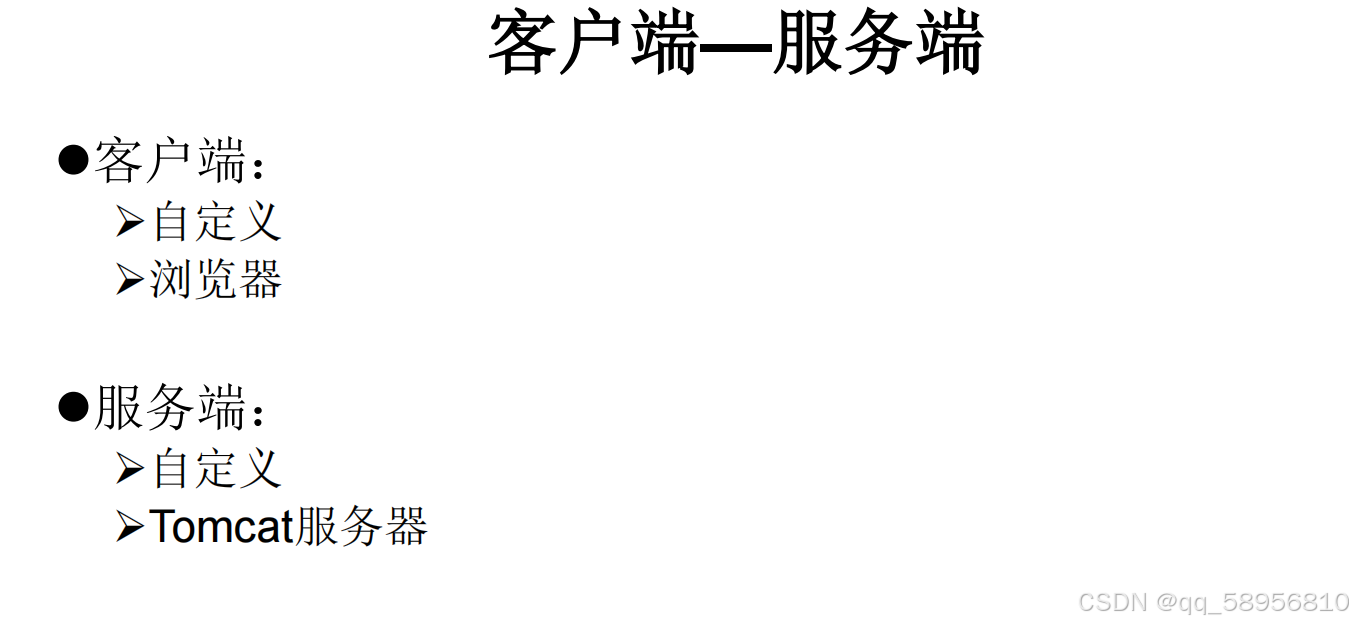
客户端—服务端
代码:
/*** ClassName: TCPTest1* Package: com.atguigu02.tcpudp* Description:* 例题1:客户端发送内容给服务器,服务器将内容打印到控制台上* @Author: lwfstart* @Create 2025-04-08 13:42* @Version: 1.0*/
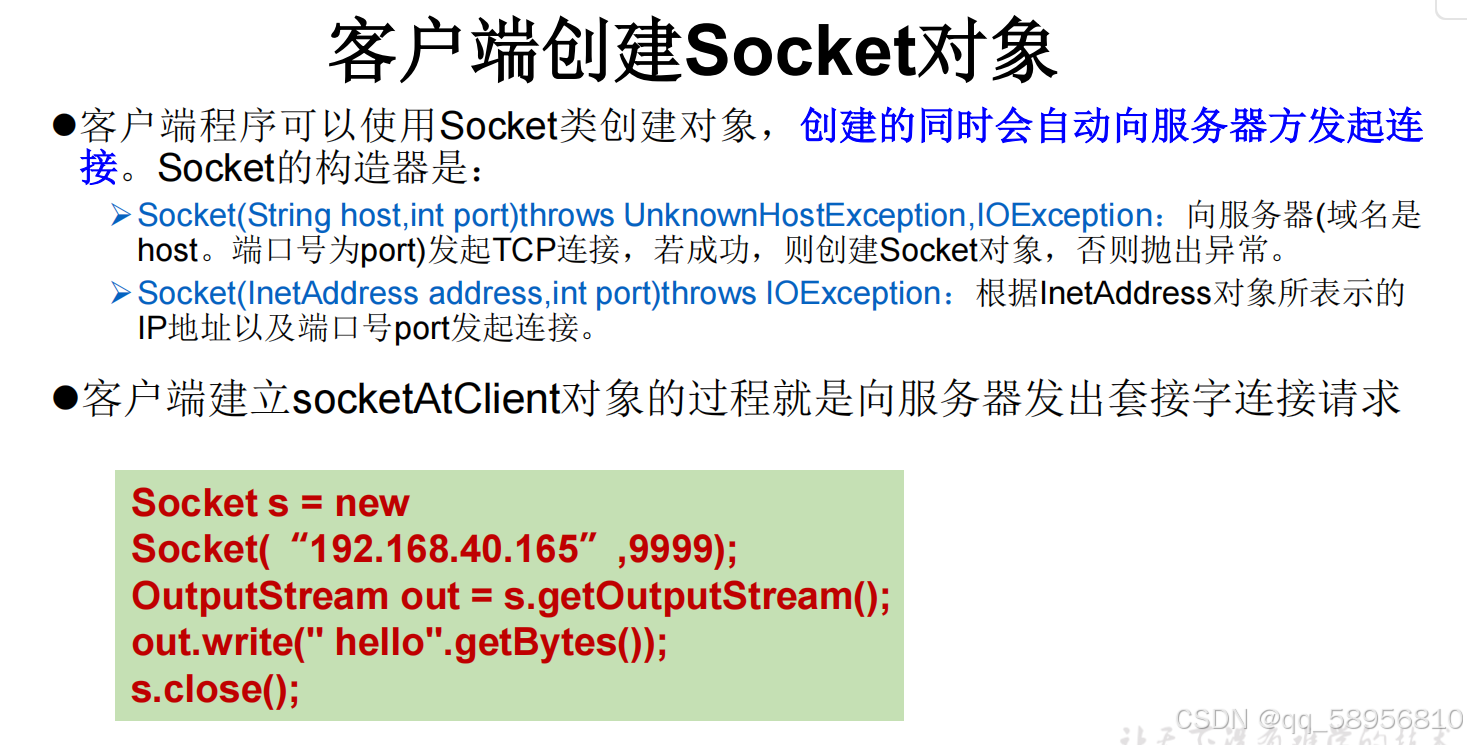
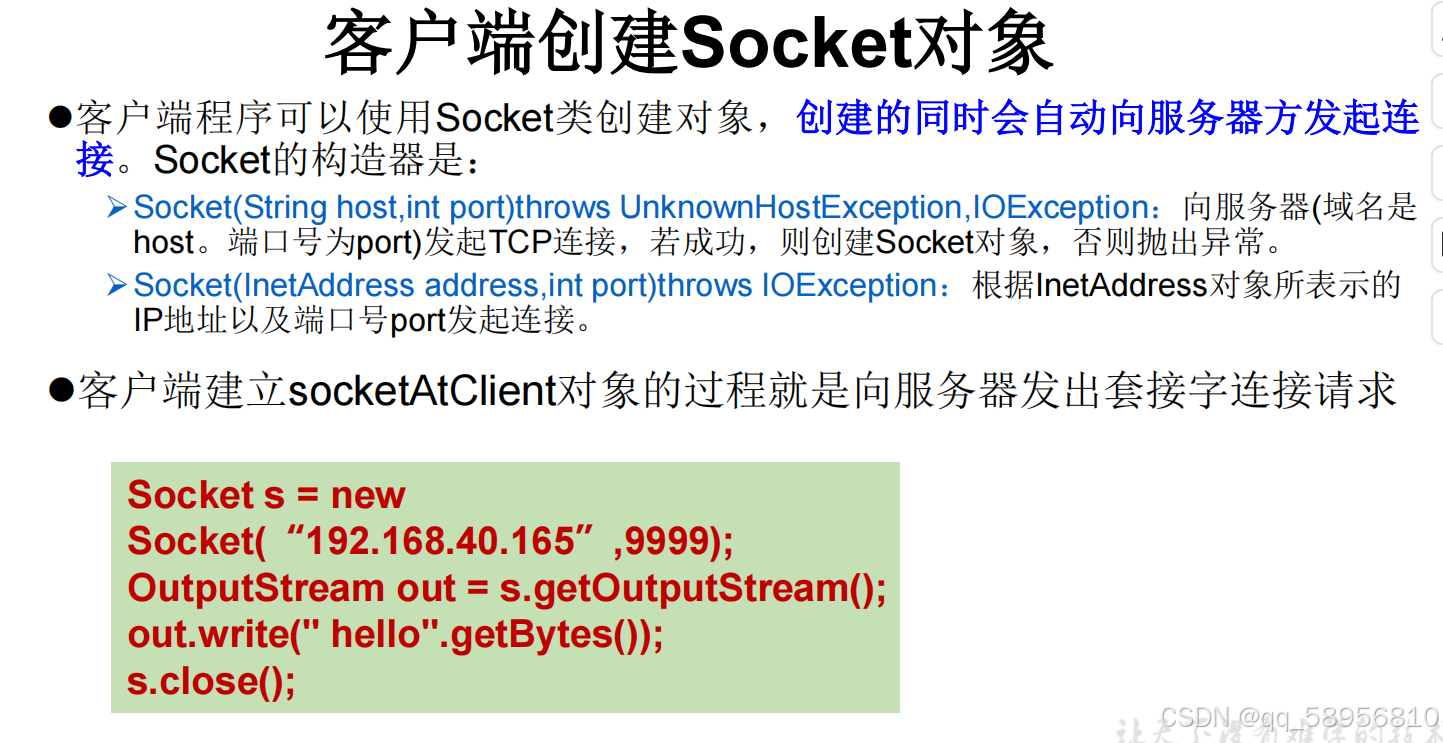
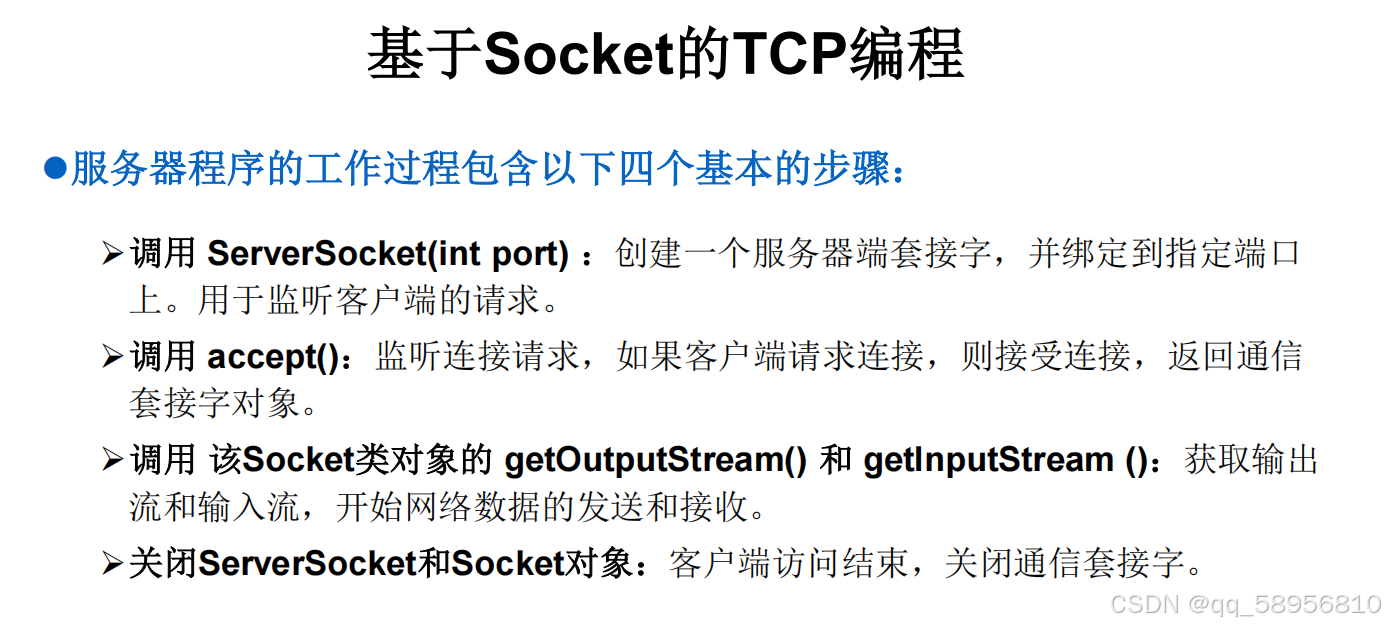
public class TCPTest1 {//客户端@Testpublic void client(){Socket socket = null;OutputStream os = null;try {//1.创建一个SocketInetAddress inetAddress = InetAddress.getByName("192.168.100.102"); //声明对方的ip地址int port = 8989; //声明对方的端口号socket = new Socket(inetAddress, port);//2.发送数据os = socket.getOutputStream();os.write("你好,我是客户端,请多多关照".getBytes());} catch (IOException e) {e.printStackTrace();} finally {//3.关闭socket,关闭流try {if (socket != null)socket.close();} catch (IOException e) {e.printStackTrace();}try {if (os != null)os.close();} catch (IOException e) {e.printStackTrace();}}}//服务端@Testpublic void server() {ServerSocket serverSocket = null;Socket socket = null; //阻塞式的方法InputStream is = null;try {//1.创建一个ServerSocketint port = 8989;serverSocket = new ServerSocket(port);//2.调用accept(),接收客户端的Socketsocket = serverSocket.accept(); //阻塞式的方法System.out.println("服务器端已开启");System.out.println("收到了来自于"+socket.getInetAddress().getHostAddress()+"的连接");//3.接收数据is = socket.getInputStream();byte[] buffer = new byte[5];int len;ByteArrayOutputStream baos = new ByteArrayOutputStream(); //内部维护了一个byte[]while((len = is.read(buffer)) != -1){//错误的,可能会出现乱码
// String str = new String(buffer,0,len);
// System.out.print(str);//正确的baos.write(buffer,0,len);}System.out.println(baos.toString());System.out.println("\n数据接收完毕");} catch (IOException e) {e.printStackTrace();} finally {//4.关闭Socket,ServerSocket,流try {if (socket != null) {socket.close();}} catch (IOException e) {e.printStackTrace();}try {if (serverSocket != null) {serverSocket.close();}} catch (IOException e) {e.printStackTrace();}try {if (is != null) {is.close();}} catch (IOException e) {e.printStackTrace();}}}
}/*** ClassName: TCPTest2* Package: com.atguigu02.tcpudp* Description:* 例题2:客户端发送文件给服务端,服务端将文件保存在本地。* @Author: lwfstart* @Create 2025-04-08 14:59* @Version: 1.0*/
public class TCPTest2 {/*** 注意:因为涉及到相关资源的关闭,需要使用try-catch-finally处理异常*///客户端@Testpublic void client() throws IOException {//1.创建SocketInetAddress inetAddress = InetAddress.getByName("127.0.0.1");int port = 9090;Socket socket = new Socket(inetAddress,port);//2.创建File的实例,FileInputStream的实例File file = new File("pic.jpg");FileInputStream fis = new FileInputStream(file);//3.通过Socket,获取输出流OutputStream os = socket.getOutputStream();//4.读写数据byte[] buffer = new byte[1024];int len;while((len = fis.read(buffer)) != -1){os.write(buffer,0,len);}System.out.println("数据发送完毕");//5.关闭Socket和相关的流os.close();fis.close();socket.close();}//服务端@Testpublic void server() throws IOException {//1.创建ServerSocketint port = 9090;ServerSocket serverSocket = new ServerSocket(port);//2.接收来自于客户端的socket:accept()Socket socket = serverSocket.accept();//3.通过Socket获取一个输入流InputStream is = socket.getInputStream();//4.创建File类的实例,FileOutputStream的实例File file = new File("pic_copy.jpg");FileOutputStream fos = new FileOutputStream(file);//5.读写过程byte[] buffer = new byte[1024];int len;while((len = is.read(buffer)) != -1){fos.write(buffer,0,len);}System.out.println("数据接收完毕");//6.关闭相关的Socket和流fos.close();is.close();socket.close();serverSocket.close();}
}
/*** ClassName: TCPTest3* Package: com.atguigu02.tcpudp* Description:* 例题3:从客户端发送文件给服务端,服务端保存到本地。并返回“发送成功"给客户端。并关闭相应的连接。* @Author: lwfstart* @Create 2025-04-08 15:29* @Version: 1.0*/
public class TCPTest3 {//客户端@Testpublic void client() throws IOException {//1.创建SocketInetAddress inetAddress = InetAddress.getByName("127.0.0.1");int port = 9090;Socket socket = new Socket(inetAddress,port);//2.创建File的实例,FileInputStream的实例File file = new File("pic.jpg");FileInputStream fis = new FileInputStream(file);//3.通过Socket,获取输出流OutputStream os = socket.getOutputStream();//4.读写数据byte[] buffer = new byte[1024];int len;while((len = fis.read(buffer)) != -1){os.write(buffer,0,len);}System.out.println("数据发送完毕");//客户端表明不在继续发送数据socket.shutdownOutput();//5.接收来自于服务端的数据InputStream is = socket.getInputStream();ByteArrayOutputStream baos = new ByteArrayOutputStream();byte[] buffer1 = new byte[5];int len1;while((len1 = is.read(buffer1)) != -1){
//            String str = new String(buffer1,0,len1);
//            System.out.println(str);baos.write(buffer1,0,len1);}System.out.println(baos.toString());//6.关闭Socket和相关的流baos.close();is.close();os.close();fis.close();socket.close();}//服务端@Testpublic void server() throws IOException {//1.创建ServerSocketint port = 9090;ServerSocket serverSocket =  new ServerSocket(port);//2.接收来自于客户端的socket:accept()Socket socket = serverSocket.accept();//3.通过Socket获取一个输入流InputStream is = socket.getInputStream();//4.创建File类的实例,FileOutputStream的实例File file = new File("pic_copy2.jpg");FileOutputStream fos = new FileOutputStream(file);//5.读写过程byte[] buffer = new byte[1024];int len;while((len = is.read(buffer)) != -1){fos.write(buffer,0,len);}System.out.println("数据接收完毕");//6.服务端发送数据给客户端OutputStream os = socket.getOutputStream();os.write("你的图片很漂亮,我接收到了".getBytes());//7.关闭相关的Socket和流os.close();fos.close();is.close();socket.close();serverSocket.close();}
}
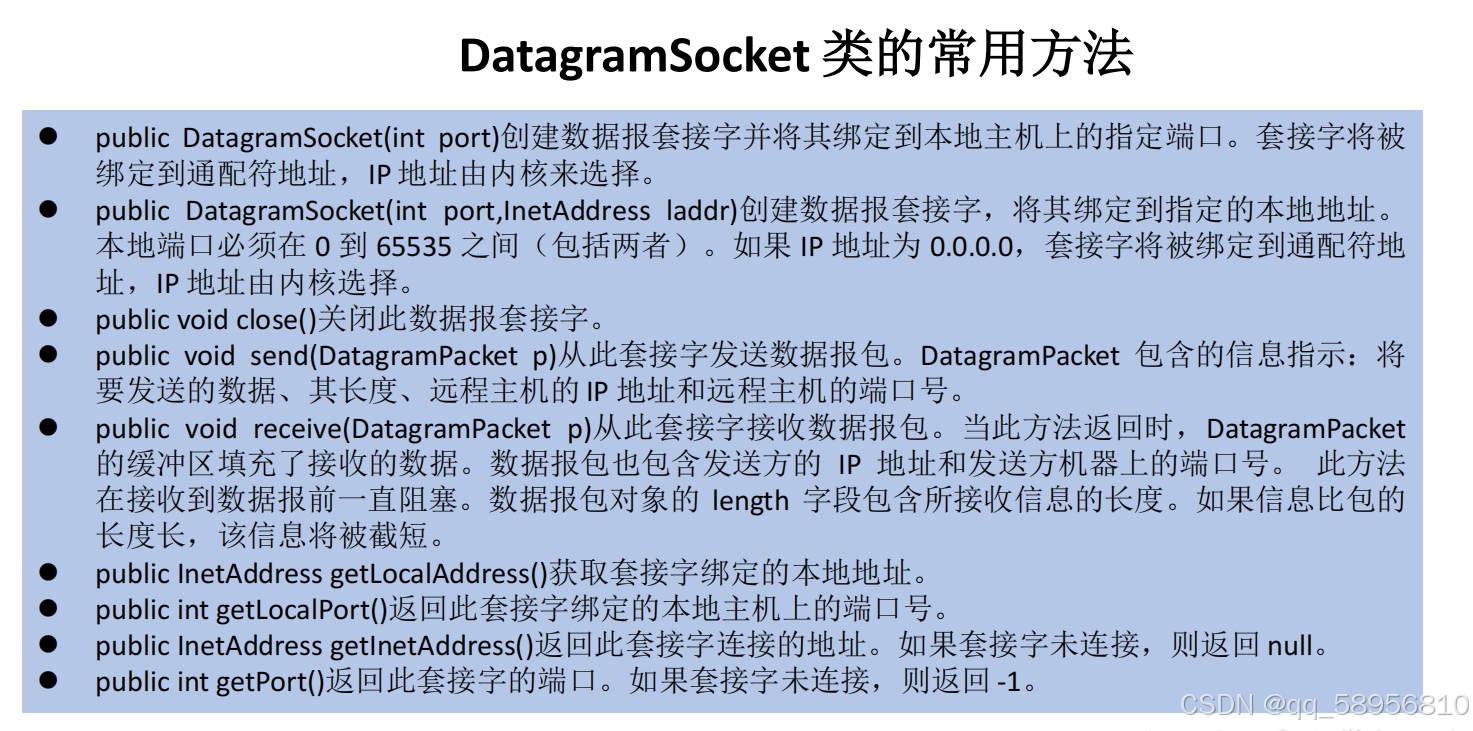
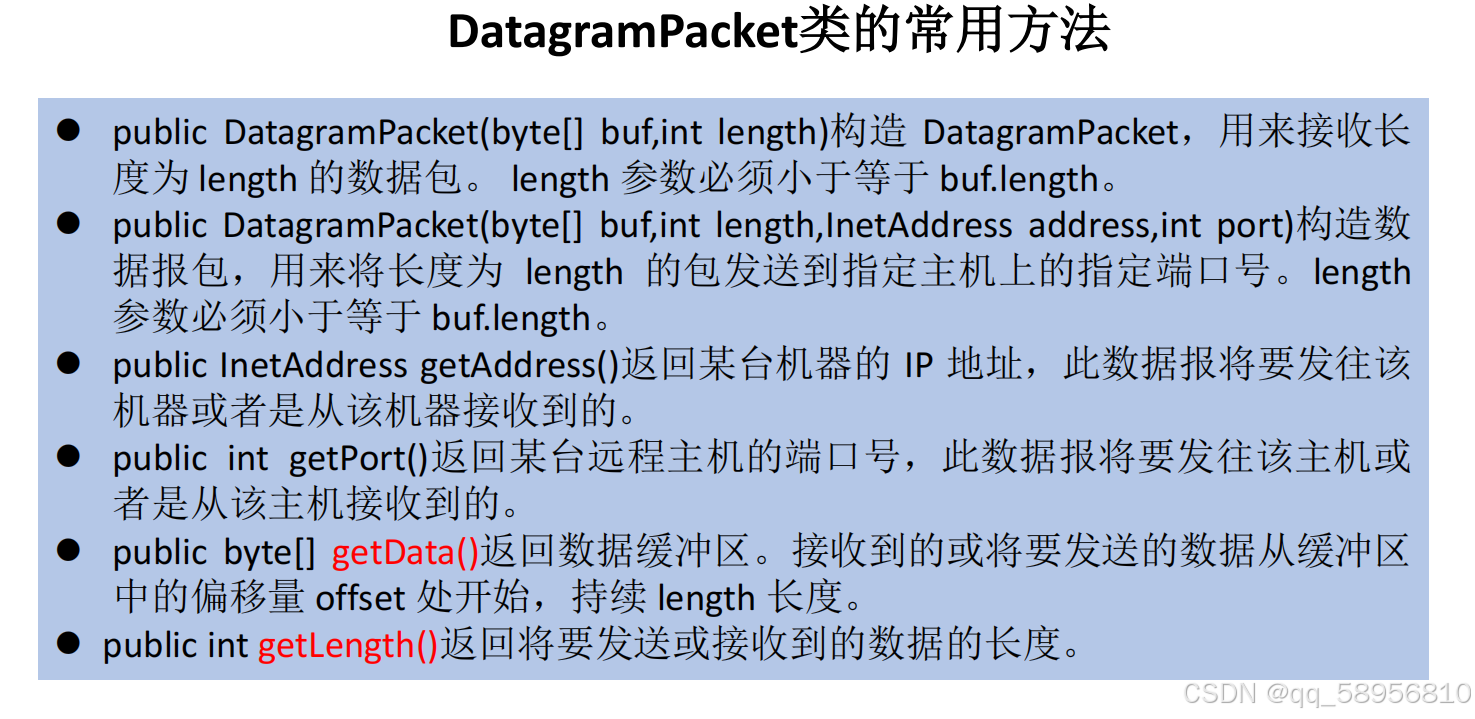
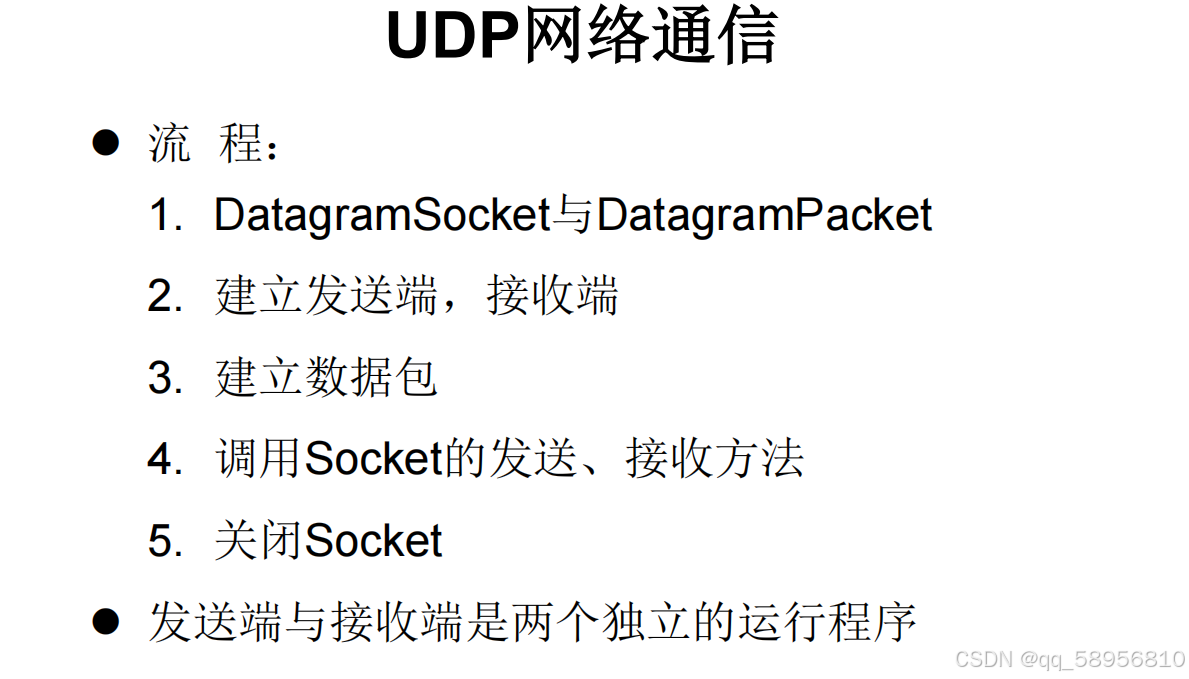
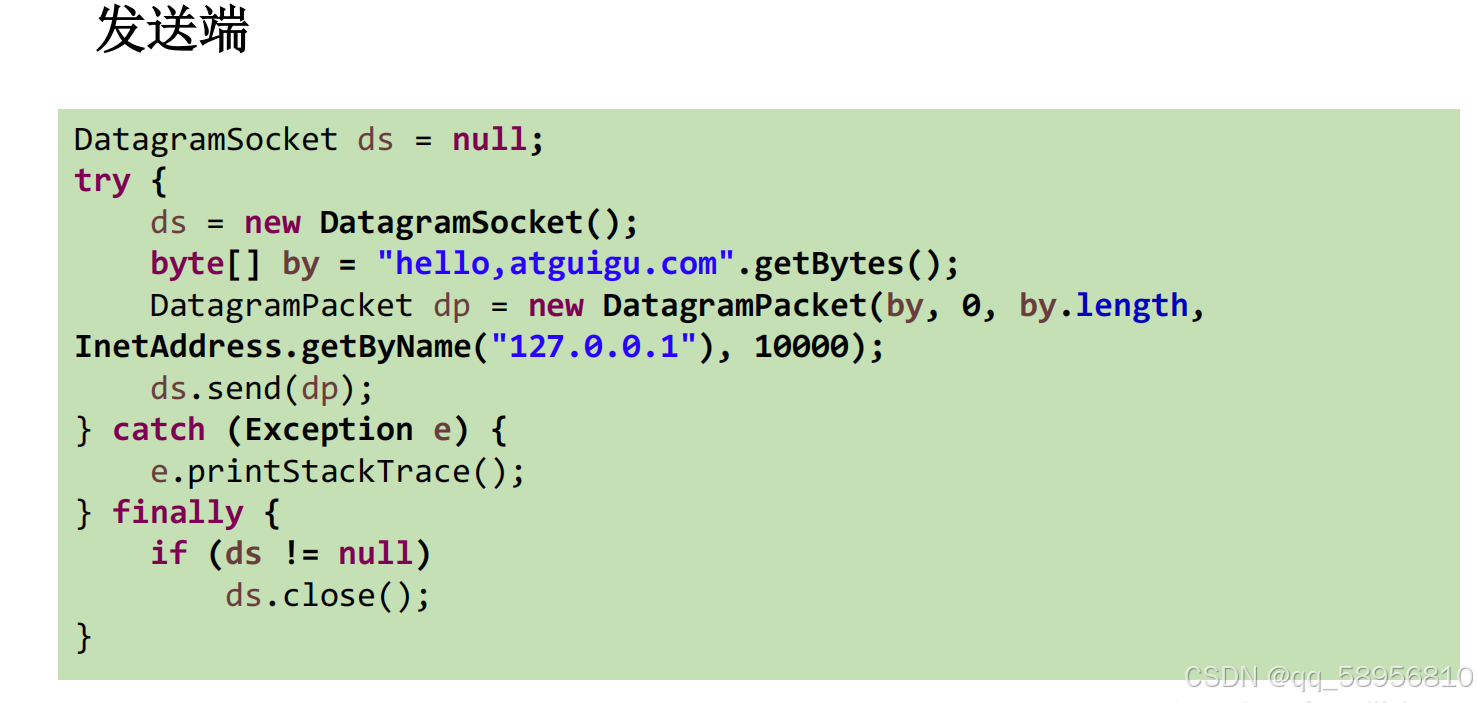
UDP网络编程
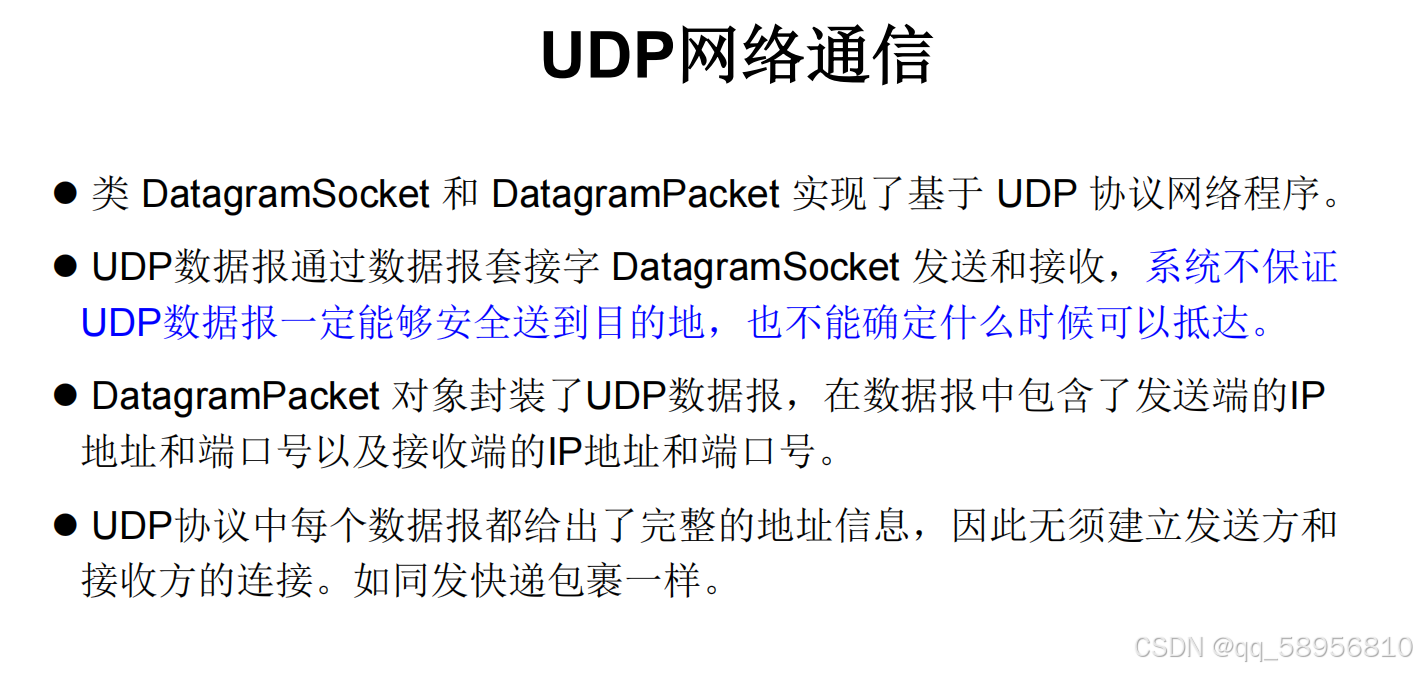
代码:
public class UDPTest {//发送端@Testpublic void sender() throws IOException {//1.创建DatagramSocket的实例DatagramSocket ds = new DatagramSocket();//2.将数据,目的地的ip,目的地的端口号都封装在DatagramSocket数据报中InetAddress inetAddress = InetAddress.getByName("127.0.0.1");int port = 9090;byte[] bytes =  "我是发送端".getBytes("utf-8");DatagramPacket packet = new DatagramPacket(bytes, 0, bytes.length, inetAddress, port);//发送数据ds.send(packet);ds.close();}//接收端@Testpublic void receiver() throws IOException {//创建DatagramSocket的实例int port = 9090;DatagramSocket ds = new DatagramSocket(port);//2.创建数据报的对象,用于接收发送端发送过来的数据byte[] buffer = new byte[1024*64];DatagramPacket packet = new DatagramPacket(buffer, 0, buffer.length);//3.接收数据ds.receive(packet);//4.获取数据,并打印到控制台上String str = new String(packet.getData(), 0, packet.getLength());System.out.println(str);ds.close();}
}URL网络编程
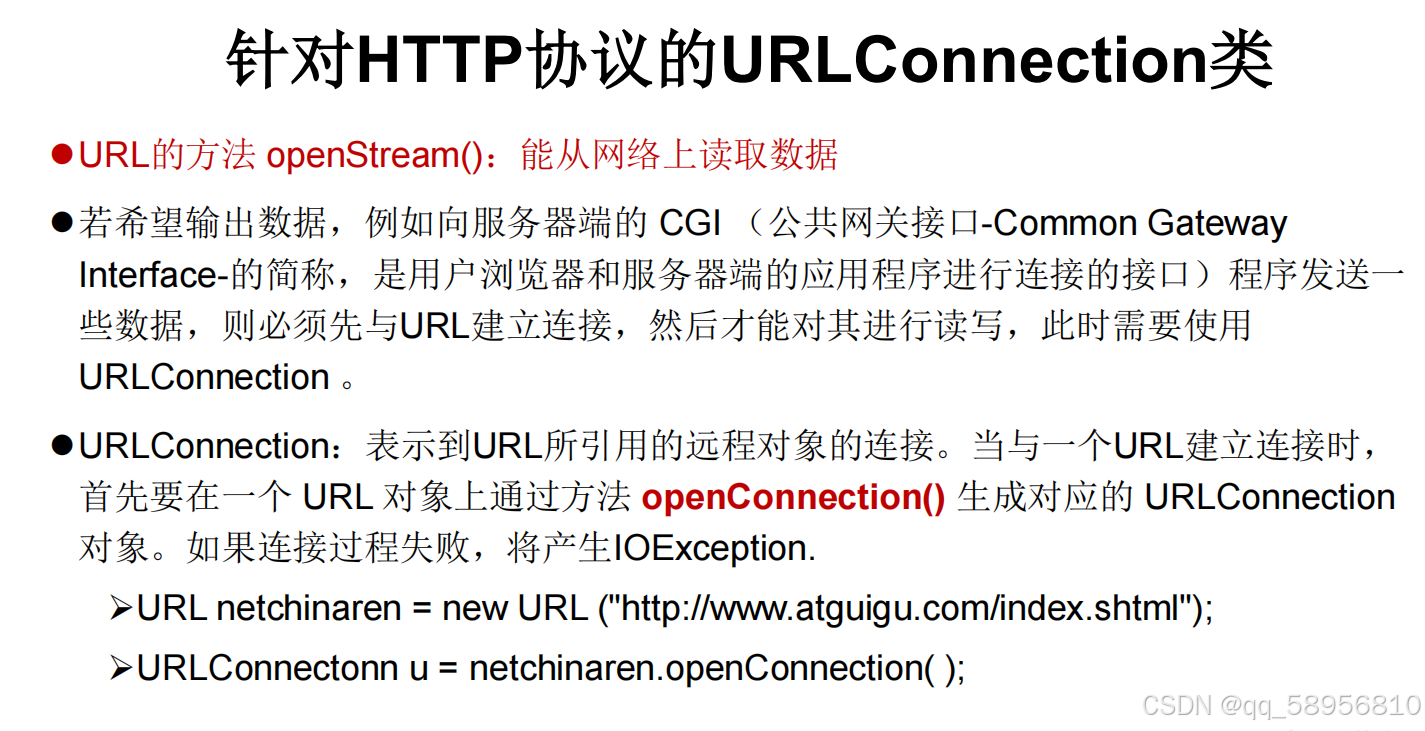
URLConnection类

总结:
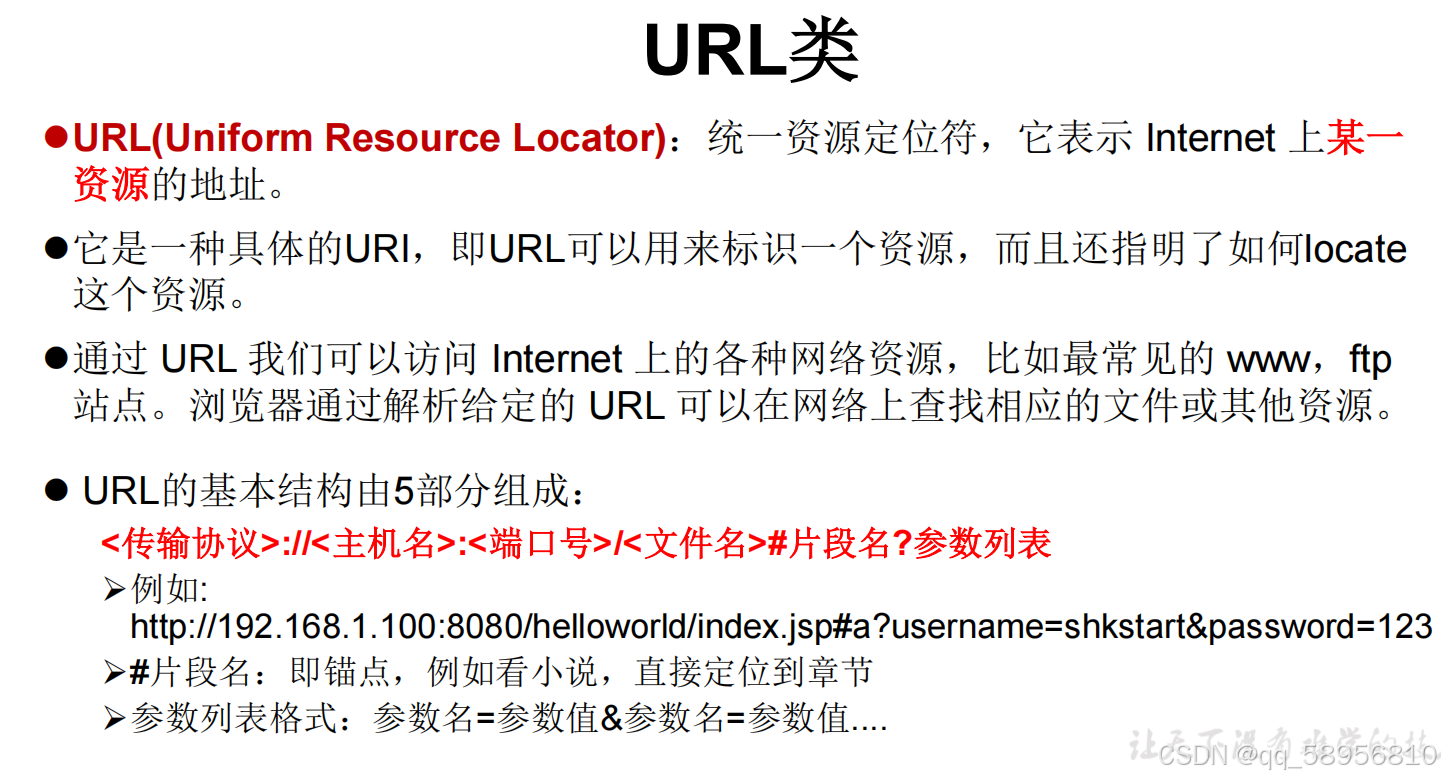
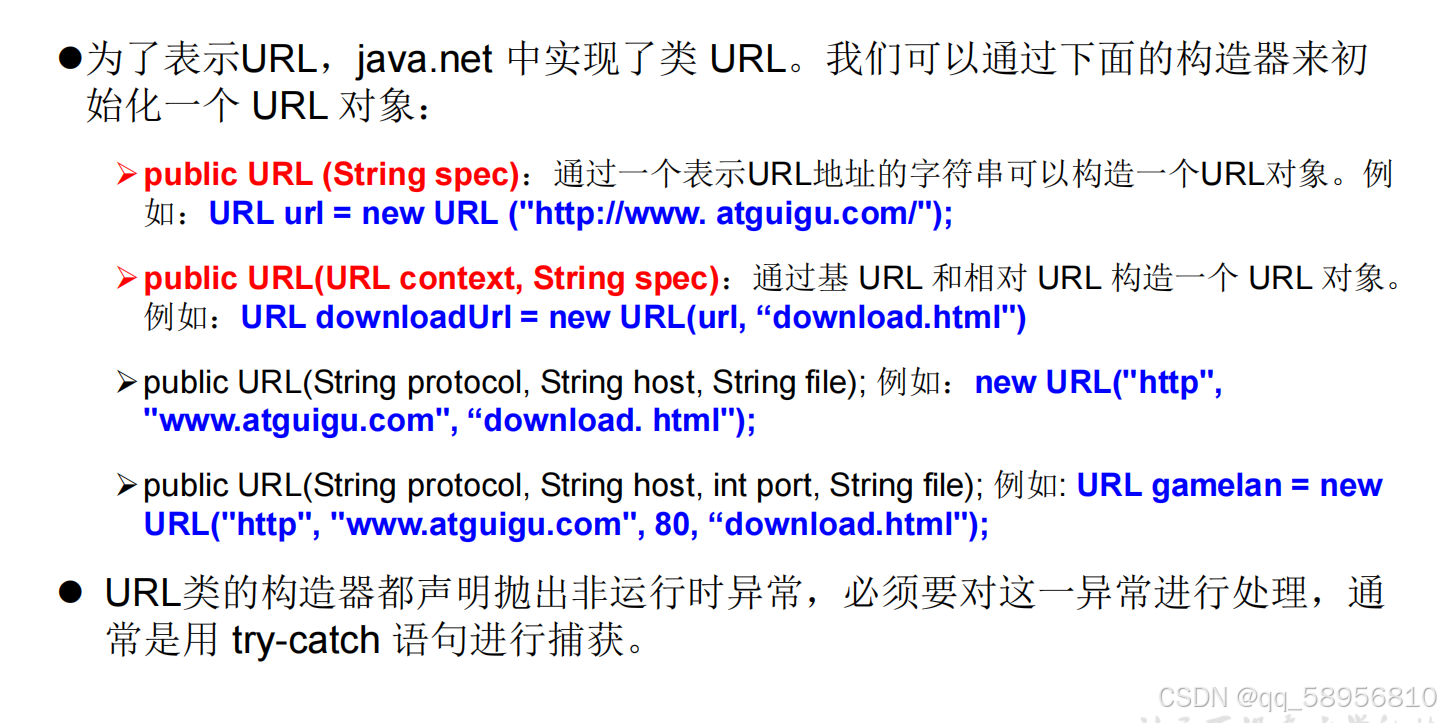
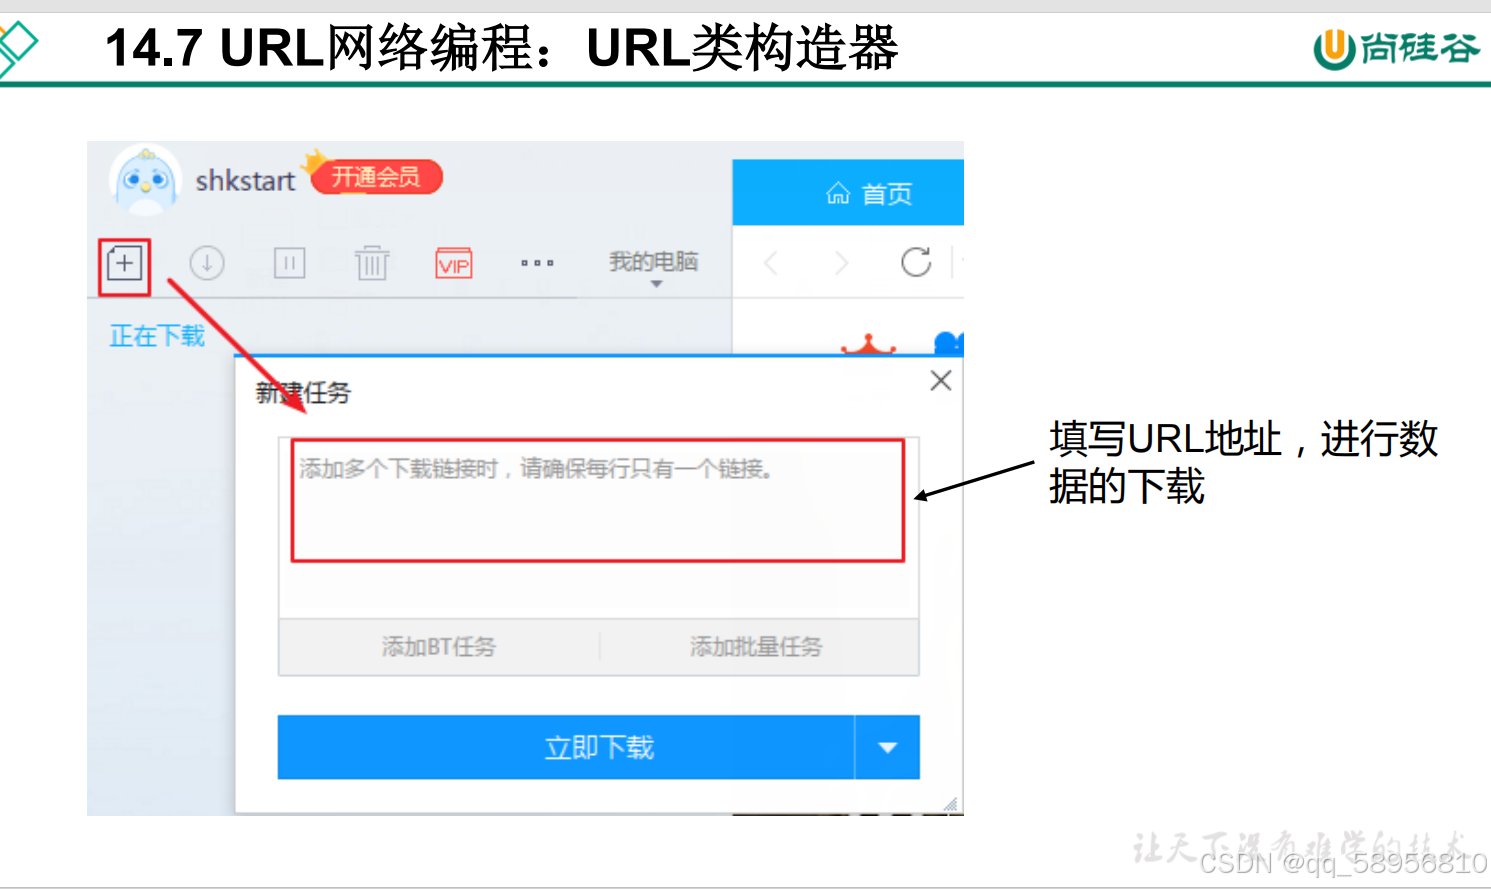
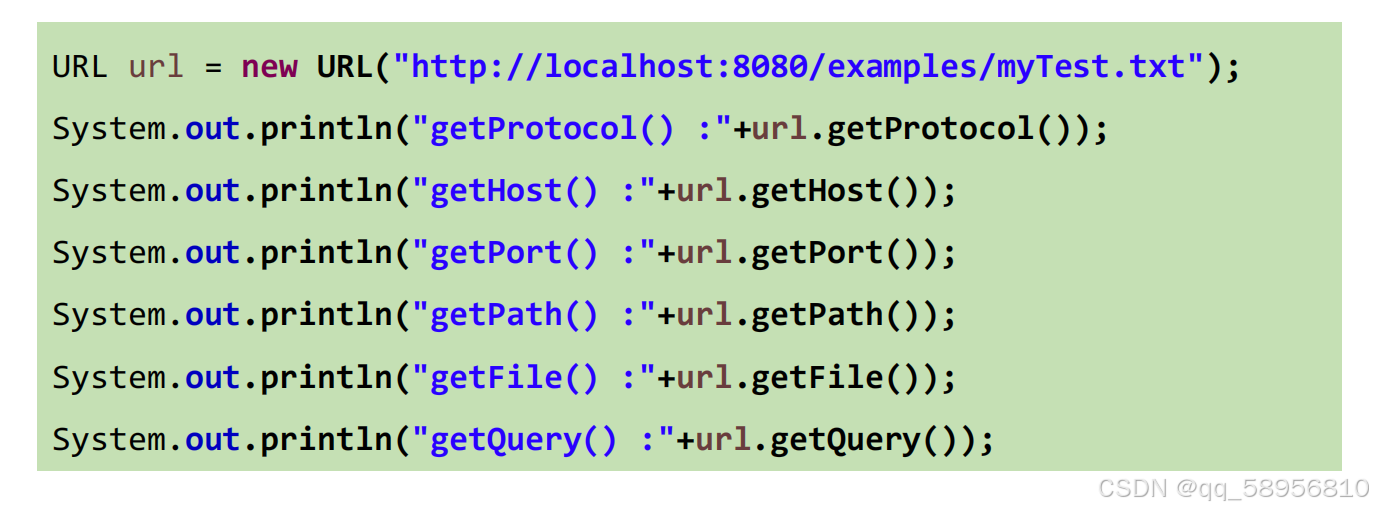
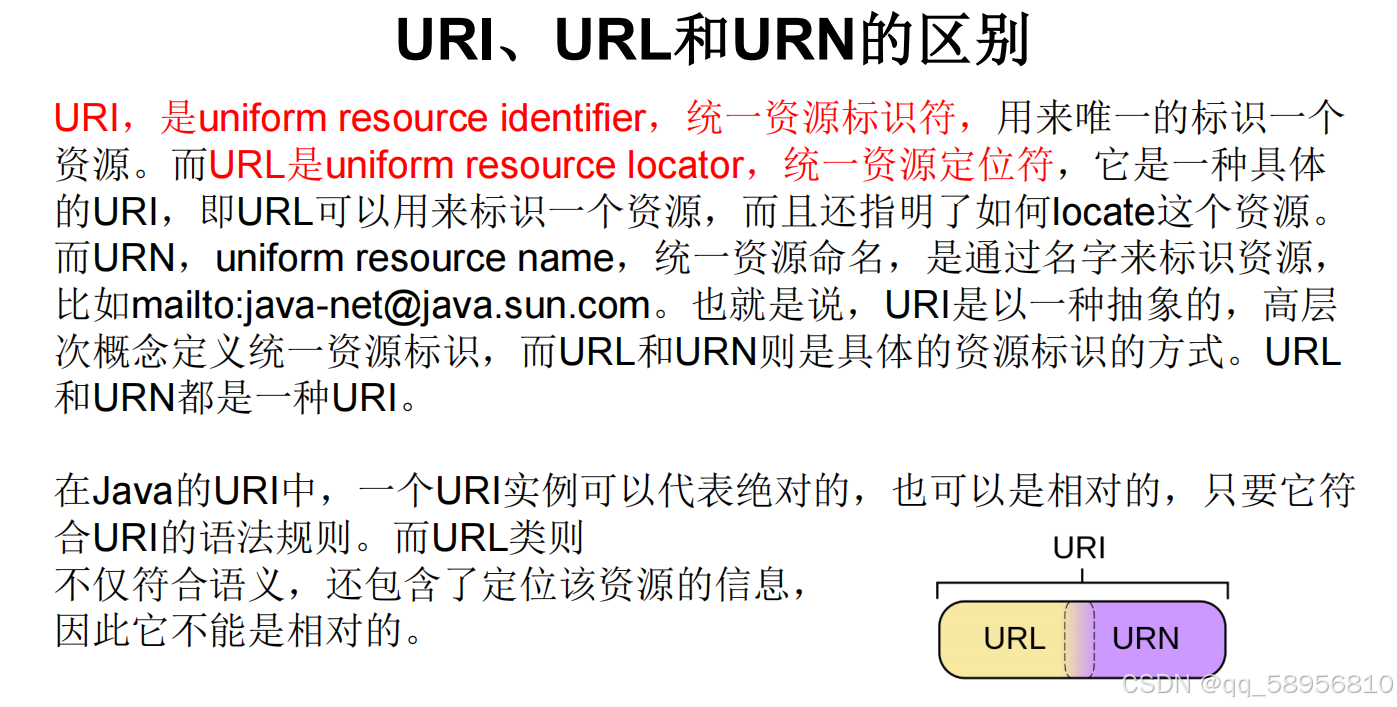
URL(Uniform Resource Locator):统一资源定位符(种子)
1.作用:
一个具体的url就对应着互联网上某一资源的地址。
2.URL的格式:
http://192.168.21.107:8080/examples/abcd.jpg?name=Tom  ---> "万事万物皆对象"
应用层协议 ip地址      端口号 资源地址    参数列表
3.URL类的实例化及常用方法
见代码
4.下载指定的URL的资源到本地(了解)
使用tomact访问资源
代码:
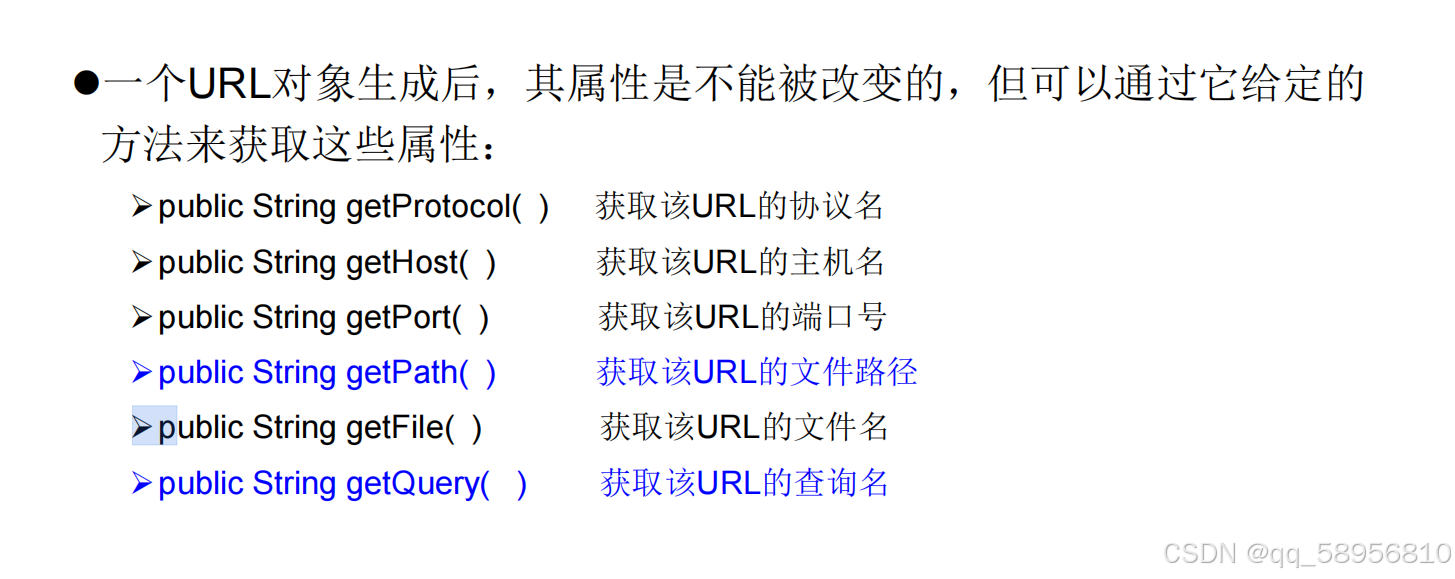
public class URLTest {public static void main(String[] args) {String str = "http://192.168.21.107:8080/examples/abcd.jpg?name=Tom";try {URL url = new URL(str);/*** public String getProtocol( ) 获取该URL的协议名* public String getHost( ) 获取该URL的主机名* public String getPort( ) 获取该URL的端口号* public String getPath( ) 获取该URL的文件路径* public String getFile( ) 获取该URL的文件名* public String getQuery( ) 获取该URL的查询名*/System.out.println(url.getProtocol());System.out.println(url.getHost());System.out.println(url.getPort());System.out.println(url.getPath());System.out.println(url.getFile());System.out.println(url.getQuery());} catch (MalformedURLException e) {e.printStackTrace();}}
}public class URLTest1 {/*** 需求:将url代表的资源下载到本地*/@Testpublic void test1() throws IOException {HttpURLConnection urlConnection = null;InputStream is = null;FileOutputStream fos = null;try {//1.获取url的实例URL url = new URL("http://127.0.0.1:8080/examples/abcd.jpg");//建立与服务端的连接urlConnection = (HttpURLConnection) url.openConnection();//3.获取输入流,创建输出流is = urlConnection.getInputStream();File file = new File("dest.jpg");fos = new FileOutputStream(file);//4.读写数据byte[] buffer = new byte[1024];int len;while((len = is.read(buffer))!=-1){fos.write(buffer,0,len);}System.out.println("文件下载完成");} catch (IOException e) {e.printStackTrace();} finally {//关闭资源try {if (fos != null) {fos.close();}} catch (IOException e) {e.printStackTrace();}try {if (is != null) {is.close();}} catch (IOException e) {e.printStackTrace();}try {if (urlConnection != null) {urlConnection.disconnect();}} catch (Exception e) {e.printStackTrace();}}}
}