中国免费网站服务器主机域名做名片用哪个网站
在前端开发中,地图交互常常需要根据不同的图形元素展示不同的鼠标样式(cursor),以提升用户体验。
今天我给大家分享一个基于 Vue3 + OpenLayers + ol-ext 的小案例:通过 Hover 交互实现对点、线、面、圆等要素的悬停效果,并切换鼠标指针样式。
一、前置知识
OpenLayers:强大的 WebGIS 库,用于构建二维地图应用。
ol-ext:OpenLayers 的扩展库,提供了 Hover、Popup、LayerSwitcher 等增强功能。
Hover 交互:ol-ext 提供的交互类,可以在鼠标移入/移出要素时触发事件,我们就可以用它来改变
cursor样式。
二、效果预览
实现效果大概如下:
鼠标移到 点要素 → 光标变为十字
crosshair鼠标移到 线要素 → 光标变为
copy鼠标移到 面要素 → 光标变为
help鼠标移到 圆要素 → 光标变为
ne-resize默认状态 → 光标为
pointer
同时,还会通过 Element Plus 的消息提示,在左下角弹出当前要素的类型。
三、代码实现
下面给出完整的 Vue3 + Composition API 写法。
<!--* @Author: 彭麒* @Date: 2025/9/17* @Email: 1062470959@qq.com* @Description: 此源码版权归吉檀迦俐所有,可供学习和借鉴或商用。-->
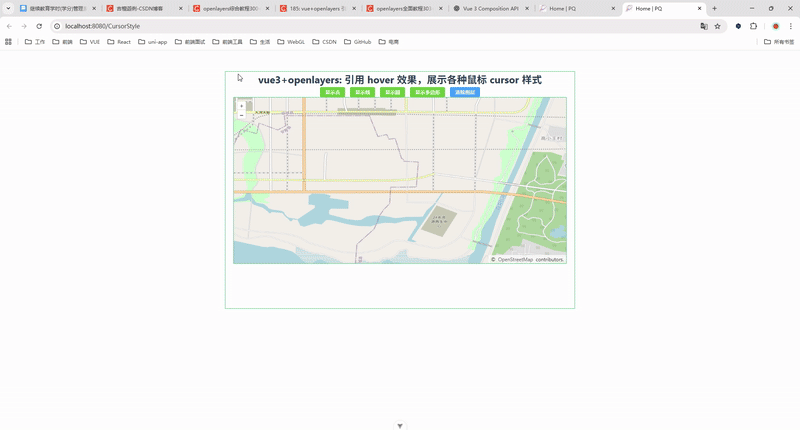
<template><div class="container"><div class="w-full flex justify-center flex-wrap"><div class="font-bold text-[24px]">vue3+openlayers: 引用 hover 效果,展示各种鼠标 cursor 样式</div></div><h4><el-button type="success" size="small" @click="showPoint">显示点</el-button><el-button type="success" size="small" @click="showLine">显示线</el-button><el-button type="success" size="small" @click="showCircle">显示圆</el-button><el-button type="success" size="small" @click="showPolygon">显示多边形</el-button><el-button type="primary" size="small" @click="clearLayer">清除图层</el-button></h4><div id="vue-openlayers"></div></div>
</template><script setup>
import { ref, onMounted } from "vue";
import "ol/ol.css";
import "ol-ext/dist/ol-ext.min.css";
import { Map, View } from "ol";
import TileLayer from "ol/layer/Tile";
import VectorLayer from "ol/layer/Vector";
import VectorSource from "ol/source/Vector";
import OSM from "ol/source/OSM";
import Feature from "ol/Feature";
import { Point, LineString, Circle, Polygon } from "ol/geom";
import Style from "ol/style/Style";
import Fill from "ol/style/Fill";
import Stroke from "ol/style/Stroke";
import CircleStyle from "ol/style/Circle";
import Hover from "ol-ext/interaction/Hover";
import { ElMessage } from "element-plus";// ref 管理状态
const map = ref(null);
const dataSource = new VectorSource({ wrapX: false });// 数据
const pointData = ref([116, 39]);
const lineData = ref([[116, 39],[116.005, 39],[116.005, 39.015],
]);
const polygonData = ref([[[116.015, 39.005],[116.016, 39.018],[116.028, 39.008],[116.015, 39.005],],
]);
const circleData = ref({ circleCenter: [115.992, 39], circleRadius: 0.005 });// 样式
const featureStyle = () =>new Style({fill: new Fill({color: "darkBlue",}),stroke: new Stroke({width: 2,color: "orange",}),image: new CircleStyle({radius: 10,fill: new Fill({color: "#ff0000",}),}),});// 方法
const clearLayer = () => {dataSource.clear();
};const showPoint = () => {const pointFeature = new Feature({geometry: new Point(pointData.value),});dataSource.addFeature(pointFeature);
};const showLine = () => {const lineFeature = new Feature({geometry: new LineString(lineData.value),});dataSource.addFeature(lineFeature);
};const showCircle = () => {const circleFeature = new Feature({geometry: new Circle(circleData.value.circleCenter,circleData.value.circleRadius),});dataSource.addFeature(circleFeature);
};const showPolygon = () => {const polygonFeature = new Feature({geometry: new Polygon(polygonData.value),});dataSource.addFeature(polygonFeature);
};// 初始化地图
const initMap = () => {const OSM_Layer = new TileLayer({source: new OSM(),});const feature_Layer = new VectorLayer({source: dataSource,style: featureStyle(),});map.value = new Map({target: "vue-openlayers",layers: [OSM_Layer, feature_Layer],view: new View({projection: "EPSG:4326",center: [116, 39],zoom: 14,}),});const hover = new Hover({ cursor: "pointer" });map.value.addInteraction(hover);hover.on("enter", (e) => {switch (e.feature.getGeometry().getType()) {case "LineString":hover.setCursor("copy");break;case "Polygon":hover.setCursor("help");break;case "Point":hover.setCursor("crosshair");break;case "Circle":hover.setCursor("ne-resize");break;default:hover.setCursor("pointer");break;}ElMessage({message: e.feature.getGeometry().getType(),type: "success",duration: 1000,});});
};// 生命周期
onMounted(() => {initMap();
});
</script><style scoped>
.container {width: 840px;height: 570px;margin: 50px auto;border: 1px solid #42B983;
}
#vue-openlayers {width: 800px;height: 400px;margin: 0 auto;border: 1px solid #42B983;position: relative;
}
</style>
四、关键点解析
ol-ext Hover 的使用
import Hover from "ol-ext/interaction/Hover";
const hover = new Hover({ cursor: "pointer" });
map.value.addInteraction(hover);
Hover 会监听要素的 enter/leave 事件,我们只需要在
enter中根据 geometry 类型修改 cursor。cursor 样式控制
利用一个映射表,让不同几何类型对应不同的鼠标样式:const cursorMap = {LineString: "copy",Polygon: "help",Point: "crosshair",Circle: "ne-resize", };Element Plus 消息提示
每次悬停时,都会弹出消息,告诉用户当前悬停的要素类型。
五、总结
通过 Vue3 + OpenLayers + ol-ext Hover,我们实现了一个很直观的交互效果:
根据不同的几何要素,自动切换鼠标光标;
提升了地图应用的用户体验;
代码简单清晰,扩展性强。
👉 在实际项目中,你可以根据需求拓展更多 cursor 样式,甚至加上 高亮效果 或 要素信息弹窗,做成一个完整的地图交互系统。