用 Vue + DeepSeek 打造一个智能聊天网站(完整前后端项目开源)
🌟 一、项目简介
最近我利用业余时间开发了一个 AI 聊天网站,
前端使用 Vue 3 + Vite,后端使用 Express 构建 API 代理,
通过 DeepSeek 提供的接口实现了一个可以像 ChatGPT 一样流畅交流的网页端聊天系统。
项目目标很简单:
-
提供一个 前端可视化聊天界面
-
实现 安全调用 DeepSeek API(后端隐藏密钥)
-
支持 连续对话、上下文记忆、流式输出
-
让任何人都能在本地快速搭建自己的智能聊天网站!
🧩 二、项目结构
项目包含前后端两个部分:
ai-chat-vue/ # 前端 (Vite + Vue 3)
├─ index.html
├─ package.json
├─ vite.config.js
├─ src/
│ ├─ main.js
│ ├─ App.vue
│ ├─ api/
│ │ └─ ai.js
│ ├─ components/
│ │ └─ ChatBox.vue
│ └─ styles.css
└─ .gitignoreai-server/ # 后端 (Node + Express)
├─ server.js
├─ package.json
└─ .env
🖥️ 三、前端部分(Vue 3 + Vite)
前端采用 Vue 3 + Composition API 构建,
界面简洁、响应式良好,并支持滚动对话、输入区和加载动画。
主要功能组件
-
ChatBox.vue:显示消息记录、输入框和发送按钮
-
api.js:封装与后端交互的接口(调用
/api/chat) -
流式输出:利用
ReadableStream实现逐字输出效果
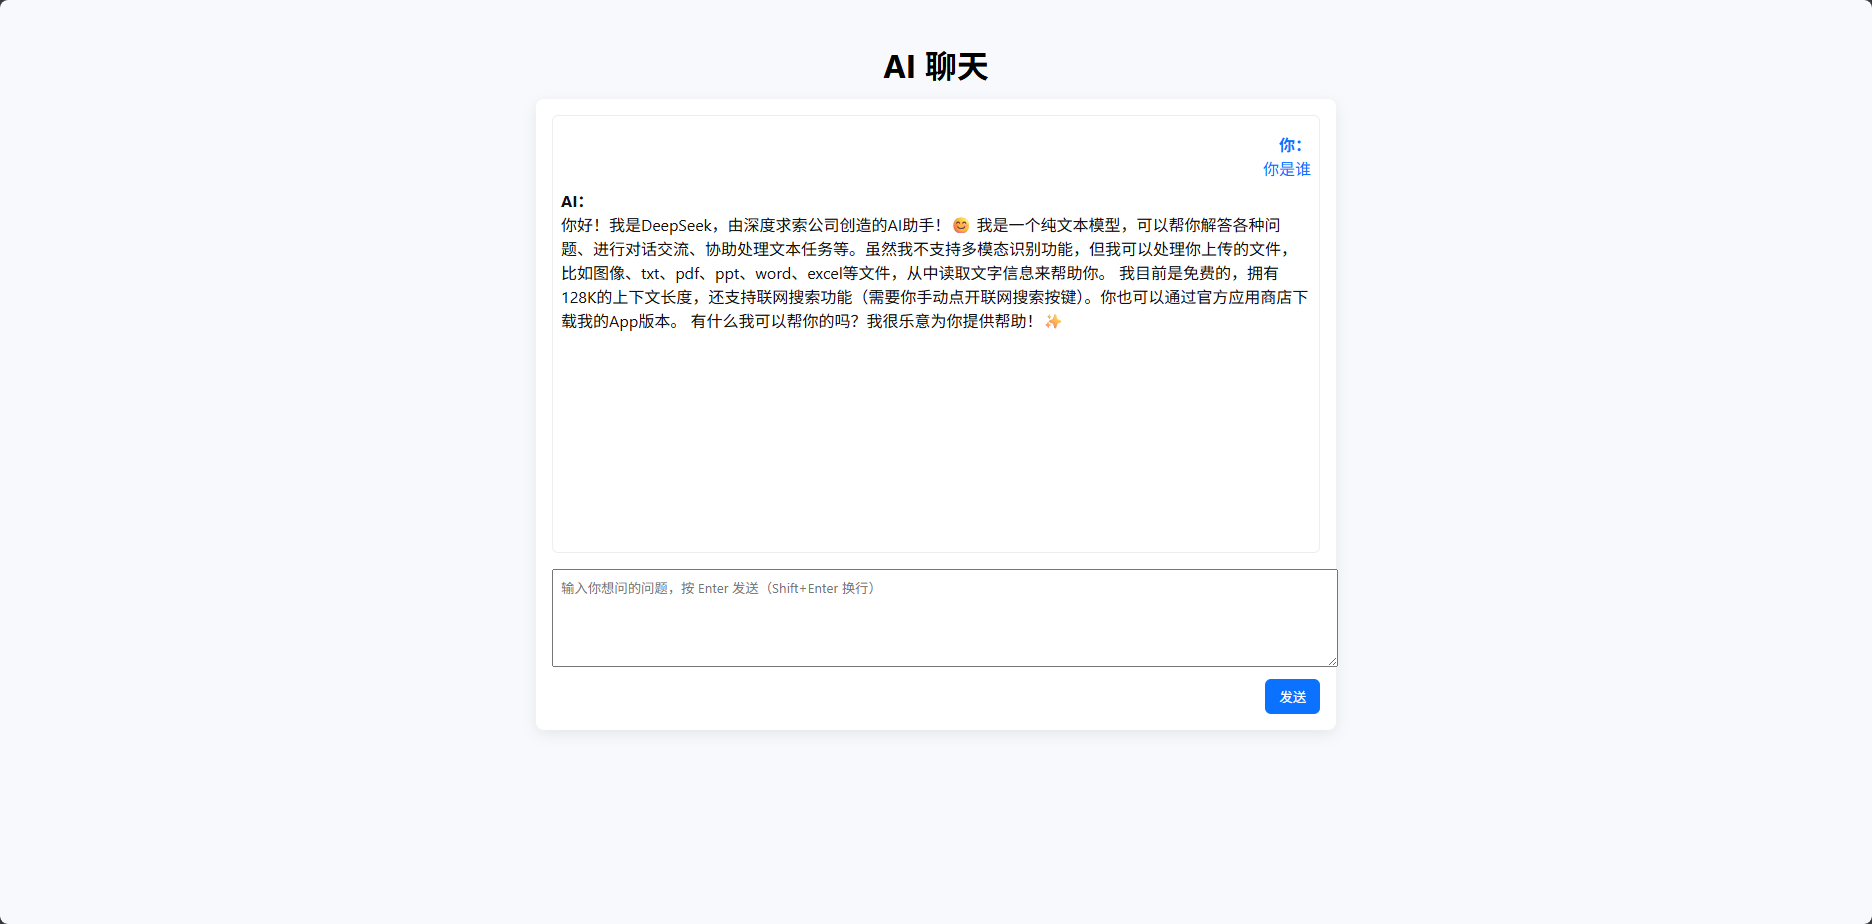
✨ 样例界面
-
左侧是聊天窗口
-
右下角输入框输入内容按回车即可发送
-
AI 响应实时滚动输出
src/api/ai.js
import axios from 'axios'
const API_BASE = import.meta.env.VITE_API_BASE || 'http://localhost:7666'
export async function getAIReply(question) {
const res = await axios.post(`${API_BASE}/api/chat`, { question })
if (res.data && res.data.reply) return res.data.reply
throw new Error('无效的后端响应')
}src/components/ChatBox.vue
<template>
<div>
<div class="messages" ref="msgBox">
<div v-for="(m, i) in messages" :key="i" class="message" :class="m.role === 'user' ? 'msg-user' : 'msg-ai'">
<div><strong>{{ m.role === 'user' ? '你' : 'AI' }}:</strong></div>
<div>{{ m.content }}</div>
</div>
</div><textarea v-model="input" @keydown.enter.prevent="sendIfEnter($event)" placeholder="输入你想问的问题,按 Enter 发送(Shift+Enter 换行)"></textarea>
<div style="display:flex;gap:8px;justify-content:flex-end;">
<button @click="send">发送</button>
</div>
</div>
</template><script setup>
import { ref, nextTick } from 'vue'
import { getAIReply } from '../api/ai'const input = ref('')
const messages = ref([])
const msgBox = ref(null)function scrollToBottom() {
nextTick(() => {
if (msgBox.value) {
msgBox.value.scrollTop = msgBox.value.scrollHeight
}
})
}function sendIfEnter(e) {
if (!e.shiftKey) send()
}async function send() {
const text = input.value.trim()
if (!text) return
messages.value.push({ role: 'user', content: text })
input.value = ''
scrollToBottom()// 显示一个占位的 AI 消息(可替换为流式)
messages.value.push({ role: 'ai', content: '正在生成回复...' })
scrollToBottom()try {
const reply = await getAIReply(text)
// 把最后一条 ai 占位替换
const lastIdx = messages.value.map(m => m.role).lastIndexOf('ai')
if (lastIdx >= 0) messages.value[lastIdx].content = reply
} catch (err) {
const lastIdx = messages.value.map(m => m.role).lastIndexOf('ai')
if (lastIdx >= 0) messages.value[lastIdx].content = '请求失败:' + (err.message || '未知错误')
}
scrollToBottom()
}
</script><style scoped>
.messages { margin-bottom: 8px }
.msg-user { color: #0b72ff }
.msg-ai { color: #111 }
textarea { font-family: inherit }
button { background: #0b72ff; color: white }
</style>
src/App.vue
<template>
<div>
<h1>AI 聊天</h1>
<div class="chat-wrap">
<ChatBox />
</div>
</div>
</template><script setup>
import ChatBox from './components/ChatBox.vue'
</script><style scoped>
h1 { margin-bottom: 12px }
</style>
src/main.js
import { createApp } from 'vue'
import App from './App.vue'
import './styles.css'createApp(App).mount('#app')
src/styles.css
body { font-family: -apple-system, BlinkMacSystemFont, 'Segoe UI', Roboto, 'Helvetica Neue', Arial; margin: 0; padding: 20px; background: #f7f9fc; }
#app { max-width: 800px; margin: 0 auto; }
h1 { text-align: center; }
.chat-wrap { background: white; border-radius: 8px; padding: 16px; box-shadow: 0 4px 14px rgba(0,0,0,0.08); }
.messages { height: 420px; overflow-y: auto; padding: 8px; border: 1px solid #eee; border-radius: 6px; }
.message { margin: 8px 0; }
.msg-user { text-align: right; }
.msg-ai { text-align: left; }
textarea { width: 100%; min-height: 80px; margin-top: 8px; padding: 8px; }
button { margin-top: 8px; padding: 8px 14px; border: none; border-radius: 6px; cursor: pointer; }
index.html
<!doctype html>
<html>
<head>
<meta charset="utf-8" />
<meta name="viewport" content="width=device-width, initial-scale=1.0" />
<title>AI 聊天 (Vue + OpenAI)</title>
</head>
<body>
<div id="app"></div>
<script type="module" src="/src/main.js"></script>
</body>
</html>
package.json
{"type": "module","name":"ai-chat-vue","version":"1.0.0","scripts":{"dev":"vite","build":"vite build","preview":"vite preview"},"dependencies":{"axios":"^1.5.0","vue":"^3.3.0"},"devDependencies":{"@vitejs/plugin-vue":"^6.0.1","vite":"^5.0.0"}}vite.config.mjs
import { defineConfig } from 'vite'
import vue from '@vitejs/plugin-vue'export default defineConfig({plugins: [vue()],server: {host: '0.0.0.0',port: 5173}
})
⚙️ 四、后端部分(Express + DeepSeek Proxy)
为了安全起见,我们不在前端直接暴露 DeepSeek 的 API Key,
而是通过 Node.js 后端中转请求。
.env
PORT=7666
DEEPSEEK_API_KEY=这里改为你的deepseek api
server.js
import express from 'express'
import cors from 'cors'
import axios from 'axios'
import dotenv from 'dotenv'dotenv.config()
const app = express()
app.use(cors())
app.use(express.json())const PORT = process.env.PORT || 7666
const DEEPSEEK_KEY = process.env.DEEPSEEK_API_KEY
if (!DEEPSEEK_KEY) console.warn('⚠️ DEEPSEEK_API_KEY 未设置,将无法调用 DeepSeek API')app.post('/api/chat', async (req, res) => {
const { question } = req.body
if (!question) return res.status(400).json({ error: 'missing question' })try {
const resp = await axios.post('https://api.deepseek.com/v1/chat/completions',{model: 'deepseek-chat', // 也可以换成 deepseek-reasoner
messages: [
{ role: 'system', content: '你是一个友好的助理。用中文回复。' },
{ role: 'user', content: question }
],
max_tokens: 800
},
{
headers: {
'Authorization': `Bearer ${DEEPSEEK_KEY}`,
'Content-Type': 'application/json'
}
}
)const reply = resp.data.choices?.[0]?.message?.content || ''
res.json({ reply })
} catch (err) {
console.error(err?.response?.data || err.message)
res.status(500).json({ reply: '调用出错,请检查后端日志。' })
}
})app.listen(PORT, () => console.log(`✅ Server listening on http://localhost:${PORT}`))
package.json
{"name": "ai-server","version": "1.0.0","type": "module","scripts": {"start": "node server.js"},"dependencies": {"axios": "^1.5.0","cors": "^2.8.5","dotenv": "^16.0.0","express": "^4.18.2"}
}
🔐 五、安全设计
-
后端代理调用 DeepSeek,防止 API Key 暴露。
-
CORS 控制:仅允许特定前端域名访问。
-
环境变量配置:所有密钥都放在
.env文件中,项目安全性更高。
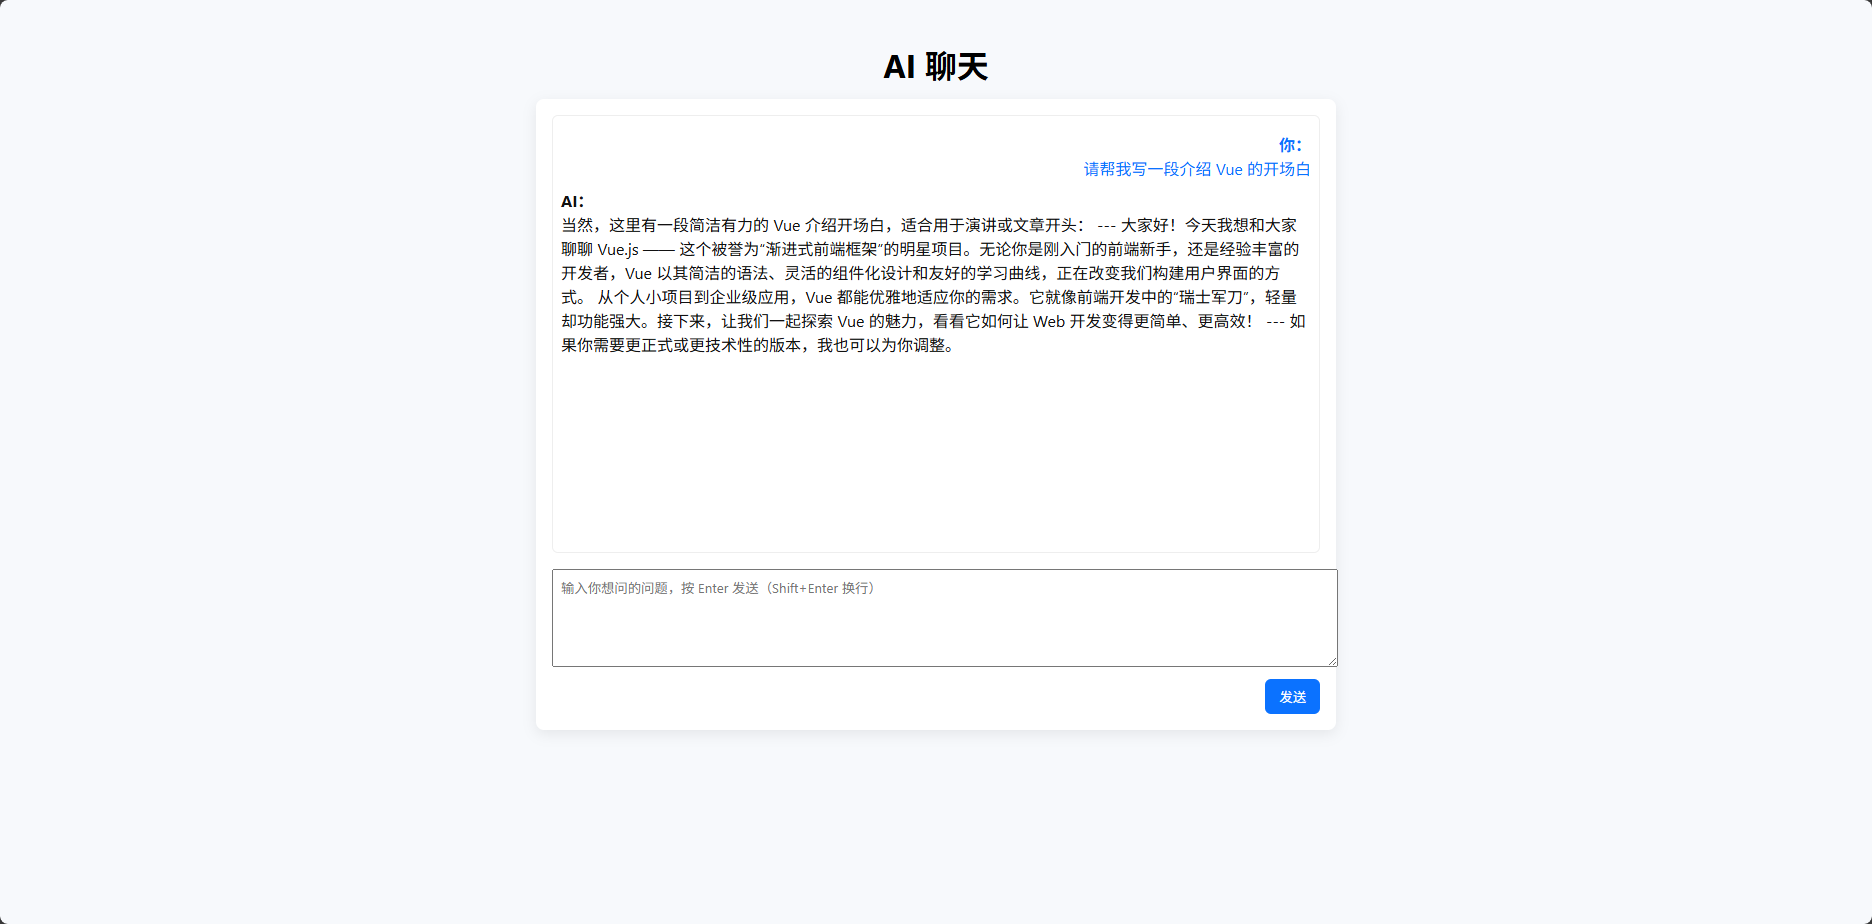
🌈 六、项目运行效果
当用户输入问题时,例如:
“请帮我写一段介绍 Vue 的开场白”
系统会流式输出 DeepSeek 的回答,
在几秒钟内完成自然语言回复。
🧠 七、技术要点与难点
| 功能 | 技术实现 |
|---|---|
| 前端聊天界面 | Vue 3 + Tailwind CSS |
| 实时响应 | ReadableStream 流式读取 |
| API 代理 | Node.js + Express |
| 安全性 | .env 隐藏密钥,CORS 限制 |
| 模型调用 | DeepSeek Chat Completion API |
🚀 八、部署方式
1️⃣ 本地运行
# 前端cd ai-chat-vuenpm installnpm run dev# 后端 (另开终端)cd ai-servernpm install# 填写 .env 中的 DEEPSEEK_API_KEYnode server.js![]()
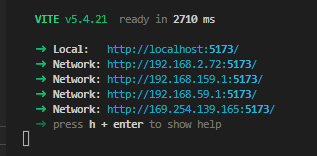
访问前端页面(默认 http://localhost:5173)开始聊天。
2️⃣ 部署到线上
-
后端:Render / Vercel / Railway / 自建服务器
-
前端:Netlify / Vercel / GitHub Pages
💬 九、项目亮点总结
✅ 前后端完全开源
✅ DeepSeek API 集成示例
✅ 流式聊天效果
✅ 安全 API Key 管理机制
✅ 适合二次开发、博客展示或课程作业
🔗 十、项目仓库地址
GitHub 地址:
👉 13536309143/Build-an-intelligent-chat-website-with-Vue-DeepSeek
❤️ 十一、结语
这是一个轻量、易扩展的 AI 聊天网站项目,
既能展示前后端交互能力,也能体验 DeepSeek 的强大对话性能。
如果你正在学习:
-
Vue 3 前端开发
-
Node.js 后端接口代理
-
AI 聊天网站架构
那么这个项目非常适合作为你的入门实战!