百度提交网站入口利用模板做网站
1.1 必备环境
1.1.1 Nacos
1.1.1.1 下载
下载地址:https://nacos.io/download/nacos-server/
- 下载最新压缩包

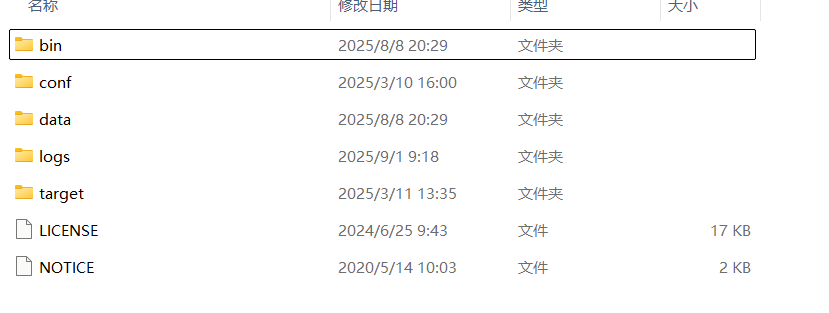
- 安装好后,内容如下
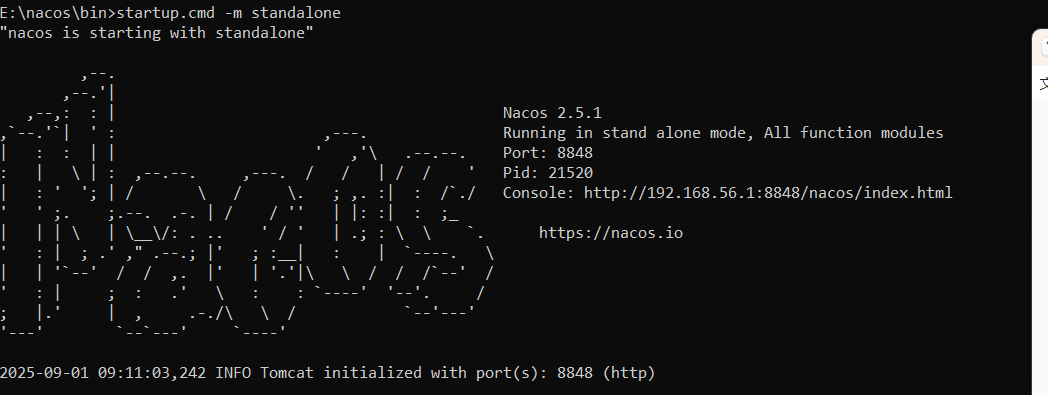
1.1.1.2 打开
进入bin目录,从此打开cmd,输入以下命令
startup.cmd -m standalone
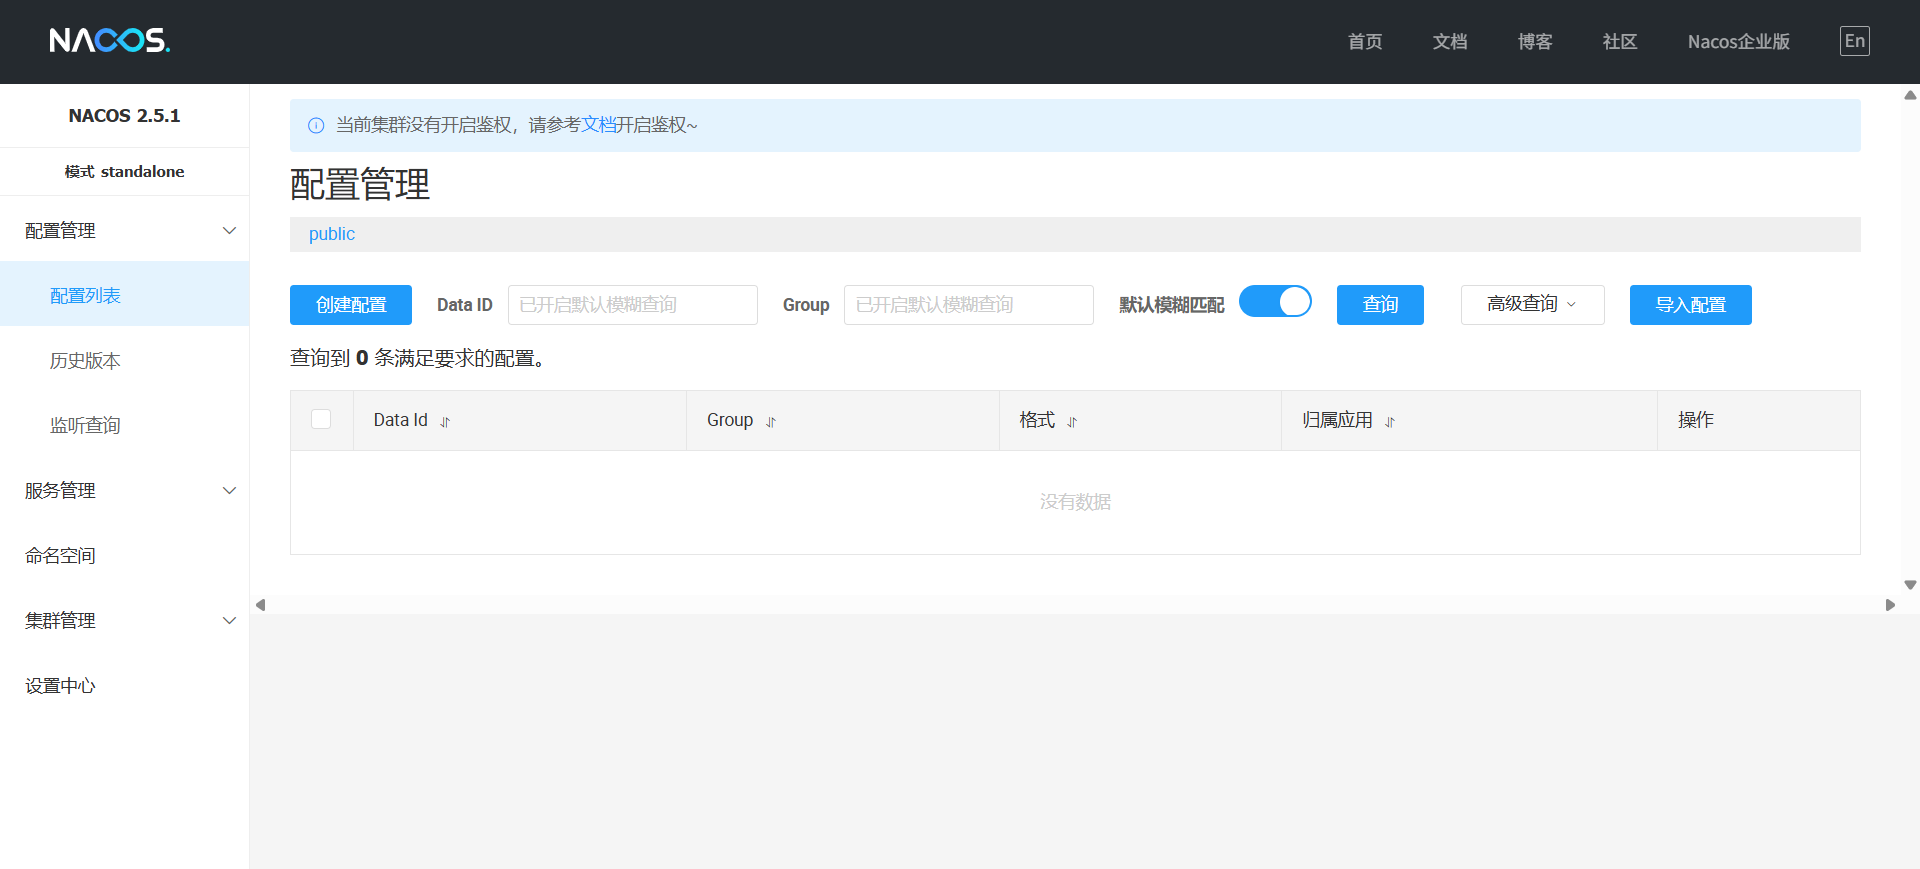
- 访问http://localhost:8848/nacos,能出现以下界面表示成功
1.1.2 redis
1.1.2.1 下载
- Windows版下载地址:https://github.com/microsoftarchive/redis/releases
- Linux版下载地址: https://download.redis.io/releases/
1.1.2.2 打开
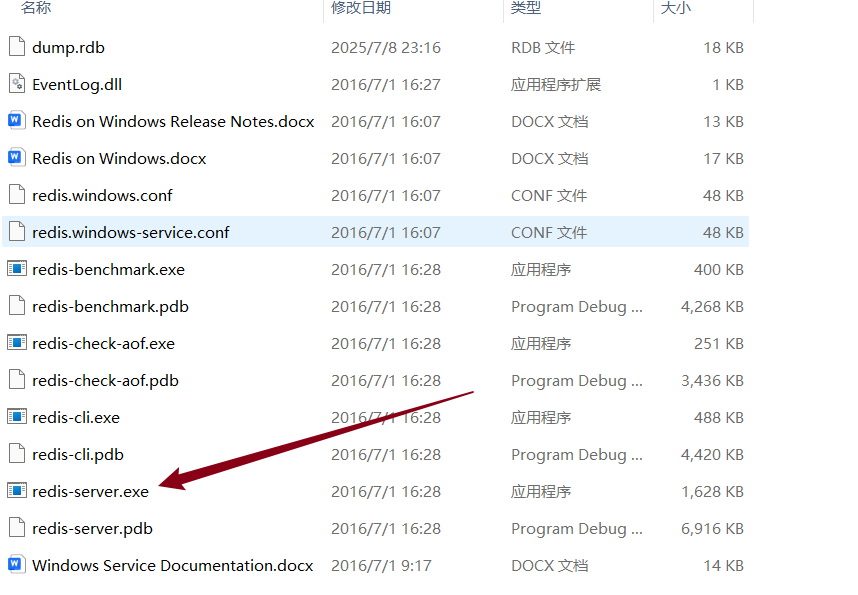
我安装的是windows版,目录如下。
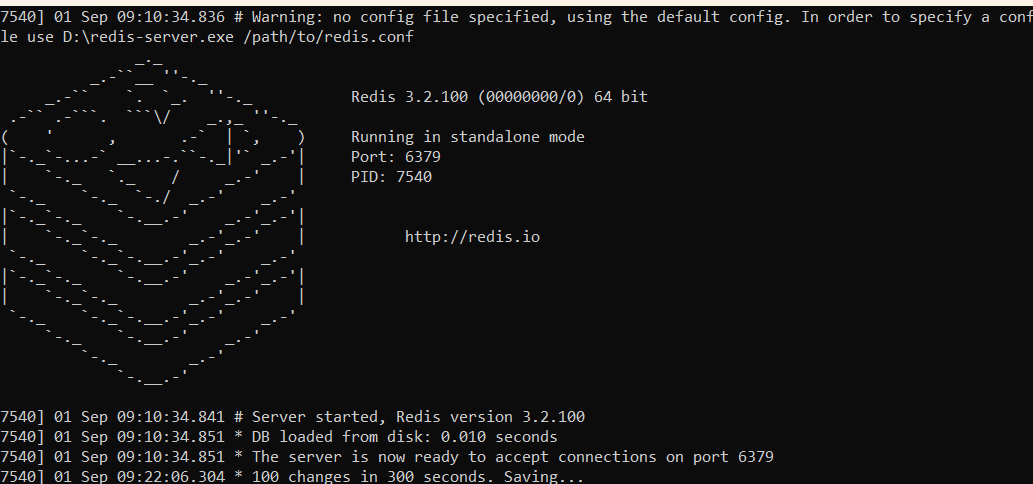
双击redis-server.exe命令即可成功打开
- 出现以下界面表示成功
1.2 创建基础工程
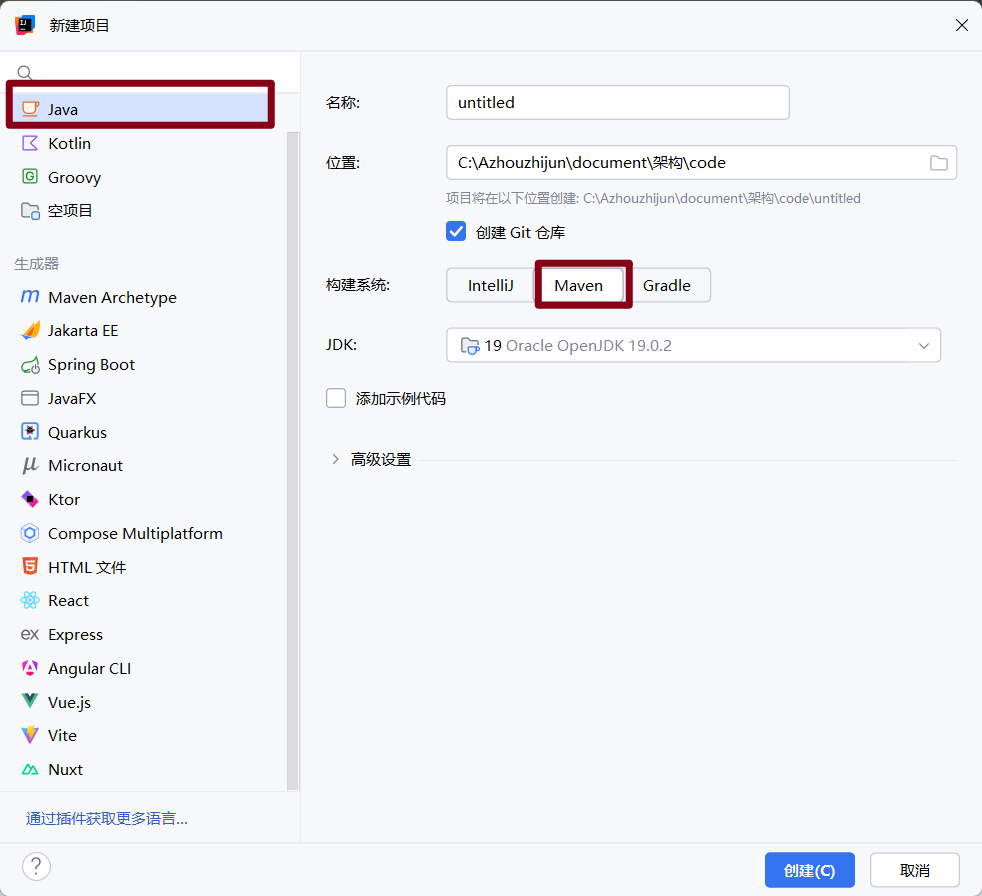
1.2.1 创建父子模块
父模块:新建一个Java项目,构建系统选择maven
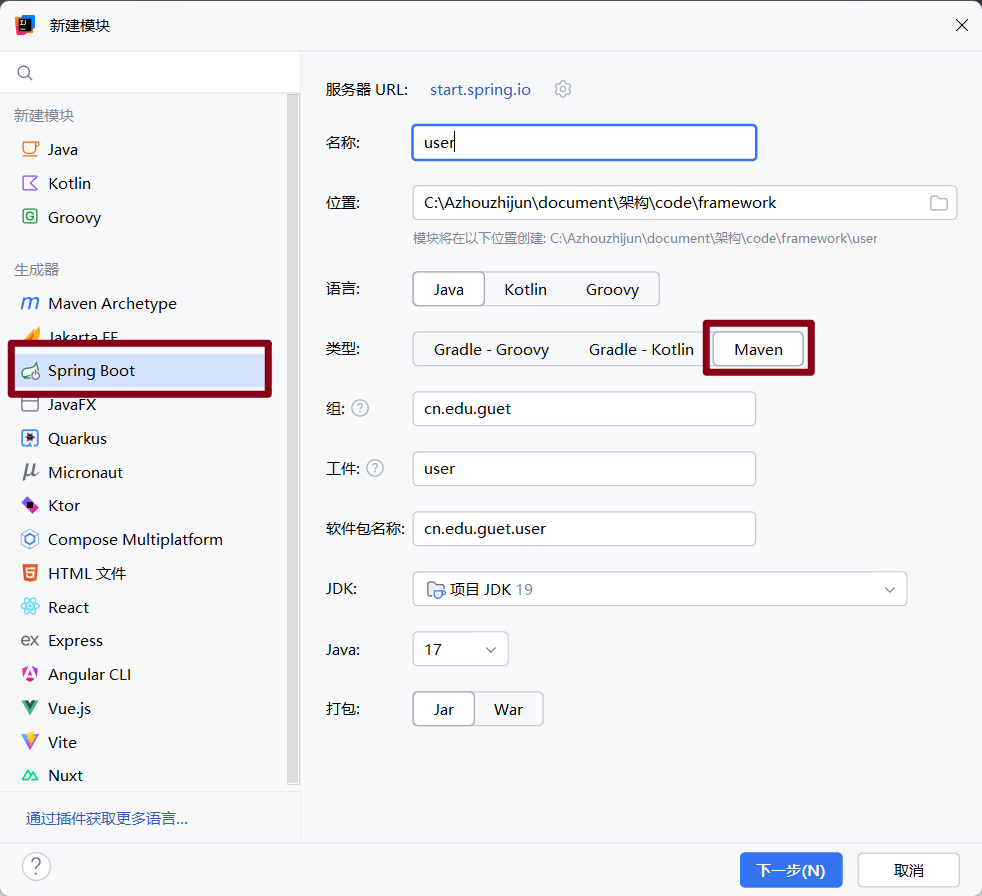
子模块:右键父模块 -> 新建 -> 模块 -> 直接创建一个SpringBoot项目(其他不选)
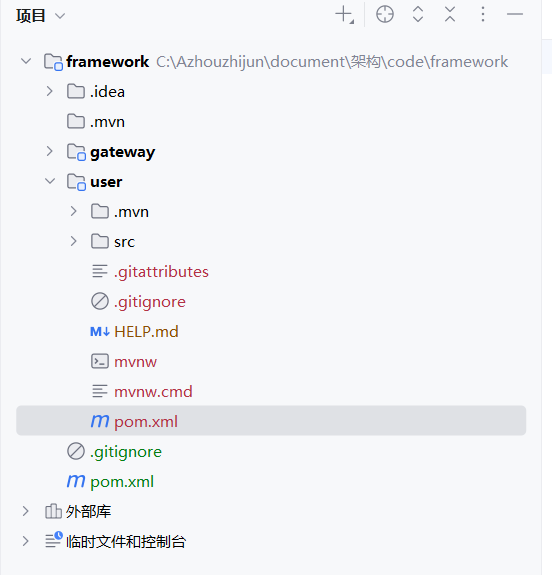
最终目录结构如下:
1.2.2 配置父子模块
1.2.2.1 父模块
- 补充pom.xml的properties标签
版本需一一对应,版本说明
<spring.cloud.version>2023.0.1</spring.cloud.version><spring.boot.version>3.2.4</spring.boot.version><spring.cloud.alibaba.version>2023.0.1.0</spring.cloud.alibaba.version>
- 添加固定依赖
<packaging>pom</packaging><dependencyManagement><dependencies><dependency><groupId>org.springframework.cloud</groupId><artifactId>spring-cloud-dependencies</artifactId><version>${spring.cloud.version}</version><type>pom</type><scope>import</scope></dependency><dependency><groupId>org.springframework.boot</groupId><artifactId>spring-boot-dependencies</artifactId><version>${spring.boot.version}</version><type>pom</type><scope>import</scope></dependency><dependency><groupId>com.alibaba.cloud</groupId><artifactId>spring-cloud-alibaba-dependencies</artifactId><version>${spring.cloud.alibaba.version}</version><type>pom</type><scope>import</scope></dependency></dependencies></dependencyManagement>
- 添加modules标签
<modules><module>user</module><module>gateway</module></modules>
1.2.2.2 子模块
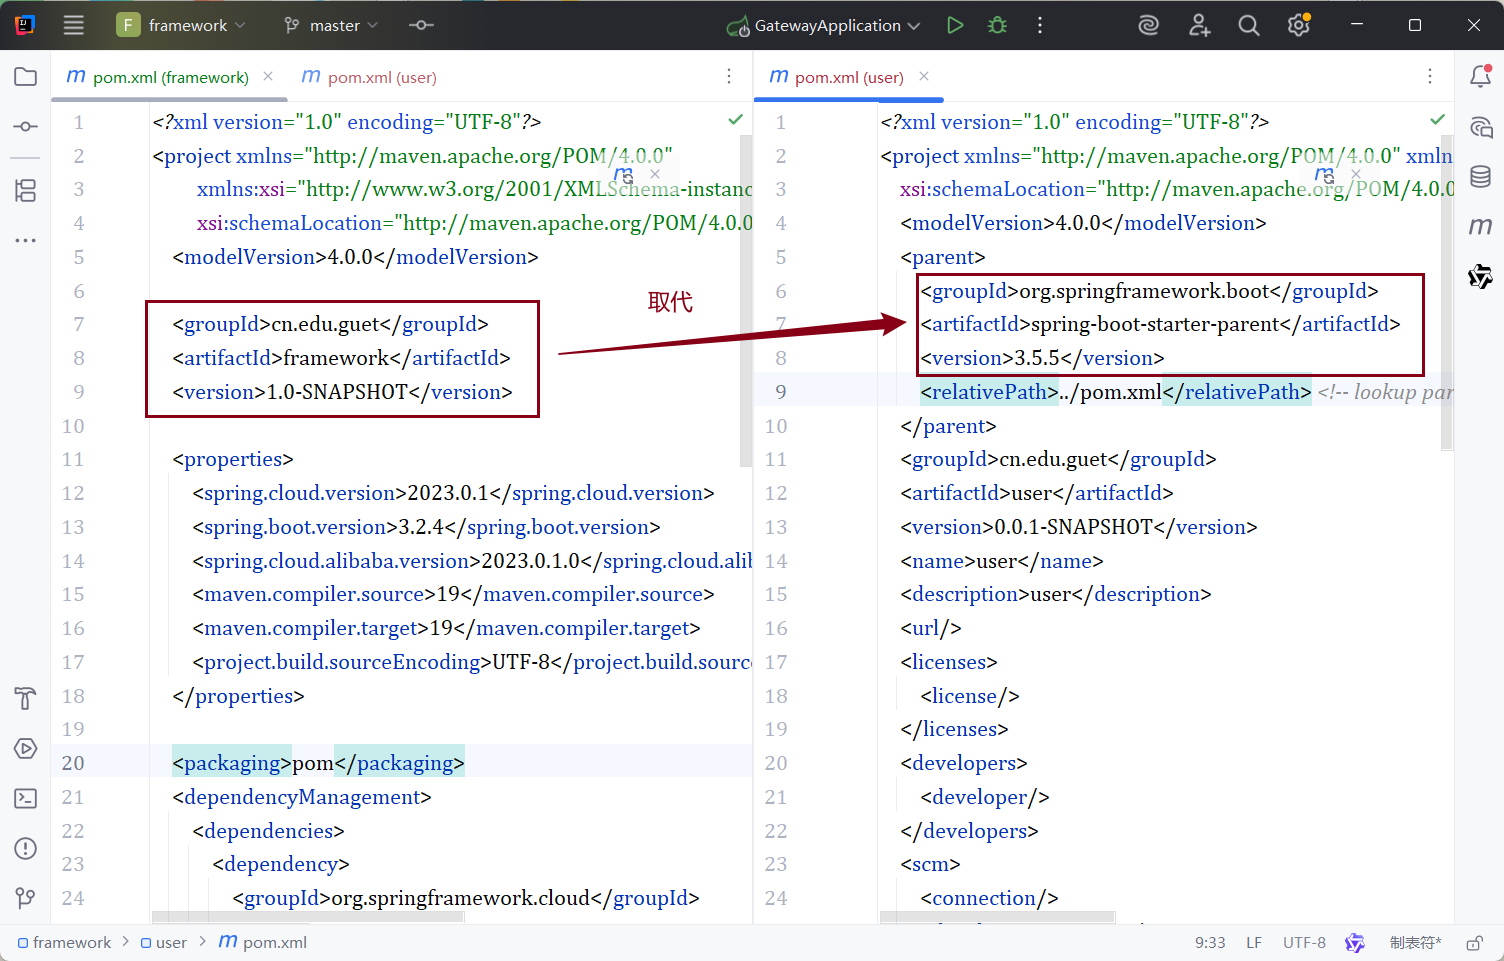
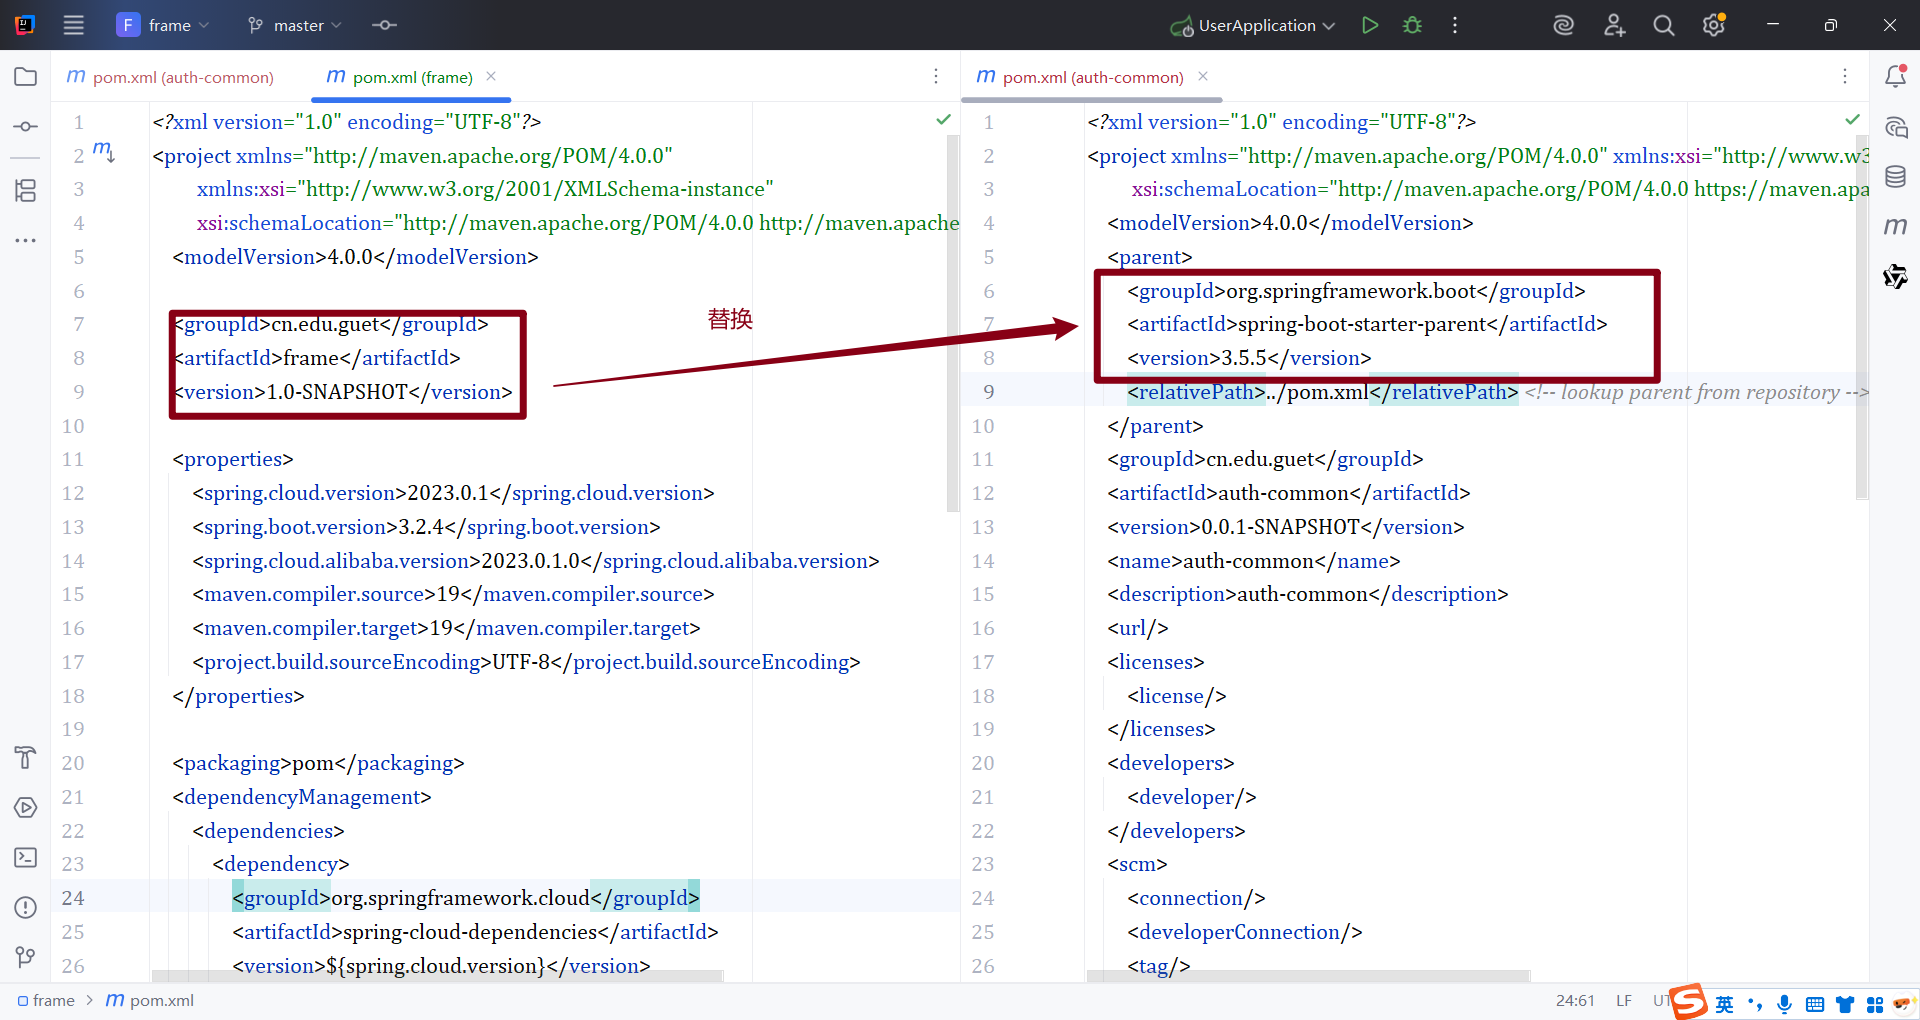
- 根据父模块更改pom.xml的parent标签
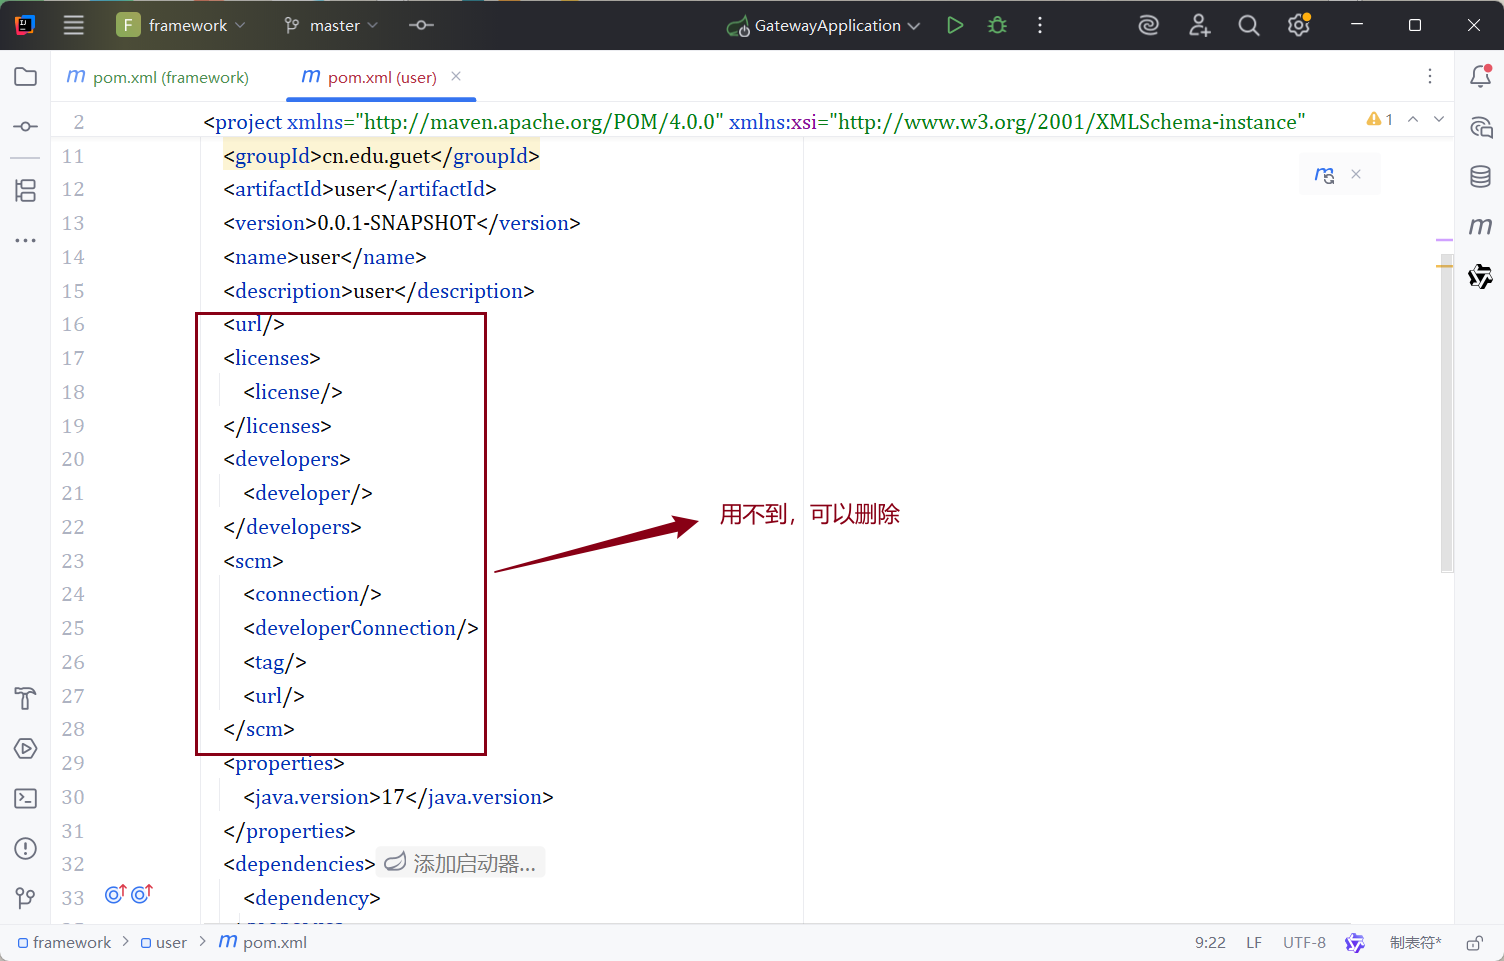
- 删除一些依赖(也可以不删)
- 在pom.xml添加启动依赖
user子模块
<dependencies><!--......原有依赖--><dependency><groupId>org.springframework.boot</groupId><artifactId>spring-boot-starter-web</artifactId></dependency><dependency><groupId>com.alibaba.cloud</groupId><artifactId>spring-cloud-starter-alibaba-nacos-discovery</artifactId></dependency><dependency><groupId>org.springframework.cloud</groupId><artifactId>spring-cloud-starter-loadbalancer</artifactId></dependency></dependencies>
gateway子模块
<dependencies><!--......原有依赖--><dependency><groupId>org.springframework.cloud</groupId><artifactId>spring-cloud-starter-gateway</artifactId></dependency><dependency><groupId>com.alibaba.cloud</groupId><artifactId>spring-cloud-starter-alibaba-nacos-discovery</artifactId></dependency><dependency><groupId>org.springframework.cloud</groupId><artifactId>spring-cloud-starter-loadbalancer</artifactId></dependency></dependencies>
1.2.3 运行子模块
- 在子模块启动类上加入@EnableDiscoveryClient注解
import org.springframework.boot.SpringApplication;
import org.springframework.boot.autoconfigure.SpringBootApplication;
import org.springframework.cloud.client.discovery.EnableDiscoveryClient;@SpringBootApplication
@EnableDiscoveryClient
public class UserApplication {//......原有代码
}
- 在子模块的application.properties(src/main/resources/application.properties)添加不同的端口号
server.port=8081
- 进入nacos的bin目录,从该目录打开cmd并输入以下命令打开nacos
startup.cmd -m standalon
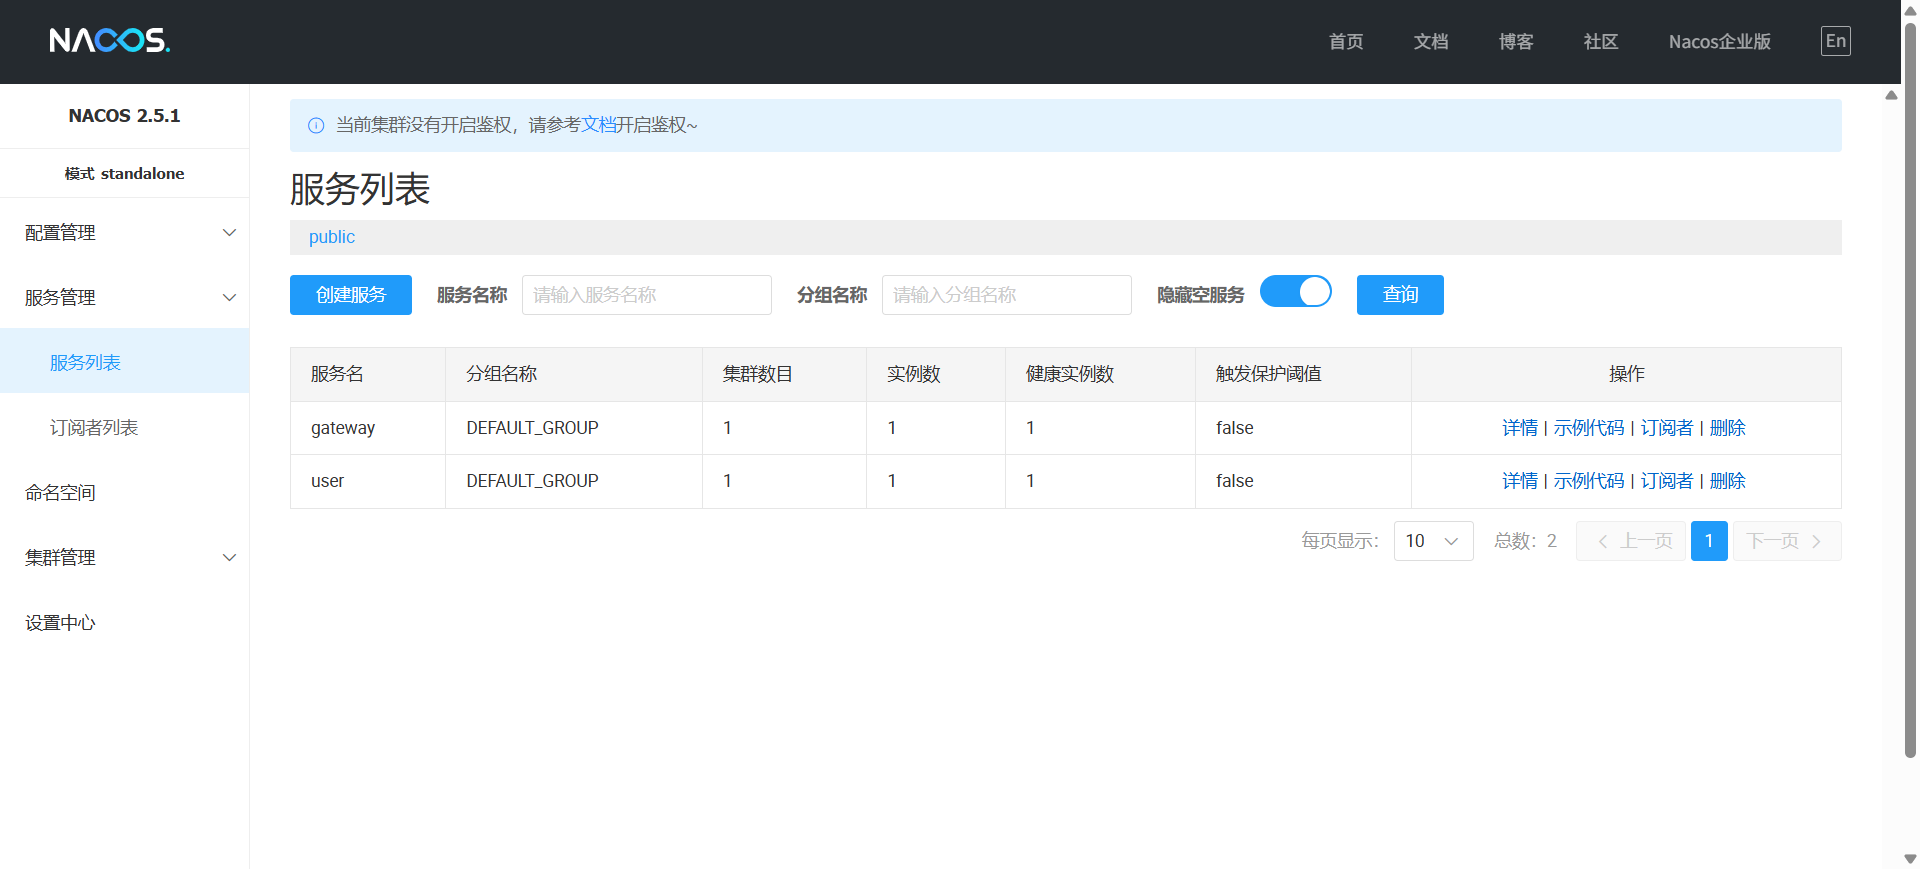
- 运行子模块后,访问http://localhost:8848/nacos,出现以下界面表示成功!
1.3 网关和禁止绕过网关
1.3.1 gateway模块
1.3.1.1 网关转发
- 在resources目录下创建application.yml文件,在其中添加一下nacos配置
spring:cloud:nacos:discovery:server-addr: localhost:8848 #Nacos地址
- 定义routes,为user子模块配置路由规则。
每个规则都应包含id、uri、predicates和filters
spring:cloud:gateway:routes: # 路由规则(列表项,下方每个路由用"- "开头)# 转发到user服务- id: route-user # 路由唯一标识(列表项,必须以"- "开头)uri: lb://user # 服务名(Nacos中注册的user服务名,确保Nacos中存在)predicates: # 匹配规则(列表项,子项用"- "开头)- Path=/api/user/** # 路径匹配(注意Path前的"- ")filters: # 过滤规则(列表项,子项用"- "开头)- StripPrefix=2
1.3.1.2 网关设置请求体
在配置文件中添加一个全局的pre过滤器。
spring:cloud:gateway:default-filters:- AddRequestHeader=X-From-Gateway, true#......以下配置保持不变
1.3.2 user子模块
- 在resources目录下创建application.yml文件,在其中添加一下nacos配置
spring:cloud:nacos:discovery:server-addr: localhost:8848 # Nacos地址(保持不变)ip: 127.0.0.1 # 强制注册为本地回环地址(关键!)port: 8081 # 可选:显式指定端口(确保与user服务端口一致)
- 创建一个Usercontroller,在其中添加一个测试接口
package cn.edu.guet.user.controller;import org.springframework.web.bind.annotation.GetMapping;
import org.springframework.web.bind.annotation.RequestMapping;
import org.springframework.web.bind.annotation.RestController;@RestController
@RequestMapping("/user")
public class UserController {/*** 测试* @return*/@GetMapping("/ceShi")public String ceShi(){return "ceshi";}
}
- 创建拦截器
import org.springframework.stereotype.Component;
import org.springframework.web.servlet.HandlerInterceptor;import jakarta.servlet.http.HttpServletRequest;
import jakarta.servlet.http.HttpServletResponse;@Component
public class GatewayInterceptor implements HandlerInterceptor {@Overridepublic boolean preHandle(HttpServletRequest request, HttpServletResponse response, Object handler) throws Exception {String fromGatewayHeader = request.getHeader("X-From-Gateway");if (!"true".equals(fromGatewayHeader)) {// 如果没有这个请求头,或者值不正确,说明请求不是从网关来的// 拒绝请求,返回403 Forbiddenresponse.setStatus(HttpServletResponse.SC_FORBIDDEN);return false;}// 校验通过,继续处理请求return true;}
}
- 注册拦截器
import org.springframework.context.annotation.Configuration;
import org.springframework.web.servlet.config.annotation.InterceptorRegistry;
import org.springframework.web.servlet.config.annotation.WebMvcConfigurer;@Configuration
public class WebConfig implements WebMvcConfigurer {private final GatewayInterceptor gatewayInterceptor;public WebConfig(GatewayInterceptor gatewayInterceptor) {this.gatewayInterceptor = gatewayInterceptor;}@Overridepublic void addInterceptors(InterceptorRegistry registry) {// 注册拦截器,并指定拦截所有路径registry.addInterceptor(gatewayInterceptor).addPathPatterns("/**");}
}
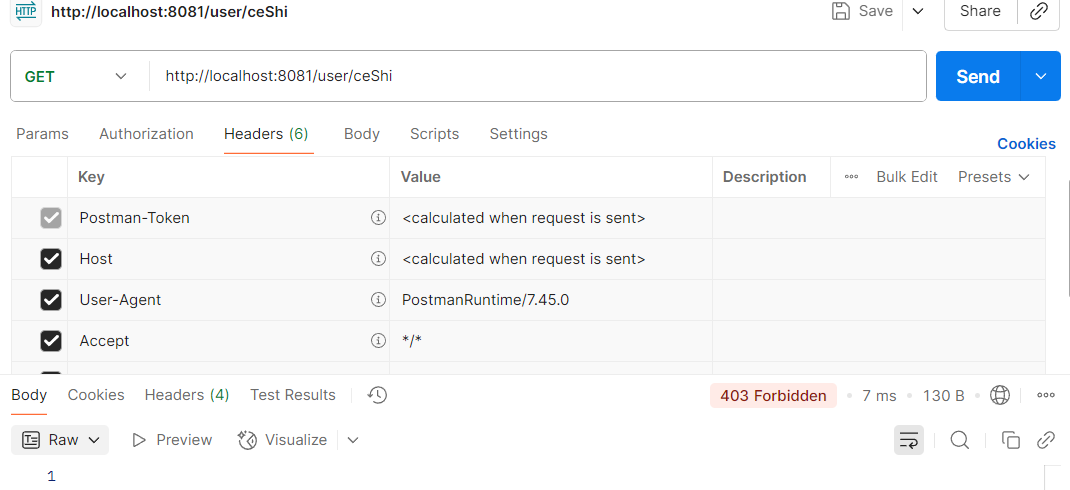
1.3.2 postman测试
- 直接访问测试接口(不通过网关)
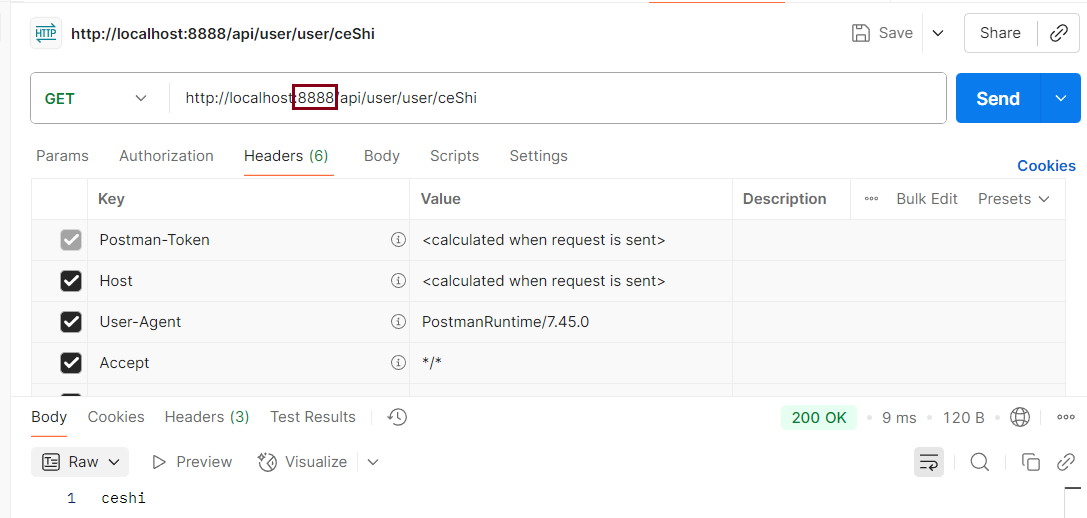
- 通过网关测试接口
1.4 JWT Token生成与认证
1.4.1 共享认证模块
1.4.1.1 创建auth-common模块并配置依赖
- 创建auth-common
右键父模块 -> 新建 -> 模块 -> 直接创建一个SpringBoot项目(其他不选)
- 补充父模块的modules
<modules><module>auth-common</module><!--......以下配置不变--></modules>
- 配置auth-common依赖
- 添加以下依赖
<dependency><groupId>io.jsonwebtoken</groupId><artifactId>jjwt-api</artifactId><version>0.11.5</version></dependency><dependency><groupId>io.jsonwebtoken</groupId><artifactId>jjwt-impl</artifactId><version>0.11.5</version><scope>runtime</scope></dependency><dependency><groupId>io.jsonwebtoken</groupId><artifactId>jjwt-jackson</artifactId><version>0.11.5</version><scope>runtime</scope></dependency><dependency><groupId>org.projectlombok</groupId><artifactId>lombok</artifactId><optional>true</optional></dependency>
1.4.1.2 创建JWT配置类和工具类
- JwtProperties.java
import lombok.Data;
import org.springframework.boot.context.properties.ConfigurationProperties;
import org.springframework.stereotype.Component;@Component
@ConfigurationProperties(prefix = "framework.jwt")
@Data
public class JwtProperties {private String secretKey;private Integer accessTokenExpireMinutes;private Integer refreshTokenExpireDays;
}
- JwtUtil.java
import cn.edu.guet.authcommon.properties.JwtProperties;
import io.jsonwebtoken.Claims;
import io.jsonwebtoken.Jwts;
import io.jsonwebtoken.SignatureAlgorithm;
import io.jsonwebtoken.security.Keys;
import org.springframework.beans.factory.annotation.Autowired;
import org.springframework.stereotype.Component;
import java.security.Key;
import java.util.Date;
import java.util.Map;
import java.util.UUID;@Component
public class JwtUtil {private final JwtProperties jwtProperties;private final Key key;@Autowiredpublic JwtUtil(JwtProperties jwtProperties) {this.jwtProperties = jwtProperties;this.key = Keys.hmacShaKeyFor(jwtProperties.getSecretKey().getBytes());}/*** 生成 Access Token*/public String generateAccessToken(Map<String, Object> claims) {claims.put("token_type", "access");long nowMillis = System.currentTimeMillis();Date now = new Date(nowMillis);Date expireDate = new Date(nowMillis + (long)jwtProperties.getAccessTokenExpireMinutes() * 60 * 1000);return Jwts.builder().setClaims(claims).setIssuedAt(now).setExpiration(expireDate).signWith(key, SignatureAlgorithm.HS256).compact();}/*** 生成 Refresh Token*/public String generateRefreshToken(Map<String, Object> claims) {claims.put("token_type", "refresh");long nowMillis = System.currentTimeMillis();Date now = new Date(nowMillis);Date expireDate = new Date(nowMillis + (long)jwtProperties.getRefreshTokenExpireDays() * 24 * 60 * 60 * 1000);return Jwts.builder().setClaims(claims).setId(UUID.randomUUID().toString()).setIssuedAt(now).setExpiration(expireDate).signWith(key, SignatureAlgorithm.HS256).compact();}/*** 解析 Token*/public Claims parseToken(String token) {return Jwts.parserBuilder().setSigningKey(key).build().parseClaimsJws(token).getBody();}// 新增一个获取属性的方法,用于登录接口返回有效期public JwtProperties getJwtProperties() {return jwtProperties;}
}
1.4.2 gateway模块
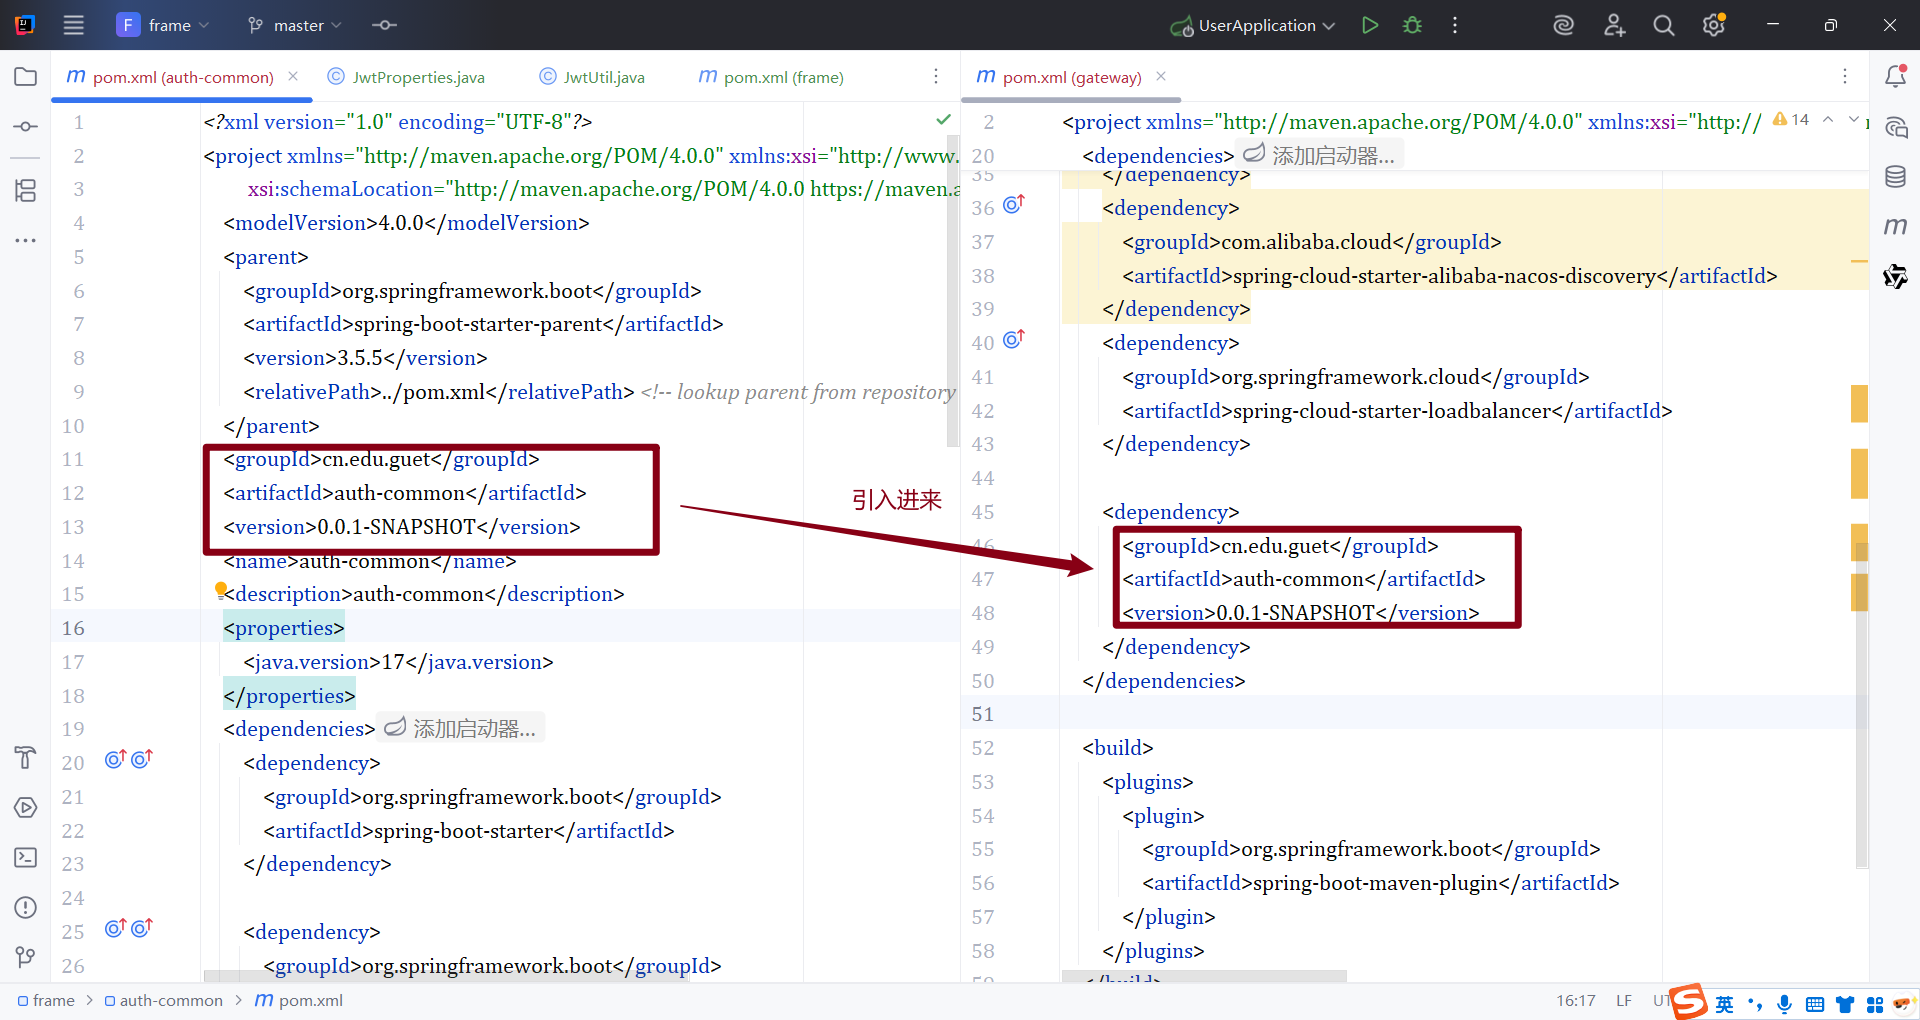
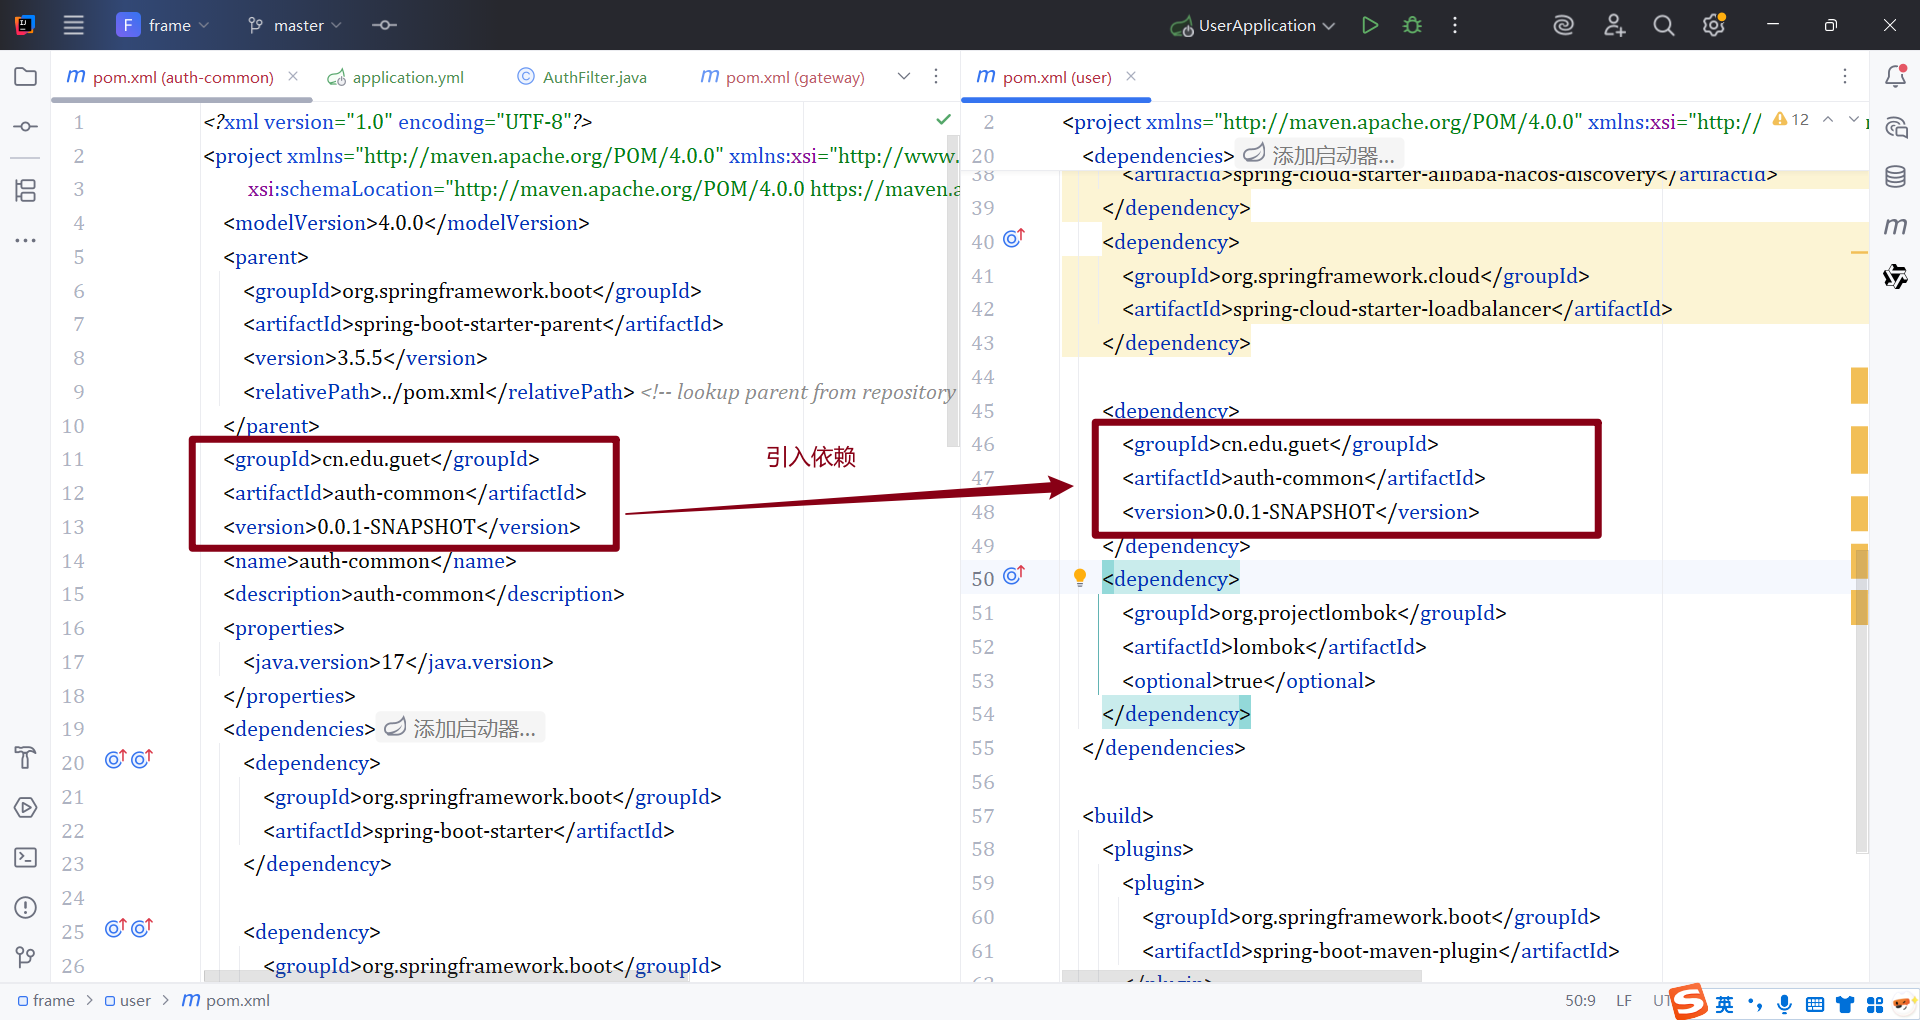
14.2.1 引入共享认证模块
- 导入auth-common模块和lombok依赖
<dependency><groupId>org.projectlombok</groupId><artifactId>lombok</artifactId><optional>true</optional></dependency>
- 添加yml配置
framework:jwt:# 密钥:一个32位或更长的随机字符串,用于对Token进行签名和验证。# 生产环境中务必使用一个复杂的随机密钥,并妥善保管。secretKey: sY6pBq8nE0yX3zH9vJ5cK2mD1fG7aL4uT8wP3oR0qI2# accessToken的有效期,单位为分钟accessTokenExpireMinutes: 15 # refreshToken的有效期,单位为天refreshTokenExpireDays: 7
1.4.2.2 生成白名单
- 创建网关配置类AuthGatewayProperties.java
import lombok.Data;
import org.springframework.boot.context.properties.ConfigurationProperties;
import org.springframework.stereotype.Component;import java.util.List;@Component
@ConfigurationProperties(prefix = "framework.auth")
@Data
public class AuthGatewayProperties {private List<String> whiteList;
}
- 添加yml配置
framework:#......原有配置保持不变auth:# 白名单路径,这些路径不需要认证whiteList:- /api/user/user/login- /api/user/user/register
1.4.2.3 实现Token黑名单(reids)
- 添加redis的响应式依赖
<dependency><groupId>org.springframework.boot</groupId><artifactId>spring-boot-starter-data-redis-reactive</artifactId>
</dependency>
- 配置redis
spring:# ......你的原有配置data:redis:host: localhostport: 6379#密码我没设置过,默认为空password:database: 15
- 实现黑名单服务
import org.springframework.beans.factory.annotation.Autowired;
import org.springframework.data.redis.core.ReactiveRedisTemplate;
import org.springframework.stereotype.Service;
import reactor.core.publisher.Mono;
import java.time.Duration;@Service
public class AuthBlacklistService {@Autowiredprivate ReactiveRedisTemplate<String, String> reactiveRedisTemplate;/*** 将 Token 加入黑名单,并设置过期时间。* @param token 要加入黑名单的 Token。* @param expiration Token 的剩余有效期。*/public Mono<Boolean> blacklistToken(String token, Duration expiration) {String key = "blacklist:" + token;return reactiveRedisTemplate.opsForValue().set(key, "invalid", expiration);}/*** 检查 Token 是否在黑名单中。* @param token 要检查的 Token。* @return 如果 Token 在黑名单中,返回 true,否则返回 false。*/public Mono<Boolean> isTokenBlacklisted(String token) {String key = "blacklist:" + token;return reactiveRedisTemplate.hasKey(key);}
}
- 增加一个内部接口
import cn.edu.guet.authcommon.util.JwtUtil;
import cn.edu.guet.gateway.service.AuthBlacklistService;
import io.jsonwebtoken.Claims;
import org.springframework.beans.factory.annotation.Autowired;
import org.springframework.http.HttpStatus;
import org.springframework.http.ResponseEntity;
import org.springframework.web.bind.annotation.PostMapping;
import org.springframework.web.bind.annotation.RequestBody;
import org.springframework.web.bind.annotation.RequestMapping;
import org.springframework.web.bind.annotation.RestController;
import reactor.core.publisher.Mono;import java.time.Duration;
import java.time.Instant;
import java.util.Date;
import java.util.Map;// GatewayBlacklistController.java (在 gateway 模块中创建)
@RestController
@RequestMapping("/internal")
public class GatewayBlacklistController {@Autowiredprivate AuthBlacklistService authBlacklistService;@Autowiredprivate JwtUtil jwtUtil;@PostMapping("/blacklist")public Mono<ResponseEntity<Map<String, String>>> blacklist(@RequestBody Map<String, String> payload) {String token = payload.get("token");if (token == null) {return Mono.just(ResponseEntity.badRequest().body(Map.of("message", "缺少令牌")));}try {Claims claims = jwtUtil.parseToken(token);Date expiration = claims.getExpiration();Duration duration = Duration.between(Instant.now(), expiration.toInstant());// 将 Token 加入黑名单,并设置剩余有效期return authBlacklistService.blacklistToken(token, duration).thenReturn(ResponseEntity.ok(Map.of("message", "Token成功列入黑名单.")));} catch (Exception e) {return Mono.just(ResponseEntity.status(HttpStatus.BAD_REQUEST).body(Map.of("message", "令牌无效")));}}
}
1.4.2.4 创建全局过滤器
- yml配置中定义全局过滤器
spring:cloud:gateway:forwarded:enabled: true# 定义全局过滤器default-filters:- DedupeResponseHeader=Access-Control-Allow-Origin Access-Control-Allow-Credentials, RETAIN_UNIQUE#......原有配置保持不变
- 创建全局过滤器AuthFilter.java
package cn.edu.guet.gateway.filter;import cn.edu.guet.authcommon.util.JwtUtil;
import cn.edu.guet.gateway.properties.AuthGatewayProperties; // 导入新创建的配置类
import cn.edu.guet.gateway.service.AuthBlacklistService;
import io.jsonwebtoken.Claims;
import io.jsonwebtoken.ExpiredJwtException;
import org.springframework.beans.factory.annotation.Autowired;
import org.springframework.cloud.gateway.filter.GatewayFilterChain;
import org.springframework.cloud.gateway.filter.GlobalFilter;
import org.springframework.core.Ordered;
import org.springframework.http.HttpHeaders;
import org.springframework.http.HttpStatus;
import org.springframework.http.server.reactive.ServerHttpRequest;
import org.springframework.http.server.reactive.ServerHttpResponse;
import org.springframework.stereotype.Component;
import org.springframework.web.server.ServerWebExchange;
import reactor.core.publisher.Mono;@Component
public class AuthFilter implements GlobalFilter, Ordered {@Autowiredprivate JwtUtil jwtUtil;// 注入创建的配置类@Autowiredprivate AuthGatewayProperties authGatewayProperties;// 注入新的黑名单服务@Autowiredprivate AuthBlacklistService authBlacklistService;@Overridepublic Mono<Void> filter(ServerWebExchange exchange, GatewayFilterChain chain) {ServerHttpRequest request = exchange.getRequest();String path = request.getURI().getPath();// 1. 从配置类中获取白名单列表,并检查当前路径是否在其中if (authGatewayProperties.getWhiteList().contains(path)) {return chain.filter(exchange);}// 2. 获取请求头中的Access TokenString token = request.getHeaders().getFirst(HttpHeaders.AUTHORIZATION);if (token == null || !token.startsWith("Bearer ")) {return unauthorizedResponse(exchange.getResponse(), "访问令牌缺失或无效");}try {// 3. 解析和验证 TokenString tokenValue = token.substring(7);Claims claims = jwtUtil.parseToken(tokenValue);//4. 验证 Token 类型if (!"access".equals(claims.get("token_type", String.class))) {return unauthorizedResponse(exchange.getResponse(), "令牌类型无效");}// 6.首先检查 Token 是否在黑名单中**return authBlacklistService.isTokenBlacklisted(tokenValue).flatMap(isBlacklisted -> {if (isBlacklisted) {return unauthorizedResponse(exchange.getResponse(), "Token 已失效。");}// 7. 如果不在黑名单,将用户信息透传到下游服务,继续验证和放行ServerHttpRequest mutatedRequest = request.mutate().header("X-User-Id", claims.get("userId", Long.class).toString()).header("X-User-Role", claims.get("role", String.class)).build();return chain.filter(exchange.mutate().request(mutatedRequest).build());});} catch (ExpiredJwtException e) {return unauthorizedResponse(exchange.getResponse(), "令牌已过期");} catch (Exception e) {return unauthorizedResponse(exchange.getResponse(), "令牌无效");}}private Mono<Void> unauthorizedResponse(ServerHttpResponse response, String message) {response.setStatusCode(HttpStatus.UNAUTHORIZED);return response.setComplete();}@Overridepublic int getOrder() {return -100; // 确保在所有路由之前执行}
}
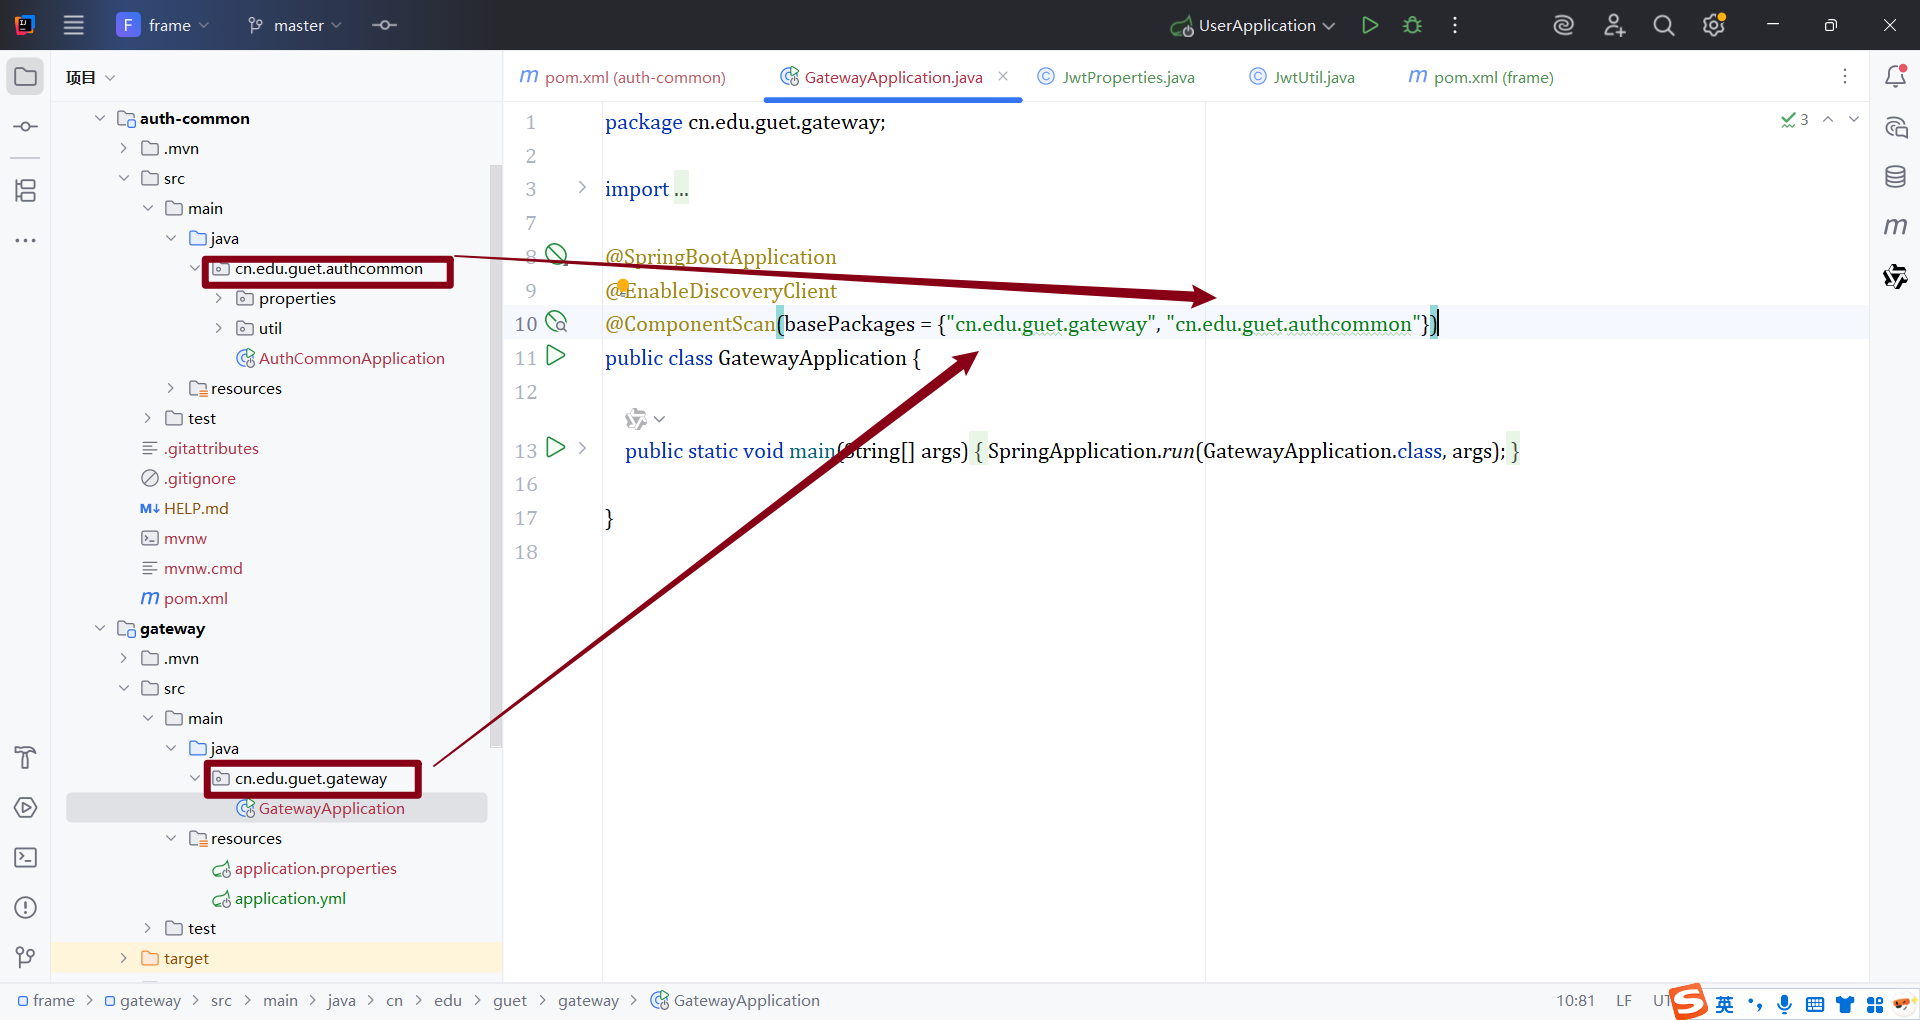
1.4.2.4 更新启动类
启动类加入新的注解
@ComponentScan(basePackages = {"cn.edu.guet.gateway", "cn.edu.guet.authcommon"})
1.4.3 user模块
1.4.3.1 引入共享认证模块
- 导入auth-common模块和lombok依赖
<dependency><groupId>org.projectlombok</groupId><artifactId>lombok</artifactId><optional>true</optional></dependency>
- 添加yml配置
framework:jwt:# 密钥:一个32位或更长的随机字符串,用于对Token进行签名和验证。# 生产环境中务必使用一个复杂的随机密钥,并妥善保管。secretKey: sY6pBq8nE0yX3zH9vJ5cK2mD1fG7aL4uT8wP3oR0qI2# accessToken的有效期,单位为分钟accessTokenExpireMinutes: 15 # refreshToken的有效期,单位为天refreshTokenExpireDays: 7
1.4.3.2 创建内部测试所用类
- controller
package cn.edu.guet.user.controller;import cn.edu.guet.authcommon.util.JwtUtil;
import cn.edu.guet.user.domain.User;
import cn.edu.guet.user.dto.LoginDTO;
import cn.edu.guet.user.service.UserService;
import io.jsonwebtoken.Claims;
import io.jsonwebtoken.ExpiredJwtException;
import org.springframework.beans.factory.annotation.Autowired;
import org.springframework.http.HttpEntity;
import org.springframework.http.HttpStatus;
import org.springframework.http.ResponseEntity;
import org.springframework.web.bind.annotation.*;
import org.springframework.web.client.RestTemplate;
import org.springframework.http.HttpHeaders;
import org.springframework.http.MediaType;
import java.util.HashMap;
import java.util.Map;@RestController
@RequestMapping("/user")
public class UserController {private final UserService userService;private final JwtUtil jwtUtil;private final RestTemplate restTemplate = new RestTemplate();@Autowiredpublic UserController(UserService userService, JwtUtil jwtUtil) {this.userService = userService;this.jwtUtil = jwtUtil;}@PostMapping("/login")public ResponseEntity<Map<String, Object>> login(@RequestBody LoginDTO loginDTO) {// 验证用户名和密码User user = userService.verifyUser(loginDTO.getUsername(), loginDTO.getPassword());if (user == null) {// 验证失败,返回 401 Unauthorizedreturn ResponseEntity.status(HttpStatus.UNAUTHORIZED).body(Map.of("message", "用户名或密码错误"));}// 验证成功,生成 JWT Token,包含用户ID和角色Map<String, Object> claims = new HashMap<>();claims.put("userId", user.getId());claims.put("role", user.getRole());String accessToken = jwtUtil.generateAccessToken(claims);String refreshToken = jwtUtil.generateRefreshToken(claims);return ResponseEntity.ok(Map.of("accessToken", accessToken,"refreshToken", refreshToken,"accessTokenExpireIn", jwtUtil.getJwtProperties().getAccessTokenExpireMinutes() * 60,"refreshTokenExpireIn", jwtUtil.getJwtProperties().getRefreshTokenExpireDays() * 24 * 60 * 60));}@PostMapping("/refresh")public ResponseEntity<Map<String, Object>> refreshToken(@RequestBody Map<String, String> payload) {String refreshToken = payload.get("refreshToken");if (refreshToken == null) {return ResponseEntity.status(HttpStatus.BAD_REQUEST).body(Map.of("message", "缺少刷新令牌"));}try {Claims claims = jwtUtil.parseToken(refreshToken);// 验证 Token 类型是否为 'refresh'if (!"refresh".equals(claims.get("token_type", String.class))) {return ResponseEntity.status(HttpStatus.UNAUTHORIZED).body(Map.of("message", "令牌类型无效"));}// 验证通过,生成新的 Access TokenString newAccessToken = jwtUtil.generateAccessToken(claims);return ResponseEntity.ok(Map.of("accessToken", newAccessToken,"accessTokenExpireIn", jwtUtil.getJwtProperties().getAccessTokenExpireMinutes() * 60));} catch (ExpiredJwtException e) {return ResponseEntity.status(HttpStatus.FORBIDDEN).body(Map.of("message", "刷新令牌已过期,请重新登录"));} catch (Exception e) {return ResponseEntity.status(HttpStatus.UNAUTHORIZED).body(Map.of("message", "刷新令牌无效"));}}@GetMapping("/logout")public ResponseEntity<Map<String, String>> logout(@RequestHeader(HttpHeaders.AUTHORIZATION) String authorizationHeader) {String token = authorizationHeader.substring(7);// 构造请求体,将 token 传递给网关的内部接口HttpHeaders headers = new HttpHeaders();headers.setContentType(MediaType.APPLICATION_JSON);HttpEntity<Map<String, String>> requestEntity = new HttpEntity<>(Map.of("token", token), headers);try {// 调用网关的内部黑名单接口// 这里的 URL 应该是网关的实际内部地址和端口restTemplate.postForEntity("http://localhost:8888/internal/blacklist", requestEntity, String.class);return ResponseEntity.ok(Map.of("message", "注销成功,令牌无效"));} catch (Exception e) {// 如果内部调用失败,不影响用户的登出体验,仅记录错误return ResponseEntity.ok(Map.of("message", "注销成功,但令牌失效失败"));}}
}
- domain
import lombok.Data;
import java.io.Serializable;@Data
public class User implements Serializable {private Long id;private String username;private String password; // 数据库中存储的是哈希值,而不是明文private String role;
}
- dto
import lombok.Data;
@Data
public class LoginDTO {private String username;private String password;}
- service接口、serviceImpl实现类
import cn.edu.guet.user.domain.User;public interface UserService {User verifyUser(String username, String password);
}
package cn.edu.guet.user.service.impl;import cn.edu.guet.user.domain.User;
import cn.edu.guet.user.service.UserService;
import org.springframework.stereotype.Service;@Service
public class UserServiceImpl implements UserService {@Overridepublic User verifyUser(String username, String password) {// 演示用的占位符逻辑:if ("admin".equals(username) && "123456".equals(password)) {User user = new User();user.setId(1L);user.setUsername("admin");user.setRole("admin");return user;}return null;}
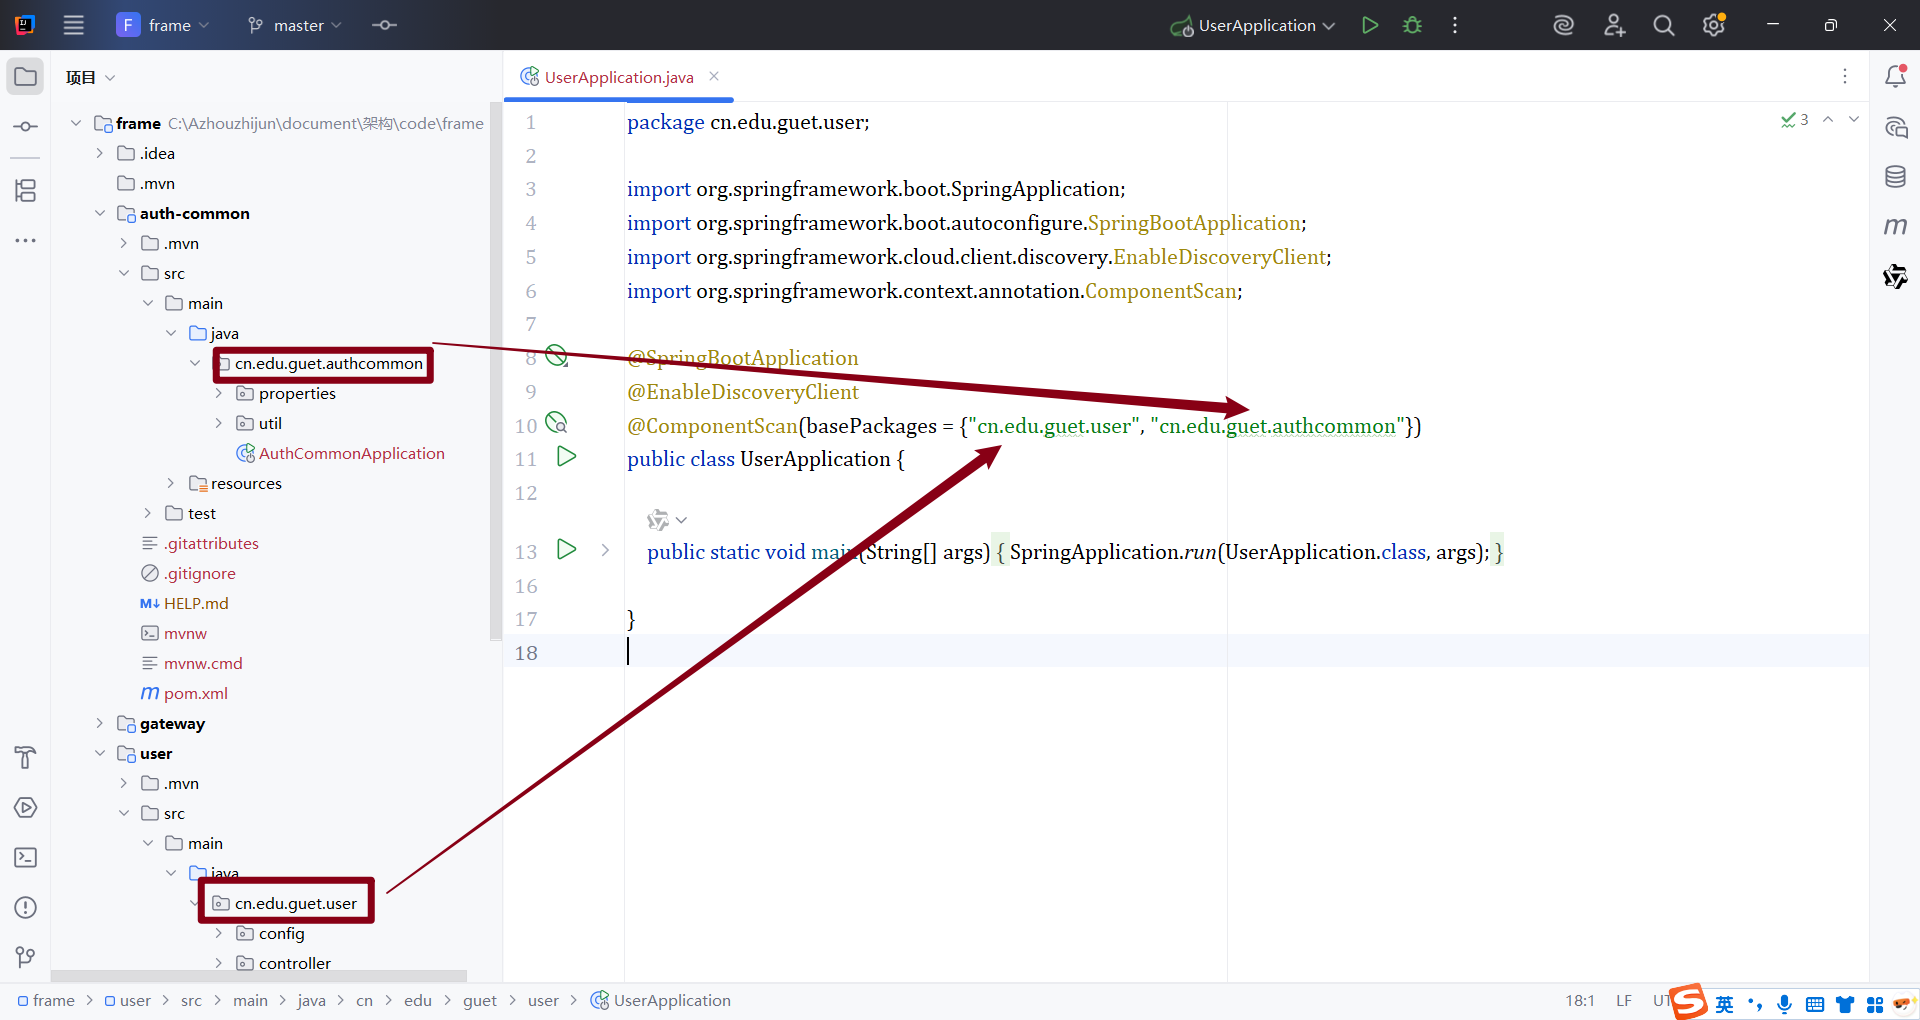
}1.4.3.3 更新启动类
启动类加入新的注解
@ComponentScan(basePackages = {"cn.edu.guet.user", "cn.edu.guet.authcommon"})
1.4.4 postman测试
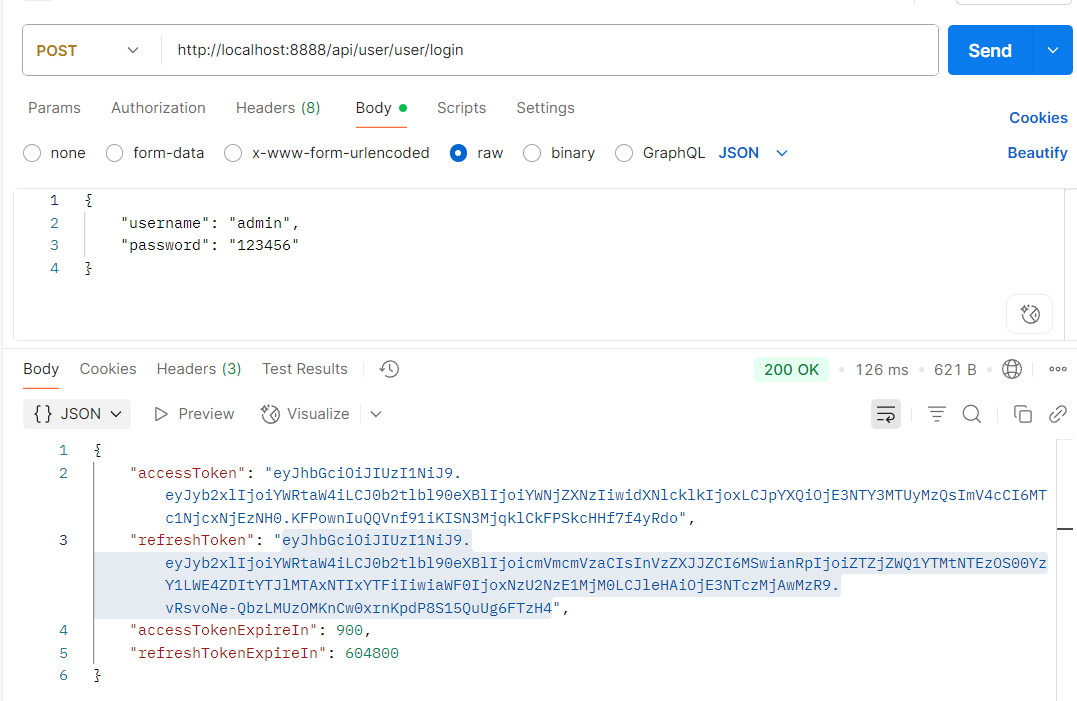
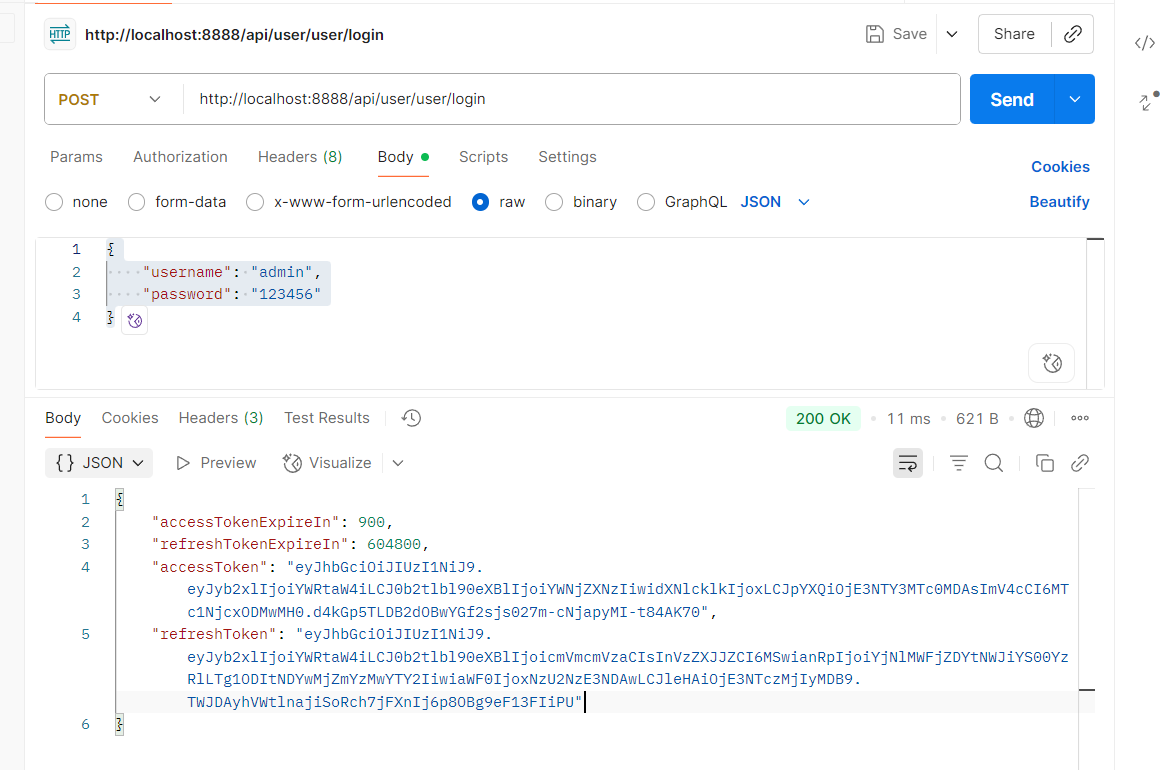
1.4.4.1 登录验证
- 传参
Body -> raw -> 添加以下内容
{"username": "admin","password": "123456"
}
- 发送请求
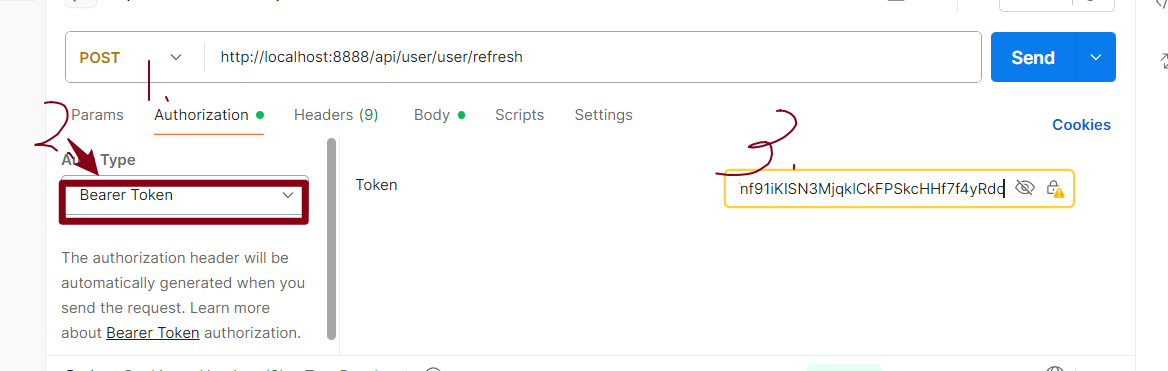
1.4.4.2 刷新验证
- 传入请求头
Authorizetion -> Bearer Token -> 复制登录时的"accessToken"的值
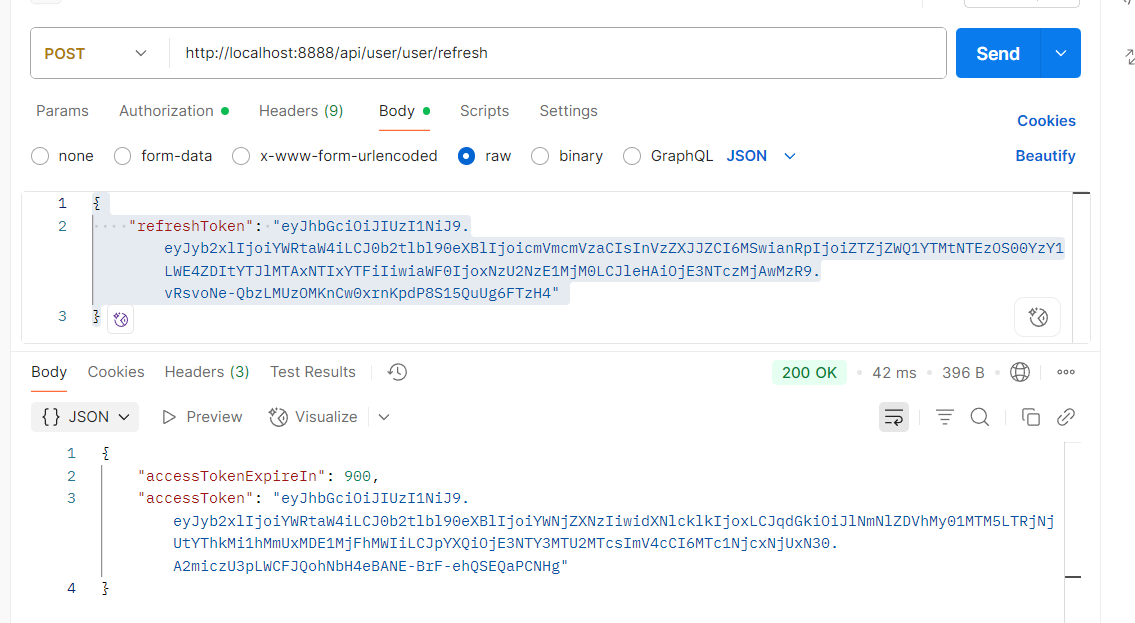
- 传参
Body -> raw -> 添加以下内容(登录时"refreshToken"的值)
{"refreshToken": "eyJhbGciOiJIUzI1NiJ9.eyJyb2xlIjoiYWRtaW4iLCJ0b2tlbl90eXBlIjoicmVmcmVzaCIsInVzZXJJZCI6MSwianRpIjoiZTZjZWQ1YTMtNTEzOS00YzY1LWE4ZDItYTJlMTAxNTIxYTFiIiwiaWF0IjoxNzU2NzE1MjM0LCJleHAiOjE3NTczMjAwMzR9.vRsvoNe-QbzLMUzOMKnCw0xrnKpdP8S15QuUg6FTzH4"
}
- 发送请求
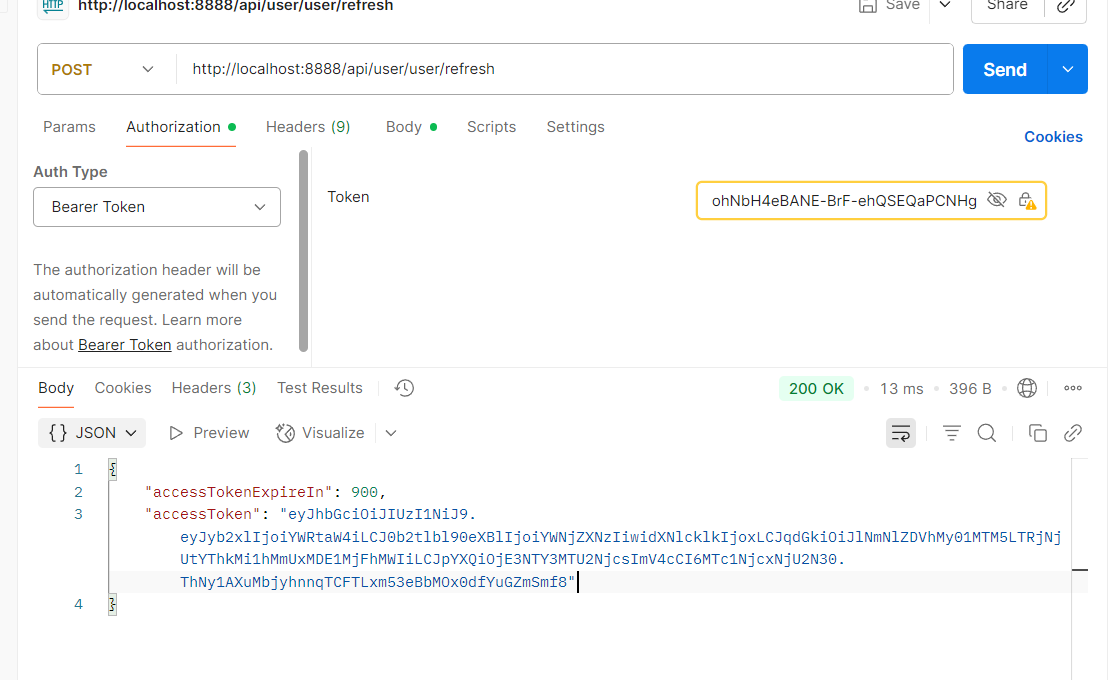
- 验证该accessToken是否有用
将该token更换一下请求头中的token,然后再次发送请求,能出结果表示成功
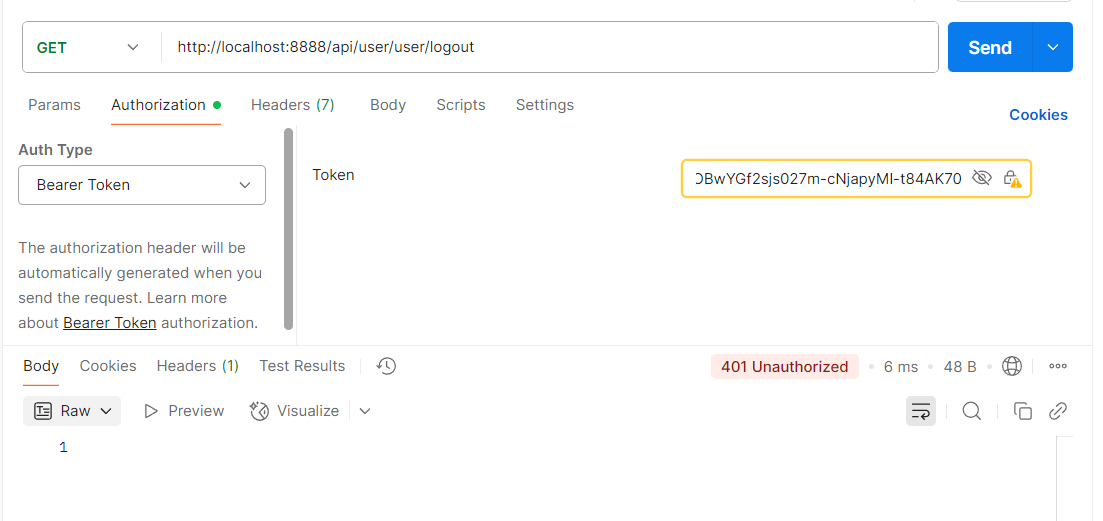
1.4.4.3 登出验证
- 首先进行登录
- 将该accessToken传入,进行登出,此刻能正常响应
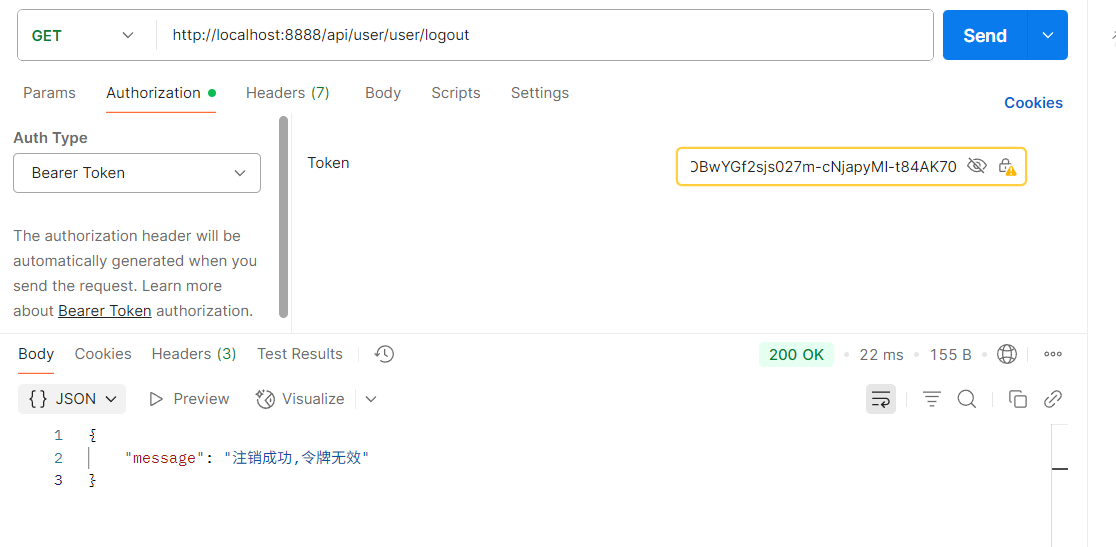
- 再次发送这个请求,会返回401