godot 通过 GDExtension 配置 C++ 开发环境
近来无事,突然想尝试一下怎么在 godot 里用 C++ 来搞开发。
经过查文档发现,当下的主流手段就是 GDExtension ,且有一个官方在维护的绑定在。(那就更得选它了)
首先是下载,安装 Visual Studio 和 Godot 这种事,这里就不赘述了,请自行解决。这里使用的是最新的 4.5 版本。
第一步先从 github 上下载官方维护的绑定 https://github.com/godotengine/godot-cpp/tree/4.5
主要配置可以参考官方文档中的说明:
https://docs.godotengine.org/zh-cn/4.5/tutorials/scripting/cpp/gdextension_cpp_example.html#compiling-the-plugin
官方基本上讲的都很清楚了,就是有一些小细节不太清楚。
首先呢先创建一个总的主文件夹,叫啥都行,再在里面创建一个 godot 项目,形成下面这样的目录结构。
gdextension_cpp_example/
|
+--demo-cpp/ # godot 项目
+--demo-cpp/bin # 放编译完的 c++ 扩展 dll
|
+--godot-cpp/ # 我们下载的 C++ bindings
|
+--src/ # 我们写的 c++ 扩展代码
src 里的代码看文档自己加就好了,这里我们就直接略过了。
然后在根目录中创建 scons 的配置文件 SConstruct 。
这里提一下,在官方绑定的 godot-cpp\test 目录下,有很多参考文件,可以基于它们写你自己的配置,或者直接贴过来用,当然你得确保环境,目录配置都是对的。
scons 的安装请自行解决,我因为爱使用 miniconda ,所以把它装在一个 conda 的 python 环境里了,一般直接安装在电脑上即可,不用像我搞这么麻烦。
SConstruct 可以参考官方的,这里贴一个我正在用的配置。
#!/usr/bin/env python
import os
import sysenv = SConscript("./godot-cpp/SConstruct")# For reference:
# - CCFLAGS are compilation flags shared between C and C++
# - CFLAGS are for C-specific compilation flags
# - CXXFLAGS are for C++-specific compilation flags
# - CPPFLAGS are for pre-processor flags
# - CPPDEFINES are for pre-processor defines
# - LINKFLAGS are for linking flags# tweak this if you want to use different folders, or more folders, to store your source code in.
env.Append(CPPPATH=["src/"])
sources = Glob("src/*.cpp")if env["platform"] == "macos":library = env.SharedLibrary("demo-cpp/bin/libgdexample.{}.{}.framework/libgdexample.{}.{}".format(env["platform"], env["target"], env["platform"], env["target"]),source=sources,)
elif env["platform"] == "ios":if env["ios_simulator"]:library = env.StaticLibrary("demo-cpp/bin/libgdexample.{}.{}.simulator.a".format(env["platform"], env["target"]),source=sources,)else:library = env.StaticLibrary("demo-cpp/bin/libgdexample.{}.{}.a".format(env["platform"], env["target"]),source=sources,)
else:library = env.SharedLibrary("demo-cpp/bin/libgdexample{}{}".format(env["suffix"], env["SHLIBSUFFIX"]),source=sources,)Default(library)
其实重点就是注意路径别写错了,尤其是你的项目名。
这时,有了这个配置,你就可以先用 scons 编译一次了,但是我觉得没啥必要。
我们直接进入 godot 项目中,手动创建一个 bin 目录即可,然后再创建一个gdexample.gdextension 文件,这个名字应该是可以修改的,不过我没仔细研究它就是了。
它是用来链接项目和扩展的,这里也贴一个我的:
[configuration]entry_symbol = "example_library_init"
compatibility_minimum = "4.5"
reloadable = true[libraries]# mac平台
macos.debug = "res://bin/libgdexample.macos.template_debug.framework"
macos.release = "res://bin/libgdexample.macos.template_release.framework"# ios 平台
ios.debug = "res://bin/libgdexample.ios.template_debug.xcframework"
ios.release = "res://bin/libgdexample.ios.template_release.xcframework"# windows 平台
windows.debug.x86_32 = "res://bin/libgdexample.windows.template_debug.dev.x86_32.dll"
windows.debug.x86_64 = "res://bin/libgdexample.windows.template_debug.dev.x86_64.dll"
windows.release.x86_32 = "res://bin/libgdexample.windows.template_release.x86_32.dll"
windows.release.x86_64 = "res://bin/libgdexample.windows.template_release.x86_64.dll"# linux 平台
linux.debug.x86_64 = "res://bin/libgdexample.linux.template_debug.x86_64.so"
linux.debug.arm64 = "res://bin/libgdexample.linux.template_debug.arm64.so"
linux.debug.rv64 = "res://bin/libgdexample.linux.template_debug.rv64.so"
linux.release.x86_64 = "res://bin/libgdexample.linux.template_release.x86_64.so"
linux.release.arm64 = "res://bin/libgdexample.linux.template_release.arm64.so"
linux.release.rv64 = "res://bin/libgdexample.linux.template_release.rv64.so"# android 平台
android.debug.x86_64 = "res://bin/libgdexample.android.template_debug.x86_64.so"
android.debug.arm64 = "res://bin/libgdexample.android.template_debug.arm64.so"
android.release.x86_64 = "res://bin/libgdexample.android.template_release.x86_64.so"
android.release.arm64 = "res://bin/libgdexample.android.template_release.arm64.so"[dependencies]ios.debug = {"res://bin/libgodot-cpp.ios.template_debug.xcframework": ""
}
ios.release = {"res://bin/libgodot-cpp.ios.template_release.xcframework": ""
}
看内容也可以知道,就是填一下后面会编译到 bin 目录下的库文件地址。
外加这里有个小限制,就是当前没有比 VsCode 更适合 godot 开发的 ide ,所以这里我们说一下该怎么配置 IDE。
重点是在 VsCode 的配置目录下创建 c_cpp_properties.json,tasks.json,launch.json 3个 json 文件。
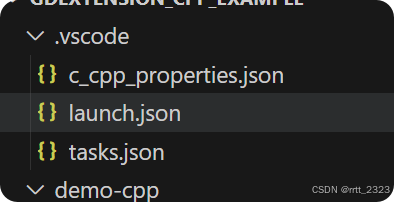
c_cpp_properties.json 是改善 ide 对 cpp 项目的智能感知。
tasks.json 是配置通过 ide 来启动 scons 编译动作。
launch.json 是配置编辑器的调试,运行,其实没啥大用。
我的 c_cpp_properties.json
{"configurations": [{"name": "Win32","includePath": ["${workspaceFolder}/**"],"defines": ["_DEBUG","UNICODE","_UNICODE","TOOLS_ENABLED","DEBUG_ENABLED","TESTS_ENABLED"],"windowsSdkVersion": "10.0.26100.0","compilerPath": "cl.exe","cStandard": "c17","cppStandard": "c++17","intelliSenseMode": "windows-msvc-x64"}],"version": 4
}
没啥好说的,照着文档来就对了。
我的 tasks.json
{// See https://go.microsoft.com/fwlink/?LinkId=733558// for the documentation about the tasks.json format"version": "2.0.0","tasks": [{"label": "build-extension [dev build]","group": "build","type": "shell","command": "cmd","args": ["/c","C:\\ProgramData\\miniconda3\\Scripts\\activate.bat && conda activate godot_scons && scons compiledb=yes dev_build=yes"],"problemMatcher": "$msCompile"}]
}
因为我的 python 是布在 conda 中的,所以 cmd 命令比较复杂。
这里有2个参数需要说一下
compiledb=yes 是为了 ide 能够更好的进行智能感知,代码补全而加的,并且它会在根目录下产生一个 compile_commands.json 文件,里面都是一些 .obj 文件的位置之类的信息。
dev_build=yes 和名字一样,就是为了编译方便进行调试的 dev 版本 dll。
我的 launch.json
{// 使用 IntelliSense 了解相关属性。 // 悬停以查看现有属性的描述。// 欲了解更多信息,请访问: https://go.microsoft.com/fwlink/?linkid=830387"version": "0.2.0","configurations": [{"name": "Run Project in Editor","type": "cppvsdbg","request": "launch","program": "F:\\GodotEngines\\Godot_v4.5-stable_win64.exe\\Godot_v4.5-stable_win64.exe","args": [ "--editor", "--path", "${workspaceFolder}/demo-cpp", "--verbose", "--debug", "--stdout" ],"stopAtEntry": false,"cwd": "${workspaceFolder}","environment": [],"console": "internalConsole","visualizerFile": "${workspaceFolder}/platform/windows/godot.natvis",//"preLaunchTask": "build-extension [dev build]"},{"name": "Run Project in Game","type": "cppvsdbg","request": "launch","program": "F:\\GodotEngines\\Godot_v4.5-stable_win64.exe\\Godot_v4.5-stable_win64.exe","args": ["--path", "${workspaceFolder}/demo-cpp","--verbose", "--debug", "--stdout"],"stopAtEntry": false,"cwd": "${workspaceFolder}","environment": [],"console": "internalConsole",//"preLaunchTask": "build-extension [dev build]"},]
}
我相信大家应该都看得懂,几乎都是明文的,这里特别说一下 preLaunchTask 是启动的前置任务,比如你想先编译后再启动之类的,就需要配它了,一般没啥用。
配置好后,打开 VsCode ,我们就可以通过 shift+ctrl+p 来呼出 > 命令行,然后选择运行生成任务,并选择我们配置的任务来进行编译了,超级的方便。


这里推荐 VsCode 除了安装 C++ 插件外,把 godot-tools 插件也装一下,非常的好用。

就是装完需要简单的配置一下,首先是把 godot 编辑器的地址填一下。

语言服务器的 ip 和端口要和编辑器里的对上
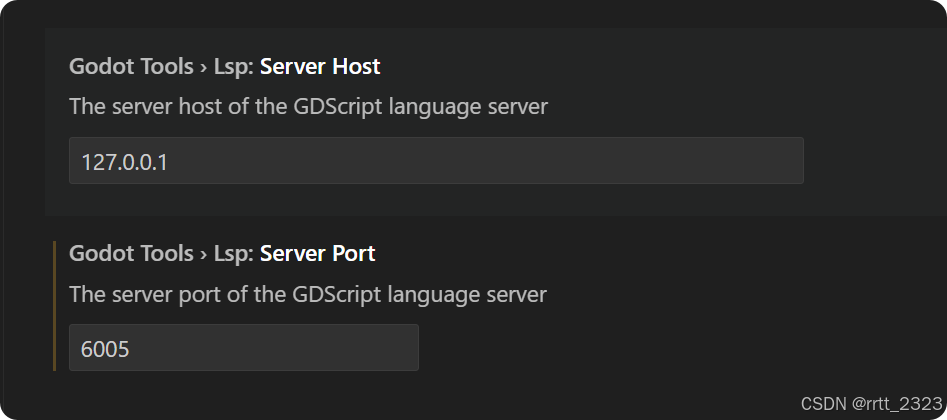
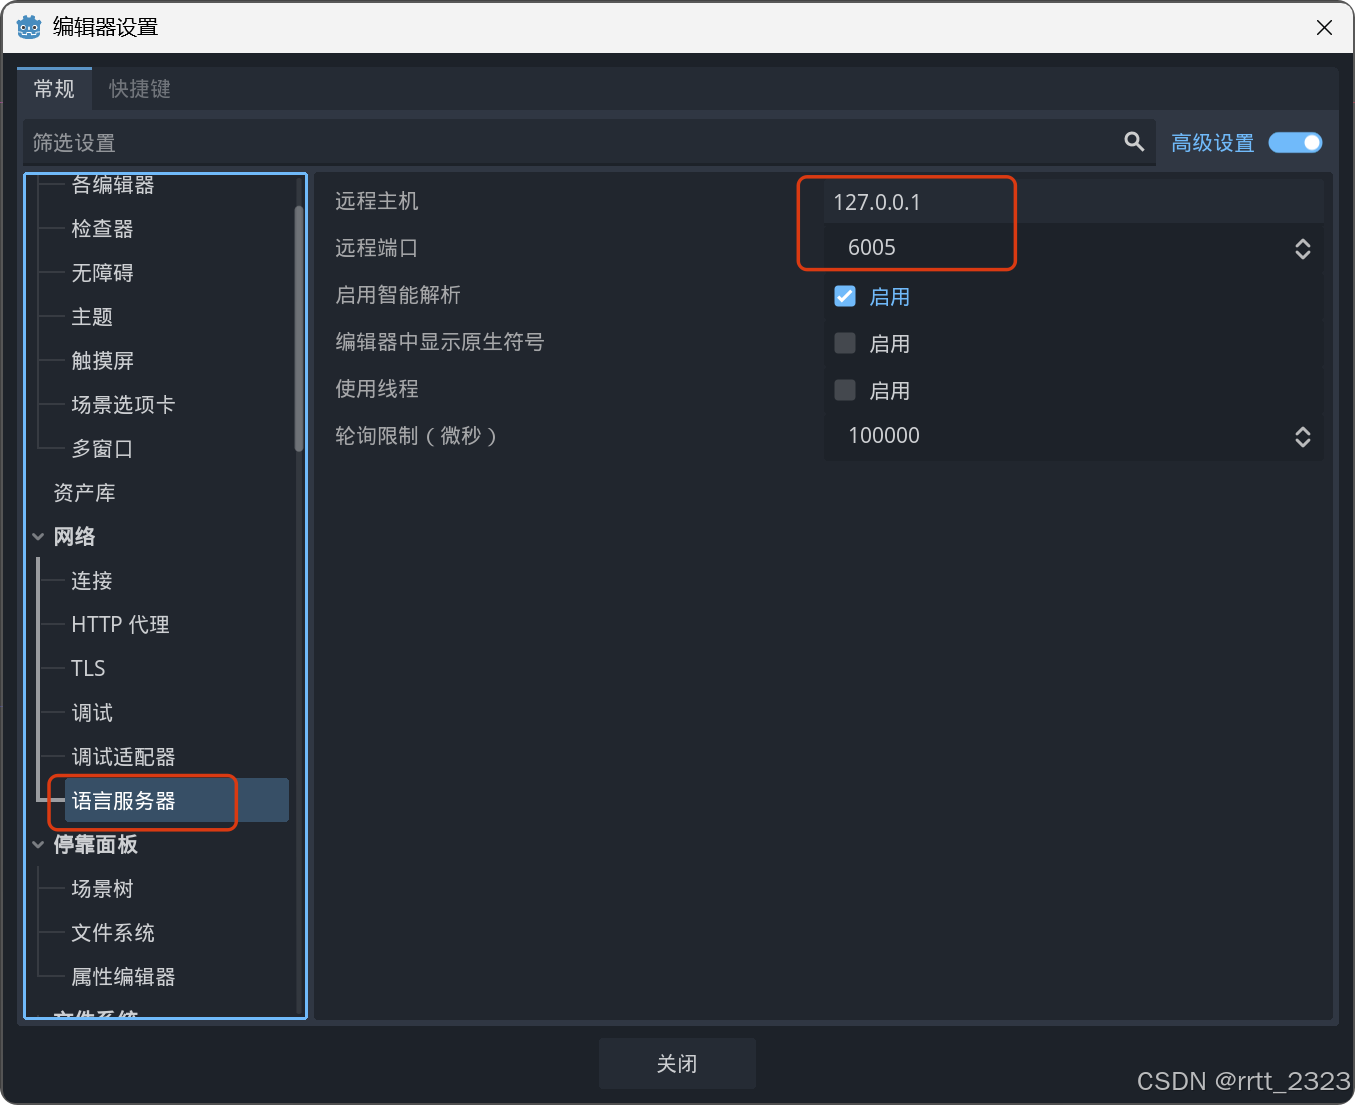
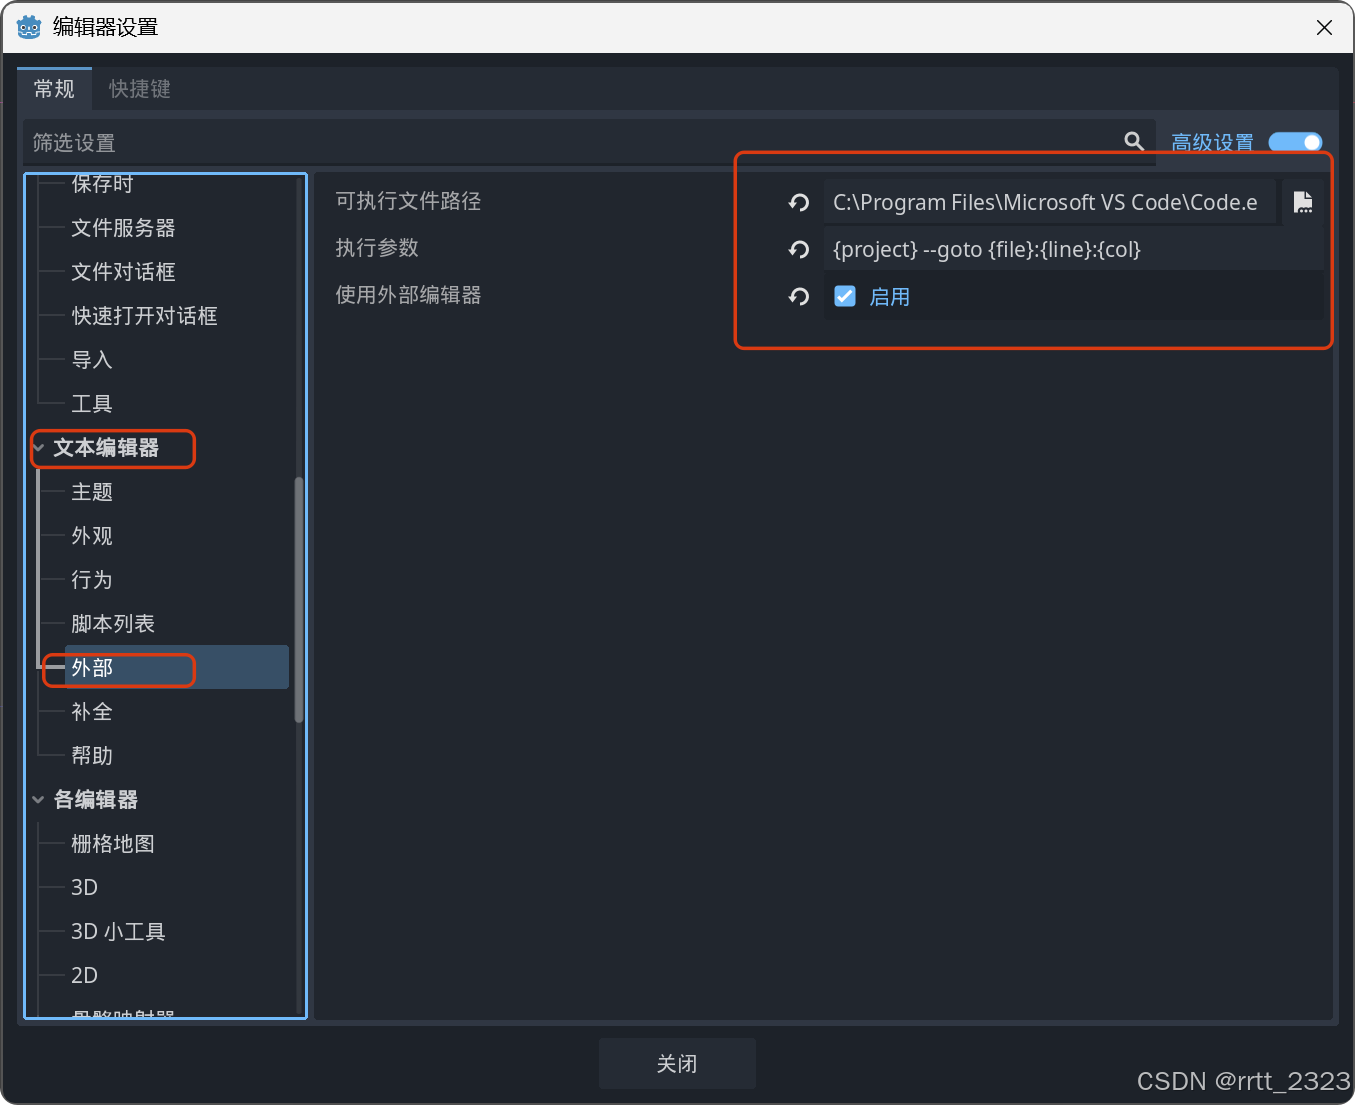
并在编辑器设置中启用外部 ide(虽然官方一直致力于自己 ide 的开发,但我还是用不习惯)
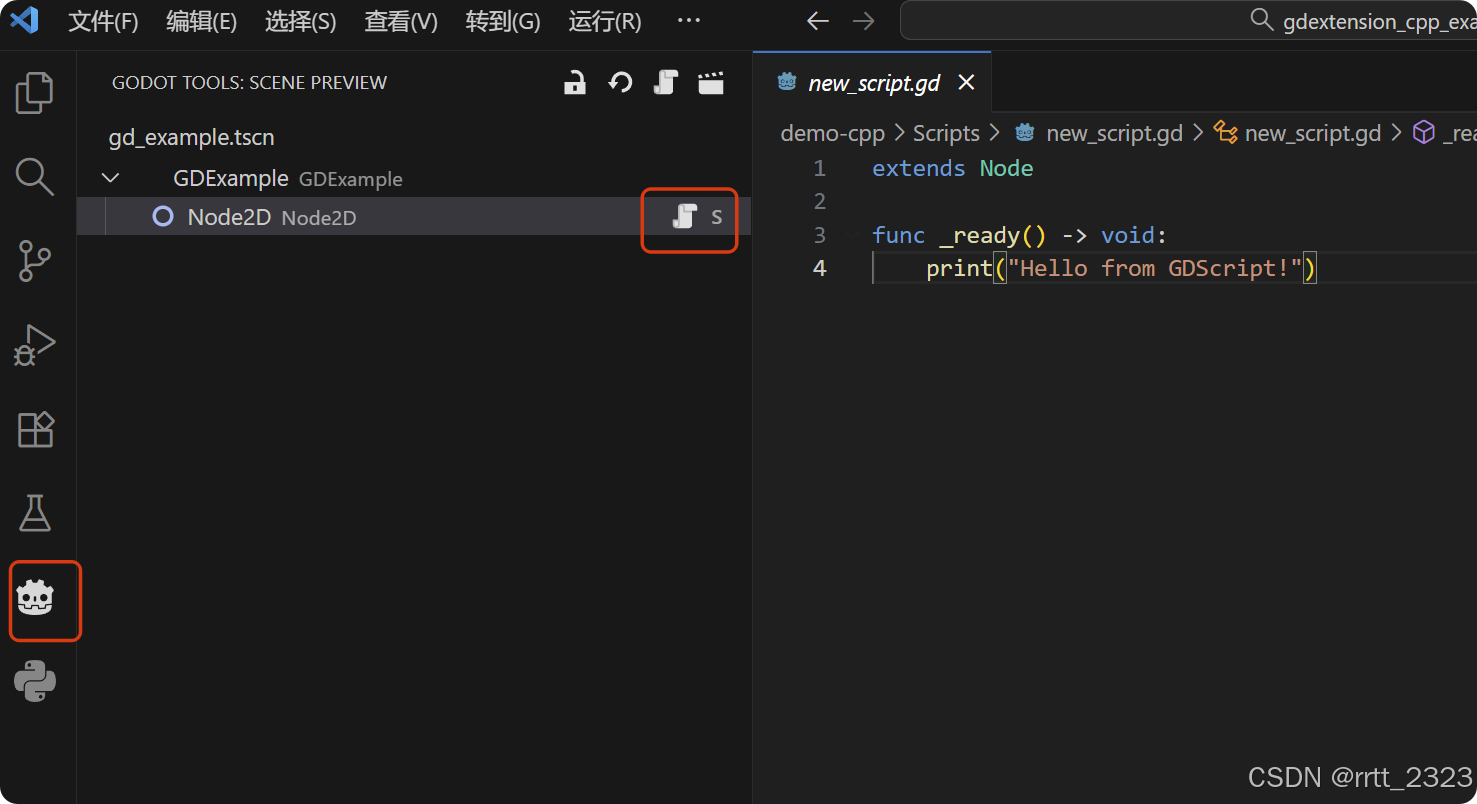
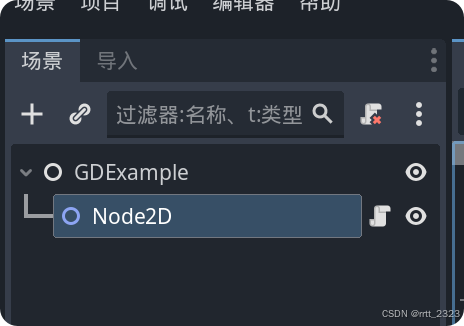
godot-tools 这个插件在左边会产生一个按钮,点开后,如果你双击了文件系统中的场景文件,它会把场景中的节点树结构给你显示出来,和你在 godot 编辑器里的一样,并可以快速打开节点上的 gd 脚本代码,给你一个纯净的编码环境,真的很 cool !
后记:
这次 godot 给我最大的惊喜有2点。
1是没有任何多余的步骤,就可以直接在扩展的 cpp 里下断点进行调试。
2是 cpp 扩展写完了直接编译,然后立刻就可以在编辑器中看到逻辑的变化,不用重启编辑器,体验直接接近写脚本语言了!
鉴于 unity 不断作妖的当下,希望 godot 这类开源引擎越来越好,相关的工作岗位越来越多吧,unity 是真的不想再用了,信任建立困难,崩塌可是很容易的~
