全网首发! Nvidia Jetson Thor 128GB DK 刷机与测评(五)常用功能测评 - RealtimeSTT 音频转文本 同声传译
这篇博客是上一篇博客的续集,所有测试和评测均基于第一篇刷机博客的环境上完成的测试。此篇博客对 RealtimeSTT 实时音频转文本算法进行了部署和测试。
系列博客如下:
- 全网首发! Nvidia Jetson Thor 128GB DK 刷机与测评(一)刷机与 OpenCV-CUDA、pytorch CUDA13.0+ 使用
- 全网首发! Nvidia Jetson Thor 128GB DK 刷机与测评(三)常用功能测评 DeepAnything 系列
- 全网首发! Nvidia Jetson Thor 128GB DK 刷机与测评(三)常用功能测评 DeepAnything 系列
- 全网首发! Nvidia Jetson Thor 128GB DK 刷机与测评(四)常用功能测评 - 目标跟踪系列 DeepSort、Boxmot、ByteTrack等
RealtimeSTT
RealtimeSTT 是一个非常知名的基于大模型的音频转文本工程,支持实时流式转换和输出,基本能实现秒级响应。在具身智能人机交互领中,STT 和 TTS 都是重要的模块,但在最新的 Thor 硬件上的部署有一些需要注意的事项,这里将对全流程提供解决方案。
- RealtimeSTT:https://github.com/KoljaB/RealtimeSTT
实时音频转文本
Step1. 拉取镜像
这里使用英伟达官方提供的 nvcr.io/nvidia/pytorch:25.08-py3 容器,使用下面的命令拉取:
$ sudo docker pull nvcr.io/nvidia/tensorflow:25.02-tf2-py3
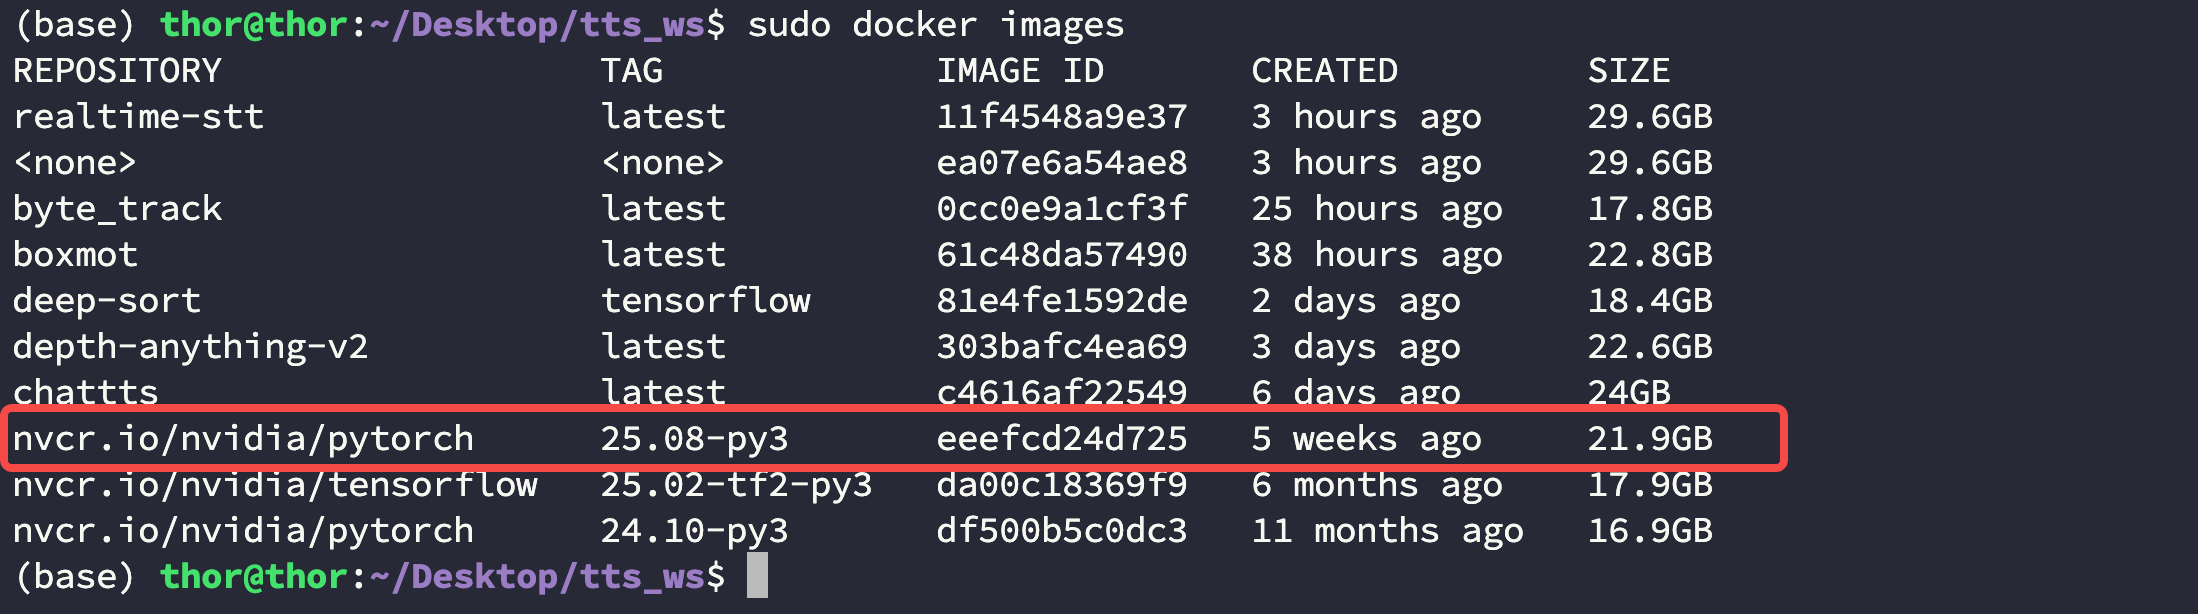
拉取完后检查镜像:
$ docker imagesREPOSITORY                  TAG             IMAGE ID       CREATED         SIZE
nvcr.io/nvidia/pytorch      25.08-py3       eeefcd24d725   5 weeks ago     21.9GB
Step2. 创建工作空间并拉取源码
创建工作空间
这里为了和宿主机 Thor 传输文件方便,建议在宿主机上先创建一个文件夹并映射到容器中,此处以 Deskop/tts_ws 为例:
$ cd Desktop
$ mkdir tts_ws
拉取源码
进入到 Deskop/tts_ws 拉取 RealtimeSTT 源码:
$ cd Desktop/tts_ws
$ git clone https://github.com/KoljaB/RealtimeSTT.git
除了 RealtimeSTT 这个库以外,还需要就地编译 CTranslate2 库:
$ cd Desktop/tts_ws
$ git clone https://github.com/OpenNMT/CTranslate2.git
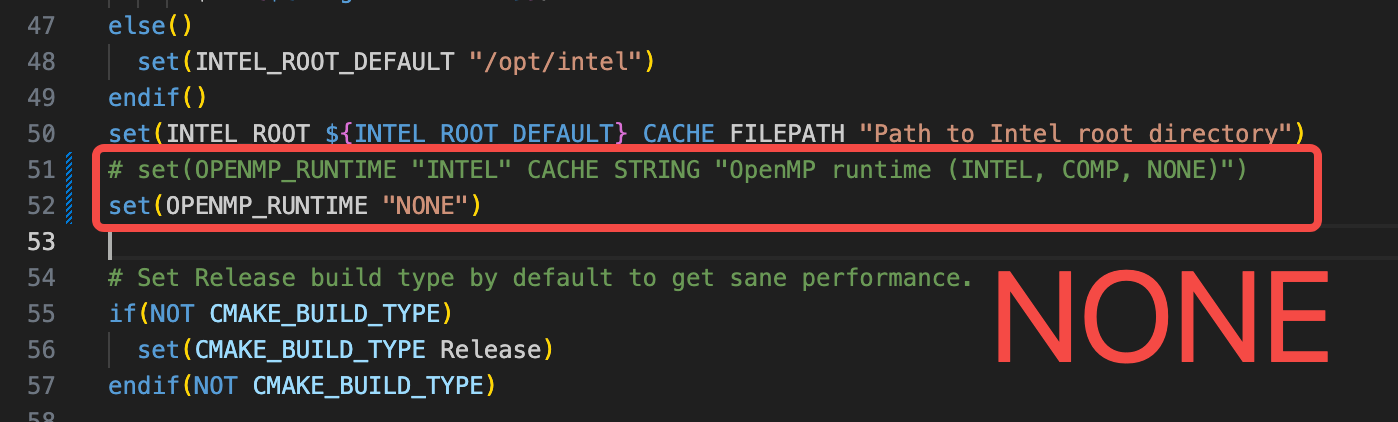
然后修改 CTranslate2/CMakeLists.txt 文件,将 51 行注释掉并添加 set(OPENMP_RUNTIME "NONE") 意思是编译时不用 Intel OpenNMP 库,因为 Thor 上没有 Intel 的硬件并且也用不到这个库,效果如下:
拉取模型资源
因为在容器中配置穿透和端口非常麻烦,建议在宿主机上完成模型拉取操作,启动容器时映射到模型保存地址。
这部分操作可以在 base 环境中完成也可以自己新建一个 conda 环境,我这里直接在 base 环境中操作了:
$ pip install huggingface_hub transformers
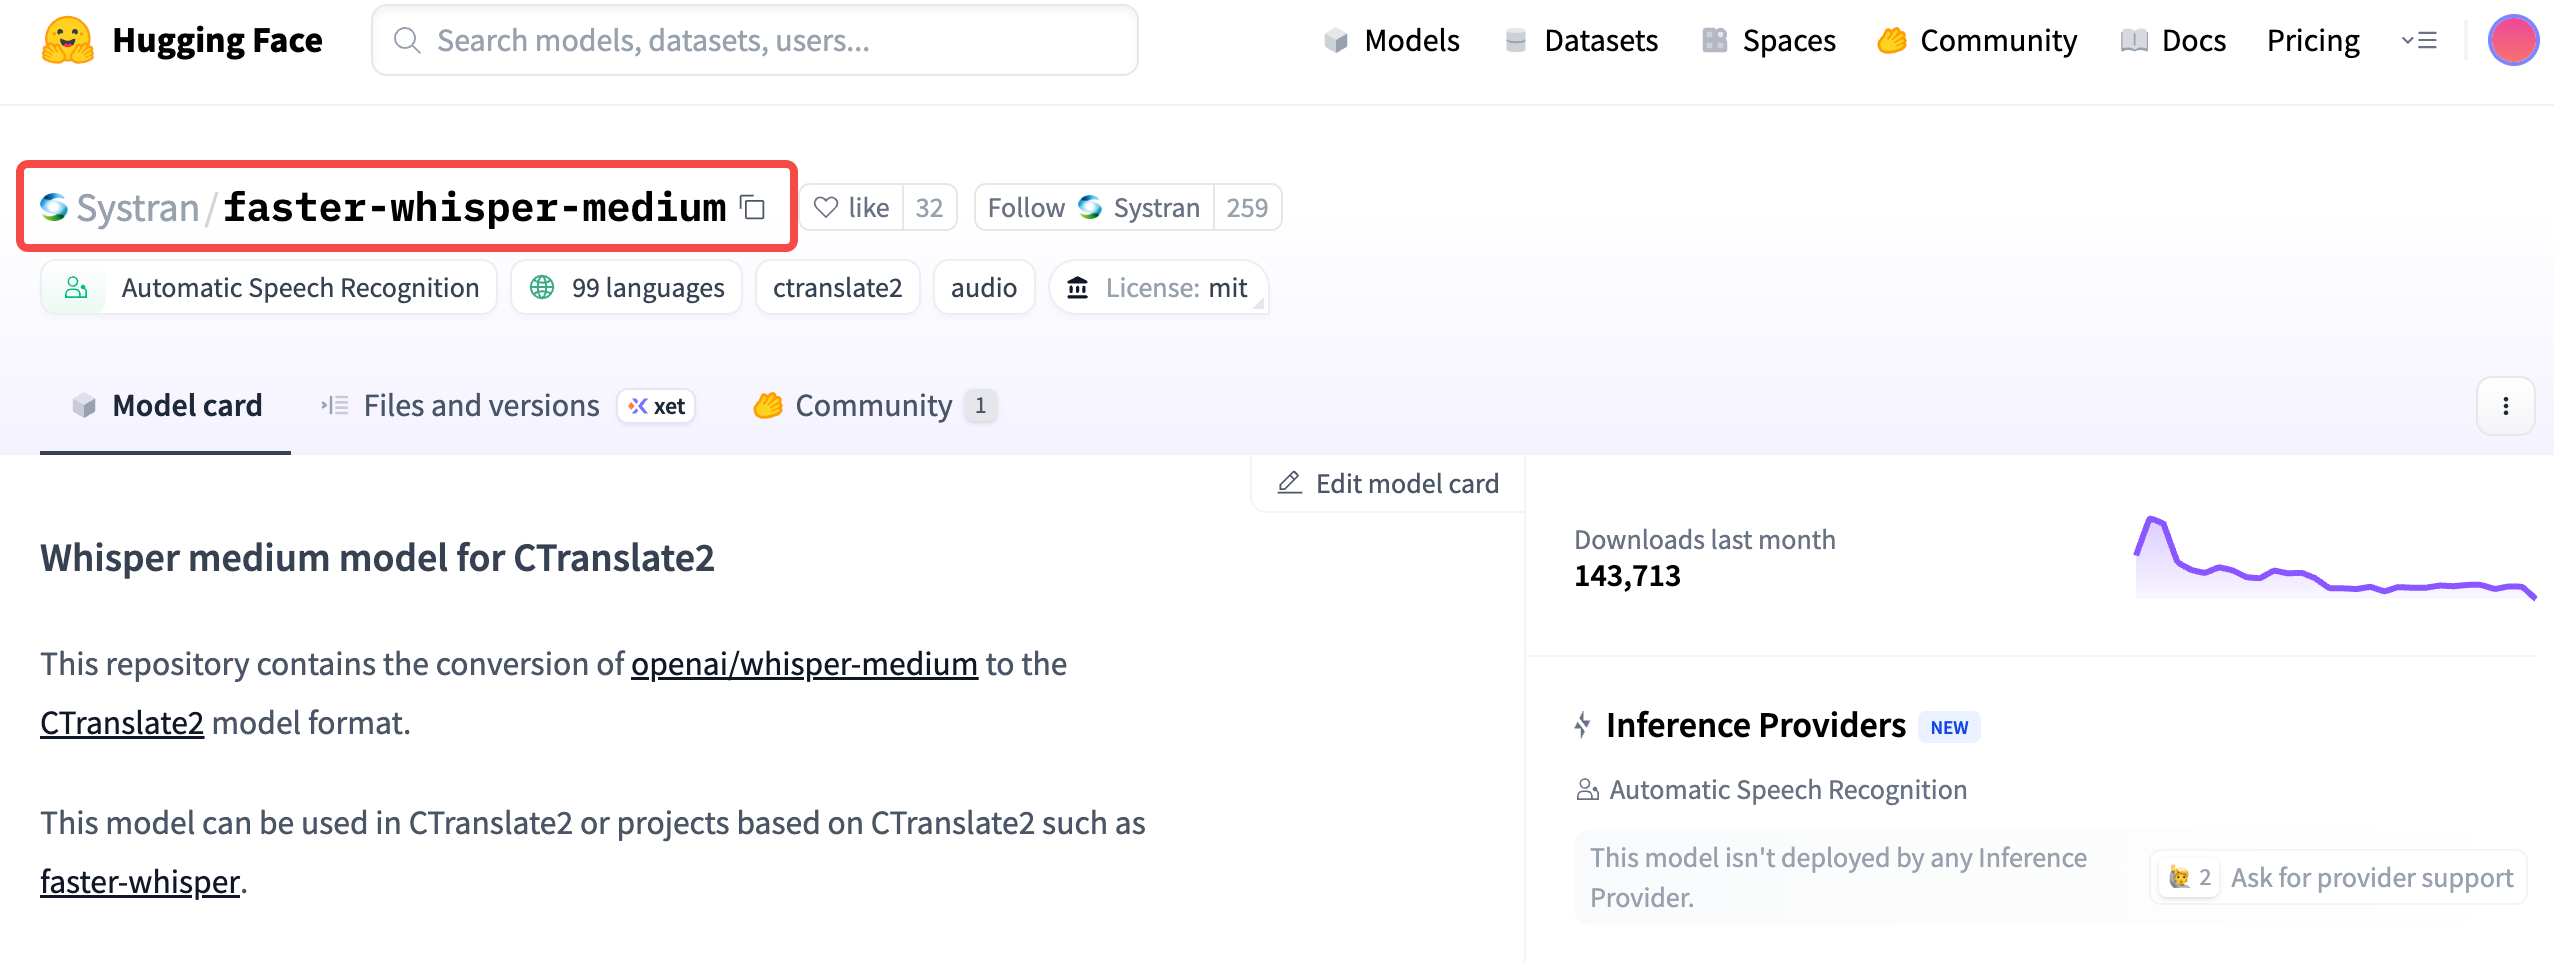
作者提供了多款模型,根据自己实际情况选择下载,这里以 faster-whisper-medium 为例,因为我们实验发现其能够平衡精度和输出速度。
- Huggingface 模型链接:https://huggingface.co/Systran/faster-whisper-medium
拉取模型:
$ python -c "from huggingface_hub import snapshot_download; snapshot_download(repo_id='Systran/faster-whisper-medium')"

Step3. 运行容器
启动容器
使用下面的命令启动容器:
$ sudo docker run -dit \--runtime nvidia \--privileged \--ipc=host \--ulimit memlock=-1 \--ulimit stack=67108864 \-v $(pwd):/workspace \-v ~/.cache/huggingface:/root/.cache/huggingface \-p 8001:8001 \nvcr.io/nvidia/pytorch:25.08-py3 \bash
查看正在运行的容器:
$ sudo docker ps -aCONTAINER ID   IMAGE                              COMMAND                  CREATED         STATUS         PORTS                                                             NAMES
99ec24086958   nvcr.io/nvidia/pytorch:25.08-py3   "/opt/nvidia/nvidia_…"   3 seconds ago   Up 3 seconds   6006/tcp, 8888/tcp, 0.0.0.0:8001->8001/tcp, [::]:8001->8001/tcp   distracted_beaver

进入该容器:
$ sudo docker exec -it distracted_beaver /bin/bash

安装依赖
在容器中执行下面的命令安装依赖库:
$ apt-get update
$ apt-get install build-essential git-lfs tmux
$ apt-get install portaudio19-dev
$ apt install ffmpeg
编译 CTranslate2
进入到 /workspace/CTranslate2 目录下创建 build 文件夹并进行编译:
$ cd /workspace/CTranslate2
$ mkdir build && cd build
$ cmake .. -DWITH_CUDA=ON -DWITH_MKL=OFF -DWITH_CUDNN=ON
$ make -j10
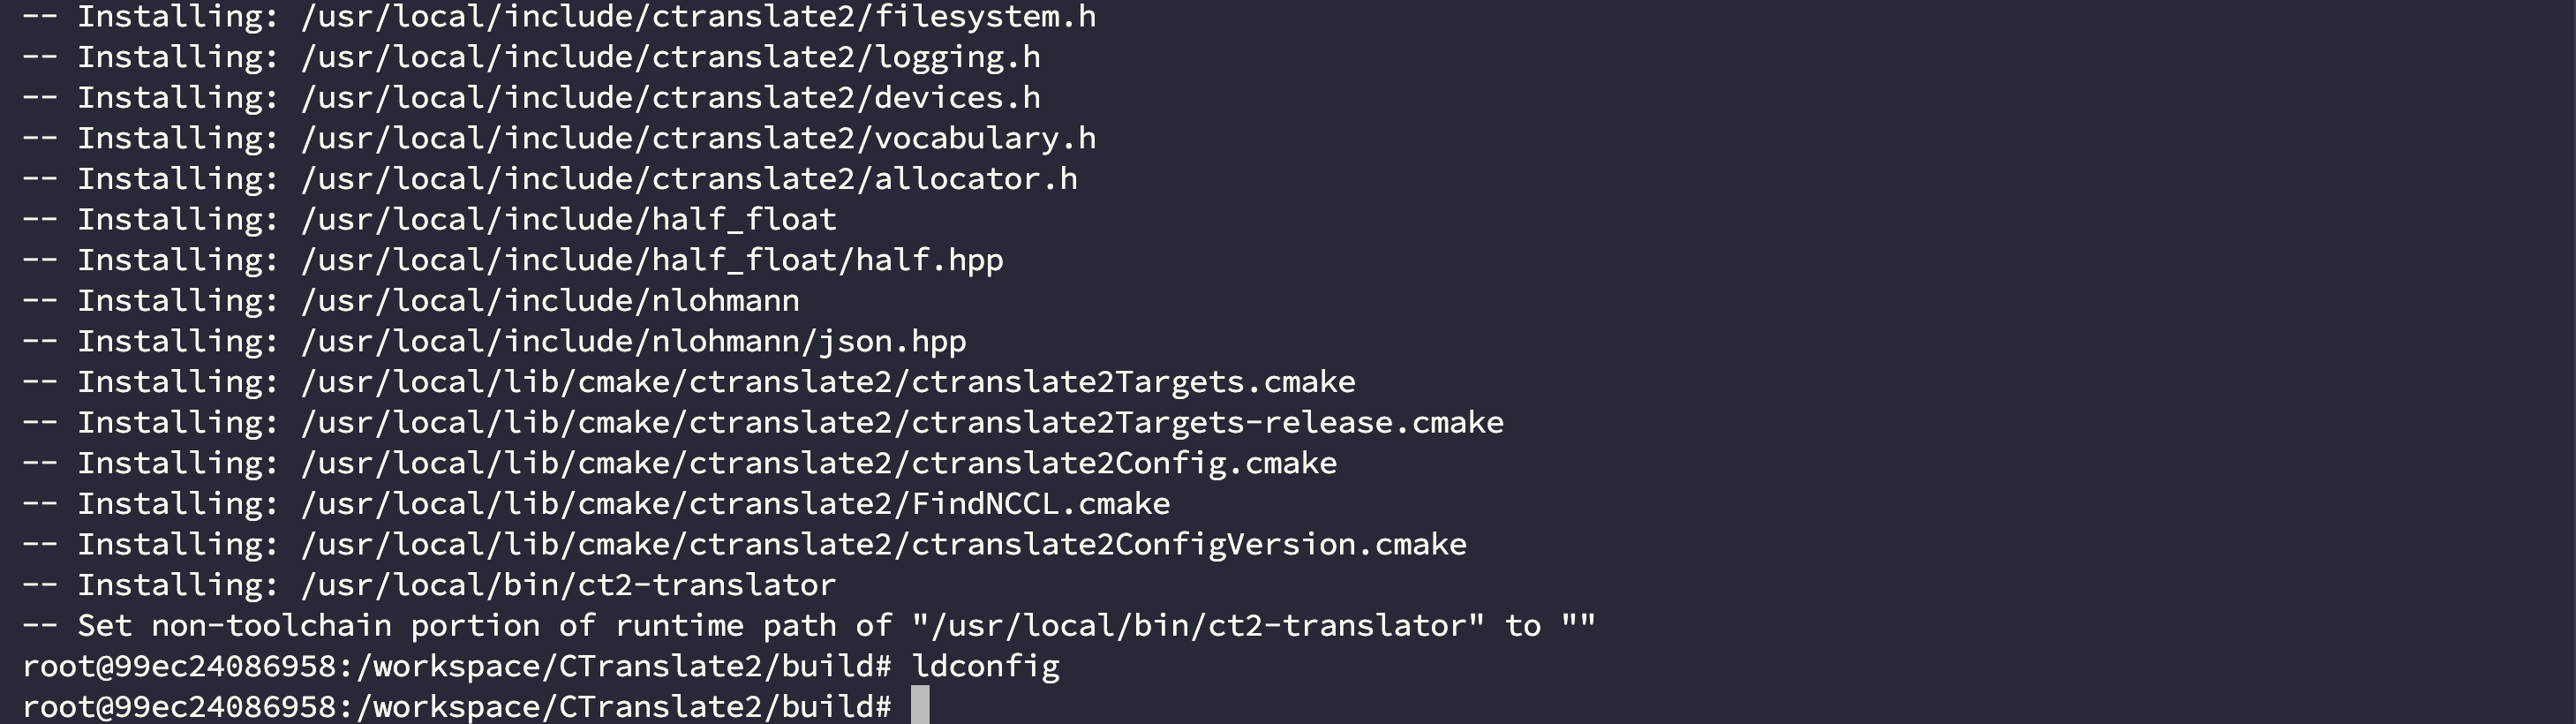
$ make install
$ ldconfig
确认编译和配置没有任何报错后 依旧在 CTranslate2 目录下 编译 python 的轮子:
$ cd python
$ pip install -r install_requirements.txt
$ python setup.py bdist_wheel
$ pip install dist/ctranslate2-4.6.0-cp312-cp312-linux_aarch64.whl  --force-reinstall
安装python依赖库
完成 CTranslate2 轮子的安装后进入到 /workspace/RealtimeSTT 目录下安装 python 依赖的库:
$ cd /workspace/RealtimeSTT
$ pip install -r requirements-gpu.txt -i https://pypi.tuna.tsinghua.edu.cn/simple
然后额外安装一个 torchaudio ,注意后面的 --no-deps 参数非常重要,否则会将容器自带的 torch 卸载:
$ pip install torchaudio -i https://pypi.tuna.tsinghua.edu.cn/simple --no-deps
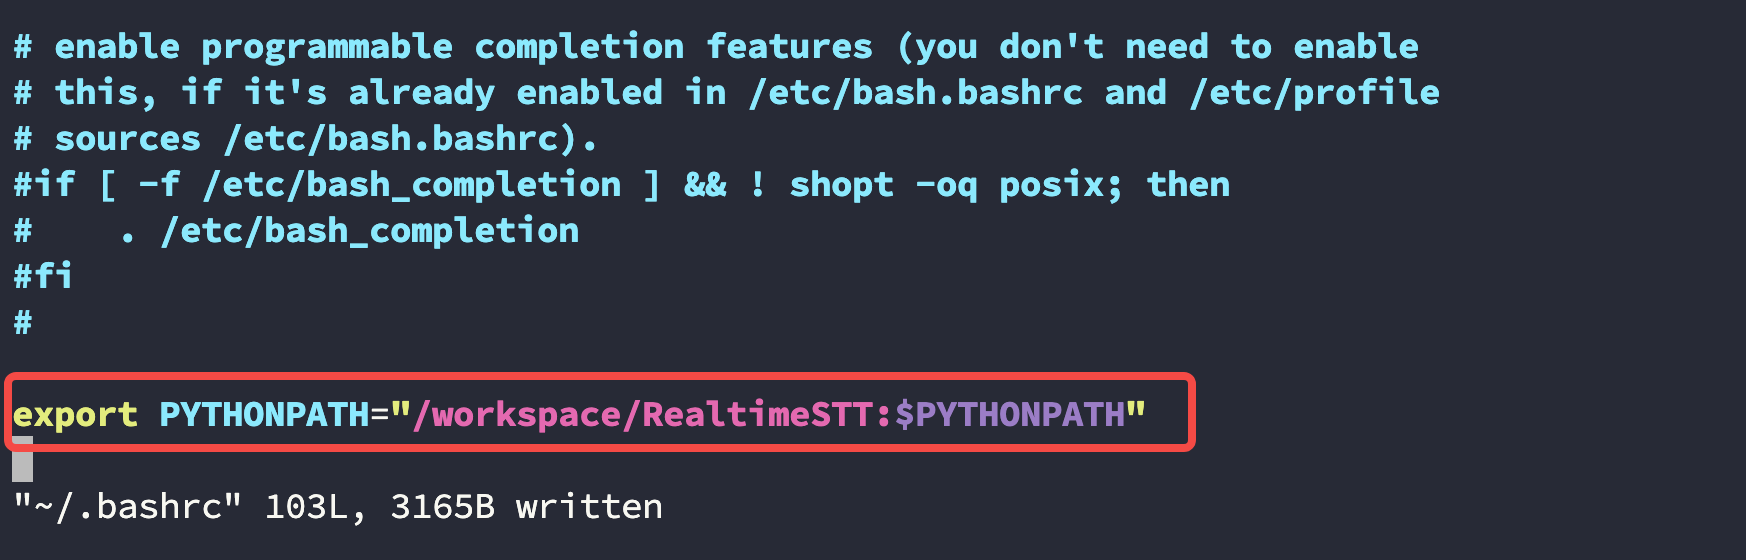
修改 ~/.bashrc 文件
编辑 容器的 ~/.bashrc 文件,在末尾添加 python 路径:
export PYTHONPATH="/workspace/RealtimeSTT:$PYTHONPATH"
Step4. 运行示例
容器内操作
直接运行官方的 RealtimeSTT/example_browserclient/server.py 示例会出现地址与端口问题,我们自己写了一个 Web 示例,创建文件 RealtimeSTT/example_browserclient/new_server.py 并将下面的代码拷贝进去:
import asyncio
import websockets
import threading
import numpy as np
from scipy.signal import resample
import json
import logging
import sys
from RealtimeSTT import AudioToTextRecorder# --- Basic Setup ---
logging.basicConfig(level=logging.INFO,format='%(asctime)s - %(name)s - %(levelname)s - %(message)s',handlers=[logging.StreamHandler(sys.stdout)]
)
logging.getLogger('websockets').setLevel(logging.WARNING)# --- Global State Management ---
is_running = True
recorder = None
recorder_ready = threading.Event()
client_websocket = None
main_loop = None# --- Core Functions ---async def send_to_client(message):"""Sends a JSON message to the connected WebSocket client."""global client_websocketif client_websocket:try:await client_websocket.send(json.dumps(message))except websockets.exceptions.ConnectionClosed:logging.info("Client connection closed.")client_websocket = Nonedef text_detected(text):"""Callback from the recorder thread on stabilized realtime text."""global main_loopif main_loop:message = {'type': 'realtime', 'text': text}asyncio.run_coroutine_threadsafe(send_to_client(message), main_loop)logging.info(f"\rRealtime: {text}")def run_recorder():"""This function runs in a separate thread, managing the AudioToTextRecorder."""global recorder, main_loop, is_running# EN-config# recorder_config = {#     'spinner': False,#     'use_microphone': False,#     'model': 'large-v2',#     'language': 'en',#     'silero_sensitivity': 0.4,#     'webrtc_sensitivity': 2,#     'post_speech_silence_duration': 0.7,#     'min_length_of_recording': 0,#     'min_gap_between_recordings': 0,#     'enable_realtime_transcription': True,#     'realtime_processing_pause': 0,#     'realtime_model_type': 'large-v2',#     'on_realtime_transcription_stabilized': text_detected,#     'print_transcription_time': True# }# ZH-configrecorder_config = {'spinner': False,'use_microphone': False,# 'model': 'large-v2',# 'model': 'large-v3','model': 'medium',# 'model': 'small','language': 'zh','silero_sensitivity': 0.6,'webrtc_sensitivity': 1,'post_speech_silence_duration': 0.3,'min_length_of_recording': 0,'min_gap_between_recordings': 0,'enable_realtime_transcription': True,'realtime_processing_pause': 0,# 'realtime_model_type': 'large-v2',# 'realtime_model_type': 'large-v3','realtime_model_type': 'medium',# 'realtime_model_type': 'small','on_realtime_transcription_stabilized': text_detected,'print_transcription_time': True}logging.info("Initializing RealtimeSTT...")recorder = AudioToTextRecorder(**recorder_config)logging.info("RealtimeSTT initialized")recorder_ready.set()while is_running:try:full_sentence = recorder.text()if main_loop:message = {'type': 'full_sentence', 'text': full_sentence}asyncio.run_coroutine_threadsafe(send_to_client(message), main_loop)logging.info(f"Sentence: {full_sentence}")except Exception as e:logging.error(f"Error in recorder loop: {e}")breaklogging.info("Recorder thread stopped.")if recorder:recorder.shutdown()logging.info("Recorder shutdown complete.")def decode_and_resample(audio_data, original_sample_rate, target_sample_rate=16000):"""Decodes and resamples audio data from the client."""try:audio_np = np.frombuffer(audio_data, dtype=np.int16)if original_sample_rate == target_sample_rate:return audio_datanum_original_samples = len(audio_np)num_target_samples = int(num_original_samples * target_sample_rate / original_sample_rate)resampled_audio = resample(audio_np, num_target_samples)return resampled_audio.astype(np.int16).tobytes()except Exception as e:logging.error(f"Error in resampling: {e}")return audio_dataasync def echo(websocket):"""Handles incoming WebSocket messages from the client."""global client_websocketlogging.info("Client connected")client_websocket = websockettry:async for message in websocket:if not recorder_ready.is_set():logging.warning("Recorder not ready, skipping message.")continuetry:metadata_length = int.from_bytes(message[:4], byteorder='little')metadata_json = message[4:4+metadata_length].decode('utf-8')metadata = json.loads(metadata_json)sample_rate = metadata['sampleRate']chunk = message[4+metadata_length:]resampled_chunk = decode_and_resample(chunk, sample_rate)recorder.feed_audio(resampled_chunk)except Exception as e:logging.error(f"Error processing message: {e}")continueexcept websockets.exceptions.ConnectionClosed:logging.info("Client disconnected normally.")finally:if client_websocket == websocket:client_websocket = Nonelogging.info("Client closed")async def main():"""Main async function to start the recorder thread and WebSocket server."""global main_loop, recorder_threadmain_loop = asyncio.get_running_loop()recorder_thread = threading.Thread(target=run_recorder)recorder_thread.start()# Wait for the recorder to be ready before starting the serverawait asyncio.to_thread(recorder_ready.wait)# --- FIX: Bind to "0.0.0.0" to be accessible outside of Docker ---async with websockets.serve(echo, "0.0.0.0", 8001):logging.info("WebSocket server started on ws://0.0.0.0:8001")await asyncio.Future()  # run foreverif __name__ == '__main__':recorder_thread = Nonetry:asyncio.run(main())except KeyboardInterrupt:logging.info("\nCaught interrupt, shutting down...")finally:is_running = Falseif recorder_thread:recorder_thread.join() # Wait for the recorder thread to finishlogging.info("Server shut down gracefully.")
使用下面的命令运行 Web Server:
$ python example_browserclient/new_server.py

宿主机操作
在宿主机任意位置,此处以 Desktop/tts_ws 目录为例,创建一个 index.html 文件并将以下内容写入:
<!DOCTYPE html>
<html lang="en">
<head><meta charset="UTF-8"><title>Realtime STT Client</title><style>body { font-family: sans-serif; max-width: 800px; margin: auto; padding: 20px; }#status { font-weight: bold; }#realtime { color: #555; font-style: italic; }#historyList { list-style-type: none; padding-left: 0; }#historyList li { background-color: #f0f0f0; padding: 10px; margin-bottom: 8px; border-radius: 5px; }#historyList li span { color: #888; font-size: 0.9em; margin-left: 15px; }button { font-size: 1.2em; padding: 10px; }</style>
</head>
<body><h1>Realtime STT WebSocket Client</h1><p>Status: <span id="status">Not Connected</span></p><button id="startButton">Start Recording</button><button id="stopButton" disabled>Stop Recording</button><hr><h2>Transcription:</h2><p><strong>Real-time:</strong> <span id="realtime">...</span></p><h2>History:</h2><ul id="historyList"></ul><script>const startButton = document.getElementById('startButton');const stopButton = document.getElementById('stopButton');const statusEl = document.getElementById('status');const realtimeEl = document.getElementById('realtime');const historyList = document.getElementById('historyList');let socket;let mediaRecorder;let audioContext;let audioProcessor;startButton.onclick = () => {connectAndRecord();startButton.disabled = true;stopButton.disabled = false;};stopButton.onclick = () => {if (mediaRecorder && mediaRecorder.state === 'recording') {mediaRecorder.stop();}if (socket) {socket.close();}if (audioContext) {audioContext.close();}startButton.disabled = false;stopButton.disabled = true;statusEl.textContent = "Stopped by user.";};function connectAndRecord() {statusEl.textContent = "Connecting to server...";socket = new WebSocket("ws://127.0.0.1:8001");socket.onopen = () => {statusEl.textContent = "Connected. Starting microphone...";startMicrophone();};socket.onmessage = (event) => {const data = JSON.parse(event.data);if (data.type === 'realtime') {realtimeEl.textContent = data.text;} else if (data.type === 'full_sentence') {const newItem = document.createElement('li');let sentenceHTML = data.text;// Check for processing_time and append it if availableif (data.processing_time) {const duration = parseFloat(data.processing_time).toFixed(2);sentenceHTML += `<span>(processed in ${duration}s)</span>`;}newItem.innerHTML = sentenceHTML;historyList.prepend(newItem); // Add new item to the top of the listrealtimeEl.textContent = ""; // Clear realtime text after final sentence}};socket.onclose = () => {statusEl.textContent = "Connection closed.";if (mediaRecorder && mediaRecorder.state === 'recording') {mediaRecorder.stop();}if (audioContext && audioContext.state !== 'closed') {audioContext.close();}startButton.disabled = false;stopButton.disabled = true;};socket.onerror = (error) => {console.error("WebSocket Error:", error);statusEl.textContent = "Error connecting. Check console.";};}async function startMicrophone() {try {const stream = await navigator.mediaDevices.getUserMedia({ audio: true });statusEl.textContent = "Microphone active. Recording...";audioContext = new (window.AudioContext || window.webkitAudioContext)();const source = audioContext.createMediaStreamSource(stream);const bufferSize = 4096;audioProcessor = audioContext.createScriptProcessor(bufferSize, 1, 1);audioProcessor.onaudioprocess = (e) => {if (socket.readyState !== WebSocket.OPEN) return;const inputData = e.inputBuffer.getChannelData(0);// The data is Float32, we need to convert to Int16const int16Data = new Int16Array(inputData.length);for (let i = 0; i < inputData.length; i++) {int16Data[i] = Math.max(-1, Math.min(1, inputData[i])) * 32767;}// This protocol part remains the sameconst metadata = { sampleRate: audioContext.sampleRate };const metadataJson = JSON.stringify(metadata);const metadataBytes = new TextEncoder().encode(metadataJson);const metadataLength = metadataBytes.length;const messageBuffer = new ArrayBuffer(4 + metadataLength + int16Data.buffer.byteLength);const view = new DataView(messageBuffer);view.setUint32(0, metadataLength, true); const messageBytes = new Uint8Array(messageBuffer);messageBytes.set(metadataBytes, 4);messageBytes.set(new Uint8Array(int16Data.buffer), 4 + metadataLength);socket.send(messageBuffer);};source.connect(audioProcessor);audioProcessor.connect(audioContext.destination);} catch (err) {console.error("Error getting microphone:", err);statusEl.textContent = "Could not access microphone.";if (socket) {socket.close();}}}</script>
</body>
</html>
然后使用下面的命令运行 python 的 http 服务:
$ python3 -m http.server 8000

在宿主机上打开浏览器前往 http://127.0.0.1:8000 地址可以看到以下界面:

连接好蓝牙麦克风后就可以开始说话了,我们这边实验后发现大疆的新款麦克风 Mic 3 配对好蓝牙后将接收器连入 Thor 即可直接使用:
这里使用了一段 B 站博主差评君的视频,连接如下:
- 网上吹爆的eSIM,可能远比你想象的更麻烦。【X.PIN】
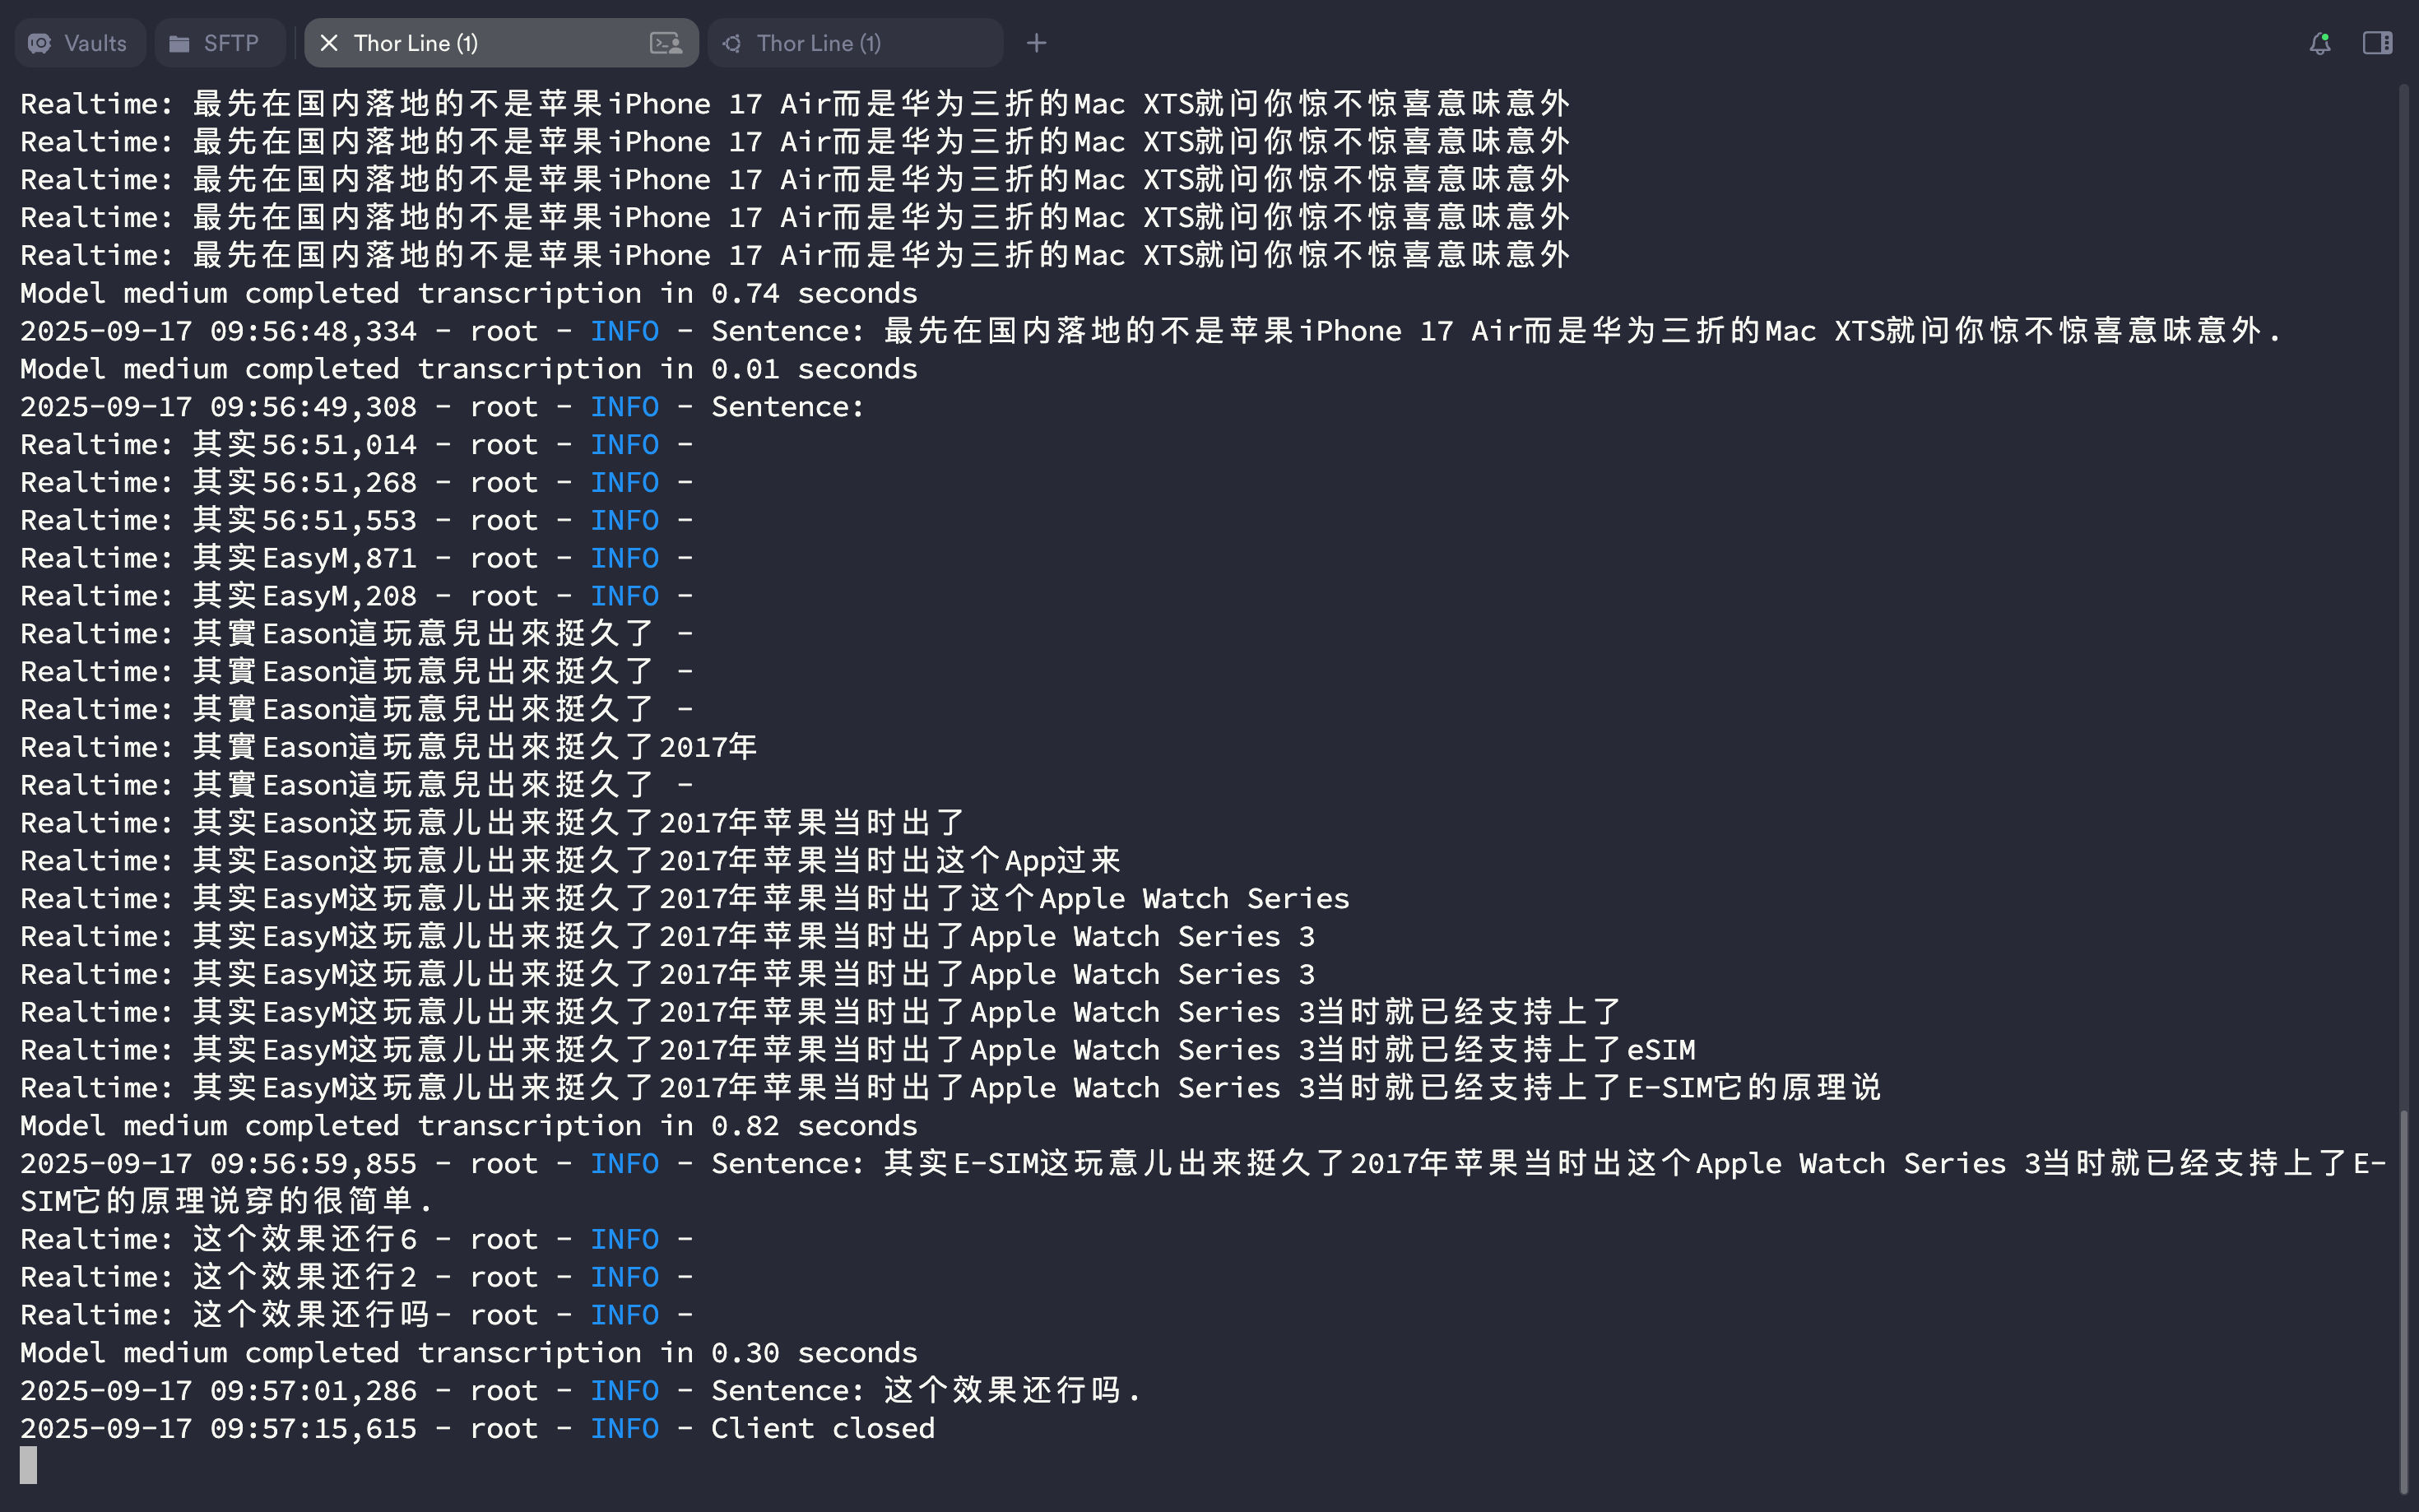
网页端实时生成文本流:

容器内输出如下:
作为对比我们使用了 科大讯飞AI录音笔S8离线版 对同一份视频进行了 STT,导出的文件结果如下:

Step5. [可选] 保存容器
在宿主机 使用下面的命令打包并保存容器,附上自己的信息和注释:
$ sudo docker commit -a "GaohaoZhou" -m "RealtimeSTT deploy" 52ce7dd06439 realtime-stt
然后查看打包的容器是否存在:
$ sudo docker images

[预计09月20日] 同声传译
同声传译部分使用 Realtime STT + ChatTTS 实现。