【回眸】Tessy 基础操作指南
Tessy基本操作
Create new project
Add Test Collection, New Folder and New Module
Specifying the target environment
Check source and analyze module
Editing the test object interface
Designing test cases
Configure the source code coverage
Analyzing the coverage
Creating a report
Tessy基本操作
Create new project
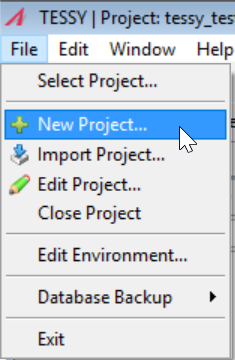
点击File菜单,选择‘New Project’
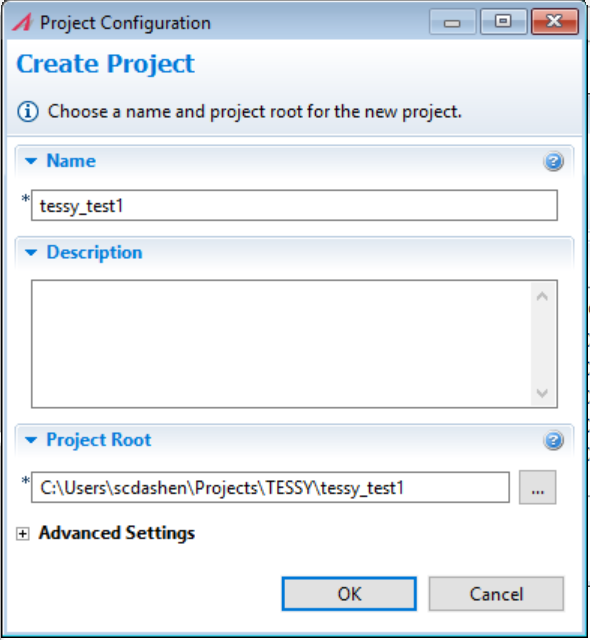
在弹出的小窗口中,填写Project Name,选择OK,一个Tessy工程便建立好了。
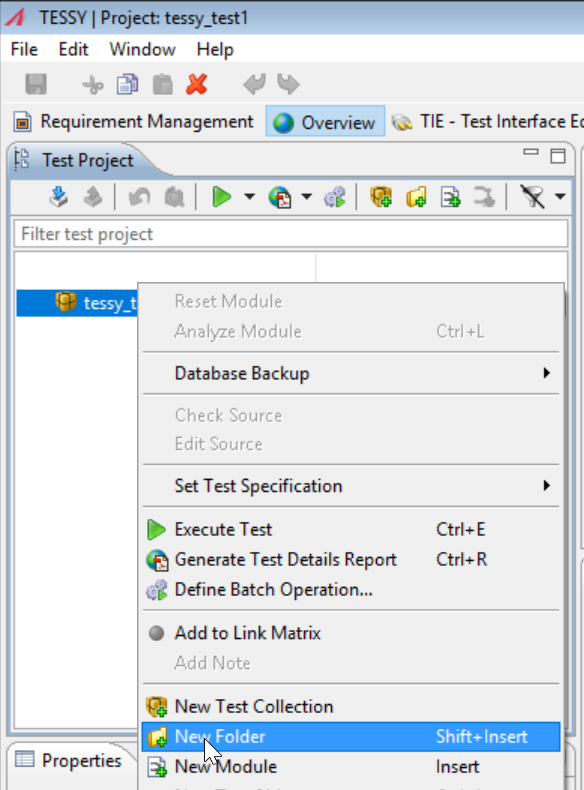
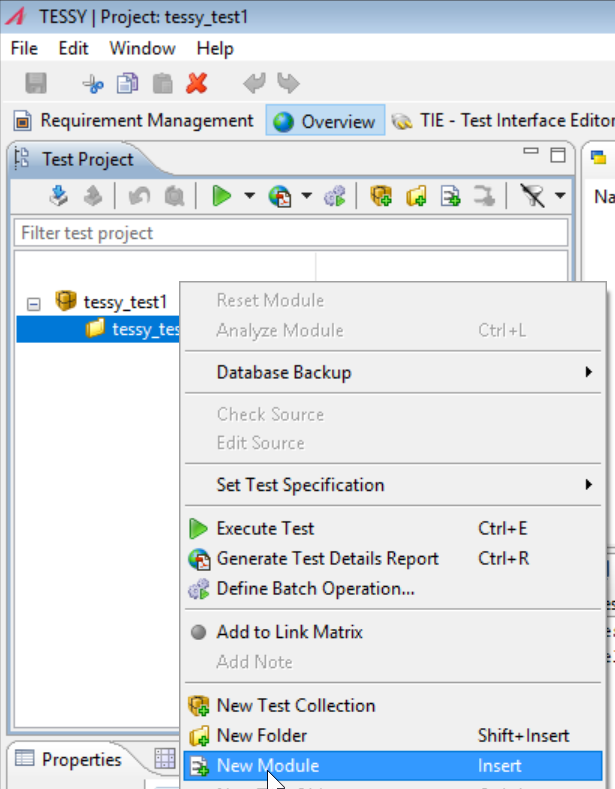
Add Test Collection, New Folder and New Module
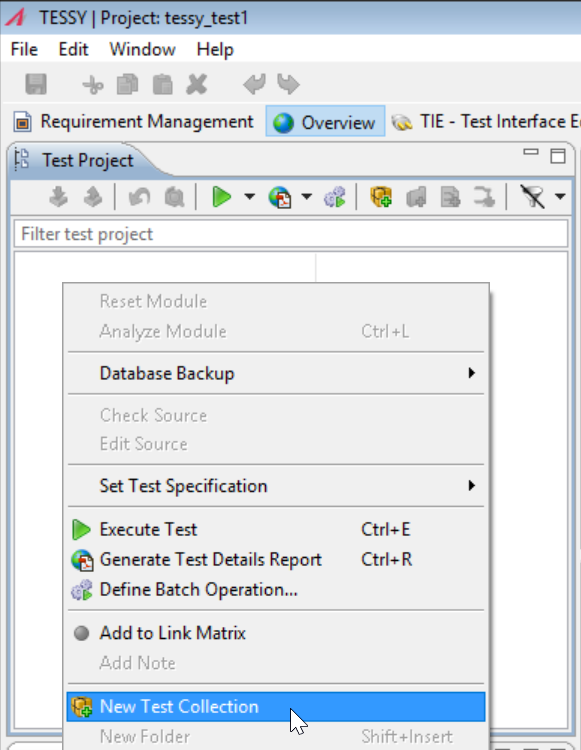
在Test Project窗口中,右键鼠标选择‘New Test Collection’,并重命名为tessy_test1
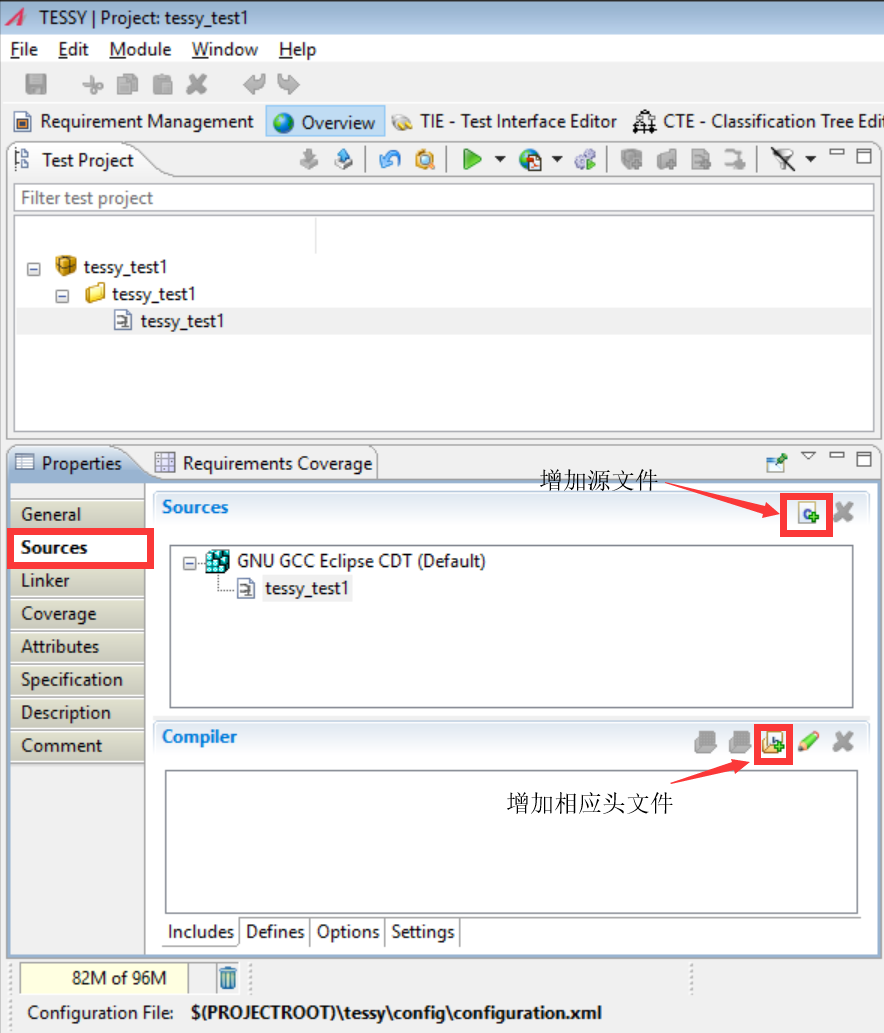
Specifying the target environment

现在便可以增加要进行测试的源代码文件到test module了,方便起见,选用Tessy工具自带的
文件来进行测试。
Check source and analyze module
右键tessy_test1 module,选中‘Check Source’,如果check成功的话,右下角的Console窗口会显示“… compiled OK”的log.

同样右键tessy_test1 module,选中‘Analyze Module’,当module分析成功的话,可以看到test object显示在module下方。
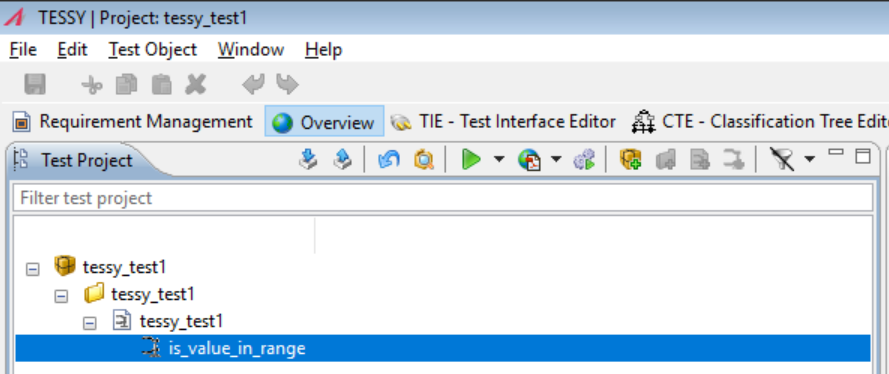
由于is_val_in_range.c中只有is_value_in_range一个函数,所以这里只有is_value_in_range这一个test object。
Editing the test object interface
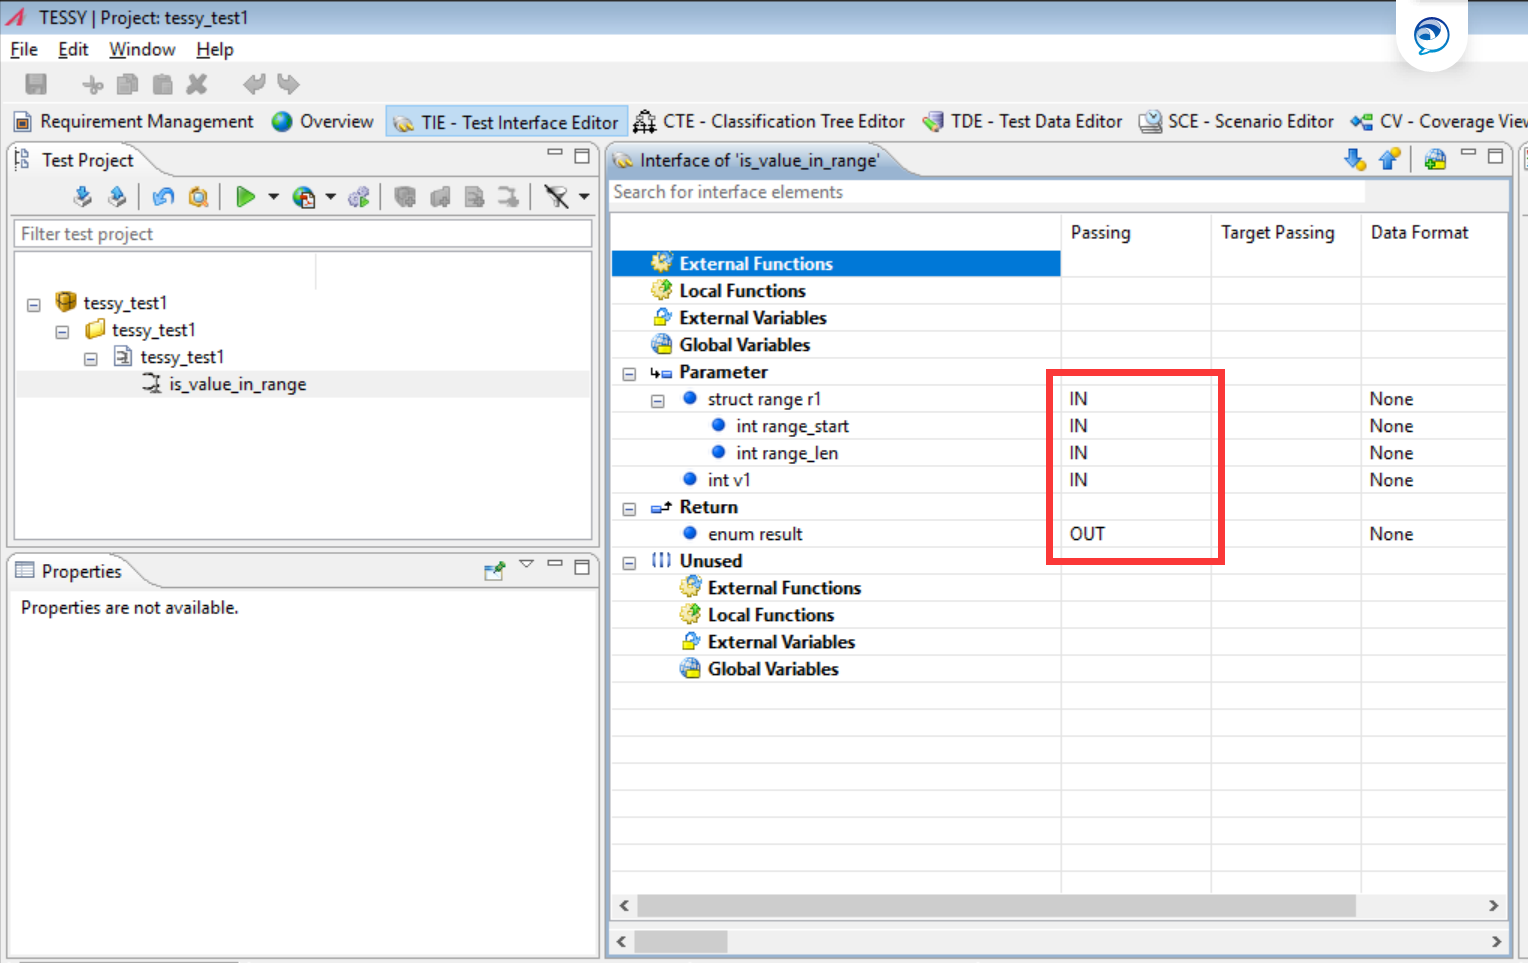
切换到TIE – Test Interface Editor
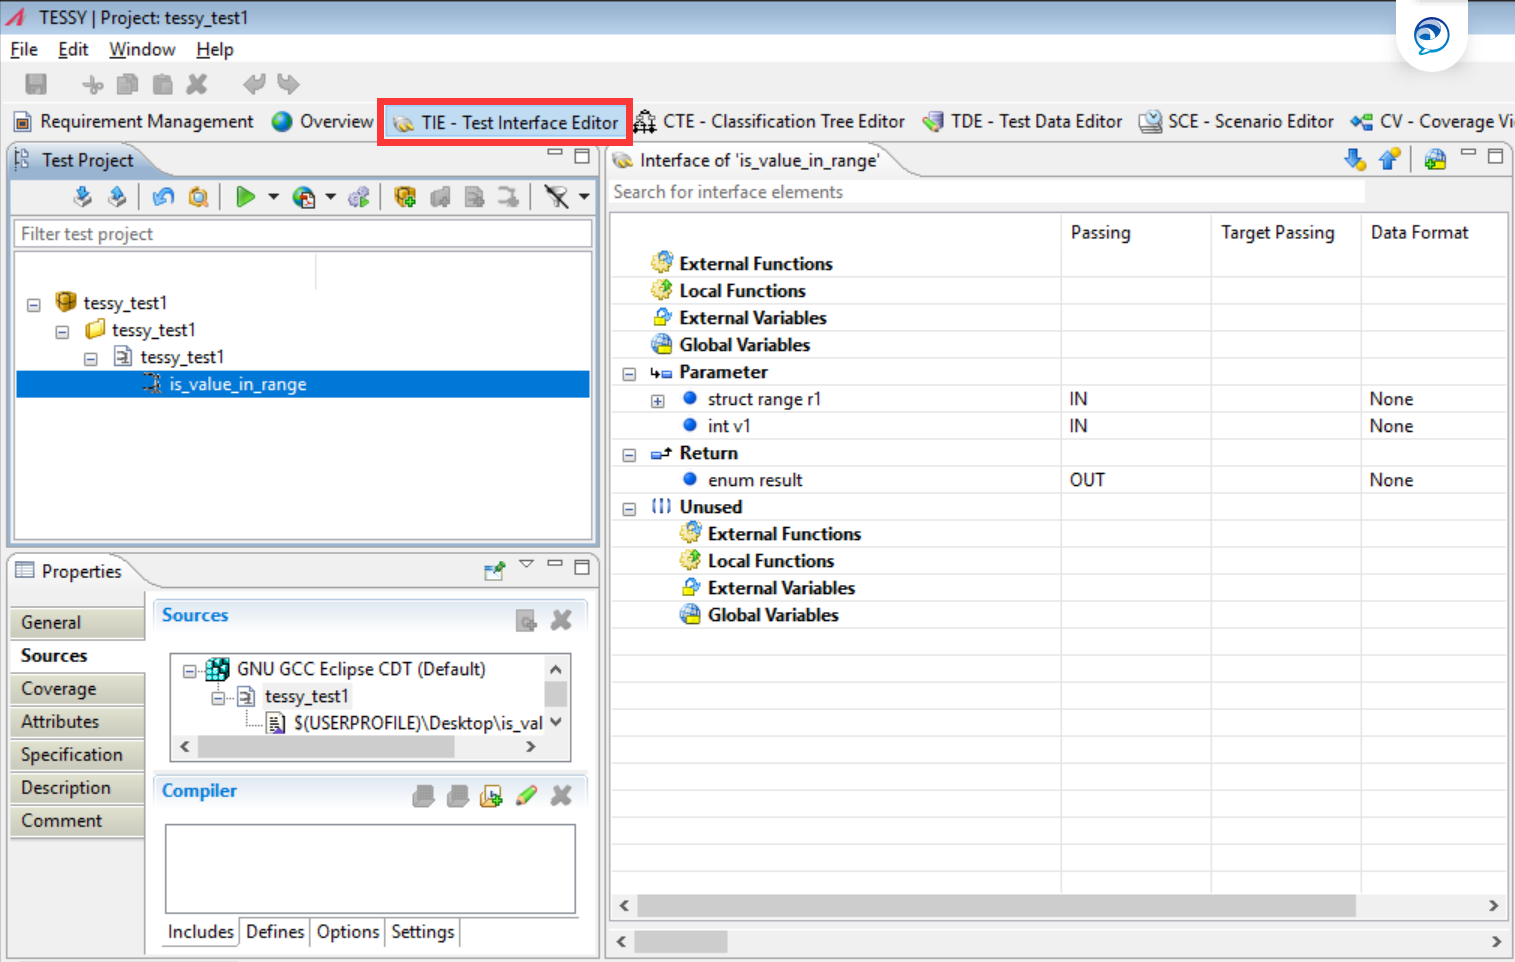
在这个界面可以编辑每个测试对象的接口信息,并确定哪些变量是输入变量以及哪些是输出变量。 输入值是测试对象读取的接口元素。 输出值则是测试对象的输出。
Designing test cases
切换到TDE – Test Data Editor
选中‘is_value_in_range’,点击‘New Test Case(Insert)’按钮,增加test case
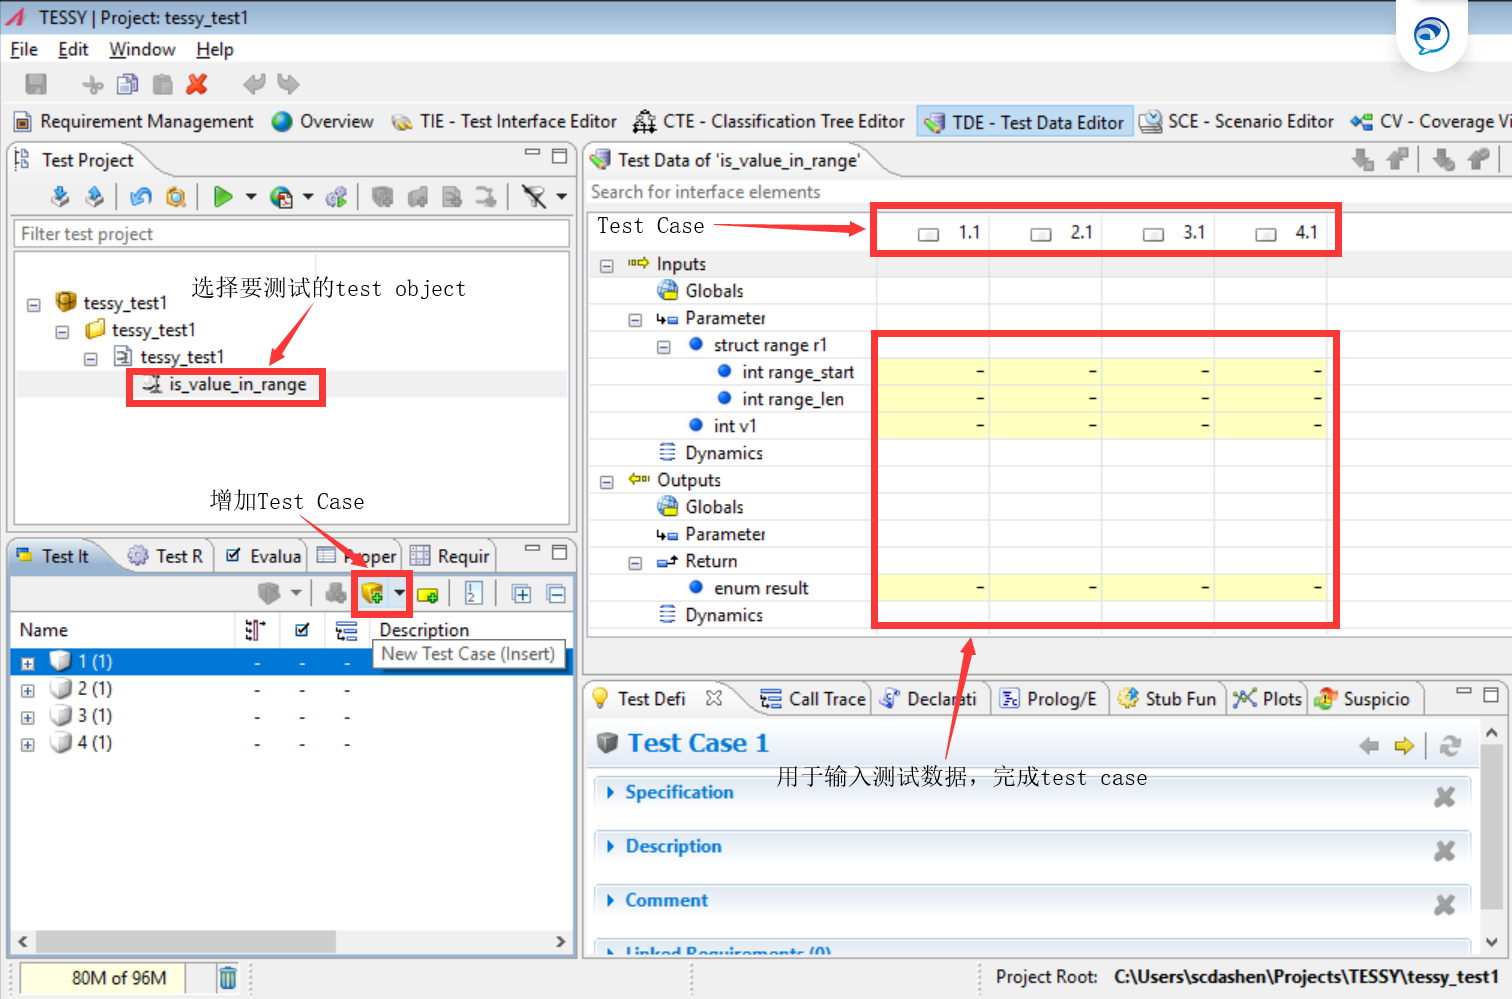
根据测试代码来设计test case
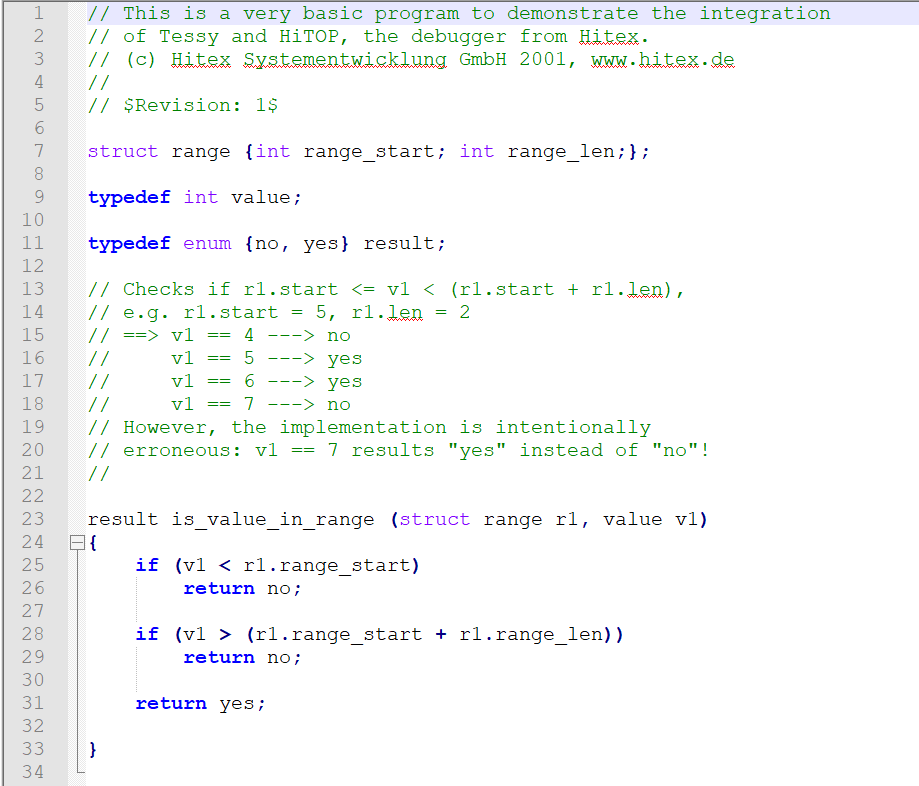
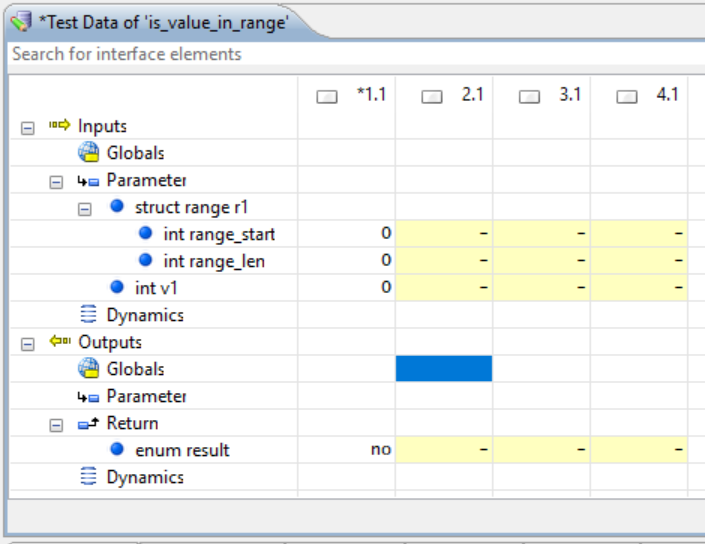
该source code的功能很简单,主要判断v1的值是否在(r1.range_start, r1.range_start + r1.range_len)之间,根据这个功能,可以设计一个test case如下
Configure the source code coverage

在新弹出的窗口中对code coverage进行设置
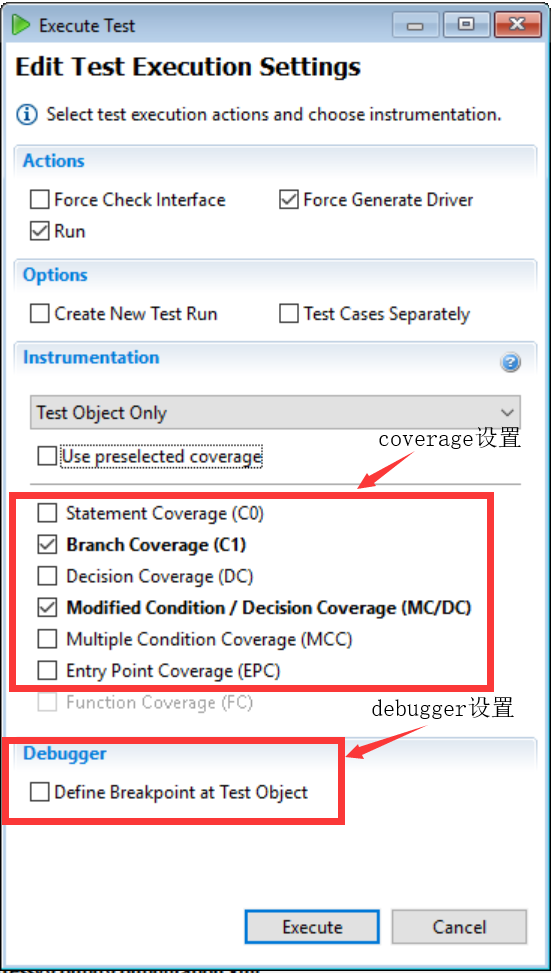
点击‘Execute’按钮后,将自动Executing the test,运行结果如下:
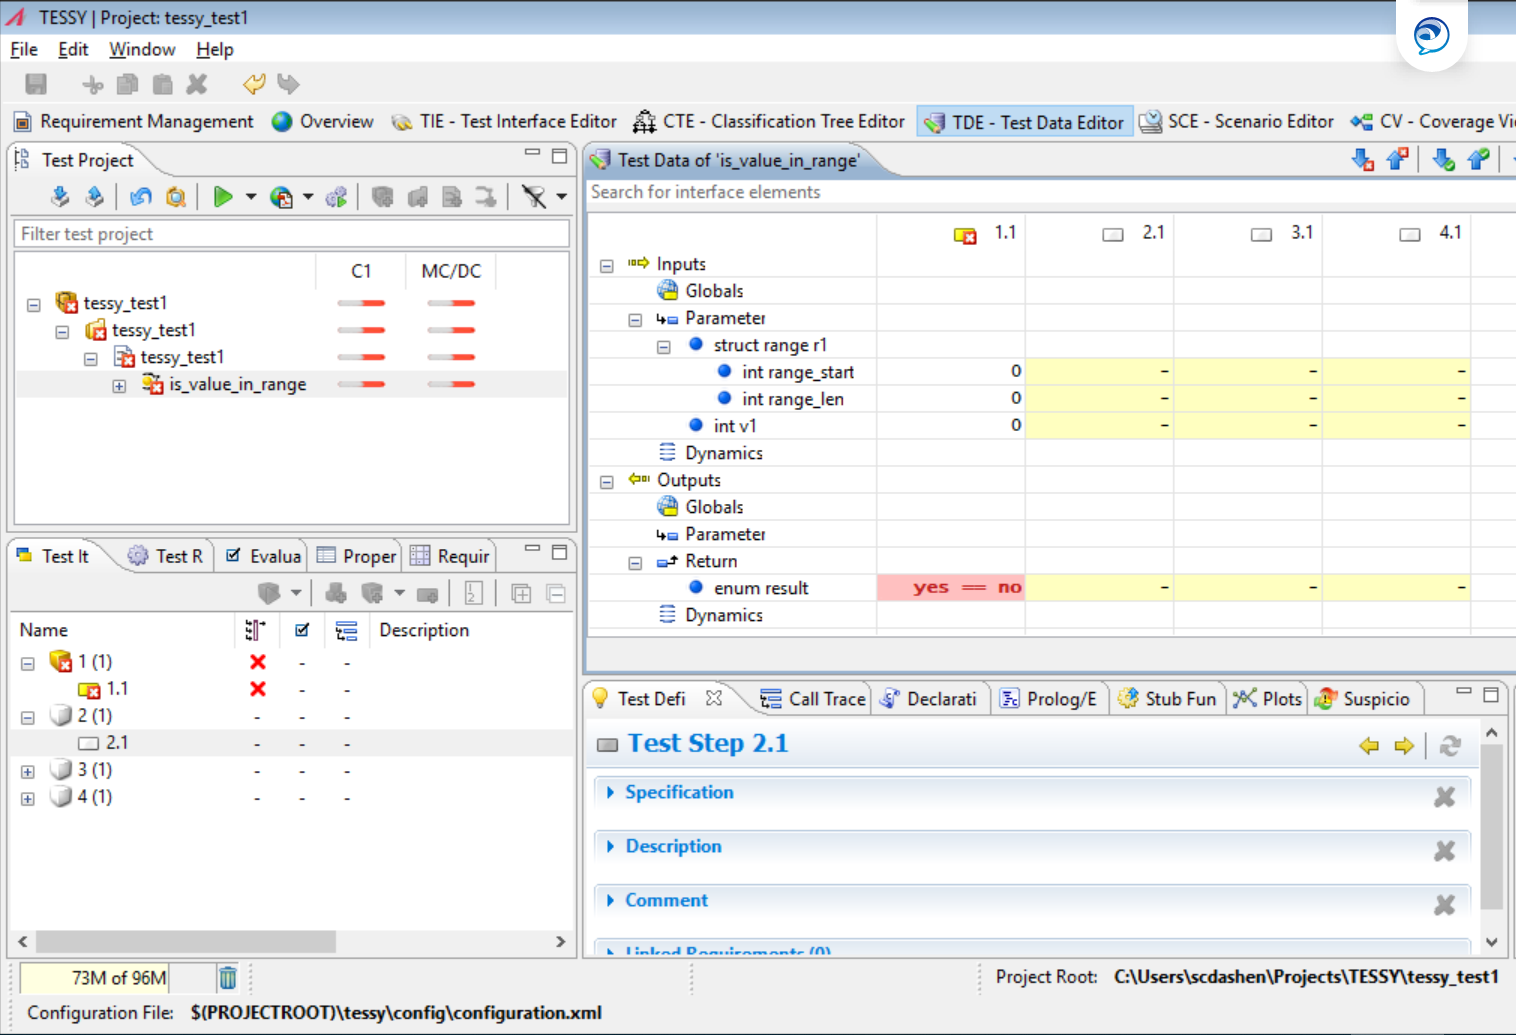
上图显示test case不通过,test case中,当v1, r1.range_start 和 r1.range_len的值都为0时,预期返回no,实际返回yes,所以应该根据该测试结果来进行debug,修改代码直接满足test case为止。
Analyzing the coverage
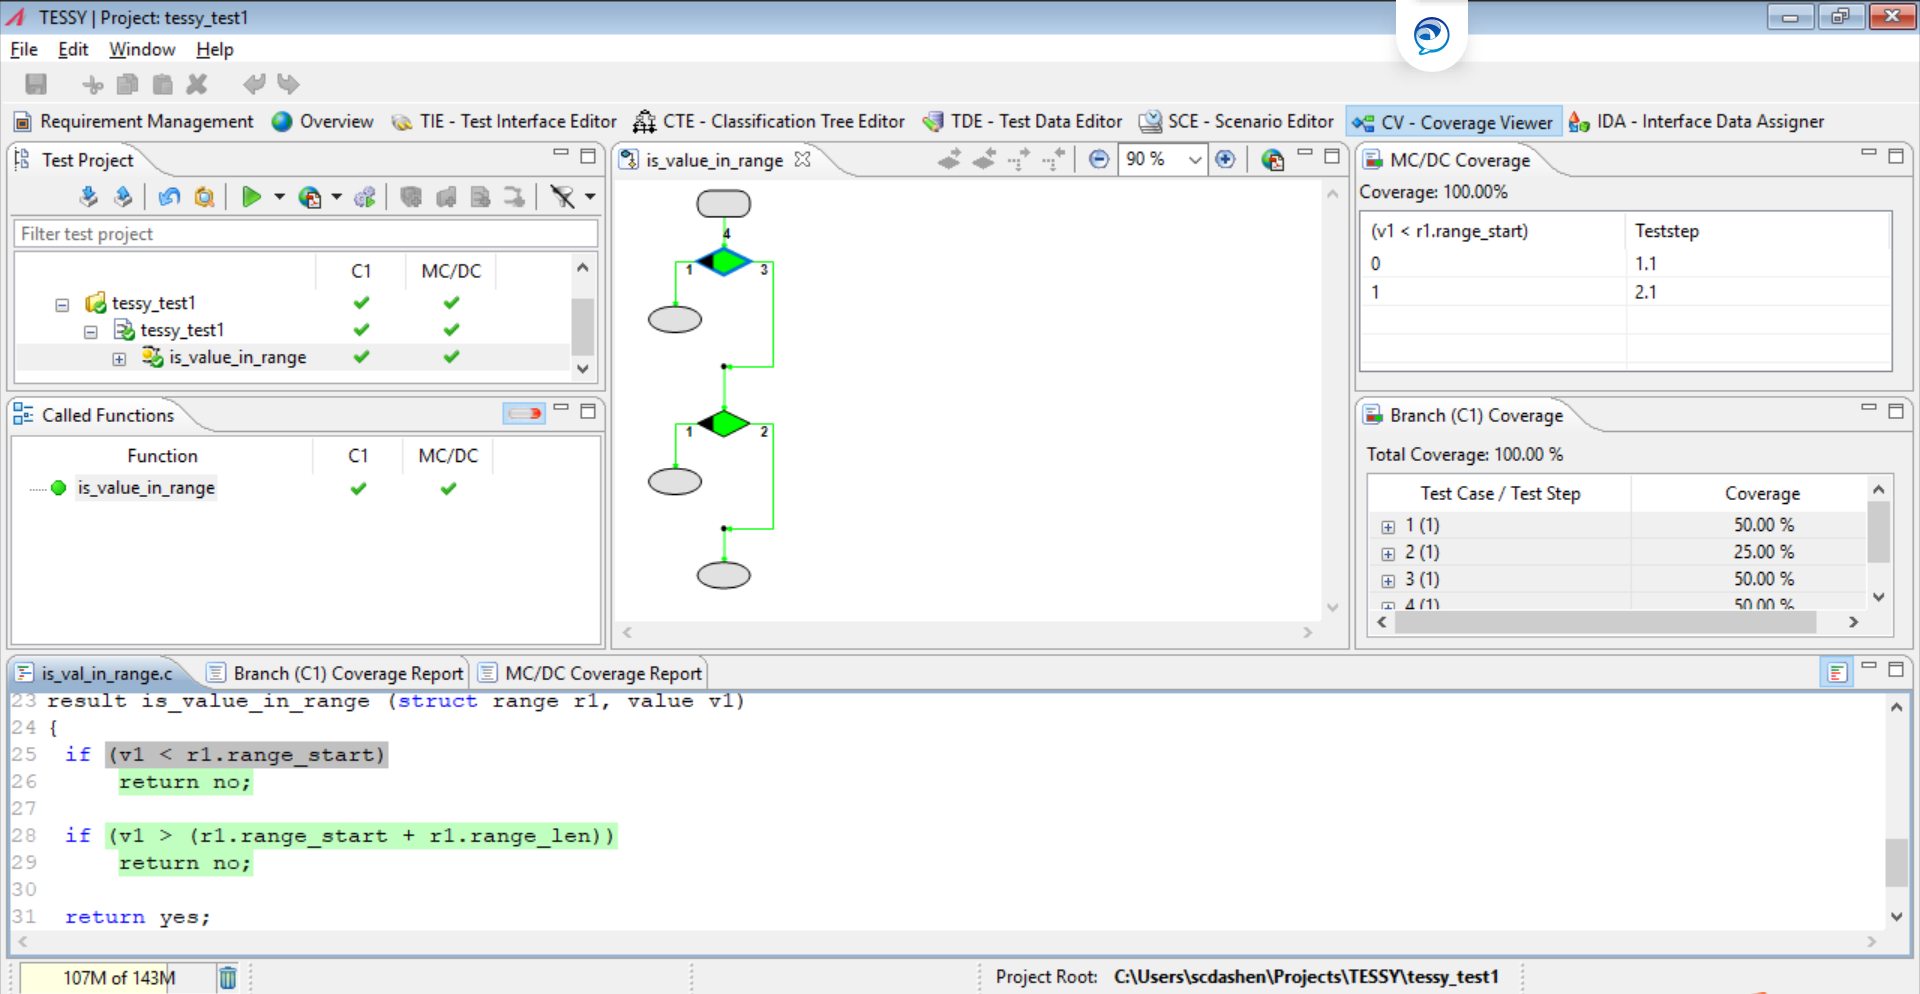
切换到CV – Coverage Viewer,该界面显示上次执行test case后code coverage的结果。
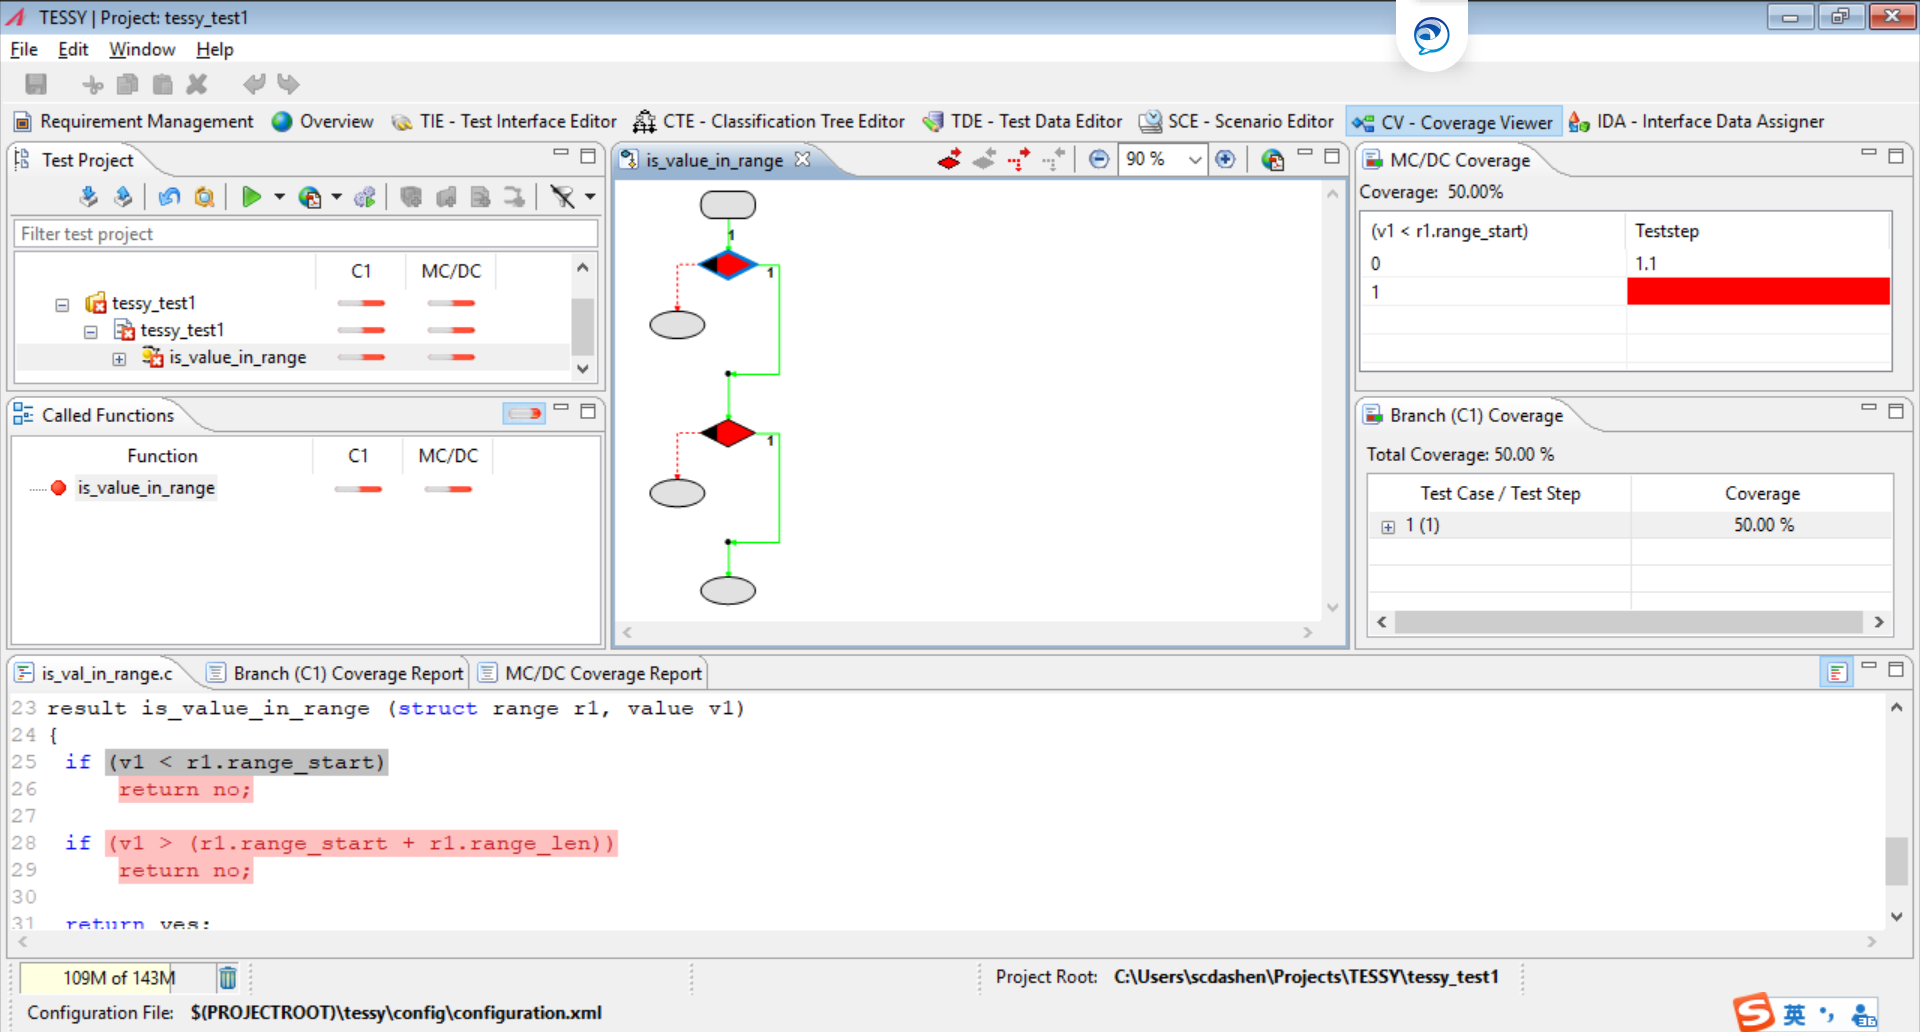
图中红色显示的code是没有覆盖的代码,需要设计更多的test case来完成100%的覆盖率。
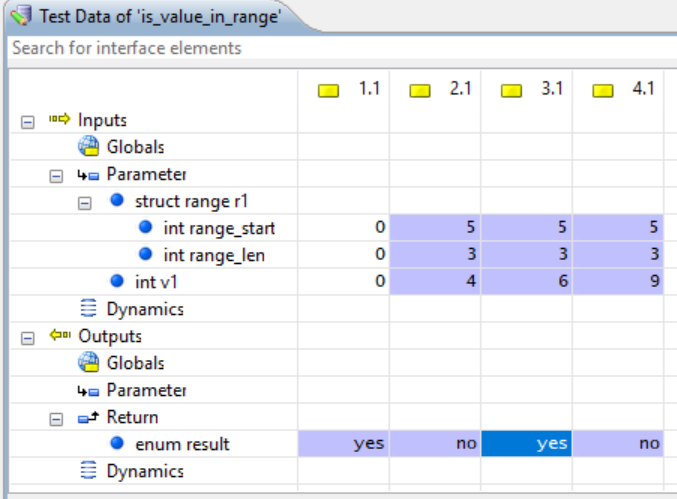
增加一些新的test case:
Creating a report
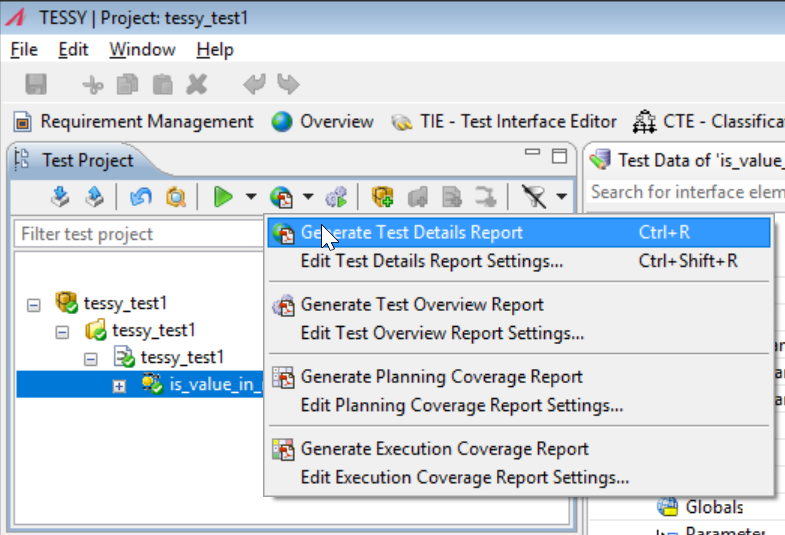
点击‘Generate Test Details Report’,自动生成测试报告。