前端vue框架
前情提要
Vue.js 是一个渐进式 JavaScript 框架,专注于构建用户界面。它基于标准的 HTML、CSS 和 JavaScript,提供了声明式、组件化的编程模型,适用于从简单到复杂的各种前端开发场景。
核心特性
Vue.js 的核心特性包括响应式数据绑定和组件化开发。响应式数据绑定通过 v-model 指令实现数据的双向绑定,而组件化开发则通过将应用拆分为独立的模块化组件来提高开发效率。
Vue.js 采用了 MVVM 架构,其中 ViewModel 负责连接视图(View)和数据模型(Model),实现数据与视图的自动同步,减少手动操作 DOM 的复杂性。
基本用法
以下是一个简单的 Vue 示例,展示了声明式渲染和响应式更新:
<div id="app">
<button @click="count++">Count is: {{ count }}</button>
</div>
<script>
const app = Vue.createApp({
data() {
return { count: 0 };
}
});
app.mount('#app');
</script>
在这个示例中,count 的变化会自动更新 DOM,体现了 Vue 的响应式特性。
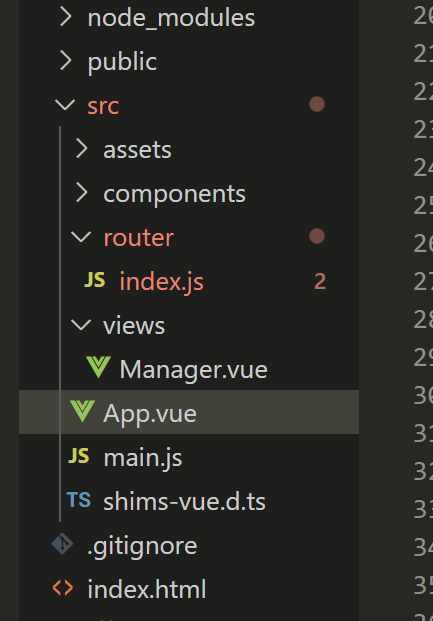
单文件组件
Vue 支持使用单文件组件(SFC)来组织代码,将模板(HTML)、逻辑(JavaScript)和样式(CSS)封装在一个文件中。例如:
<template>
<button @click="increment">Count is: {{ count }}</button>
</template>
<script>
import { ref } from 'vue';
export default {
setup() {
const count = ref(0);
const increment = () => count.value++;
return { count, increment };
}
};
</script>
<style scoped>
button {
font-weight: bold;
}
</style>
这种方式使代码更加模块化和易于维护。
API 风格
Vue 提供了两种 API 风格:选项式 API 和 组合式 API。选项式 API 更适合初学者,代码结构清晰;组合式 API 则更灵活,适合复杂场景。
常见指令
-
v-if / v-else:条件渲染。
-
v-for:循环渲染。
-
v-bind:绑定 HTML 属性。
-
v-on:事件监听。
-
v-model:表单双向绑定。
适用场景
Vue 可用于多种开发场景,包括单页应用(SPA)、服务端渲染(SSR)、静态站点生成(SSG)等。其灵活性使其能够适应不同规模和复杂度的项目需求。
Vue.js 是一个功能强大且易于上手的框架,无论是初学者还是经验丰富的开发者,都可以通过它高效地构建现代 Web 应用。
了解详细信息:
1 -
vue的特点
1.数据的双向绑定
(1)vue与js相比更简洁,js赋值和获取值需要两步,
vue只需要一步实现,如下代码
<template><div>
<!-- // 实现数据的双向绑定,v-model相当于id的形式 -->
姓名:<input type="text" v-model="name"/>{{ name }}
薪水:<input type="number" v-model="salary"/>{{ salary }}<button @click="Addsalary">涨薪</button><!-- {{ name }} --><!-- 姓名:<input type="text" id="name"/> --></div>
</template><script>
// // js的赋值
// document.getElementById("name").value="hello world"// // js的取值,打印
// var name=document.getElementById("name");
// name.addEventListener('input',function(e){
//   console.log(e.target.value)
// })// vue的赋值取值
export default {
// 数据data(){return{name:"张三",salary:5000}},methods:{Addsalary(){this.salary += 1000}}}</script>
其他的例子
<template><div>姓名:<input v-model="userName" /> {{ userName }}<br />薪水:<input type="number" v-model="salary" /> {{ salary }}<br /><button v-on:click="addSalary">提交</button> <button @click="changeUserInfo">查看个人信息</button></div><hr /><div class="userInfo" v-if="showUserInfo"><h2>个人信息</h2>年龄:<input type="number" v-model="userInfo.age" /><br />性别:<input type="radio" value="1" v-model="userInfo.sex">男<input type="radio" value="2" v-model="userInfo.sex">女 <br/>岗位:<select v-model="userInfo.department"><option value="dev">开发</option><option value="test">测试</option><option value="maintain">运维</option></select><br />技术 :                                     <!--:key 确保每一条数据的唯一索引不会发生变化-->                       <span v-for="skill in userInfo.skills" :key="skill">{{ skill }}</span><br />学习新技术:  <input v-model="newSkill" /> <button @click="learnSkill">学习</button><br />个人信息汇总: {{ userInfo }}</div>
</template><script lang="ts">
export default {data() {return {userName: 'roy',salary: 15000,userInfo: {age: 0,sex: 1,skills: ['java', 'vue', 'python'],department: ''},newSkill: '',showUserInfo: false}},methods: {addSalary() {this.salary += 1000},learnSkill() {if (this.newSkill)this.userInfo.skills.push(this.newSkill)},changeUserInfo() {this.showUserInfo = !this.showUserInfo}}
}
</script><style scoped>
.userInfo {background-color: bisque;width: 80%;
}.userInfo span {background-color: yellow;margin-left: 10px;border: 1px;border-radius: 5px;
}
</style>
(2)vue的双向数据绑定的案例
2.vue模块,表单的绑定
<template><div class="app" >hello world</div></template><script></script>
<style>
.app{color: paleturquoise;background-color: aliceblue;/* 水平 */text-align: center;line-height: 100px;width: 100px;height: 100px;line-height: 100px;}</style>
注意需要在父级vue中引入
<template><MyApp/>
</template>
<script>import MyApp from './components/MyApp.vue'//引入组件export default{components:{ //注册组件MyApp}}
</script>
3.组件的嵌套关系
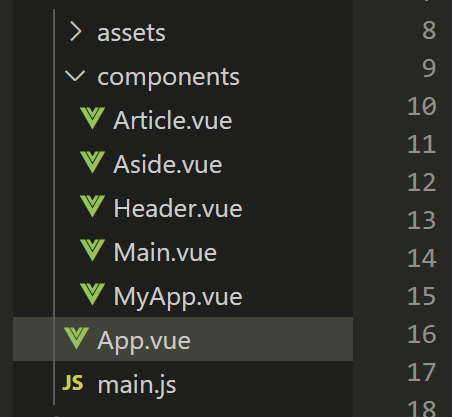
<template><h3>Article</h3>
</template>
<style>h3{width:80%;margin:0 auto;text-align: center;line-height: 100px;box-sizing: border-box;margin-top: 50px;background:#999;}
</style><template><div class="asside"><h3>Aside</h3></div>
</template>
<script>export default{}
</script>
<style scoped>.asside{float: right;width:30%;height: 600px;border: 5px solid#999;box-sizing: border-box;border-left:0;}
</style><template><h3>Header</h3>
</template>
<style scoped>h3{width:100%;height:100px;border:5px solid #999;text-align: center;line-height:100px;box-sizing: border-box;}
</style><template><div class="main"><Article/><Article/></div>
</template>
<script>
import Article from './Article.vue';
export default{components:{Article}
}</script>
<style scoped>.main{/* 想做浮动 */float:left;width:70%;height: 600px;border: 5px solid #999;box-sizing: border-box;         }
</style>
<template><Header/><Main/><Aside/></template>
<script>import Aside from './components/Aside.vue'//引入组件import Header from './components/Header.vue'//引入组件import Main from './components/Main.vue'//引入组件export default{name:'App' ,components:{ //注册组件Header,Main,Aside}}
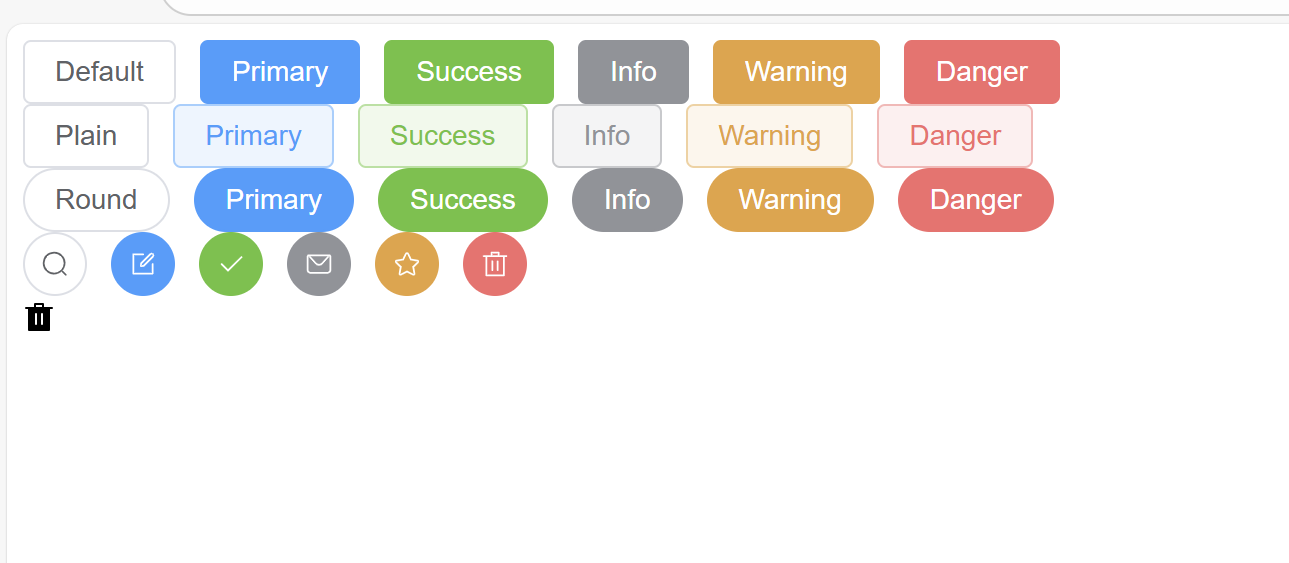
</script>4.一些好看的小组件,参考网站设计 | Element Plus
5.页面跳转(路由的配置)
a.终端(powershell),下载路由
npm install vue-router@latest
b.引入index.js
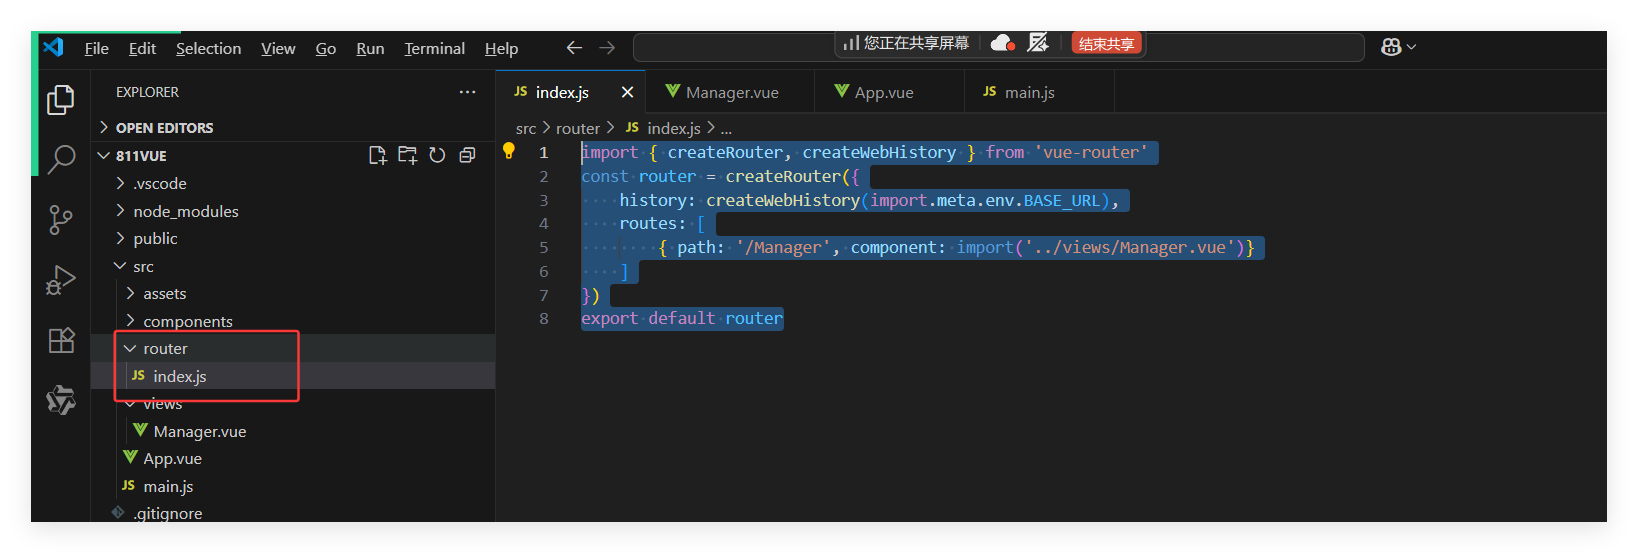
import { createRouter, createWebHistory } from 'vue-router'
const router = createRouter({history: createWebHistory(import.meta.env.BASE_URL),routes: [{ path: '/Manager', component: import('../views/Manager.vue')}]
})
export default router
c.main.js路由引入
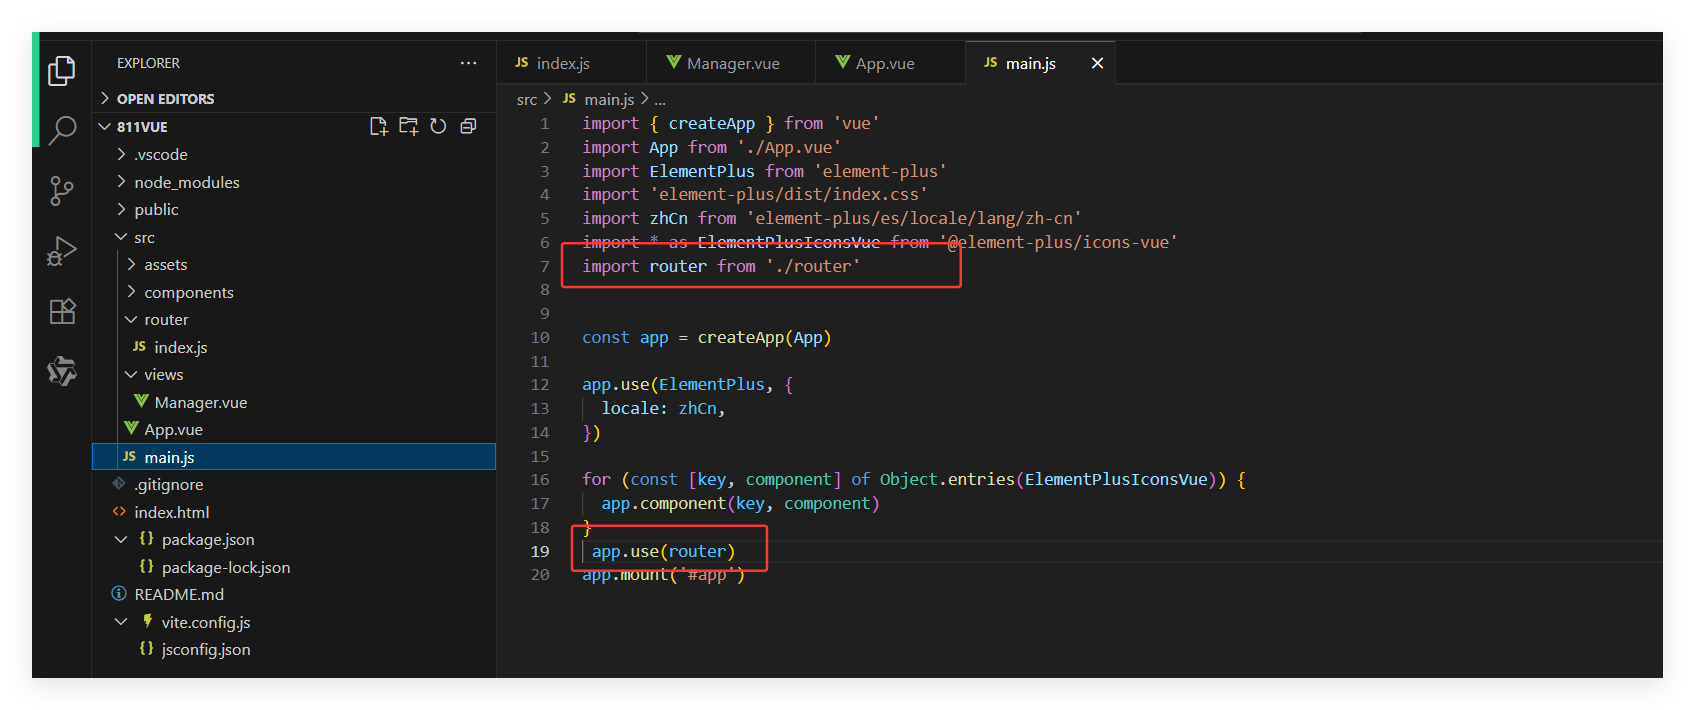
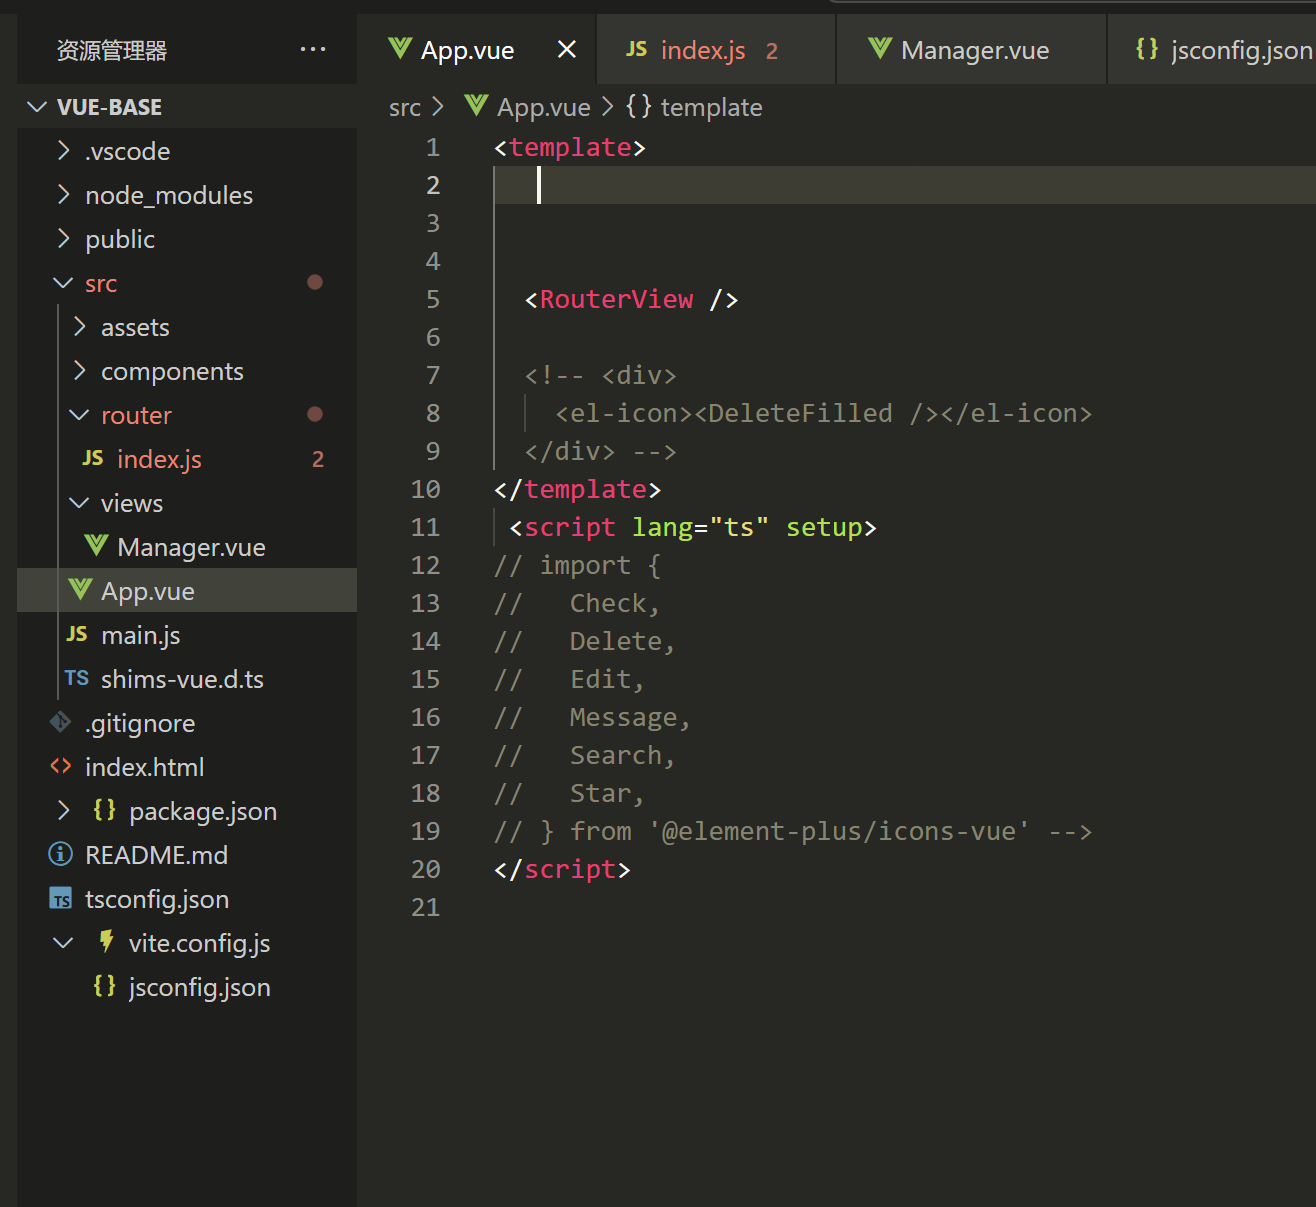
d.App.vue不直接访问App.vue,加一行代码<RouterView/>
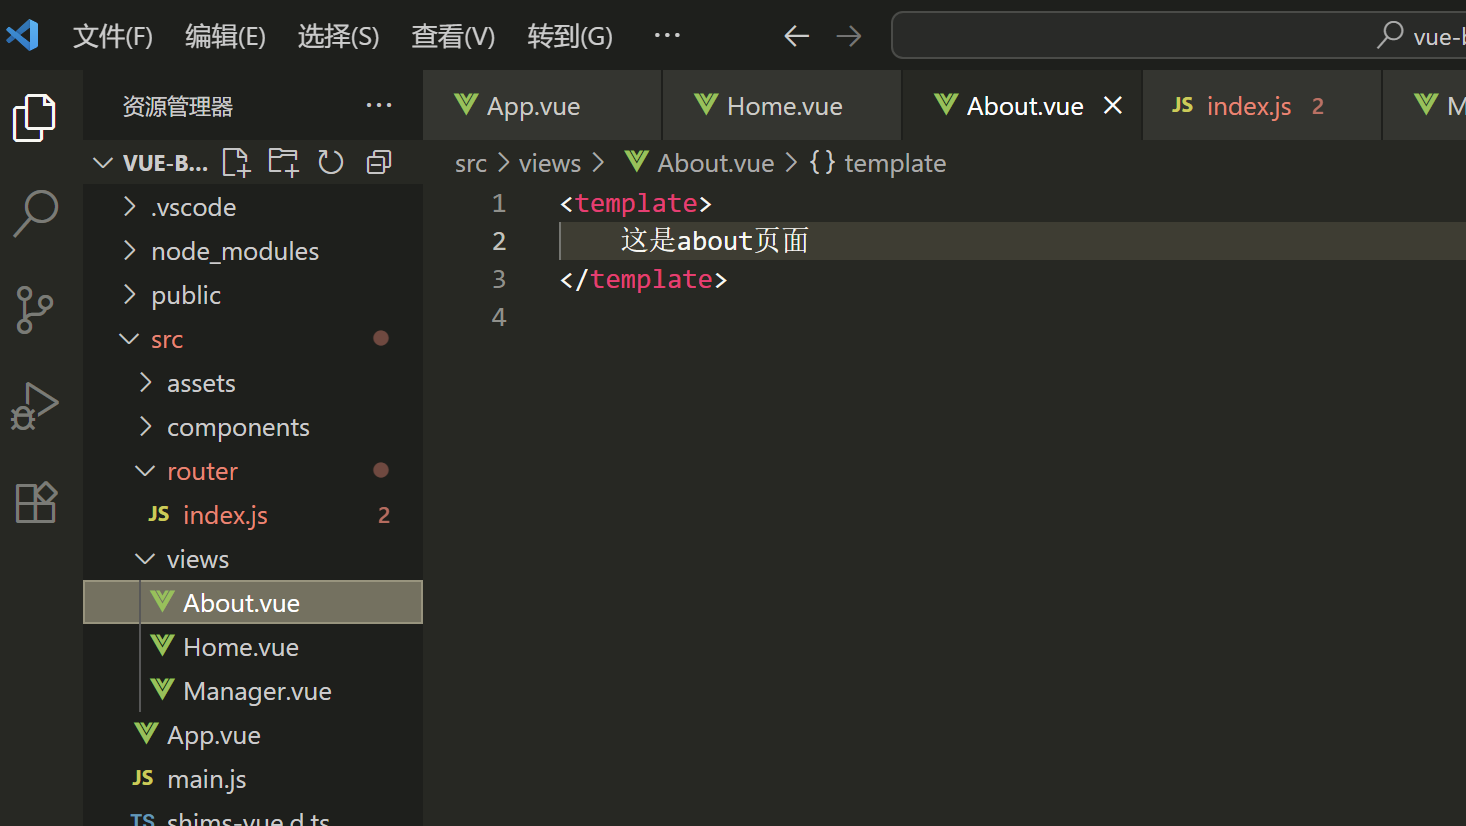
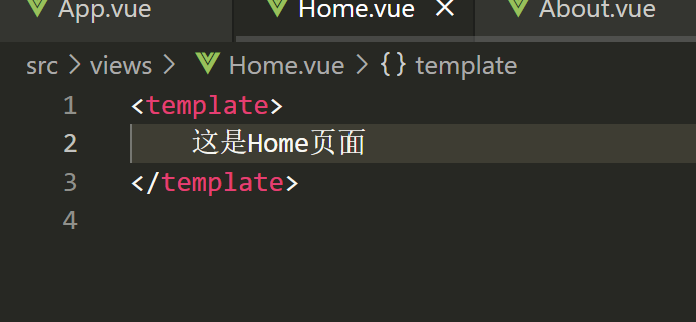
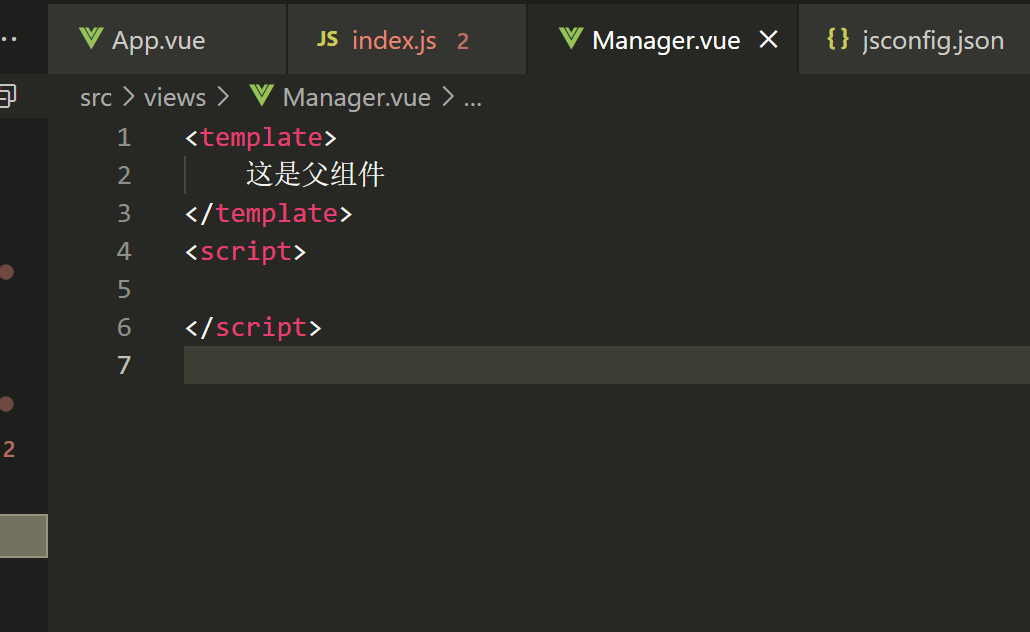
e.Manager.vue
6.子路由,点击侧边栏,能跳转页面
a.配置(先配置5的main.js)
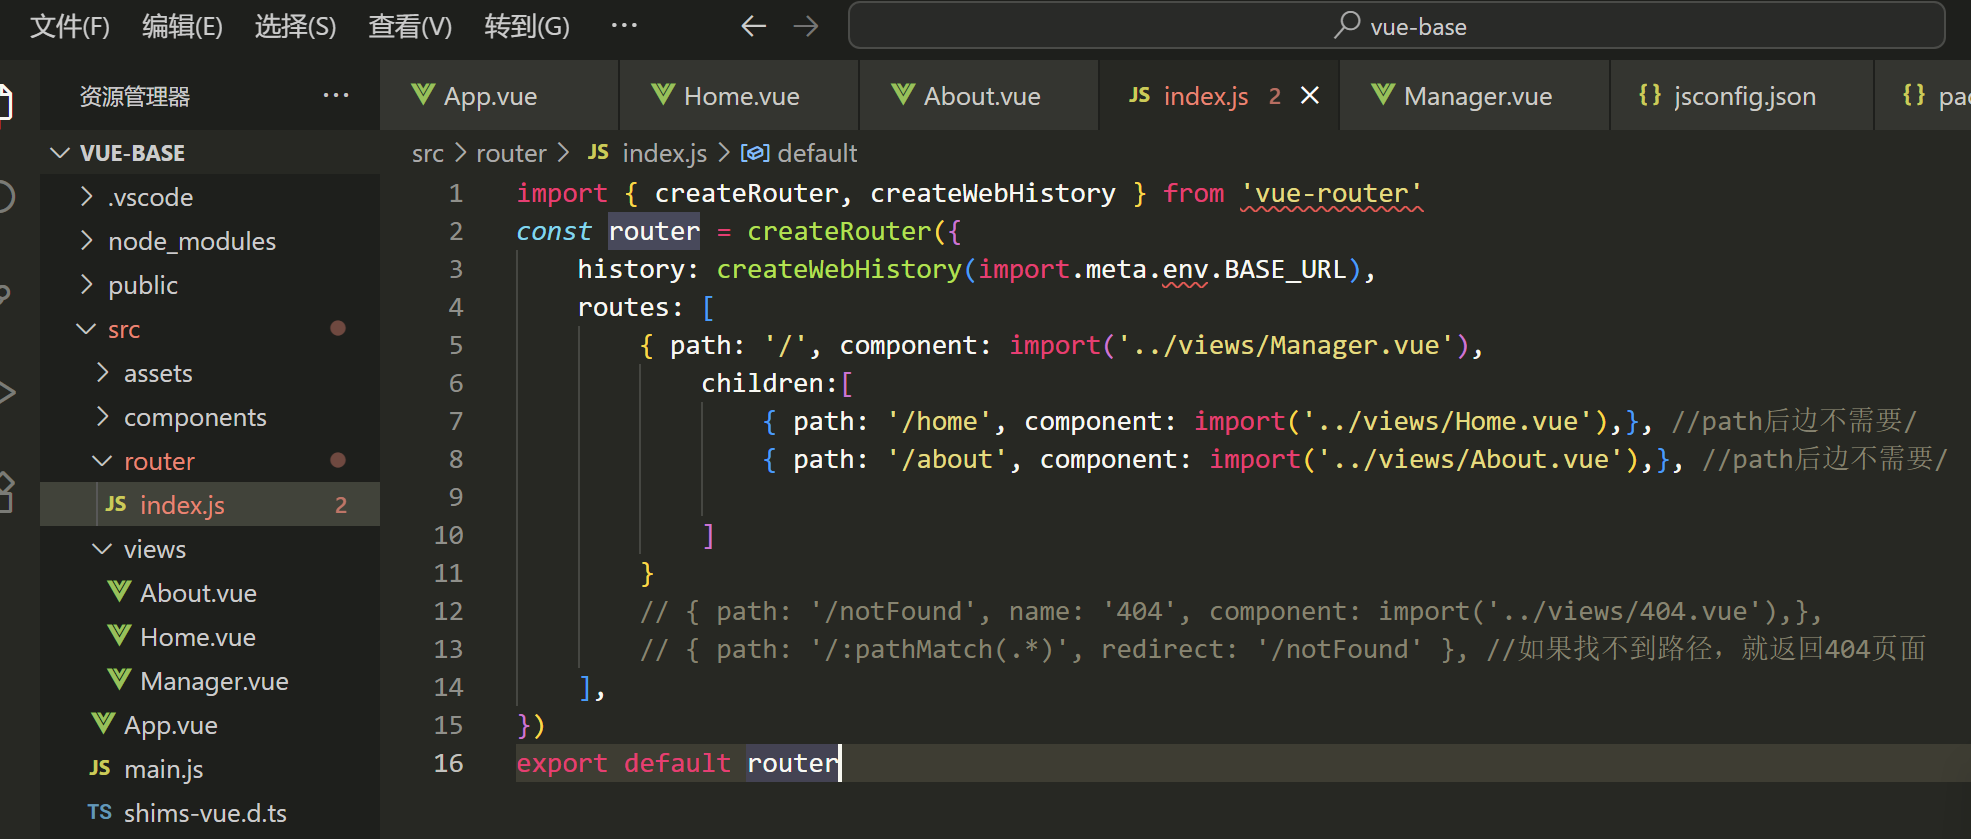
import { createRouter, createWebHistory } from 'vue-router'
const router = createRouter({history: createWebHistory(import.meta.env.BASE_URL),routes: [{ path: '/', component: import('../views/Manager.vue'),children:[{ path: '/home', component: import('../views/Home.vue'),}, //path后边不需要/{ path: '/about', component: import('../views/About.vue'),}, //path后边不需要/]}// { path: '/notFound', name: '404', component: import('../views/404.vue'),},// { path: '/:pathMatch(.*)', redirect: '/notFound' }, //如果找不到路径,就返回404页面],
})
export default router
b.父级元素里面配置子路由器
 <!-- 承载子路由的容器 -->
<router-view />
c.