SpringCloudGateWay 使用nacos网关自动负载均衡
安装好nacos后(参考以前文章SpringCloud 使用nacos注册服务,使用openFeign调用服务-CSDN博客)
新建一个项目,添加
spring-cloud-starter-gateway-server-webmvc
spring-cloud-loadbalancer
spring-cloud-starter-alibaba-nacos-discovery
依赖,pom.xml参考
<?xml version="1.0" encoding="UTF-8"?>
<project xmlns="http://maven.apache.org/POM/4.0.0" xmlns:xsi="http://www.w3.org/2001/XMLSchema-instance"xsi:schemaLocation="http://maven.apache.org/POM/4.0.0 https://maven.apache.org/xsd/maven-4.0.0.xsd"><modelVersion>4.0.0</modelVersion><parent><groupId>org.springframework.boot</groupId><artifactId>spring-boot-starter-parent</artifactId><version>3.5.3</version><relativePath/> <!-- lookup parent from repository --></parent><groupId>org.example</groupId><artifactId>gateway</artifactId><version>0.0.1-SNAPSHOT</version><name>gateway</name><description>gateway</description><url/><licenses><license/></licenses><developers><developer/></developers><scm><connection/><developerConnection/><tag/><url/></scm><properties><java.version>21</java.version><spring-cloud.version>2025.0.0</spring-cloud.version></properties><dependencies><dependency><groupId>org.springframework.cloud</groupId><artifactId>spring-cloud-starter-gateway-server-webmvc</artifactId></dependency><dependency><groupId>org.springframework.cloud</groupId><artifactId>spring-cloud-loadbalancer</artifactId></dependency><dependency><groupId>com.alibaba.cloud</groupId><artifactId>spring-cloud-starter-alibaba-nacos-discovery</artifactId><version>2023.0.3.3</version></dependency><dependency><groupId>org.springframework.boot</groupId><artifactId>spring-boot-starter-test</artifactId><scope>test</scope></dependency></dependencies><dependencyManagement><dependencies><dependency><groupId>org.springframework.cloud</groupId><artifactId>spring-cloud-dependencies</artifactId><version>${spring-cloud.version}</version><type>pom</type><scope>import</scope></dependency></dependencies></dependencyManagement><build><plugins><plugin><groupId>org.springframework.boot</groupId><artifactId>spring-boot-maven-plugin</artifactId></plugin></plugins></build></project>
applocation.yaml设定nacos地址启动loadbalance
spring:application:name: gatewaycloud:nacos:server-addr: 192.168.68.238:8848loadbalancer:nacos:enabled: true
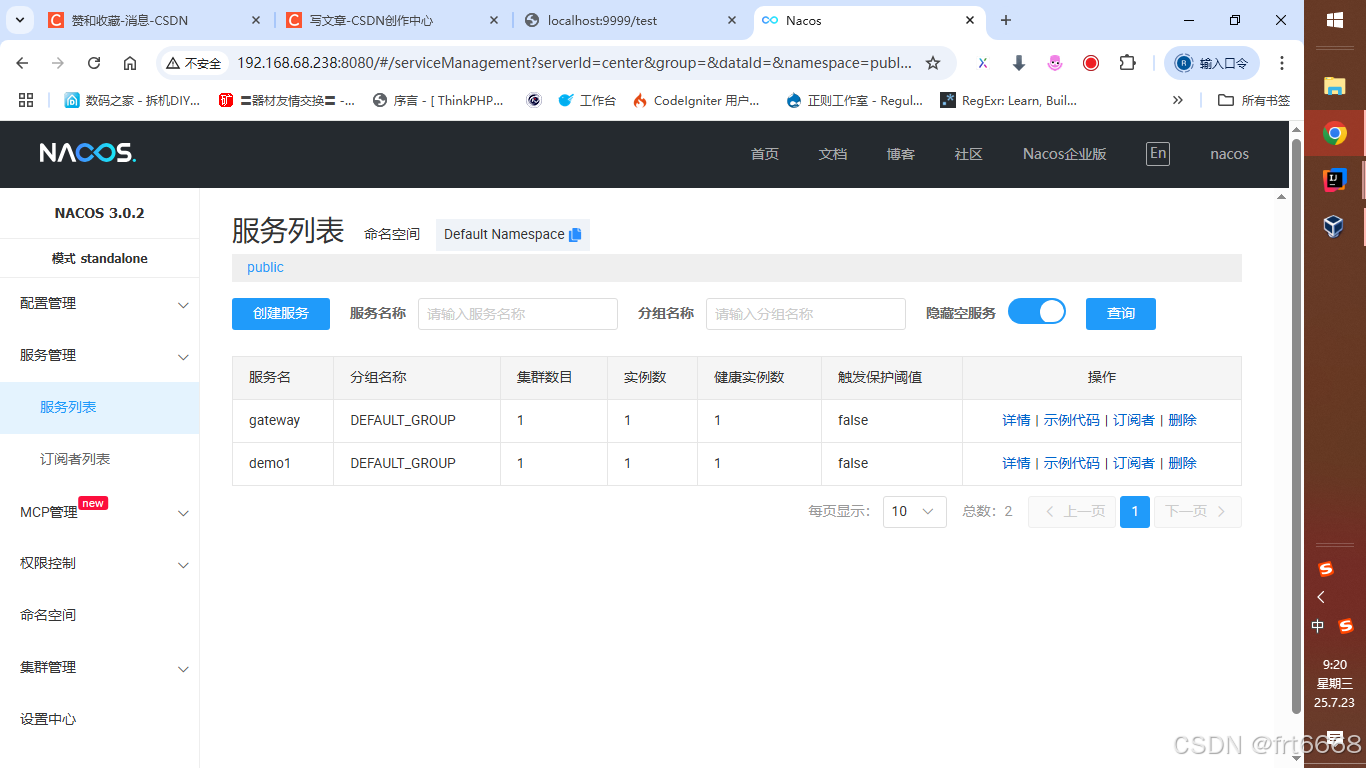
server:port: 9999项目启动后在nacos查看到网关服务和后端服务
路由方式有很多,可以在配置文件中声明也可以写配置类,另外新版本的springcloudgateway配置方式与老版本有变化,不需要实现GloalFilter,更清爽简单了
写一个配置类,添加@Configuration注解,在配置类中添加一个路由,在后端添加一个header,response添加一个返回header
package org.example.gateway;import org.springframework.context.annotation.Bean;
import org.springframework.context.annotation.Configuration;
import org.springframework.web.servlet.function.RouterFunction;
import org.springframework.web.servlet.function.ServerResponse;import static org.springframework.cloud.gateway.server.mvc.filter.AfterFilterFunctions.addResponseHeader;
import static org.springframework.cloud.gateway.server.mvc.filter.BeforeFilterFunctions.addRequestHeader;
import static org.springframework.cloud.gateway.server.mvc.filter.LoadBalancerFilterFunctions.lb;
import static org.springframework.cloud.gateway.server.mvc.handler.GatewayRouterFunctions.route;
import static org.springframework.cloud.gateway.server.mvc.handler.HandlerFunctions.http;@Configuration
class RouteConfiguration {@Beanpublic RouterFunction<ServerResponse> gatewayRouterFunctionsAddReqHeader() {return route("test").GET("/**", http()).filter(lb("demo1")).before(addRequestHeader("token", "666")).after(addResponseHeader("powered", "666")).build();}
}
测试,访问http://localhost:9999/test,header中有666 成功!