Egg.js框架的基本介绍与用法,以及如何连接数据库并对数据库进行增删改查
文章目录
- 说在前面
- Egg框架
- 项目结构
- 配置路由和页面
- Controller控制器的编写方式
- Get请求和参数传递
- Post请求和参数接受
- Service的编写和使用方法
- EJS模版的使用
- 服务端渲染的好处
- cookie的增删改查
- cookie的配置
- 中间件的编写和使用
- 对多种对象进行扩展
- 连接MySQL数据库
- 对数据库进行增删改查
说在前面
- 最近波煮也是终于开始了心心念念的实习工作,因为公司业务要求需要学习Egg框架,所以就有了这篇博客。
- 以下内容均为我在我的云老师------“技术胖”那里学习整理的笔记,原教学视频链接:Egg框架
Egg框架
项目结构
app目录:Egg.js 的核心业务逻辑目录,包含应用的控制器、路由、服务等核心功能模块。config目录:存放应用的全局配置和插件配置。test目录:存放单元测试、集成测试等测试代码。typings目录:可选目录,用于存放 TypeScript 类型声明文件(.d.ts),为项目中的 JavaScript 代码提供类型提示logs目录:存放应用运行时的日志文件(如 egg/ 目录下的日志),用于问题排查和监控。run目录:Egg.js 运行时自动生成的临时文件目录,包含进程配置元数据、计时信息等
配置路由和页面
- 在app目录下的controller中的home.js文件中配置如下:
- 例如登录页面是要新增的页面
const { Controller } = require("egg");class HomeController extends Controller {async index() {const { ctx } = this;ctx.body = "hello world";}async login() {const { ctx } = this;ctx.body = "<h1>登录页面</h1>";}
}module.exports = HomeController;
- 进行路由配置:在app目录下的router.js文件中
/*** @param {Egg.Application} app - egg application*/
module.exports = (app) => {const { router, controller } = app;router.get("/", controller.home.index);router.get("/login", controller.home.login);
};
Controller控制器的编写方式
- 首先引入
Controller - 编写自己的类并继承引入的
Controller - 通过
module.exports导出
"use strict";const Controller = require("egg").Controller;class LoginController extends Controller {async index() {const { ctx } = this;ctx.body = "<h1>注册登录页面</h1>";}
}module.exports = LoginController;
Get请求和参数传递
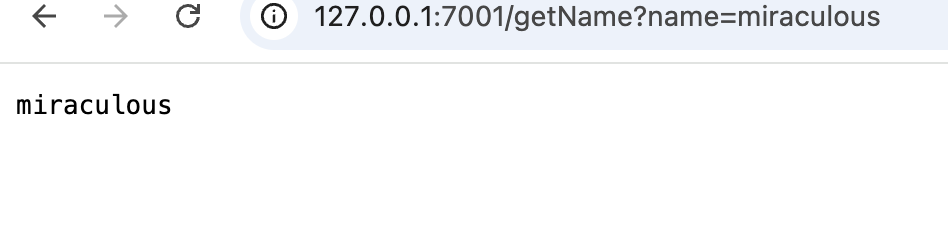
- 在url中携带参数
http://127.0.0.1:7001/getName?name=miraculous
//自由传参async getName() {const { ctx } = this;ctx.body = ctx.query.name;}//严格传参
async getAge() {const { ctx } = this;ctx.body = ctx.params.age + "  " + ctx.params.sex;}
严格传参和自由传参的区别:
自由传参:采用query获取参数;
严格传参:采用params获取参数;
以及注册路由时的写法略有不同
router.get("/getName", controller.home.getName);//自由传参router.get("/getAge/:age/:sex", controller.home.getAge); //严格传参
- 效果如下图:
Post请求和参数接受
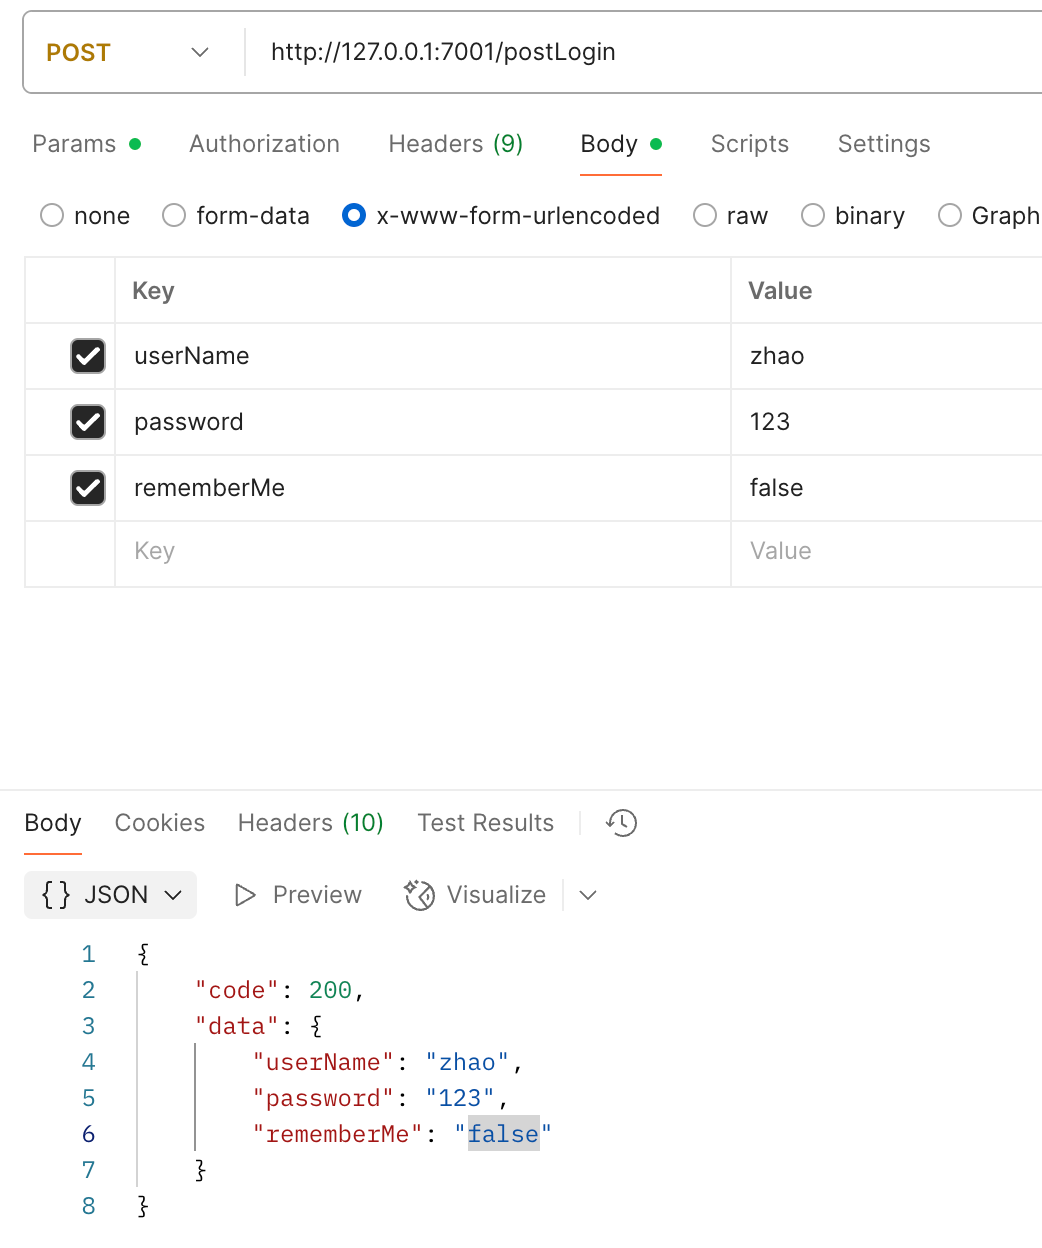
- 编写模块
async login() {const { ctx } = this;ctx.body = {code: 200,data: ctx.request.body,};}
- 使用post方法注册路由
router.post("/postLogin", controller.login.login); - 使用postman携带参数请求,如下图:
Service的编写和使用方法
- Service是封装的一个抽象层:所有的和数据库交互的代码都放在其中
- 好处:
- 保持Controller逻辑更加简单
- 独立性:一个Service可以被多个Controller中使用
- 编写:
"use strict";const Service = require("egg").Service;
class MyService extends Service {async getInfo(id) {return {id: id,name: "zhangsan",age: 18,};}
}module.exports = MyService;
- 使用:通过
ctx的service访问自己编写的service
async getName() {const { ctx } = this;const res = await ctx.service.myservice.getInfo("123123");ctx.body = res;}
EJS模版的使用
- 简介:EJS(Embedded JavaScript templating)是一种简单易用的模板引擎,用于在服务器端生成 HTML 页面。它允许你将 JavaScript 代码嵌入到 HTML 模板中,从而动态生成页面内容。EJS 是 Node.js 生态系统中最流行的模板引擎之一,广泛用于构建动态网站和 Web 应用程序。
- 使用步骤:
1.config.default.js和plugin.js中进行配置
2. 创建控制器和路由
3. 在app/view中创建一个EJS的模版文件index.html
服务端渲染的好处
- 对SEO非常友好
- 快速的首次加载时间
- 减少客户端负担
- 减少客户端攻击面
cookie的增删改查
- 前端代码:
<button onclick="add()">增加cookie</button><button onclick="del()">删除cookie</button><button onclick="editor()">修改cookie</button><button onclick="show()">查找cookie</button><script>function add() {fetch("/add", {method: "POST",headers: {"Content-Type": "application/json",},}).then((res) => {console.log(res.body);});}function del() {fetch("/del", {method: "POST",headers: {"Content-Type": "application/json",},}).then((res) => {console.log(res.body);});}function editor() {fetch("/editor", {method: "POST",headers: {"Content-Type": "application/json",},}).then((res) => {console.log(res.body);});}function show() {fetch("/show", {method: "POST",headers: {"Content-Type": "application/json",},}).then((res) => {console.log(res.body);});}</script>- 后端代码:
async add() {const { ctx } = this;//设置cookiectx.cookies.set("user", "miraculous");ctx.body = {status: 200,message: "cokkie设置成功",};}async del() {const { ctx } = this;ctx.cookies.set("user", null);ctx.body = {status: 200,message: "cokkie删除成功",};}async editor() {const { ctx } = this;ctx.cookies.set("user", "GG Bond");ctx.body = {status: 200,message: "cokkie修改成功",};}async show() {const { ctx } = this;ctx.body = {status: 200,message: "cokkie获取成功",data: ctx.cookies.get("user"),};}
cookie的配置
maxAge:设置cookie的有效时间httpOnly:一个布尔值,是否只允许在服务端操作cookieencrypt:对cookie进行加密
中间件的编写和使用
- 在app目录下创建子目录
middleware - 创建并编写中间件:这里我编写了一个计数器的中间件
module.exports = (options) => {return async (ctx, next) => {if (ctx.session.counter) {ctx.session.counter++;} else {ctx.session.counter = 1;}await next();};
};
- 在
config.default.js中配置中间件:
// add your middleware config here
config.middleware = ["counter"];
- 中间件生效
- 如果想让中间件只在某个页面中起作用,可以在路由中进行配置,并且移除config.default.js中的中间件配置。
router.get("/login", counter, controller.home.login);
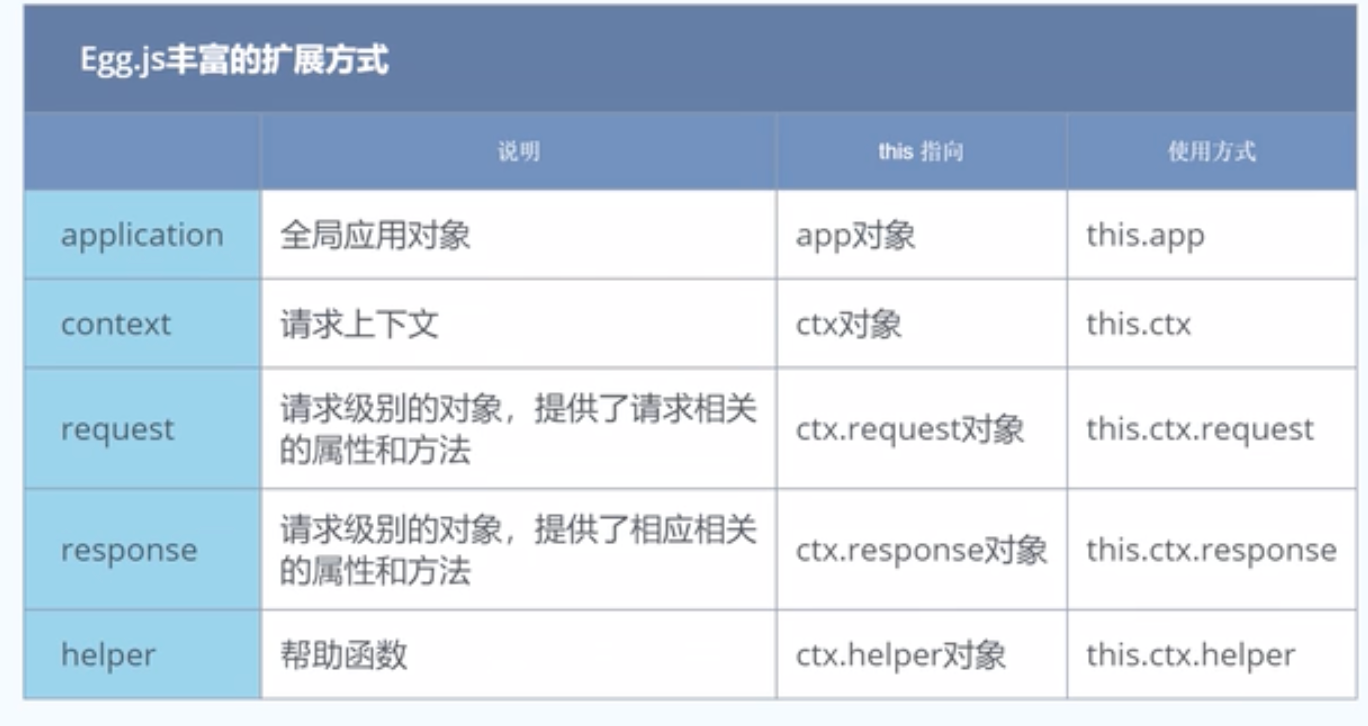
对多种对象进行扩展
连接MySQL数据库
- 安装插件:
egg-mysql - 在
plugin中配置:
// 配置数据库
exports.mysql = {enable: true,package: "egg-mysql",
};
- 在
config.default.js中配置
//配置数据库config.mysql = {app: true,agent: false,client: {host: "localhost",port: "3306",user: "root",password: "你自己的密码",database: "你自己的数据库",},};
对数据库进行增删改查
- 在
Service目录中编写对数据库操作的方法
"use strict";const Service = require("egg").Service;
class TestDbService extends Service {async addUser(user) {try {//插入数据库const app = this.app;bconst result = await app.mysql.insert("user", user);return result;} catch (error) {console.log(error);return null;}}//删除用户async delUser(id) {try {const app = this.app;const result = await app.mysql.delete("user", id);return result;} catch (error) {console.log(error);return null;}}//修改用户async updateUser(user) {try {const app = this.app;const result = await app.mysql.update("user", user);return result;} catch (error) {console.log(error);return null;}}//查询用户async getUser() {try {//查询数据库const app = this.app;const result = await app.mysql.select("user");return result;} catch (error) {console.log(error);return null;}}
}module.exports = TestDbService;
- 在Controller中调用Service中的方法进行操作
"use strict";const Controller = require("egg").Controller;
class UserManage extends Controller {async addUser() {const ctx = this.ctx;const user = {username: "张三",phone: "12345678901",password: "123456",email: "1183229981@qq.com",};const res = await ctx.service.testDb.addUser(user);ctx.body = "增加用户";}async delUser() {const ctx = this.ctx;const id = {id: 1,};const res = await ctx.service.testDb.delUser(id);if (res) {ctx.body = "删除用户--成功";} else {ctx.body = "删除用户--失败";}}async updateUser() {const ctx = this.ctx;const user = {id: 2,username: "李四",password: "123456",email: "11111111@qq.com",};const res = await ctx.service.testDb.updateUser(user);if (res) {ctx.body = "修改用户--成功";} else {ctx.body = "修改用户--失败";}}async getUser() {const ctx = this.ctx;const res = await ctx.service.testDb.getUser();ctx.body = "查询用户" + JSON.stringify(res);}
}module.exports = UserManage;