使用 pytesseract 构建一个简单 OCR demo
简介
pytesseract 库是 Google Tesseract OCR (光学字符识别)引擎的一个 Python 封装库,使用广泛且功能强大。
构建
使用 pytesseract 构建一个简单 OCR demo。
步骤一:安装必要的库
您需要在您的 Python 环境中安装 pytesseract、Pillow (用于图像处理) 和 OpenCV (虽然不是必需的,但在处理图像时非常有用)。
打开终端或命令提示符,运行以下命令:
pip install pytesseract Pillow opencv-python
步骤二:安装 Tesseract OCR 引擎
pytesseract 只是一个 Python 接口,它需要后台安装的 Tesseract OCR 引擎才能工作。Tesseract 的安装方法因操作系统而异:
Windows: 您可以从 Tesseract 官方 GitHub release 页面 下载安装程序。安装时请记住安装路径,之后可能需要在代码中指定 Tesseract 的可执行文件路径。
macOS: 使用 Homebrew 进行安装:
brew install tesseract
中文识别 :如果您需要识别中文,请确保:
- 已通过 brew install tesseract-lang 安装了中文字体数据。
- 在调用 image_to_string 时使用 lang=‘chi_sim’ (简体中文) 或 lang=‘chi_tra’ (繁体中文)。
Linux (Ubuntu/Debian): 使用 apt-get 进行安装:
sudo apt-get install tesseract-ocrsudo apt-get install libtesseract-dev
步骤三:编写 Python 代码
创建一个 Python 文件 (例如 simple_ocr.py) 并粘贴以下代码。
import pytesseract
from PIL import Image
import cv2
import os # 获取当前脚本文件的绝对路径
script_path = os.path.abspath(__file__)
# 获取脚本文件所在的目录
script_dir = os.path.dirname(script_path)# 如果您是Windows用户,并且Tesseract没有添加到系统环境变量中。
# tesseract_cmd_path = r'C:\Program Files\Tesseract-OCR\tesseract.exe' # windows
tesseract_cmd_path = r'/opt/homebrew/bin/tesseract' # macOS/Linux 查询命令:which tesseract # Check if the tesseract executable exists at the specified path
if not os.path.exists(tesseract_cmd_path):print(f"Error: Tesseract executable not found at {tesseract_cmd_path}")print("Please update 'tesseract_cmd_path' in the script to your Tesseract installation path.")
else:pytesseract.pytesseract.tesseract_cmd = tesseract_cmd_path# 指定您要进行OCR的图片文件路径
image_path = 'test_image.png' # 请替换为您的图片文件路径
image_path = os.path.join(script_dir, image_path)
# Check if the image file exists
if not os.path.exists(image_path):print(f"Error: Image file not found at {image_path}")print("Please make sure the image file exists and the path is correct.")
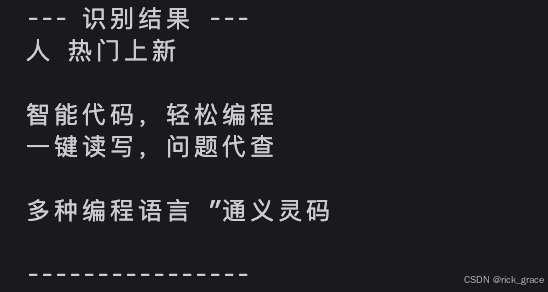
else:try:# 使用 Pillow 加载图片# img = Image.open(image_path)# 或者使用 OpenCV 加载图片,方便后续图像处理img_cv = cv2.imread(image_path)# 如果使用 OpenCV 加载,需要转换为 PIL Image 对象或直接传给 image_to_string (cv2.imread returns numpy array)# pytesseract.image_to_string 可以接受 PIL Image 对象或 numpy array# 我们这里直接使用 numpy arrayimg_np = cv2.cvtColor(img_cv, cv2.COLOR_BGR2RGB) # OpenCV读取是BGR格式,Tesseract通常处理RGB# 使用 pytesseract.image_to_string 进行文字识别# lang 参数可以指定语言,例如 'eng' 表示英语,'chi_sim' 表示简体中文# 您需要安装对应语言的 Tesseract 语言包, macOS/Linux: brew install tesseract-langtext = pytesseract.image_to_string(img_np, lang='chi_sim') # 或者 lang='eng' for English# 打印识别结果print("---- 识别结果 ----")print(text)print("----------------")
步骤四:准备测试图片
创建一个名为 test_image.png 的图片文件,其中包含一些您想要识别的文字,并将其放在与 Python 脚本相同的目录下。

步骤五:运行代码
在终端或命令提示符中,导航到保存 simple_ocr.py 文件的目录,然后运行:
python simple_ocr.py
如果一切顺利,您将在控制台中看到从图片中识别出的文字。
注意事项:
Tesseract 安装路径:
- 如果您在 Windows 上运行,请务必将 tesseract_cmd_path 变量的值修改为您系统中 tesseract.exe 的实际安装路径。
- 在 macOS 或 Linux 上,如果 Tesseract 已通过包管理器安装并添加到 PATH 中,代码中的默认路径通常是正确的,或者您也可以尝试注释掉设置 pytesseract.pytesseract.tesseract_cmd 的那一行,让 pytesseract 自己去寻找。
语言包:
- 如果您需要识别非英文字符(例如中文),您还需要安装对应的 Tesseract 语言包,并在 pytesseract.image_to_string 函数中指定 lang 参数,例如 lang=‘chi_sim’。
- 语言包的安装通常是将对应的 .traineddata 文件放到 Tesseract 安装目录下的 tessdata 文件夹中。
图片质量:
- OCR 识别效果很大程度上取决于输入图片的质量。清晰、高对比度、文字方向正确的图片更容易识别。
- 对于有噪声或扭曲的图片,您可能需要使用 OpenCV 等库进行预处理(如二值化、去噪、旋转矫正)来提高识别率。代码中也提供了加载图片并进行颜色空间转换的部分,为可能的预处理留下了空间。
进一步探索 pytesseract 的其他功能:
- 例如 image_to_data 获取文字位置信息、image_to_boxes 获取字符边界框等,以便构建更复杂的 OCR 应用。