PaddleOCR本地部署 (Python+Flask)
查看配置:
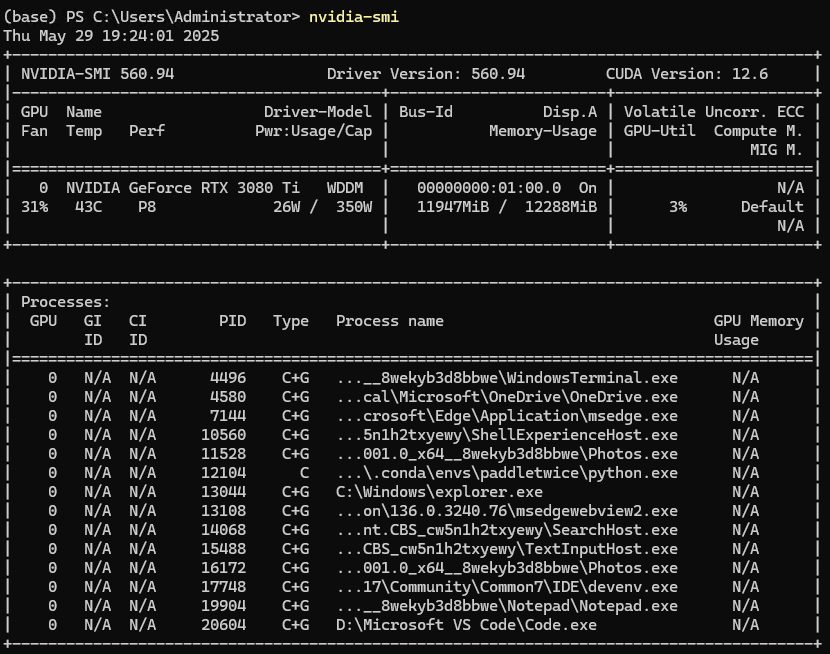
win10系统+Python 3.9.13 + NVIDIA GeForce RTX 3080 Ti
安装环境:
1)下载 CUDA Toolkit 12.6
2)安装 CUDA Toolkit
查看是否安装成功
nvcc --version
3)安装 PaddlePaddle GPU 版本(配合 CUDA 12.6)
PaddlePaddle安装指令
查看 PaddlePaddle 版本:
import paddle
print(paddle.__version__)
4)安装paddleocr
虚拟环境安装:
# 创建并激活虚拟环境
python -m venv venv
venv\Scripts\activate# 安装 paddleocr 到当前虚拟环境中
pip install paddleocr# 或者指定国内镜像
pip install paddleocr -i https://pypi.tuna.tsinghua.edu.cn/simple
查看paddleocr版本:
import paddleocr
print(paddleocr.__version__)
版本错误可安装指定版本:
pip install paddleocr==2.10.0
目录
TestPaddle/
├── ocr_server.py
├── ch_PP-OCRv4_det_server_infer
|	├── inference.pdiparams
|	├── inference.pdiparams.info
|	└── inference.pdmodel
├── ch_PP-OCRv4_rec_server_infer
|	├── inference.pdiparams
|	├── inference.pdiparams.info
|	└── inference.pdmodel
└── cls
|	├── inference.pdiparams
|	├── inference.pdiparams.info
|	└── inference.pdmodel
└── 001.jpg
ocr_server.py:
from flask import Flask, request, jsonify
from paddleocr import PaddleOCR
import cv2
import os
import time
import numpy as np
import json
from datetime import datetime
import requests
import urllib.parse# 测试命令:curl "http://localhost:8082/image-ocr?templateCode=23&path=001.jpg"
# 现场 虚拟环境激活  py38\Scripts\activate
app = Flask(__name__)# # 获取当前脚本所在目录作为基础路径
BASE_DIR = os.path.dirname(os.path.abspath(__file__))# 初始化 OCR 引擎(使用本地模型路径)
ocr_engine = PaddleOCR(use_angle_cls=False,lang="ch",det_model_dir=os.path.join(BASE_DIR, 'ch_PP-OCRv4_det_server_infer'),rec_model_dir=os.path.join(BASE_DIR, 'ch_PP-OCRv4_rec_server_infer'),cls_model_dir=os.path.join(BASE_DIR, 'cls'),use_gpu=True,use_pdserving=False,det_limit_side_len=3264,det_db_thresh=0.8,det_db_box_thresh=0.6,det_db_unclip_ratio=3,rec_image_shape="3, 48, 64",e2e_limit_side_len=3264,e2e_pgnet_score_thresh=0.0001,download_model=False
)@app.route('/image-ocr', methods=['GET'])
def image_ocr():try:# 获取查询参数template_code = request.args.get('templateCode')image_path = request.args.get('path')# 检查参数是否为空if not image_path:return jsonify({'Status': 'Error','Message': 'Missing required parameter: path','ReceivedAt': get_current_time_with_ms()}), 400# 可选:打印 templateCode(但不参与 OCR 处理)print(f"Template Code: {template_code}")# # 检查图像是否存在# if not os.path.exists(image_path):#     return jsonify({#         'Status': 'Error',#         'Message': f'Image file does not exist: {image_path}',#         'ReceivedAt': get_current_time_with_ms()#     }), 400# 读取图像# img = cv2.imread(image_path)img = read_image(image_path)if img is None:return jsonify({'Status': 'Error','Message': 'Failed to load image.','ReceivedAt': get_current_time_with_ms()}), 400# 设置边缘裁剪距离gap = 10closingPix = 5gray_image = cv2.cvtColor(img, cv2.COLOR_BGR2GRAY)height, width = gray_image.shape[:2]# 设置边缘10个像素为255height, width = gray_image.shape[:2]gray_image[:, :gap] = 255gray_image[:, width - 10:] = 255gray_image[:gap, :] = 255gray_image[height - gap:, :] = 255# 二值化处理_, binary = cv2.threshold(gray_image, 254, 255, cv2.THRESH_BINARY_INV)# 先膨胀5次,再腐蚀5次kernel = cv2.getStructuringElement(cv2.MORPH_RECT, (5, 5))morphed = cv2.dilate(binary, kernel, iterations=closingPix)morphed = cv2.erode(morphed, kernel, iterations=closingPix)# 寻找连通域num_labels, labels, stats, centroids = cv2.connectedComponentsWithStats(morphed, connectivity=8)# 收集所有灰度为 0 的区域对应的矩形(排除背景)rectangles = []for i in range(1, num_labels):  # 从1开始跳过背景x, y, w, h, _ = stats[i]rectangles.append((x, y, w, h))# print("Rectangle", i)# 按照先 y(行),再 x(列)排序merged_rects_sorted = sorted(rectangles, key=lambda r: (r[1], r[0]))sum_message = ""final_message_parts = []for idx, rect in enumerate(merged_rects_sorted, start=1):x, y, w, h = rect# 创建一个全白的图像(与原图大小一致)mask = np.ones_like(img) * 255  # 灰度图为 255 的白色背景图像# 将 rect 区域替换为原图中的内容mask[y:y + h, x:x + w] = img[y:y + h, x:x + w]# img = mask# cv2.imwrite("test Rectangle"+str(idx)+".jpeg", mask)print(f"Rectangle {idx}: x={x}, y={y}, w={w}, h={h}")# 执行 OCRresult = ocr_engine.ocr(mask, cls=False)# 格式化结果message_lines = []for line in result:if line is not None:for word_info in line:text = word_info[1][0]coords = word_info[0]coord_str = ",".join([f"({int(x)},{int(y)})" for x, y in coords])message_lines.append(f"{text}:{coord_str}")message = "Rectangle"+str(idx)+"{" + ";".join(message_lines) + "}"sum_message = sum_message + messagereturn jsonify({'Status': 'Success','Message': sum_message,'ReceivedAt': get_current_time_with_ms()})except Exception as e:return jsonify({'Status': 'Error','Message': str(e),'ReceivedAt': get_current_time_with_ms()}), 500def get_current_time_with_ms():"""返回当前系统时间,格式为 YYYY-MM-DD HH:MM:SS.sss"""return time.strftime('%Y-%m-%d %H:%M:%S.') + f"{int(time.time() * 1000) % 1000:03d}"def read_image(image_source):"""读取图像,支持 HTTP URL 和本地路径:param image_source: 图像地址,可以是 URL 或本地路径:return: OpenCV 图像对象,失败返回 None"""if urllib.parse.urlparse(image_source).scheme in ('http', 'https'):# 是网络URL,使用 requests 下载try:response = requests.get(image_source, timeout=10)response.raise_for_status()image_array = np.frombuffer(response.content, dtype=np.uint8)image = cv2.imdecode(image_array, cv2.IMREAD_COLOR)except Exception as e:print(f"读取网络图像失败: {e}")return Noneelse:# 当作本地路径处理if os.path.exists(image_source):image = cv2.imread(image_source)else:print(f"本地路径不存在: {image_source}")return Nonereturn imageif __name__ == '__main__':app.run(host='0.0.0.0', port=8082, threaded=True)
测试:
