虚拟机中创建虚拟机-window10为例
目录
流程
启用嵌套虚拟化
关闭所有虚拟机
编辑主机的虚拟机配置文件(.vmx文件):
在VMware Workstation中启用虚拟化引擎:
接下来详细演示一下
流程
启用嵌套虚拟化
-
关闭所有虚拟机
-
编辑主机的虚拟机配置文件(.vmx文件):
-
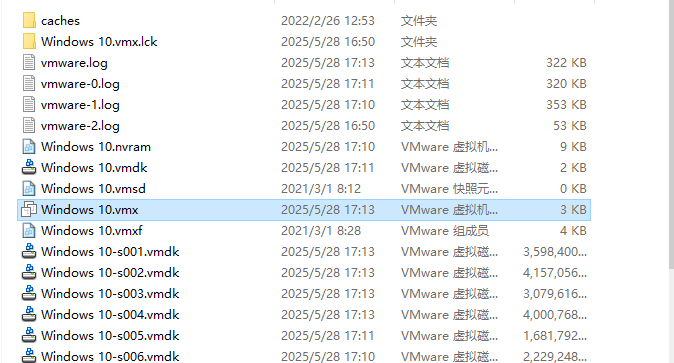
找到您当前运行的虚拟机(不是您想安装的CentOS)的.vmx文件
-
添加或修改以下行:
vhv.enable = "TRUE" hypervisor.cpuid.v0 = "FALSE"
-
-
在VMware Workstation中启用虚拟化引擎:
-
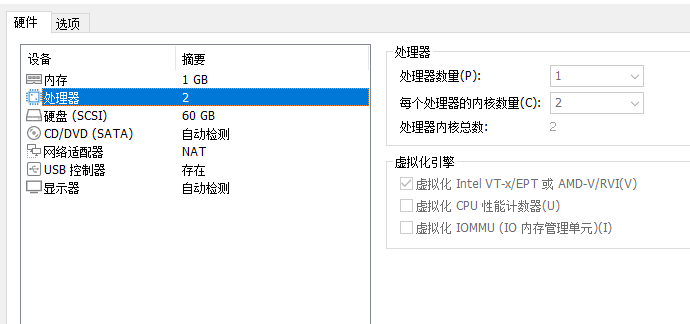
右键点击虚拟机 → 设置 → 处理器
-
勾选"虚拟化Intel VT-x/EPT或AMD-V/RVI"
-
勾选"虚拟化IOMMU(IO内存管理单元)"
-
接下来详细演示一下
打开我们的虚拟机的虚拟目录,打开扩展名
添加下面条件,追加最后两行参数
### === 新增的嵌套虚拟化配置 === ###
vhv.enable = "TRUE"
hypervisor.cpuid.v0 = "FALSE"
.encoding = "GBK"
config.version = "8"
virtualHW.version = "16"
mks.enable3d = "TRUE"
pciBridge0.present = "TRUE"
pciBridge4.present = "TRUE"
pciBridge4.virtualDev = "pcieRootPort"
pciBridge4.functions = "8"
pciBridge5.present = "TRUE"
pciBridge5.virtualDev = "pcieRootPort"
pciBridge5.functions = "8"
pciBridge6.present = "TRUE"
pciBridge6.virtualDev = "pcieRootPort"
pciBridge6.functions = "8"
pciBridge7.present = "TRUE"
pciBridge7.virtualDev = "pcieRootPort"
pciBridge7.functions = "8"
vmci0.present = "TRUE"
hpet0.present = "TRUE"
displayName = "Windows 10"
guestOS = "windows9"
nvram = "Windows 10.nvram"
virtualHW.productCompatibility = "hosted"
powerType.powerOff = "soft"
powerType.powerOn = "soft"
powerType.suspend = "soft"
powerType.reset = "soft"
usb.vbluetooth.startConnected = "TRUE"
sensor.location = "pass-through"
tools.syncTime = "FALSE"
sound.autoDetect = "TRUE"
sound.virtualDev = "hdaudio"
sound.fileName = "-1"
numvcpus = "2"
cpuid.coresPerSocket = "2"
memsize = "1024"
mem.hotadd = "TRUE"
scsi0.virtualDev = "lsisas1068"
scsi0.present = "TRUE"
sata0.present = "TRUE"
scsi0:0.fileName = "Windows 10.vmdk"
scsi0:0.present = "TRUE"
sata0:1.deviceType = "cdrom-raw"
sata0:1.fileName = "auto detect"
sata0:1.present = "TRUE"
usb.present = "TRUE"
ehci.present = "TRUE"
usb_xhci.present = "TRUE"
svga.graphicsMemoryKB = "1048576"
ethernet0.connectionType = "nat"
ethernet0.addressType = "generated"
ethernet0.virtualDev = "e1000e"
serial0.fileType = "thinprint"
serial0.fileName = "thinprint"
ethernet0.present = "TRUE"
extendedConfigFile = "Windows 10.vmxf"
floppy0.present = "FALSE"
numa.autosize.cookie = "20022"
numa.autosize.vcpu.maxPerVirtualNode = "2"
uuid.bios = "56 4d da f2 f7 e1 68 b3-59 b6 39 a7 15 f6 2d 27"
uuid.location = "56 4d da f2 f7 e1 68 b3-59 b6 39 a7 15 f6 2d 27"
vm.genid = "4128149281896923890"
vm.genidX = "-3223032741427934339"
scsi0:0.redo = ""
pciBridge0.pciSlotNumber = "17"
pciBridge4.pciSlotNumber = "21"
pciBridge5.pciSlotNumber = "22"
pciBridge6.pciSlotNumber = "23"
pciBridge7.pciSlotNumber = "24"
scsi0.pciSlotNumber = "160"
usb.pciSlotNumber = "32"
ethernet0.pciSlotNumber = "192"
ehci.pciSlotNumber = "33"
usb_xhci.pciSlotNumber = "224"
vmci0.pciSlotNumber = "34"
sata0.pciSlotNumber = "35"
scsi0.sasWWID = "50 05 05 62 f7 e1 68 b0"
svga.vramSize = "268435456"
vmotion.checkpointFBSize = "4194304"
vmotion.checkpointSVGAPrimarySize = "268435456"
ethernet0.generatedAddress = "00:0c:29:f6:2d:27"
ethernet0.generatedAddressOffset = "0"
vmci0.id = "1746112199"
monitor.phys_bits_used = "43"
cleanShutdown = "TRUE"
softPowerOff = "FALSE"
sata0:1.startConnected = "FALSE"
toolsInstallManager.lastInstallError = "0"
svga.guestBackedPrimaryAware = "TRUE"
tools.remindInstall = "FALSE"
toolsInstallManager.updateCounter = "1"
guestOS.detailed.data = ""
gui.lastPoweredViewMode = "fullscreen"
sata0:1.autodetect = "TRUE"
usb_xhci:4.present = "TRUE"
usb_xhci:4.deviceType = "hid"
usb_xhci:4.port = "4"
usb_xhci:4.parent = "-1"
unity.wasCapable = "TRUE"
guestInfo.detailed.data = ""
vhv.enable = "TRUE"
hypervisor.cpuid.v0 = "FALSE"
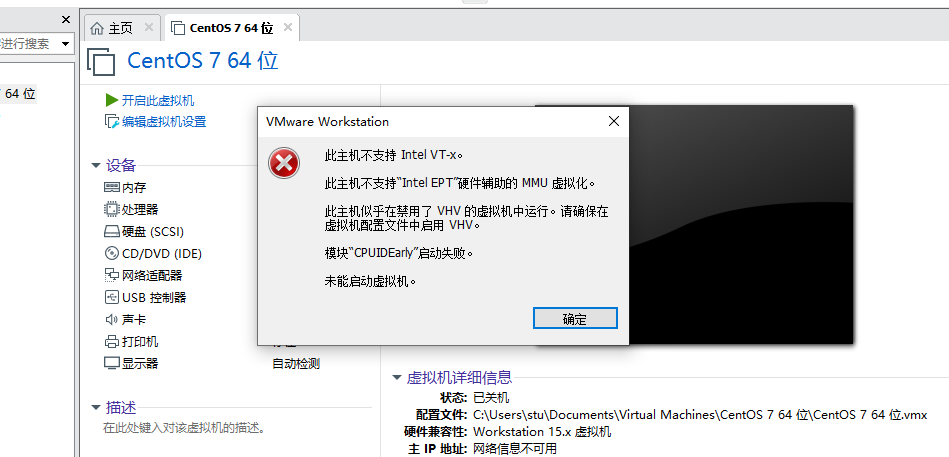
如果直接开启的话会出现以下情况
开启虚拟化
即可完成相应配置