Unity-编辑器扩展
之前我们关于Unity的讨论都是针对于Unity底层的内容或者是代码层面的东西,这一次我们来专门研究Unity可视化的编辑器,在已有的基础上做一些扩展。
基本功能
首先我们来认识三个文件夹:
Editor,Gizmos,Editor Default Resources
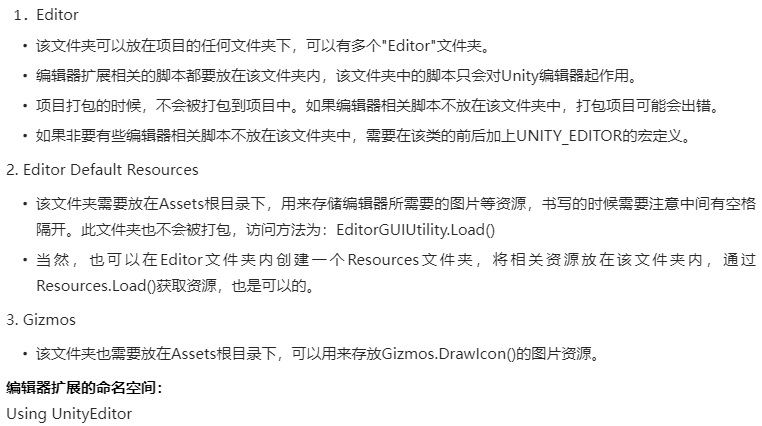
这三个文件夹在Unity中比较特殊,当你符合命名要求以及文件路径要求之后它就会被Unity编辑器自动识别为这些特殊文件夹。
比如:

然后我们来了解一下操作编辑器的内容:
[MenuItem]
我们在Editor文件夹中新建一个脚本后放入以下函数:
[MenuItem("MyTool/DeleteAllObj", true)]private static bool DeleteValidate(){if (Selection.objects.Length > 0)return true;elsereturn false;}[MenuItem("MyTool/DeleteAllObj", false)]private static void MyToolDelete(){//Selection.objects foreach (Object item in Selection.objects){Undo.DestroyObjectImmediate(item);}}MenuItem会帮助我们在Unity编辑器窗口新建一个可选项,代码中新建的可选项名为MyTool,其中点击MyTool我们定义了一个DeleteAllObj按钮,点击之后执行下列的DeleteValidate函数。后续跟到的一个bool变量代表的是一个验证函数和一个执行函数:true下面跟的是验证函数而false下面跟的是执行函数。验证函数会动态的检查我们菜单项是否可用,可用就高亮显示而不可用就会变灰;如果验证函数返回true,菜单项可用,我们才能去执行执行函数。
[MenuItem(“CONTEXT/组件名/按钮名”)]
[MenuItem(“CONTEXT/组件名/按钮名”)] 是 Unity 编辑器扩展中用于 在特定组件的上下文菜单中添加自定义功能按钮 的关键语法。因为是在已有的组件上添加自定义按钮,所以组件名称必须是已有的组件名称。
比如你加入这段代码在Editor文件的脚本中:
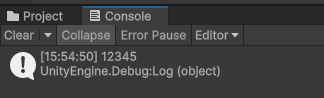
[MenuItem("CONTEXT/Rigidbody/Init")]private static void RigidbodyInit(){Debug.Log("12345");}然后你去场景中任一物体的刚体组件上:
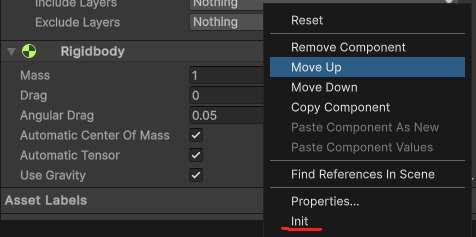
点击按钮后就会执行你的语句。
MenuCommand
用于获取当前操作的组件,在代码里使用,比如以下代码:
[MenuItem("CONTEXT/PlayerHealth/Init")]static void Init(MenuCommand cmd){PlayerHealth health = cmd.context as PlayerHealth;}可以看到我们的代码中直接用MenuCommand cmd定义了当前组件的实例。
ContextMenu、ContextMenuItem
对于ContextMenu来说,通过在脚本方法上标注 [ContextMenu("菜单项名称")],可在该组件的 Inspector 右键菜单 中添加一个按钮,点击后触发对应方法。
比如以下代码:
using System.Collections;
using System.Collections.Generic;
using UnityEngine;public class ResetHealth : MonoBehaviour
{[ContextMenu("Reset Health")]void Resethealth(){// 重置血量逻辑}
}
那么在Inspector中:
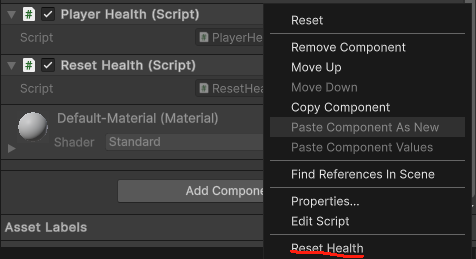
ContextMenuItem 的作用则是通过在字段上标注 [ContextMenuItem("菜单项名称", "方法名")],可在 Inspector 中该字段的 右键菜单 中添加操作按钮,直接修改字段值或触发逻辑。
比如以下代码:
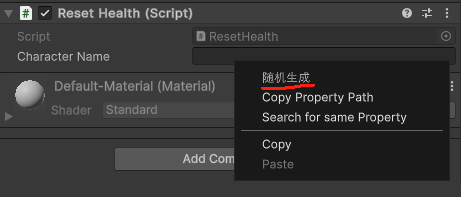
[ContextMenuItem("随机生成", "RandomizeName")]public string characterName;void RandomizeName() {characterName = "Player_" + Random.Range(1, 100);}效果如下:
Selection
用于获取选择的游戏物体
- Selection.activeGameObject 返回第一个选择的场景中的对象
- Selection.gameObjects 返回场景中选择的多个对象,包含预制体等
- Selection.objects 返回选择的多个对象
用法如下:
using UnityEditor;
using UnityEngine;public static class DeleteAll // 改为静态类
{[MenuItem("MyTool/Delete Selected Objects")]static void DeleteSelected(){// 加入安全校验if (Selection.objects.Length == 0){Debug.LogWarning("未选择任何对象");return;}foreach (Object obj in Selection.objects){if (obj != null){Undo.DestroyObjectImmediate(obj);}}}
}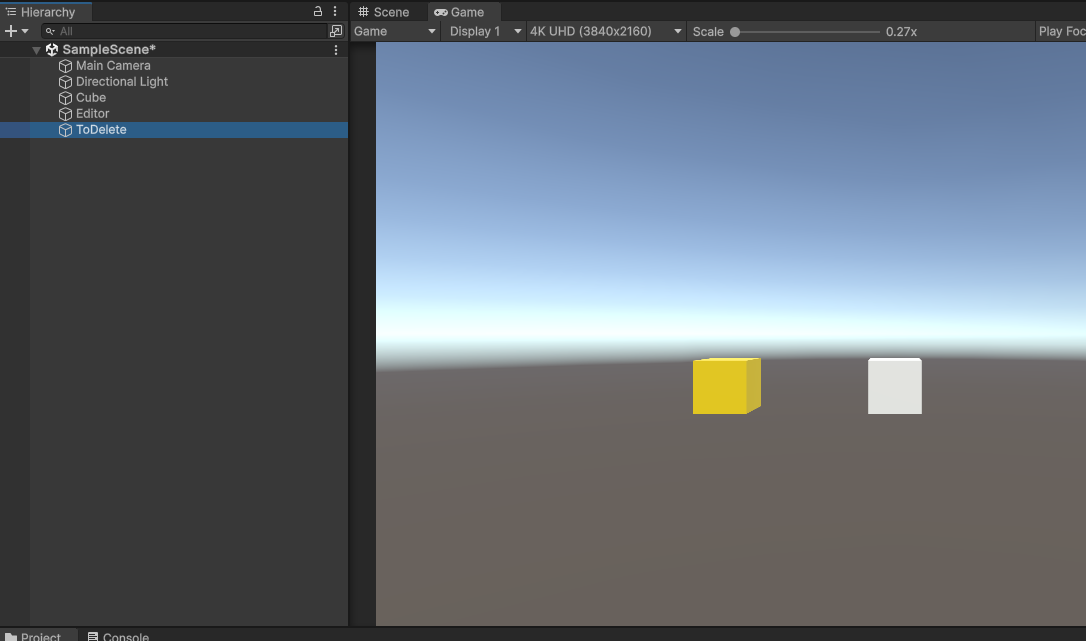
我们选中这个黄色的cube,之后打开MyTool中的Delete Selected Objects:
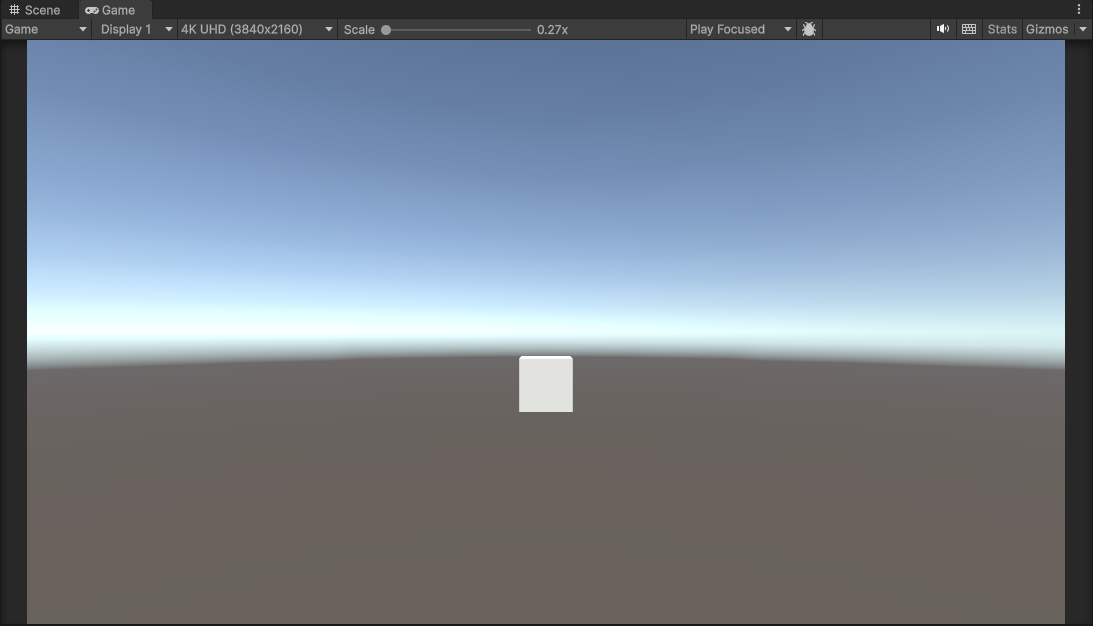
就会删除了。
自定义Inspector面板
学会了操作Unity编辑器的基本操作后,我们来尝试自己写出一个Inspector界面:
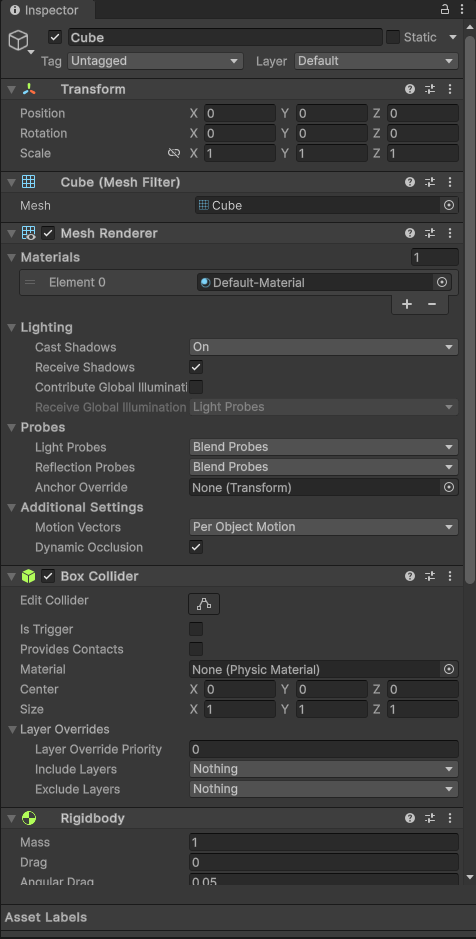
这是我们正常的Inspector界面。
我们先写这样一个脚本:
using UnityEngine;
public enum Course
{Chinese,Mathematics,English
}public class InspectorExample : MonoBehaviour
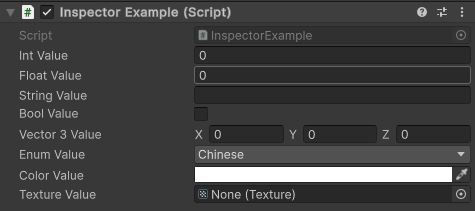
{public int intValue;public float floatValue;public string stringValue;public bool boolValue;public Vector3 vector3Value;public Course enumValue = Course.Chinese;public Color colorValue = Color.white;public Texture textureValue;
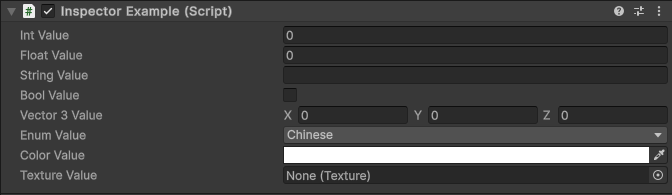
}这个脚本定义了一个枚举和一些变量,其Inspector如图:
然后这个时候我们再根据这个InspectorExample类来写下面的这个脚本:
using UnityEngine;
using UnityEditor;[CustomEditor(typeof(InspectorExample))]
public class InspectorExampleEditor : Editor
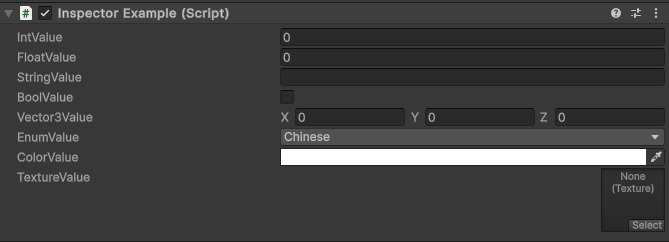
{//target指该编辑器类绘制的目标类,需要将它强转为目标类private InspectorExample _target { get { return target as InspectorExample; } }//GUI重新绘制public override void OnInspectorGUI(){//EditorGUILayout.LabelField("IntValue",_target.intValue.ToString(),EditorStyles.boldLabel);//_target.intValue = EditorGUILayout.IntSlider(new GUIContent("Slider"),_target.intValue, 0, 10);//_target.floatValue = EditorGUILayout.Slider(new GUIContent("FloatValue"), _target.floatValue, 0, 10);_target.intValue = EditorGUILayout.IntField("IntValue", _target.intValue);_target.floatValue = EditorGUILayout.FloatField("FloatValue", _target.floatValue);_target.stringValue = EditorGUILayout.TextField("StringValue", _target.stringValue);_target.boolValue = EditorGUILayout.Toggle("BoolValue", _target.boolValue);_target.vector3Value = EditorGUILayout.Vector3Field("Vector3Value", _target.vector3Value);_target.enumValue = (Course)EditorGUILayout.EnumPopup("EnumValue", (Course)_target.enumValue);_target.colorValue = EditorGUILayout.ColorField(new GUIContent("ColorValue"), _target.colorValue);_target.textureValue = (Texture)EditorGUILayout.ObjectField("TextureValue", _target.textureValue, typeof(Texture), true);}
}效果如图:
不难看出这段函数中最重要的内容就是EditorGUILayout这个函数:
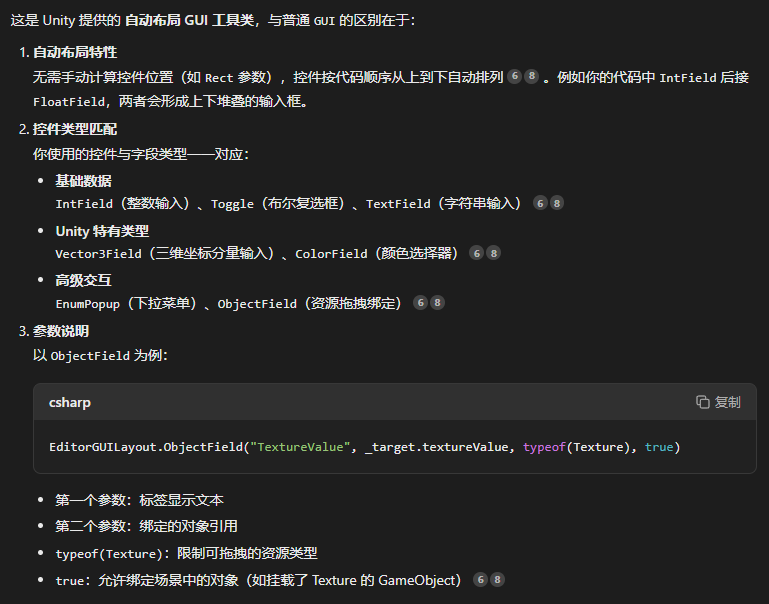
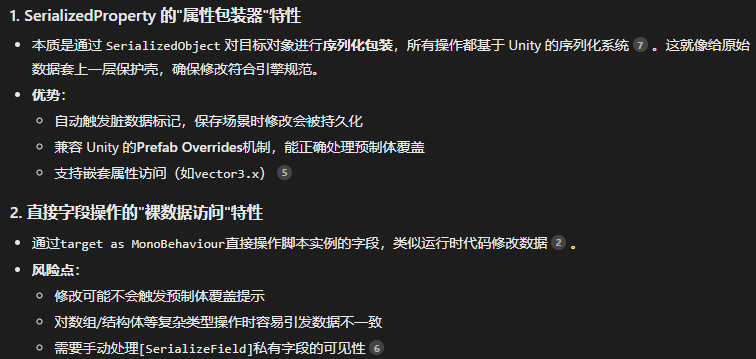
这是一个自定义Inspector的方法,还有一种是:
using UnityEditor;[CustomEditor(typeof(InspectorExample))]
public class InspectorExampleEditor : Editor
{//定义序列化属性private SerializedProperty intValue;private SerializedProperty floatValue;private SerializedProperty stringValue;private SerializedProperty boolValue;private SerializedProperty vector3Value;private SerializedProperty enumValue;private SerializedProperty colorValue;private SerializedProperty textureValue;private void OnEnable(){//通过名字查找被序列化属性。intValue = serializedObject.FindProperty("intValue");floatValue = serializedObject.FindProperty("floatValue");stringValue = serializedObject.FindProperty("stringValue");boolValue = serializedObject.FindProperty("boolValue");vector3Value = serializedObject.FindProperty("vector3Value");enumValue = serializedObject.FindProperty("enumValue");colorValue = serializedObject.FindProperty("colorValue");textureValue = serializedObject.FindProperty("textureValue");}public override void OnInspectorGUI(){//表示更新序列化物体serializedObject.Update();EditorGUILayout.PropertyField(intValue);EditorGUILayout.PropertyField(floatValue);EditorGUILayout.PropertyField(stringValue);EditorGUILayout.PropertyField(boolValue);EditorGUILayout.PropertyField(vector3Value);EditorGUILayout.PropertyField(enumValue);EditorGUILayout.PropertyField(colorValue);EditorGUILayout.PropertyField(textureValue);//应用修改的属性值,不加的话,Inspector面板的值修改不了serializedObject.ApplyModifiedProperties();}
}
这两种自定义Inspector的方法的区别在于:

可以这样理解两种自定义Inspector的方法的差异:第一种是我们统一将Inspector里的内容转换为属性(Property),然后统一对属性进行操作;第二种则是我们通过Unity里提供的接口直接对Inspector的内容进行修改。
效果如图:
看起来似乎没有什么区别,那只是因为我们没有在重载的OnInspectorGUI()方法中加入新东西而已。
我们往里面加一个:
// 大标题(加粗+蓝色字体)var titleStyle = new GUIStyle(EditorStyles.boldLabel) {fontSize = 16,normal = { textColor = new Color(0.2f, 0.6f, 1f) }};EditorGUILayout.LabelField("★ 老公今晚不在家 ★", titleStyle);效果如图:
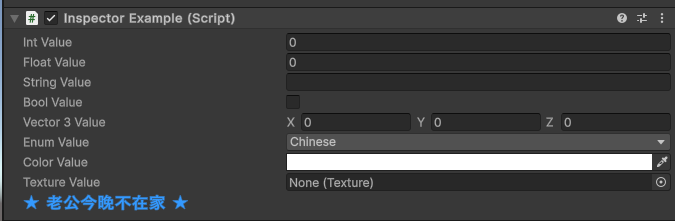
这样就实现了我们的自定义Inspector了,总结来说:首先我们需要一个InspectorExample这样的脚本作为基础,然后在Editor中通过序列化或者直接字段操作来修改InspectorExample在Inspector上显示的内容即可。
创建编辑器窗体
学会自定义Inspector之后我们来学习如何在编辑器中创建窗(window),这方面Unity也已经帮助我们写好了API,我们直接去调用并设置即可。
Unity有三种窗类:ScriptableWizard,EditorWindow和PopupWindowContent。

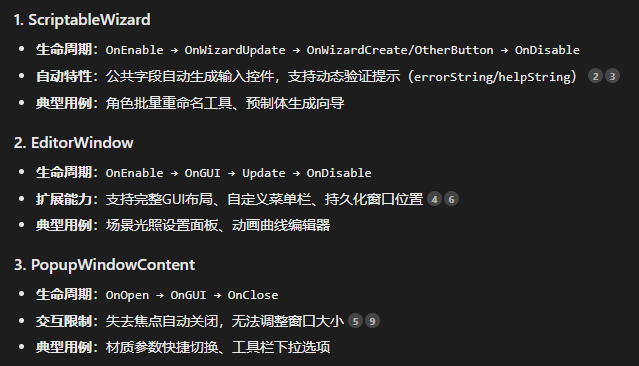
可以看到,第一种窗口最大的特色就是自动生成输入控件,所以第一种窗口往往都是作为需求输入来使用;第二种窗口则是有着更完整的生命周期,且其功能更全面;第三种窗口则是一个临时性的弹窗,点一点按钮就会关闭的那种,更适合作为提示窗口。
我们分别来使用代码生成这三种窗口试试:
using UnityEngine;
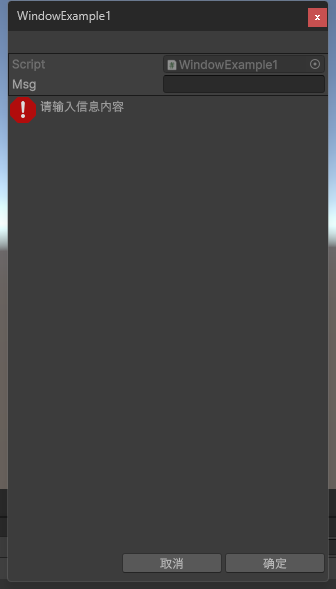
using UnityEditor;public class WindowExample1 : ScriptableWizard
{public string msg = ""; //显示窗体[MenuItem("MyWindow/First Window")]private static void ShowWindow(){ScriptableWizard.DisplayWizard<WindowExample1>("WindowExample1", "确定", "取消");}//显示时调用private void OnEnable(){Debug.Log("OnEnable");}//更新时调用private void OnWizardUpdate(){Debug.Log("OnWizardUpdate");if (string.IsNullOrEmpty(msg)){errorString = "请输入信息内容";//错误提示helpString = "";//帮助提示}else{errorString = "";helpString = "请点击确认按钮";}}//点击确定按钮时调用private void OnWizardCreate(){Debug.Log("OnWizardCreate");}//点击第二个按钮时调用private void OnWizardOtherButton(){Debug.Log("OnWizardOtherButton");}//当ScriptableWizard需要更新其GUI时,将调用此函数以绘制内容//为GUI绘制提供自定义行为,默认行为是按垂直方向排列绘制所有公共属性字段//一般不重写该方法,按照默认绘制方法即可protected override bool DrawWizardGUI(){return base.DrawWizardGUI();}//隐藏时调用private void OnDisable(){Debug.Log("OnDisable");}//销毁时调用private void OnDestroy(){Debug.Log("OnDestroy");}
}放入Editor中后在“MyWindow”中点击“First Window”,效果如图:
然后是:
using UnityEngine;
using UnityEditor;public class WindowExample2 : EditorWindow
{private static WindowExample2 window;//窗体实例//显示窗体[MenuItem("MyWindow/Second Window")]private static void ShowWindow(){window = EditorWindow.GetWindow<WindowExample2>("Window Example");window.Show();}//显示时调用private void OnEnable(){Debug.Log("OnEnable");}//绘制窗体内容private void OnGUI(){EditorGUILayout.LabelField("Your Second Window", EditorStyles.boldLabel);}//固定帧数调用private void Update(){Debug.Log("Update");}//隐藏时调用private void OnDisable(){Debug.Log("OnDisable");}//销毁时调用private void OnDestroy(){Debug.Log("OnDestroy");}
}
效果如下:
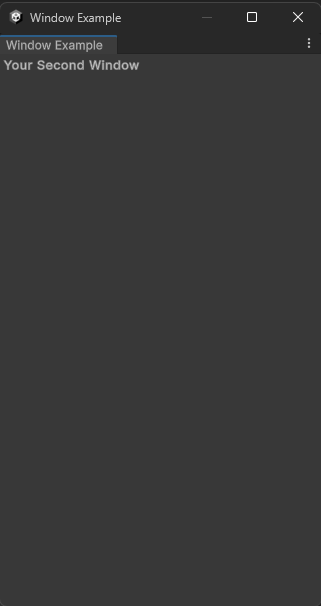
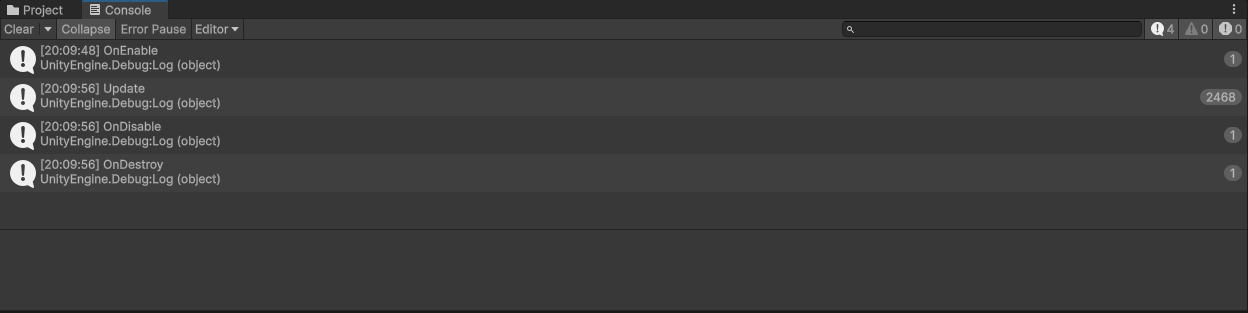
可以看到打开这个窗口后也会有类似于MonoBehaviour一样的生命周期函数存在并提供使用,所以说非常全能。
最后是:
using UnityEngine;
using UnityEditor;public class WindowExample3 : EditorWindow
{private static WindowExample3 window;private PopWindowExample popWindow = new PopWindowExample();private Rect buttonRect;//显示窗体[MenuItem("MyWindow/Third Window")]private static void ShowWindow(){window = EditorWindow.GetWindow<WindowExample3>("Window Example 3");window.Show();}//绘制窗体内容private void OnGUI(){GUILayout.Label("Popup example", EditorStyles.boldLabel);if (GUILayout.Button("Popup Options", GUILayout.Width(200))){PopupWindow.Show(buttonRect, popWindow);}//获取GUILayout最后用于控件的矩形if (Event.current.type == EventType.Repaint)buttonRect = GUILayoutUtility.GetLastRect();}
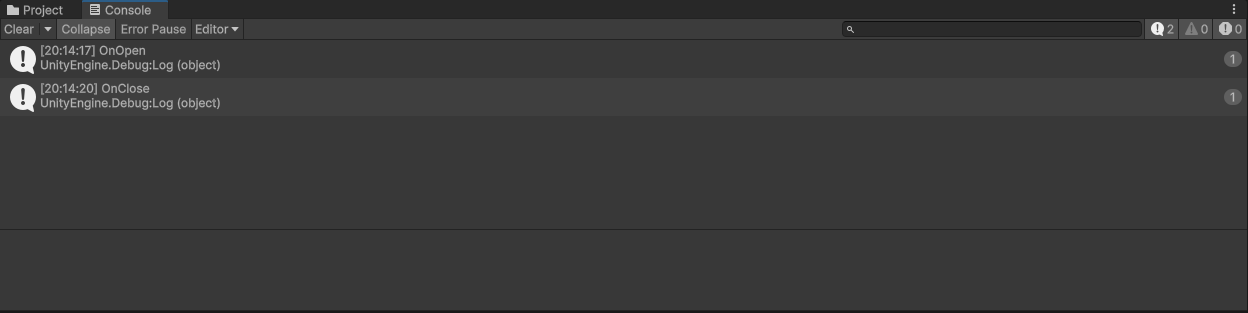
}public class PopWindowExample : PopupWindowContent
{bool toggle = true;//开启弹窗时调用public override void OnOpen(){Debug.Log("OnOpen");}//绘制弹窗内容public override void OnGUI(Rect rect){EditorGUILayout.LabelField("PopWindow");toggle = EditorGUILayout.Toggle("Toggle", toggle);}//关闭弹窗时调用public override void OnClose(){Debug.Log("OnClose");}public override Vector2 GetWindowSize(){//设置弹窗的尺寸return new Vector2(200, 100);}
}效果如图:
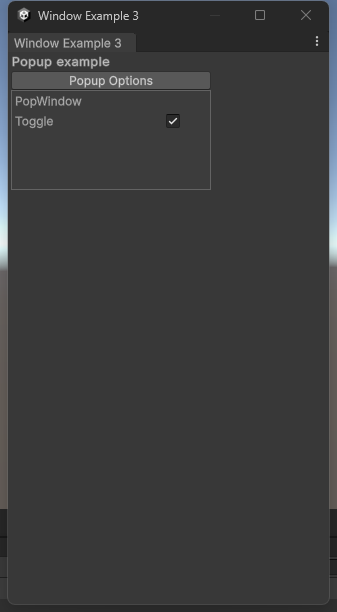
针对不同的情境我们使用不同的窗体。
Gizmos辅助调试工具
Gizmos是Scene场景的可视化调试或辅助工具,相信在实际的游戏开发中大家都不会陌生,我们经常需要Gizmos绘制一些诸如射线检测,碰撞检测之类的实际检测范围来看交互逻辑有没有写错。
最常见的相关函数是OnDrawGizmo或者OnDrawGizmosSelected方法:OnDrawGizmos在每一帧都会被调用,其渲染的Gizmos是一直可见的,而OnDrawGizmosSelected是当物体被选中的时候才会显示。
public class GizmosExample : MonoBehaviour
{//绘制效果一直显示private void OnDrawGizmos(){var color = Gizmos.color;Gizmos.color = Color.white;Gizmos.DrawCube(transform.position, Vector3.one);Gizmos.color = color;}//绘制效果在选中对象时显示private void OnDrawGizmosSelected(){var color = Gizmos.color;Gizmos.color = Color.white;Gizmos.DrawWireCube(transform.position, Vector3.one);Gizmos.color = color;}
}
现在我们来试试如何绘制:
我们先新建一个类TargetExample。
using UnityEngine;// 目标脚本需挂载到场景中的游戏对象
public class TargetExample : MonoBehaviour
{}
然后我们在Editor文件夹中写这样一个脚本:
using UnityEngine;
using UnityEditor;public class GizmosTest
{//表示物体显示并且被选择的时候,绘制Gizmos[DrawGizmo(GizmoType.Active | GizmoType.Selected)]//第一个参数需要指定目标类,目标类需要挂载在场景对象中private static void MyCustomOnDrawGizmos(TargetExample target, GizmoType gizmoType){var color = Gizmos.color;Gizmos.color = Color.white;//target为挂载该组件的对象Gizmos.DrawCube(target.transform.position, Vector3.one);Gizmos.color = color;}
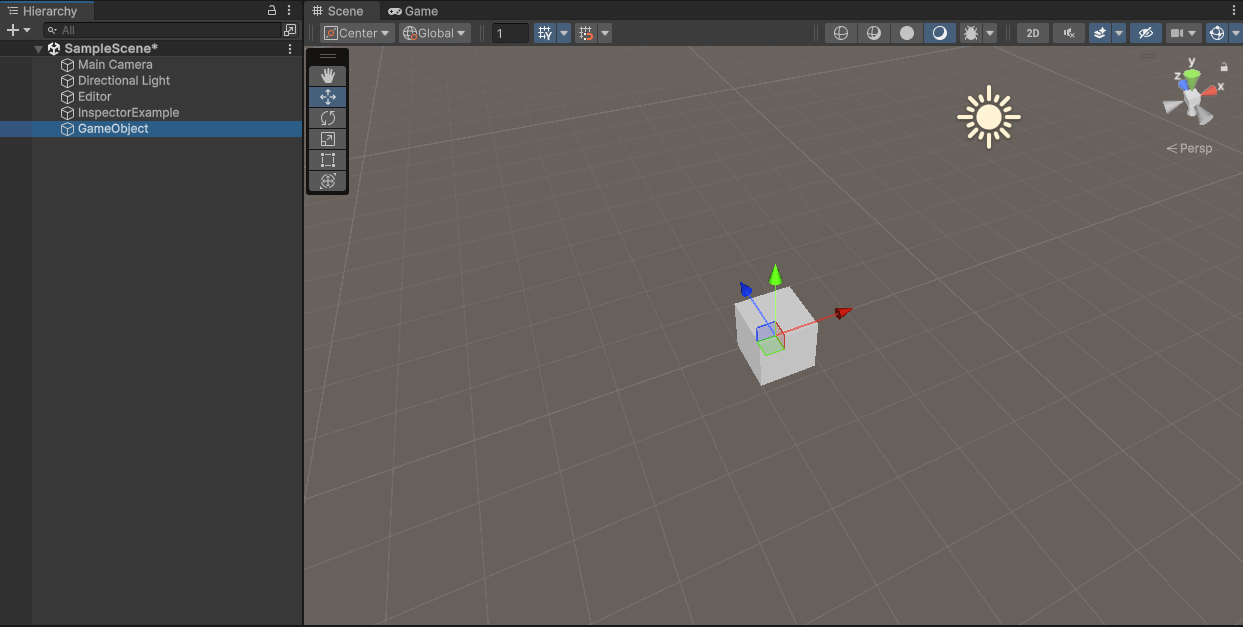
}然后随便新建一个empty:
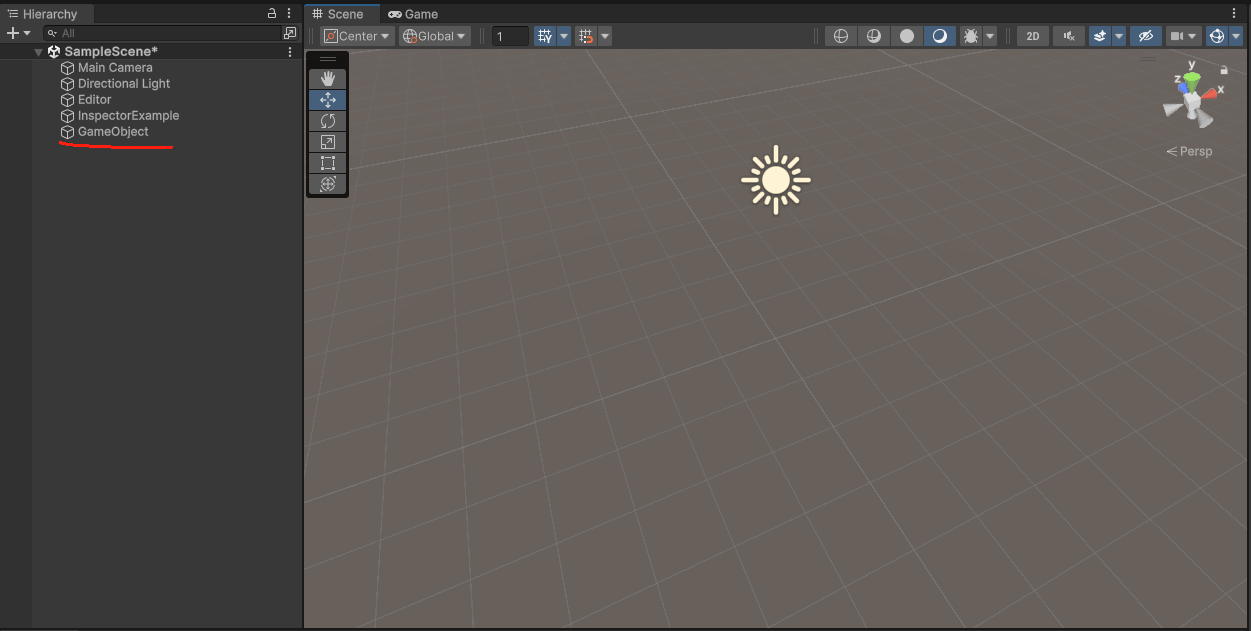
点击后就能看到:
我们再来一个比较常见的关于Gizmos的应用:
private Camera mainCamera;private void OnDrawGizmos(){if (mainCamera == null)mainCamera = Camera.main;Gizmos.color = Color.green;//设置gizmos的矩阵 Gizmos.matrix = Matrix4x4.TRS(mainCamera.transform.position, mainCamera.transform.rotation, Vector3.one);Gizmos.DrawFrustum(Vector3.zero, mainCamera.fieldOfView, mainCamera.farClipPlane, mainCamera.nearClipPlane, mainCamera.aspect);}效果如图:

扩展Scene视图
用大白话来说,扩展Scene视图就是给Unity的场景编辑窗口“加外挂”,让开发者能更方便地调试和编辑游戏场景。具体能干三件事:加辅助显示,加自定义工具,改操作方式。
怎么实现呢?
在这里我们就不能不提一个很好用的小工具——Handles了。
Unity 的 Handles 类是专为 Scene 视图设计的交互式 3D 控件工具,简单来说就是给开发者提供了一套“可视化操作杆”,可以直接在场景中用鼠标拖拽、旋转、缩放物体或参数,而无需反复修改代码或 Inspector 面板中的数值。以下是它的核心功能和应用场景:
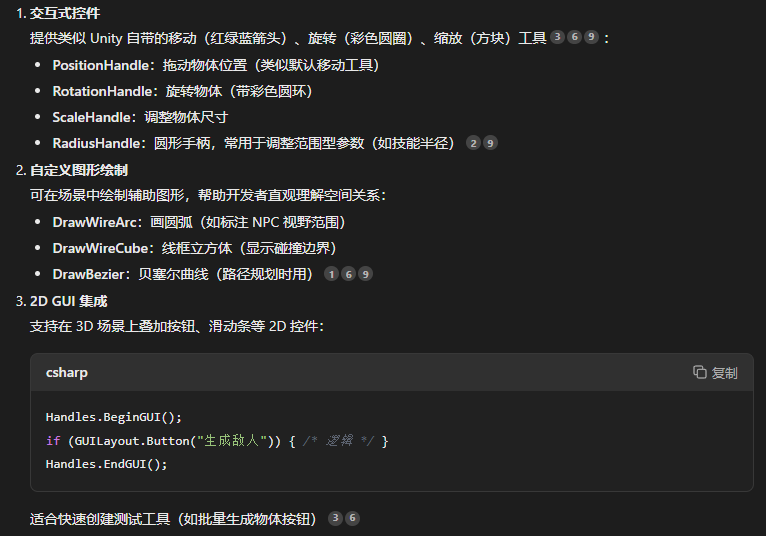
我们来看下面这个代码:
using UnityEditor;
using UnityEngine;[CustomEditor(typeof(SceneExt))]
public class SceneExtEditor : Editor
{//获取SceneExt脚本对象private SceneExt _target { get { return target as SceneExt; } }private void OnSceneGUI(){//操作句柄Handles.Label(_target.transform.position,_target.transform.name + " : " + _target.transform.position);//绘制GUI的内容必须要在BeginGUI、EndGUI的方法对中Handles.BeginGUI();//设置GUI绘制的区域GUILayout.BeginArea(new Rect(50, 50, 200, 200));GUILayout.Label("Scene 扩展练习");GUILayout.EndArea();Handles.EndGUI();}
}
效果如图:
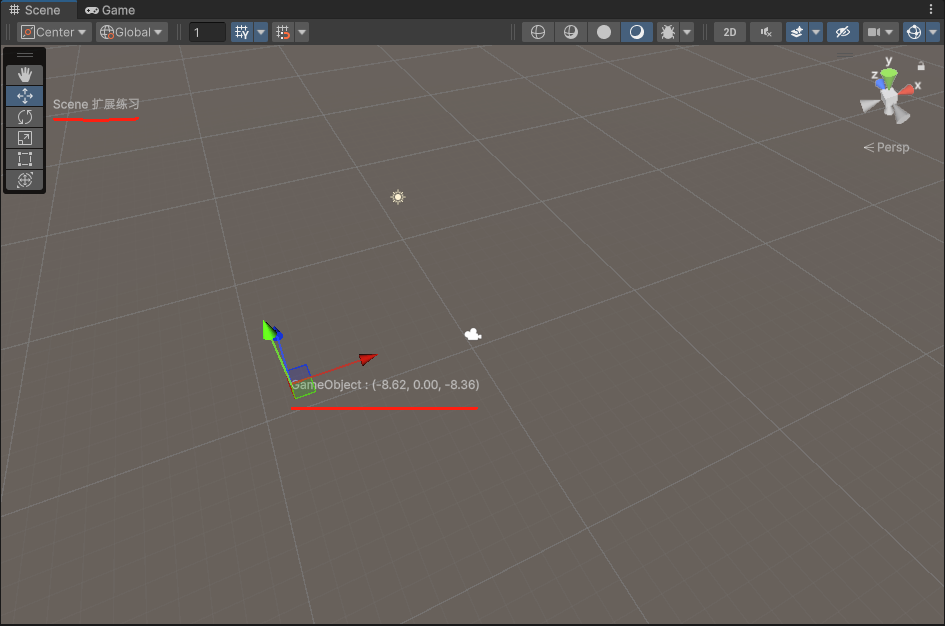
需要注意的是,我们关于Handles绘制GUI的内容必须在BeginGUI和EndGUI之间。
关于Handles类还有很多可用的内容,比如我们这样写一个脚本挂载在目标物体上:
using UnityEngine;public class SceneExt : MonoBehaviour
{public bool showLabel = true;public bool showLine = true;public bool showSlider = true;public bool showRadius = true;public bool showCircleHandleCap = true;public bool showSphereHandleCap = true; public bool showGUI = true;public Vector3 sliderPos = Vector3.forward;public float areaRadius = 1;public float circleSize = 1;
}
然后我们在Editor文件夹中这样写一个脚本:
using UnityEditor;
using UnityEngine;[CustomEditor(typeof(SceneExt))]
public class SceneExtEditor : Editor
{//获取SceneExt脚本对象private SceneExt _target { get { return target as SceneExt; } }private void OnSceneGUI(){if (_target.showLabel){//操作句柄,显示文本Handles.Label(_target.transform.position + Vector3.up * 0.5f, _target.transform.name + " : " + _target.transform.position);}if (_target.showLine){//修改句柄的颜色Handles.color = Color.yellow;//绘制一条线Handles.DrawLine(_target.transform.position, Vector3.up * 5);}if (_target.showSlider){Handles.color = Color.red;//绘制一个可以沿着某个轴向的3D滑动条_target.sliderPos = Handles.Slider(_target.sliderPos, _target.transform.forward);}if (_target.showRadius){Handles.color = Color.blue;//绘制一个半径控制手柄_target.areaRadius = Handles.RadiusHandle(Quaternion.identity, _target.transform.position, _target.areaRadius);}if (_target.showCircleHandleCap){//获取Y轴的颜色Handles.color = Handles.yAxisColor;//绘制一个圆环Handles.CircleHandleCap(0, _target.transform.position + Vector3.up * 2, Quaternion.Euler(90, 0, 0), _target.circleSize, EventType.Repaint);}if (_target.showSphereHandleCap){Handles.color = Color.green;//绘制一个球形Handles.SphereHandleCap(1, _target.transform.position, Quaternion.identity, HandleUtility.GetHandleSize(_target.transform.position), EventType.Repaint);}if (_target.showGUI){//绘制GUI的内容必须要在BeginGUI、EndGUI的方法对中Handles.BeginGUI();//设置GUI绘制的区域GUILayout.BeginArea(new Rect(50, 50, 200, 200));GUILayout.Label("Scene 扩展练习");GUILayout.EndArea();Handles.EndGUI();}}
}
效果如图:

EditorPrefs、ScriptableObject、Undo
Unity编辑器为开发者提供了类似PlayerPrefs的数据保存方式EditorPrefs。EditorPrefs是适用于编辑器模式,而PlayerPrefs适用于游戏运行时。
EditorPrefs提供了四种数据的保存:int,float,string,bool
通过Set方法保存下数据,下次则通过Get方法来获取数据,HasKey方法可以判断是否存在该数据的保存,删除数据调用DeleteKey方法即可。
比如下列这段代码:
using UnityEngine;
using UnityEditor;public class WindowExample2 : EditorWindow
{private static WindowExample2 window;//窗体实例private string tempMsg;//显示窗体[MenuItem("MyWindow/Second Window")] private static void ShowWindow(){window = EditorWindow.GetWindow<WindowExample2>("Window Example");window.Show();}private void OnEnable(){if (EditorPrefs.HasKey("TempMsg")){tempMsg = EditorPrefs.GetString("TempMsg");}}private void OnGUI(){tempMsg = EditorGUILayout.TextField("Temp Msg", tempMsg);if (GUILayout.Button("Save")){EditorPrefs.SetString("TempMsg", tempMsg);}}
}
我们调用EditorPrefs.HasKey()方法来检测是否有"TempMsg"键,有的话用Get方法获取,需要的话用Set方法设置键和值进行保存。
效果如图:
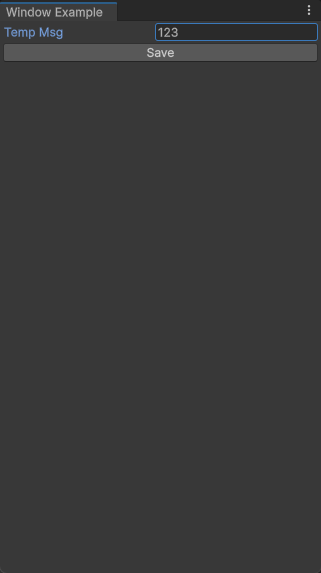
点击save之后就会存储“123”到EditorPrefs中。
ScriptableObject则是一个我们都不陌生的内容,早在很久之前我们就用SO来实现内容的存储过。
ScriptableObject是Unity引擎中一种特殊的可编程数据容器,它允许开发者将数据以资源文件(.asset)的形式存储在项目中,既能在编辑器模式下持久化数据,又能高效管理游戏运行时配置。
Undo则是专门用于撤销编辑器模式下的操作,如:
Undo.RegisterCreatedObjectUndo : 记录新建的对象状态,可以撤销新建的对象
Undo.RecordObject:记录对象的状态,需要在修改之前调用
Undo.AddComponent:可以撤销新挂载的组件
Undo.DestroyObjectImmediate:可以撤销删除对象的操作
Undo.SetTransformParent:可以撤销修改父对象的操作
我们用一个实例来学习其用法:
using UnityEditor;
using UnityEngine;public class UndoTest
{[MenuItem("Tools/Create Obj")]private static void CreateObj(){GameObject newObj = new GameObject("Undo");Undo.RegisterCreatedObjectUndo(newObj, "CreateObj");}[MenuItem("Tools/Move Obj")]private static void MoveObj() {//获取选中的场景对象Transform trans = Selection.activeGameObject.transform;if (trans){Undo.RecordObject(trans, "MoveObj");trans.position += Vector3.up;}}[MenuItem("Tools/AddComponent Obj")]private static void AddComponentObj() {//获取选中的场景对象GameObject selectedObj = Selection.activeGameObject;if (selectedObj){Undo.AddComponent(selectedObj,typeof(Rigidbody));}}[MenuItem("Tools/Destroy Obj")]private static void DestroyObj(){//获取选中的场景对象GameObject selectedObj = Selection.activeGameObject;if (selectedObj){Undo.DestroyObjectImmediate(selectedObj);}}[MenuItem("Tools/SetParent Obj")]private static void SetParentObj(){//获取选中的场景对象Transform trans = Selection.activeGameObject.transform;Transform root = Camera.main.transform;if (trans){Undo.SetTransformParent(trans, root, trans.name);}}
}
效果如下:

AssetPostprocessor
AssetPostprocessor是Unity引擎中用于自动化资源导入流程的核心工具,它允许开发者在资源(纹理、模型、音频等)导入前后插入自定义逻辑,实现资源处理的标准化、优化和批量化。
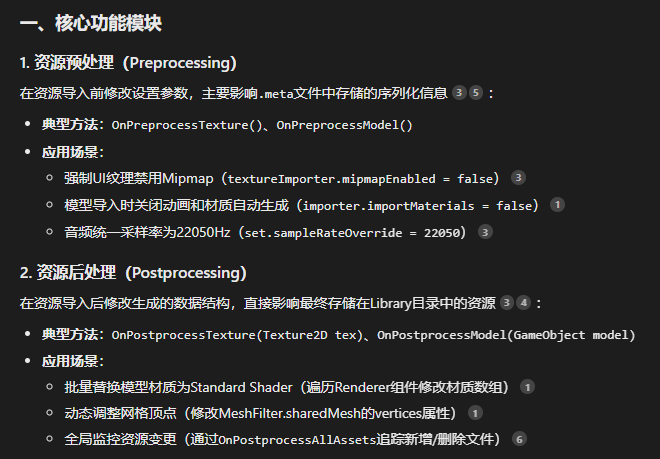
一言以蔽之,AssetPostprocessor就是一个在导入资源时在导入前后对资源进行处理的一个工具。
AssetPostprocessor是基于周期函数来实现功能的,也就是Preprocessh和Postprocess。
这是一些常见的方法:
OnPreprocessTexture:在导入纹理贴图之前调用
OnPreprocessModel:在导入模型之前调用
OnPreprocessAudio:在导入音频之前调用
OnPostprocessTexture:在导入纹理贴图之后调用
OnPostprocessModel:在导入模型之后调用
OnPostprocessAudio:在导入音频之后调用
OnPostprocessAllAssets:所有资源的导入,删除,移动操作都会调用该方法
比如以下代码:
using UnityEngine;
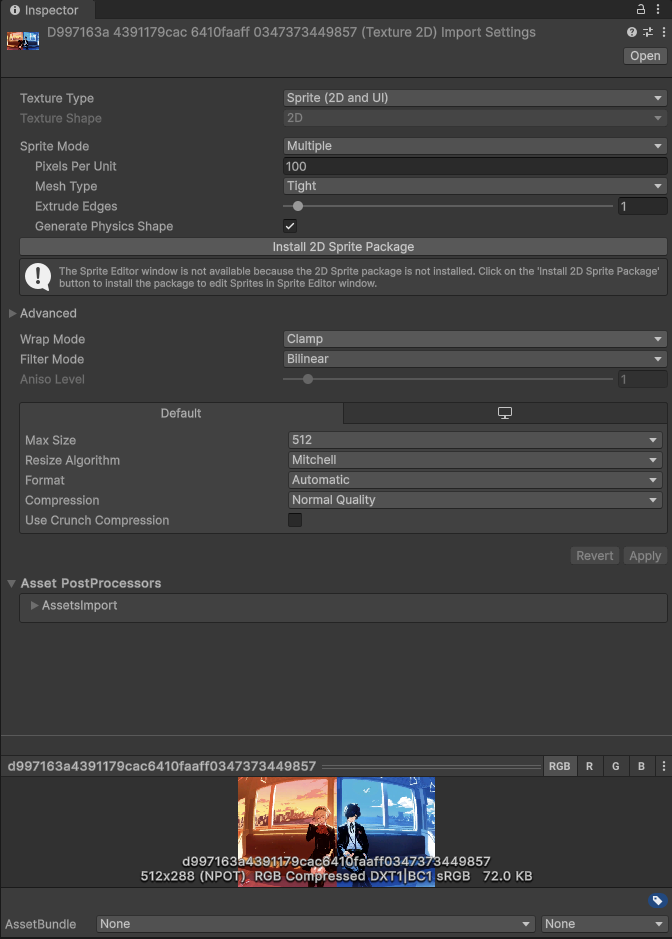
using UnityEditor;public class AssetsImport : AssetPostprocessor
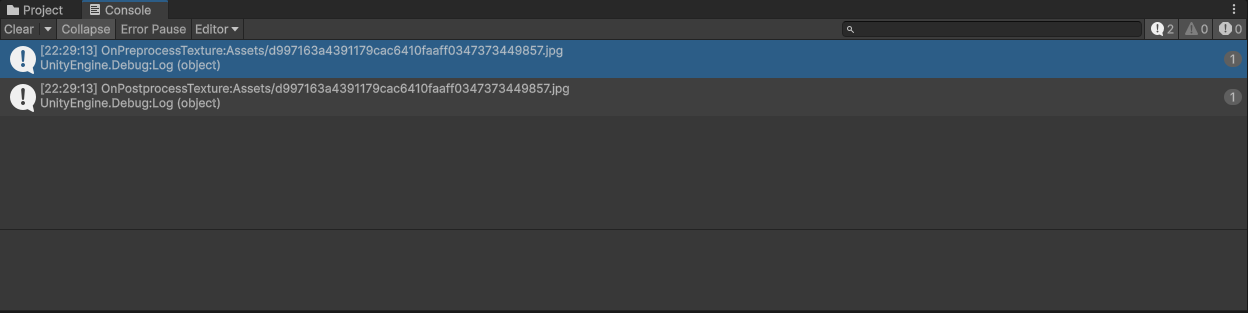
{private void OnPreprocessTexture(){Debug.Log("OnPreprocessTexture:" + this.assetPath);TextureImporter importer = this.assetImporter as TextureImporter;importer.textureType = TextureImporterType.Sprite;importer.maxTextureSize = 512;importer.mipmapEnabled = false;}public void OnPostprocessTexture(Texture2D tex){Debug.Log("OnPostprocessTexture:" + this.assetPath);}
}我们随便拖入一张图:
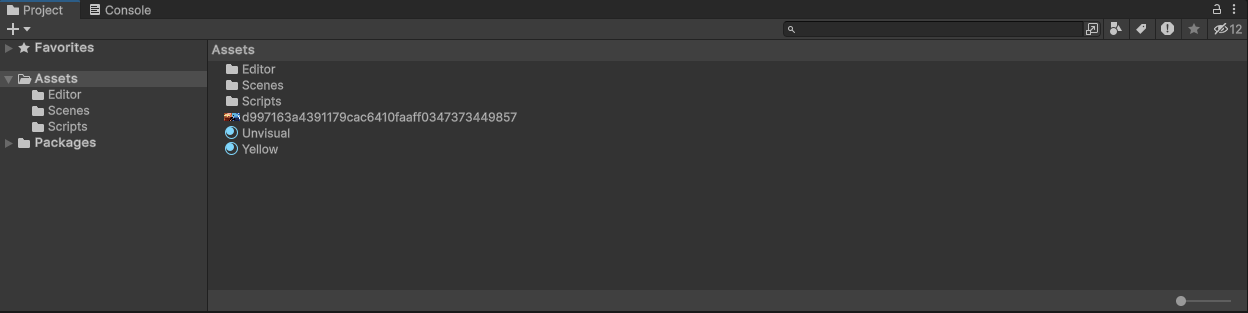
后台会输出:
且这张图的属性会被修正为: