Prometheus
介绍
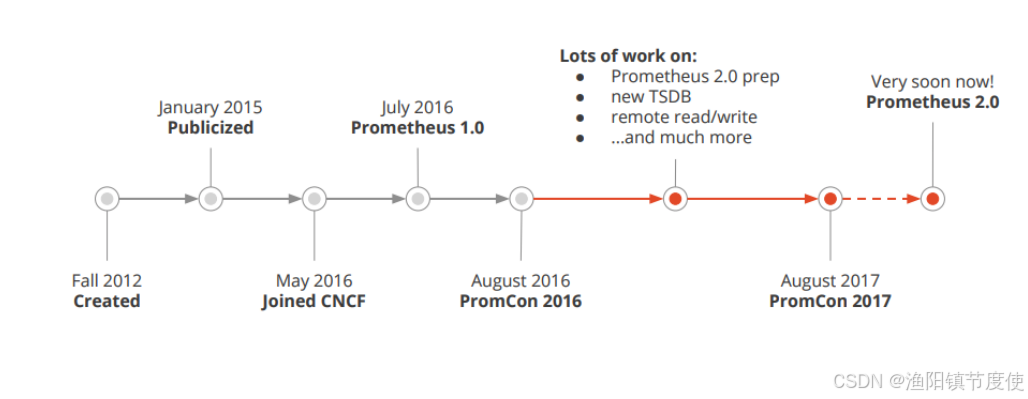
prometheus受启发于Google的Brogmon监控系统(相似kubernetes是从Brog系统演变而来)。 2016年5月继kubernetes之后成为第二个加入CNCF基金会的项目,同年6月正式发布1.0版本。2017年底发布基于全新存储层的2.0版本,能更好地与容器平台、云平台配合。官方网站:https://prometheus.io项目托管:https://github.com/prometheus
优势
prometheus是基于一个开源的完整监控方案,其对传统监控系统的测试和告警模型进行了彻底的颠覆,形成了基于中央化的规则计算、统一分析和告警的新模型。 相对传统的监控系统有如下几个优点。
- 易于管理: 部署使用的是go编译的二进制文件,不存在任何第三方依赖问题,可以使用服务发现动态管理监控目标。
- 监控服务内部运行状态: 我们可以使用prometheus提供的常用开发语言提供的client库完成应用层面暴露数据, 采集应用内部运行信息。
- 强大的查询语言promQL: prometheus内置一个强大的数据查询语言PromQL,通过PromQL可以实现对监控数据的查询、聚合。同时PromQL也被应用于数据可视化(如grafana)以及告警中的。
- 高效: 对于监控系统而言,大量的监控任务必然导致有大量的数据产生。 而Prometheus可以高效地处理这些数据。
- 可扩展: prometheus配置比较简单, 可以在每个数据中心运行独立的prometheus server, 也可以使用联邦集群,让多个prometheus实例产生一个逻辑集群,还可以在单个prometheus server处理的任务量过大的时候,通过使用功能分区和联邦集群对其扩展。
- 易于集成: 目前官方提供多种语言的客户端sdk,基于这些sdk可以快速让应用程序纳入到监控系统中,同时还可以支持与其他的监控系统集成。
- 可视化: prometheus server自带一个ui, 通过这个ui可以方便对数据进行查询和图形化展示,可以对接grafana可视化工具展示精美监控指标。
架构
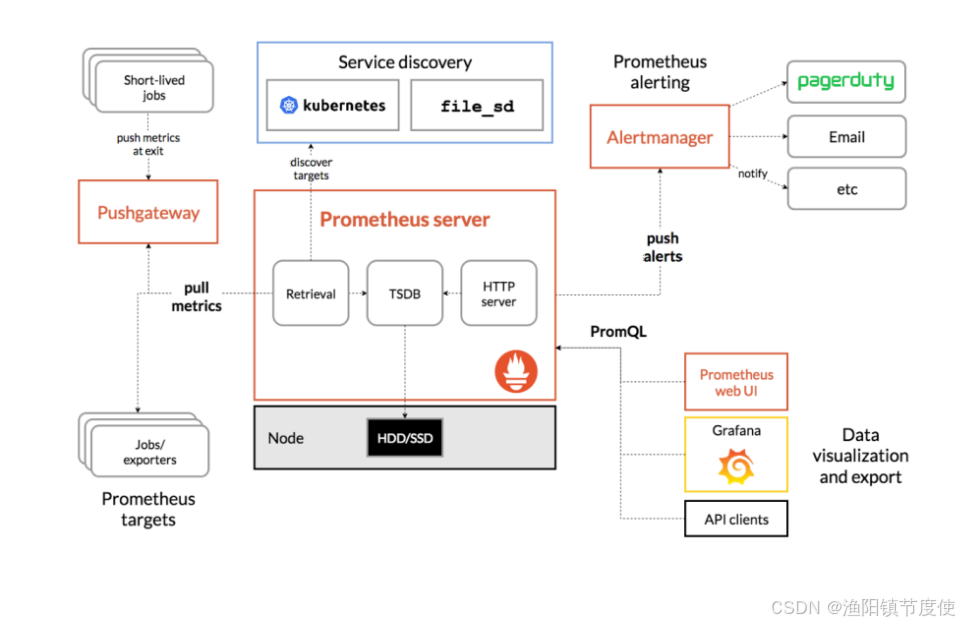
prometheus负责从pushgateway和Jobs中采集数据, 存储到后端Storatge中,可以通过PromQL进行查询, 推送alerts信息到AlertManager。 AlertManager根据不同的路由规则进行报警通知。
- prometheus server是Prometheus组件中的核心部分,负责实现对监控数据的获取,存储以及查询。
- exporter简单说是采集端,通过http服务的形式保留一个url地址,prometheus server 通过访问该exporter提供的endpoint端点,即可获取到需要采集的监控数据。exporter分为2大类。
- 直接采集:这一类exporter直接内置了对Prometheus监控的支持,比如cAdvisor,Kubernetes等。
- 间接采集: 原有监控目标不支持prometheus,需要通过prometheus提供的客户端库编写监控采集程序,例如Mysql Exporter, JMX Exporter等。
- AlertManager ,在prometheus中,支持基于PromQL创建告警规则,如果满足定义的规则,则会产生一条告警信息,进入AlertManager进行处理。可以集成邮件,Slack或者通过webhook自定义报警。
- PushGateway 由于Prometheus数据采集采用pull方式进行设置的, 内置必须保证prometheus server 和对应的exporter必须通信,当网络情况无法直接满足时,可以使用pushgateway来进行中转,可以通过pushgateway将内部网络数据主动push到gateway里面去,而prometheus采用pull方式拉取pushgateway中数据。
- web ui Prometheus内置一个简单的Web控制台,可以查询指标,查看配置信息或者Service Discovery等,实际工作中,查看指标或者创建仪表盘通常使用Grafana,Prometheus作为Grafana的数据源
数据模型
Prometheus将所有数据存储为时间序列,具有相同度量名称以及标签属于同一个指标。每个时间序列都由度量名称和一组键值对(也称为标签)组成。
格式:

度量指标名称是api_http_requests_total, 标签为method=“POST”, handler=“/messages” 的示例如下所示:

指标类型
prometheus的指标有四种类型,分别是Counter,Gauge,Histogram,Summary。
- Counter只增不减的计数器,用于描述某个指标的累计状态,比如请求量统计,http_requests_total
- Gauge可增可减的计量器,用于描述某个指标当前的状态,比如系统内存余量,node_memory_MemFree_bytes
- Histogram直方图指标用于描述指标的分布情况,比如对于请求响应时间,总共10w个请求,小于10ms的有5w个,小于50ms的有9w个,小于100ms的有9.9w个
- Summary和直方图类似,summary也是用于描述指标分布情况,不过表现形式不同,比如还是对于请求响应时间,summary描述则是,总共10w个请求,50%小于10ms,90%小于50ms,99%小于100ms
安装
linux安装
Prometheus也是go语言开发的,所以只需要下载其二进制包进行安装即可。
前往地址:https://prometheus.io/download 下载最新版本即可。
[root@localhost prometheus]# tar -zxvf prometheus-2.37.1.linux-amd64.tar.gz
prometheus-2.37.1.linux-amd64/
prometheus-2.37.1.linux-amd64/consoles/
prometheus-2.37.1.linux-amd64/consoles/index.html.example
prometheus-2.37.1.linux-amd64/consoles/node-cpu.html
prometheus-2.37.1.linux-amd64/consoles/node-disk.html
prometheus-2.37.1.linux-amd64/consoles/node-overview.html
prometheus-2.37.1.linux-amd64/consoles/node.html
prometheus-2.37.1.linux-amd64/consoles/prometheus-overview.html
prometheus-2.37.1.linux-amd64/consoles/prometheus.html
prometheus-2.37.1.linux-amd64/console_libraries/
prometheus-2.37.1.linux-amd64/console_libraries/menu.lib
prometheus-2.37.1.linux-amd64/console_libraries/prom.lib
prometheus-2.37.1.linux-amd64/prometheus.yml
prometheus-2.37.1.linux-amd64/LICENSE
prometheus-2.37.1.linux-amd64/NOTICE
prometheus-2.37.1.linux-amd64/prometheus
prometheus-2.37.1.linux-amd64/promtool
[root@localhost prometheus]# cd prometheus-2.37.1.linux-amd64
[root@localhost prometheus-2.37.1.linux-amd64]# ll
total 206252
drwxr-xr-x. 2 3434 3434        38 Sep 12 09:04 console_libraries
drwxr-xr-x. 2 3434 3434       173 Sep 12 09:04 consoles
-rw-r--r--. 1 3434 3434     11357 Sep 12 09:04 LICENSE
-rw-r--r--. 1 3434 3434      3773 Sep 12 09:04 NOTICE
-rwxr-xr-x. 1 3434 3434 109681846 Sep 12 08:46 prometheus
-rw-r--r--. 1 3434 3434       934 Sep 12 09:04 prometheus.yml
-rwxr-xr-x. 1 3434 3434 101497637 Sep 12 08:49 promtool
[root@localhost prometheus-2.37.1.linux-amd64]# ./prometheus --help
usage: prometheus [<flags>]The Prometheus monitoring serverFlags:-h, --help                     Show context-sensitive help (also try --help-long and --help-man).--version                  Show application version.
Prometheus 是通过一个 YAML 配置文件来进行启动的,如果我们使用二进制的方式来启动的话,可以使用下面的命令:
./prometheus --config.file=prometheus.yml
其中 prometheus.yml 文件的基本配置如下:
global:scrape_interval:     15sevaluation_interval: 15s
rule_files:# - "first.rules"# - "second.rules"
scrape_configs:- job_name: prometheusstatic_configs:- targets: ['localhost:9090']
上面这个配置文件中包含了3个模块:global、rule_files 和 scrape_configs。
- global 模块控制 Prometheus Server 的全局配置:
- scrape_interval:表示 prometheus 抓取指标数据的频率,默认是15s,我们可以覆盖这个值
- evaluation_interval:用来控制评估规则的频率,prometheus 使用规则产生新的时间序列数据或者产生警报
- rule_files:指定了报警规则所在的位置,prometheus 可以根据这个配置加载规则,用于生成新的时间序列数据或者报警信息,当前我们没有配置任何报警规则。
- scrape_configs 用于控制 prometheus 监控哪些资源。
由于 prometheus 通过 HTTP 的方式来暴露的它本身的监控数据,prometheus 也能够监控本身的健康情况。在默认的配置里有一个单独的 job,叫做 prometheus,它采集 prometheus 服务本身的时间序列数据。这个 job 包含了一个单独的、静态配置的目标:监听 localhost 上的 9090 端口。prometheus 默认会通过目标的 /metrics 路径采集 metrics。所以,默认的 job 通过 URL:http://localhost:9090/metrics 采集 metrics。收集到的时间序列包含 prometheus 服务本身的状态和性能。如果我们还有其他的资源需要监控的话,直接配置在 scrape_configs 模块下面就可以了。
[root@localhost prometheus-2.37.1.linux-amd64]# ./prometheus --config.file=prometheus.yml
测试访问:
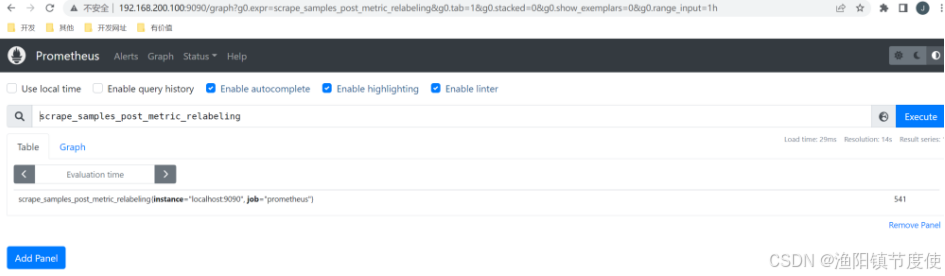
查看暴露的指标:

docker安装
对于Docker用户,直接使用Prometheus的镜像即可启动Prometheus Server:
docker run -d -p 9090:9090 -v /etc/prometheus:/etc/prometheus prom/prometheus
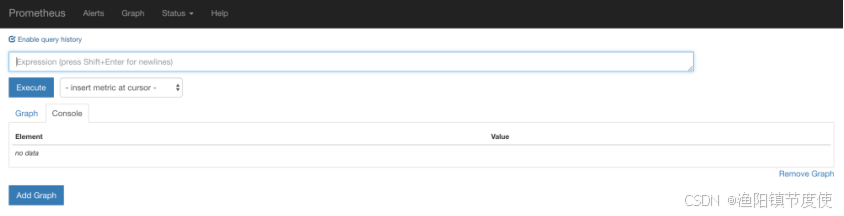
启动完成后,可以通过http://localhost:9090访问Prometheus的UI界面:
示例
Prometheus 提供了go的一个客户端示例。
D:\git\github\go> git clone https://github.com/prometheus/client_golang
D:\git\github\go\client_golang\examples\random>go env -w GOOS=linux
D:\git\github\go\client_golang\examples\random>go env -w GOARCH=amd64
D:\git\github\go\client_golang\examples\random>go build

[root@localhost prometheus]# chmod +x random
[root@localhost prometheus]# ./random -listen-address=:8080
[root@localhost prometheus]# ./random -listen-address=:8081
[root@localhost prometheus]# ./random -listen-address=:8082
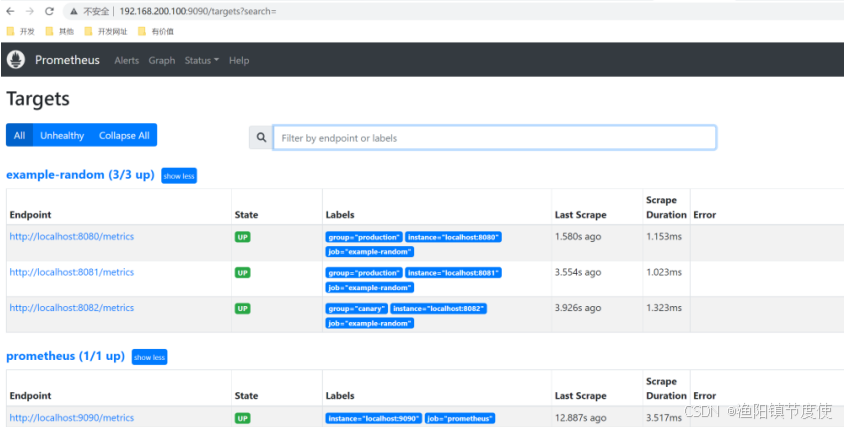
这个时候我们可以得到3个不同的监控接口:http://localhost:8080/metrics、http://localhost:8081/metrics 和 http://localhost:8082/metrics (这是示例代码中提供的)
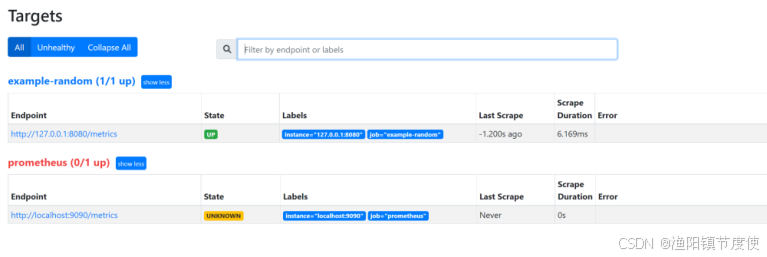
// Expose the registered metrics via HTTP.http.Handle("/metrics", promhttp.HandlerFor(prometheus.DefaultGatherer,promhttp.HandlerOpts{// Opt into OpenMetrics to support exemplars.EnableOpenMetrics: true,},))现在我们配置 Prometheus 来采集这些新的目标,让我们将这三个目标分组到一个名为 example-random 的任务。假设前两个端点(即:http://localhost:8080/metrics、http://localhost:8081/metrics )都是生产级目标应用,第三个端点(即:http://localhost:8082/metrics )为金丝雀实例。要在 Prometheus 中对此进行建模,我们可以将多组端点添加到单个任务中,为每组目标添加额外的标签。 在此示例中,我们将 group =“production” 标签添加到第一组目标,同时将 group=“canary”添加到第二组。将以下配置添加到 prometheus.yml 中的 scrape_configs 部分,然后重新启动 Prometheus 实例:
scrape_configs:- job_name: 'example-random'scrape_interval: 5s # Override the global default and scrape targets from this job every 5 seconds.static_configs:- targets: ['localhost:8080', 'localhost:8081']labels:group: 'production'- targets: ['localhost:8082']labels:group: 'canary'
添加配置后,重新启动
配置文件详解
# my global config
global:scrape_interval:     15s # Set the scrape interval to every 15 seconds. Default is every 1 minute.evaluation_interval: 15s # Evaluate rules every 15 seconds. The default is every 1 minute.# scrape_timeout is set to the global default (10s).# Alertmanager configuration
alerting:alertmanagers:- static_configs:- targets:# - alertmanager:9093# Load rules once and periodically evaluate them according to the global 'evaluation_interval'.
rule_files:# - "first_rules.yml"# - "second_rules.yml"# A scrape configuration containing exactly one endpoint to scrape:
# Here it's Prometheus itself.
scrape_configs:# The job name is added as a label `job=<job_name>` to any timeseries scraped from this config.- job_name: 'prometheus'# metrics_path defaults to '/metrics'# scheme defaults to 'http'.static_configs:- targets: ['localhost:9090']
- global: 此片段指定的是prometheus的全局配置, 比如采集间隔,抓取超时时间等。
- rule_files: 此片段指定报警规则文件, prometheus根据这些规则信息,会推送报警信息到alertmanager中。
- scrape_configs: 此片段指定抓取配置,prometheus的数据采集通过此片段配置。
- alerting: 此片段指定报警配置, 这里主要是指定prometheus将报警规则推送到指定的alertmanager实例地址。
- remote_write: 指定后端的存储的写入api地址。
- remote_read: 指定后端的存储的读取api地址。
global
# How frequently to scrape targets by default.[ scrape_interval: <duration> | default = 1m ] # 抓取间隔# How long until a scrape request times out.[ scrape_timeout: <duration> | default = 10s ] # 抓取超时时间# How frequently to evaluate rules.[ evaluation_interval: <duration> | default = 1m ] # 评估规则间隔# The labels to add to any time series or alerts when communicating with# external systems (federation, remote storage, Alertmanager).external_labels: # 外部一些标签设置[ <labelname>: <labelvalue> ... ]
scrapy_config
一个scrape_config 片段指定一组目标和参数, 目标就是实例,指定采集的端点, 参数描述如何采集这些实例, 主要参数如下
- scrape_interval: 抓取间隔,默认继承global值。
- scrape_timeout: 抓取超时时间,默认继承global值。
- metric_path: 抓取路径, 默认是/metrics
- scheme: 指定采集使用的协议,http或者https。
- params: 指定url参数。
- basic_auth: 指定认证信息。
- *_sd_configs: 指定服务发现配置
- static_configs: 静态指定服务job。
- relabel_config: relabel设置。
普通
scrape_configs:# The job name is added as a label `job=<job_name>` to any timeseries scraped from this config.- job_name: 'prometheus'# metrics_path defaults to '/metrics'# scheme defaults to 'http'.static_configs:- targets: ['localhost:9090']- job_name: "node"static_configs:- targets:- "192.168.100.10:20001"- "192.168.100.11:20001- "192.168.100.12:20001"
file_sd_configs方式
文件形式的服务发现
scrape_configs:# The job name is added as a label `job=<job_name>` to any timeseries scraped from this config.- job_name: 'prometheus'# metrics_path defaults to '/metrics'# scheme defaults to 'http'.static_configs:- targets: ['localhost:9090']- job_name: "node"file_sd_configs:- refresh_interval: 10sfiles: - "/usr/local/prometheus/prometheus/conf/node*.yaml"# 独立文件配置如下
cat node-dis.yaml
- targets:- "192.168.100.10:20001"labels:hostname: node00
- targets:- "192.168.100.11:20001"labels:hostname: node01
- targets:- "192.168.100.12:20001"labels:hostname: node02
通过file_fd_files 配置后我们可以在不重启prometheus的前提下, 修改对应的采集文件(node_dis.yml), 在特定的时间内(refresh_interval),prometheus会完成配置信息的载入工作。
修改前面的示例:
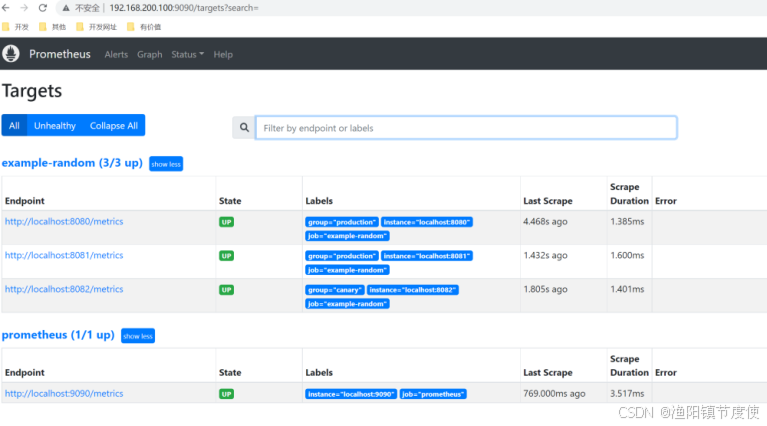
scrape_configs:- job_name: 'example-random'scrape_interval: 5s # Override the global default and scrape targets from this job every 5 seconds.file_sd_configs:- refresh_interval: 10sfiles: - "/mnt/prometheus/prometheus-2.37.1.linux-amd64/conf/node*.yaml"
node-random.yaml
- targets: - 'localhost:8080'- 'localhost:8081'labels:group: 'production'
- targets: - 'localhost:8082'labels:group: 'canary'
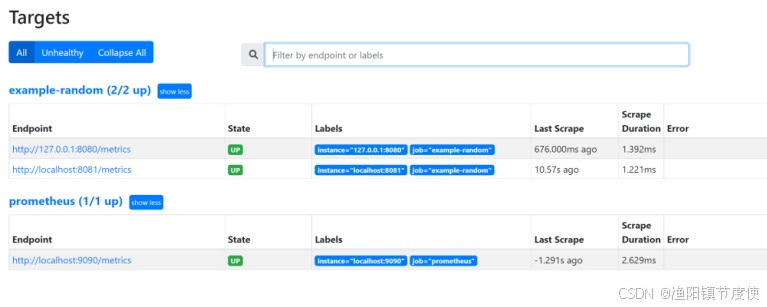
重新启动,正常显示
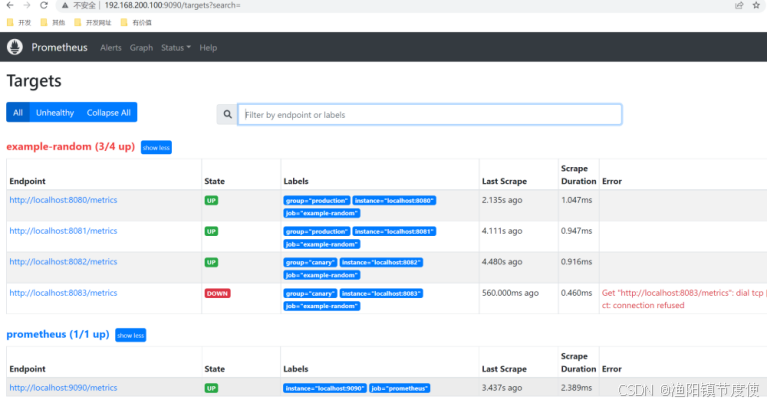
修改node-random.yaml
- targets: - 'localhost:8080'- 'localhost:8081'labels:group: 'production'
- targets: - 'localhost:8082'- 'localhost:8083'labels:group: 'canary'
不重启,等待10s
consul_sd_file
consul是一个服务发现工具。
先部署启动一个consul
[root@localhost consul]# wget https://releases.hashicorp.com/consul/1.6.1/consul_1.6.1_linux_amd64.zip
[root@localhost consul]# unzip consul_1.6.1_linux_amd64.zip
[root@localhost consul]# mv consul /usr/local/bin/
#运行测试
[root@localhost consul]# consul agent -dev
创建配置文件:
node1.json
{"addresses": {"http": "0.0.0.0","https": "0.0.0.0"},"services": [{ "name": "example-random","tags": ["production"],"port": 8080}]}[root@localhost consul]# cd /etc/consul.d/
[root@localhost consul.d]# ll
total 0
[root@localhost consul.d]# vim node1.json
{"addresses": {"http": "0.0.0.0","https": "0.0.0.0"},"services": [{"name": "example-random","tags": ["production"],"port": 8080}]}
运行
consul agent -dev -config-dir=/etc/consul.d
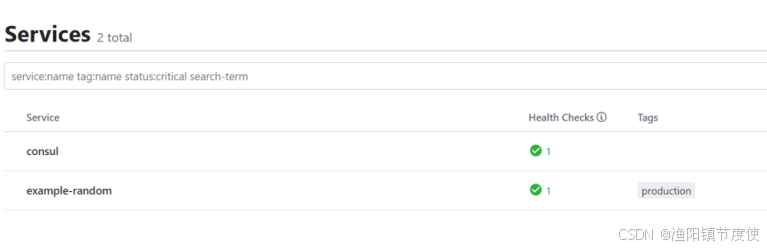
修改prometheus配置:
- job_name: "example-random"consul_sd_configs:- server: localhost:8500services: - example-random
添加一个新的节点:
node2.json
[root@localhost consul.d]# vim node2.json
{"Node": "node2","Address": "localhost","Service":{"Port": 8081,"ID": "example-random","Service": "example-random"}
}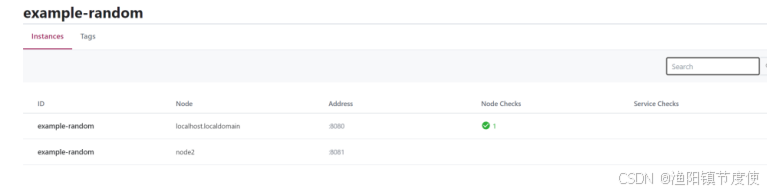
[root@localhost consul.d]# curl -XPUT -d@node2.json  127.0.0.1:8500/v1/catalog/register
true
安装Node Exporter
在Prometheus的架构设计中,Prometheus Server并不直接服务监控特定的目标,其主要任务负责数据的收集,存储并且对外提供数据查询支持。因此为了能够能够监控到某些东西,如主机的CPU使用率,我们需要使用到Exporter。Prometheus周期性的从Exporter暴露的HTTP服务地址(通常是/metrics)拉取监控样本数据。
这里为了能够采集到主机的运行指标如CPU, 内存,磁盘等信息。我们可以使用Node Exporter。
Node Exporter同样采用Golang编写,并且不存在任何的第三方依赖,只需要下载,解压即可运行。可以从https://prometheus.io/download/获取最新的node exporter版本的二进制包。
wget https://github.com/prometheus/node_exporter/releases/download/v1.7.0/node_exporter-1.7.0.linux-amd64.tar.gz
也可以使用docker安装
docker run -d -p 9100:9100 prom/node-exporter
访问http://localhost:9100/可以看到以下页面:
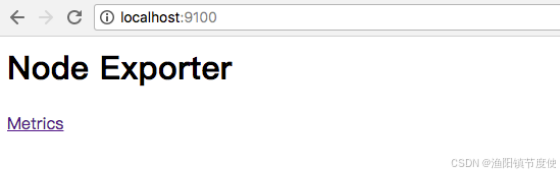
Node Exporter页面
初始Node Exporter监控指标
访问http://localhost:9100/metrics,可以看到当前node exporter获取到的当前主机的所有监控数据,如下所示
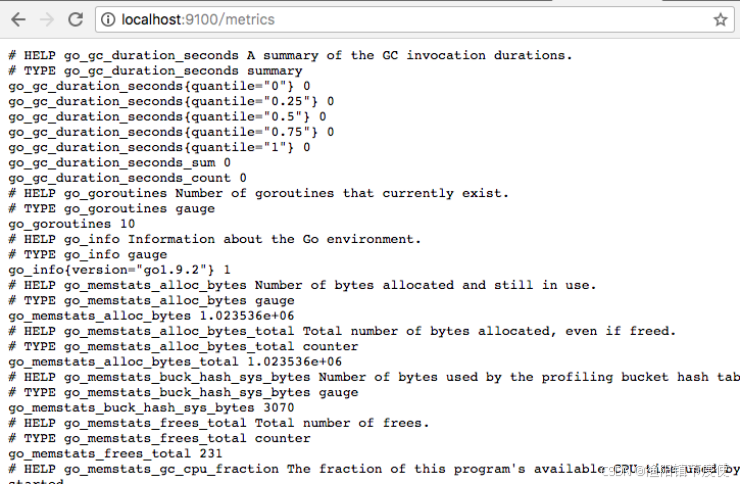
每一个监控指标之前都会有一段类似于如下形式的信息:
# HELP node_cpu Seconds the cpus spent in each mode.
# TYPE node_cpu counter
node_cpu{cpu="cpu0",mode="idle"} 362812.7890625
# HELP node_load1 1m load average.
# TYPE node_load1 gauge
node_load1 3.0703125
其中HELP用于解释当前指标的含义,TYPE则说明当前指标的数据类型。在上面的例子中node_cpu的注释表明当前指标是cpu0上idle进程占用CPU的总时间,CPU占用时间是一个只增不减的度量指标,从类型中也可以看出node_cpu的数据类型是计数器(counter),与该指标的实际含义一致。又例如node_load1该指标反映了当前主机在最近一分钟以内的负载情况,系统的负载情况会随系统资源的使用而变化,因此node_load1反映的是当前状态,数据可能增加也可能减少,从注释中可以看出当前指标类型为仪表盘(gauge),与指标反映的实际含义一致。
除了这些以外,在当前页面中根据物理主机系统的不同,你还可能看到如下监控指标:
- node_boot_time:系统启动时间
- node_cpu:系统CPU使用量
- nodedisk*:磁盘IO
- nodefilesystem*:文件系统用量
- node_load1:系统负载
- nodememeory*:内存使用量
- nodenetwork*:网络带宽
- node_time:当前系统时间
- go_*:node exporter中go相关指标
- process_*:node exporter自身进程相关运行指标
从Node Exporter收集监控数据
为了能够让Prometheus Server能够从当前node exporter获取到监控数据,这里需要修改Prometheus配置文件。编辑prometheus.yml并在scrape_configs节点下添加以下内容:
scrape_configs:- job_name: 'prometheus'static_configs:- targets: ['localhost:9090']# 采集node exporter监控数据- job_name: 'node'static_configs:- targets: ['localhost:9100']
重新启动Prometheus Server
访问http://localhost:9090,进入到Prometheus Server。如果输入“up”并且点击执行按钮以后,可以看到如下结果:
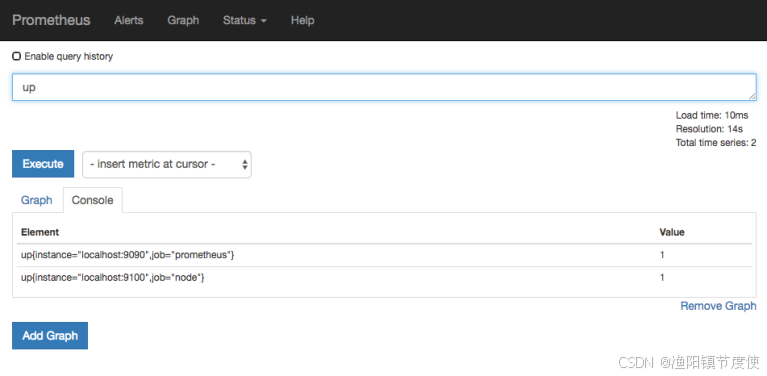
如果Prometheus能够正常从node exporter获取数据,则会看到以下结果:
up{instance="localhost:9090",job="prometheus"} 1
up{instance="localhost:9100",job="node"} 1
其中“1”表示正常,反之“0”则为异常