ultralytics框架计算大中小目标检测精度
先前在跑DETR类目标检测算法时,由于其默认使用的是COCO数据集,所以输出结果中包含不同尺度的检测精度,即大、中、小目标。
而现在博主在使用ultralytics时,发现其并没有这个指标效果,但在先前的实验中,博主发现DETR中计算这些指标使用的是pycocotools这个工具包,那么我们就可以将检测结果和标注数据采用这个工具进行计算。话不多说,我们开整。
YOLO数据集转COCO
首先,我们要做的是将YOLO格式的数据集转换为COCO格式的数据集,代码如下:
这里需要注意的是,COCO的类别是从1开始的,而YOLO的类别则从0开始,那么我们就需要category_id = int(parts[0])+1。
import os
import json
from PIL import Imagedef yolo_to_coco(yolo_dir, img_dir, output_file, categories):"""将YOLO格式的标注转换为COCO格式。:param yolo_dir: 包含YOLO标注txt文件的目录路径。:param img_dir: 包含对应图像的目录路径。:param output_file: 输出的COCO格式JSON文件路径。:param categories: 类别列表,如[{"id": 0, "name": "cat"}, {"id": 1, "name": "dog"}]"""images = []annotations = []image_id = 0annotation_id = 0for txt_file in os.listdir(yolo_dir):if not txt_file.endswith('.txt'):continue# 获取对应的图像文件名img_file = os.path.splitext(txt_file)[0] + '.jpg'image_id = os.path.splitext(txt_file)[0]img_path = os.path.join(img_dir, img_file)if not os.path.exists(img_path):print(f"找不到对应的图像文件: {img_file}")continue# 获取图像尺寸with Image.open(img_path) as img:width, height = img.size# 图像信息image_info = {"id": image_id,"file_name": img_file,"width": width,"height": height}images.append(image_info)# 解析YOLO标注with open(os.path.join(yolo_dir, txt_file), 'r') as f:lines = f.readlines()for line in lines:parts = line.strip().split()category_id = int(parts[0])+1x_center = float(parts[1])y_center = float(parts[2])bbox_width = float(parts[3])bbox_height = float(parts[4])# 计算边界框的绝对坐标abs_x = x_center * widthabs_y = y_center * heightabs_w = bbox_width * widthabs_h = bbox_height * heightannotation = {"id": annotation_id,"image_id": image_id,"category_id": category_id,"bbox": [abs_x - abs_w / 2, abs_y - abs_h / 2, abs_w, abs_h],"area": abs_w * abs_h,"iscrowd": 0}annotations.append(annotation)annotation_id += 1coco_format_json = {"images": images,"annotations": annotations,"categories": categories}with open(output_file, 'w') as f:json.dump(coco_format_json, f)
# 示例调用
categories = [{"id": 0, "name": "balloon"}, {"id": 1, "name": "kite"},{"id": 2, "name": "nest"},{"id": 3, "name": "trash"}]  # 根据实际情况修改
yolo_to_coco("D:/project_mine/detection/datasets/others/labels/val", "D:/project_mine/detection/datasets/others/images/val", "coco_annotations.json", categories)
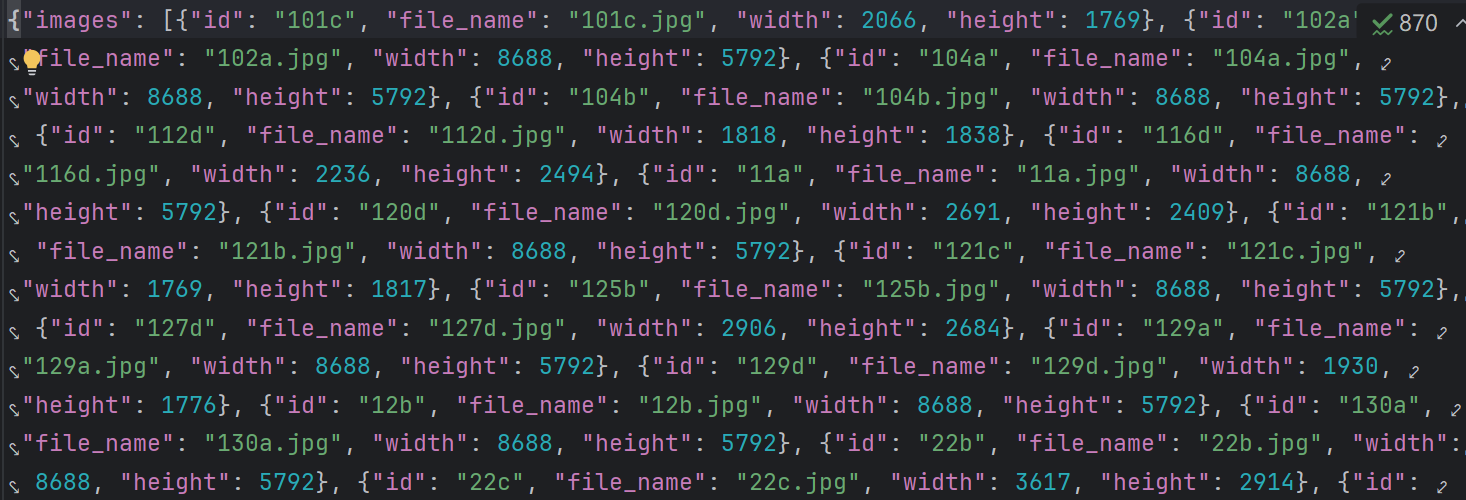
转换出的数据如下:
推理结果保存为json
第二步,我们需要在推理时,将结果保存为json格式,这个ultralytics框架中已经帮我们实现好了:只需要在参数中加上save_json=True即可
from ultralytics import RTDETR
# 加载模型
model = RTDETR("weights/best.pt")# 开始验证
validation_results = model.val(data="others.yaml",imgsz=640,batch=16,save_json=True,conf=0.25,iou=0.6,device="0"
)
print(validation_results.results_dict)
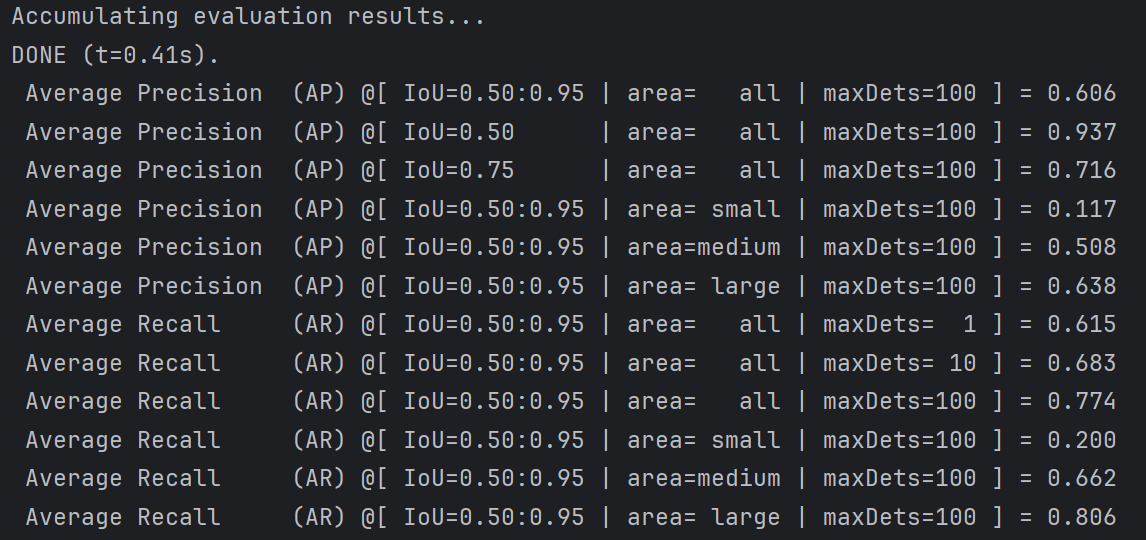
计算多尺度检测结果
如今,我们将数据均转换为COCO格式了,那么就可以采用pycocotools工具包计算了,代码如下:
from pycocotools.coco import COCO
from pycocotools.cocoeval import COCOeval
# 加载标注和预测
annFile = 'coco_annotations.json'
resFile = 'predictions.json'
cocoGt = COCO(annFile)
cocoDt = cocoGt.loadRes(resFile)# 先评估整体性能 (area='all')
cocoEval = COCOeval(cocoGt, cocoDt, 'bbox')
cocoEval.evaluate()
cocoEval.accumulate()
cocoEval.summarize()
结果如下:
码字不易,给个赞呗!