rsync
rsync
实验需求
把源服务器上/root/etc目录实时同步到目标服务器的/tmp下
注:server是源服务器,client是目标服务器
实验解法
源服务器:
1.安装rsync软件包
[root@server ~]# yum -y install rsync
2.创建/root/etc目录
[root@server ~]# mkdir etc
[root@server ~]# cd etc
[root@server etc]# pwd
/root/etc
[root@server etc]# touch file1 file2
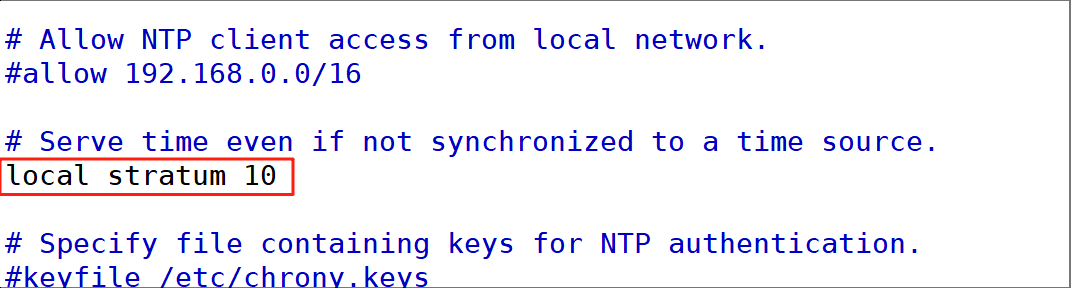
3.配置时钟同步,将源服务器当作时钟服务器
[root@server ~]# vim /etc/chrony.conf
重启时钟服务
[root@server ~]# systemctl restart chronyd
[root@server ~]# systemctl enable chronyd
[root@server ~]# hwclock -w
4.关闭防火墙
[root@server ~]# systemctl stop firewalld.service
[root@server ~]# systemctl disable firewalld.service
[root@server ~]# setenforce 0
目标服务器:
5.关闭防火墙
[root@client ~]# systemctl stop firewalld.service
[root@client ~]# systemctl disable firewalld.service
[root@client ~]# setenforce 0
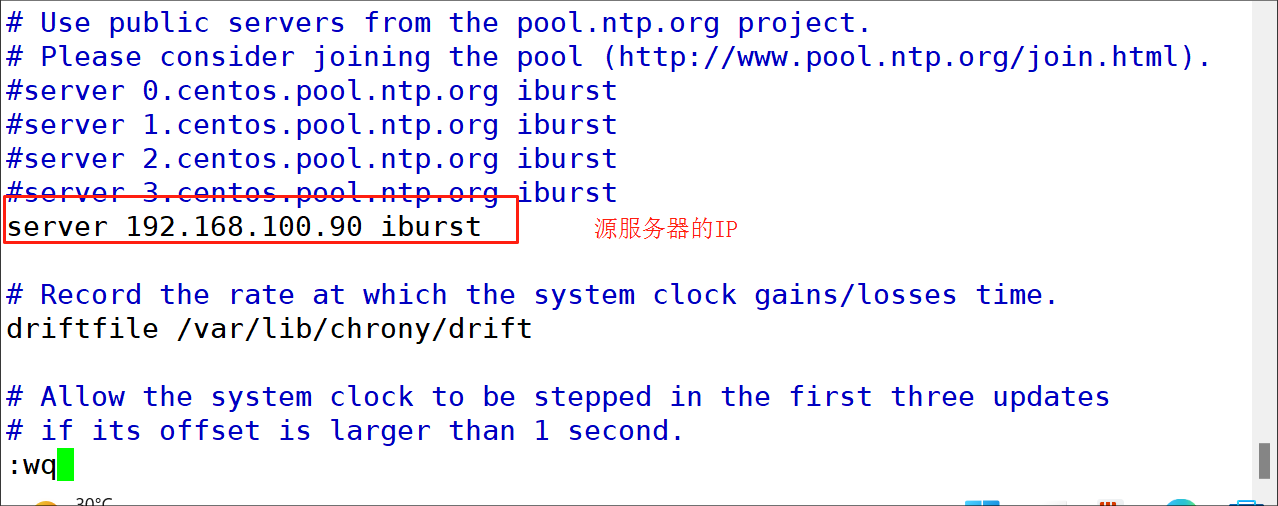
6.设置chrony.conf
[root@client ~]# vim /etc/chrony.conf
重启时钟服务
[root@client ~]# systemctl restart chronyd
[root@client ~]# systemctl enable chronyd
[root@client ~]# hwclock -w
7.安装rsync软件包
[root@client ~]# yum -y install rsync
8.设置rsyncd.conf配置文件
[root@client ~]# vim /etc/rsyncd.conf

9.创建用户认证文件
[root@client ~]# vim /etc/rsync.pass

10.设置文件权限
[root@client ~]# chmod 600 /etc/rsyncd*
11.启动rsync服务并设置开机自启动
[root@client ~]# rsync --daemon
[root@client ~]# vim /etc/rc.d/rc.local

源服务器:
12.创建认证密码文件
[root@server ~]# vim /etc/rsync.pass

13.设置文件权限
[root@server ~]# chmod 600 /etc/rsync.pass
14.源服务器运行
[root@server etc]# rsync -avH --port 873 --progress --delete /root/etc/ admin@192.168.100.12::etc_from_client --password-file=/etc/rsync.pass

15.查看服务器内核是否支持inotify
[root@server etc]# ll /proc/sys/fs/inotify

如果有这三个max开头的文件则表示服务器内核支持inotify
16.安装make,gcc,gcc-c++编译工具
[root@server etc]# yum -y install make gcc gcc-c++
17.安装inotify-tools
[root@server ~]# yum -y install inotify-tools
18.写同步脚本
[root@server ~]# mkdir /yc
[root@server ~]# cd /yc
[root@server yc]# vim inotify.sh

19.给脚本执行的权限
[root@server ~]# chmod +x /yc/inotify.sh
20.运行脚本
[root@server ~]# nohup bash /yc/inotify.sh &
[1] 8767
[root@server ~]# nohup: ignoring input and appending output to ‘nohup.out’
[root@server ~]# ps -ef | grep inotify

21…在源服务器上生成一个新文件
[root@server ~]# cd /root/etc/
[root@server etc]# touch file3
22.查看inotify生成的日志
[root@server etc]# vim /tmp/rsync.log

23.去目标服务器验证
源服务器中:
设置脚本开机启动
[root@server etc]# chmod +x /etc/rc.d/rc.local
[root@server etc]# vim /etc/rc.d/rc.local
