Qt项目——串口调试助手
目录
- 前言
- 工程文档
- 结果预览
- 一、如何使用CH340G模块和安装驱动
- 二、UI的制作
- 三、自动检测串口号
- 四、打开串口和发送界面优化
- 五、实现自首自发功能和发送状态更新
- 六、自动发送功能
- 七、清空和保存接收记录
- 八、刷新右下角时间
- 九、Hex显示和接收
- 十、换行功能
- 十一、面板隐藏和显示功能
- 十二、串口刷新和子控件组
- 十三、自动循环发送
- 十四、重置功能
- 十五、保存和载入指令集文本
- 十六、如何打包工程项目
- 结语
前言
这个项目相比记事本来说难度大了很多,实现起来更复杂了,引入了很多个新控件,比如QSerialPort,QTimer、QThread等。相信大家学过c51或者stm32对串口会比较熟悉,再做这个项目之前大家要准备好USB转TTL模块并安装好驱动。

工程文档
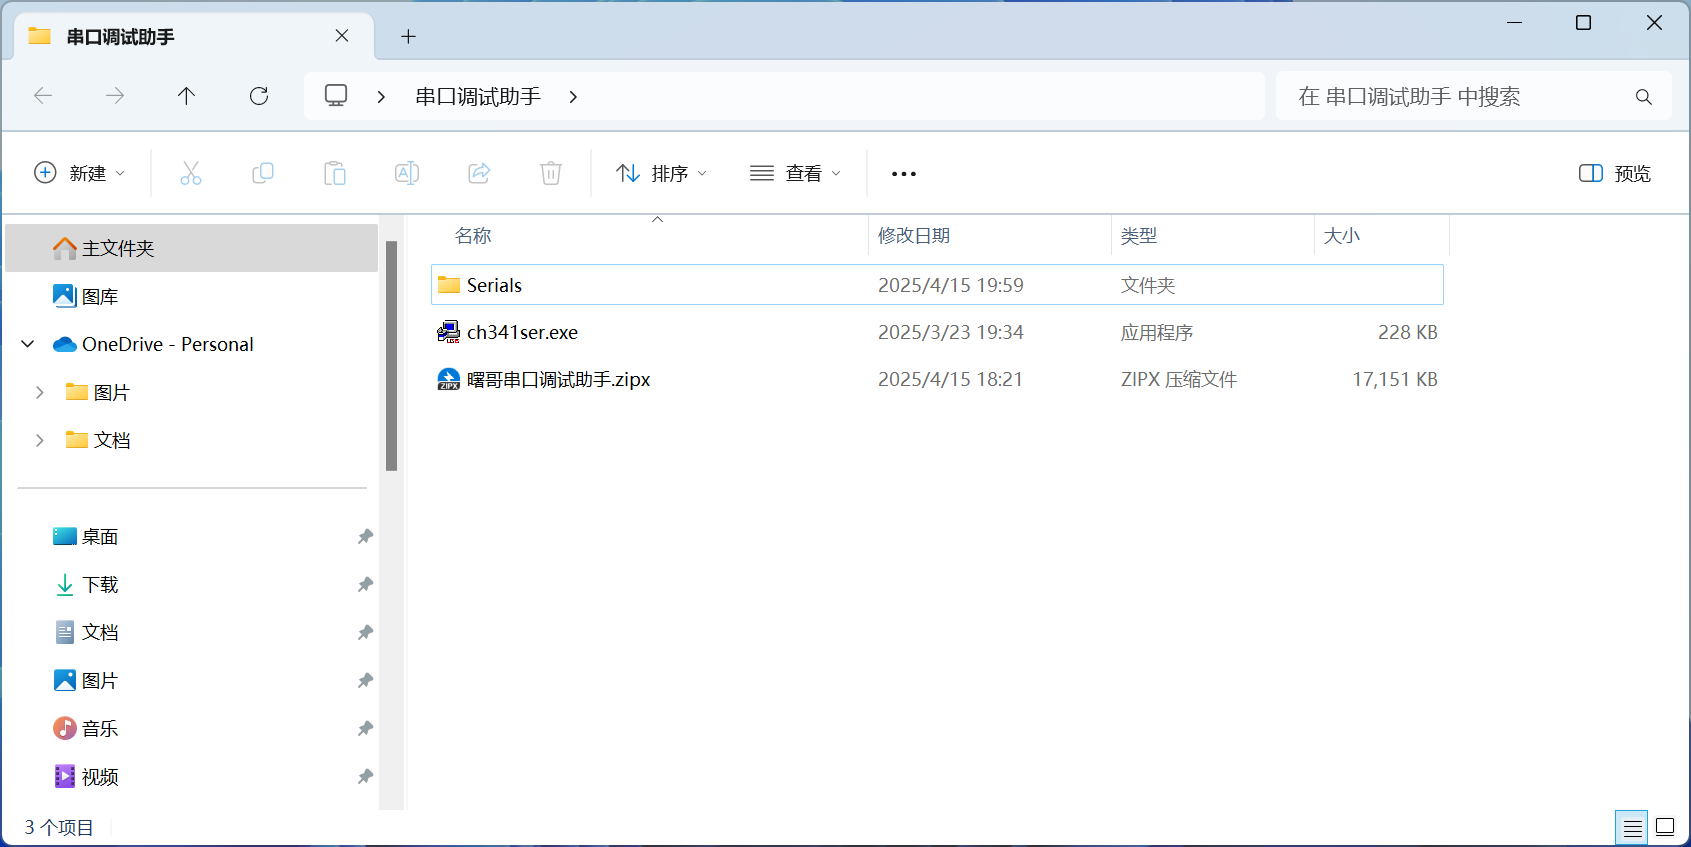
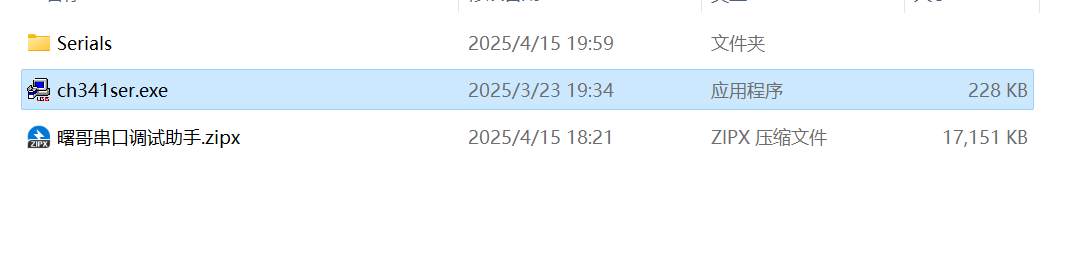
包含打包文件,原工程文件,驱动安装。
链接:https://pan.baidu.com/s/1mBbfqMGKSPGpGOBjb8bwCw
提取码:wm4q
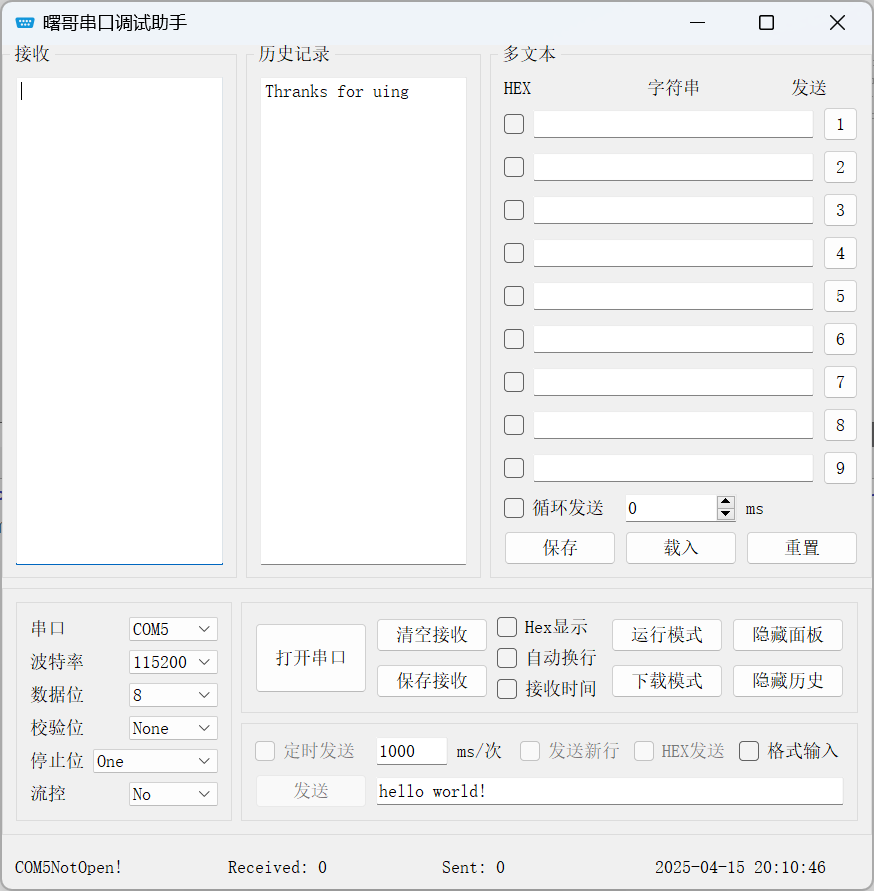
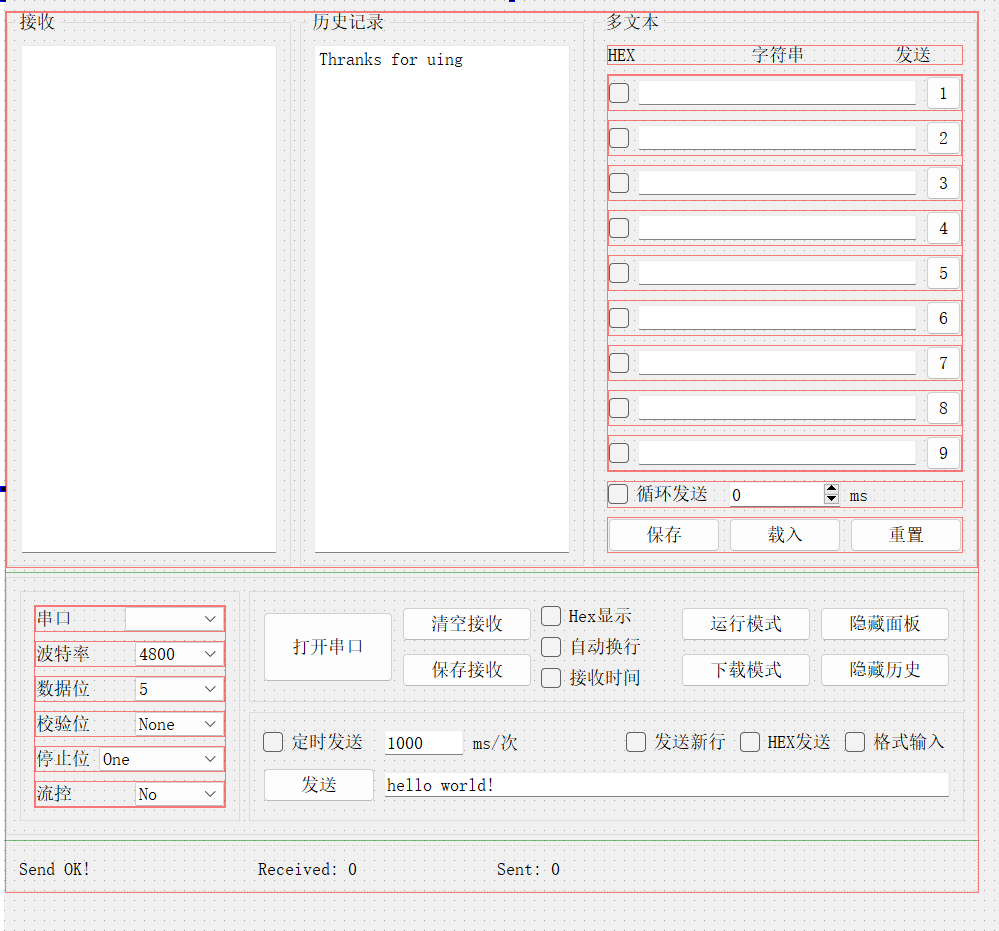
结果预览
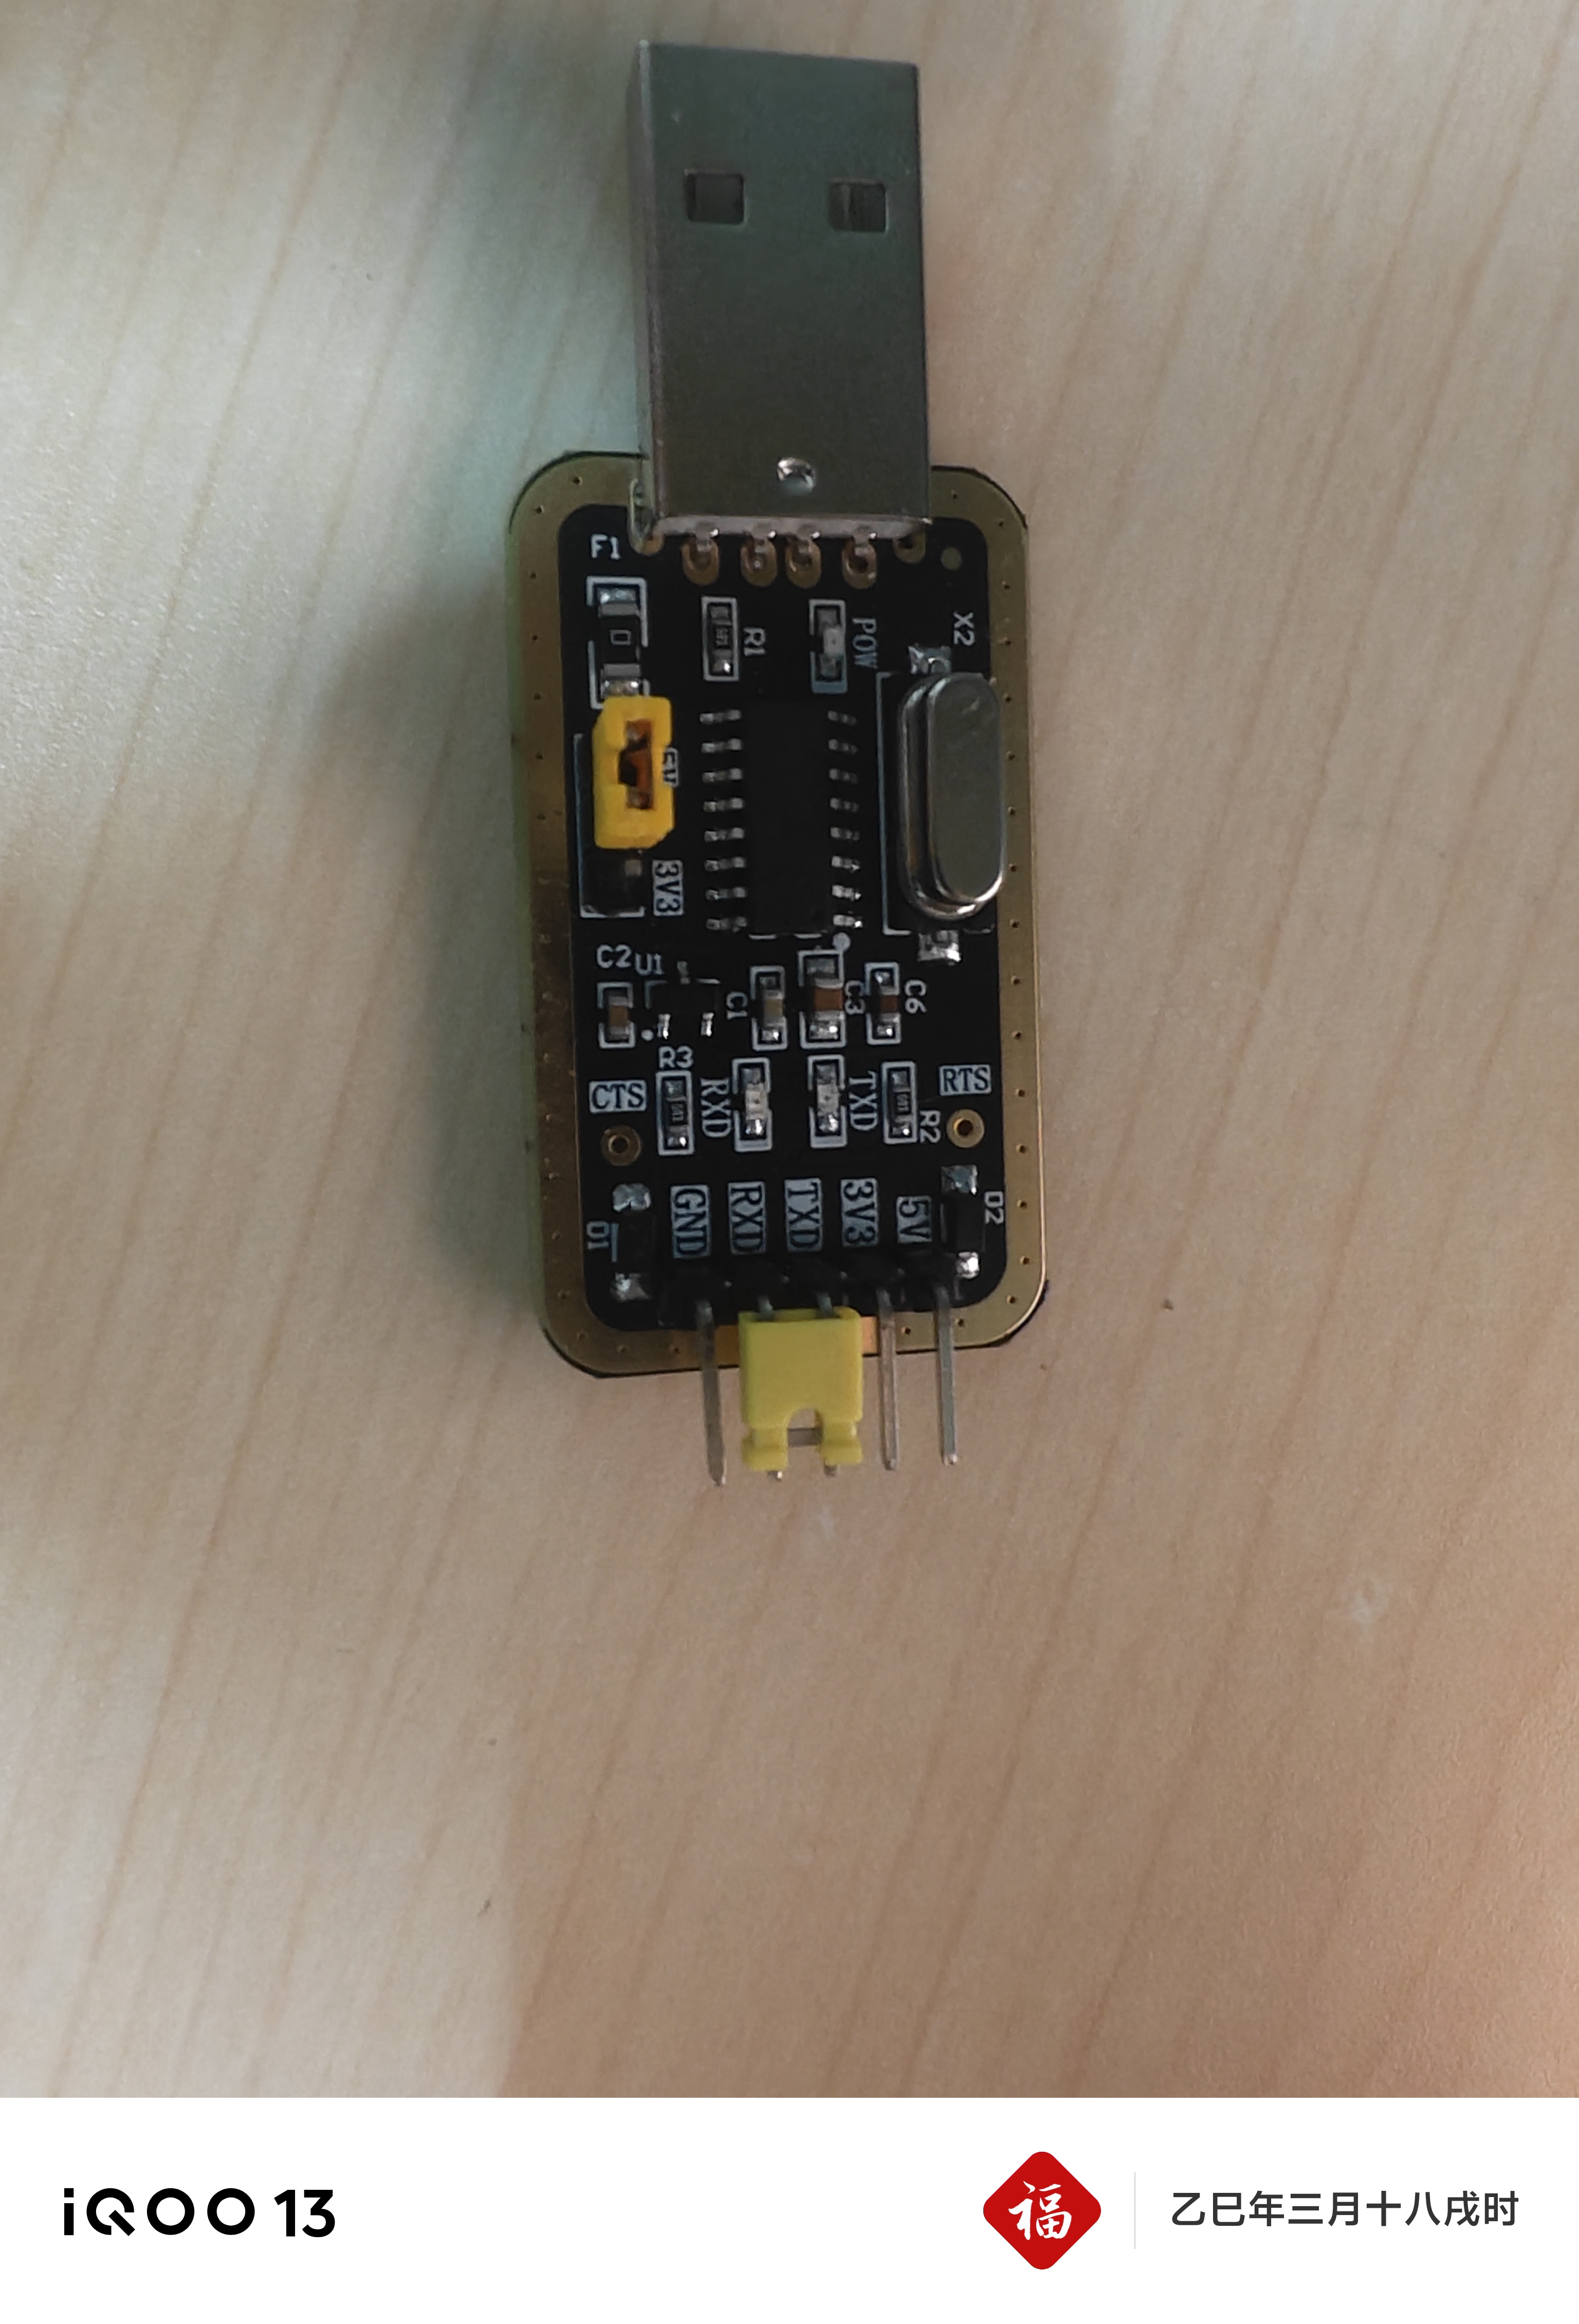
一、如何使用CH340G模块和安装驱动
大家一定要用跳线帽将TX和RX短接不然数据传输不了,安装驱动在我的这个文档里面。
跳线帽这样处理:
安装驱动点击这个ch341ser.exe安装即可
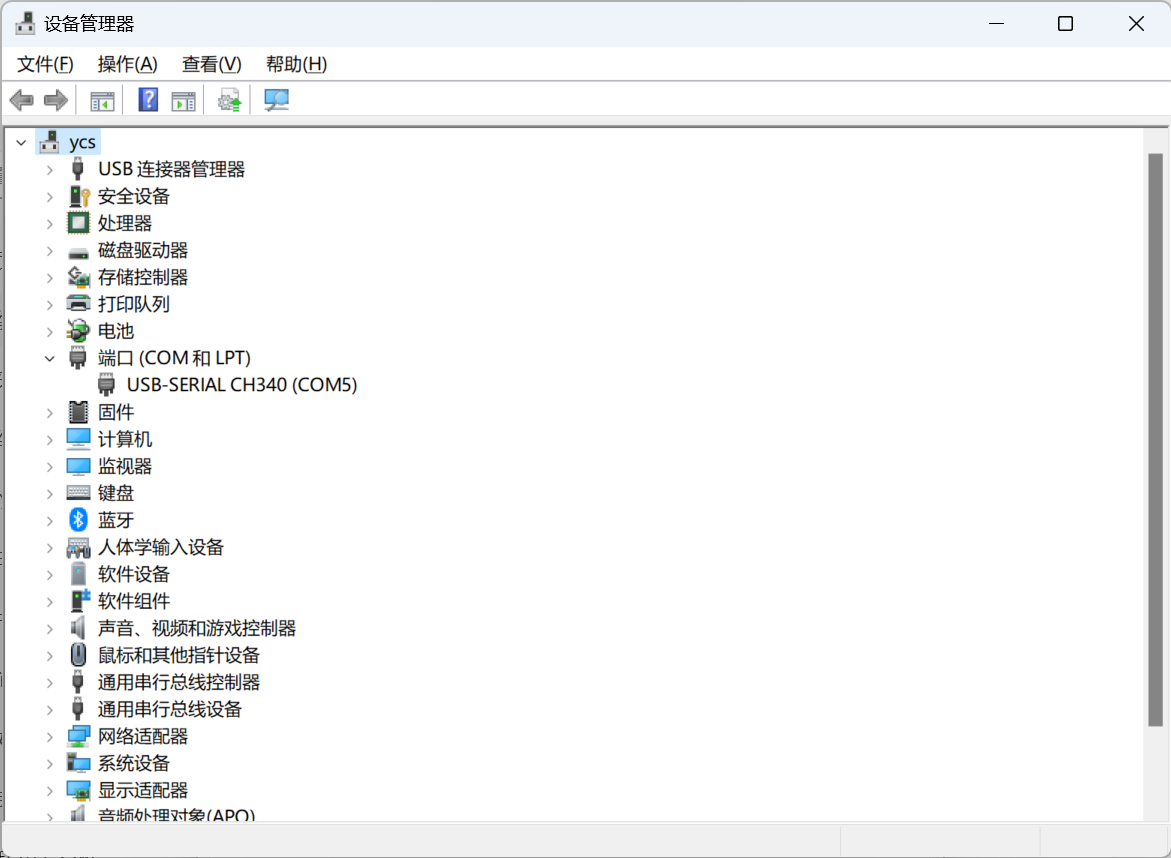
安装好了以后把模块插入电脑,右键此电脑点击属性再点高级系统设置,再点再点硬件点击设备管理器最后查看端口,如下图片表示与电脑链接成功。
二、UI的制作
接收区、历史记录和多文本,以及以下的所有控件最外层也就是父控件都可以用Group Box,其余的就是pushButton(按钮),checkBox(勾选框),spinBoox(循环发送旁边那个控件),comboBox(串口等状态位),还有textEdit和lineEdit等等,大家要利用好水平,垂直布局,和栅格布局等布局功能,怎么使用我就不赘述了,还不懂自己摸索或者看我上一期记事本的项目。
三、自动检测串口号
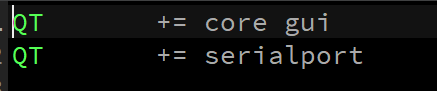
首先一定要在.Pro文件里面添加serialport这个库。
QList<QSerialPortInfo> serialList = QSerialPortInfo::availablePorts();for(QSerialPortInfo serialInfo : serialList){qDebug() << serialInfo.portName();ui->comboBox_serialNum->addItem(serialInfo.portName());}
四、打开串口和发送界面优化
在打开串口之前我要配置好所有串口状态的参数,端口号,波特率、数据位、校验位、停止位、流控,配置好槽函数。打开和关闭的时候设置好相应控件的使能状态。
void Widget::on_btnCloseOrOpenSerial_clicked(bool checked)
{//qDebug() << "IN checked" << checked;if(checked){//1. 选择端口号serialPort->setPortName(ui->comboBox_serialNum->currentText());//2. 配置波特率serialPort->setBaudRate(ui->comboBox_boautrate->currentText().toInt());//3. 配置数据位serialPort->setDataBits(QSerialPort::DataBits(ui->comboBox_databit->currentText().toUInt()));//4. 配置校验位switch (ui->comboBox_jiaoyan->currentIndex()) {case 0:serialPort->setParity(QSerialPort::NoParity);break;case 1:break;serialPort->setParity(QSerialPort::EvenParity);case 2:serialPort->setParity(QSerialPort::MarkParity);break;case 3:serialPort->setParity(QSerialPort::OddParity);break;case 4:serialPort->setParity(QSerialPort::SpaceParity);break;default:serialPort->setParity(QSerialPort::UnknownParity);break;}//5. 配置停止位serialPort->setStopBits(QSerialPort::StopBits(ui->comboBox_databit->currentText().toUInt()));//6. 流控if(ui->comboBox_fileCon->currentText() == "None")serialPort->setFlowControl(QSerialPort::NoFlowControl);//7. 打开串口if(serialPort->open(QIODevice::ReadWrite)){qDebug() << "serial open success";ui->comboBox_databit->setEnabled(false);ui->comboBox_fileCon->setEnabled(false);ui->comboBox_jiaoyan->setEnabled(false);ui->comboBox_stopbit->setEnabled(false);ui->comboBox_boautrate->setEnabled(false);ui->comboBox_serialNum->setEnabled(false);ui->btnCloseOrOpenSerial->setText("关闭串口");ui->btnSendContext->setEnabled(true);// serialStatus = true;}else{QMessageBox msgBox;msgBox.setWindowTitle("打开串口错误");msgBox.setText("打开失败,串口可能被占用或者已拔出!");msgBox.exec();}}else{serialPort->close();ui->btnCloseOrOpenSerial->setText("打开串口");ui->comboBox_databit->setEnabled(true);ui->comboBox_fileCon->setEnabled(true);ui->comboBox_jiaoyan->setEnabled(true);ui->comboBox_stopbit->setEnabled(true);ui->comboBox_boautrate->setEnabled(true);ui->comboBox_serialNum->setEnabled(true);// serialStatus = false;ui->btnSendContext->setEnabled(false);}
}
五、实现自首自发功能和发送状态更新
在发送按键那里点击转到槽函数,配置好自发自收函数用信号和槽在将它们连接起来。
connect(serialPort,&QSerialPort::readyRead,this,&Widget::on_SerialData_readyToRead);
void Widget::on_btnSendContext_clicked()
{int writeCnt = 0;const char* sendData = ui->lineEditSendContext->text().toStdString().c_str();writeCnt = serialPort->write(sendData);if(writeCnt == -1){ui->labelSendStatus->setText("SendError!");}else{writeCntTotal+=writeCnt;qDebug() << "SendOK" << sendData;ui->labelSendStatus->setText("SendOK!");ui->labelSendcnt->setNum(writeCntTotal);if(strcmp(sendData,sendBak.toStdString().c_str()) != 0){ui->textEditRecord->append(sendData);sendBak = QString(sendData);}}
}void Widget::on_SerialData_readyToRead()
{QString revMessage = serialPort->readAll();if(revMessage != NULL){qDebug() << "getMessage:"<< revMessage;ui->textEditRev->append(revMessage);readCntTotal += revMessage.size();ui->labelRevcnt->setNum(readCntTotal);}
}
六、自动发送功能
设置一个定时器,再用信号和槽将它们绑定。
connect(timer,&QTimer::timeout,[=](){on_btnSendContext_clicked();});
void Widget::on_checkBSendInTime_clicked(bool checked)
{// qDebug() <<"checkBsendIntime:"<<checked;if(checked){ui->lineEditTimeeach->setEnabled(false);ui->lineEditSendContext->setEnabled(false);timer->start(ui->lineEditTimeeach->text().toInt());//on_btnSendContext_clicked();}else{timer->stop();ui->lineEditTimeeach->setEnabled(true);ui->lineEditSendContext->setEnabled(true);}
}
七、清空和保存接收记录
void Widget::on_btnrevClear_clicked()
{ui->textEditRev->setText("");
}void Widget::on_btnrevSave_clicked()
{QString fileName = QFileDialog::getSaveFileName(this, tr("Save File"),"D:/QT/serialData.txt",tr("Text (*.txt)"));if(fileName != NULL){QFile file(fileName);if (!file.open(QIODevice::WriteOnly | QIODevice::Text))return;QTextStream out(&file);out << ui->textEditRev->toPlainText();file.close();}
}
八、刷新右下角时间
同样这个功能也需要定时器实现,每次到达需要的时间就刷新一次系统时间,将其信号和槽函数绑定起来。
QTimer *getSysTimeTimer = new QTimer(this);connect(getSysTimeTimer,SIGNAL(timeout()),this,SLOT(time_reflash()));getSysTimeTimer->start(100);
void Widget::getSysTime()
{QDateTime currentTime = QDateTime::currentDateTime();QDate date = currentTime.date();int year = date.year();int month = date.month();int day = date.day();QTime time = currentTime.time();int hour = time.hour();int minite = time.minute();int second = time.second();myTime = QString("%1-%2-%3  %4:%5:%6").arg(year, 2, 10, QChar('0')).arg(month, 2, 10, QChar('0')).arg(day, 2, 10, QChar('0')).arg(hour, 2, 10, QChar('0')).arg(minite, 2, 10, QChar('0')).arg(second, 2, 10, QChar('0'));
}
九、Hex显示和接收
void Widget::on_SerialData_readyToRead()
{QString revMessage = serialPort->readAll();if(revMessage != NULL){if(ui->checkBHexDisplay->isChecked()){QByteArray tmpHexString = revMessage.toUtf8().toHex();//原来控件上的内容,hexQString tmpStringHex = ui->textEditRev->toPlainText(); //因为勾选了,读出来的就是hextmpHexString = tmpStringHex.toUtf8() + tmpHexString; //把读出的旧的hex和新收到的数据转成hex进行拼接//重新显示在控件上ui->textEditRev->setText(QString::fromUtf8(tmpHexString));}else{if(ui->checkBrevTime->checkState()== Qt::Unchecked){ui->textEditRev->append(revMessage);}else if(ui->checkBrevTime->checkState()== Qt::Checked){getSysTime();ui->textEditRev->append("【"+myTime+"】 "+revMessage);}}readCntTotal += revMessage.size();ui->labelRevcnt->setText("Received:"+QString::number(readCntTotal));}
}
void Widget::on_checkBHexDisplay_clicked(bool checked)
{if(checked){//1. 读取textEdit上的内容QString tmp = ui->textEditRev->toPlainText();//2. 转换成hexQByteArray qtmp = tmp.toUtf8();qtmp = qtmp.toHex();//3. 显示ui->textEditRev->setText(QString::fromUtf8(qtmp));}else{//1. 读取textEdit上的内容,hexQString tmpHexString = ui->textEditRev->toPlainText();QByteArray tmpHexQBytearray = tmpHexString.toUtf8();QByteArray tmpQByteString = QByteArray::fromHex(tmpHexQBytearray);ui->textEditRev->setText(QString::fromUtf8(tmpQByteString));}
}
十、换行功能
换行勾选框选中就接收的信息就自动追加"\r\n"换行
void Widget::on_SerialData_readyToRead()
{QString revMessage = serialPort->readAll();qDebug() << "revCnt:" << revMessage.size() << "context:" << revMessage;if(revMessage != NULL){if(ui->checkBLine->isChecked()) revMessage.append("\r\n");//16进制显示if(ui->checkBHexDisplay->isChecked()){QByteArray tmpHexString = revMessage.toUtf8().toHex().toUpper();//原来控件上的内容,hexQString tmpStringHex = ui->textEditRev->toPlainText(); //因为勾选了,读出来的就是hextmpHexString = tmpStringHex.toUtf8() + tmpHexString; //把读出的旧的hex和新收到的数据转成hex进行拼接//重新显示在控件上ui->textEditRev->setText(QString::fromUtf8(tmpHexString));}else{//非16进制显示if(ui->checkBrevTime->checkState()== Qt::Unchecked){ui->textEditRev->insertPlainText(revMessage);}else if(ui->checkBrevTime->checkState()== Qt::Checked){getSysTime();ui->textEditRev->insertPlainText("【"+myTime+"】 "+revMessage);}}//接收的总字节数readCntTotal += revMessage.size();//显示接收的总字节数量ui->labelRevcnt->setText("Received:"+QString::number(readCntTotal));}
}
十一、面板隐藏和显示功能
还是选择勾选框的方案。
void Widget::on_btnhideTable_clicked(bool checked)
{if(checked){ui->btnhideTable->setText("拓展面板");ui->groupBoxTexts->hide();}else{ui->btnhideTable->setText("隐藏面板");ui->groupBoxTexts->show();}
}void Widget::on_btnHideHistory_clicked(bool checked)
{if(checked){ui->btnHideHistory->setText("显示历史");ui->groupBoxRecord->hide();}else{ui->btnHideHistory->setText("隐藏历史");ui->groupBoxRecord->show();}
}
十二、串口刷新和子控件组
实现一个槽函数进行串口的更新,还是用信号和槽绑定起来。用QList将所有多文本区的按钮储存起来,遍历每个按钮进行信号和槽绑定这样就不用创建9个槽函数,大大提升工作效率。
connect(getSysTimeTimer,SIGNAL(timeout()),this,SLOT(time_reflash()));
QList<QPushButton *> buttons;for(int i = 1; i <= 9; i++){QString btnName = QString("pushButton_%1").arg(i);QPushButton* btn = findChild<QPushButton *>(btnName);if(btn){btn->setProperty("buttonId",i);buttons.append(btn);connect(btn,SIGNAL(clicked()),this,SLOT(on_command_button_clicked()));}}
void Widget::refreshSerialName()
{ui->comboBox_serialNum->clear();//检测系统可用串口,并更新到comboBox上待用户选择QList<QSerialPortInfo> serialList = QSerialPortInfo::availablePorts();for(QSerialPortInfo serialInfo : serialList){// qDebug() << serialInfo.portName();ui->comboBox_serialNum->addItem(serialInfo.portName());}ui->labelSendStatus->setText("Com Refreshed!");
}void Widget::on_command_button_clicked()
{QPushButton *btn = qobject_cast<QPushButton *>(sender());if(btn){int num = btn->property("buttonId").toInt();QString lineEditName = QString("lineEdit_%1").arg(num);QLineEdit *lineEdit = findChild<QLineEdit *>(lineEditName);if(lineEdit)ui->lineEditSendContext->setText(lineEdit->text());QString checkBoxName = QString("checkBox_%1").arg(num);QCheckBox *checkBox = findChild<QCheckBox *>(checkBoxName);if(checkBox)ui->checkBHexSend->setChecked(checkBox->isChecked());on_btnSendContext_clicked();}
}
十三、自动循环发送
这个也是用定时器比较好。
buttonsConTimer = new QTimer(this);connect(buttonsConTimer,&QTimer::timeout,this,&Widget::buttons_handler);
void Widget::buttons_handler()
{if(buttonIndex < buttons.size()){QPushButton *btnTmp = buttons[buttonIndex];emit btnTmp->clicked();buttonIndex++;}else{buttonIndex = 0;}
}void Widget::on_checkBox_send_clicked(bool checked)
{if(checked){ui->spinBox->setEnabled(false);buttonsConTimer->start(ui->spinBox->text().toUInt());}else{ui->spinBox->setEnabled(true);buttonsConTimer->stop();}
}
十四、重置功能
void Widget::on_btnInit_clicked()
{QMessageBox msgBox;msgBox.setWindowTitle("提示");msgBox.setIcon(QMessageBox::Question);msgBox.setText("重置列表不可逆,确认是否重置?");//msgBox.setStandardButtons(QMessageBox::Yes | QMessageBox::No);QPushButton *yesButton = msgBox.addButton("是",QMessageBox::YesRole);QPushButton *noButton = msgBox.addButton("否",QMessageBox::NoRole);msgBox.exec();if(msgBox.clickedButton() == yesButton){qDebug() << "yesButton";for(int i = 0; i < lineEdits.size(); i++){//遍历lineEdit,并清空内容lineEdits[i]->clear();//遍历checkBox,并取消勾选checkBoxs[i]->setChecked(false);}}if(msgBox.clickedButton() == noButton){qDebug() << "noButton";}
}
十五、保存和载入指令集文本
void Widget::on_btnSave_clicked()
{QString fileName = QFileDialog::getSaveFileName(this, tr("保存文件"),"D:/",tr("文本类型 (*.txt)"));QFile file(fileName);if (!file.open(QIODevice::WriteOnly | QIODevice::Text))return;QTextStream out(&file);for(int i = 0; i < lineEdits.size(); i++){out << checkBoxs[i]->isChecked() << "|" << lineEdits[i]->text() << "\n";}file.close();
}void Widget::on_btnLoad_clicked()
{int i = 0;QString fileName = QFileDialog::getOpenFileName(this, tr("打开文件"),"D:/",tr("文本类型 (*.txt)"));if(fileName != NULL){QFile file(fileName);if (!file.open(QIODevice::ReadOnly | QIODevice::Text))return;QTextStream in(&file);while(!in.atEnd() && i <= 9){QString line = in.readLine();QStringList parts = line.split("|");if(parts.count() == 2){checkBoxs[i]->setChecked(parts[0].toInt());lineEdits[i]->setText(parts[1]);}i++;}}
}
十六、如何打包工程项目
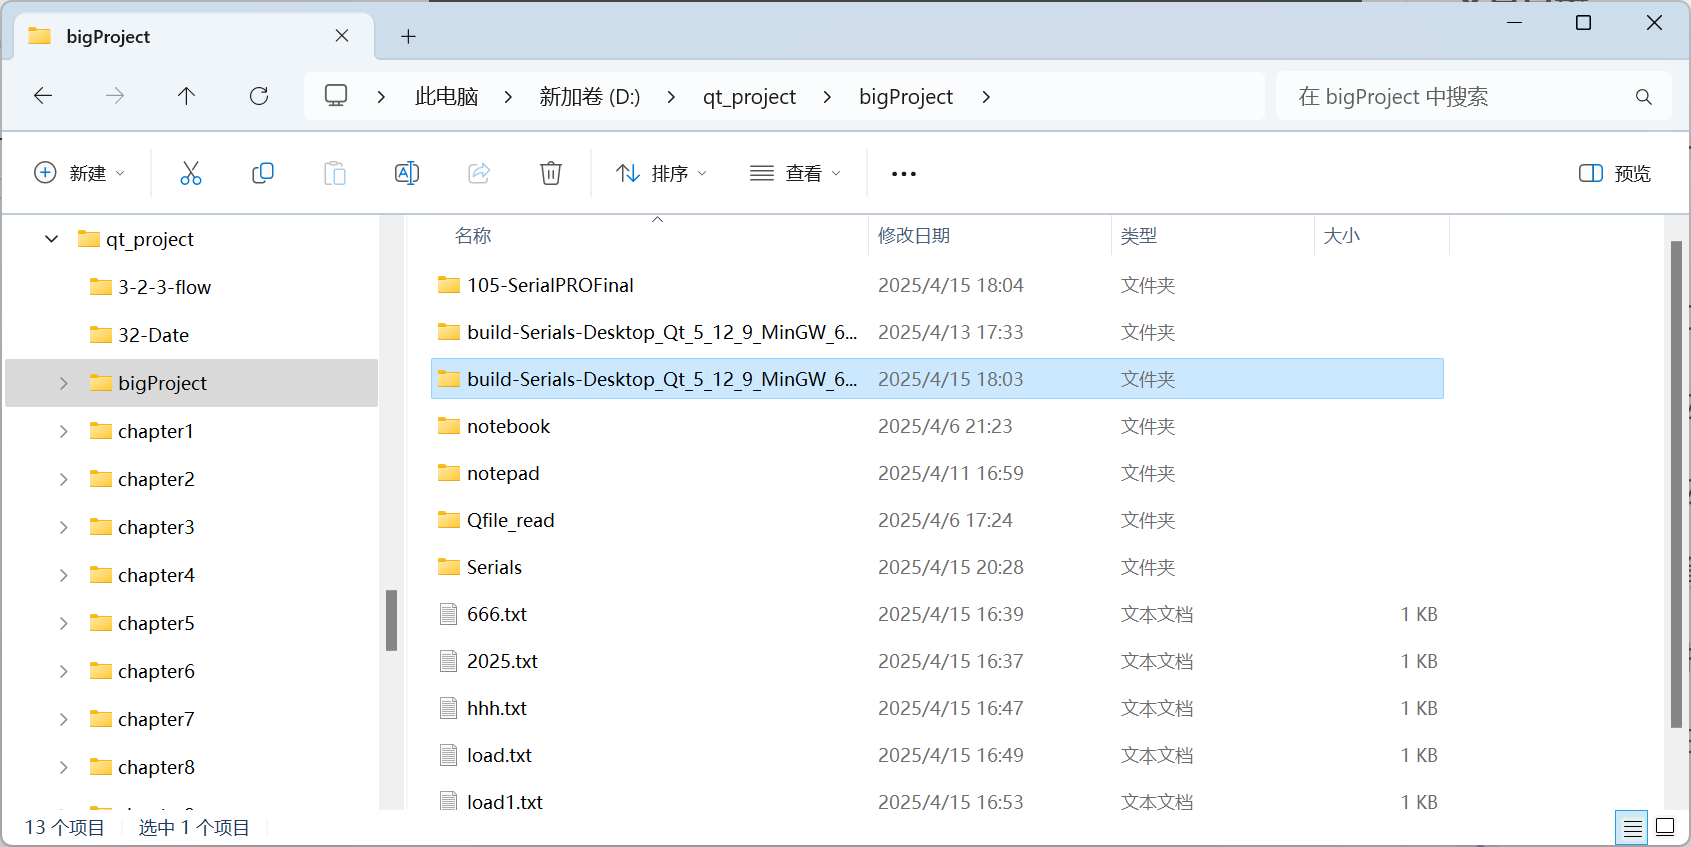
首先将我们完成的项目用release构建一遍,构建完之后文件夹就有这个文件,再点release就是当前目录,你点Serials.exe文件不能运行,因为缺文件还没编译。
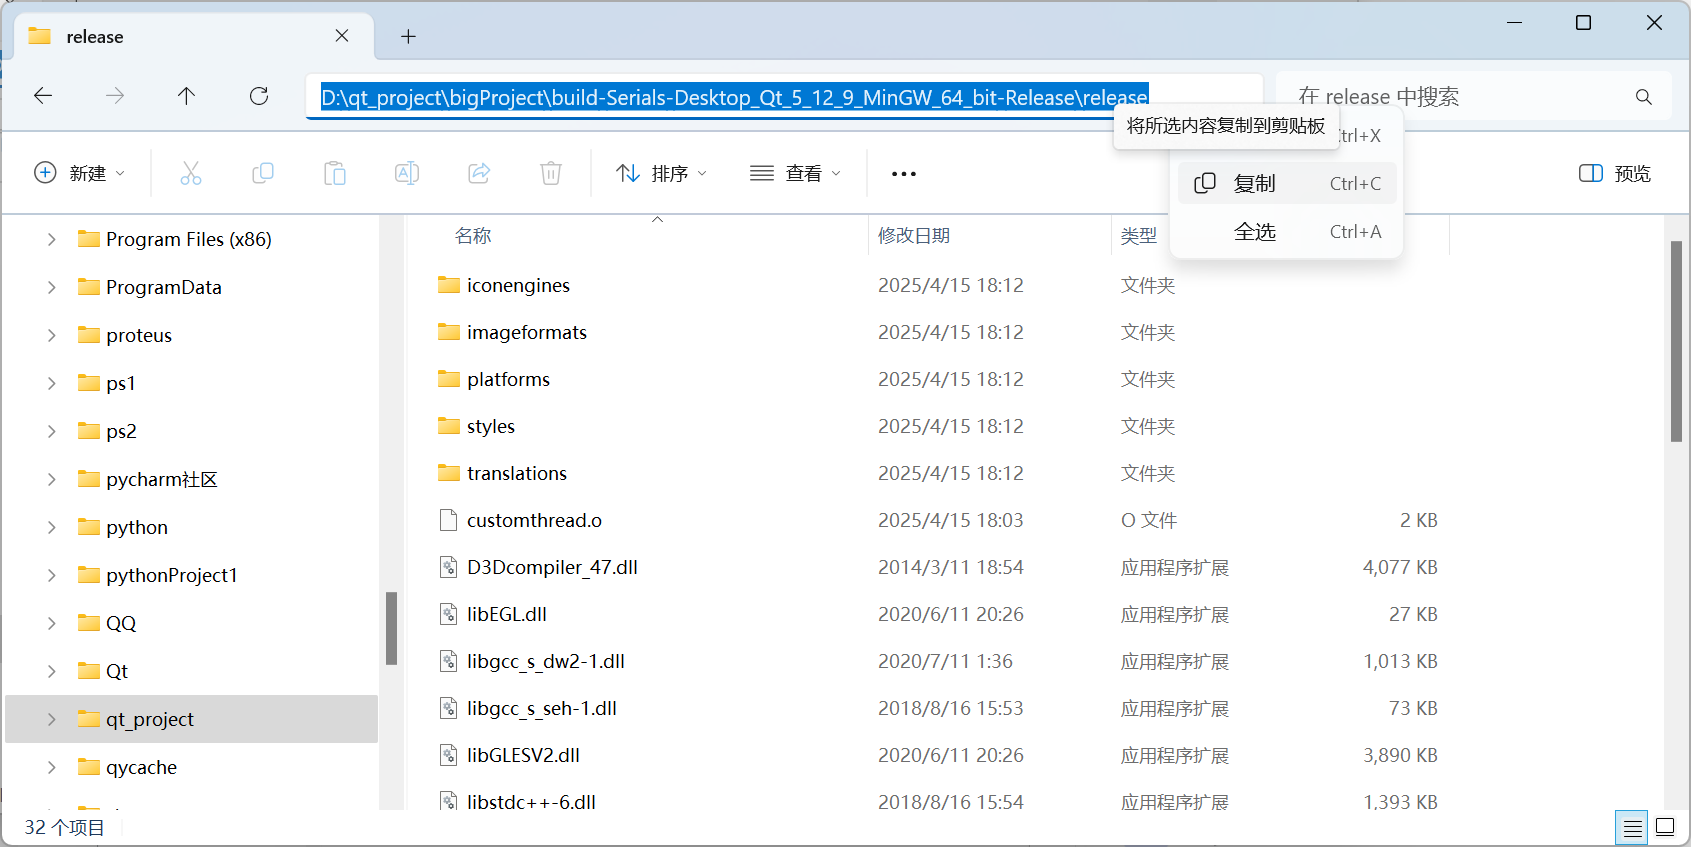
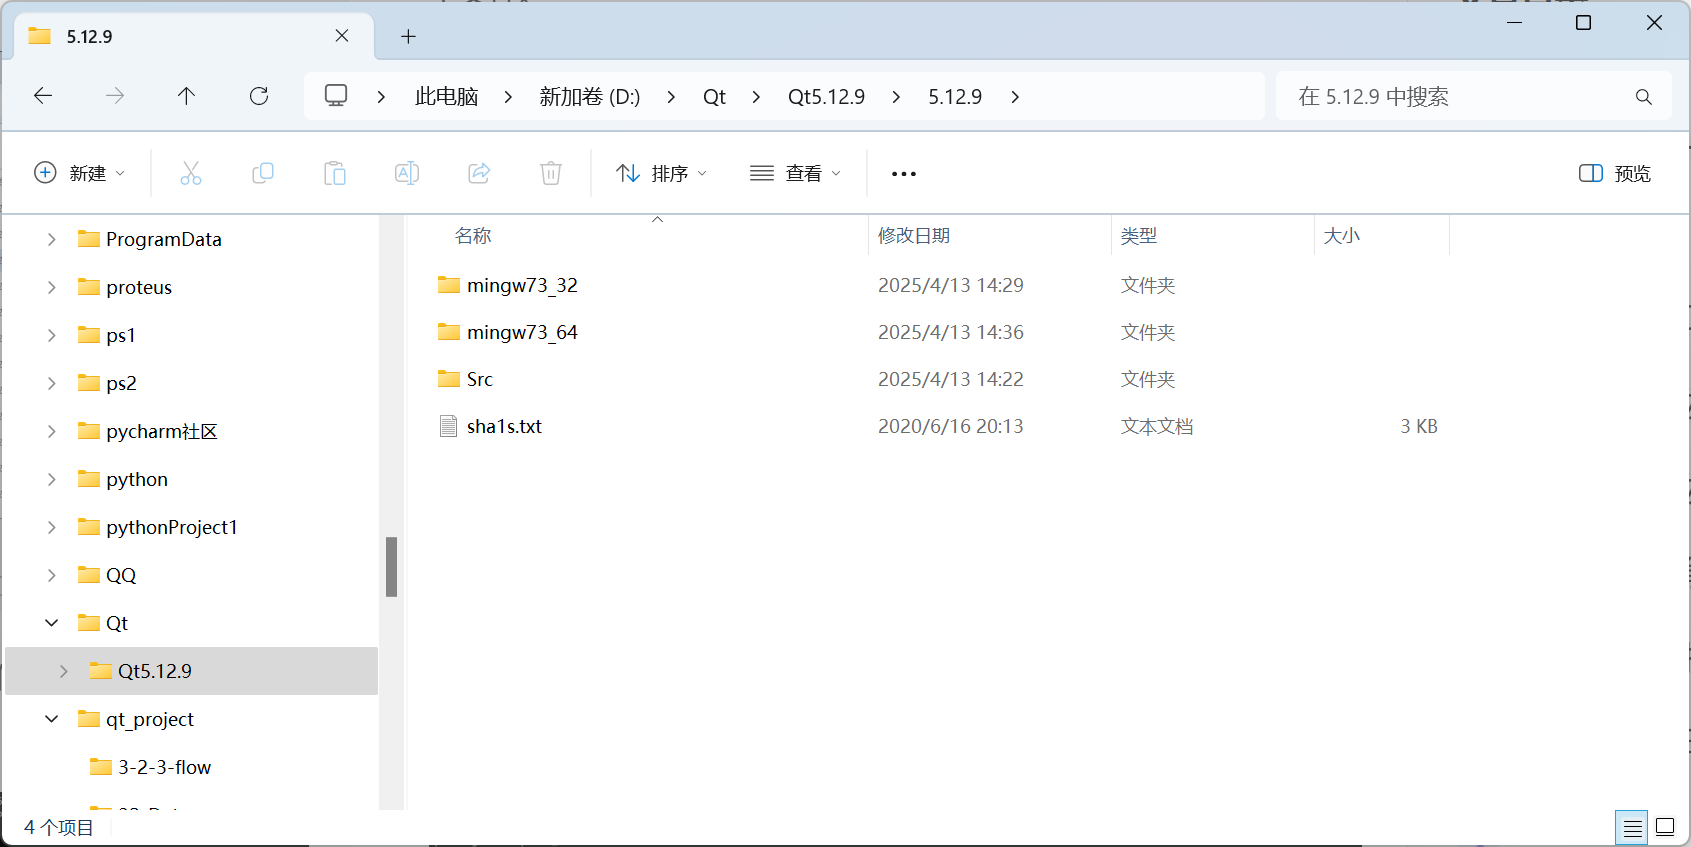
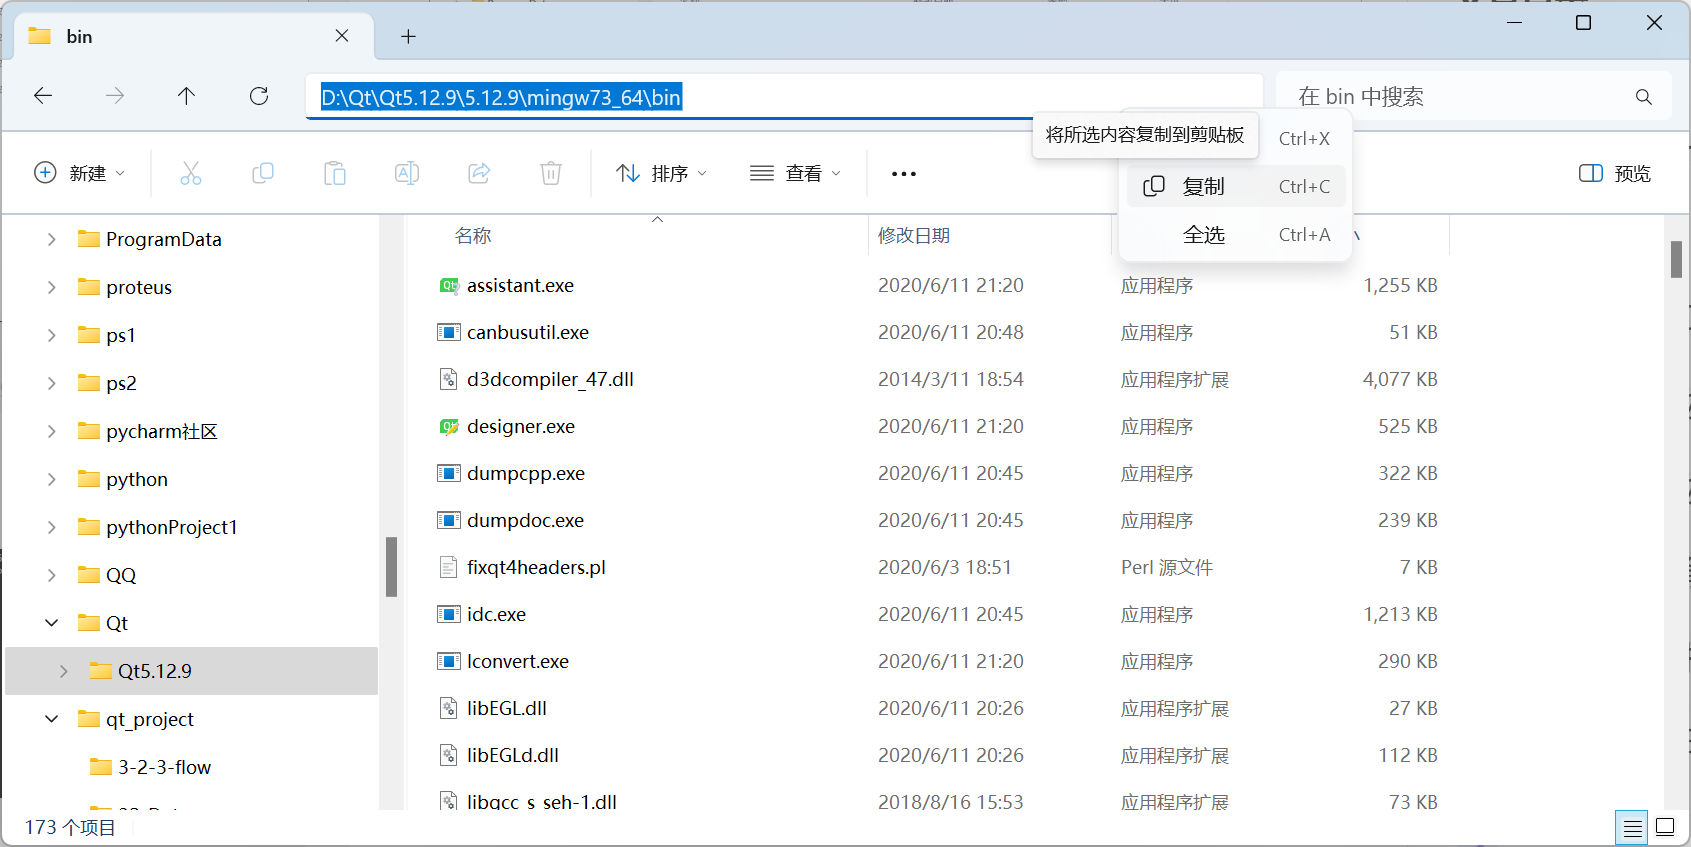
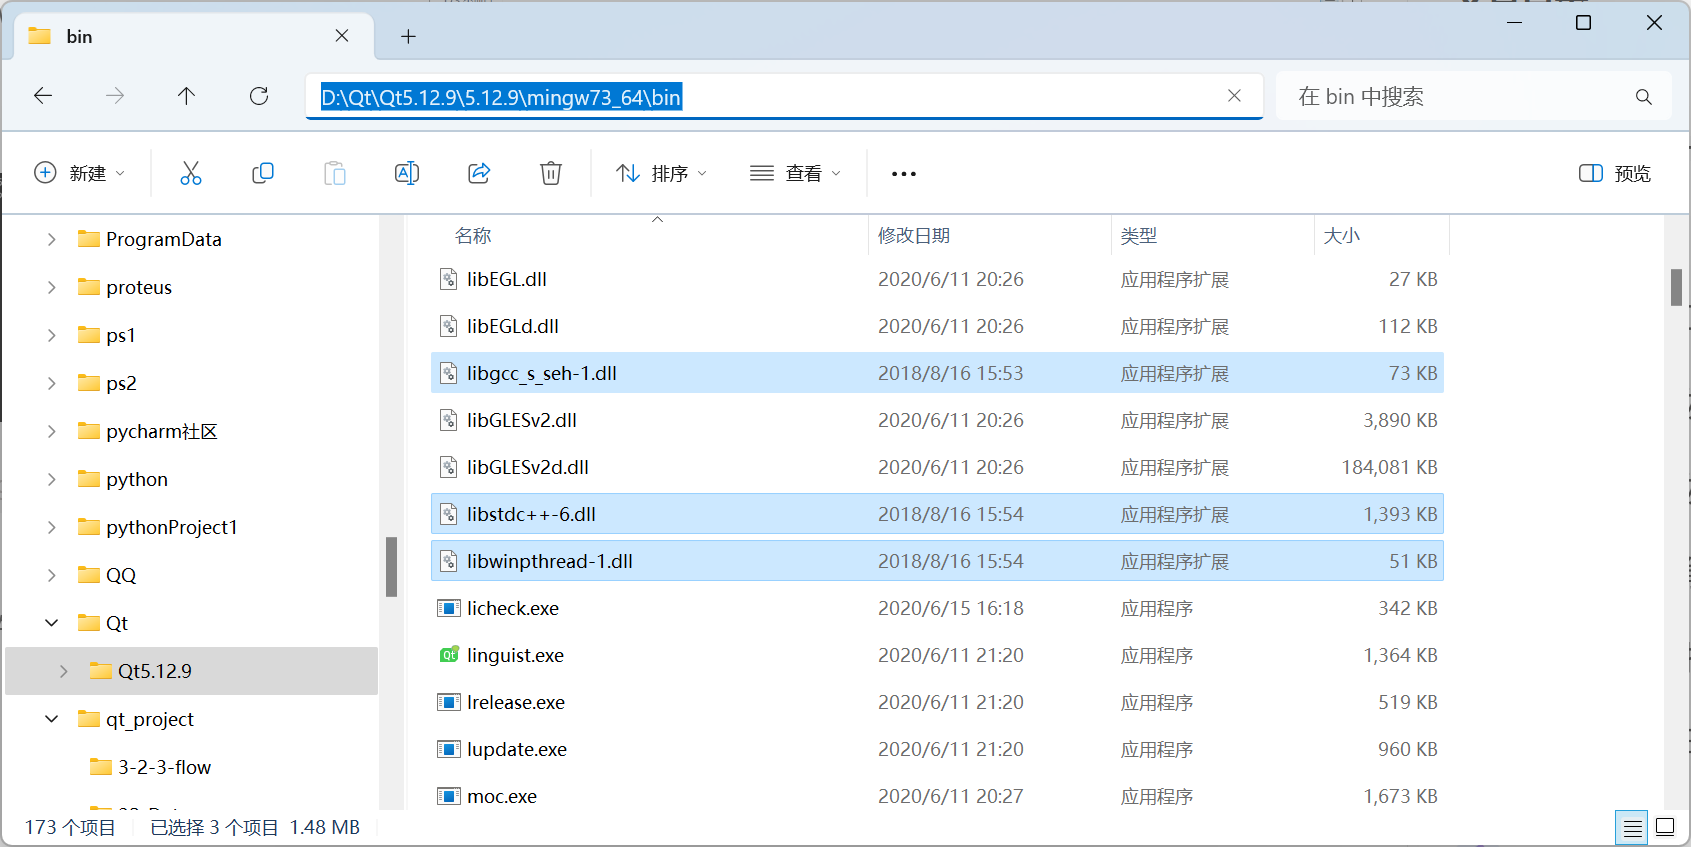
然后打开cmd命令提示符界面,cd 粘贴上上面这个路径回车进入,进入这个release文件目录。这时候我们还需要我们安装Qt文档里面找出编译器的目录。你重构的项目是32位或者64位是哪个就进哪个目录,我的是64位。然后再点进bin,将这个路径复制下来。
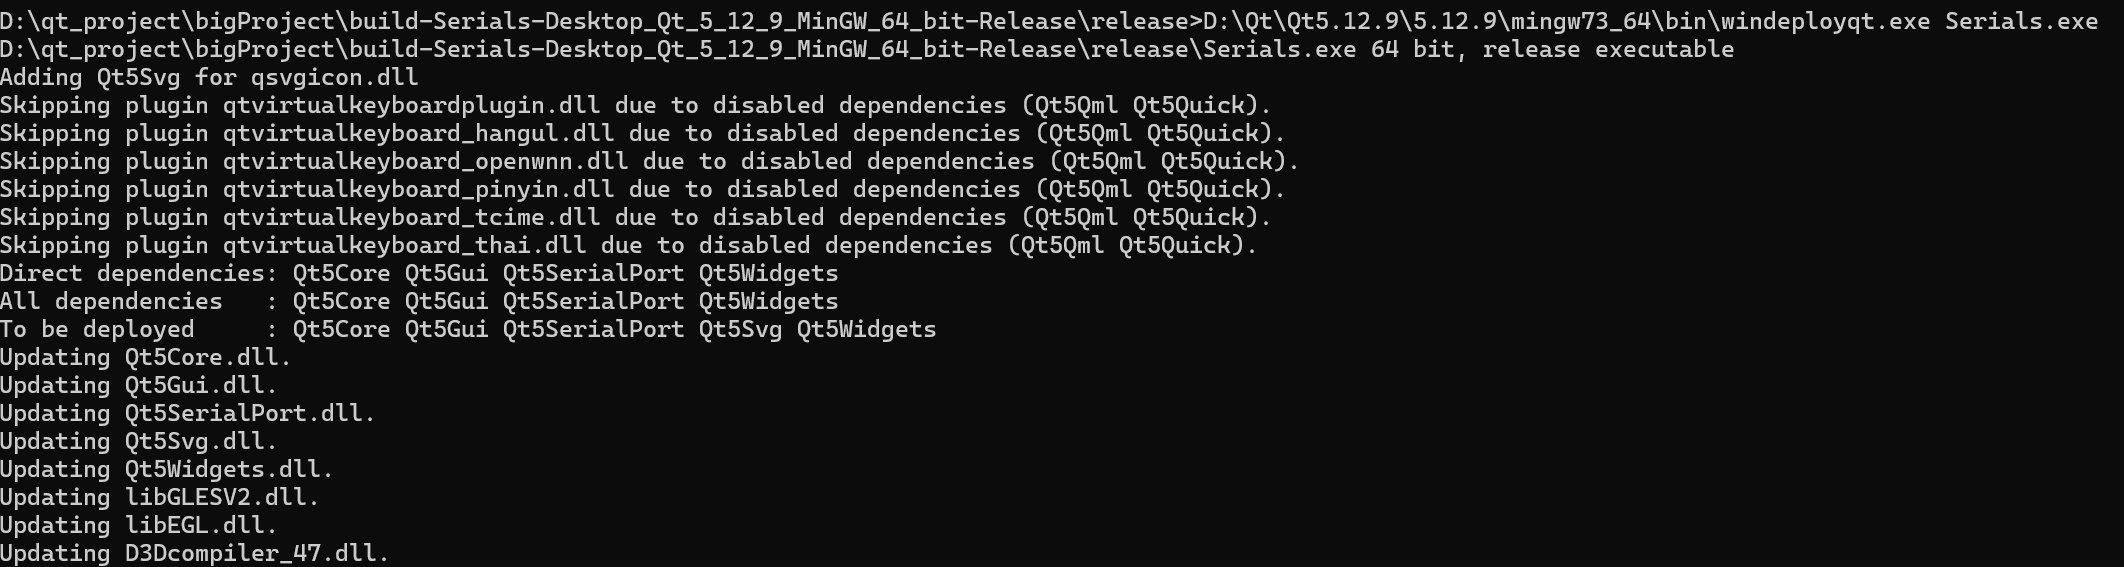
最后将这个路径复制到命令行里面再添加这个命令\windeployqt.exe Serials.exe回车它就开始下载到工程文件里。
还没结束点击Serials.exe文件还不能运行,还缺文件一般是缺这几个,将它们复制到release文档。一般是缺这几个文档。
这时候Serials.exe文件能运行就说明成功了。
将release文档里面的所有文件搞成压缩包就行。
结语
在实现这个过程很漫长,其中会出现非常多的bug,我有一个bug找了快两天,查了很久资料才解决,上面每个步骤都是思路其中会有bug,真正编码时还是看我最后的原工程文件的代码,比较完善。当然这个项目是我第一次做有bug也说不准,你们发现可以向我指正。

希望大家可以一键三连,后续我们一起学习,谢谢大家!!!
