个人小站折腾后记
个人小站折腾后记
🏠个人主页:shark-Gao
🧑个人简介:大家好,我是shark-Gao,一个想要与大家共同进步的男人😉😉
🎉目前状况:23届毕业生,目前在某公司实习👏👏
❤️欢迎大家:这里是CSDN,我总结知识的地方,欢迎来到我的博客,我亲爱的大佬😘
🖥️个人小站 :个人博客,欢迎大家访问
CSDN发布的文章同样会在个人小站折腾后记 个人博客进行同步,欢迎大家指点!!!
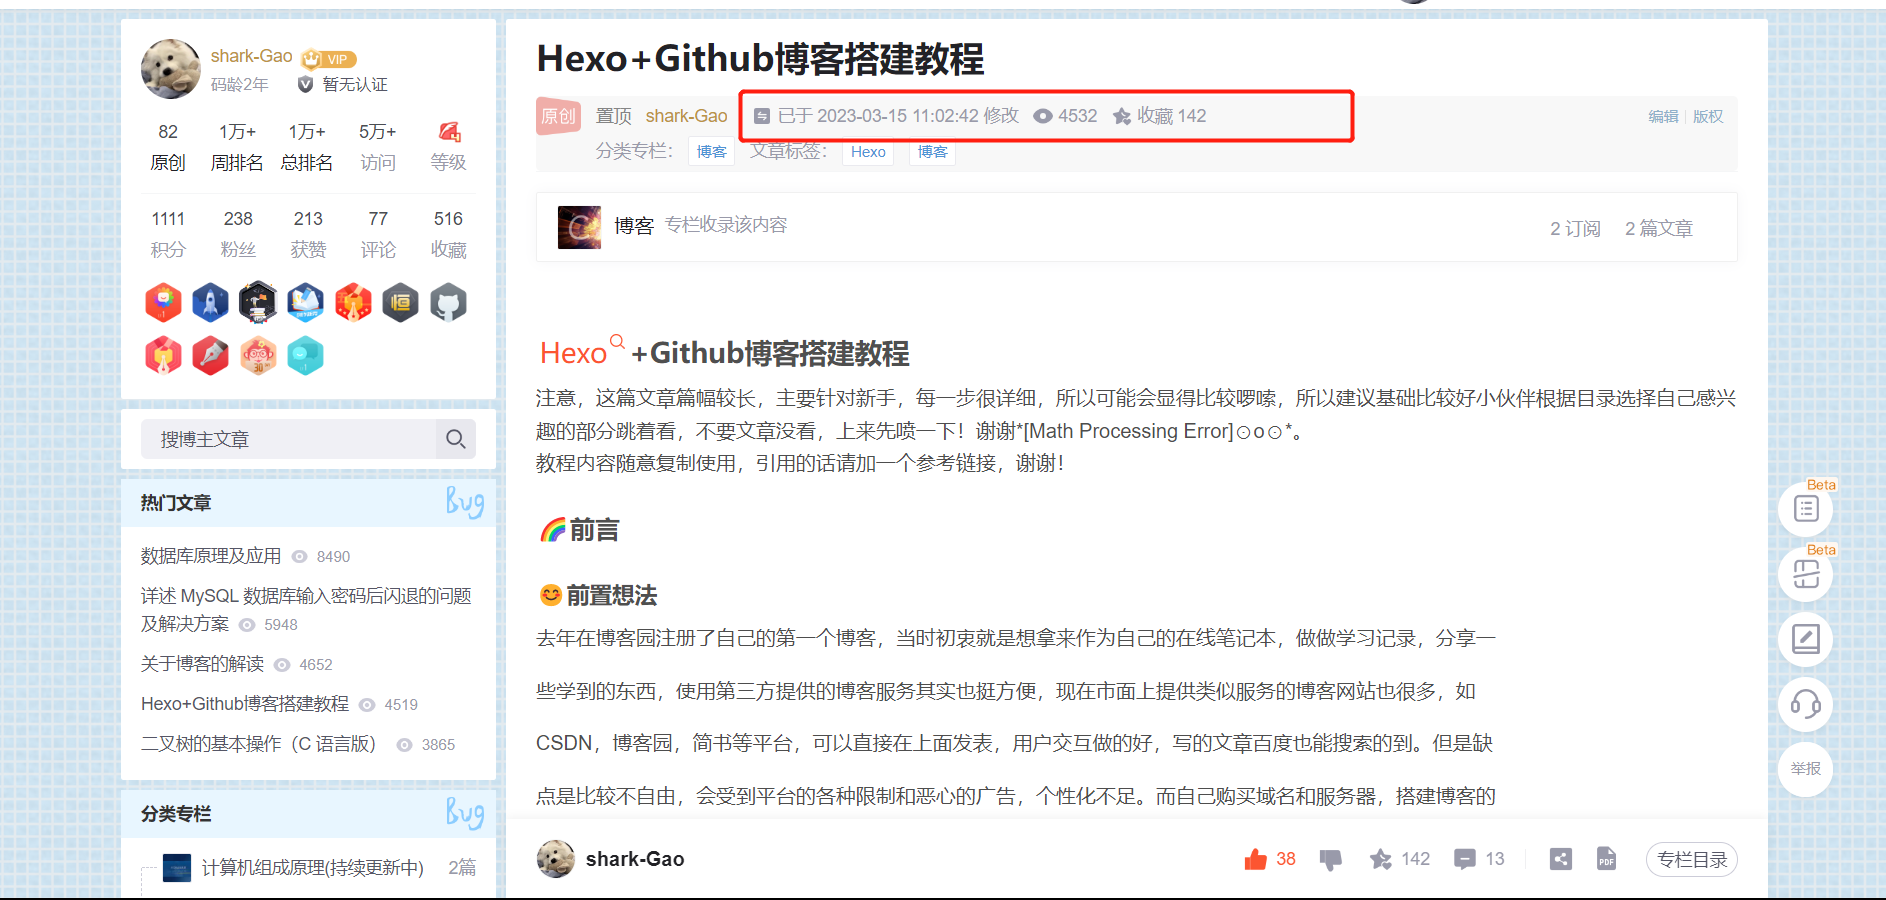
转眼上次这篇博客搭建小记已经过去一年之久,同时也得到了大家的喜欢和认可,能把我知道的一些知识和技巧分享给大家我很开心!
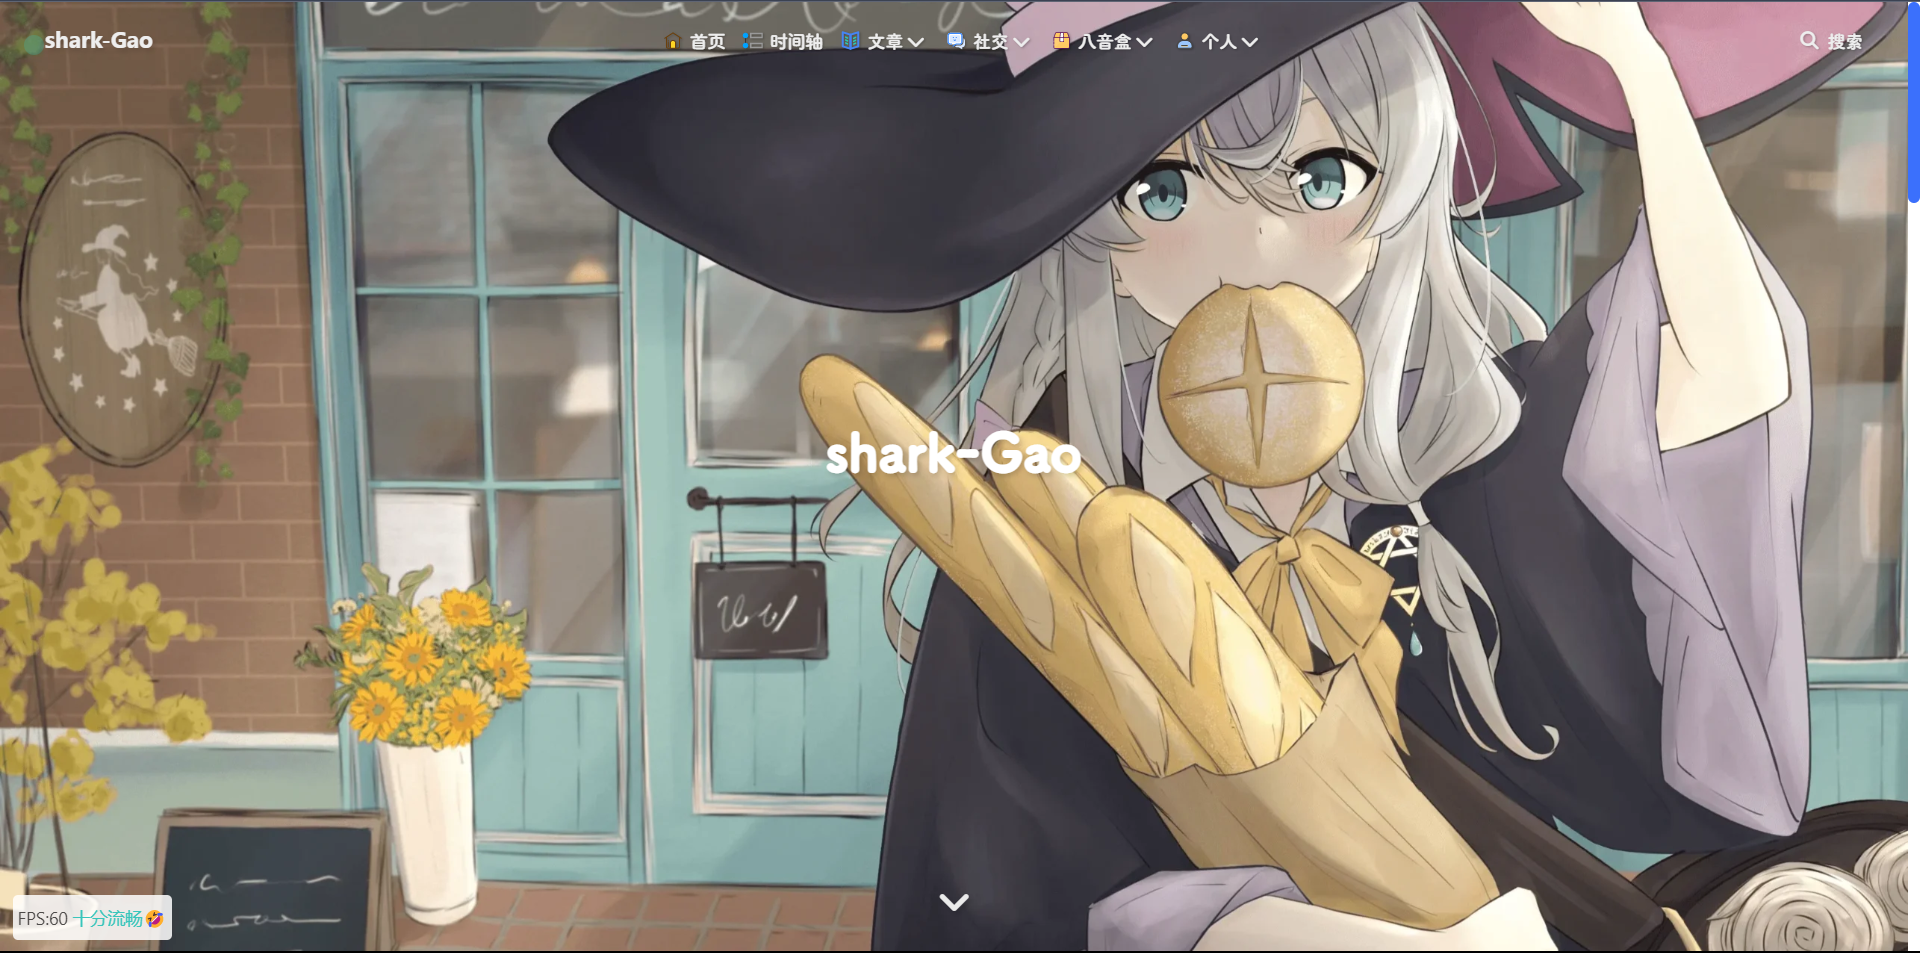
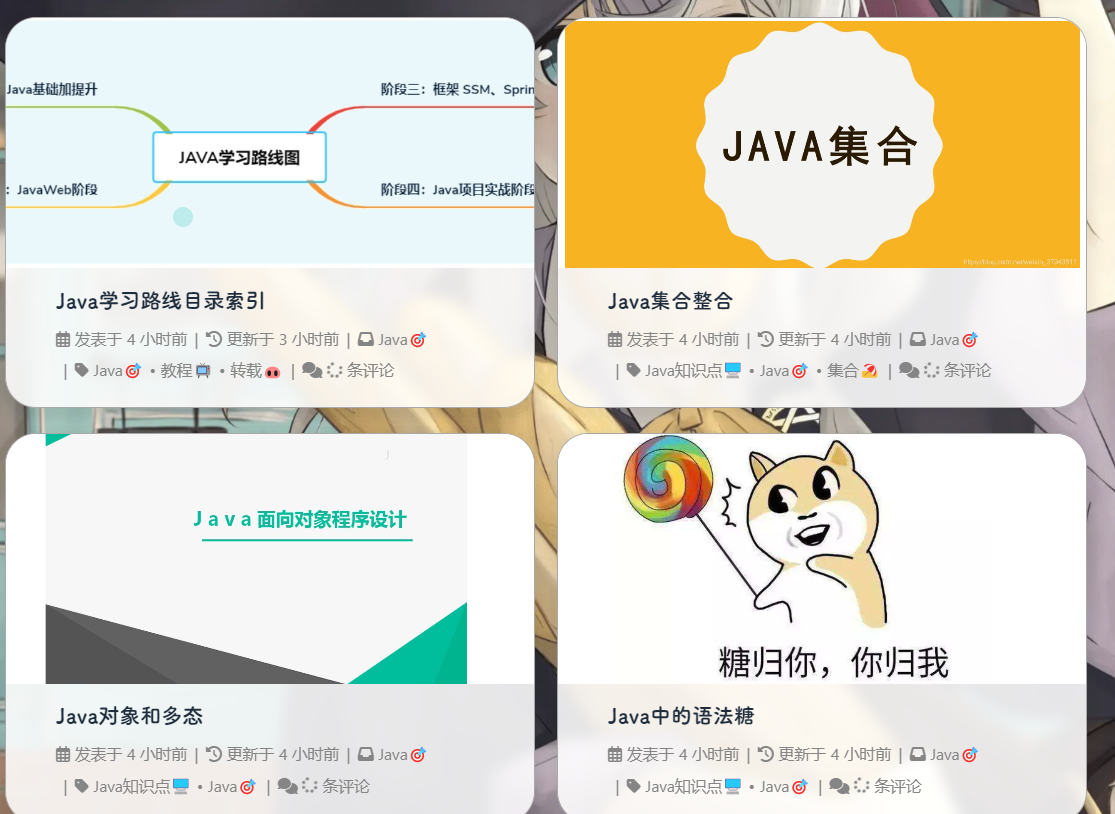
一年之余,也有一段时间没有更新自己的个人小站了,这次周末便抽空重新捯饬了一番,这次也打算重新记录一下,同时也供大家参考,希望可以对大家有所帮助。以下附上一张小站截图。
欢迎大家访问我的小破站 :小破站
主题选择
在主题选择这方面,我依然选择的是butterfly主题,这里非常感谢这些开源的大佬们,才能让我们看到这些好用又美观的主题🉑。
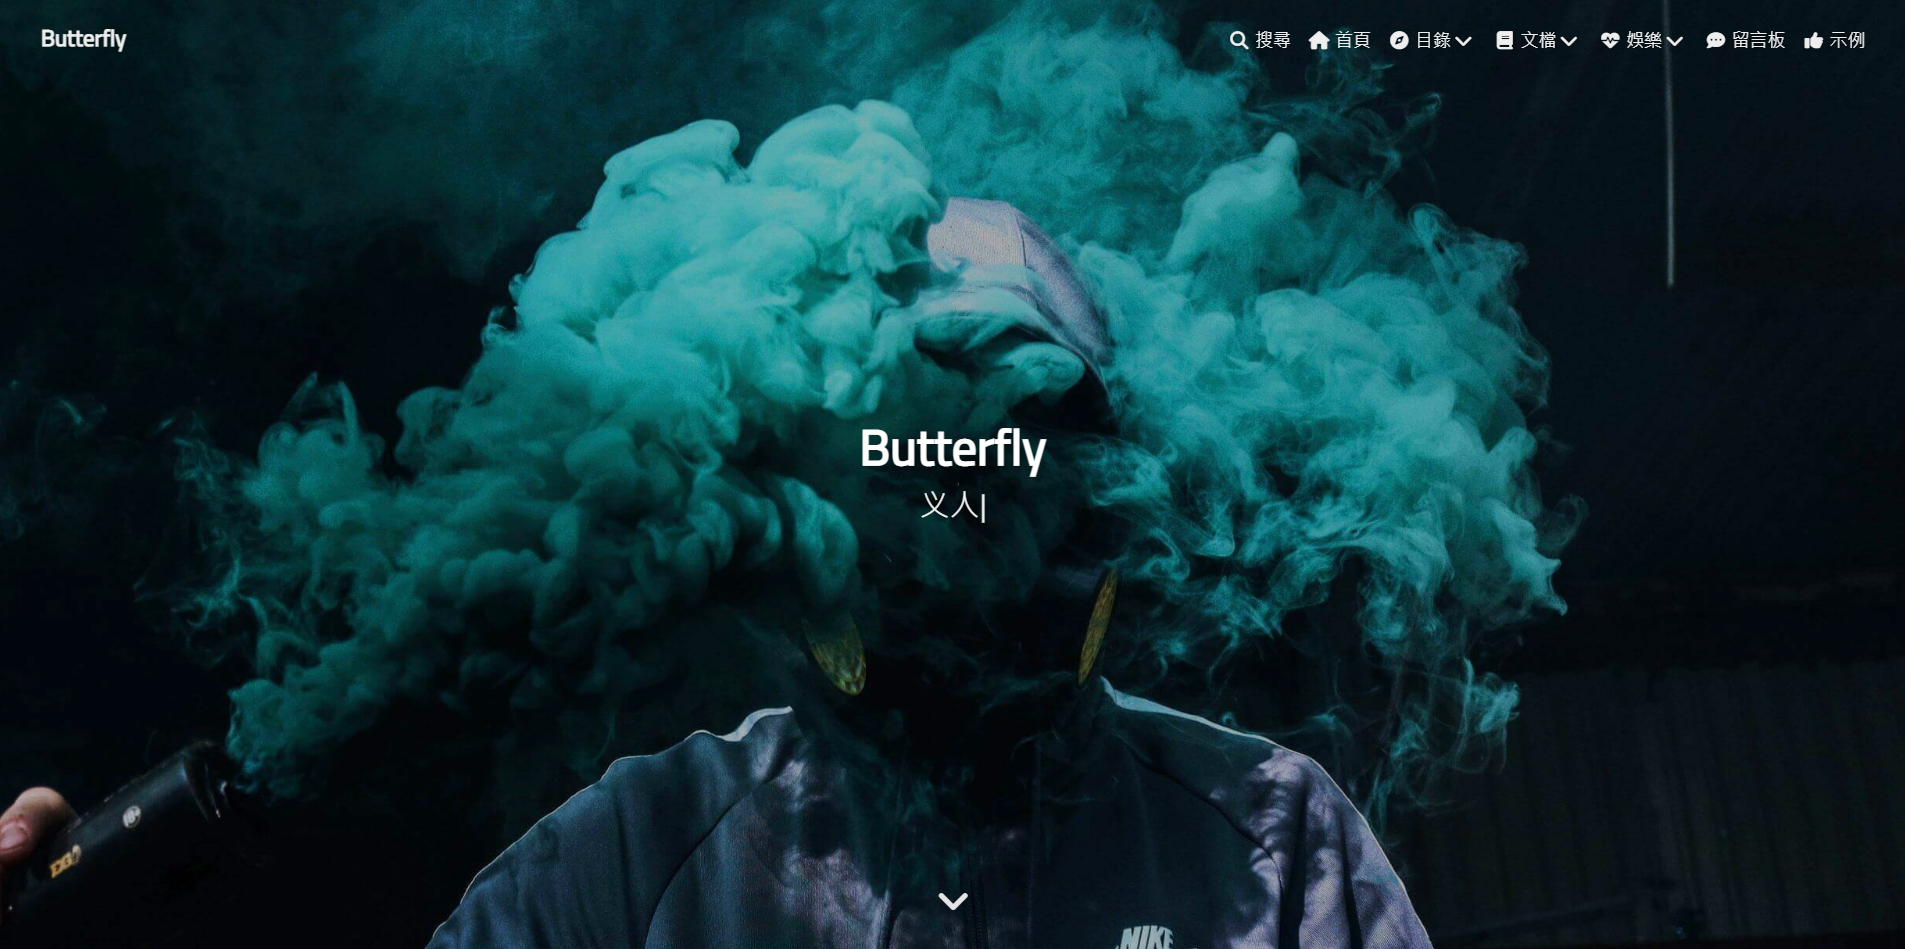
这次我的博客还是基于butterfly主题的一些魔改,按照自己的折腾和参照大佬的想法,慢慢琢磨出来的!!!
魔改教程
外挂标签的引入(店长)
详见:Tag Plugins Plus
-
安装插件,在博客根目录
[BlogRoot]下打开终端,运行以下指令:npm install hexo-butterfly-tag-plugins-plus --save考虑到hexo自带的markdown渲染插件
hexo-renderer-marked与外挂标签语法的兼容性较差,建议您将其替换成hexo-renderer-kramednpm uninstall hexo-renderer-marked --save npm install hexo-renderer-kramed --save -
添加配置信息,以下为写法示例
在站点配置文件_config.yml或者主题配置文件_config.butterfly.yml中添加# tag-plugins-plus # see https://akilar.top/posts/615e2dec/ tag_plugins: enable: true # 开关 priority: 5 #过滤器优先权 issues: false #issues标签依赖注入开关 link: placeholder: /img/link.png #link_card标签默认的图标图片 CDN: anima: https://npm.elemecdn.com/hexo-butterfly-tag-plugins-plus@latest/lib/assets/font-awesome-animation.min.css #动画标签anima的依赖 jquery: https://npm.elemecdn.com/jquery@latest/dist/jquery.min.js #issues标签依赖 issues: https://npm.elemecdn.com/hexo-butterfly-tag-plugins-plus@latest/lib/assets/issues.js #issues标签依赖 iconfont: //at.alicdn.com/t/font_2032782_8d5kxvn09md.js #参看https://akilar.top/posts/d2ebecef/ carousel: https://npm.elemecdn.com/hexo-butterfly-tag-plugins-plus@latest/lib/assets/carousel-touch.js tag_plugins_css: https://npm.elemecdn.com/hexo-butterfly-tag-plugins-plus@latest/lib/tag_plugins.css -
参数释义
| 参数 | 备选值/类型 | 释义 |
|---|---|---|
| enable | true/false | 【必选】控制开关 |
| priority | number | 【可选】过滤器优先级,数值越小,执行越早,默认为10,选填 |
| issues | true/false | 【可选】issues标签控制开关,默认为false |
| link.placeholder | 【必选】link卡片外挂标签的默认图标 | |
| CDN.anima | URL | 【可选】动画标签anima的依赖 |
| CDN.jquery | URL | 【可选】issues标签依赖 |
| CDN.issues | URL | 【可选】issues标签依赖 |
| CDN.iconfont | URL | 【可选】iconfont标签symbol样式引入,如果不想引入,则设为false |
| CDN.carousel | URL | 【可选】carousel旋转相册标签鼠标拖动依赖,如果不想引入则设为false |
| CDN.tag_plugins_css | URL | 【可选】外挂标签样式的CSS依赖,为避免CDN缓存延迟,建议将@latest改为具体版本号 |
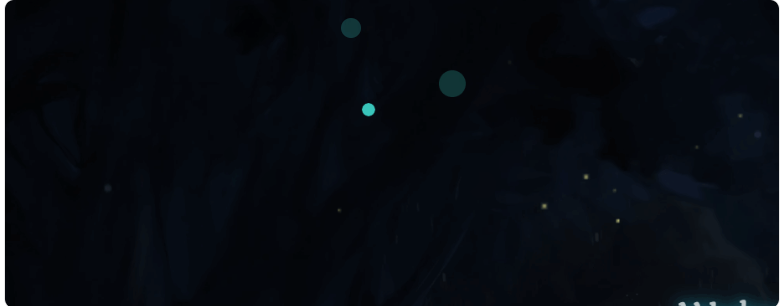
听话的鼠标魔改
效果预览 :
-
新建文件
[BlogRoot]\source\js\cursor.js,在里面写上如下代码:var CURSOR; Math.lerp = (a, b, n) => (1 - n) * a + n * b; const getStyle = (el, attr) => { try { return window.getComputedStyle ? window.getComputedStyle(el)[attr] : el.currentStyle[attr]; } catch (e) {} return ""; }; class Cursor { constructor() { this.pos = {curr: null, prev: null}; this.pt = []; this.create(); this.init(); this.render(); } move(left, top) { this.cursor.style["left"] = `${left}px`; this.cursor.style["top"] = `${top}px`; } create() { if (!this.cursor) { this.cursor = document.createElement("div"); this.cursor.id = "cursor"; this.cursor.classList.add("hidden"); document.body.append(this.cursor); } var el = document.getElementsByTagName('*'); for (let i = 0; i < el.length; i++) if (getStyle(el[i], "cursor") == "pointer") this.pt.push(el[i].outerHTML); document.body.appendChild((this.scr = document.createElement("style"))); // 这里改变鼠标指针的颜色 由svg生成 this.scr.innerHTML = `* {cursor: url("data:image/svg+xml,<svg xmlns='http://www.w3.org/2000/svg' viewBox='0 0 8 8' width='8px' height='8px'><circle cx='4' cy='4' r='4' opacity='.5'/></svg>") 4 4, auto}`; } refresh() { this.scr.remove(); this.cursor.classList.remove("hover"); this.cursor.classList.remove("active"); this.pos = {curr: null, prev: null}; this.pt = []; this.create(); this.init(); this.render(); } init() { document.onmouseover = e => this.pt.includes(e.target.outerHTML) && this.cursor.classList.add("hover"); document.onmouseout = e => this.pt.includes(e.target.outerHTML) && this.cursor.classList.remove("hover"); document.onmousemove = e => {(this.pos.curr == null) && this.move(e.clientX - 8, e.clientY - 8); this.pos.curr = {x: e.clientX - 8, y: e.clientY - 8}; this.cursor.classList.remove("hidden");}; document.onmouseenter = e => this.cursor.classList.remove("hidden"); document.onmouseleave = e => this.cursor.classList.add("hidden"); document.onmousedown = e => this.cursor.classList.add("active"); document.onmouseup = e => this.cursor.classList.remove("active"); } render() { if (this.pos.prev) { this.pos.prev.x = Math.lerp(this.pos.prev.x, this.pos.curr.x, 0.15); this.pos.prev.y = Math.lerp(this.pos.prev.y, this.pos.curr.y, 0.15); this.move(this.pos.prev.x, this.pos.prev.y); } else { this.pos.prev = this.pos.curr; } requestAnimationFrame(() => this.render()); } } (() => { CURSOR = new Cursor(); // 需要重新获取列表时,使用 CURSOR.refresh() })();其中比较重要的参数就是鼠标的尺寸和颜色,已经在上图中标出,目前发现颜色只支持RGB写法和固有名称写法(例如red这种),其他参数也可以自行摸索:
* {cursor: url("data:image/svg+xml,<svg xmlns='http://www.w3.org/2000/svg' viewBox='0 0 8 8' width='8px' height='8px'><circle cx='4' cy='4' r='4' opacity='1.0' fill='rgb(57, 197, 187)'/></svg>") 4 4, auto}` -
在
[BlogRoot]\source\css\custom.css添加如下代码:/* 鼠标样式 */ #cursor { position: fixed; width: 16px; height: 16px; /* 这里改变跟随的底色 */ background: var(--theme-color); border-radius: 8px; opacity: 0.25; z-index: 10086; pointer-events: none; transition: 0.2s ease-in-out; transition-property: background, opacity, transform; } #cursor.hidden { opacity: 0; } #cursor.hover { opacity: 0.1; transform: scale(2.5); -webkit-transform: scale(2.5); -moz-transform: scale(2.5); -ms-transform: scale(2.5); -o-transform: scale(2.5); } #cursor.active { opacity: 0.5; transform: scale(0.5); -webkit-transform: scale(0.5); -moz-transform: scale(0.5); -ms-transform: scale(0.5); -o-transform: scale(0.5); }这里比较重要的参数就是鼠标跟随的圆形颜色,可以根据自己的喜好进行更改:
#cursor { /* 这里改变跟随的底色 */ background: rgb(57, 197, 187); } -
在主题配置文件
_config.butterfly.yml文件的inject配置项引入刚刚创建的css文件和js文件:inject: head: + - <link rel="stylesheet" href="/css/custom.css"> bottom: + - <script defer src="/js/cursor.js"></script> -
重启项目即可看见效果:
hexo cl; hexo s
页面样式调节
这个教程是通过css样式调节各个页面透明度、模糊度(亚克力效果)、圆角、边框样式等,看起来会更加舒适。
-
复制以下代码进去自定义的
custom.css文件:root { --trans-light: rgba(255, 255, 255, 0.88); --trans-dark: rgba(25, 25, 25, 0.88); --border-style: 1px solid rgb(169, 169, 169); --backdrop-filter: blur(5px) saturate(150%); } /* 首页文章卡片 */ #recent-posts > .recent-post-item { background: var(--trans-light); backdrop-filter: var(--backdrop-filter); border-radius: 25px; border: var(--border-style); } /* 首页侧栏卡片 */ #aside-content .card-widget { background: var(--trans-light); backdrop-filter: var(--backdrop-filter); border-radius: 18px; border: var(--border-style); } /* 文章页、归档页、普通页面 */ div#post, div#page, div#archive { background: var(--trans-light); backdrop-filter: var(--backdrop-filter); border: var(--border-style); border-radius: 20px; } /* 导航栏 */ #page-header.nav-fixed #nav { background: rgba(255, 255, 255, 0.75); backdrop-filter: var(--backdrop-filter); } [data-theme="dark"] #page-header.nav-fixed #nav { background: rgba(0, 0, 0, 0.7) !important; } /* 夜间模式遮罩 */ [data-theme="dark"] #recent-posts > .recent-post-item, [data-theme="dark"] #aside-content .card-widget, [data-theme="dark"] div#post, [data-theme="dark"] div#archive, [data-theme="dark"] div#page { background: var(--trans-dark); } /* 夜间模式页脚页头遮罩透明 */ [data-theme="dark"] #footer::before { background: transparent !important; } [data-theme="dark"] #page-header::before { background: transparent !important; } /* 阅读模式 */ .read-mode #aside-content .card-widget { background: rgba(158, 204, 171, 0.5) !important; } .read-mode div#post { background: rgba(158, 204, 171, 0.5) !important; } /* 夜间模式下的阅读模式 */ [data-theme="dark"] .read-mode #aside-content .card-widget { background: rgba(25, 25, 25, 0.9) !important; color: #ffffff; } [data-theme="dark"] .read-mode div#post { background: rgba(25, 25, 25, 0.9) !important; color: #ffffff; } -
参数说明:
--trans-light:白天模式带透明度的背景色,如rgba(255, 255, 255, 0.88)底色是纯白色,其中0.88就透明度,在0-1之间调节,值越大越不透明;--trans-dark: 夜间模式带透明度的背景色,如rgba(25, 25, 25, 0.88)底色是柔和黑色,其中0.88就透明度,在0-1之间调节,值越大越不透明;--border-style: 边框样式,1px solid rgb(169, 169, 169)指宽度为1px的灰色实体边框;--backdrop-filter: 背景过滤器,如blur(5px) saturate(150%)表示饱和度为150%的、高斯模糊半径为5px的过滤器,这是亚克力效果的一种实现方法;- 大家可以根据自己喜好进行调节,不用拘泥于我的样式!
-
记住在主题配置文件
_config.butterfly.yml的inject配置项中引入该css文件:inject: head: + - <link rel="stylesheet" href="/css/custom.css"> -
重启项目即可看见效果:
hexo cl; hexo s
引入iconfont自定义图标
详见:Iconfont Inject
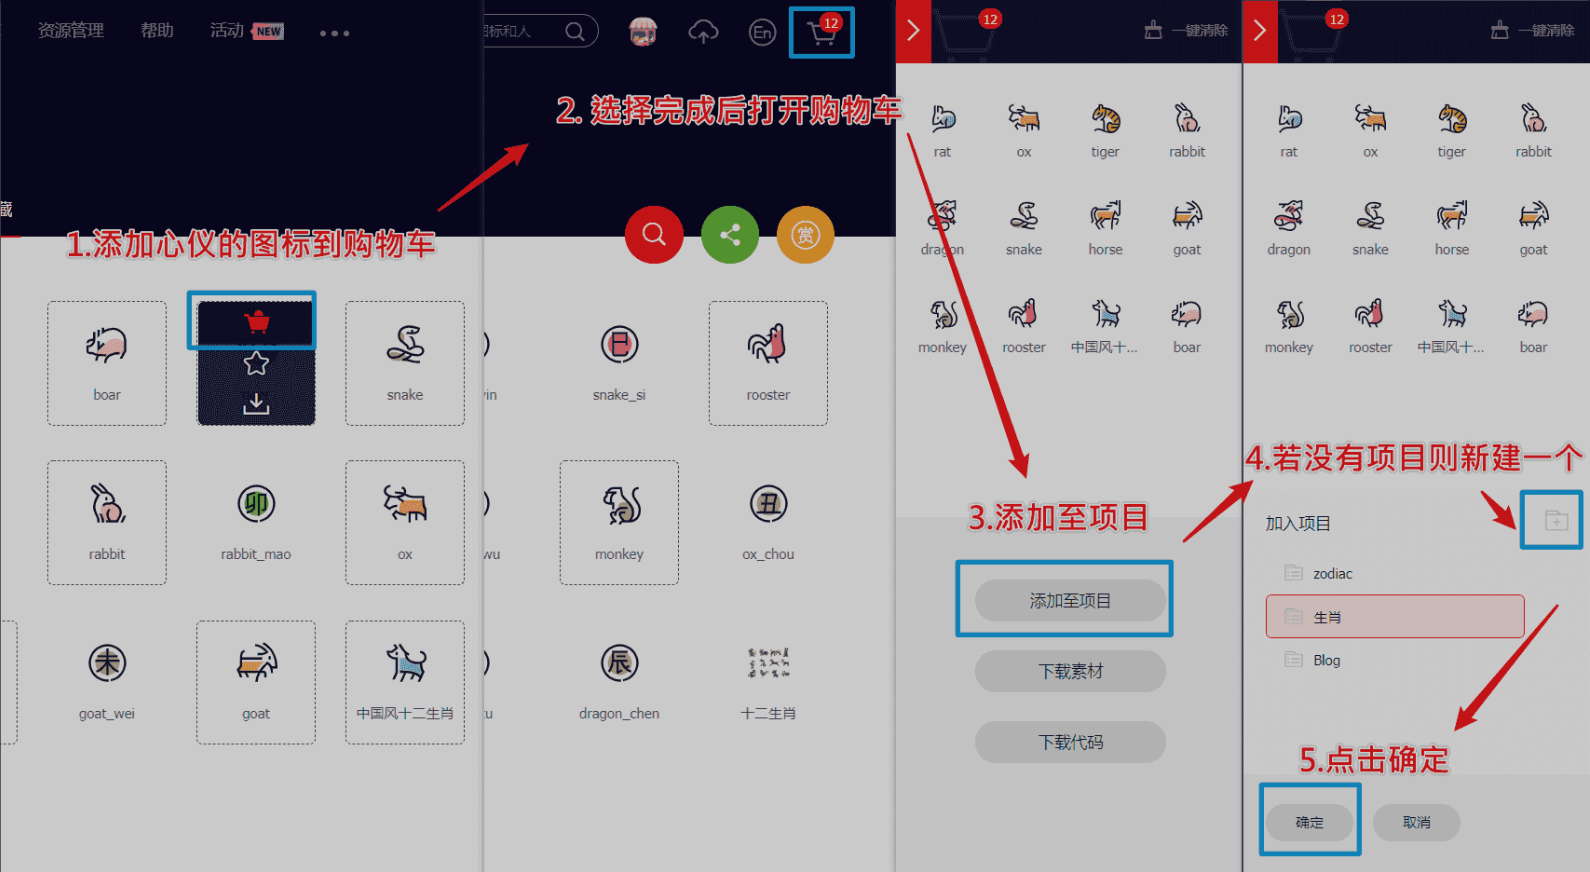
新建图标项目
-
访问阿里巴巴矢量图标库,注册登录。
-
搜索自己心仪的图标,然后选择添加入库,加到购物车。
-
选择完毕后点击右上角的购物车图标,打开侧栏,选择添加到项目,如果没有项目就新建一个。
-
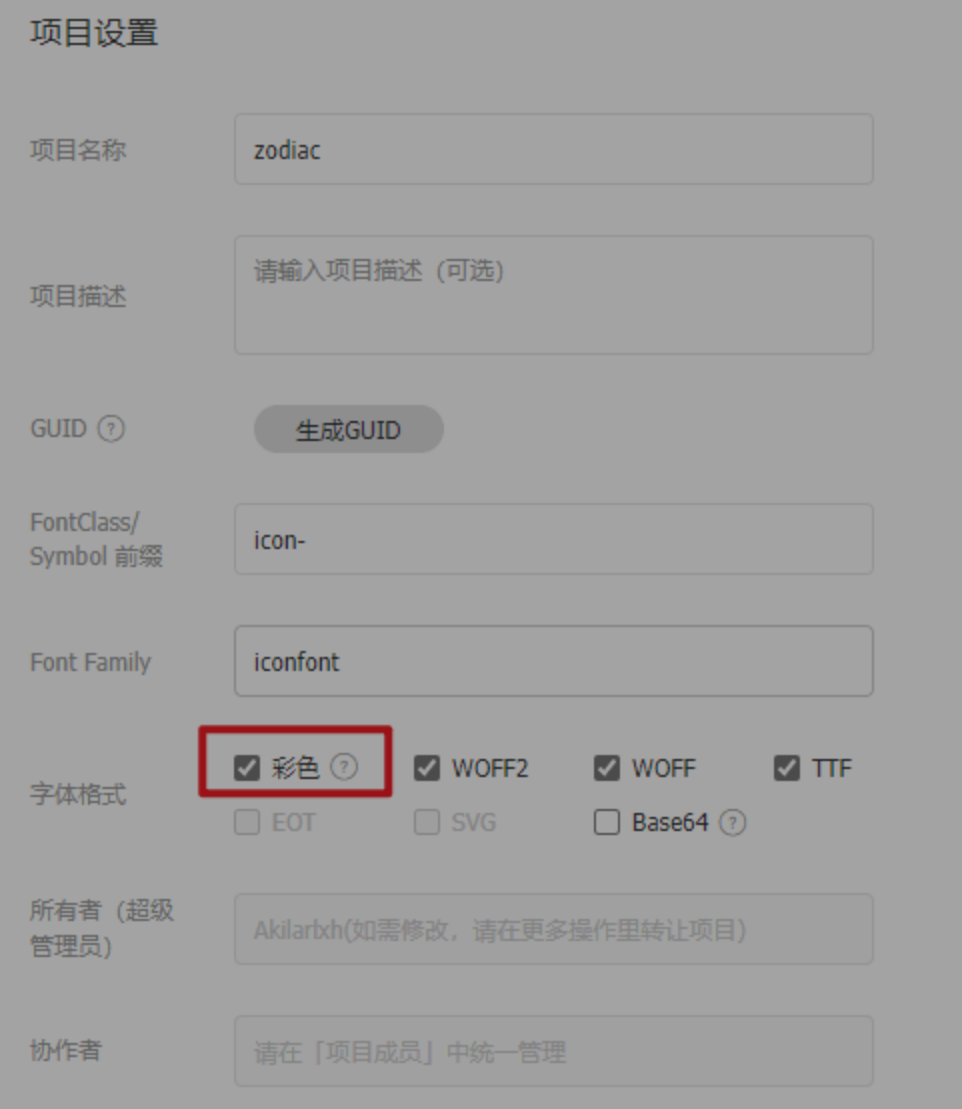
可以通过上方顶栏菜单->资源管理->我的项目,找到之前添加的图标项目。(现在的iconfont可以在图标库的项目设置里直接打开彩色设置,然后采用fontclass的引用方式即可使用多彩图标。但是单一项目彩色图标上限是40个图标,酌情采用。)

引入图标
线上引入方案,我使用的是官方文档中最便捷的font-class方案。这一方案偶尔会出现图标加载不出的情况。但是便于随时对图标库进行升级,换一下在线链接即可,适合新手使用。最新版本的iconfont支持直接在项目设置中开启彩色图标,从而实现直接用class添加多彩色图标。(推荐直接用这个即可)
-
在
[BlogRoot]\themes\butterfly\source\css\custom.css中填写如下内容,引入Unicode和Font-class的线上资源:@import "//at.alicdn.com/t/font_2264842_b004iy0kk2b.css";更推荐在在主题配置文件
inject配置项进行全局引入:inject: head: - <link rel="stylesheet" href="//at.alicdn.com/t/font_2264842_b004iy0kk2b.css" media="defer" οnlοad="this.media='all'"> bottom: - <script async src="//at.alicdn.com/t/font_2264842_b004iy0kk2b.js"></script> -
同时可以在自定义
CSS中添加如下样式来控制图标默认大小和颜色等属性(若已经在项目设置中勾选了彩色选项,则无需再定义图标颜色),写法与字体样式类似,这恐怕也是它被称为iconfont(图标字体)的原因 :.iconfont { font-family: "iconfont" !important; /* 这里可以自定义图标大小 */ font-size: 3em; font-style: normal; -webkit-font-smoothing: antialiased; -moz-osx-font-smoothing: grayscale; } -
可以通过自己的阿里图标库的font-class方案查询复制相应的
icon-xxxx。<i class="iconfont icon-rat"></i> <i class="iconfont icon-ox"></i> <i class="iconfont icon-tiger"></i> <i class="iconfont icon-rabbit"></i> <i class="iconfont icon-dragon"></i> <i class="iconfont icon-snake"></i> <i class="iconfont icon-horse"></i> <i class="iconfont icon-goat"></i> <i class="iconfont icon-monkey"></i> <i class="iconfont icon-rooster"></i>
渐变色版权美化
详见:(二创)Copyright-beautify
效果预览
-
修改
[BlogRoot]\themes\butterfly\layout\includes\post\post-copyright.pug,直接复制以下内容替换原文件内容。此处多次用到了三元运算符作为默认项设置,在确保有主题配置文件的默认项的情况下,也可以在相应文章的front-matter中重新定义作者,原文链接,开源许可协议等内容。if theme.post_copyright.enable && page.copyright !== false - let author = page.copyright_author ? page.copyright_author : config.author - let url = page.copyright_url ? page.copyright_url : page.permalink - let license = page.license ? page.license : theme.post_copyright.license - let license_url = page.license_url ? page.license_url : theme.post_copyright.license_url .post-copyright .post-copyright__title span.post-copyright-info h #[=page.title] .post-copyright__type span.post-copyright-info a(href=url_for(url))= theme.post_copyright.decode ? decodeURI(url) : url .post-copyright-m .post-copyright-m-info .post-copyright-a h 作者 .post-copyright-cc-info h=author .post-copyright-c h 发布于 .post-copyright-cc-info h=date(page.date, config.date_format) .post-copyright-u h 更新于 .post-copyright-cc-info h=date(page.updated, config.date_format) .post-copyright-c h 许可协议 .post-copyright-cc-info a.icon(rel='noopener' target='_blank' title='Creative Commons' href='https://creativecommons.org/') i.fab.fa-creative-commons a(rel='noopener' target='_blank' title=license href=url_for(license_url))=license -
修改
[BlogRoot]\themes\butterfly\source\css\_layout\post.styl,直接复制以下内容,替换原文件,这个文件就是自己调节样式的。其中,184行是白天模式的背景色,这里默认是我网站的渐变色,大家可以根据自己的喜好调节;253行是夜间模式的发光光圈颜色,大家也可以自行替换成自己喜欢的颜色:beautify() headStyle(fontsize) padding-left: unit(fontsize + 12, 'px') &:before margin-left: unit((-(fontsize + 6)), 'px') font-size: unit(fontsize, 'px') &:hover padding-left: unit(fontsize + 18, 'px') h1, h2, h3, h4, h5, h6 transition: all .2s ease-out &:before position: absolute top: calc(50% - 7px) color: $title-prefix-icon-color content: $title-prefix-icon line-height: 1 transition: all .2s ease-out @extend .fontawesomeIcon &:hover &:before color: $light-blue h1 headStyle(20) h2 headStyle(18) h3 headStyle(16) h4 headStyle(14) h5 headStyle(12) h6 headStyle(12) ol, ul p margin: 0 0 8px li &::marker color: $light-blue font-weight: 600 font-size: 1.05em &:hover &::marker color: var(--pseudo-hover) ul > li list-style-type: circle #article-container word-wrap: break-word overflow-wrap: break-word a color: $theme-link-color &:hover text-decoration: underline img display: block margin: 0 auto 20px max-width: 100% transition: filter 375ms ease-in .2s p margin: 0 0 16px iframe margin: 0 0 20px if hexo-config('anchor') a.headerlink &:after @extend .fontawesomeIcon float: right color: var(--headline-presudo) content: '\f0c1' font-size: .95em opacity: 0 transition: all .3s &:hover &:after color: var(--pseudo-hover) h1, h2, h3, h4, h5, h6 &:hover a.headerlink &:after opacity: 1 ol, ul ol, ul padding-left: 20px li margin: 4px 0 p margin: 0 0 8px if hexo-config('beautify.enable') if hexo-config('beautify.field') == 'site' beautify() else if hexo-config('beautify.field') == 'post' &.post-content beautify() > :last-child margin-bottom: 0 !important #post .tag_share .post-meta &__tag-list display: inline-block &__tags display: inline-block margin: 8px 8px 8px 0 padding: 0 12px width: fit-content border: 1px solid $light-blue border-radius: 12px color: $light-blue font-size: .85em transition: all .2s ease-in-out &:hover background: $light-blue color: var(--white) .post_share display: inline-block float: right margin: 8px 0 width: fit-content .social-share font-size: .85em .social-share-icon margin: 0 4px width: w = 1.85em height: w font-size: 1.2em line-height: w .post-copyright position: relative margin: 40px 0 10px padding: 10px 16px border: 1px solid var(--light-grey) transition: box-shadow .3s ease-in-out overflow: hidden border-radius: 12px!important background: linear-gradient(45deg, #f6d8f5, #c2f1f0, #f0debf); &:before background var(--heo-post-blockquote-bg) position absolute right -26px top -120px content '\f25e' font-size 200px font-family 'Font Awesome 5 Brands' opacity .2 &:hover box-shadow: 0 0 8px 0 rgba(232, 237, 250, .6), 0 2px 4px 0 rgba(232, 237, 250, .5) .post-copyright &-meta color: $light-blue font-weight: bold &-info padding-left: 6px a text-decoration: none word-break: break-word &:hover text-decoration: none .post-copyright-cc-info color: $theme-color; .post-outdate-notice position: relative margin: 0 0 20px padding: .5em 1.2em border-radius: 3px background-color: $noticeOutdate-bg color: $noticeOutdate-color if hexo-config('noticeOutdate.style') == 'flat' padding: .5em 1em .5em 2.6em border-left: 5px solid $noticeOutdate-border &:before @extend .fontawesomeIcon position: absolute top: 50% left: .9em color: $noticeOutdate-border content: '\f071' transform: translateY(-50%) .ads-wrap margin: 40px 0 .post-copyright-m-info .post-copyright-a, .post-copyright-c, .post-copyright-u display inline-block width fit-content padding 2px 5px [data-theme="dark"] #post .post-copyright background #07080a text-shadow #bfbeb8 0 0 2px border 1px solid rgb(19 18 18 / 35%) box-shadow 0 0 5px var(--theme-color) animation flashlight 1s linear infinite alternate .post-copyright-info color #e0e0e4 #post .post-copyright__title font-size 22px .post-copyright__notice font-size 15px .post-copyright box-shadow 2px 2px 5px -
默认项的配置
-
作者:
[BlogRoot]\_config.yml中的author配置项# Site title: Akilarの糖果屋 subtitle: Akilar.top description: keywords: author: Akilar #默认作者 language: zh-CN timezone: '' -
许可协议:
[BlogRoot]\_config.butterfly.yml中的license和license_url配置项post_copyright: enable: true decode: true license: CC BY-NC-SA 4.0 license_url: https://creativecommons.org/licenses/by-nc-sa/4.0/
-
-
页面覆写配置项,修改对应文章的
front-matter--- title: Copyright-beautify # 文章名称 date: 2021-03-02 13:52:46 # 文章发布日期 updated: 2021-03-02 13:52:46 # 文章更新日期 copyright_author: Nesxc # 作者覆写 copyright_url: https://www.nesxc.com/post/hexocc.html # 原文链接覆写 license: # 许可协议名称覆写 license_url: # 许可协议链接覆写 ---
aplayer音乐播放器
详见:Butterfly添加全局吸底Aplayer教程
效果预览
注意:我这里只在某个页面引入音乐播放器,如果要引入全局吸底的播放器,请见上面的链接。
-
在博客根目录
[BlogRoot]下打开终端,运行以下指令:npm install hexo-tag-aplayer --save -
在网站配置文件
_config.yml中修改aplayer配置项为:# 音乐插件 aplayer: meting: true asset_inject: false -
在主题配置文件
_config.butterfly.yml中修改aplayerInject配置项为:# Inject the css and script (aplayer/meting) aplayerInject: enable: true per_page: false -
在你想要加入音乐播放器的页面加入以下语句:
<div id="aplayer-oSEOhviA" class="aplayer aplayer-tag-marker meting-tag-marker" data-id="4895239160" data-server="netease" data-type="playlist" data-mode="random" data-autoplay="false" data-listmaxheight="340px" data-preload="auto" data-theme="#e3f2f5" data-volume="0.4" mutex="true"></div>其中
data-id为歌单ID可以换为你喜欢的歌曲,其他参数见详情页这里不再赘述!
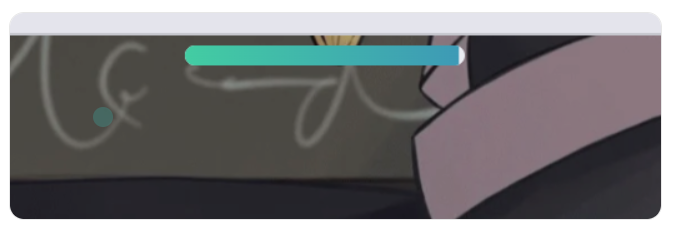
顶部渐变条色加载条
效果预览 :
-
新建
[BlogRoot]\source\css\progress_bar.css文件,写入以下内容(或者你在[BlogRoot]\source\css\custom.css直接加也行,最后在配置文件记得引入即可).pace { -webkit-pointer-events: none; pointer-events: none; -webkit-user-select: none; -moz-user-select: none; user-select: none; z-index: 2000; position: fixed; margin: auto; top: 4px; left: 0; right: 0; height: 8px; border-radius: 8px; width: 7rem; background: #eaecf2; border: 1px #e3e8f7; overflow: hidden } .pace-inactive .pace-progress { opacity: 0; transition: .3s ease-in } .pace .pace-progress { -webkit-box-sizing: border-box; -moz-box-sizing: border-box; -ms-box-sizing: border-box; -o-box-sizing: border-box; box-sizing: border-box; -webkit-transform: translate3d(0, 0, 0); -moz-transform: translate3d(0, 0, 0); -ms-transform: translate3d(0, 0, 0); -o-transform: translate3d(0, 0, 0); transform: translate3d(0, 0, 0); max-width: 200px; position: absolute; z-index: 2000; display: block; top: 0; right: 100%; height: 100%; width: 100%; /* linear-gradient(to right, #3494e6, #ec6ead) */ background: linear-gradient(to right, #43cea2, #3866ca); animation: gradient 2s ease infinite; background-size: 200% } .pace.pace-inactive { opacity: 0; transition: .3s; top: -8px } -
在主题配置文件
_config.butterfly.yml的inject配置项加入刚刚的css样式和必须的js依赖:inject: head: - xxx - <link rel="stylesheet" href="/css/progress_bar.css" media="defer" οnlοad="this.media='all'"> bottom: - xxx - <script async src="//npm.elemecdn.com/pace-js@1.2.4/pace.min.js"></script>
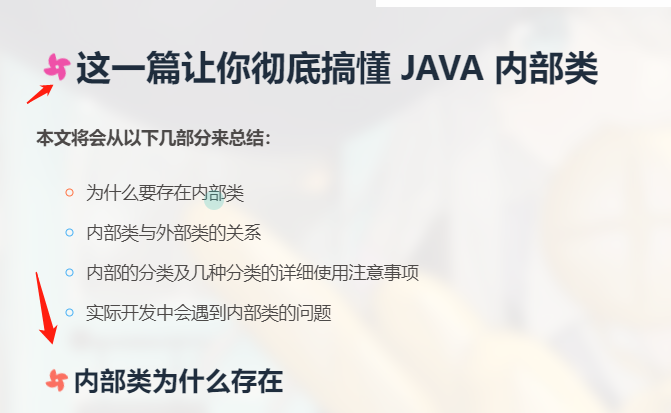
文章H1~H6标题小风车转动效果
效果预览 :
-
修改主题配置文件
_config.butterfly.yml文件的beautify配置项:beautify: enable: true field: post # site/post # title-prefix-icon: '\f0c1' 原内容 title-prefix-icon: '\f863' title-prefix-icon-color: "#F47466" -
在
[BlogRoot]\source\css\custom.css中加入以下代码,可以自己调节一下转速:/* 文章页H1-H6图标样式效果 */ /* 控制风车转动速度 4s那里可以自己调节快慢 */ h1::before, h2::before, h3::before, h4::before, h5::before, h6::before { -webkit-animation: ccc 4s linear infinite; animation: ccc 4s linear infinite; } /* 控制风车转动方向 -1turn 为逆时针转动,1turn 为顺时针转动,相同数字部分记得统一修改 */ @-webkit-keyframes ccc { 0% { -webkit-transform: rotate(0deg); transform: rotate(0deg); } to { -webkit-transform: rotate(-1turn); transform: rotate(-1turn); } } @keyframes ccc { 0% { -webkit-transform: rotate(0deg); transform: rotate(0deg); } to { -webkit-transform: rotate(-1turn); transform: rotate(-1turn); } } /* 设置风车颜色 */ #content-inner.layout h1::before { color: #ef50a8; margin-left: -1.55rem; font-size: 1.3rem; margin-top: -0.23rem; } #content-inner.layout h2::before { color: #fb7061; margin-left: -1.35rem; font-size: 1.1rem; margin-top: -0.12rem; } #content-inner.layout h3::before { color: #ffbf00; margin-left: -1.22rem; font-size: 0.95rem; margin-top: -0.09rem; } #content-inner.layout h4::before { color: #a9e000; margin-left: -1.05rem; font-size: 0.8rem; margin-top: -0.09rem; } #content-inner.layout h5::before { color: #57c850; margin-left: -0.9rem; font-size: 0.7rem; margin-top: 0rem; } #content-inner.layout h6::before { color: #5ec1e0; margin-left: -0.9rem; font-size: 0.66rem; margin-top: 0rem; } /* s设置风车hover动效 6s那里可以自己调节快慢*/ #content-inner.layout h1:hover, #content-inner.layout h2:hover, #content-inner.layout h3:hover, #content-inner.layout h4:hover, #content-inner.layout h5:hover, #content-inner.layout h6:hover { color: var(--theme-color); } #content-inner.layout h1:hover::before, #content-inner.layout h2:hover::before, #content-inner.layout h3:hover::before, #content-inner.layout h4:hover::before, #content-inner.layout h5:hover::before, #content-inner.layout h6:hover::before { color: var(--theme-color); -webkit-animation: ccc 6s linear infinite; animation: ccc 6s linear infinite; }
网站恶搞标题
效果预览 :
-
新建文件
[BlogRoot]\source\js\title.js,写入以下内容://动态标题 var OriginTitile = document.title; var titleTime; document.addEventListener('visibilitychange', function () { if (document.hidden) { //离开当前页面时标签显示内容 document.title = '👀跑哪里去了~'; clearTimeout(titleTime); } else { //返回当前页面时标签显示内容 document.title = '🐖抓到你啦~'; //两秒后变回正常标题 titleTime = setTimeout(function () { document.title = OriginTitile; }, 2000); } }); -
在主题配置文件
_config.butterfly.yml引入该文件:inject: bottom: + - <script async src="/js/title.js"></script> -
重启项目:
hexo cl; hexo s
右边滚动栏样式
效果预览 :
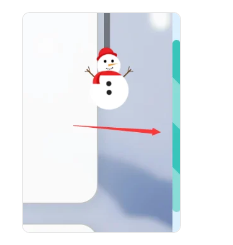
- 在
custom.css中加入以下代码,其中var(--theme-color)换成你自己的主题色:
/* 滚动条样式 */
::-webkit-scrollbar {
  width: 8px;
  height: 8px;
}

::-webkit-scrollbar-track {
  background-color: rgba(73, 177, 245, 0.2);
  border-radius: 2em;
}

::-webkit-scrollbar-thumb {
  background-color: var(--theme-color);
  background-image: -webkit-linear-gradient(
    45deg,
    rgba(255, 255, 255, 0.4) 25%,
    transparent 25%,
    transparent 50%,
    rgba(255, 255, 255, 0.4) 50%,
    rgba(255, 255, 255, 0.4) 75%,
    transparent 75%,
    transparent
  );
  border-radius: 2em;
}

::-webkit-scrollbar-corner {
  background-color: transparent;
}

::-moz-selection {
  color: #fff;
  background-color: var(--theme-color);
}
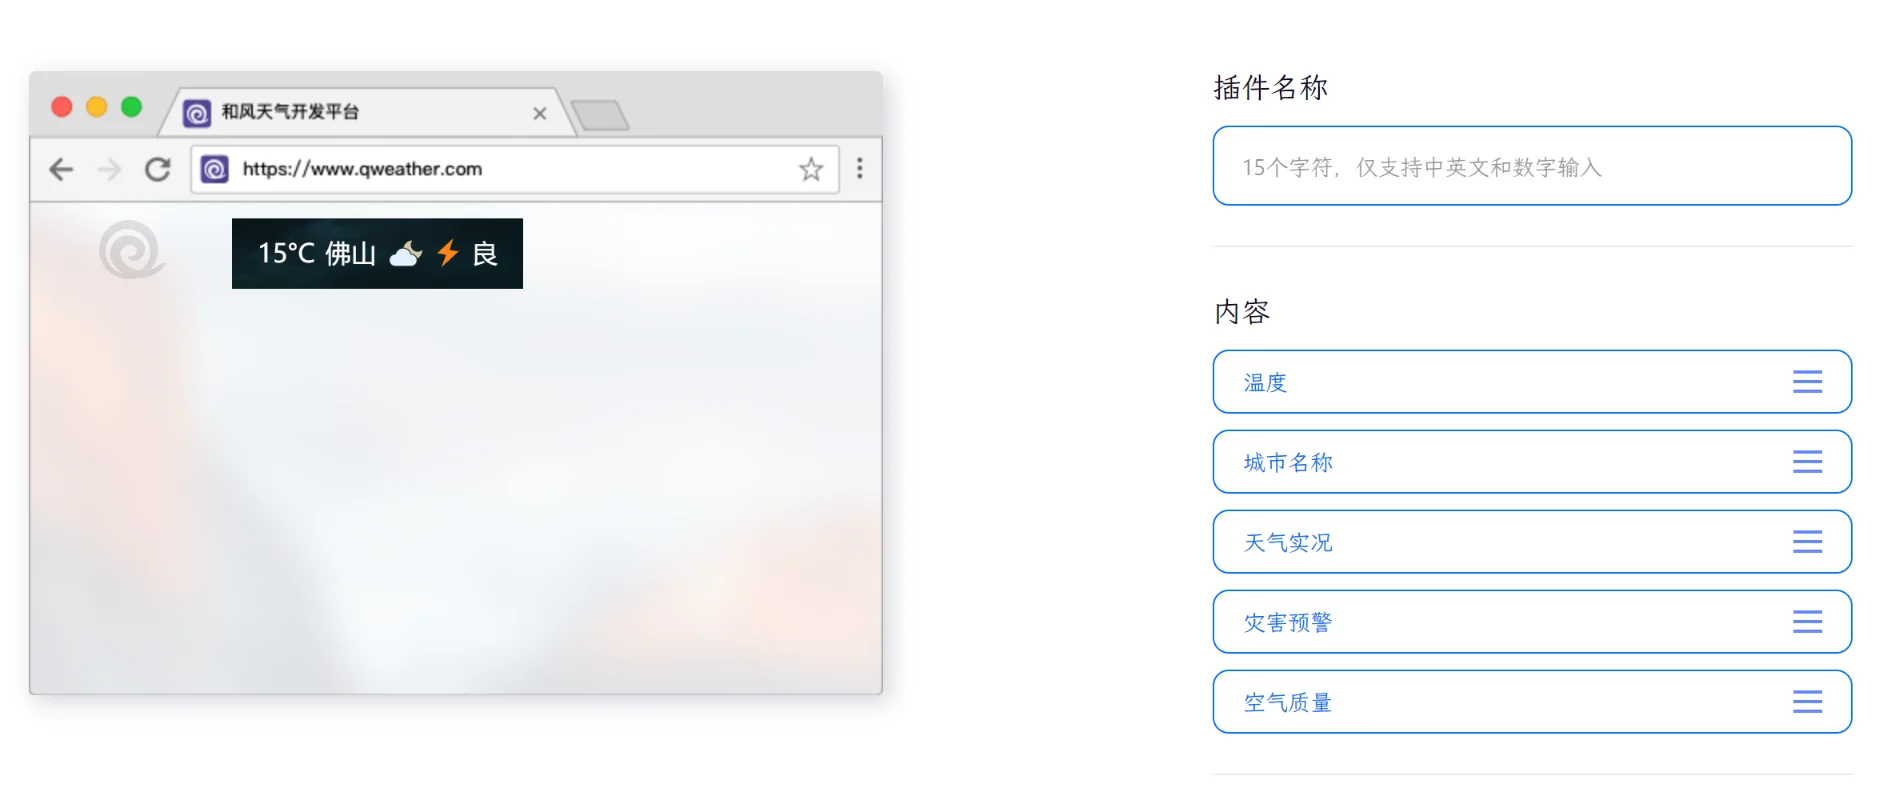
导航栏和风天气
效果预览 :

详见:Hexo在顶部增加天气小部件
效果预览
-
在和风天气插件中创建一个模板,点击生成代码:
-
创建文件
[BlogRoot]\source\js\weather.js,将生成的代码写入,例如:WIDGET = { "CONFIG": { "modules": "01234", "background": "5", "tmpColor": "FF9900", "tmpSize": "16", "cityColor": "CCCCCC", "citySize": "16", "aqiColor": "D9D9D9", "aqiSize": "16", "weatherIconSize": "24", "alertIconSize": "18", "padding": "15px 10px 10px 20px", "shadow": "0", "language": "auto", "borderRadius": "5", "fixed": "false", "vertical": "top", "horizontal": "left", "key": "...." } } -
在主题配置文件
_config.butterfly.yml的inject的bottom处引入:inject: bottom: + - <script src="https://widget.qweather.net/simple/static/js/he-simple-common.js?v=2.0"></script> + - <script src="/js/weather.js"></script> -
接下来要挂载到导航栏:在
[BlogRoot]\themes\butterfly\layout\includes\header\nav.pug中加入一个元素,这个元素就是用来放天气组件的:nav#nav span#blog_name a#site-name(href=url_for('/')) #[=config.title] + #he-plugin-simple -
上述操作可以将天气组件成功展示在导航栏中间,如果想要调整该组件位置到
blog_name旁,可以直接修改weather.js中的padding项(不推荐),当然推荐在nav.pug中添加一个占位组件:nav#nav span#blog_name a#site-name(href=url_for('/')) #[=config.title] #he-plugin-simple + #none_space -
然后在
[BlogRoot]\themes\butterfly\source\css\_layout\head.styl中将#blog_name替换为#none_space:- #blog_name + #none_space flex: 1 -
重启项目即可看到效果:
hexo cl; hexo s
Hexo博客如何迁移到新电脑
参考教程:CSDN:Hexo博客迁移到新电脑
-
在新电脑行进行环境准备工作,具体的步骤和Hexo博客搭建基础教程(一)的第1-7步一模一样,大家在新电脑上跟着做即可(注意千万不要做第8步,
hexo init blog-demo这一步会覆盖并还原你原本的的源码文件) -
这时候新建一个文件夹
new-blog,用来装你的新博客源码的,进入这个文件夹,准备复制我们旧的博客源码进来,我们可以看到旧的博客项目结构是如下样子的:
这里红框内的都是需要复制迁移到新的博客的,具体的要不要保留见下表:
需要复制的 需要删除的 _config.yml:站点配置文件 .git:无论是在站点根目录下,还是主题目录下的.git文件,都可以删掉 _config.butterfly.yml:主题配置文件,为了方便主题升级剥离出来的配置文件 node_modules: npm install会根据package.json生成package.json:说明使用哪些依赖包 public: hexo g会重新编译生成scaffolds:文章的模板 .deploy_git:在使用 hexo d时也会重新生成source:自己写的博客源码 db.json文件: hexo s快速启动所需的数据库themes:主题文件夹(魔改都在里面啦) package-lock.json:记录依赖之间的内部依赖关系,可以根据 package.json重新生成.gitignore:说明在提交时哪些文件可以忽略 -
复制所需的文件到新电脑的文件夹之后,在
git bash中切换目录到新拷贝的文件夹里,使用npm install命令,进行模块安装。这里绝对不能使用hexo init初始化,因为有的文件我们已经拷贝生成过来了,所以不必用hexo init去整体初始化,如果不慎用了,则站点的配置文件_config.yml里面内容会被重置,所以这一步一定要慎重:npm i -
执行以下命令情况并启动项目,进入
localhost:4000进行验证:hexo cl; hexo g; hexo s -
当本地能成功启动,之后就可以部署到Github,执行以下代码:
hexo d如果出现
Deploy done,则说明部署成功,稍等两分钟,打开浏览器访问之前的域名就可以看到之前的博客,以后你可以在这台新电脑上魔改和写文章了~
gulp压缩全局资源(店长)
参考教程:使用gulp压缩博客静态资源
Github Action自动部署(店长)
参考教程:使用Github Action实现全自动部署
Live2D教程
效果预览 :
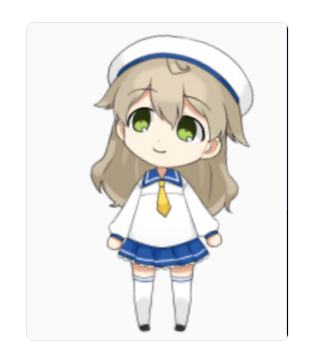
目前只推荐这个(因为消耗资源较少),这是博客自带的看板娘,这孩子不会说话也不能换装,只会跟着你的鼠标晃动脑袋,不过有几款超可爱。
安装
-
在Hexo根目录
[BlogRoot]下打开终端,输入以下指令安装必要插件:npm install --save hexo-helper-live2d -
打开站点配置文件
[BlogRoot]\config.yml
搜索live2d,按照如下注释内容指示进行操作。
如果没有搜到live2d的配置项,就直接把以下内容复制到最底部。# Live2D ## https://github.com/EYHN/hexo-helper-live2d live2d: enable: true #开关插件版看板娘 scriptFrom: local # 默认 pluginRootPath: live2dw/ # 插件在站点上的根目录(相对路径) pluginJsPath: lib/ # 脚本文件相对与插件根目录路径 pluginModelPath: assets/ # 模型文件相对与插件根目录路径 # scriptFrom: jsdelivr # jsdelivr CDN # scriptFrom: unpkg # unpkg CDN # scriptFrom: https://npm.elemecdn.com/live2d-widget@3.x/lib/L2Dwidget.min.js # 你的自定义 url tagMode: false # 标签模式, 是否仅替换 live2d tag标签而非插入到所有页面中 debug: false # 调试, 是否在控制台输出日志 model: use: live2d-widget-model-wanko # npm-module package name # use: wanko # 博客根目录/live2d_models/ 下的目录名 # use: ./wives/wanko # 相对于博客根目录的路径 # use: https://npm.elemecdn.com/live2d-widget-model-wanko@1.0.5/assets/wanko.model.json # 你的自定义 url display: position: right #控制看板娘位置 width: 150 #控制看板娘大小 height: 300 #控制看板娘大小 mobile: show: true # 手机中是否展示 -
完成后保存修改,在Hexo根目录下运行指令。
hexo clean
hexo g
hexo s
之所以必须要使用
hexo clean是因为我们需要清空缓存重新生成静态页面,不然看板娘没被加入生成的静态页面里,是不会出现的。
更换
-
同样是在Hexo根目录
[BlogRoot]下,打开终端,选择想要的看板娘进行安装,例如我这里用到的是live2d-widget-model-koharu,一个Q版小正太。其他的模型也可以在模型预览里查看以供选择。 -
输入指令
npm install --save live2d-widget-model-koharu -
然后在站点配置文件
[BlogRoot]\_config.yml里找到model项修改为期望的模型model: use: live2d-widget-model-koharu # 默认为live2d-widget-model-wanko -
之后按部就班的运行
hexo clean
hexo g
hexo s
就能在
localhost:4000上查看效果了。
卸载看板娘
卸载插件和卸载模型的指令都是通过npm进行操作的。在博客根目录[BlogRoot]打开终端,输入:
npm uninstall hexo-helper-live2d #卸载看板娘插件
npm uninstall live2d-widget-model-modelname #卸载看板娘模型。记得替换modelname为看板娘名称
卸载后为了保证配置项不出错,记得把[BlogRoot]\_config.yml里的配置项给注释或者删除掉。
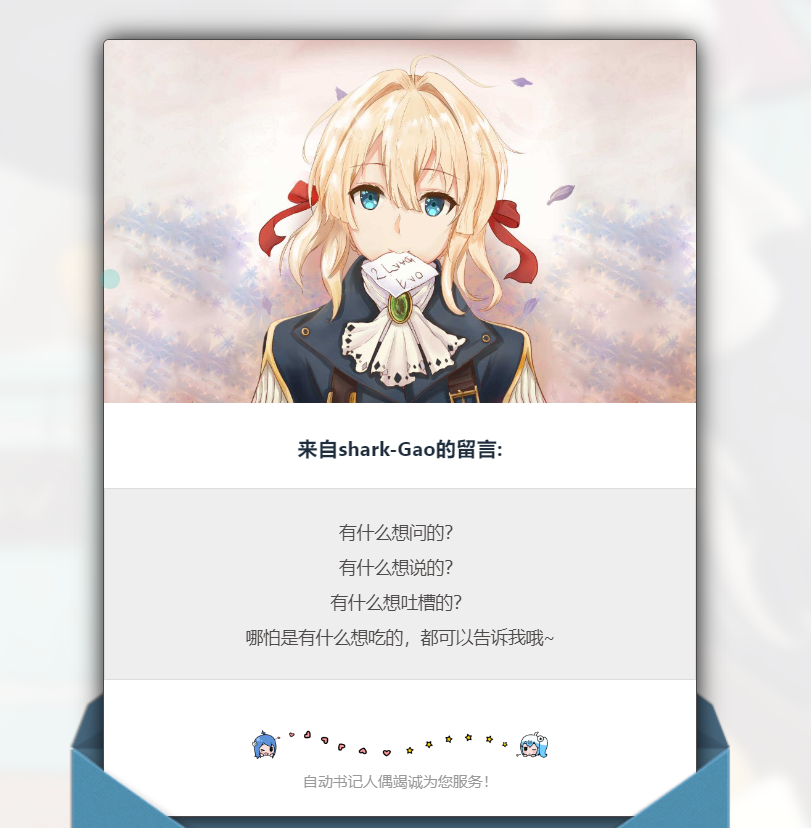
violet留言板(店长)
效果预览 :
-
在
[BlogRoot]运行指令npm install hexo-butterfly-envelope --save -
在站点配置文件
_config.yml或主题配置文件_config.butterfly.yml添加以下配置项# envelope_comment # see https://akilar.top/posts/e2d3c450/ envelope_comment: enable: true #控制开关 custom_pic: cover: https://npm.elemecdn.com/hexo-butterfly-envelope/lib/violet.jpg #信笺头部图片 line: https://npm.elemecdn.com/hexo-butterfly-envelope/lib/line.png #信笺底部图片 beforeimg: https://npm.elemecdn.com/hexo-butterfly-envelope/lib/before.png # 信封前半部分 afterimg: https://npm.elemecdn.com/hexo-butterfly-envelope/lib/after.png # 信封后半部分 message: #信笺正文,多行文本,写法如下 - 有什么想问的? - 有什么想说的? - 有什么想吐槽的? - 哪怕是有什么想吃的,都可以告诉我哦~ bottom: 自动书记人偶竭诚为您服务! #仅支持单行文本 height: #1050px,信封划出的高度 path: #【可选】comments 的路径名称。默认为 comments,生成的页面为 comments/index.html front_matter: #【可选】comments页面的 front_matter 配置 title: 留言板 comments: true
一图流教程
效果预览 :
-
在
[BlogRoot]\source文件夹下新建一个文件夹css,该文件夹用于存放自定义的css样式,再新建一个名为custom.css,在里面写入以下代码:/* 页脚与头图透明 */ #footer { background: transparent !important; } #page-header { background: transparent !important; } /* 白天模式遮罩透明 */ #footer::before { background: transparent !important; } #page-header::before { background: transparent !important; } /* 夜间模式遮罩透明 */ [data-theme="dark"] #footer::before { background: transparent !important; } [data-theme="dark"] #page-header::before { background: transparent !important; } -
在主题配置文件
[BlogRoot]\_config.butterfly.yml文件中的inject配置项的head子项加入以下代码,代表引入刚刚创建的custom.css文件(这是相对路径的写法)inject: head: - <link rel="stylesheet" href="/css/custom.css" media="defer" οnlοad="this.media='all'"> -
在主题配置文件
[BlogRoot]\_config.butterfly.yml文件中的index_img和footer_bg配置项取消头图与页脚图的加载项避免冗余加载# The banner image of home page index_img: # Footer Background footer_bg: false -
部分人反映一图流改完了背景图也没了,那大概率是你之前没设置背景图。在主题配置文件
[BlogRoot]\_config.butterfly.yml文件中的background配置项设置背景图background: url(https://source.fomal.cc/img/home_bg.webp)
页脚Github徽标(店长)
效果预览 :

-
安装插件,在博客根目录
[BlogRoot]下打开终端,运行以下指令:npm install hexo-butterfly-footer-beautify --save -
添加配置信息,以下为写法示例
在站点配置文件_config.yml或者主题配置文件_config.butterfly.yml中添加(这是我的配置)# footer_beautify # 页脚计时器:[Native JS Timer](https://akilar.top/posts/b941af/) # 页脚徽标:[Add Github Badge](https://akilar.top/posts/e87ad7f8/) footer_beautify: enable: timer: true # 计时器开关 bdage: true # 徽标开关 priority: 5 #过滤器优先权 enable_page: all # 应用页面 exclude: #屏蔽页面 # - /posts/ # - /about/ layout: # 挂载容器类型 type: id name: footer-wrap index: 0 # 计时器部分配置项(看你喜欢哪个,最好下载下来放到自己的项目中不然会增加我网站的负载) # 这是我的 # runtime_js: https://www.fomal.cc/static/js/runtime.js # runtime_css: https://www.fomal.cc/static/css/runtime.min.css # 这是店长的 runtime_js: https://npm.elemecdn.com/hexo-butterfly-footer-beautify@1.0.0/lib/runtime.js runtime_css: https://npm.elemecdn.com/hexo-butterfly-footer-beautify@1.0.0/lib/runtime.css # 徽标部分配置项 swiperpara: 0 #若非0,则开启轮播功能,每行徽标个数 bdageitem: - link: https://hexo.io/ #徽标指向网站链接 shields: https://img.shields.io/badge/Frame-Hexo-blue?style=flat&logo=hexo #徽标API message: 博客框架为Hexo_v6.2.0 #徽标提示语 - link: https://butterfly.js.org/ shields: https://img.shields.io/badge/Theme-Butterfly-6513df?style=flat&logo=bitdefender message: 主题版本Butterfly_v4.3.1 - link: https://vercel.com/ shields: https://img.shields.io/badge/Hosted-Vercel-brightgreen?style=flat&logo=Vercel message: 本站采用多线部署,主线路托管于Vercel - link: https://dashboard.4everland.org/ # https://img.shields.io/badge/Hosted-4EVERLAND-3FE2C1?style=flat&logo=IPFS shields: https://img.shields.io/badge/Hosted-4EVERLAND-22DDDD?style=flat&logo=IPFS message: 本站采用多线部署,备用线路托管于4EVERLAND - link: https://github.com/ shields: https://img.shields.io/badge/Source-Github-d021d6?style=flat&logo=GitHub message: 本站项目由Github托管 - link: http://creativecommons.org/licenses/by-nc-sa/4.0/ shields: https://img.shields.io/badge/Copyright-BY--NC--SA%204.0-d42328?style=flat&logo=Claris message: 本站采用知识共享署名-非商业性使用-相同方式共享4.0国际许可协议进行许可 swiper_css: https://npm.elemecdn.com/hexo-butterfly-swiper/lib/swiper.min.css swiper_js: https://npm.elemecdn.com/hexo-butterfly-swiper/lib/swiper.min.js swiperbdage_init_js: https://npm.elemecdn.com/hexo-butterfly-footer-beautify/lib/swiperbdage_init.min.js -
参数释义
| 参数 | 备选值/类型 | 释义 |
|---|---|---|
| priority | number | 【可选】过滤器优先级,数值越小,执行越早,默认为10,选填 |
| enable.timer | true/false | 【必选】计时器控制开关 |
| enable.bdage | true/false | 【必选】徽标控制开关 |
| enable_page | path | 【可选】填写想要应用的页面,如根目录就填’/‘,分类页面就填’/categories/‘。若要应用于所有页面,就填all,默认为all |
| exclude | path | 【可选】填写想要屏蔽的页面,可以多个。仅当enable_page为’all’时生效。写法见示例。原理是将屏蔽项的内容逐个放到当前路径去匹配,若当前路径包含任一屏蔽项,则不会挂载。 |
| layout.type | id/class | 【可选】挂载容器类型,填写id或class,不填则默认为id |
| layout.name | text | 【必选】挂载容器名称 |
| layout.index | 0和正整数 | 【可选】前提是layout.type为class,因为同一页面可能有多个class,此项用来确认究竟排在第几个顺位 |
| runtime_js | url | 【必选】页脚计时器脚本,可以下载上文填写示例的链接,参照注释和教程:Native JS Timer自行修改。 |
| runtime_css | url | 【可选】自定义样式,预留开发者接口,可自行下载。 |
| swiperpara | number | 【可选】若非零,则开启轮播功能,此项表示每行最多容纳徽标个数,用来应对徽标过多显得页脚拥挤的问题 |
| bdageitem.link | url | 【可选】页脚徽标指向的网站链接 |
| bdageitem.shields | url | 【必选】页脚徽标对应的API,API具体写法示例参照教程Add Github Badge |
| bdageitem.message | text | 【可选】页脚徽标悬停时显示的信息 |
| swiper_css | url | 【可选】swiper的依赖 |
| swiper_js | url | 【可选】swiper的依赖 |
| swiperbdage_init_js | url | 【可选】swiper初始化方法 |
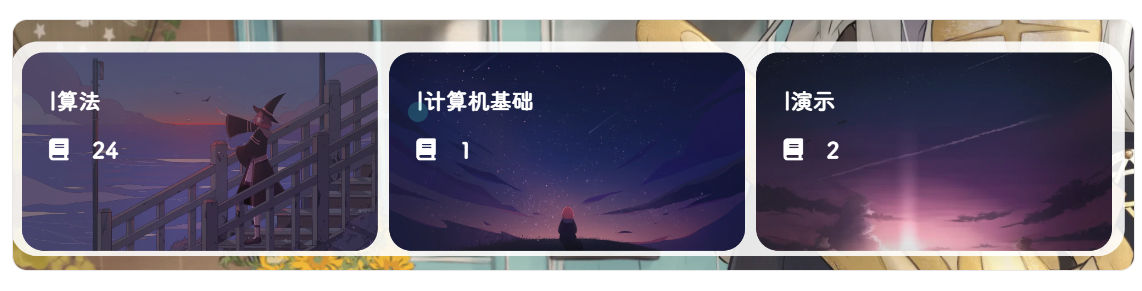
首页分类磁贴新版(店长)
-
安装插件,在博客根目录
[BlogRoot]下打开终端,运行以下指令:npm install hexo-butterfly-categories-card --save -
添加配置信息,以下为写法示例
在站点配置文件_config.yml或者主题配置文件_config.butterfly.yml中添加以下代码,注意要根据他的默认描述排序改为你自己对应的分类名字:# hexo-butterfly-categories-card # see https://akilar.top/posts/a9131002/ categoryBar: enable: true # 开关 priority: 5 #过滤器优先权 enable_page: / # 应用页面 layout: # 挂载容器类型 type: id name: recent-posts index: 0 column: odd # odd:3列 | even:4列 row: 1 #显示行数,默认两行,超过行数切换为滚动显示 message: - descr: Ubuntu指南 cover: https://assets.akilar.top/image/cover1.webp - descr: 玩转Win10 cover: https://assets.akilar.top/image/cover2.webp - descr: 长篇小说连载 cover: https://assets.akilar.top/image/cover3.webp - descr: 个人日记 cover: https://assets.akilar.top/image/cover4.webp - descr: 诗词歌赋 cover: https://assets.akilar.top/image/cover5.webp - descr: 杂谈教程 cover: https://assets.akilar.top/image/cover6.webp custom_css: https://npm.elemecdn.com/hexo-butterfly-categories-card@1.0.0/lib/categorybar.css -
参数释义
| 参数 | 备选值/类型 | 释义 |
|---|---|---|
| priority | number | 【可选】过滤器优先级,数值越小,执行越早,默认为10,选填 |
| enable | true/false | 【必选】控制开关 |
| enable_page | path/all | 【可选】填写想要应用的页面的相对路径(即路由地址),如根目录就填’/‘,分类页面就填’/categories/‘。若要应用于所有页面,就填’all’,默认为’/‘ |
| layout.type | id/class | 【可选】挂载容器类型,填写id或class,不填则默认为id |
| layout.name | text | 【必选】挂载容器名称 |
| layout.index | 0和正整数 | 【可选】前提是layout.type为class,因为同一页面可能有多个class,此项用来确认究竟排在第几个顺位 |
| column | odd/even | 【可选】显示列数,考虑到比例问题,只提供3列和4列,odd为3列, even为4列 |
| row | number | 【可选】显示行数,默认两行,超过行数切换为滚动显示 |
| message.descr | text | 分类描述,需要和你自己的文章分类一一对应。 |
| message.cover | url | 分类背景,需要和你自己的文章分类一一对应。 |
| custom_css | url | 【可选】自定义样式,会替换默认的css链接,可以下载文档给出的cdn链接后自主修改 |
首页分类磁贴1.0(小冰)
效果预览 :
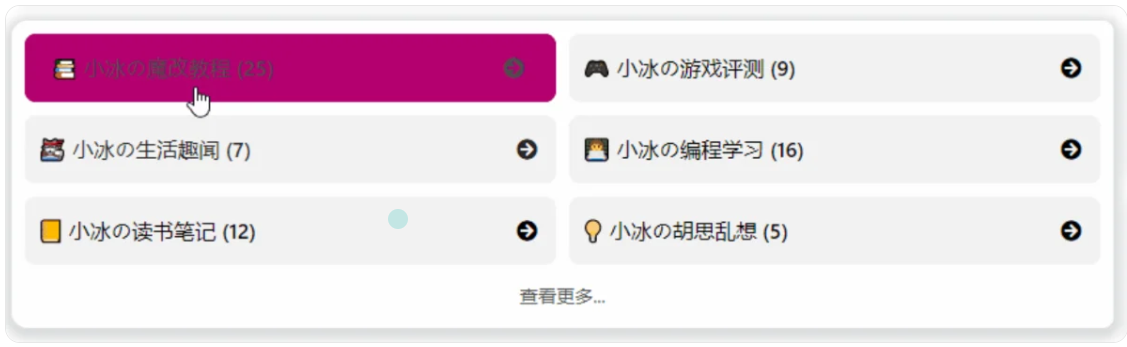
这个插件主要实现了以下功能:
- 自定义 tags 或 categories 的排列和展示
- 自定义 tags 或 categories 的展示图标,名称
- 自定义排列的行数,默认 2 行
教程:
-
在博客根目录
[BlogRoot]下打开终端,运行以下指令:npm i hexo-magnet --save注意,一定要加
--save,不然本地预览的时候可能不会显示!!! -
在网站配置文件
_config.yml新增以下项 (注意不是主题配置文件),这里的分类名字必须和你文章的分类名字一一对应:magnet: enable: true priority: 1 enable_page: / type: categories devide: 2 display: - name: 教程 display_name: 小冰の魔改教程 icon: 📚 - name: 游戏评测 display_name: 小冰の游戏评测 icon: 🎮 - name: 生活趣闻 display_name: 小冰の生活趣闻 icon: 🐱👓 - name: vue display_name: 小冰の编程学习 icon: 👩💻 - name: 学习 display_name: 小冰の读书笔记 icon: 📒 - name: 随想 display_name: 小冰の胡思乱想 icon: 💡 color_setting: text_color: black text_hover_color: white background_color: "#f2f2f2" background_hover_color: "#b30070" layout: type: id name: recent-posts index: 0 temple_html: '<div class="recent-post-item" style="width:100%;height: auto"><div id="catalog_magnet">${temple_html_item}</div></div>' plus_style: "" -
配置项的含义:
-
enable
参数:true/false
含义:是否开启插件 -
enable_page
参数:/
含义:路由地址,如 / 代表主页。/me/ 代表自我介绍页等等 -
priority
参数:1
含义:插件的叠放顺序,数字越大,叠放约靠前。 -
type
参数:categories/tags
含义:选择筛选分类还是标签 -
devide
参数:2
含义:表示分隔的列数,2 表示分为两列展示 -
display
参数:
- name: 教程 # 这里是tags或者categories的名称
  display_name: 小冰の魔改教程 # 这里是替换的名称
  icon: 📚 # 这里是展示的图标
含义:配置项,可自行设置,按照设置的顺序展示
-
color_setting
参数:
text_color: black # 文字默认颜色
text_hover_color: white # 文字鼠标悬浮颜色
background_color: "#f2f2f2" # 文字背景默认颜色
background_hover_color: "#b30070" # 文字背景悬浮颜色
含义:颜色配置项,可自行设置
-
layout
参数:type; (class&id)
参数:name;
参数:index;(数字)
含义:如果说 magnet 是一幅画,那么这个 layout 就是指定了哪面墙来挂画
而在 HTML 的是世界里有两种墙分别 type 为 id 和 class。
其中在定义 class 的时候会出现多个 class 的情况,这时就需要使用 index,确定是哪一个。
最后墙的名字即是 name;<div name="我是墙" id="recent-posts"> <!-- id=>type recent-posts=>name --> <div name="我是画框"> <div name="我是纸"> <!--这里通过js挂载magnet,也就是画画--> </div> </div> </div> -
temple_html
参数:html 模板字段
含义:包含挂载容器<div class="recent-post-item" style="width:100%;height: auto"> <!--文章容器--> <div id="catalog_magnet"> <!--挂载容器--> ${temple_html_item} </div> </div> -
plus_style
参数:“”
含义:提供可自定义的 style,如加入黑夜模式。
-
-
执行 hexo 三连
hexo clean hexo g hexo s -
我们可以看到黑夜模式看起来特别的别扭,因此还要做一下黑夜模式的颜色适配,在
custom.css文件中添加以下代码适配黑夜模式(具体颜色可以自己调节):/* 小冰分类分类磁铁黑夜模式适配 */ /* 一般状态 */ [data-theme="dark"] .magnet_link_context { background: #1e1e1e; color: antiquewhite; } /* 鼠标悬浮状态 */ [data-theme="dark"] .magnet_link_context:hover { background: #3ecdf1; color: #f2f2f2; }
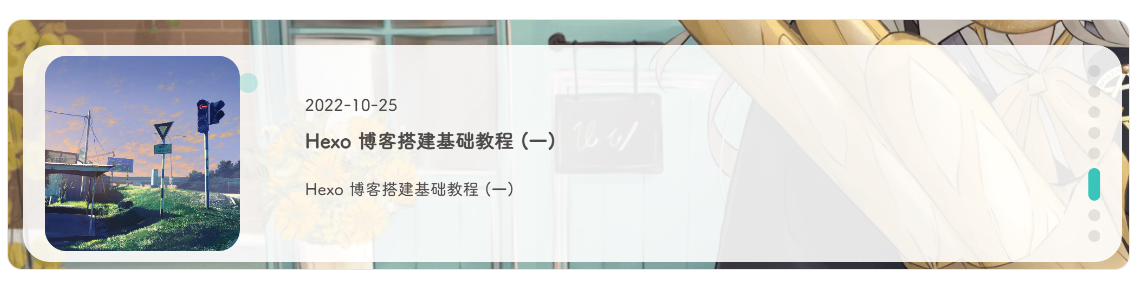
文章置顶滚动栏(店长)
效果预览 :
-
安装插件,在博客根目录
[BlogRoot]下打开终端,运行以下指令:npm install hexo-butterfly-swiper --save -
添加配置信息,以下为写法示例
在站点配置文件_config.yml或者主题配置文件_config.butterfly.yml中添加# hexo-butterfly-swiper # see https://akilar.top/posts/8e1264d1/ swiper: enable: true # 开关 priority: 5 #过滤器优先权 enable_page: all # 应用页面 timemode: date #date/updated layout: # 挂载容器类型 type: id name: recent-posts index: 0 default_descr: 再怎么看我也不知道怎么描述它的啦! swiper_css: https://npm.elemecdn.com/hexo-butterfly-swiper/lib/swiper.min.css #swiper css依赖 swiper_js: https://npm.elemecdn.com/hexo-butterfly-swiper/lib/swiper.min.js #swiper js依赖 custom_css: https://npm.elemecdn.com/hexo-butterfly-swiper/lib/swiperstyle.css # 适配主题样式补丁 custom_js: https://npm.elemecdn.com/hexo-butterfly-swiper/lib/swiper_init.js # swiper初始化方法 -
参数释义
| 参数 | 备选值/类型 | 释义 |
|---|---|---|
| priority | number | 【可选】过滤器优先级,数值越小,执行越早,默认为10,选填 |
| enable | true/false | 【必选】控制开关 |
| enable_page | path/all | 【可选】填写想要应用的页面的相对路径(即路由地址),如根目录就填’/‘,分类页面就填’/categories/‘。若要应用于所有页面,就填’all’,默认为all |
| timemode | date/updated | 【可选】时间显示,date为显示创建日期,updated为显示更新日期,默认为date |
| layout.type | id/class | 【可选】挂载容器类型,填写id或class,不填则默认为id |
| layout.name | text | 【必选】挂载容器名称 |
| layout.index | 0和正整数 | 【可选】前提是layout.type为class,因为同一页面可能有多个class,此项用来确认究竟排在第几个顺位 |
| default_descr | text | 默认文章描述 |
| swiper_css | url | 【可选】自定义的swiper依赖项css链接 |
| swiper_js | url | 【可选】自定义的swiper依赖项加js链接 |
| custom_css | url | 【可选】适配主题样式补丁 |
| custom_js | url | 【可选】swiper初始化方法 |
使用方法:在文章的front_matter中添加swiper_index配置项即可。
---
title: 文章标题
date: 创建日期
updated: 更新日期
cover: 文章封面
description: 文章描述
swiper_index: 1 #置顶轮播图顺序,非负整数,数字越大越靠前
---
文章双侧栏显示(小冰)
效果预览 :
-
在博客根目录
[BlogRoot]下打开终端,运行以下指令:BASH npm i hexo-butterfly-article-double-row --save -
在网站配置文件
_config.yml新增以下项 (注意不是主题配置文件):YML butterfly_article_double_row: enable: true -
这时候插件有个bug,就是最后一页文章数目为奇数的时候,会出现这种情况
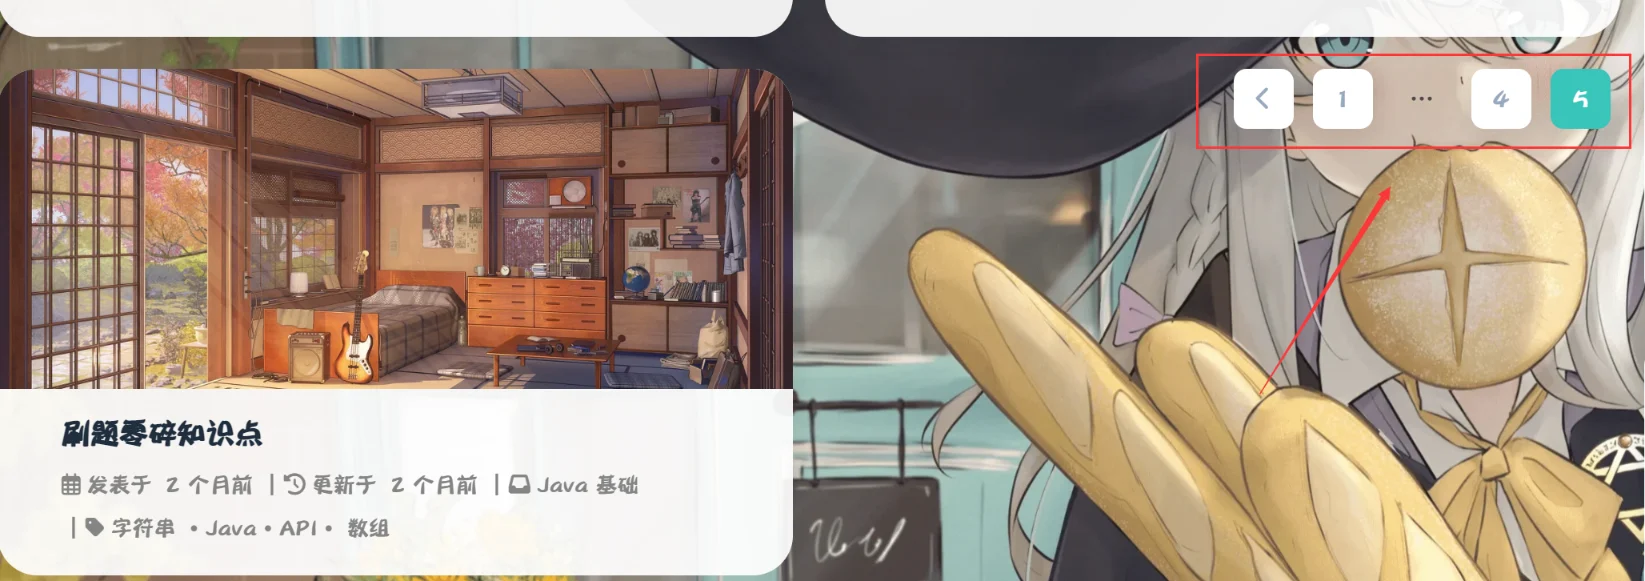
会显得很不舒服,感谢唐志远大佬修复了这个bug,只需要在
custom.css文件添加以下代码即可:
/* 翻页按钮居中 */
#pagination {
  width: 100%;
  margin: auto;
}
执行 hexo 三连:
hexo clean
hexo g
hexo s
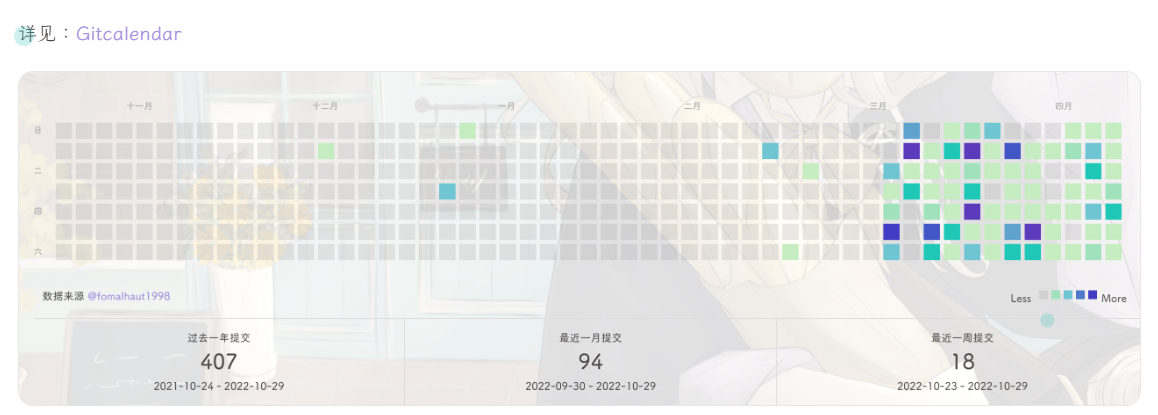
GitCalendar(店长)
效果预览 :
安装
-
安装插件,在博客根目录
[BlogRoot]下打开终端,运行以下指令:BASH npm install hexo-filter-gitcalendar --save -
添加配置信息,以下为写法示例
在站点配置文件_config.yml或者主题配置文件如_config.butterfly.yml中添加YML # hexo-filter-gitcalendar gitcalendar: enable: true # 开关 priority: 5 #过滤器优先权 enable_page: / # 应用页面 # butterfly挂载容器 layout: # 挂载容器类型 type: id name: recent-posts index: 0 user: Fomalhaut-Blog #git用户名 apiurl: 'https://gitcalendar.fomal.cc' # 这是我的API,最好自己弄一个 minheight: pc: 280px #桌面端最小高度 mibile: 0px #移动端最小高度 color: "['#d9e0df', '#c6e0dc', '#a8dcd4', '#9adcd2', '#89ded1', '#77e0d0', '#5fdecb', '#47dcc6', '#39dcc3', '#1fdabe', '#00dab9']" # 目前我在用的 # "['#e4dfd7', '#f9f4dc', '#f7e8aa', '#f7e8aa', '#f8df72', '#fcd217', '#fcc515', '#f28e16', '#fb8b05', '#d85916', '#f43e06']" #橘黄色调 # color: "['#ebedf0', '#fdcdec', '#fc9bd9', '#fa6ac5', '#f838b2', '#f5089f', '#c4067e', '#92055e', '#540336', '#48022f', '#30021f']" #浅紫色调 # color: "['#ebedf0', '#f0fff4', '#dcffe4', '#bef5cb', '#85e89d', '#34d058', '#28a745', '#22863a', '#176f2c', '#165c26', '#144620']" #翠绿色调 # color: "['#ebedf0', '#f1f8ff', '#dbedff', '#c8e1ff', '#79b8ff', '#2188ff', '#0366d6', '#005cc5', '#044289', '#032f62', '#05264c']" #天青色调 container: .recent-post-item(style='width:100%;height:auto;padding:10px;') #父元素容器,需要使用pug语法 gitcalendar_css: https://npm.elemecdn.com/hexo-filter-gitcalendar/lib/gitcalendar.css gitcalendar_js: https://npm.elemecdn.com/hexo-filter-gitcalendar/lib/gitcalendar.js -
参数释义
| 参数 | 备选值/类型 | 释义 |
|---|---|---|
| priority | number | 【可选】过滤器优先级,数值越小,执行越早,默认为10,选填 |
| enable | true/false | 【必选】控制开关 |
| enable_page | path/all | 【可选】填写想要应用的页面的相对路径(即路由地址),如根目录就填’/‘,分类页面就填’/categories/‘。若要应用于所有页面,就填’all’,默认为’/‘ |
| layout.type | id/class | 【可选】挂载容器类型,填写id或class,不填则默认为id |
| layout.name | text | 【必选】挂载容器名称 |
| layout.index | 0和正整数 | 【可选】前提是layout.type为class,因为同一页面可能有多个class,此项用来确认究竟排在第几个顺位 |
| user | text | 【必选】git用户名 |
| apiurl | url | 【可选】默认使用提供文档提供的api,但还是建议自建api,参考教程:自建API部署 |
| minheight.pc | 280px | 【可选】桌面端最小高度,默认为280px |
| minheight.mobile | 0px | 【可选】移动端最小高度,默认为0px |
| color | list | 【可选】一个包含11个色值的数组,文档给出了四款预设值 |
| container | pug | 【可选】预留的父元素容器,用以适配多主题,需要用pug语法填写,目前已适配butterfly,volantis,matery,mengd主题,这四个主题,插件会自自动识别_config.yml内填写的theme配置项。其余主题需要自己填写父元素容器。 |
| gitcalendar_css | URL | 【可选】自定义CSS样式链接 |
| gitcalendar_js | URL | 【可选】自定义js链接 |
自定义挂载容器
很多人反映不想挂在首页,想挂在关于或者统计等页面,只需要做2步:
-
在对应页面创建一个DOM让插件有地方挂载,例如演示的就是在关于页面(
/about/)的文件中直接写入一个div块<!-- GitCalendar容器 --> <div id="gitZone"></div> -
在对应配置项改为与你容器
id以创建页面路径相关的(是改不是加!!!)enable_page: /about/ # 应用页面(记住最后带/) layout: # 挂载容器类型 type: id name: gitZone index: 0 -
重启项目就会看见
hexo cl; hexo s
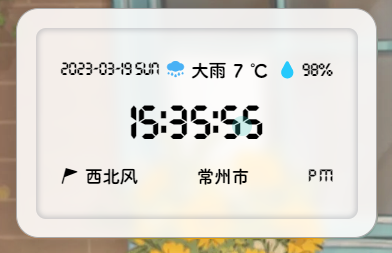
侧边栏电子时钟(安知鱼)
效果预览 :
-
如果有安装店长的插件版侧边栏电子钟(与店长的电子钟冲突),在博客根目录
[BlogRoot]下打开终端,运行以下指令# 卸载原版电子钟 npm uninstall hexo-butterfly-clock -
安装插件,在博客根目录
[BlogRoot]下打开终端,运行以下指令:npm install hexo-butterfly-clock-anzhiyu --save -
添加配置信息,以下为写法示例
在主题配置文件_config.butterfly.yml(注意一定要主题配置文件)中添加:# electric_clock (安知鱼电子钟) # see https://anzhiy.cn/posts/fc18.html electric_clock: enable: true # 开关 priority: 5 #过滤器优先权 enable_page: / # 应用页面 exclude: # - /posts/ # - /about/ layout: # 挂载容器类型 type: class name: sticky_layout index: 0 loading: https://cdn.cbd.int/hexo-butterfly-clock-anzhiyu/lib/loading.gif #加载动画自定义 clock_css: https://cdn.cbd.int/hexo-butterfly-clock-anzhiyu/lib/clock.min.css clock_js: https://cdn.cbd.int/hexo-butterfly-clock-anzhiyu/lib/clock.min.js ip_api: https://widget.qweather.net/simple/static/js/he-simple-common.js?v=2.0 qweather_key: # 和风天气key gaud_map_key: # 高得地图web服务key default_rectangle: false # 开启后将一直显示rectangle位置的天气,否则将获取访问者的地理位置与天气 rectangle: 113.34532,23.15624 # 获取访问者位置失败时会显示该位置的天气,同时该位置为开启default_rectangle后的位置其中qweather_key 和gaud_map_key 最好自己去申请对应的 api key,默认使用
鱼的,可能会被限制,不保证可靠性。 -
参数释义
| 参数 | 备选值/类型 | 释义 |
|---|---|---|
| priority | number | 【可选】过滤器优先级,数值越小,执行越早,默认为 10,选填 |
| enable | true/false | 【必选】控制开关 |
| enable_page | path/all | 【可选】填写想要应用的页面的相对路径(即路由地址),如根目录就填’/‘,分类页面就填’/categories/‘。若要应用于所有页面,就填’all’,默认为 all |
| exclude | path | 【可选】填写想要屏蔽的页面,可以多个。写法见示例。原理是将屏蔽项的内容逐个放到当前路径去匹配,若当前路径包含任一屏蔽项,则不会挂载。 |
| layout.type | id/class | 【可选】挂载容器类型,填写 id 或 class,不填则默认为 id |
| layout.name | text | 【必选】挂载容器名称 |
| layout.index | 0和正整数 | 【可选】前提是 layout.type 为 class,因为同一页面可能有多个 class,此项用来确认究竟排在第几个顺位 |
| loading | URL | 【可选】电子钟加载动画的图片 |
| clock_css | URL | 【可选】电子钟样式 CDN 资源 |
| clock_js | URL | 【可选】电子钟执行脚本 CDN 资源 |
| ip_api | URL | 【可选】获取时钟 IP 的 API |
| qweather_key | text | 【可选】和风天气 key |
| gaud_map_key | text | 【可选】高得地图 web 服务 key |
| default_rectangle | text | 【可选】开启后将一直显示 rectangle 位置的天气,否则将获取访问者的地理位置与天气 |
| rectangle | text | 【可选】获取访问者位置失败时会显示该位置的天气,同时该位置为开启 default_rectangle 后的位置 |
API申请教程
一、qweather_key申请地址: https://id.qweather.com/#/login
-
登录后进入控制台
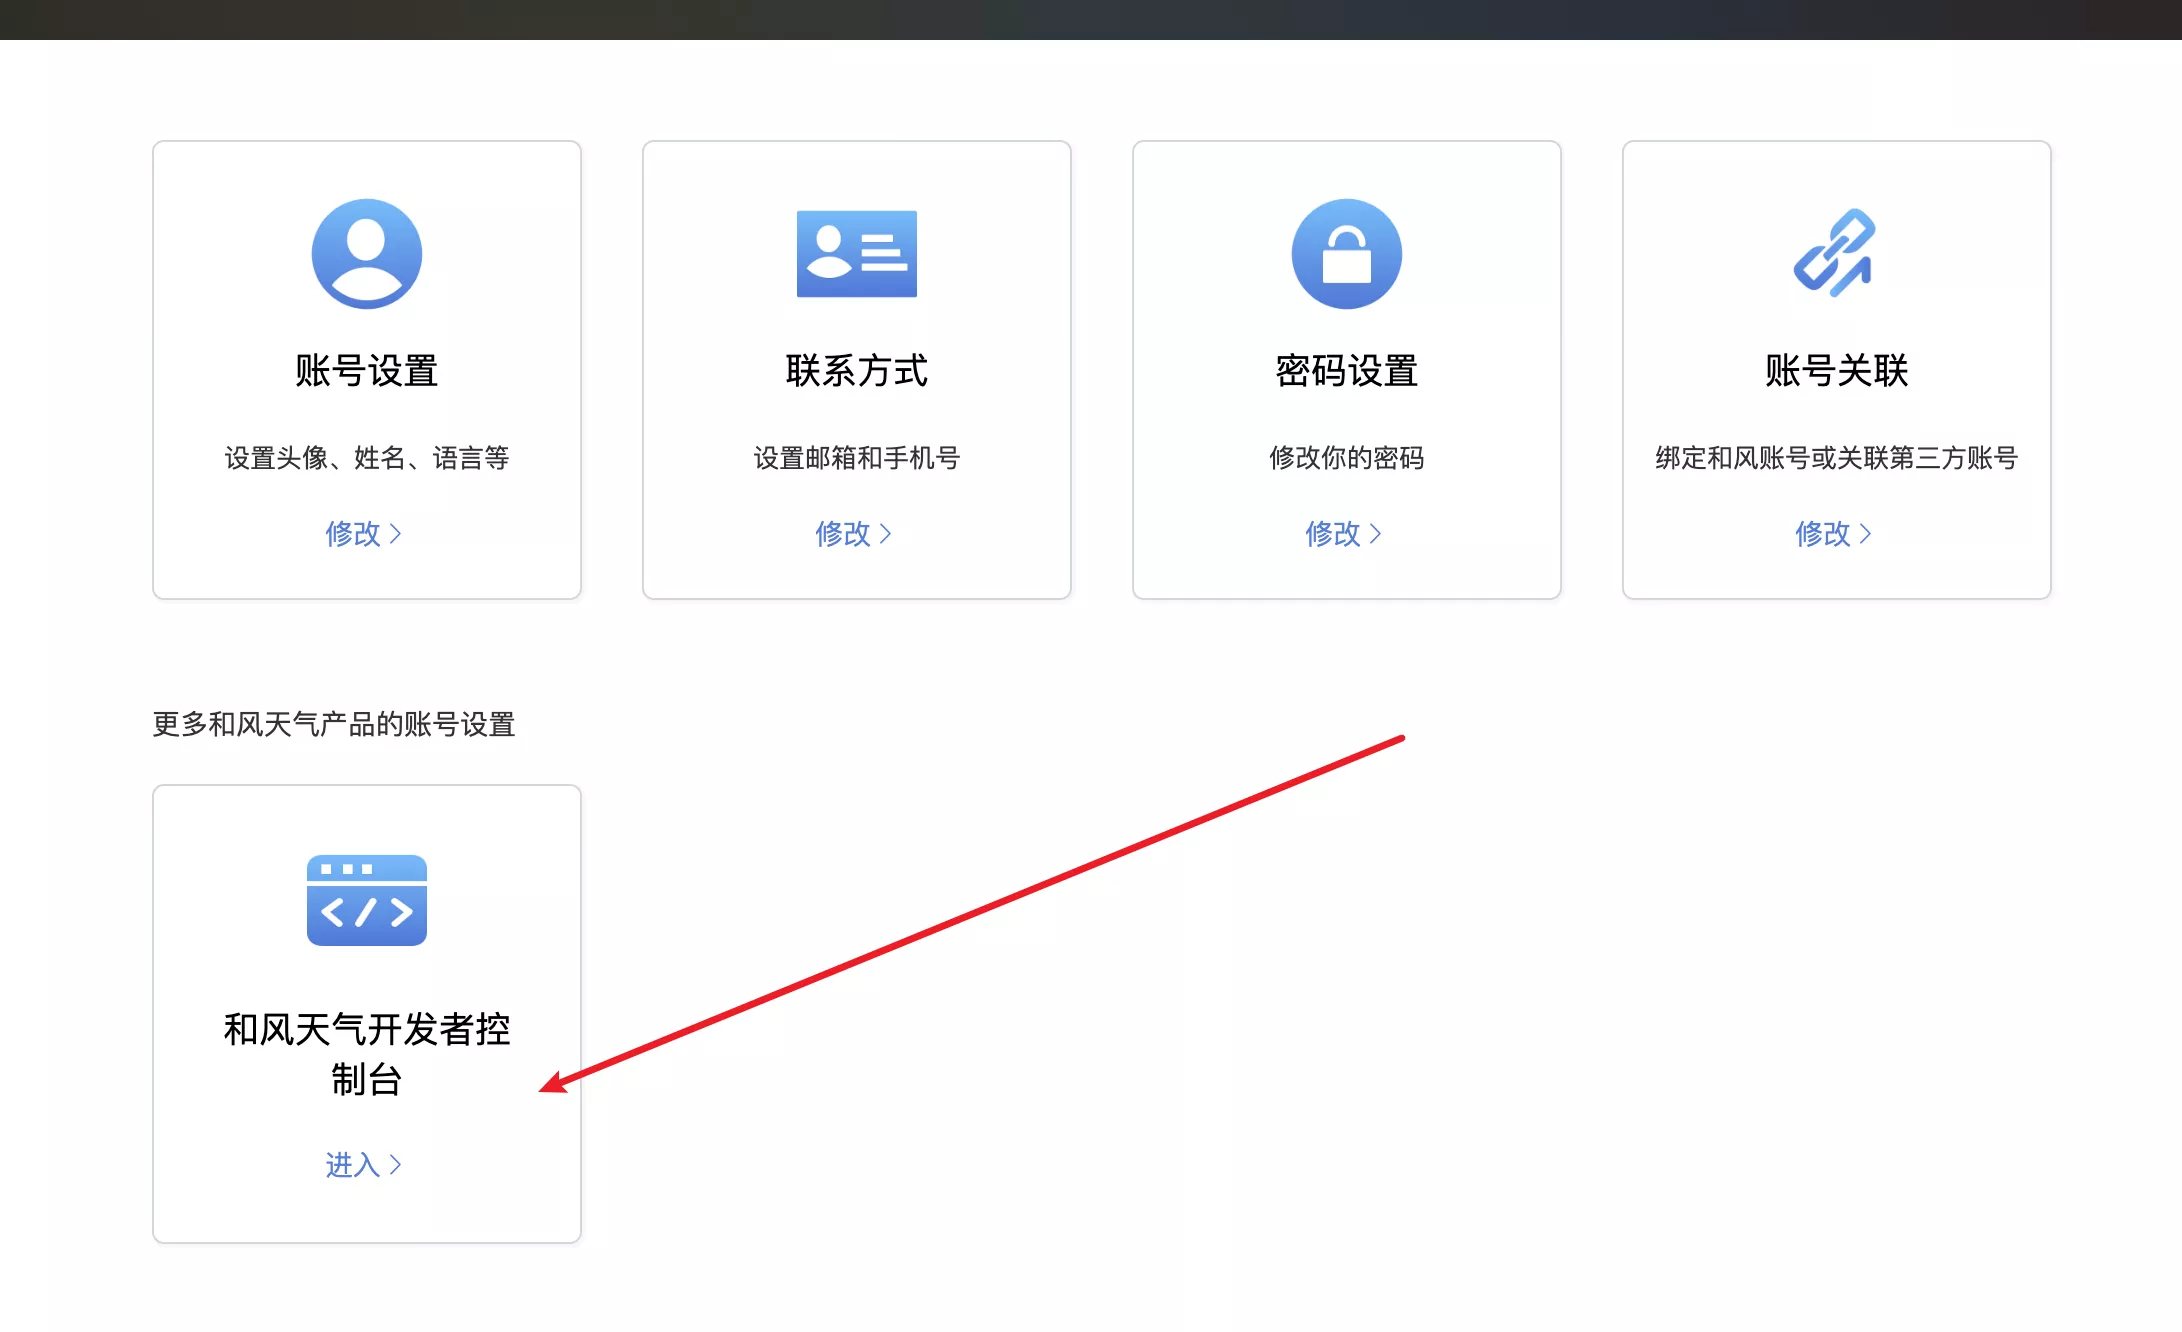
-
创建应用

-
填写应用名称和 key 名称随意
-
选择 WebApi
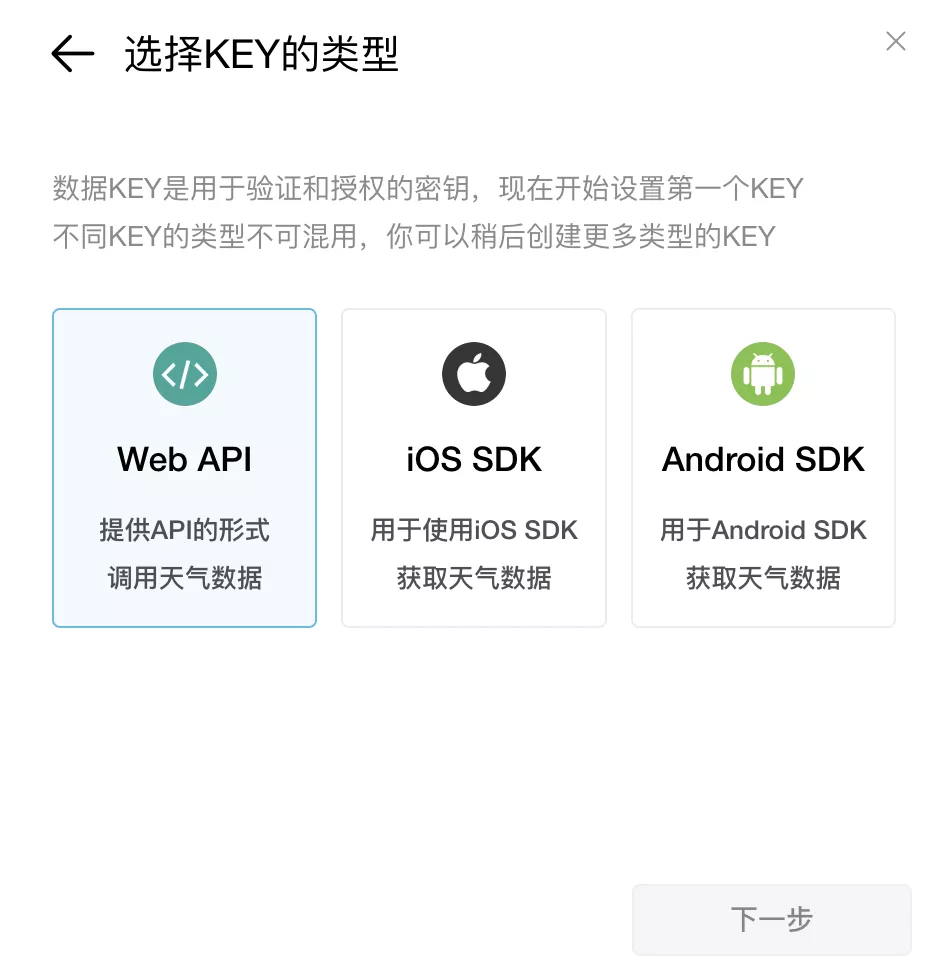
-
复制 key

二、gaud_map_key 申请地址: https://lbs.amap.com/
-
登录后进入控制台
-
创建应用,名称随意,类型选其他

-
点击添加,
key名称随意,服务平台选择Web服务,点击提交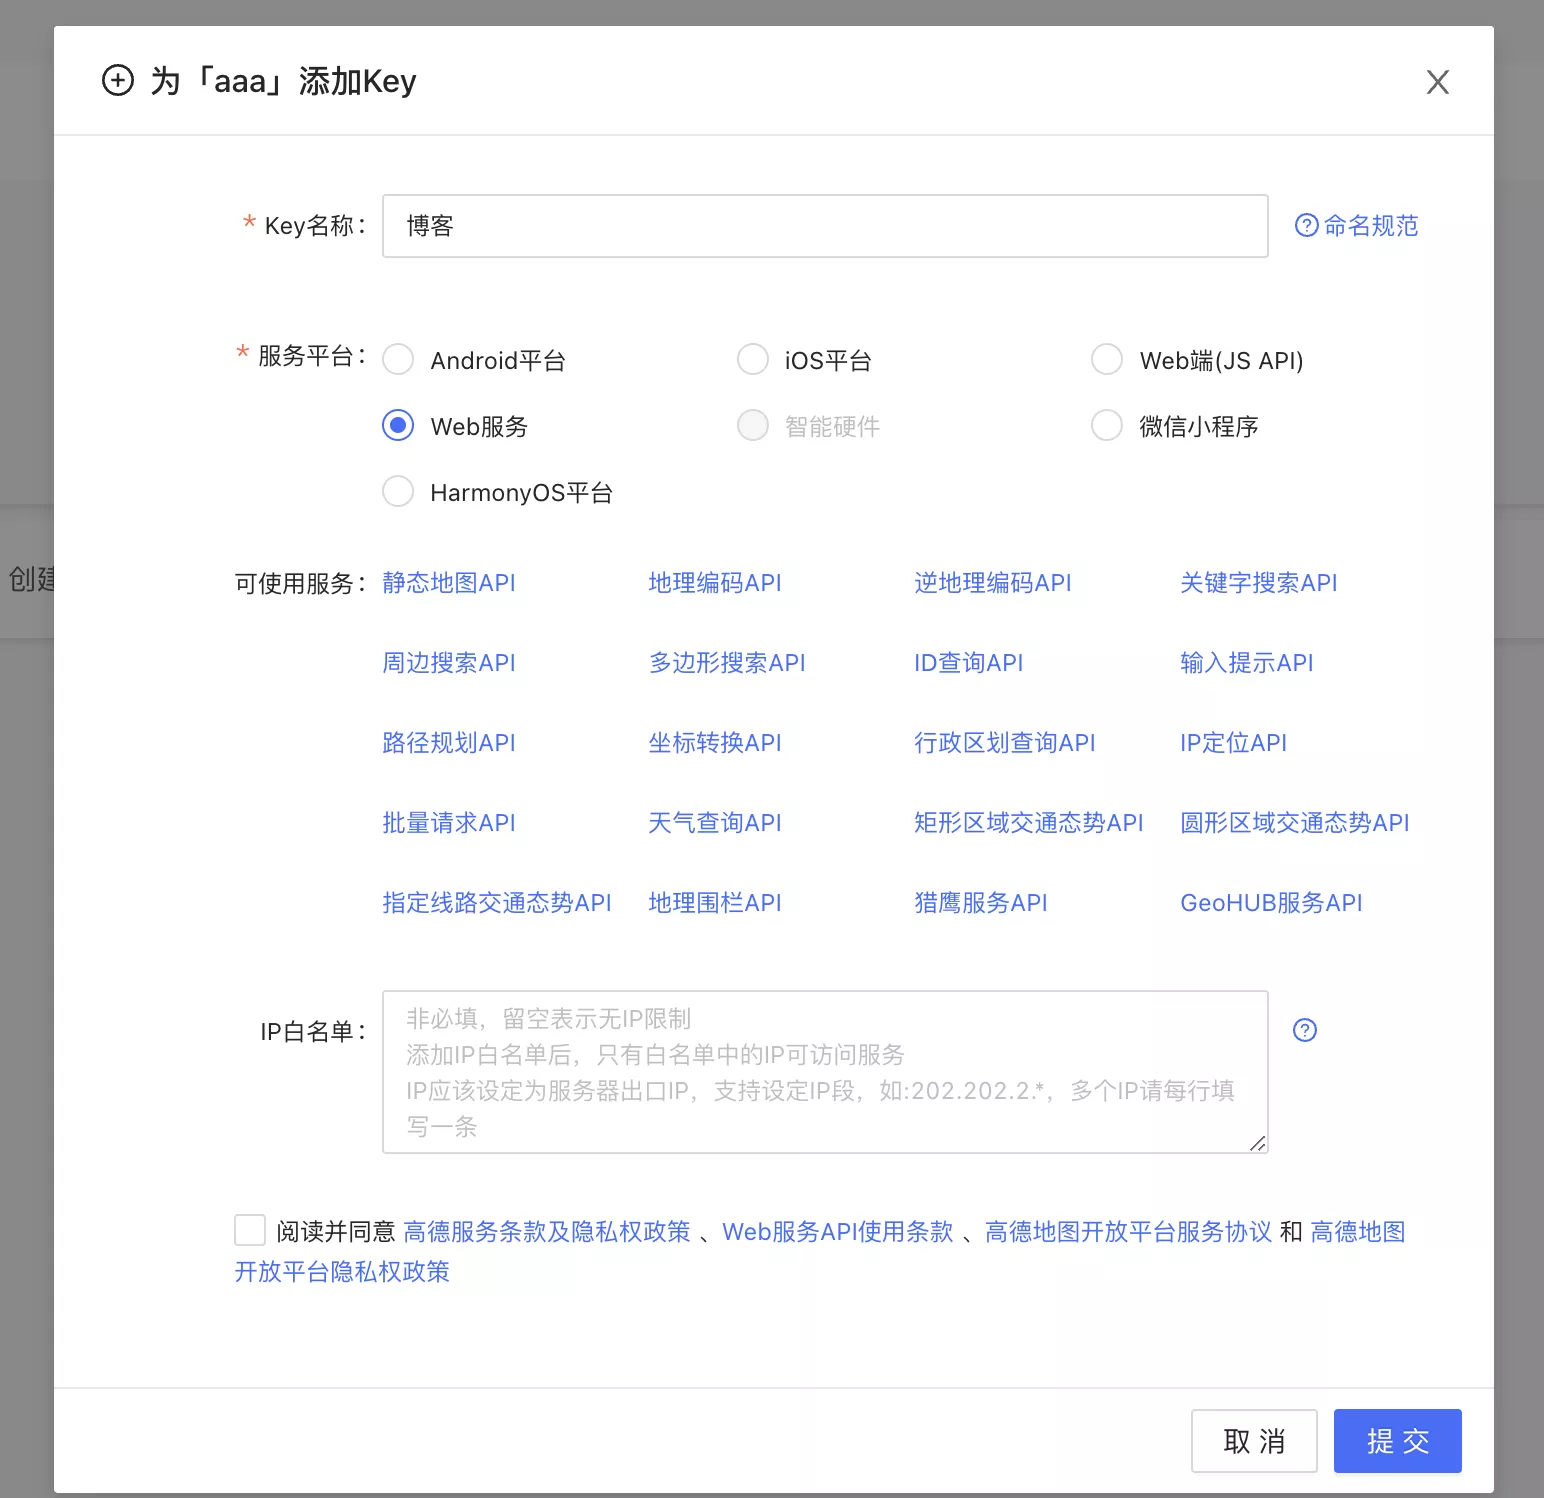
-
复制 key

结尾
本次的教程就到这里结束了,希望能给大家带来帮助,欢迎大家评论区留言!!!