KTransformer:国产高性能大模型加载工具使用指南
文章目录
- 一、源码安装KTransformer
- 报错处理
- 1、如果出现报错:
- 2、如果出现报错:
- 3、 比较棘手的问题:
- 安装测试
- 二、KTransformer加载模型
- 报错处理
- HF镜像配置
- 三、Docker安装
- 四、Docker安装 TORCH_USE_CUDA_DSA报错
- 五 、 参考链接
- 六、总结概要
此前,我撰写过几篇关于DeepSeek的文章,其中涉及通过Ollama加载模型,以及利用llama.cpp量化模型(实际上,Llama.cpp也具备加载模型的功能,与Ollama类似)。本文将介绍一款国产的高性能大模型加载工具:KTransformer。不过,由于本地GPU型号老旧,无法正常运行KTransformer,但编译安装过程并无问题,下面将详细介绍其安装方法。
一、源码安装KTransformer
首先,从Github克隆KTransformer的仓库,然后按照官方指导流程进行构建。需要注意的是,不要使用0.2.1版本,按照官方说法,该版本会导致大模型性能下降,此问题在最新版本中已修复,因此建议从最新源代码进行安装。
$ git clone https://github.com/kvcache-ai/ktransformers.git
正克隆到 'ktransformers'...
remote: Enumerating objects: 1866, done.
remote: Counting objects: 100% (655/655), done.
remote: Compressing objects: 100% (300/300), done.
remote: Total 1866 (delta 440), reused 359 (delta 355), pack-reused 1211 (from 2)
接收对象中: 100% (1866/1866), 9.33 MiB | 7.65 MiB/s, 完成.
处理 delta 中: 100% (990/990), 完成.
$ cd ktransformers/
$ git submodule init
子模组 'third_party/llama.cpp'(https://github.com/ggerganov/llama.cpp.git)已对路径 'third_party/llama.cpp' 注册
子模组 'third_party/pybind11'(https://github.com/pybind/pybind11.git)已对路径 'third_party/pybind11' 注册
$ git submodule update
正克隆到 '/datb/DeepSeek/ktransformers/third_party/llama.cpp'...
正克隆到 '/datb/DeepSeek/ktransformers/third_party/pybind11'...
子模组路径 'third_party/llama.cpp':检出 'a94e6ff8774b7c9f950d9545baf0ce35e8d1ed2f'
子模组路径 'third_party/pybind11':检出 'bb05e0810b87e74709d9f4c4545f1f57a1b386f5'
$ bash install.sh
Successfully built ktransformers
Installing collected packages: wcwidth, zstandard, tomli, tenacity, sniffio, six, pyproject_hooks, pydantic-core, psutil, propcache, orjson, ninja, multidict, jsonpointer, h11, greenlet, frozenlist, exceptiongroup, colorlog, click, attrs, async-timeout, annotated-types, aiohappyeyeballs, yarl, uvicorn, SQLAlchemy, requests-toolbelt, pydantic, jsonpatch, httpcore, build, blessed, anyio, aiosignal, starlette, httpx, aiohttp, langsmith, fastapi, accelerate, langchain-core, langchain-text-splitters, langchain, ktransformers
Successfully installed SQLAlchemy-2.0.38 accelerate-1.3.0 aiohappyeyeballs-2.4.6 aiohttp-3.11.12 aiosignal-1.3.2 annotated-types-0.7.0 anyio-4.8.0 async-timeout-4.0.3 attrs-25.1.0 blessed-1.20.0 build-1.2.2.post1 click-8.1.8 colorlog-6.9.0 exceptiongroup-1.2.2 fastapi-0.115.8 frozenlist-1.5.0 greenlet-3.1.1 h11-0.14.0 httpcore-1.0.7 httpx-0.28.1 jsonpatch-1.33 jsonpointer-3.0.0 ktransformers-0.2.1+cu128torch26fancy langchain-0.3.18 langchain-core-0.3.35 langchain-text-splitters-0.3.6 langsmith-0.3.8 multidict-6.1.0 ninja-1.11.1.3 orjson-3.10.15 propcache-0.2.1 psutil-7.0.0 pydantic-2.10.6 pydantic-core-2.27.2 pyproject_hooks-1.2.0 requests-toolbelt-1.0.0 six-1.17.0 sniffio-1.3.1 starlette-0.45.3 tenacity-9.0.0 tomli-2.2.1 uvicorn-0.34.0 wcwidth-0.2.13 yarl-1.18.3 zstandard-0.23.0
Installation completed successfully
当看到上述输出时,表明安装成功。若安装过程中出现报错,可参考以下内容进行调试。
报错处理
1、如果出现报错:
FileNotFoundError: [Errno 2] No such file or directory: '/xxx/nvcc
此报错是由于CUDA_HOME设置错误导致的。可先使用which nvcc查看nvcc的路径:
$ which nvcc
/home/llama/bin/nvcc
然后将该路径(根据自身环境配置)添加到环境变量中:
$ export CUDA_HOME=/home/llama/targets/x86_64-linux
2、如果出现报错:
sh: 1: cicc: not found
该报错是因为cicc不在系统路径中,可将cicc可执行文件路径添加到环境变量:
$ export PATH=$PATH:/home/llama/nvvm/bin
3、 比较棘手的问题:
make[2]: *** 没有规则可制作目标“/home/lib64/libcudart.so”
这个问题比较棘手,修改PATH、CUDA_HOME和LD_LIBRARY_PATH后仍无法解决。最后发现路径中写死了lib64,而本地CUDA路径通常为lib。可直接将这些库复制一份:
$ cp -r /home/lib/ /home/lib64/
虽然这种方法涉及动态链接库调用问题,不够优雅,但确实能解决报错,避免重新安装CUDA。
安装测试
安装成功后,可使用以下指令测试是否安装成功:
$ python -m ktransformers.local_chat --help
NAME
    local_chat.py

SYNOPSIS
    local_chat.py <flags>

FLAGS
    --model_path=MODEL_PATH
        Type: Optional[str | None]
        Default: None
    -o, --optimize_rule_path=OPTIMIZE_RULE_PATH
        Type: Optional[str]
        Default: None
    -g, --gguf_path=GGUF_PATH
        Type: Optional[str | None]
        Default: None
    --max_new_tokens=MAX_NEW_TOKENS
        Type: int
        Default: 300
    -c, --cpu_infer=CPU_INFER
        Type: int
        Default: 10
    -u, --use_cuda_graph=USE_CUDA_GRAPH
        Type: bool
        Default: True
    -p, --prompt_file=PROMPT_FILE
        Type: Optional[str | None]
        Default: None
    --mode=MODE
        Type: str
        Default: 'normal'
    -f, --force_think=FORCE_THINK
        Type: bool
        Default: False
二、KTransformer加载模型
要执行local_chat,还需安装flash-attn:
$ python3 -m pip install flash-attn --no-build-isolation
建议的模型列表:

若要使用KTransformer的Chat功能,需将模型路径放置在KTransformer安装的根目录,即git
clone后cd进入的路径。使用KTransformer加载模型时,需要safetensor模型和gguf模型。例如,从ModelScope下载DeepSeek-V2.5-IQ4_XS模型(在KTransformer根目录执行以下操作):
$ git clone https://www.modelscope.cn/deepseek-ai/DeepSeek-V2.5.git
正克隆到 'DeepSeek-V2.5'...
remote: Enumerating objects: 81, done.
remote: Counting objects: 100% (81/81), done.
remote: Compressing objects: 100% (80/80), done.
remote: Total 81 (delta 6), reused 0 (delta 0), pack-reused 0
展开对象中: 100% (81/81), 1.47 MiB | 1017.00 KiB/s, 完成.
过滤内容: 100% (55/55), 3.10 GiB | 60.00 KiB/s, 完成.
Encountered 55 file(s) that may not have been copied correctly on Windows:
    model-00013-of-000055.safetensors
    model-00052-of-000055.safetensors
    ...
    model-00029-of-000055.safetensors

See: `git lfs help smudge` for more details.
然后 在 KTransformer根目录创建一个GGUF模型路径:DeepSeek-V2.5-GGUF,进入该文件夹下载相应的GGUF模型:
$ modelscope download --model bartowski/DeepSeek-V2.5-GGUF DeepSeek-V2.5-IQ4_XS/DeepSeek-V2.5-IQ4_XS-00001-of-00004.gguf --local_dir ./
$ modelscope download --model bartowski/DeepSeek-V2.5-GGUF DeepSeek-V2.5-IQ4_XS/DeepSeek-V2.5-IQ4_XS-00002-of-00004.gguf --local_dir ./
$ modelscope download --model bartowski/DeepSeek-V2.5-GGUF DeepSeek-V2.5-IQ4_XS/DeepSeek-V2.5-IQ4_XS-00003-of-00004.gguf --local_dir ./
$ modelscope download --model bartowski/DeepSeek-V2.5-GGUF DeepSeek-V2.5-IQ4_XS/DeepSeek-V2.5-IQ4_XS-00004-of-00004.gguf --local_dir ./
模型文件下载完成后,回到KTransformer根目录,使用KTransformer加载模型:
$ python -m ktransformers.local_chat --model_path ./DeepSeek-V2.5/ --gguf_path ./DeepSeek-V2.5-GGUF/
若本地硬件和软件安装正常,经过一系列日志输出后,即可进入Chat界面。若遇到报错,可参考以下调试内容。
报错处理
第一个有可能出现的问题是GPU管理问题:
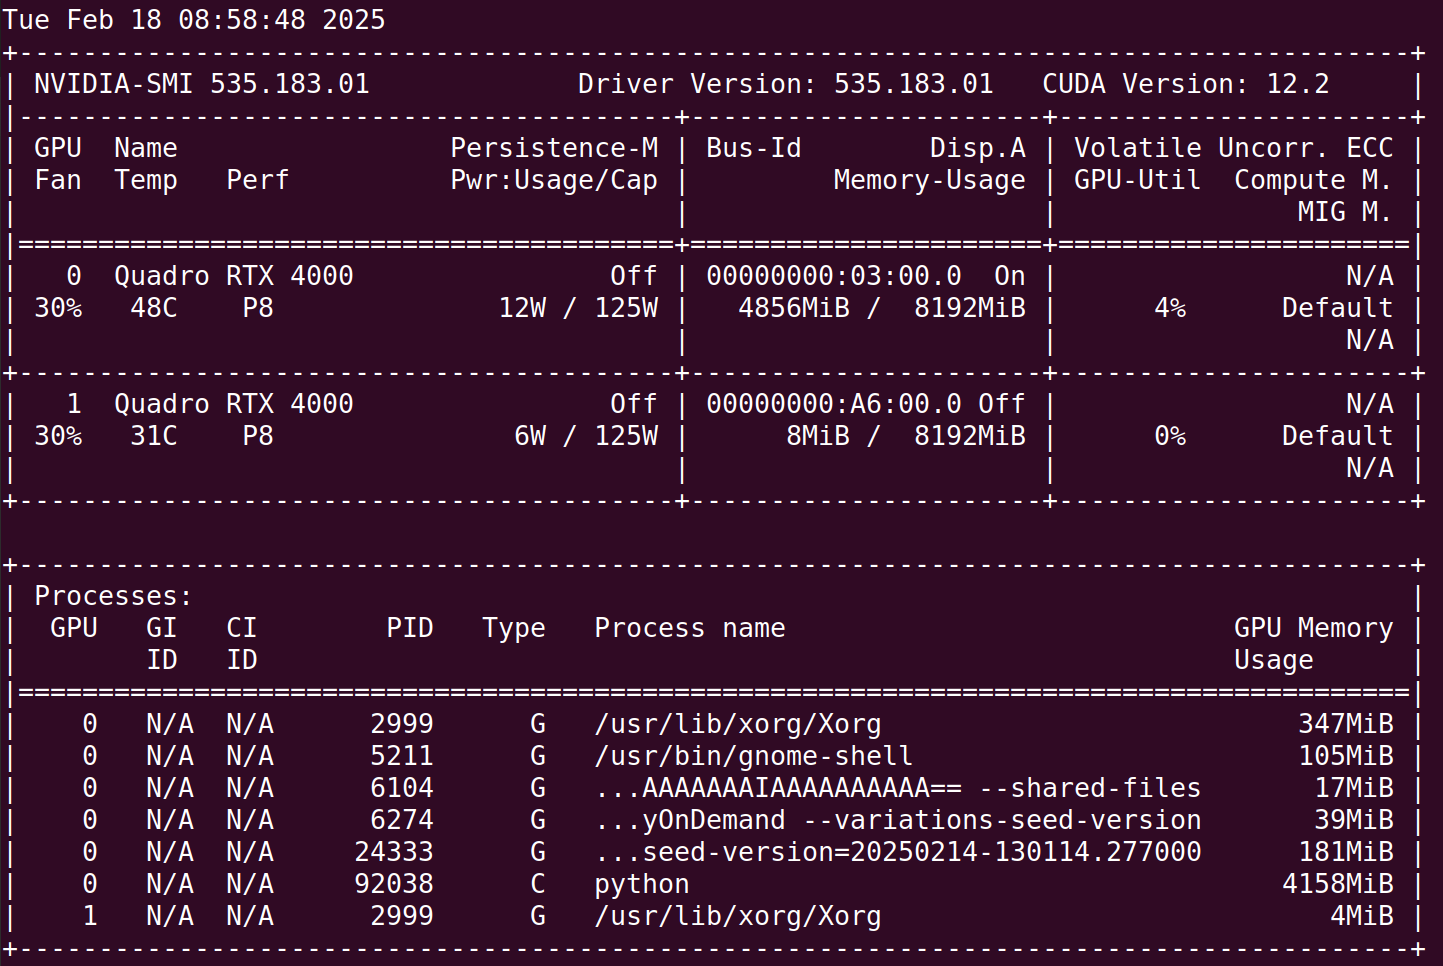
本地硬件为2张8G的显卡,理论上该模型所需的10GB显存是足够的,但仍遇到OOM报错:
Traceback (most recent call last):
  ...
torch.OutOfMemoryError: CUDA out of memory. Tried to allocate 320.00 MiB. GPU 0 has a total capacity of 7.78 GiB of which 243.12 MiB is free. Including non-PyTorch memory, this process has 6.96 GiB memory in use. Of the allocated memory 6.25 GiB is allocated by PyTorch, and 623.76 MiB is reserved by PyTorch but unallocated. If reserved but unallocated memory is large try setting PYTORCH_CUDA_ALLOC_CONF=expandable_segments:True to avoid fragmentation.  See documentation for Memory Management  (https://pytorch.org/docs/stable/notes/cuda.html#environment-variables)
这是因为KTransformer默认仅使用一张显卡的显存,按照官方说法,多卡PCIE通信开销较大,可能导致性能下降。不过,官方仓库的optimize路径下有一些关于多GPU的JSON配置文件,主要是V3和R1的,对于V2.5版本可直接复用V2的optimize-rule,参考以下命令运行:
$ python -m ktransformers.local_chat --model_path ./DeepSeek-V2.5/ --gguf_path ./DeepSeek-V2.5-GGUF/ -f true --port 11434 --optimize_rule_path ktransformers/optimize/optimize_rules/DeepSeek-V2-Chat-multi-gpu.yaml --cpu_infer 45
这样可将模型的一部分层数分配到另一张显卡上,避免OOM问题。
HF镜像配置
本地使用的模型均从modelscope下载,但KTransformer若未找到本地模型文件,会从Hugging Face搜索并下载相应模型。由于国内网络问题,直接下载模型可能失败。可配置HF的镜像地址:
$ export HF_ENDPOINT=https://hf-mirror.com
此方法未经本人测试,仅供参考,有兴趣的朋友可自行尝试。
三、Docker安装
若不想配置环境或解决编译过程中的问题,可使用Docker安装。已有现成的Docker镜像approachingai/ktransformers:0.2.1。由于国内从dockerhub拉取镜像常遇网络问题,可使用国内镜像源,例如docker.1ms.run:
$ docker pull docker.1ms.run/approachingai/ktransformers:0.2.1
0.2.1: Pulling from approachingai/ktransformers
43f89b94cd7d: Pull complete
dd4939a04761: Pull complete
...
819a99ec0367: Pull complete
Digest: sha256:7de7da1cca07197aed37aff6e25daeb56370705f0ee05dbe3ad4803c51cc50a3
Status: Downloaded newer image for docker.1ms.run/approachingai/ktransformers:0.2.1
docker.1ms.run/approachingai/ktransformers:0.2.1
拉取完成后,可查看正在运行的容器:
$ docker ps -a
此时容器列表为空,再查看本地镜像:
$ docker images
REPOSITORY                                                          TAG       IMAGE ID       CREATED       SIZE
docker.1ms.run/approachingai/ktransformers                          0.2.1     614daa66a726   3 days ago    18.5GB
使用镜像构建一个容器,并将本地需要用到的目录映射进去:
$ docker run --gpus all -v /datb/DeepSeek/:/models --name ktransformers -itd approachingai/ktransformers:0.2.1
再次查看正在运行的容器:
$ docker ps -a
CONTAINER ID   IMAGE                                                                     COMMAND               CREATED         STATUS                     PORTS                                                                                                                       NAMES
0d3fb9d57002   docker.1ms.run/approachingai/ktransformers:0.2.1                          "tail -f /dev/null"   3 minutes ago   Up 3 minutes                                                                                                                                           ktransformers
容器启动成功后,进入容器环境:
$ docker exec -it ktransformers /bin/bash
查看当前目录和映射目录:
root@0d3fb9d57002:/workspace# ll
total 12
drwxr-xr-x 1 root root 4096 Feb 15 05:45 ./
drwxr-xr-x 1 root root 4096 Feb 19 00:54 ../
drwxrwxr-x 8 1004 1004 4096 Feb 15 06:40 ktransformers/
root@0d3fb9d57002:/workspace# ll /models/
total 72
drwxr-xr-x  7 1001 1001  4096 Feb 17 06:19 ./
drwxr-xr-x  1 root root  4096 Feb 19 00:54 ../
drwxrwxr-x  3 1001 1001  4096 Feb  6 09:19 DeepSeek32B/
drwxrwxr-x 12 1001 1001  4096 Feb 17 09:14 ktransformers/
drwxrwxr-x  4 1001 1001  4096 Feb 12 02:31 llama
类似于上面的使用方法,直接启动Chat,只不过需要相应的修改一下路径配置:
root@0d3fb9d57002:/models# python3 -m ktransformers.local_chat --gguf_path ktransformers/DeepSeek-V2.5-GGUF --model_path ktransformers/DeepSeek-V2.5 --cpu_infer 45 -f true --port 11434 --optimize_rule_path ktransformers/ktransformers/optimize/optimize_rules/DeepSeek-V2-Chat-multi-gpu.yaml
如果本地的硬件条件没有问题,这里应该会直接进入到Chat界面。
四、Docker安装 TORCH_USE_CUDA_DSA报错
接下来说一个无解的问题,在执行local_chat的编译过程,有可能弹出来的一个报错
loading token_embd.weight to cpu
/opt/conda/lib/python3.10/site-packages/ktransformers/util/custom_gguf.py:644: UserWarning: The given NumPy array is not writable, and PyTorch does not support non-writable tensors. This means writing to this tensor will result in undefined behavior. You may want to copy the array to protect its data or make it writable before converting it to a tensor. This type of warning will be suppressed for the rest of this program. (Triggered internally at /opt/conda/conda-bld/pytorch_1716905979055/work/torch/csrc/utils/tensor_numpy.cpp:206.)
  data = torch.from_numpy(data)
Traceback (most recent call last):
  File "/opt/conda/lib/python3.10/runpy.py", line 196, in _run_module_as_main
    return _run_code(code, main_globals, None,
  File "/opt/conda/lib/python3.10/runpy.py", line 86, in _run_code
    exec(code, run_globals)
  File "/opt/conda/lib/python3.10/site-packages/ktransformers/local_chat.py", line 179, in <module>
    fire.Fire(local_chat)
  File "/opt/conda/lib/python3.10/site-packages/fire/core.py", line 143, in Fire
    component_trace = _Fire(component, args, parsed_flag_args, context, name)
  File "/opt/conda/lib/python3.10/site-packages/fire/core.py", line 477, in _Fire
    component, remaining_args = _CallAndUpdateTrace(
  File "/opt/conda/lib/python3.10/site-packages/fire/core.py", line 693, in _CallAndUpdateTrace
    component = fn(*varargs, **kwargs)
  File "/opt/conda/lib/python3.10/site-packages/ktransformers/local_chat.py", line 110, in local_chat
    optimize_and_load_gguf(model, optimize_rule_path, gguf_path, config)
  File "/opt/conda/lib/python3.10/site-packages/ktransformers/optimize/optimize.py", line 129, in optimize_and_load_gguf
    load_weights(module, gguf_loader)
  File "/opt/conda/lib/python3.10/site-packages/ktransformers/util/utils.py", line 85, in load_weights
    load_weights(child, gguf_loader, prefix+name+".")
  File "/opt/conda/lib/python3.10/site-packages/ktransformers/util/utils.py", line 87, in load_weights
    module.load()
  File "/opt/conda/lib/python3.10/site-packages/ktransformers/operators/base_operator.py", line 60, in load
    utils.load_weights(child, self.gguf_loader, self.key+".")
  File "/opt/conda/lib/python3.10/site-packages/ktransformers/util/utils.py", line 85, in load_weights
    load_weights(child, gguf_loader, prefix+name+".")
  File "/opt/conda/lib/python3.10/site-packages/ktransformers/util/utils.py", line 85, in load_weights
    load_weights(child, gguf_loader, prefix+name+".")
  File "/opt/conda/lib/python3.10/site-packages/ktransformers/util/utils.py", line 85, in load_weights
    load_weights(child, gguf_loader, prefix+name+".")
  File "/opt/conda/lib/python3.10/site-packages/ktransformers/util/utils.py", line 87, in load_weights
    module.load()
  File "/opt/conda/lib/python3.10/site-packages/ktransformers/operators/base_operator.py", line 60, in load
    utils.load_weights(child, self.gguf_loader, self.key+".")
  File "/opt/conda/lib/python3.10/site-packages/ktransformers/util/utils.py", line 85, in load_weights
    load_weights(child, gguf_loader, prefix+name+".")
  File "/opt/conda/lib/python3.10/site-packages/ktransformers/util/utils.py", line 87, in load_weights
    module.load()
  File "/opt/conda/lib/python3.10/site-packages/ktransformers/operators/linear.py", line 430, in load
    self.generate_linear.load(w=w)
  File "/opt/conda/lib/python3.10/site-packages/ktransformers/operators/linear.py", line 215, in load
    w_ref, marlin_q_w, marlin_s, g_idx, sort_indices, _ = marlin_quantize(
  File "/opt/conda/lib/python3.10/site-packages/ktransformers/ktransformers_ext/operators/custom_marlin/quantize/utils/marlin_utils.py", line 93, in marlin_quantize
    w_ref, q_w, s, g_idx, rand_perm = quantize_weights(w, num_bits, group_size,
  File "/opt/conda/lib/python3.10/site-packages/ktransformers/ktransformers_ext/operators/custom_marlin/quantize/utils/quant_utils.py", line 61, in quantize_weights
    w = w.reshape((group_size, -1))
RuntimeError: CUDA error: no kernel image is available for execution on the device
CUDA kernel errors might be asynchronously reported at some other API call, so the stacktrace below might be incorrect.
For debugging consider passing CUDA_LAUNCH_BLOCKING=1.
Compile with `TORCH_USE_CUDA_DSA` to enable device-side assertions.
在进入Chat界面后,输入任意问题时,可能会弹出如下报错:
Chat: who are you?
Traceback (most recent call last):
  File "/home/dechin/anaconda3/envs/llama/lib/python3.10/runpy.py", line 196, in _run_module_as_main
    return _run_code(code, main_globals, None,
  File "/home/dechin/anaconda3/envs/llama/lib/python3.10/runpy.py", line 86, in _run_code
    exec(code, run_globals)
  File "/datb/DeepSeek/ktransformers/ktransformers/local_chat.py", line 179, in <module>
    fire.Fire(local_chat)
  File "/home/dechin/anaconda3/envs/llama/lib/python3.10/site-packages/fire/core.py", line 135, in Fire
    component_trace = _Fire(component, args, parsed_flag_args, context, name)
  File "/home/dechin/anaconda3/envs/llama/lib/python3.10/site-packages/fire/core.py", line 468, in _Fire
    component, remaining_args = _CallAndUpdateTrace(
  File "/home/dechin/anaconda3/envs/llama/lib/python3.10/site-packages/fire/core.py", line 684, in _CallAndUpdateTrace
    component = fn(*varargs, **kwargs)
  File "/datb/DeepSeek/ktransformers/ktransformers/local_chat.py", line 173, in local_chat
    generated = prefill_and_generate(
  File "/datb/DeepSeek/ktransformers/ktransformers/util/utils.py", line 154, in prefill_and_generate
    logits = model(
  File "/home/dechin/anaconda3/envs/llama/lib/python3.10/site-packages/torch/nn/modules/module.py", line 1739, in _wrapped_call_impl
    return self._call_impl(*args, **kwargs)
  File "/home/dechin/anaconda3/envs/llama/lib/python3.10/site-packages/torch/nn/modules/module.py", line 1750, in _call_impl
    return forward_call(*args, **kwargs)
  File "/datb/DeepSeek/ktransformers/ktransformers/models/modeling_deepseek.py", line 1731, in forward
    outputs = self.model(
  File "/home/dechin/anaconda3/envs/llama/lib/python3.10/site-packages/torch/nn/modules/module.py", line 1739, in _wrapped_call_impl
    return self._call_impl(*args, **kwargs)
  File "/home/dechin/anaconda3/envs/llama/lib/python3.10/site-packages/torch/nn/modules/module.py", line 1750, in _call_impl
    return forward_call(*args, **kwargs)
  File "/datb/DeepSeek/ktransformers/ktransformers/operators/models.py", line 722, in forward
    layer_outputs = decoder_layer(
  File "/home/dechin/anaconda3/envs/llama/lib/python3.10/site-packages/torch/nn/modules/module.py", line 1739, in _wrapped_call_impl
    return self._call_impl(*args, **kwargs)
  File "/home/dechin/anaconda3/envs/llama/lib/python3.10/site-packages/torch/nn/modules/module.py", line 1750, in _call_impl
    return forward_call(*args, **kwargs)
  File "/datb/DeepSeek/ktransformers/ktransformers/models/modeling_deepseek.py", line 1238, in forward
    hidden_states, self_attn_weights, present_key_value = self.self_attn(
  File "/home/dechin/anaconda3/envs/llama/lib/python3.10/site-packages/torch/nn/modules/module.py", line 1739, in _wrapped_call_impl
    return self._call_impl(*args, **kwargs)
  File "/home/dechin/anaconda3/envs/llama/lib/python3.10/site-packages/torch/nn/modules/module.py", line 1750, in _call_impl
    return forward_call(*args, **kwargs)
  File "/datb/DeepSeek/ktransformers/ktransformers/operators/attention.py", line 407, in forward
    return self.forward_windows(
  File "/datb/DeepSeek/ktransformers/ktransformers/operators/attention.py", line 347, in forward_windows
    return self.forward_chunck(
  File "/datb/DeepSeek/ktransformers/ktransformers/operators/attention.py", line 85, in forward_chunck
    q = self.q_b_proj(self.q_a_layernorm(self.q_a_proj(hidden_states)))
  File "/home/dechin/anaconda3/envs/llama/lib/python3.10/site-packages/torch/nn/modules/module.py", line 1739, in _wrapped_call_impl
    return self._call_impl(*args, **kwargs)
  File "/home/dechin/anaconda3/envs/llama/lib/python3.10/site-packages/torch/nn/modules/module.py", line 1750, in _call_impl
    return forward_call(*args, **kwargs)
  File "/datb/DeepSeek/ktransformers/ktransformers/models/modeling_deepseek.py", line 113, in forward
    hidden_states = hidden_states.to(torch.float32)
RuntimeError: CUDA error: invalid device function
CUDA kernel errors might be asynchronously reported at some other API call, so the stacktrace below might be incorrect.
For debugging consider passing CUDA_LAUNCH_BLOCKING=1
Compile with `TORCH_USE_CUDA_DSA` to enable device-side assertions.
类似于这种 TORCH_USE_CUDA_DSA 的问题,按照官方说法,很大概率是由于显卡型号老旧导致的。目前这个问题较难解决,只能通过更换显卡的方式来处理。
五 、 参考链接
Optimize Rule写法参考
DeepSeek-R1大模型部署参考
六、总结概要
本文主要介绍了国产高性能大模型加载工具 KTransformer 的安装方法。该工具对本地硬件条件有一定要求,如果显卡型号过于老旧,可能会出现 TORCH_USE_CUDA_DSA相关报错,且此问题只能通过更换显卡解决。作者本地未完全测试成功,但源码安装方法和 Docker 安装方法经确认没有问题。