JS深浅拷贝与性能优化
一、深浅拷贝
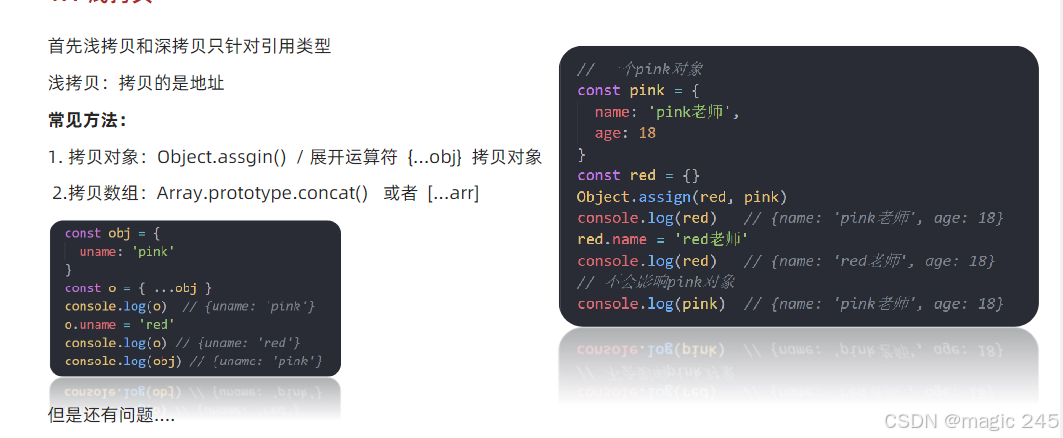
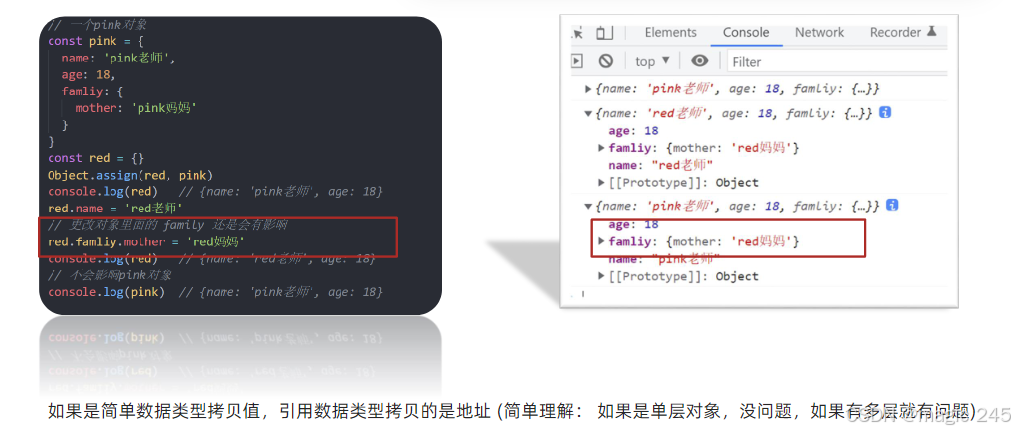
浅拷贝
深拷贝
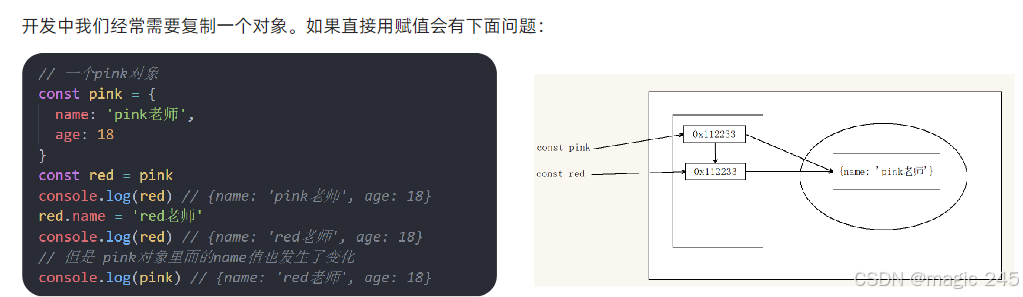
1.浅拷贝
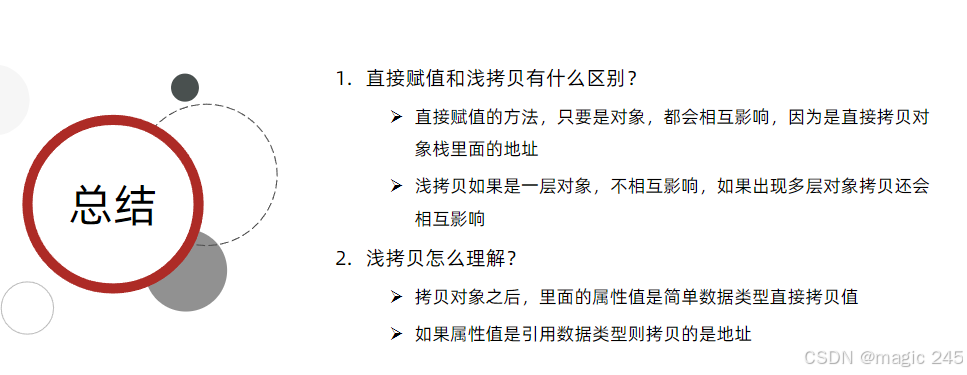
2. 深拷贝
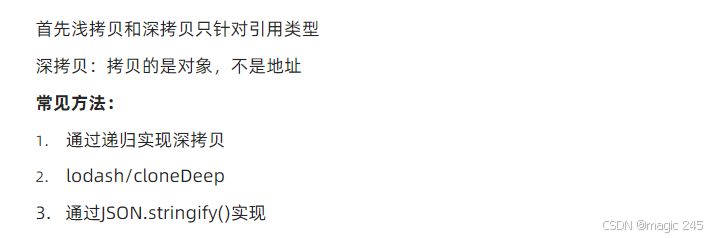
⑴常见方法:
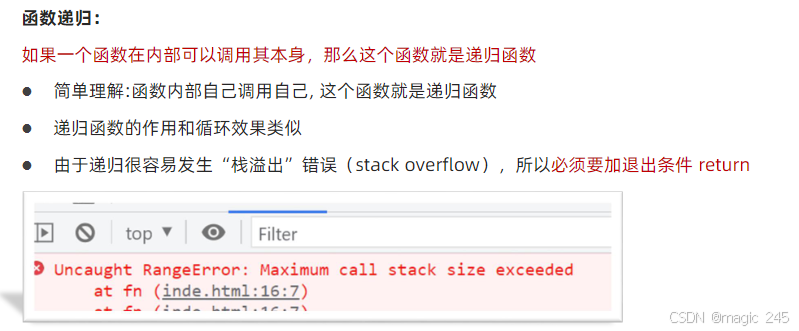
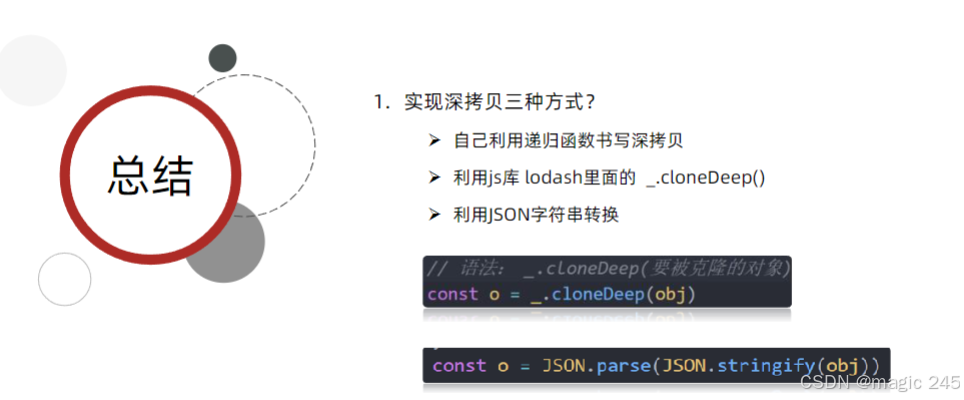
①通过递归实现深拷贝

<!DOCTYPE html>
<html lang="en">

<head>
  <meta charset="UTF-8">
  <meta http-equiv="X-UA-Compatible" content="IE=edge">
  <meta name="viewport" content="width=device-width, initial-scale=1.0">
  <title>Document</title>
</head>

<body>
  <script>
    let i = 1
    function fn() {
      console.log(`这是第${i}次`)
      if (i >= 6) {
        return
      }
      i++
      fn()
    }
    fn()
  </script>
</body>

</html>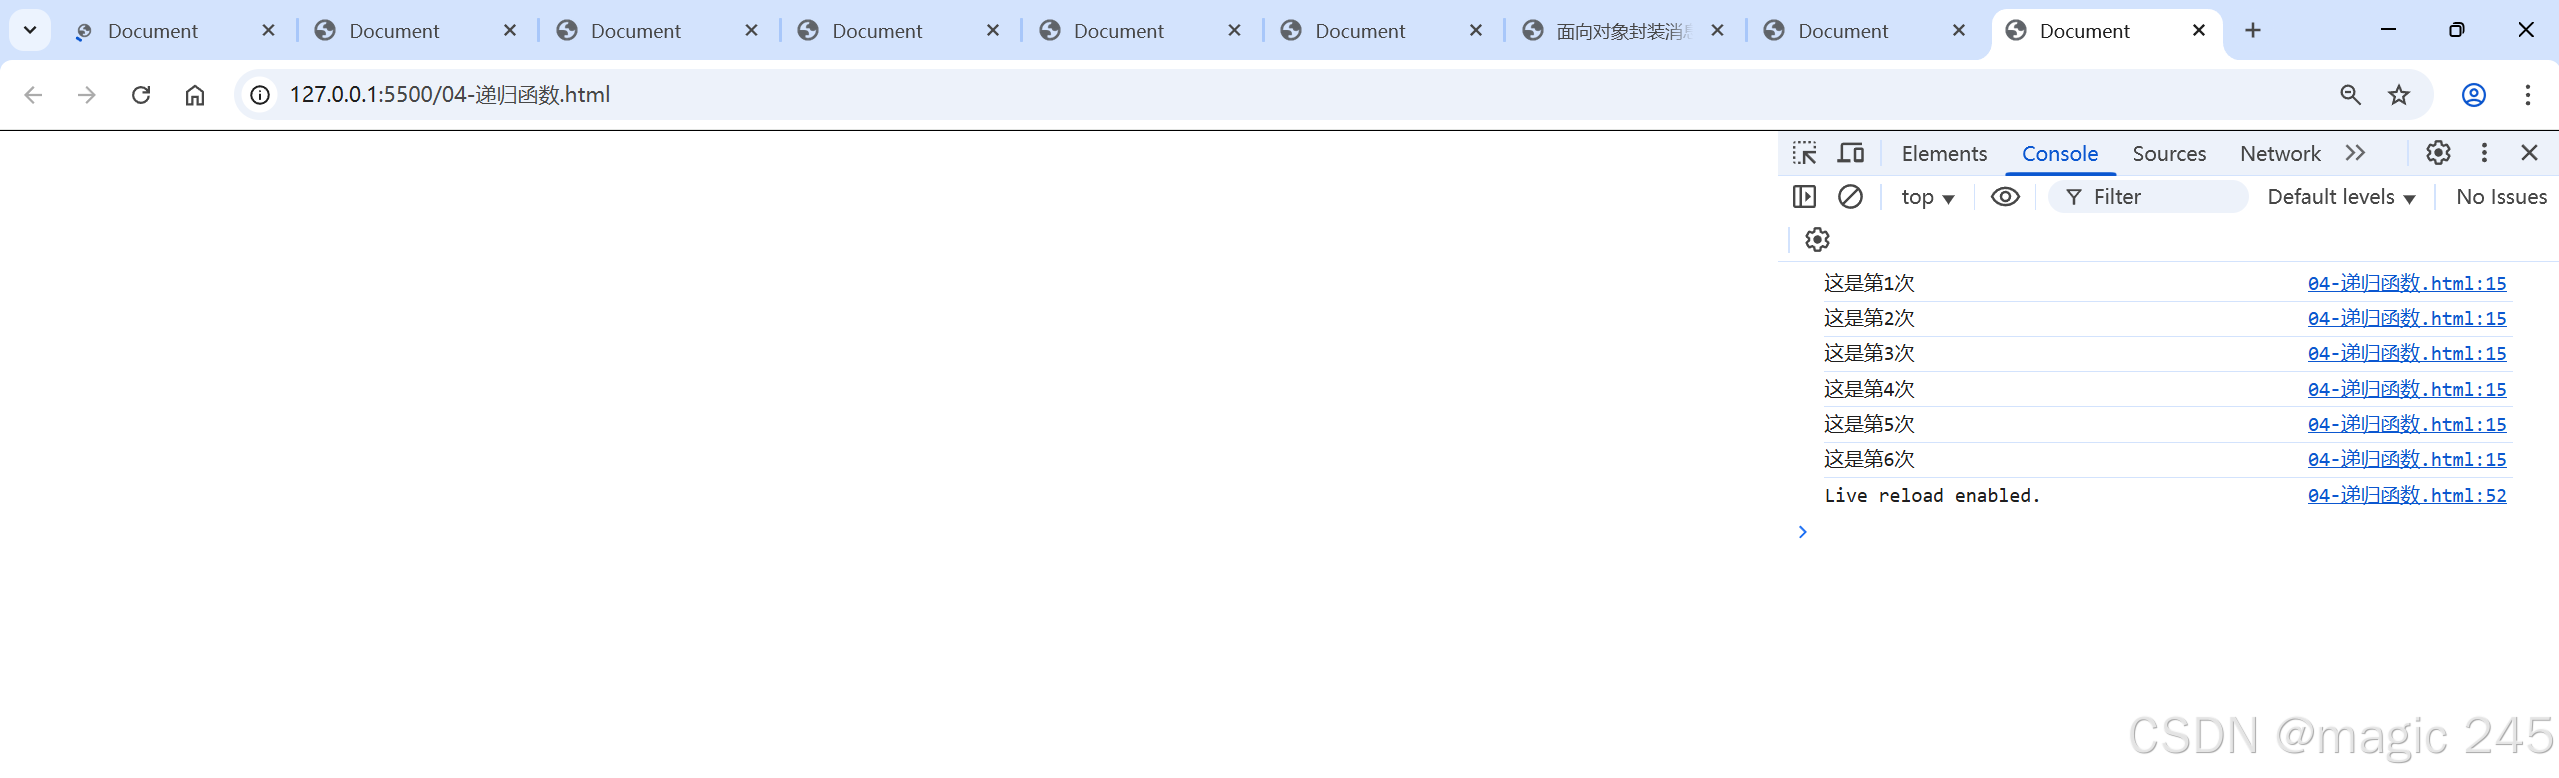
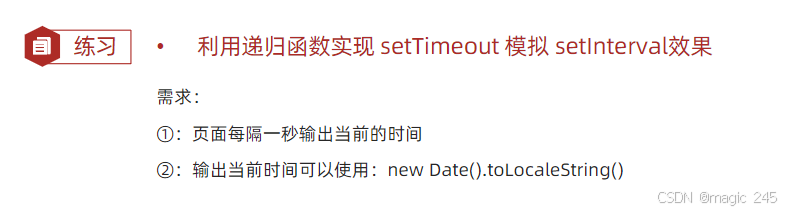
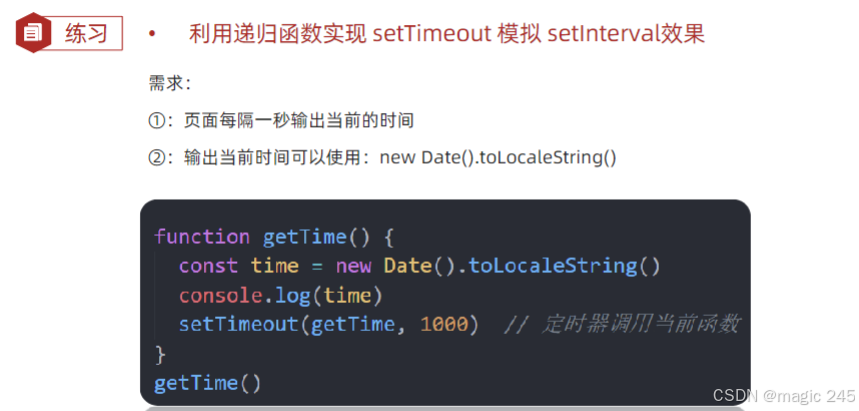
②练习 利用递归函数实现setTimeout 模拟setInterval效果
利用递归函数实现setTimeout 模拟setInterval效果
<!DOCTYPE html>
<html lang="en">

<head>
  <meta charset="UTF-8">
  <meta http-equiv="X-UA-Compatible" content="IE=edge">
  <meta name="viewport" content="width=device-width, initial-scale=1.0">
  <title>Document</title>
</head>

<body>
  <div></div>
  <script>
    function getTime() {
      document.querySelector('div').innerHTML = new Date().toLocaleString()
      setTimeout(getTime, 1000)
    }
    getTime()
  </script>
</body>

</html>
③ js库lodash里面cloneDeep内部实现了深拷贝

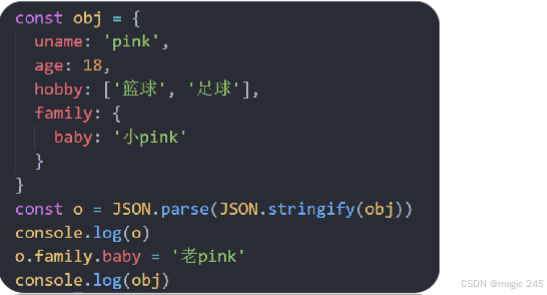
④ 通过JSON.stringify()实现
二、异常处理
throw 抛异常
try /catch 捕获异常
debugger
了解JavaScript 中程序异常处理的方法,提升代码运行的健壮性。
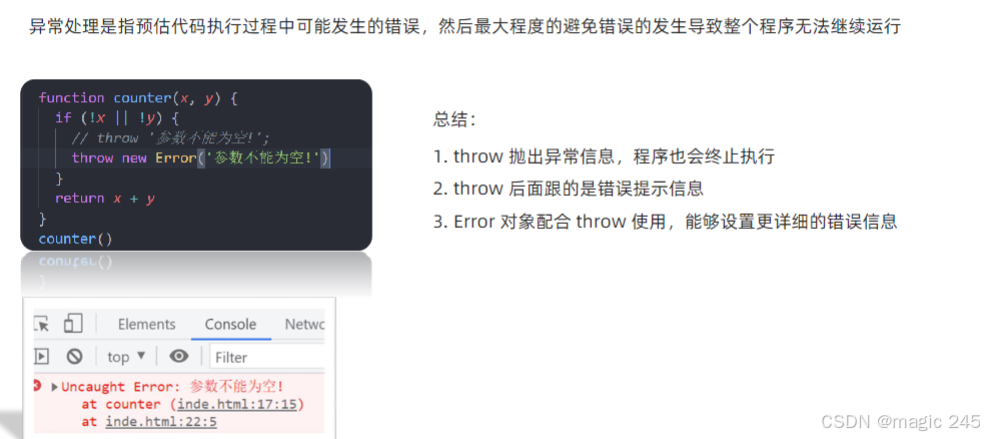
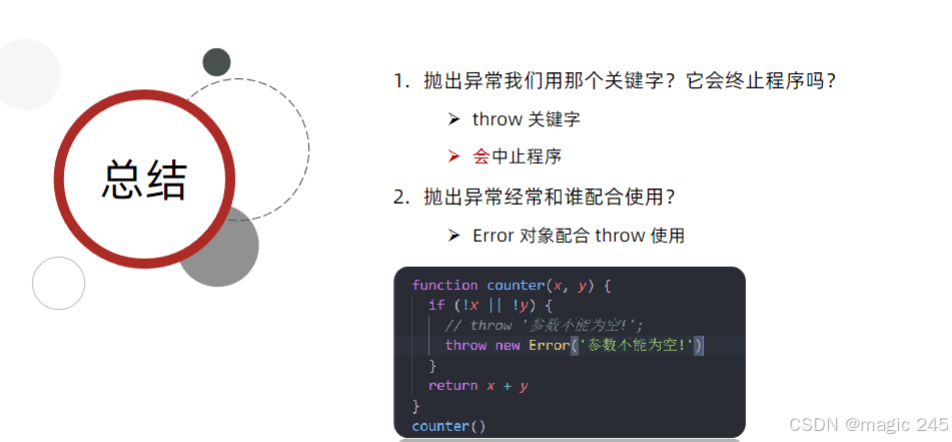
1. throw 抛异常
<!DOCTYPE html>
<html lang="en">

<head>
  <meta charset="UTF-8">
  <meta http-equiv="X-UA-Compatible" content="IE=edge">
  <meta name="viewport" content="width=device-width, initial-scale=1.0">
  <title>Document</title>
</head>

<body>
  <script>
    function fn(x, y) {
      if (!x || !y) {
        // throw '没有参数传递进来'
        throw new Error('没有参数传递过来')
      }

      return x + y
    }
    console.log(fn())
  </script>
</body>

</html>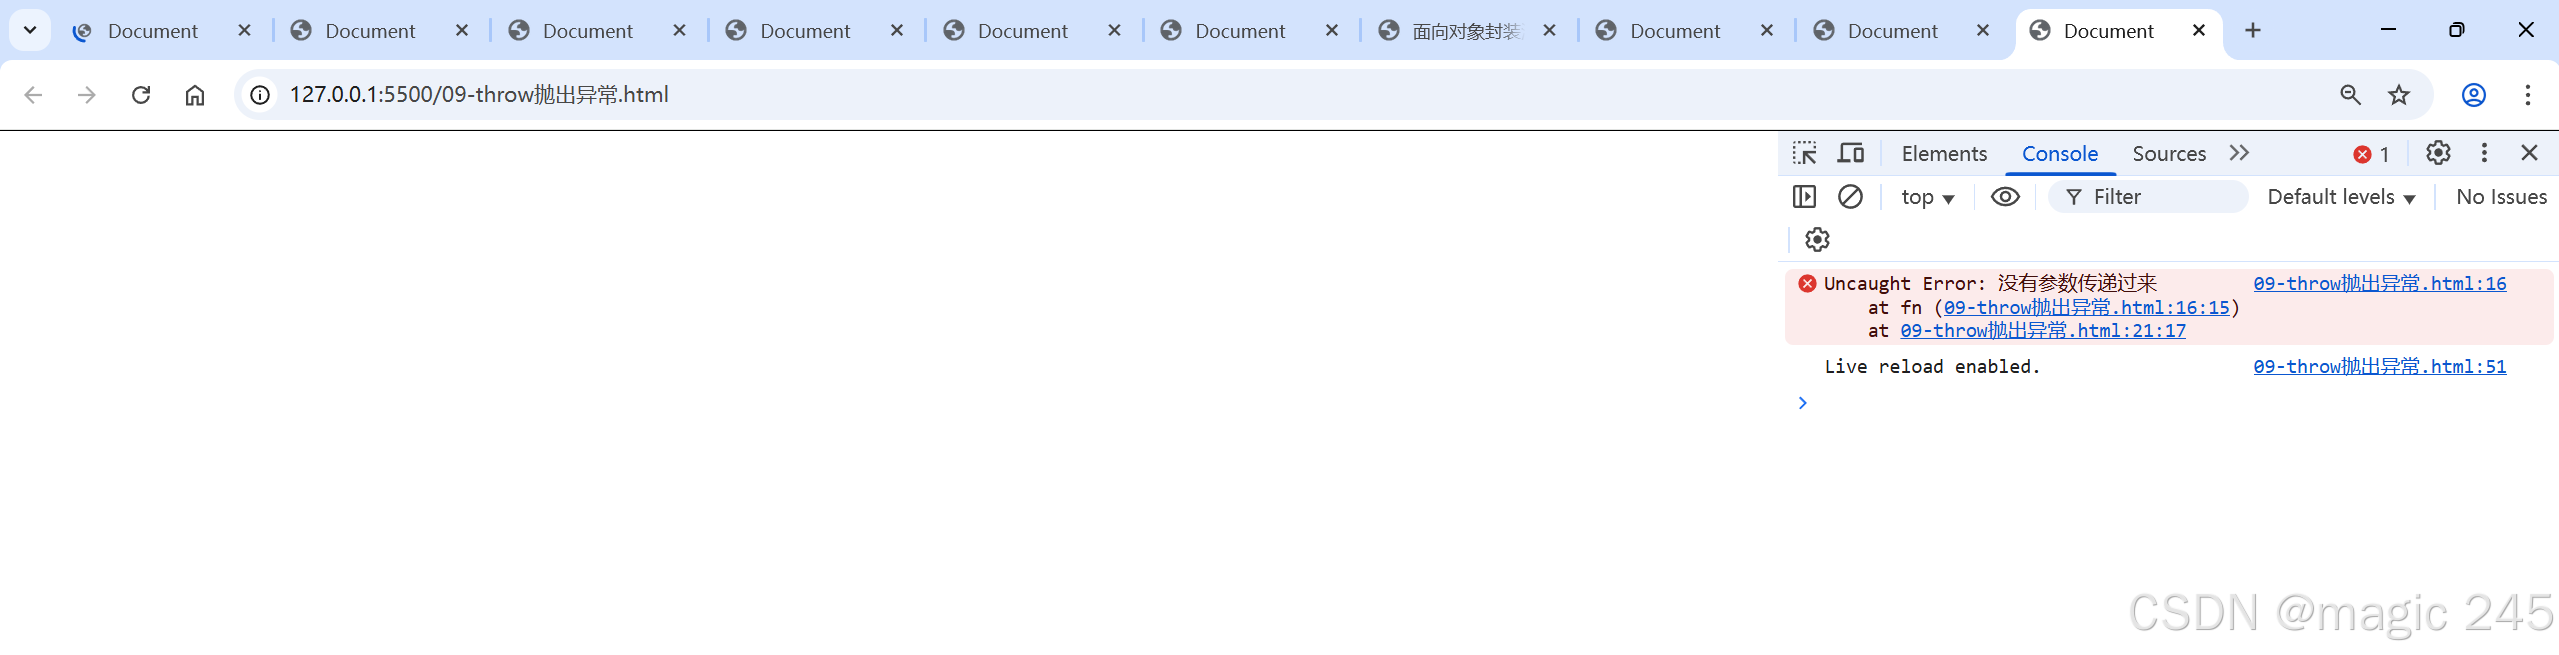
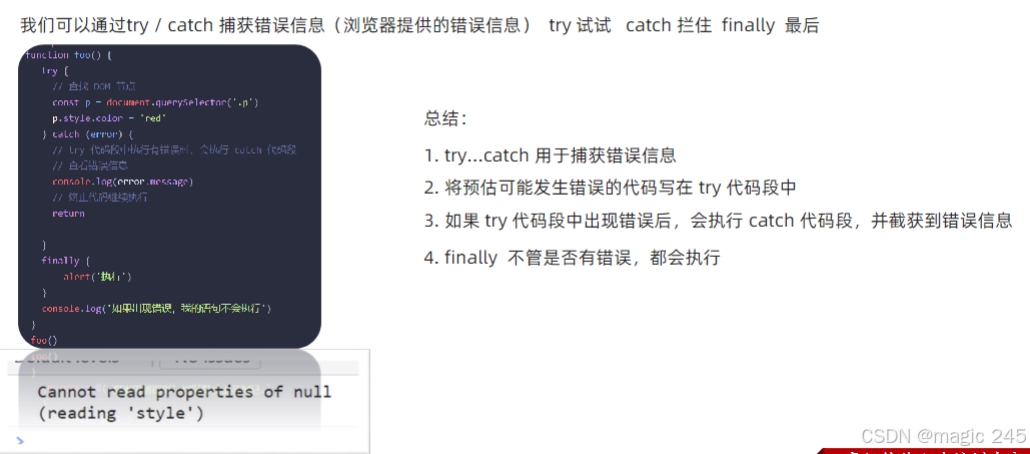
2. try/catch 捕获错误信息
<!DOCTYPE html>
<html lang="en">

<head>
  <meta charset="UTF-8">
  <meta http-equiv="X-UA-Compatible" content="IE=edge">
  <meta name="viewport" content="width=device-width, initial-scale=1.0">
  <title>Document</title>
</head>

<body>
  <p>123</p>
  <script>
    function fn() {
      try {
        // 可能发送错误的代码 要写到 try
        const p = document.querySelector('.p')
        p.style.color = 'red'
      } catch (err) {
        // 拦截错误,提示浏览器提供的错误信息,但是不中断程序的执行
        console.log(err.message)
        throw new Error('你看看,选择器错误了吧')
        // 需要加return 中断程序
        // return
      }
      finally {
        // 不管你程序对不对,一定会执行的代码
        alert('弹出对话框')
      }
      console.log(11)
    }
    fn()
  </script>
</body>

</html>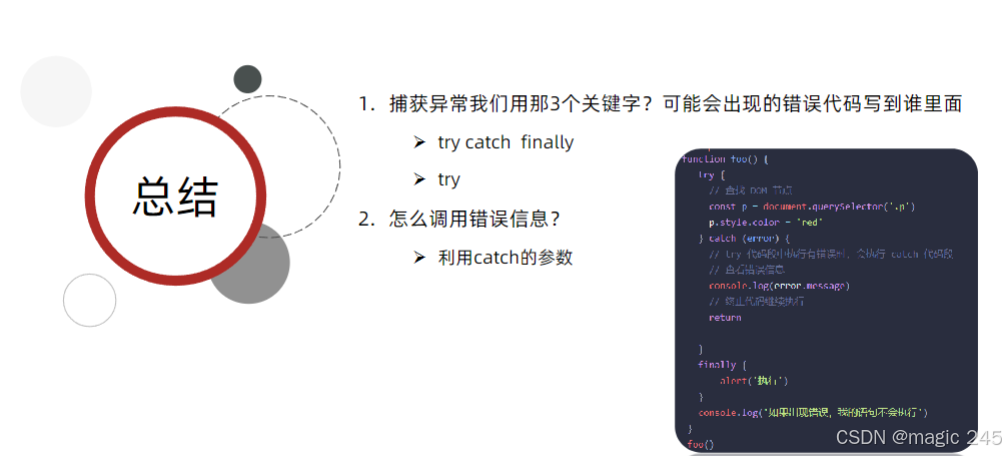
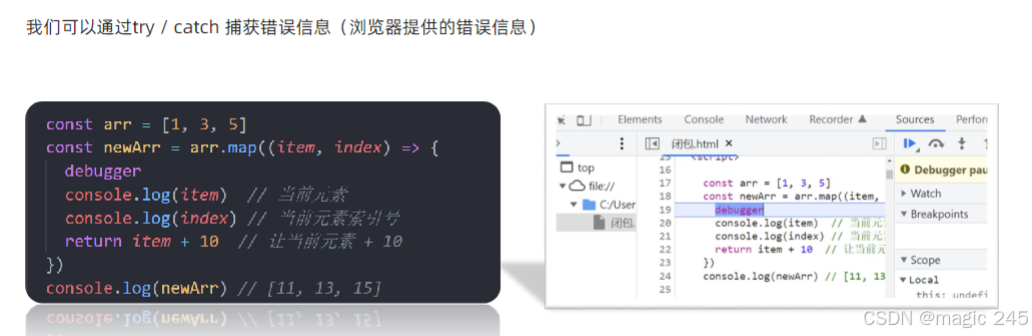
3.debugger
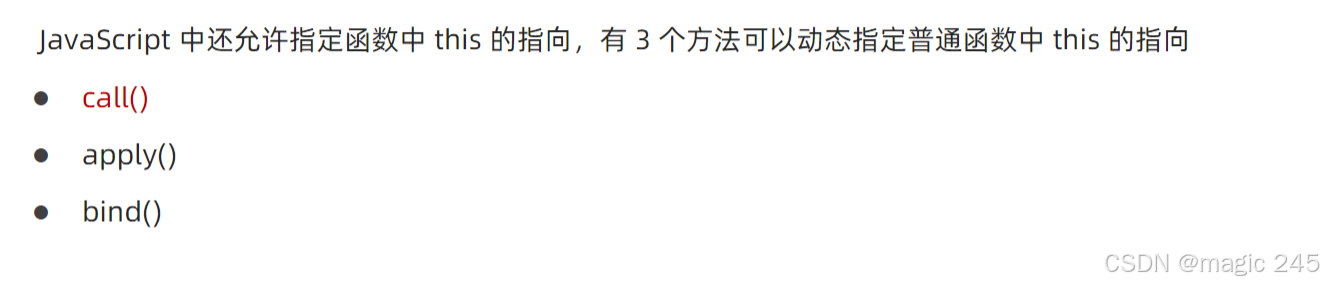
三、处理this
this指向
改变this
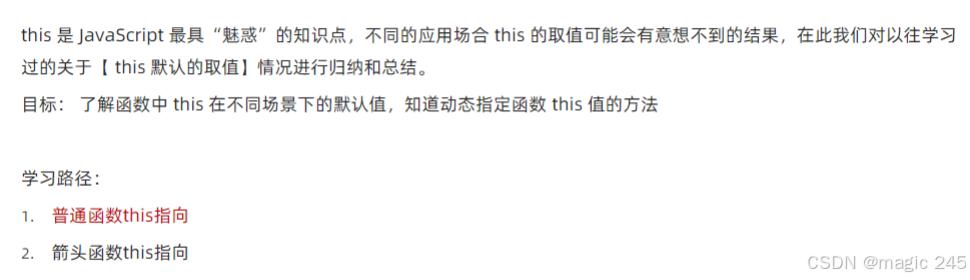
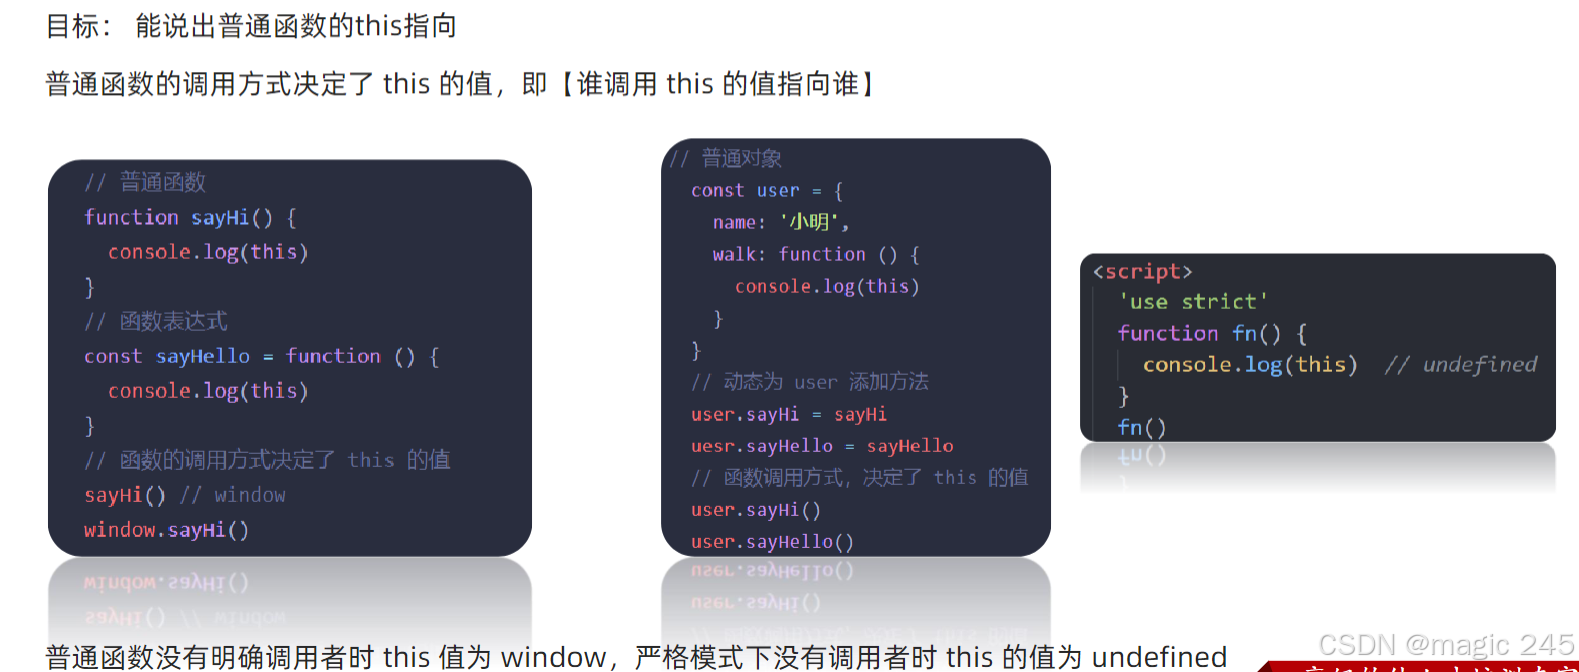
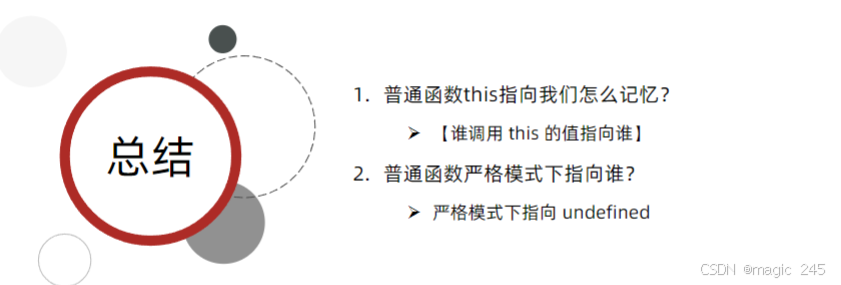
1. this指向
⑴ this指向-普通函数
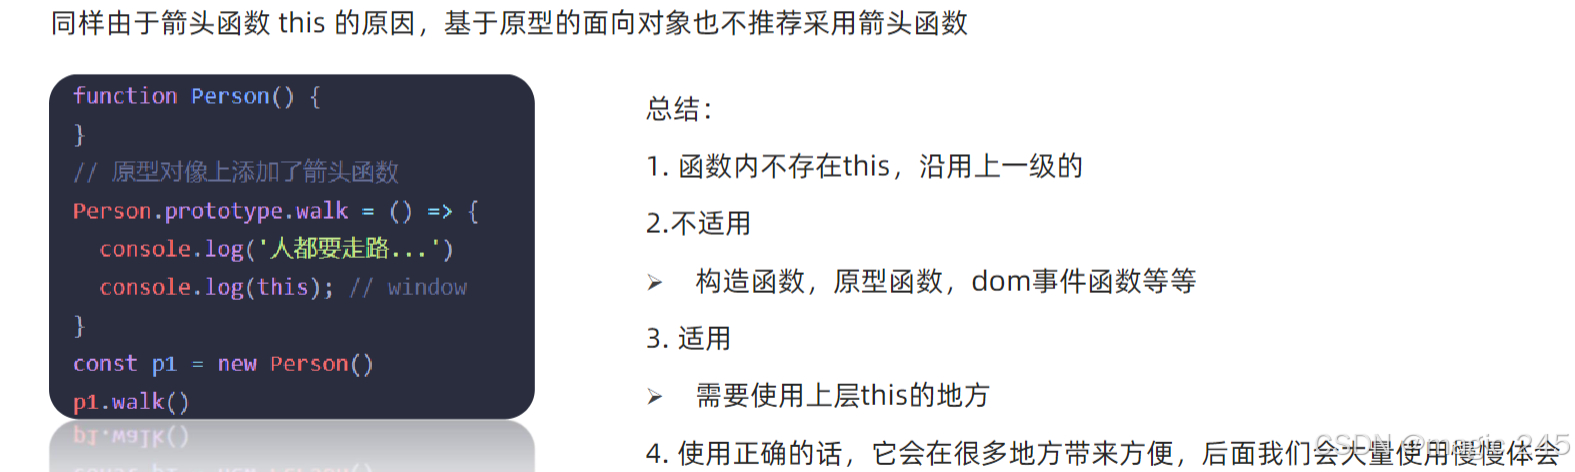
⑵.this指向-箭头函数
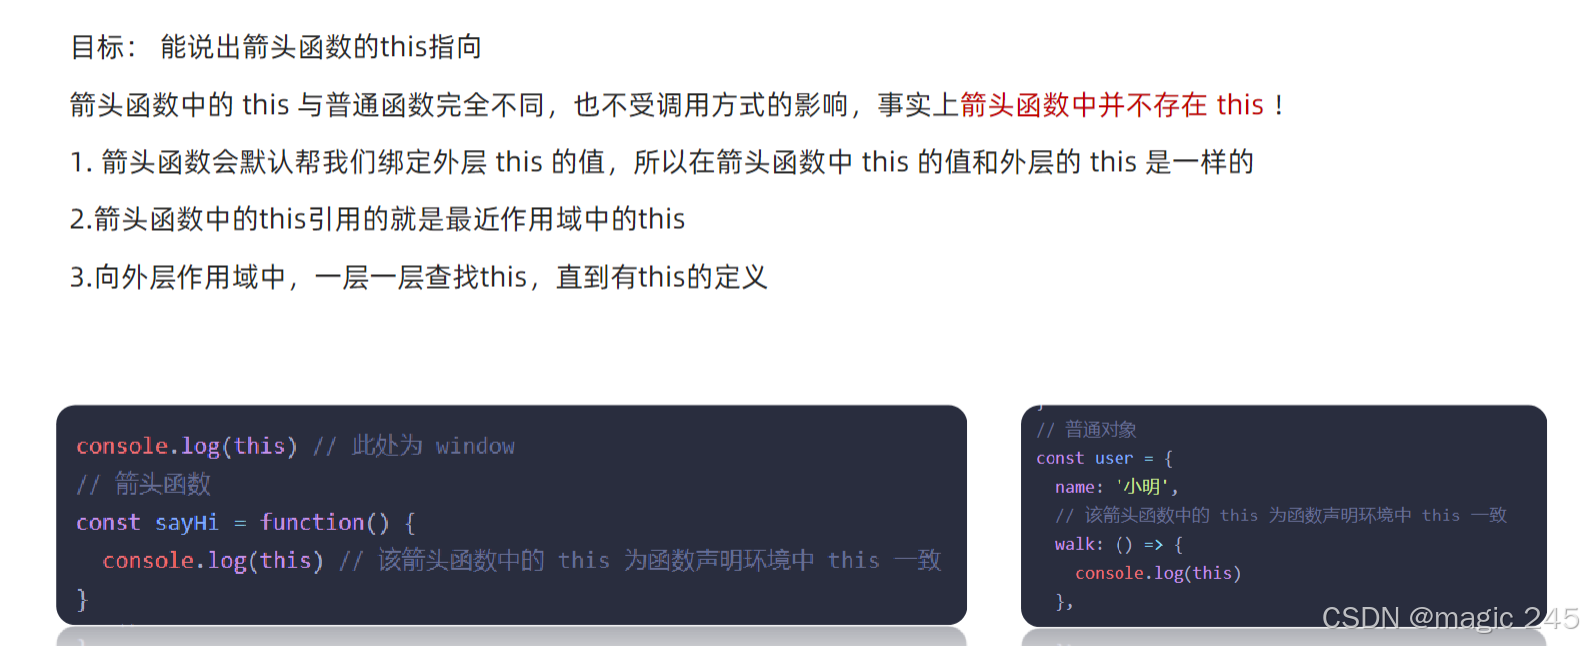
注意情况1:
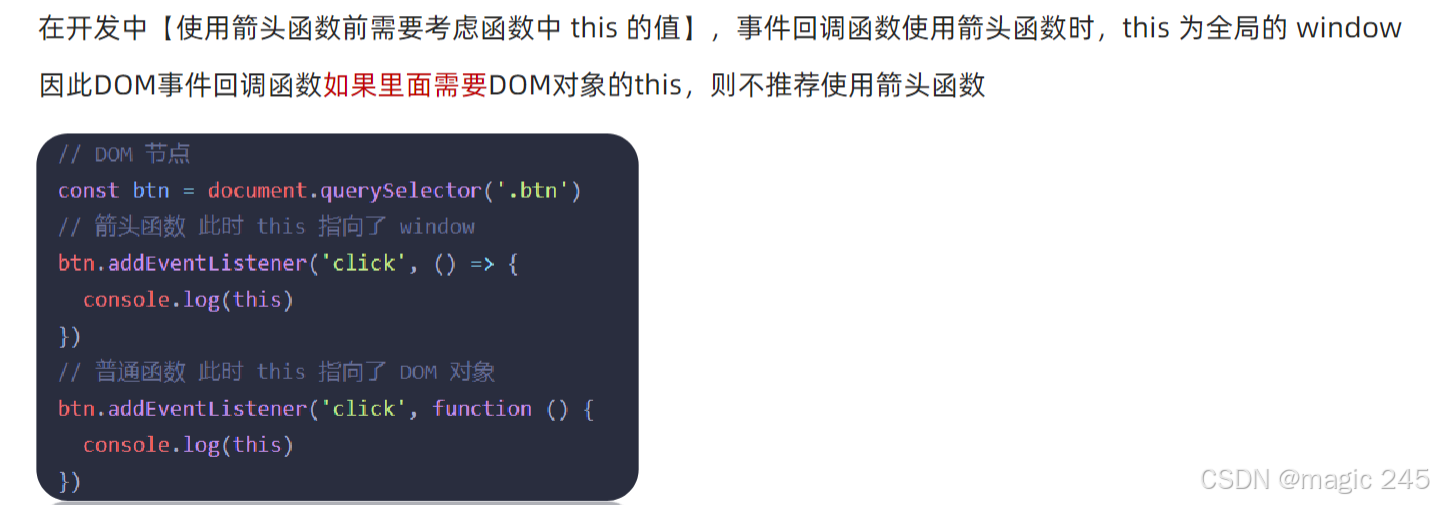
注意情况2:
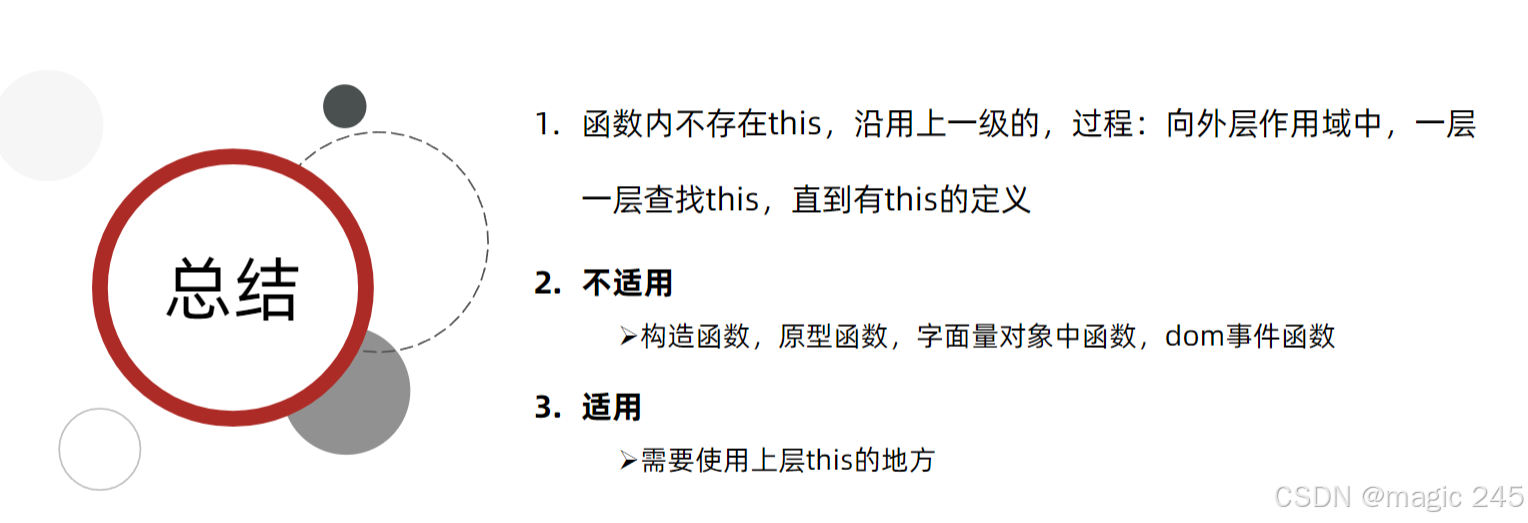
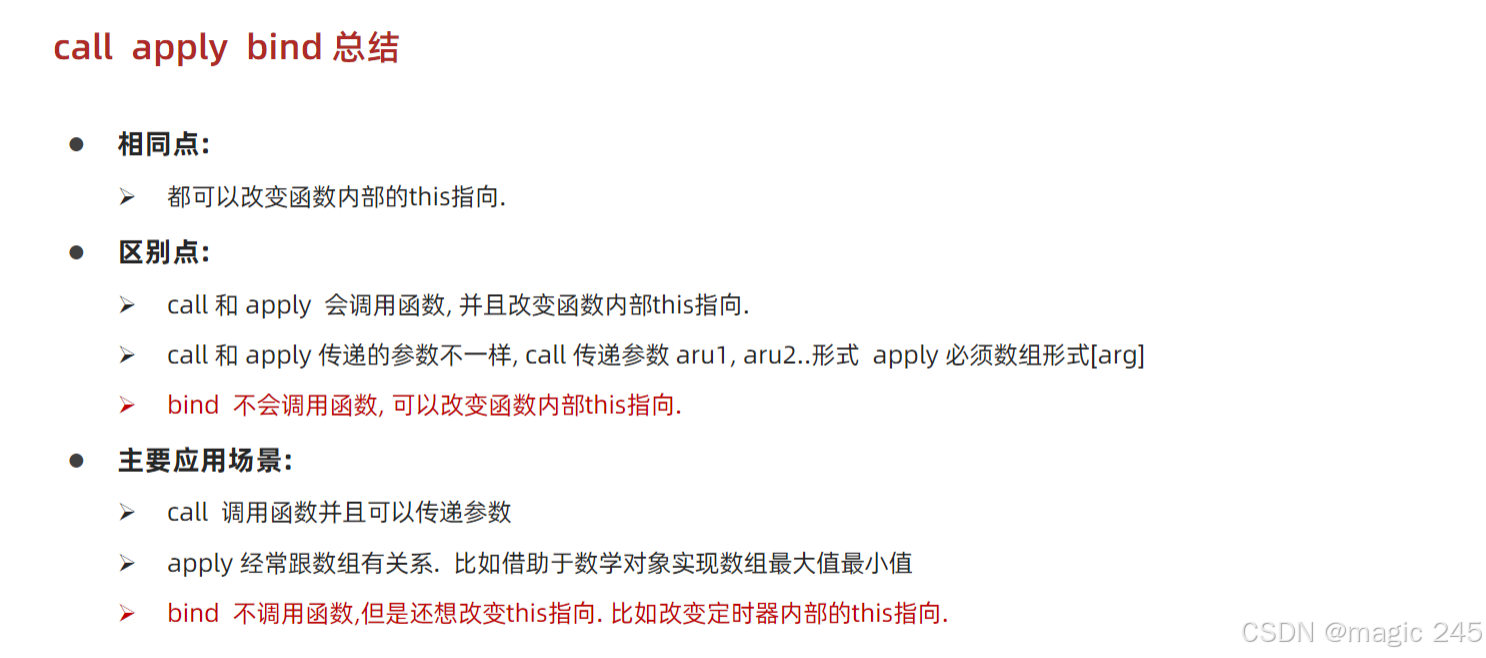
2.改变this
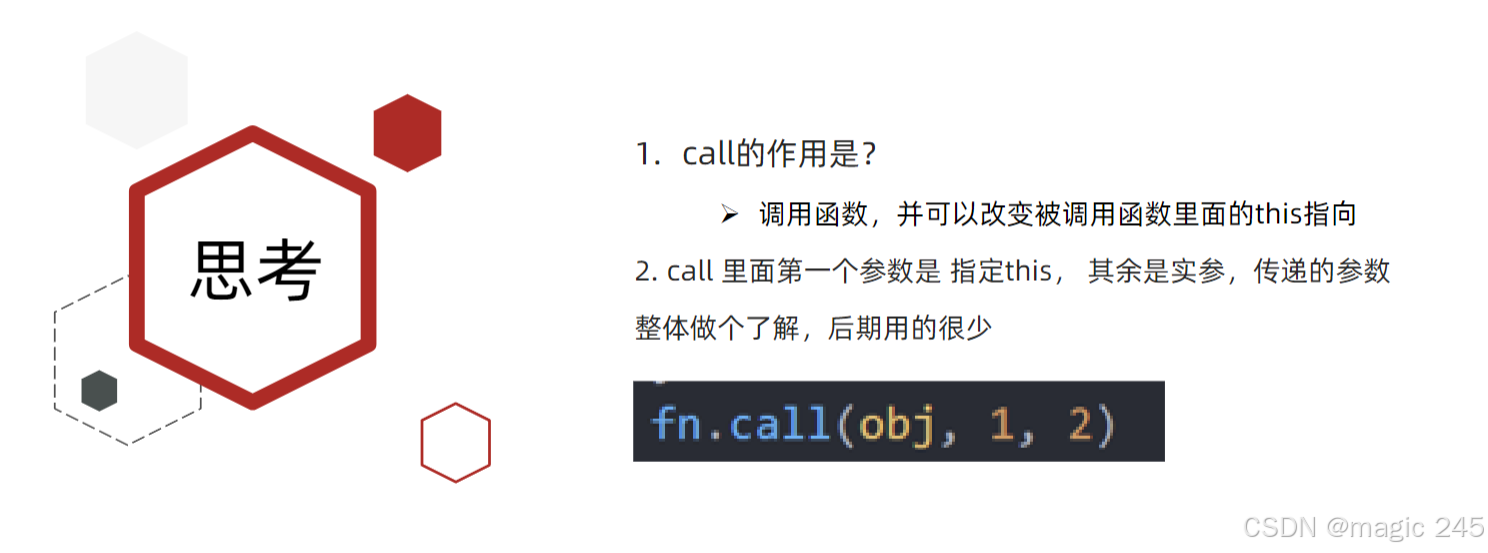
⑴. call() –了解
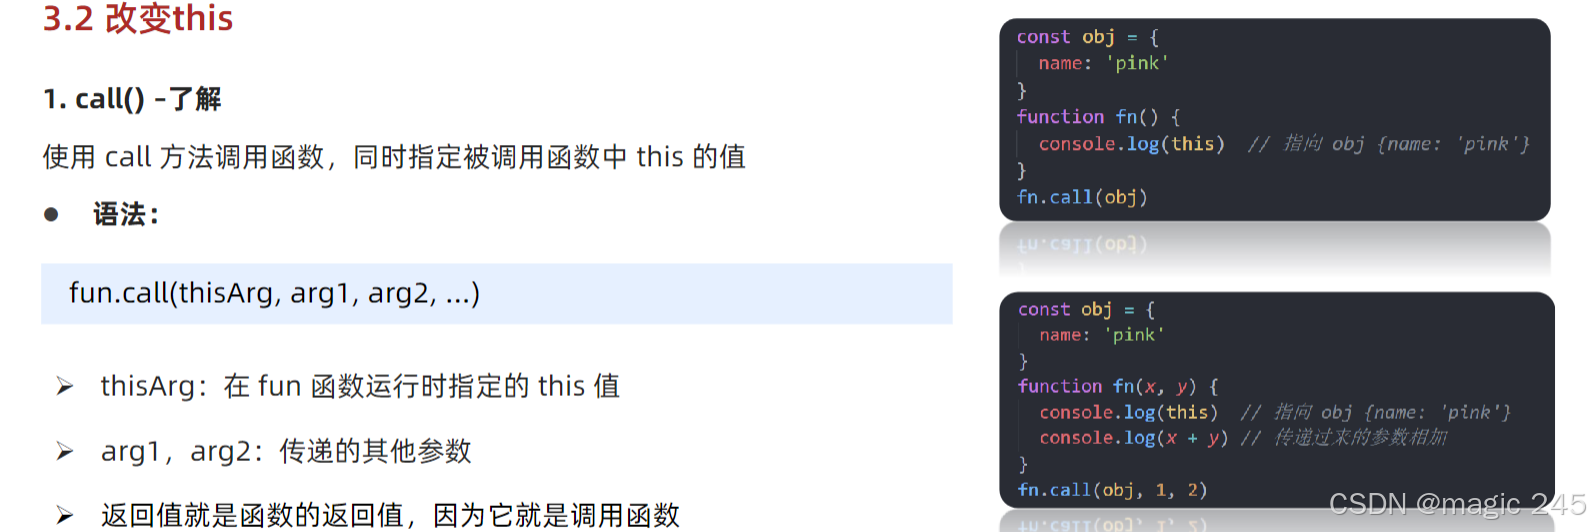
<!DOCTYPE html>
<html lang="en">

<head>
  <meta charset="UTF-8">
  <meta http-equiv="X-UA-Compatible" content="IE=edge">
  <meta name="viewport" content="width=device-width, initial-scale=1.0">
  <title>Document</title>
</head>

<body>
  <script>
    const obj = {
      uname: 'pink'
    }
    function fn(x, y) {
      console.log(this) // window
      console.log(x + y)
    }
    // 1. 调用函数
    // 2. 改变 this 指向
    fn.call(obj, 1, 2)
  </script>
</body>

</html>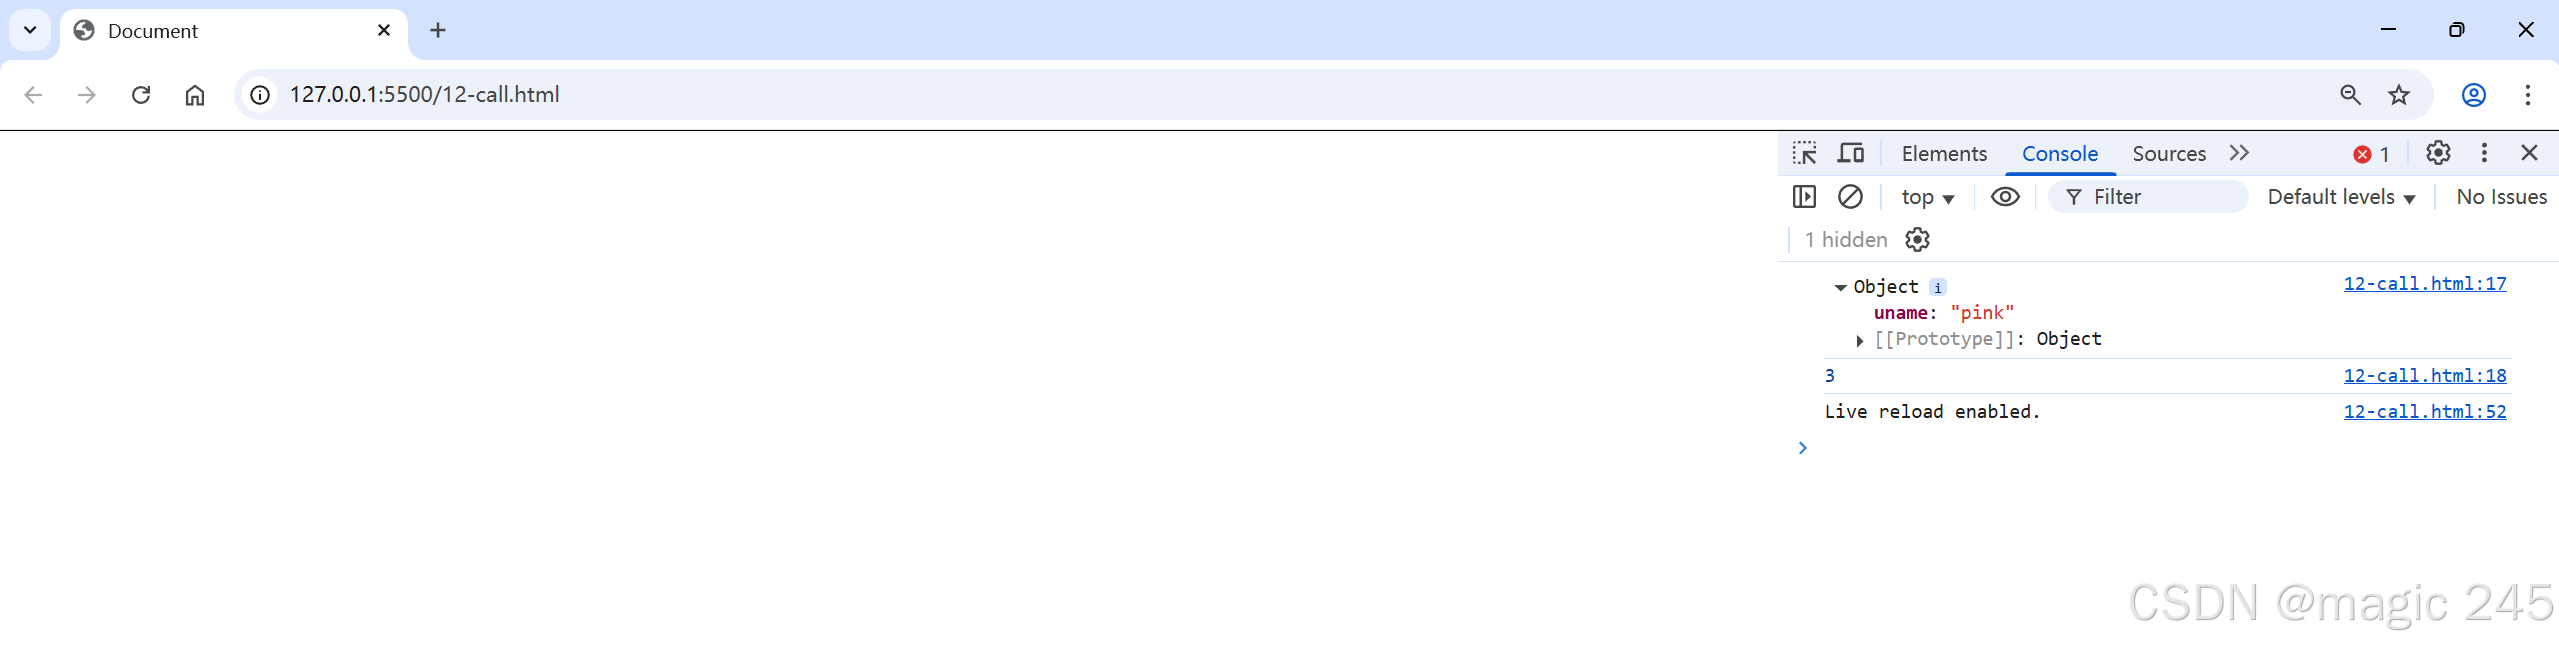
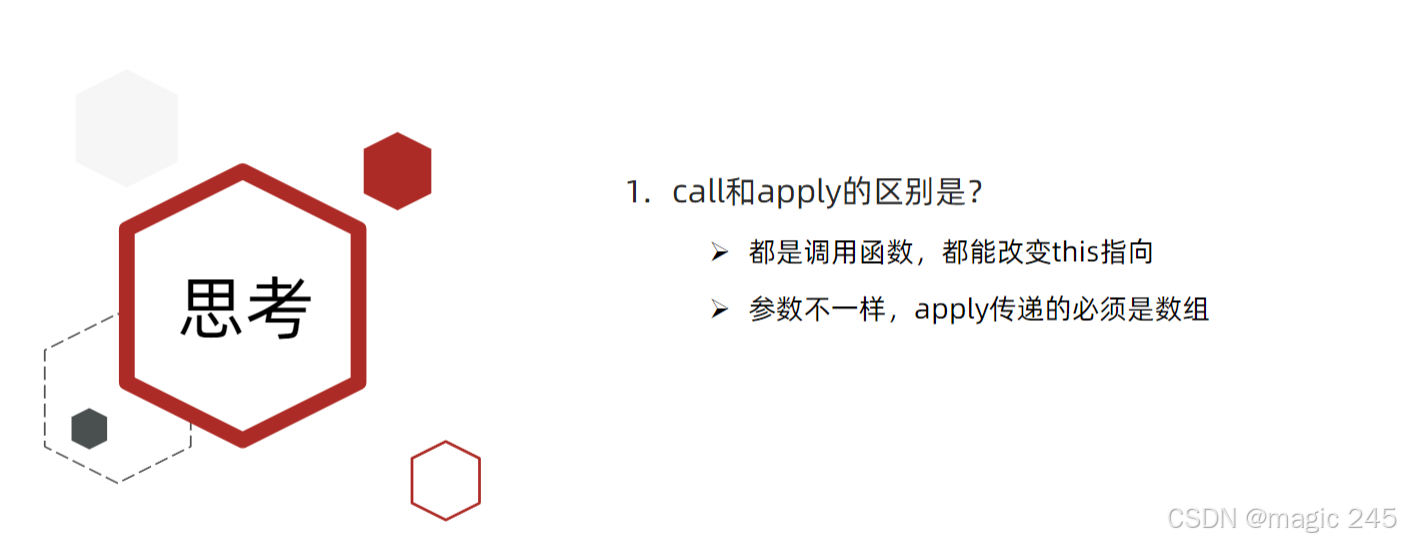
⑵. apply()-理解

<!DOCTYPE html>
<html lang="en">

<head>
  <meta charset="UTF-8">
  <meta http-equiv="X-UA-Compatible" content="IE=edge">
  <meta name="viewport" content="width=device-width, initial-scale=1.0">
  <title>Document</title>
</head>

<body>
  <script>
    const obj = {
      age: 18
    }
    function fn(x, y) {
      console.log(this) // {age: 18}
      console.log(x + y)
    }
    // 1. 调用函数
    // 2. 改变this指向
    //  fn.apply(this指向谁, 数组参数)
    fn.apply(obj, [1, 2])
    // 3. 返回值   本身就是在调用函数,所以返回值就是函数的返回值

    // 使用场景: 求数组最大值
    // const max = Math.max(1, 2, 3)
    // console.log(max)
    const arr = [100, 44, 77]
    const max = Math.max.apply(Math, arr)
    const min = Math.min.apply(null, arr)
    console.log(max, min)
    // 使用场景: 求数组最大值
    console.log(Math.max(...arr))
  </script>
</body>

</html>
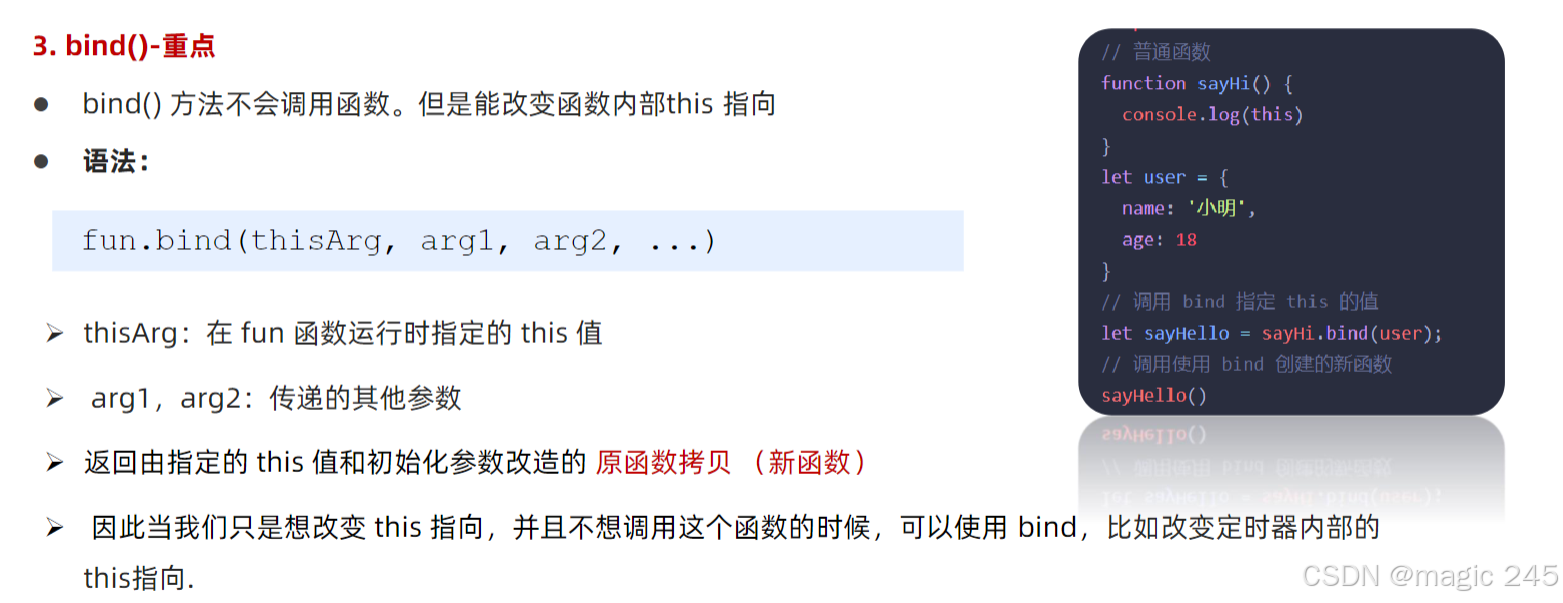
⑶ bind()-重点
<!DOCTYPE html>
<html lang="en">

<head>
  <meta charset="UTF-8">
  <meta http-equiv="X-UA-Compatible" content="IE=edge">
  <meta name="viewport" content="width=device-width, initial-scale=1.0">
  <title>Document</title>
</head>

<body>
  <button>发送短信</button>
  <script>
    const obj = {
      age: 18
    }
    function fn() {
      console.log(this)
    }

    // 1. bind 不会调用函数
    // 2. 能改变this指向
    // 3. 返回值是个函数,  但是这个函数里面的this是更改过的obj
    const fun = fn.bind(obj)
    // console.log(fun)
    fun()

    // 需求,有一个按钮,点击里面就禁用,2秒钟之后开启
    document.querySelector('button').addEventListener('click', function () {
      // 禁用按钮
      this.disabled = true
      window.setTimeout(function () {
        // 在这个普通函数里面,我们要this由原来的window 改为 btn
        this.disabled = false
      }.bind(this), 2000)   // 这里的this 和 btn 一样
    })
  </script>
</body>

</html>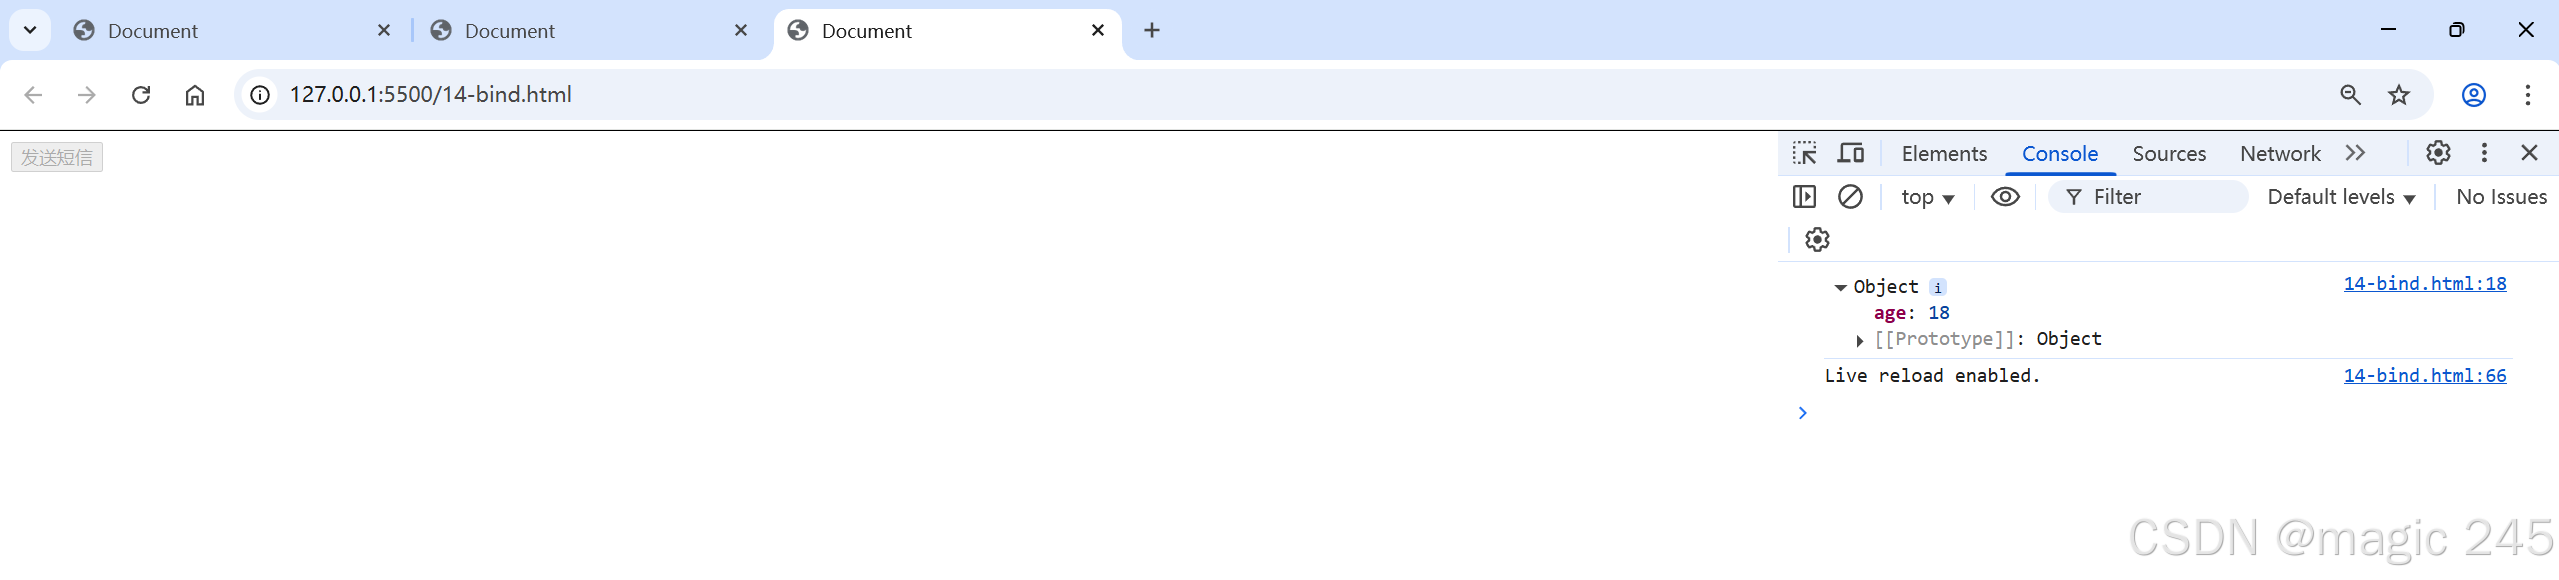
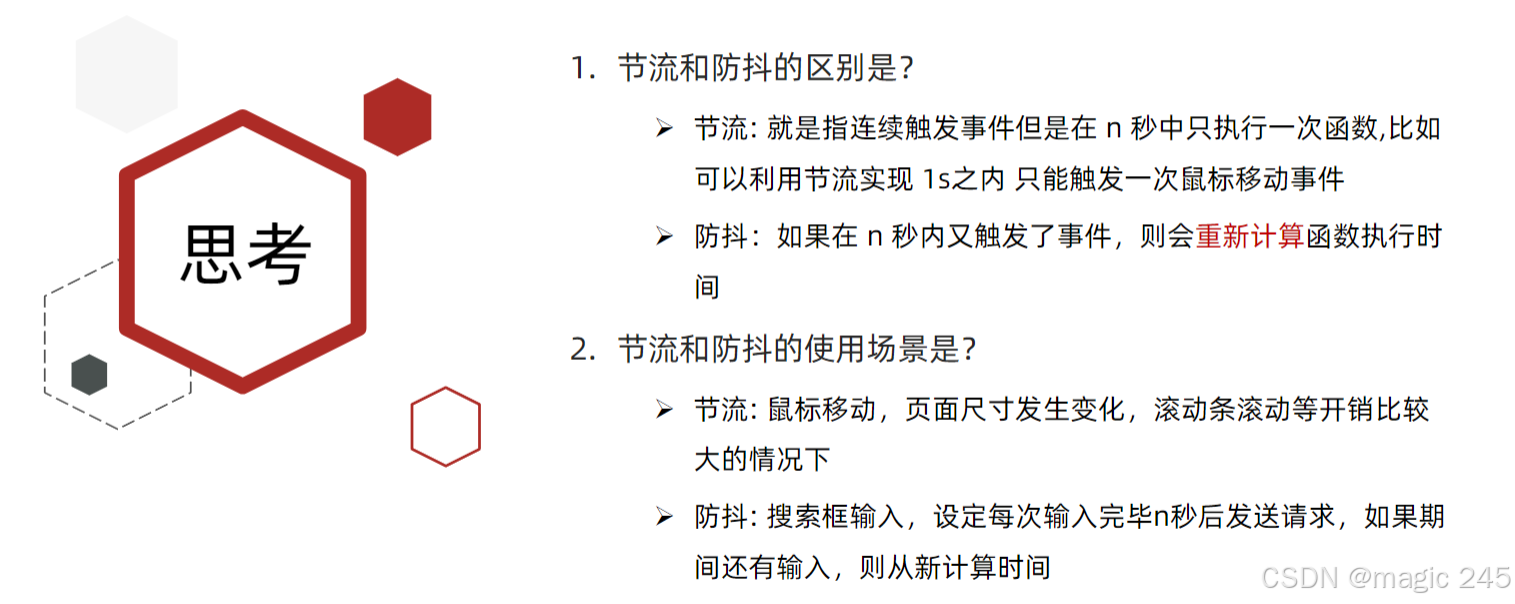
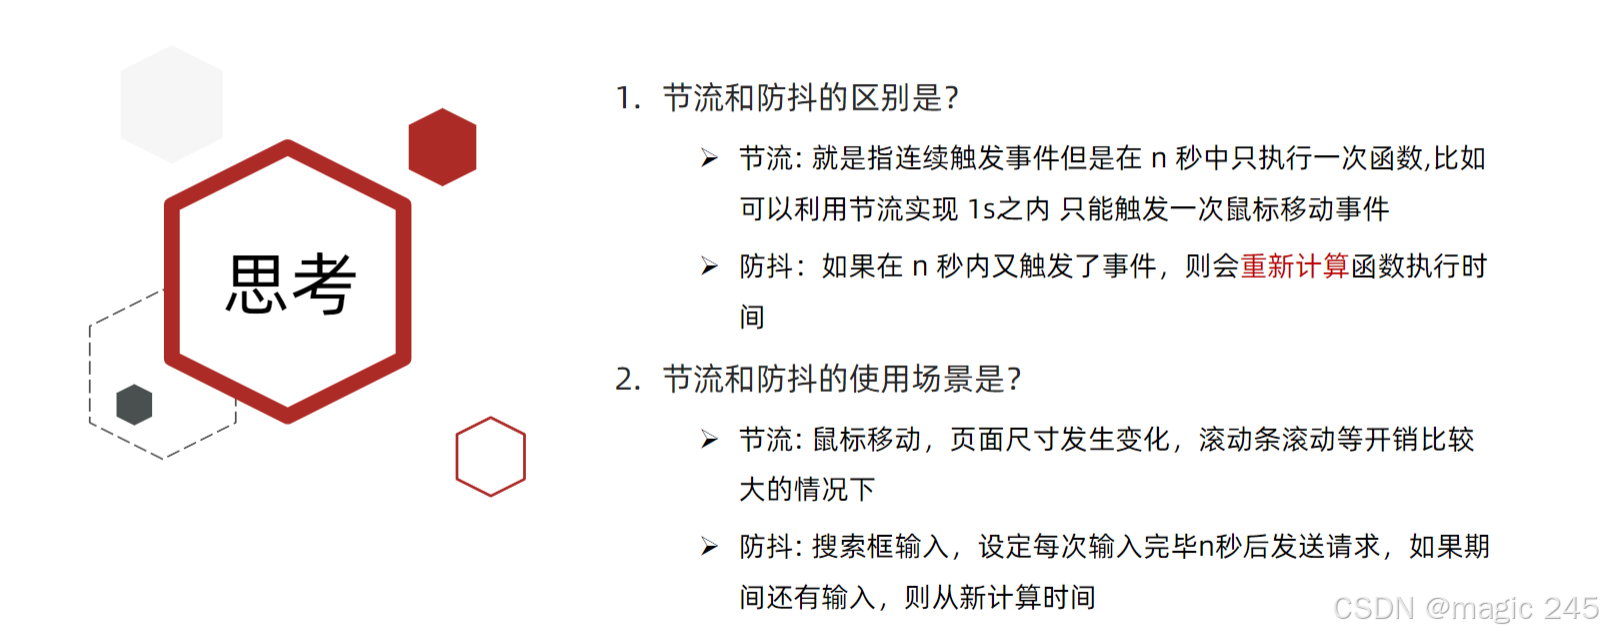
四、性能优化
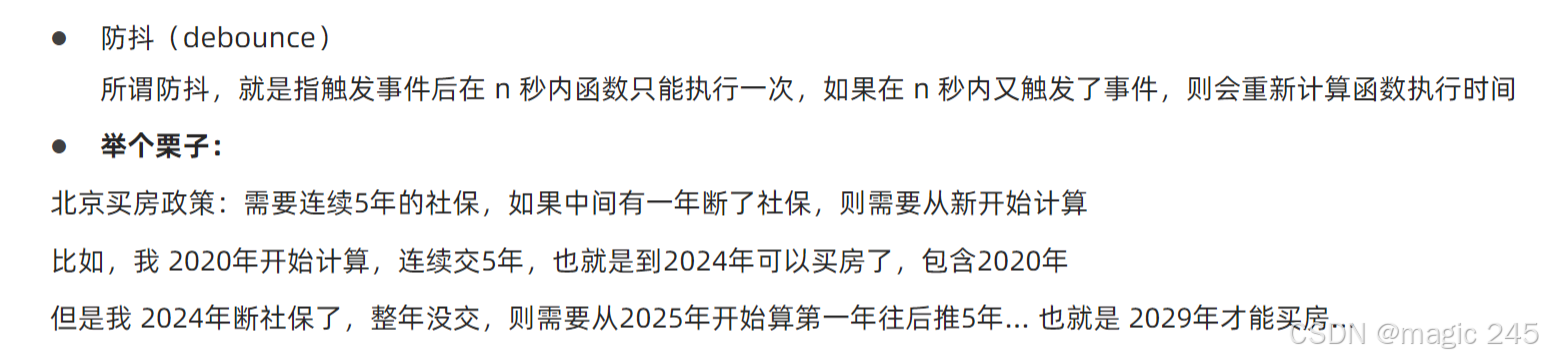
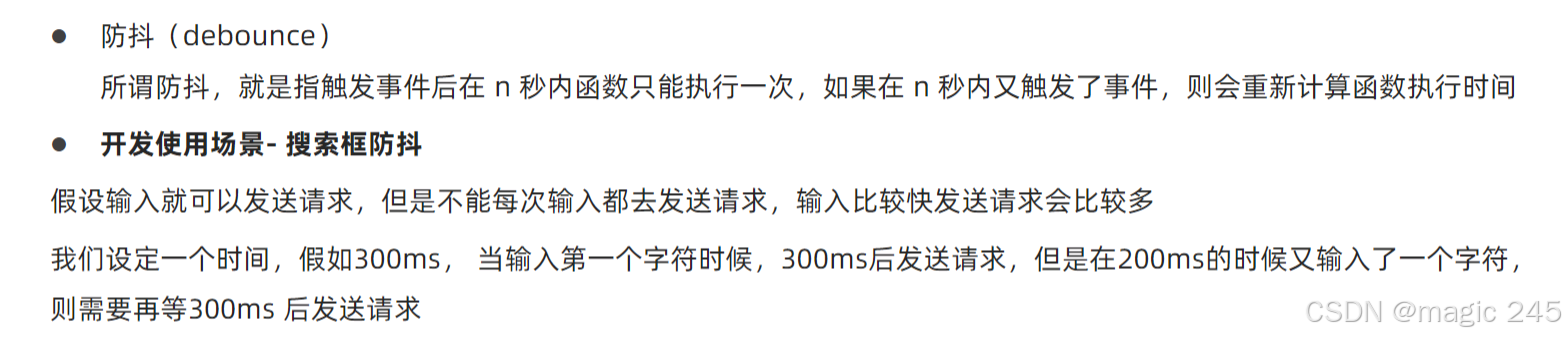
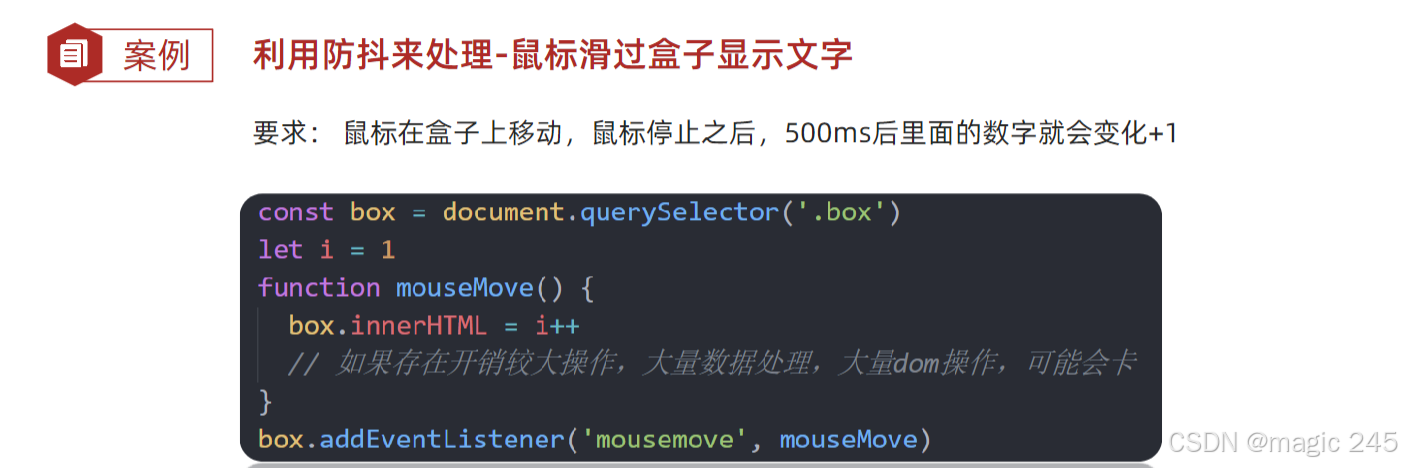
防抖
节流
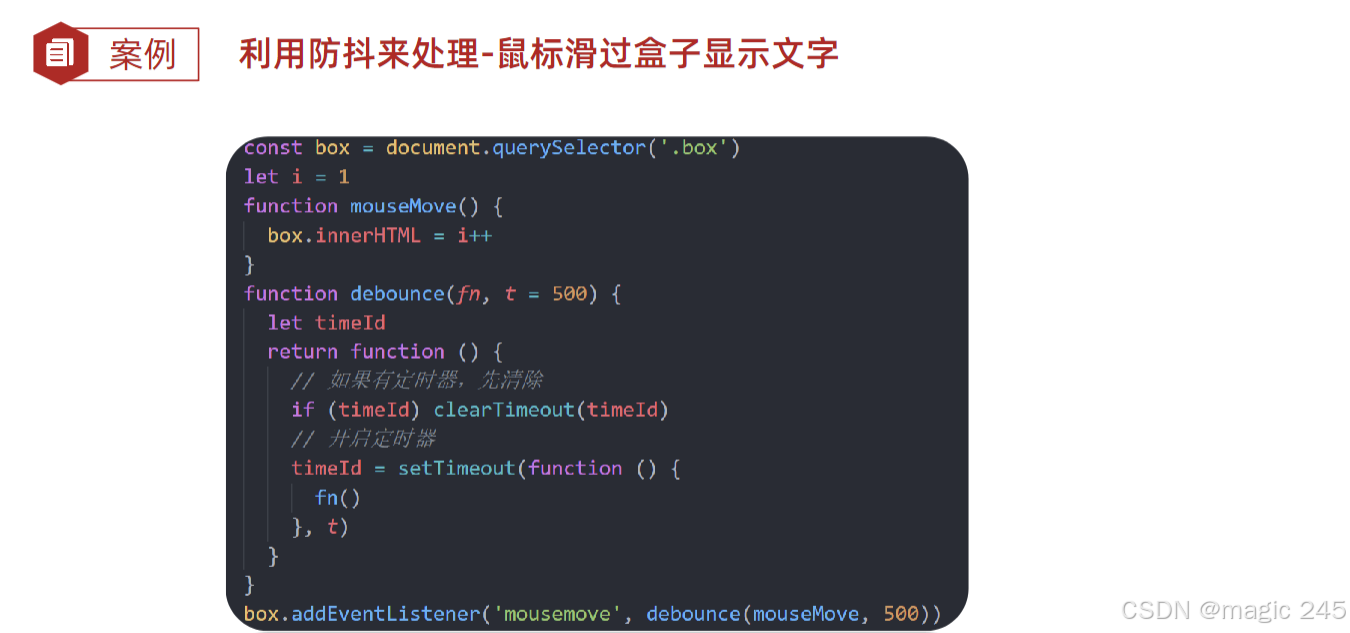
1.防抖
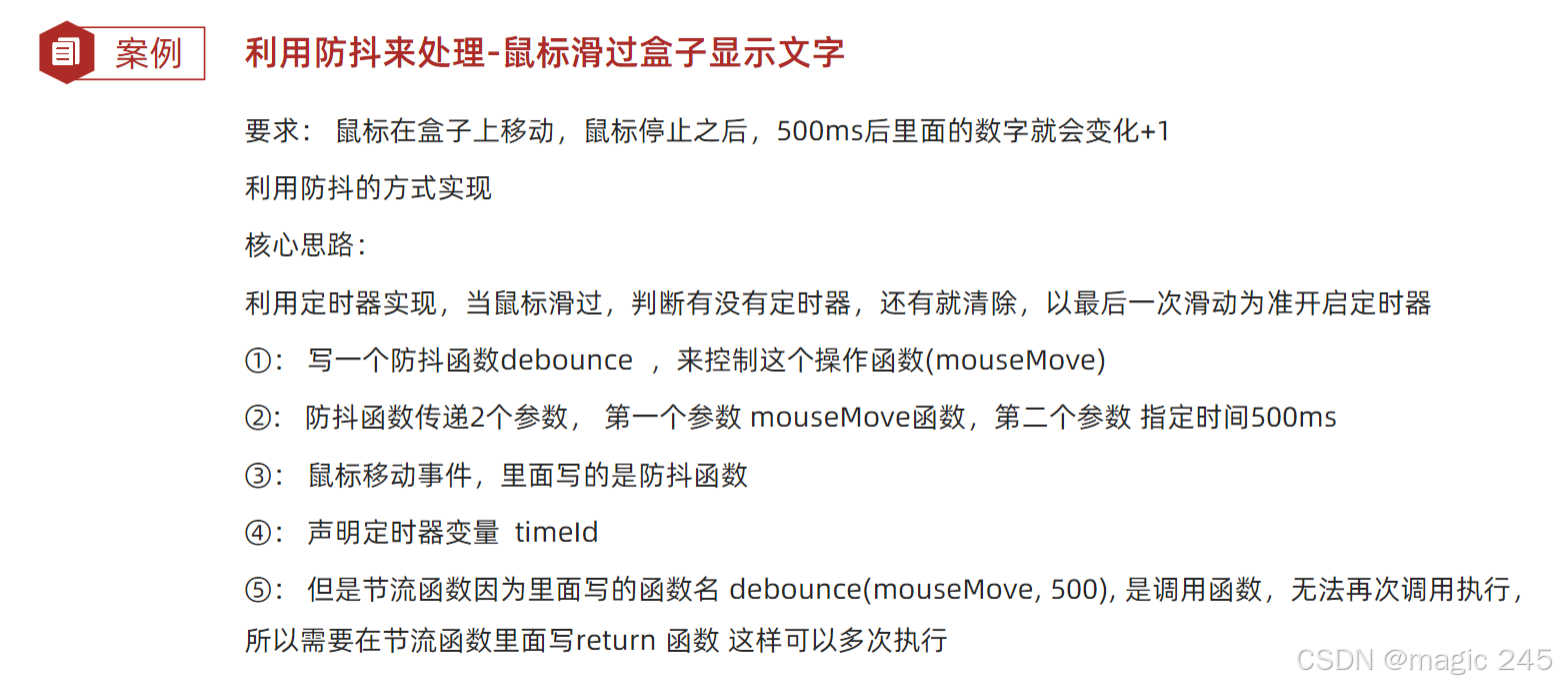
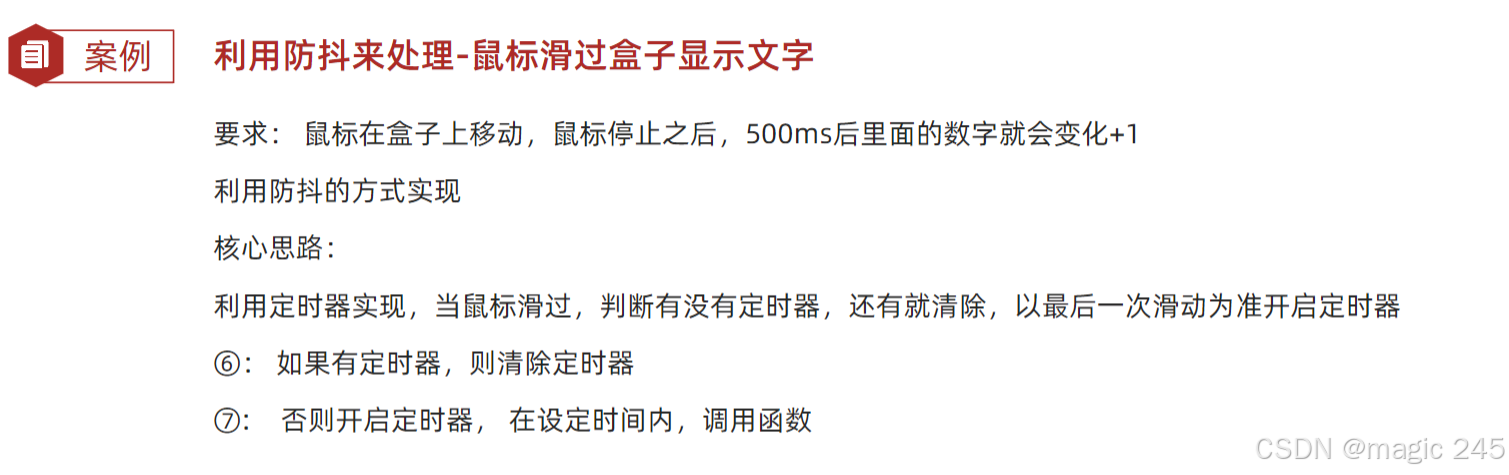
<!DOCTYPE html>
<html lang="en">

<head>
  <meta charset="UTF-8" />
  <meta http-equiv="X-UA-Compatible" content="IE=edge" />
  <meta name="viewport" content="width=device-width, initial-scale=1.0" />
  <title>Document</title>
  <style>
    .box {
      width: 500px;
      height: 500px;
      background-color: #ccc;
      color: #fff;
      text-align: center;
      font-size: 100px;
    }
  </style>
</head>

<body>
  <div class="box"></div>
  <script>
    const box = document.querySelector('.box')
    let i = 1  // 让这个变量++
    // 鼠标移动函数
    function mouseMove() {
      box.innerHTML = ++i
      // 如果里面存在大量操作 dom 的情况,可能会卡顿
    }
    // 防抖函数
    function debounce(fn, t) {
      let timeId
      return function () {
        // 如果有定时器就清除
        if (timeId) clearTimeout(timeId)
        // 开启定时器 200
        timeId = setTimeout(function () {
          fn()
        }, t)
      }
    }
    // box.addEventListener('mousemove', mouseMove)
    box.addEventListener('mousemove', debounce(mouseMove, 200))

  </script>
</body>

</html>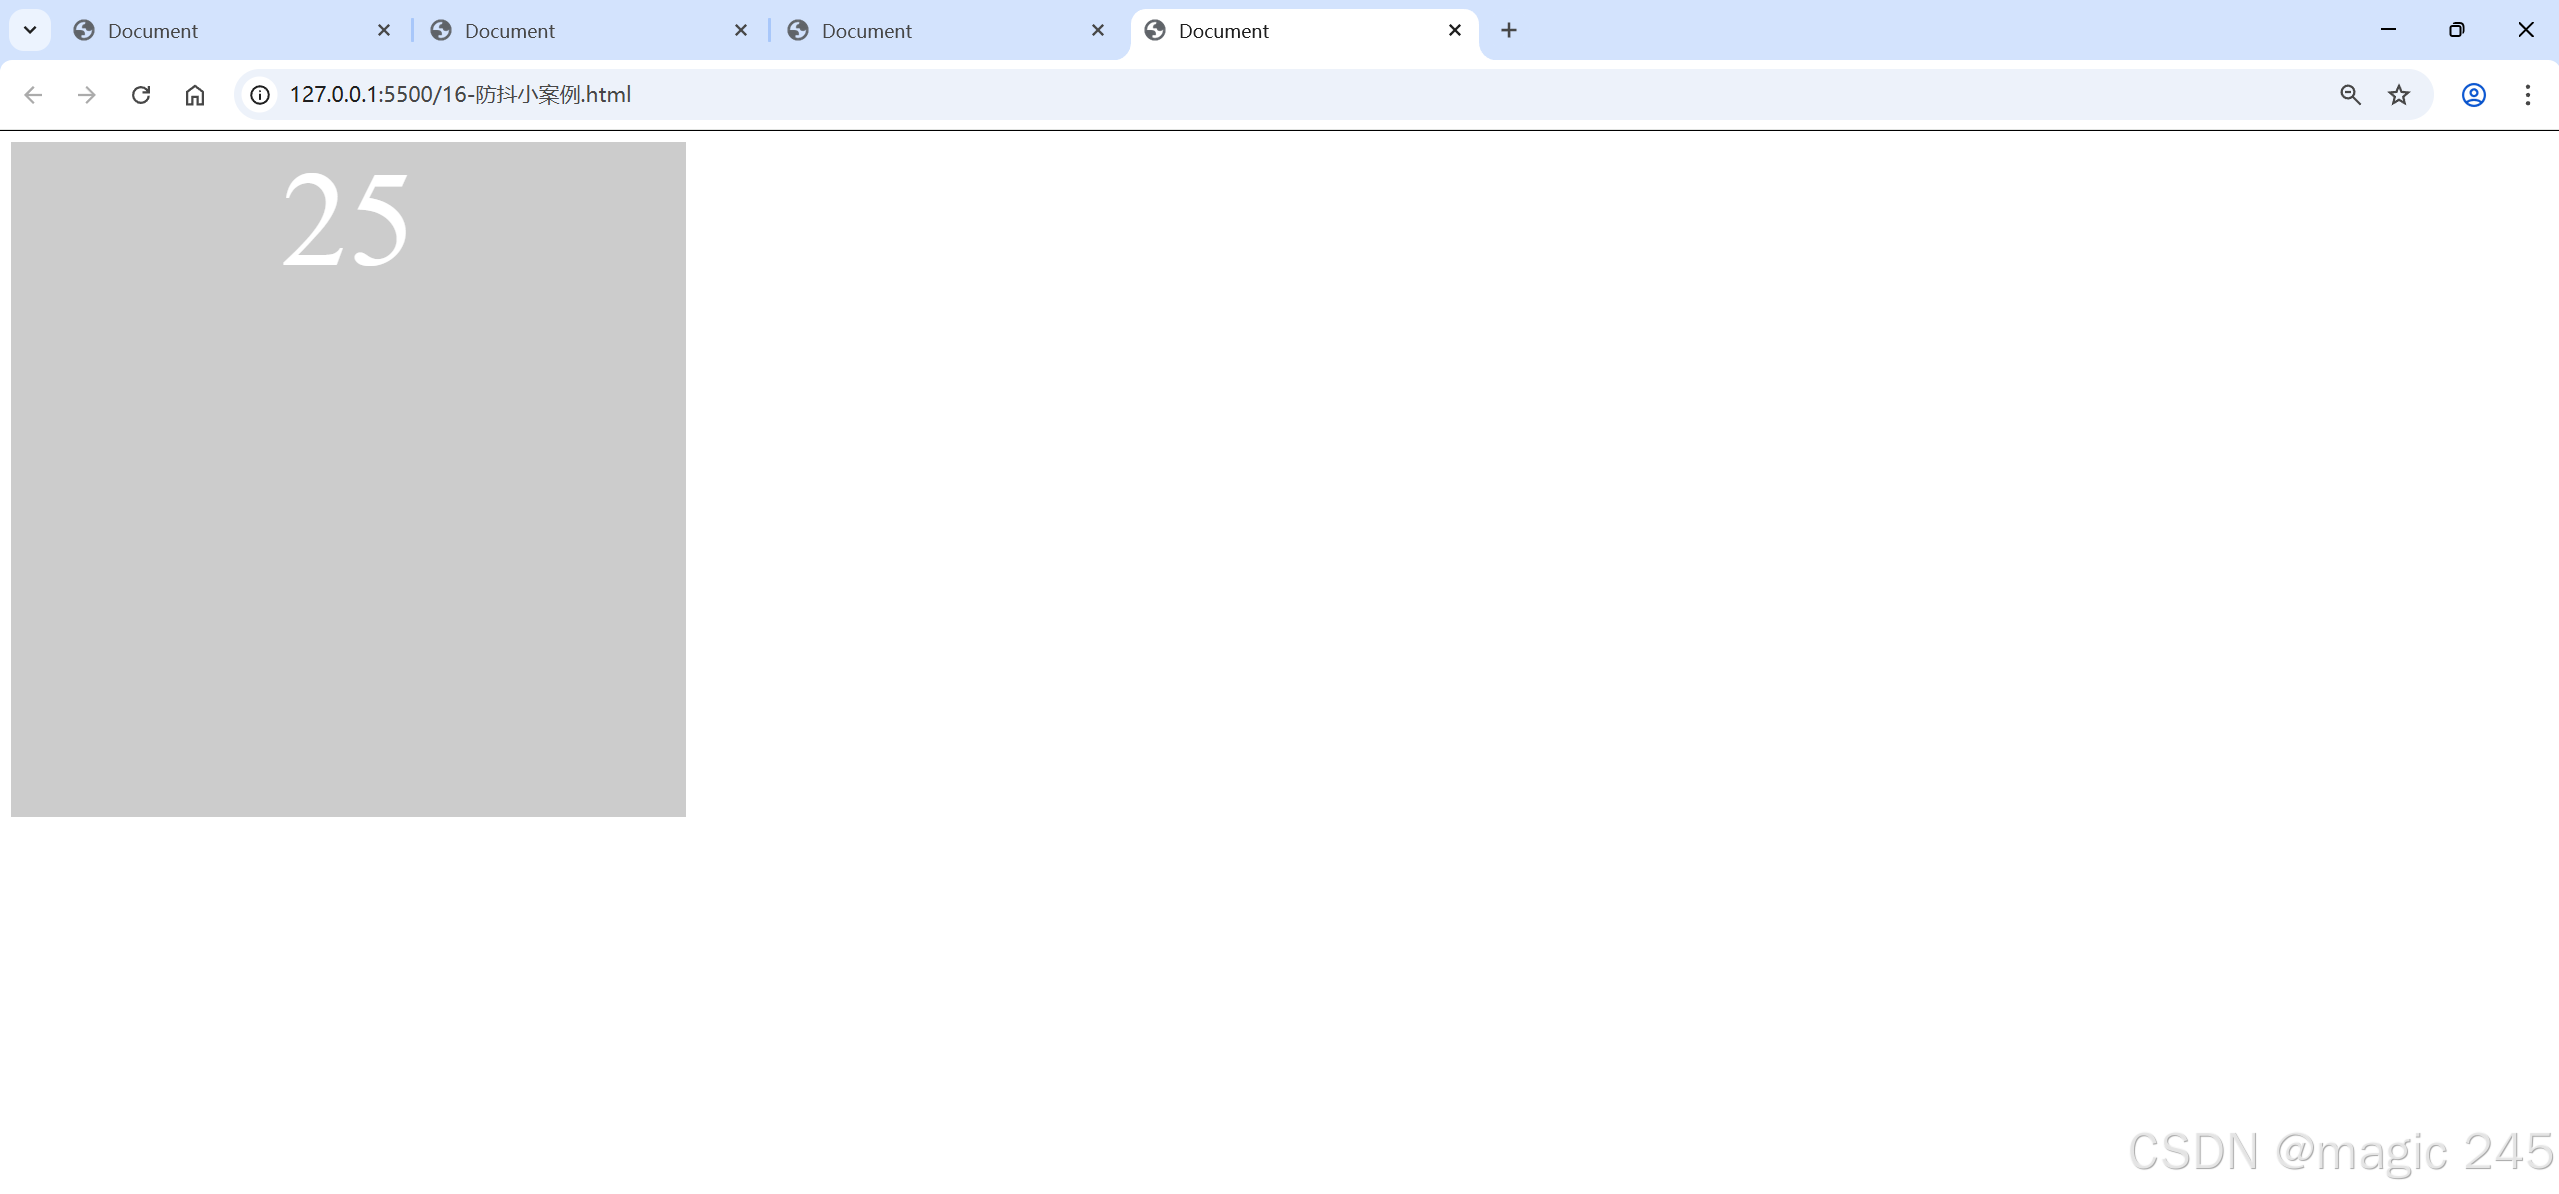
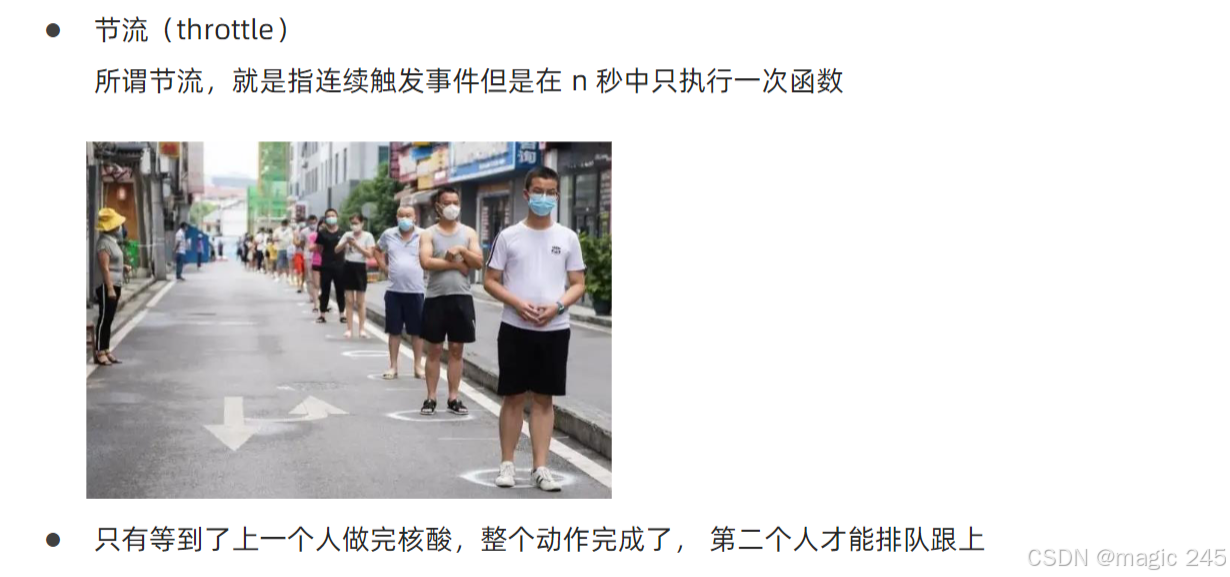
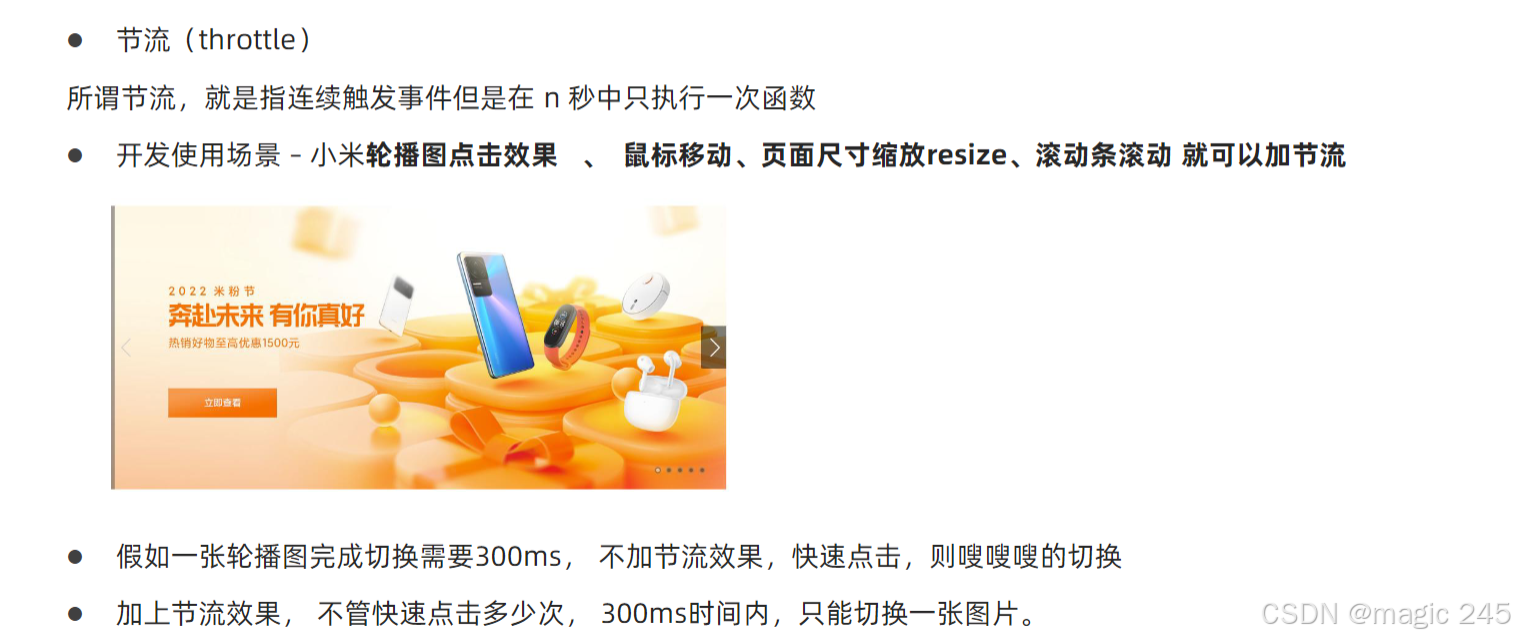
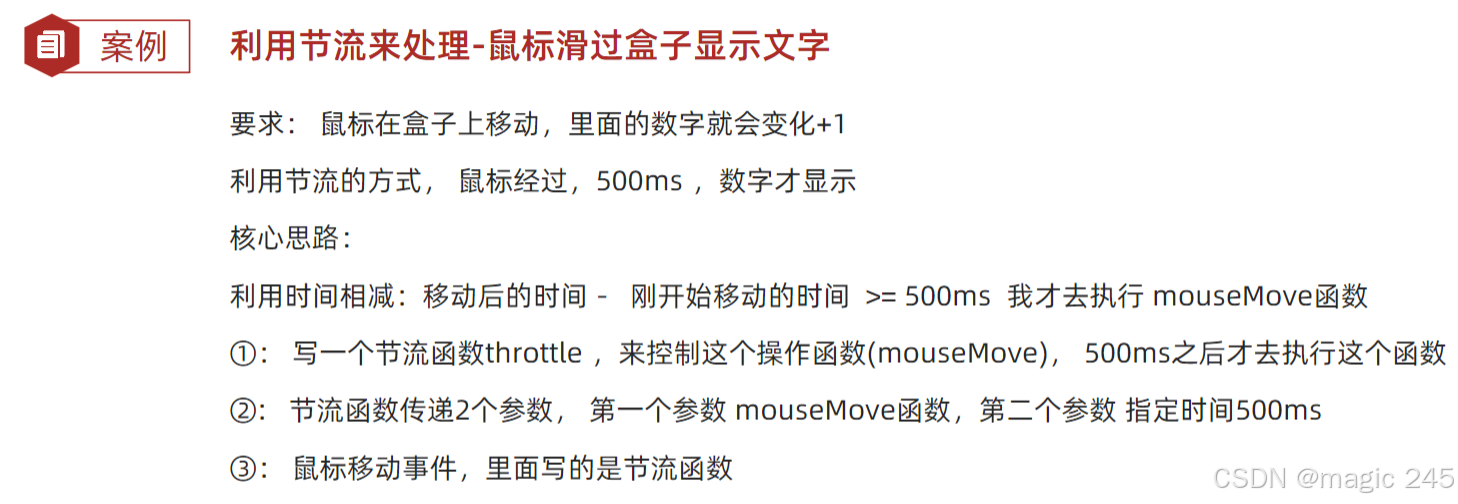
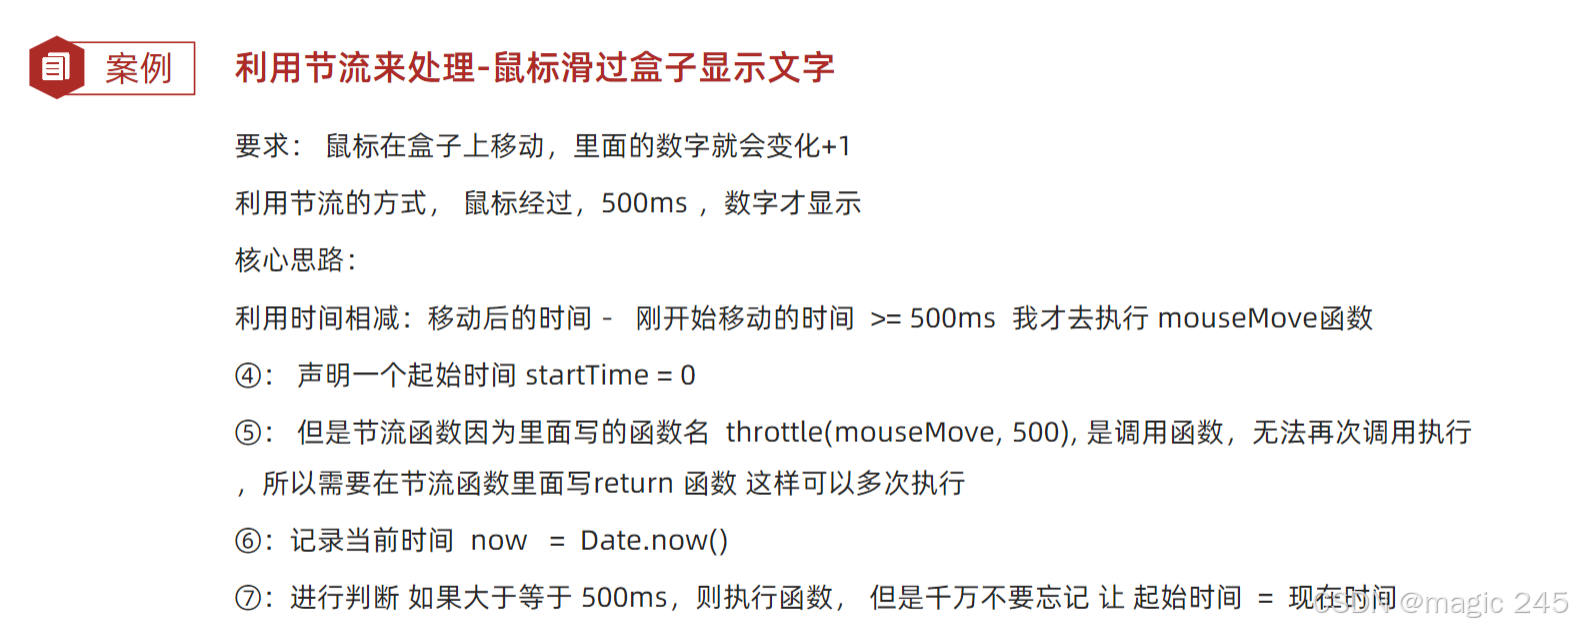
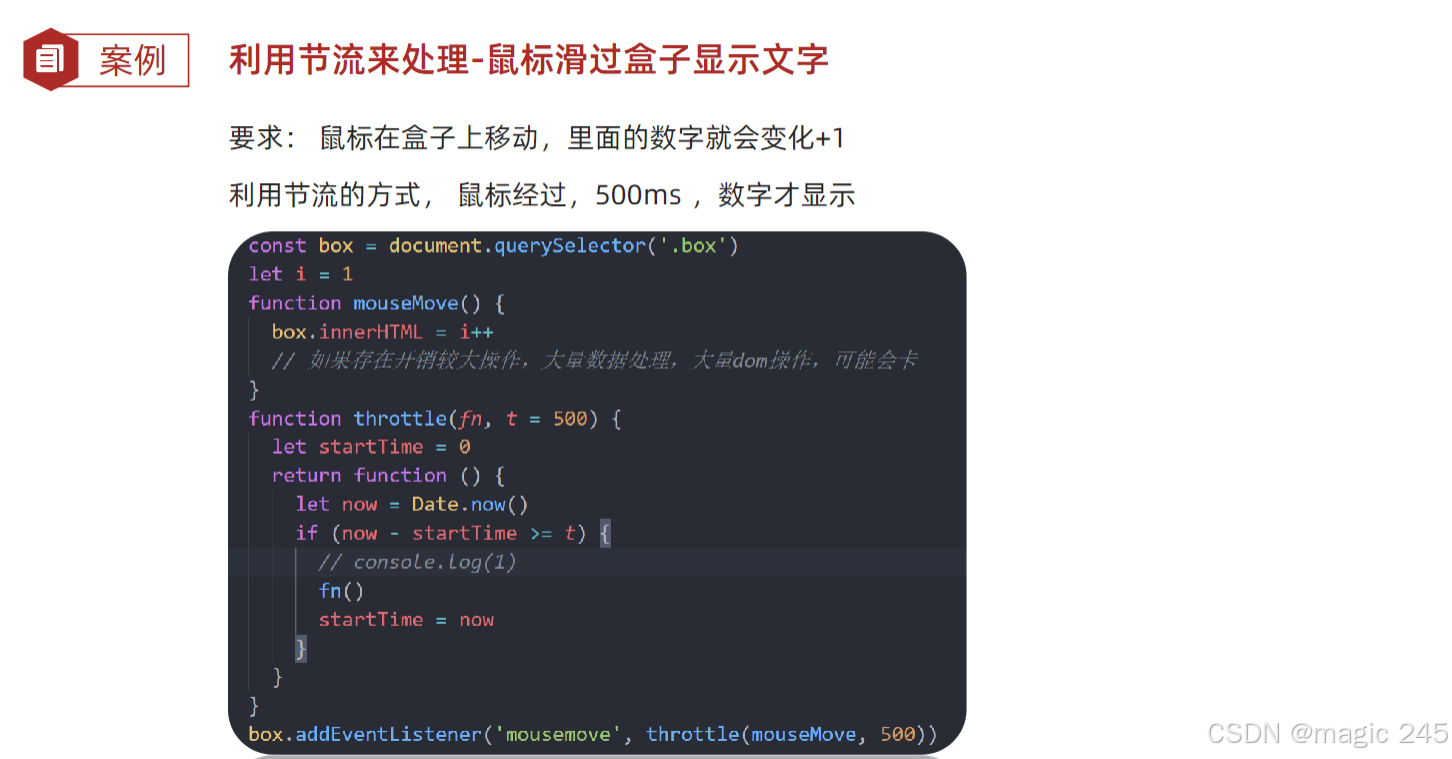
2.节流

<!DOCTYPE html>
<html lang="en">

<head>
  <meta charset="UTF-8" />
  <meta http-equiv="X-UA-Compatible" content="IE=edge" />
  <meta name="viewport" content="width=device-width, initial-scale=1.0" />
  <title>Document</title>
  <style>
    .box {
      width: 500px;
      height: 500px;
      background-color: #ccc;
      color: #fff;
      text-align: center;
      font-size: 100px;
    }
  </style>
</head>

<body>
  <div class="box"></div>
  <script>
    const box = document.querySelector('.box')
    let i = 1  // 让这个变量++
    // 鼠标移动函数
    function mouseMove() {
      box.innerHTML = ++i
      // 如果里面存在大量操作 dom 的情况,可能会卡顿
    }
    // console.log(mouseMove)
    // 节流函数 throttle
    function throttle(fn, t) {
      // 起始时间
      let startTime = 0
      return function () {
        // 得到当前的时间
        let now = Date.now()
        // 判断如果大于等于 500 采取调用函数
        if (now - startTime >= t) {
          // 调用函数
          fn()
          // 起始的时间 = 现在的时间   写在调用函数的下面
          startTime = now
        }
      }
    }
    box.addEventListener('mousemove', throttle(mouseMove, 500))

    // throttle(mouseMove, 500) === function () { console.log(1) }


    // box.addEventListener('mousemove', function () {
    //   // 得到当前的时间
    //   let now = Date.now()
    //   // 判断如果大于等于 500 采取调用函数
    //   if (now - startTime >= t) {
    //     // 调用函数
    //     fn()
    //     // 起始的时间 = 现在的时间   写在调用函数的下面
    //     startTime = now
    //   }
    // })

  </script>
</body>

</html>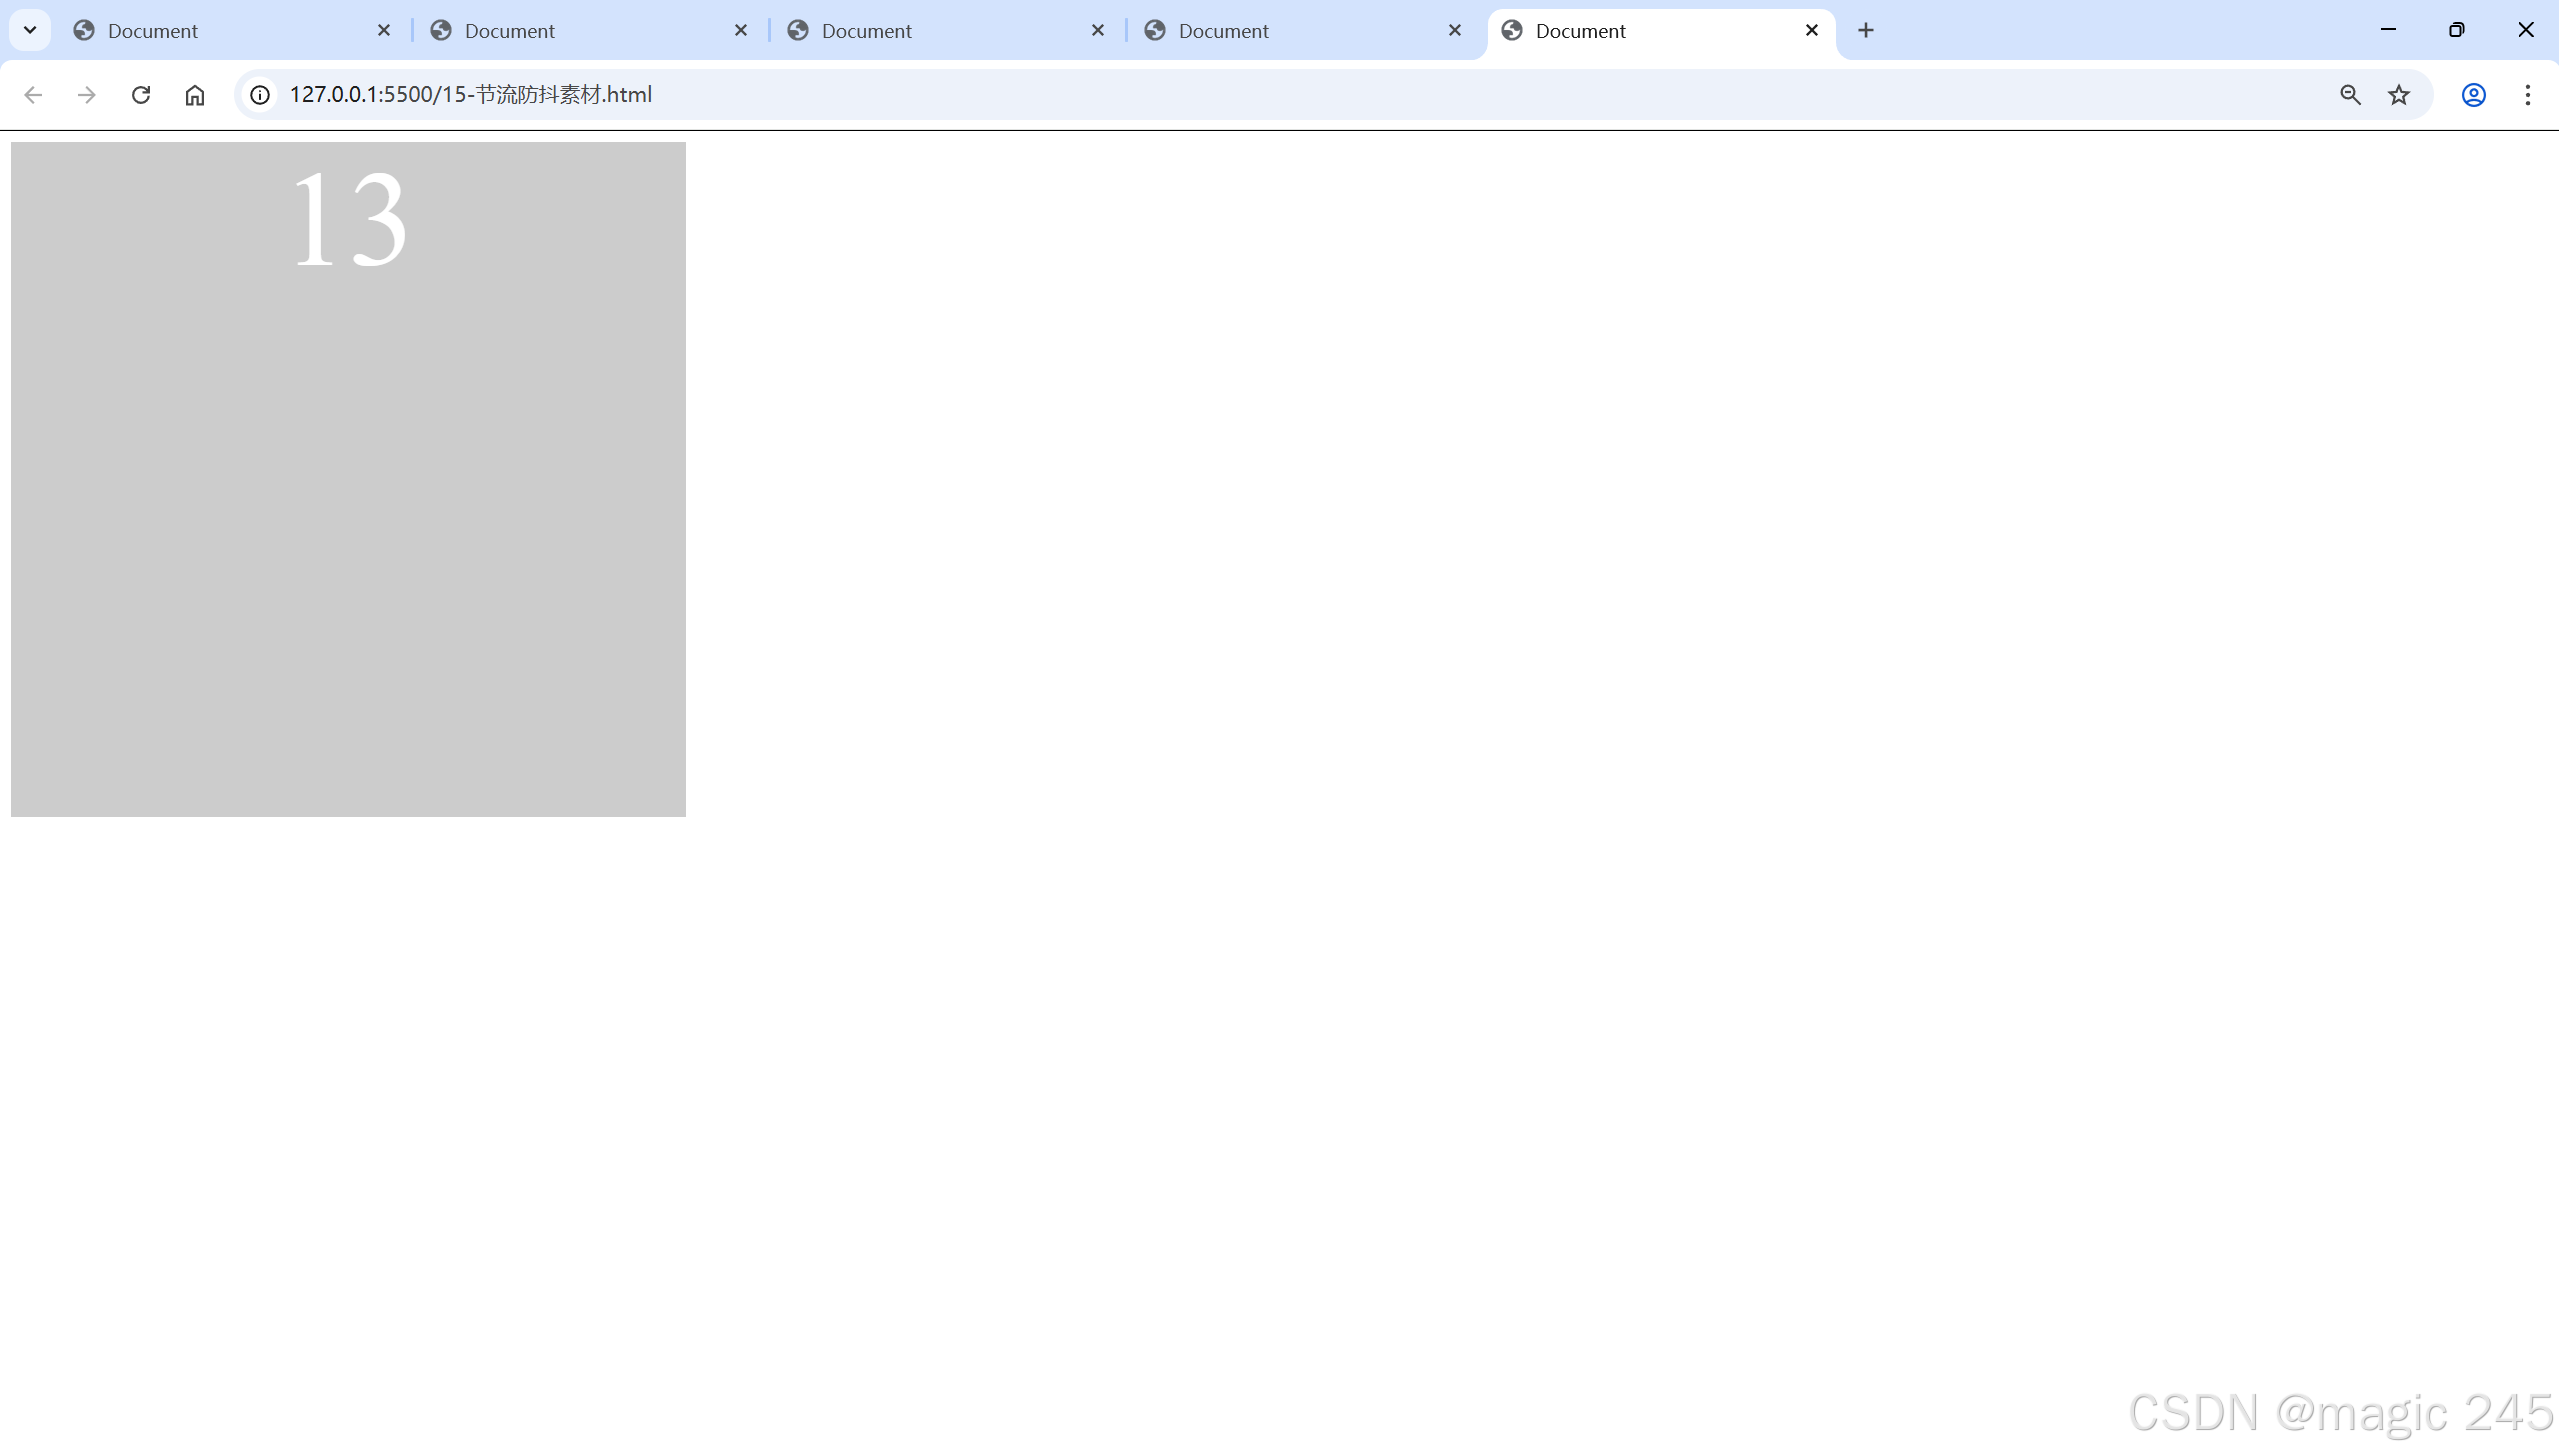
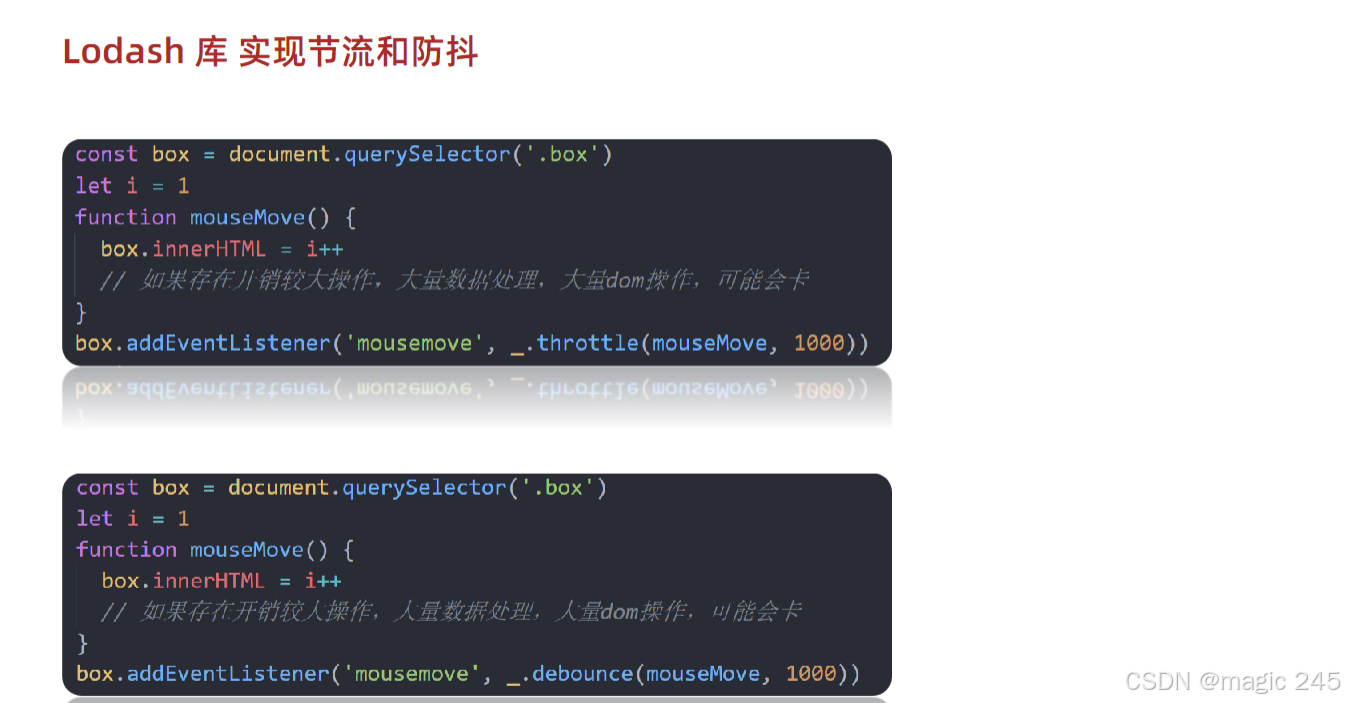
3.Lodash 库实现节流和防抖
<!DOCTYPE html>
<html lang="en">

<head>
  <meta charset="UTF-8" />
  <meta http-equiv="X-UA-Compatible" content="IE=edge" />
  <meta name="viewport" content="width=device-width, initial-scale=1.0" />
  <title>Document</title>
  <style>
    .box {
      width: 500px;
      height: 500px;
      background-color: #ccc;
      color: #fff;
      text-align: center;
      font-size: 100px;
    }
  </style>
</head>

<body>
  <div class="box"></div>
  <script src="./lodash.min.js"></script>
  <script>
    const box = document.querySelector('.box')
    let i = 1  // 让这个变量++
    // 鼠标移动函数
    function mouseMove() {
      box.innerHTML = ++i
      // 如果里面存在大量操作 dom 的情况,可能会卡顿
    }

    // box.addEventListener('mousemove', mouseMove)
    // lodash 节流写法
    // box.addEventListener('mousemove', _.throttle(mouseMove, 500))
    // lodash 防抖的写法
    box.addEventListener('mousemove', _.debounce(mouseMove, 500))

  </script>
</body>

</html>
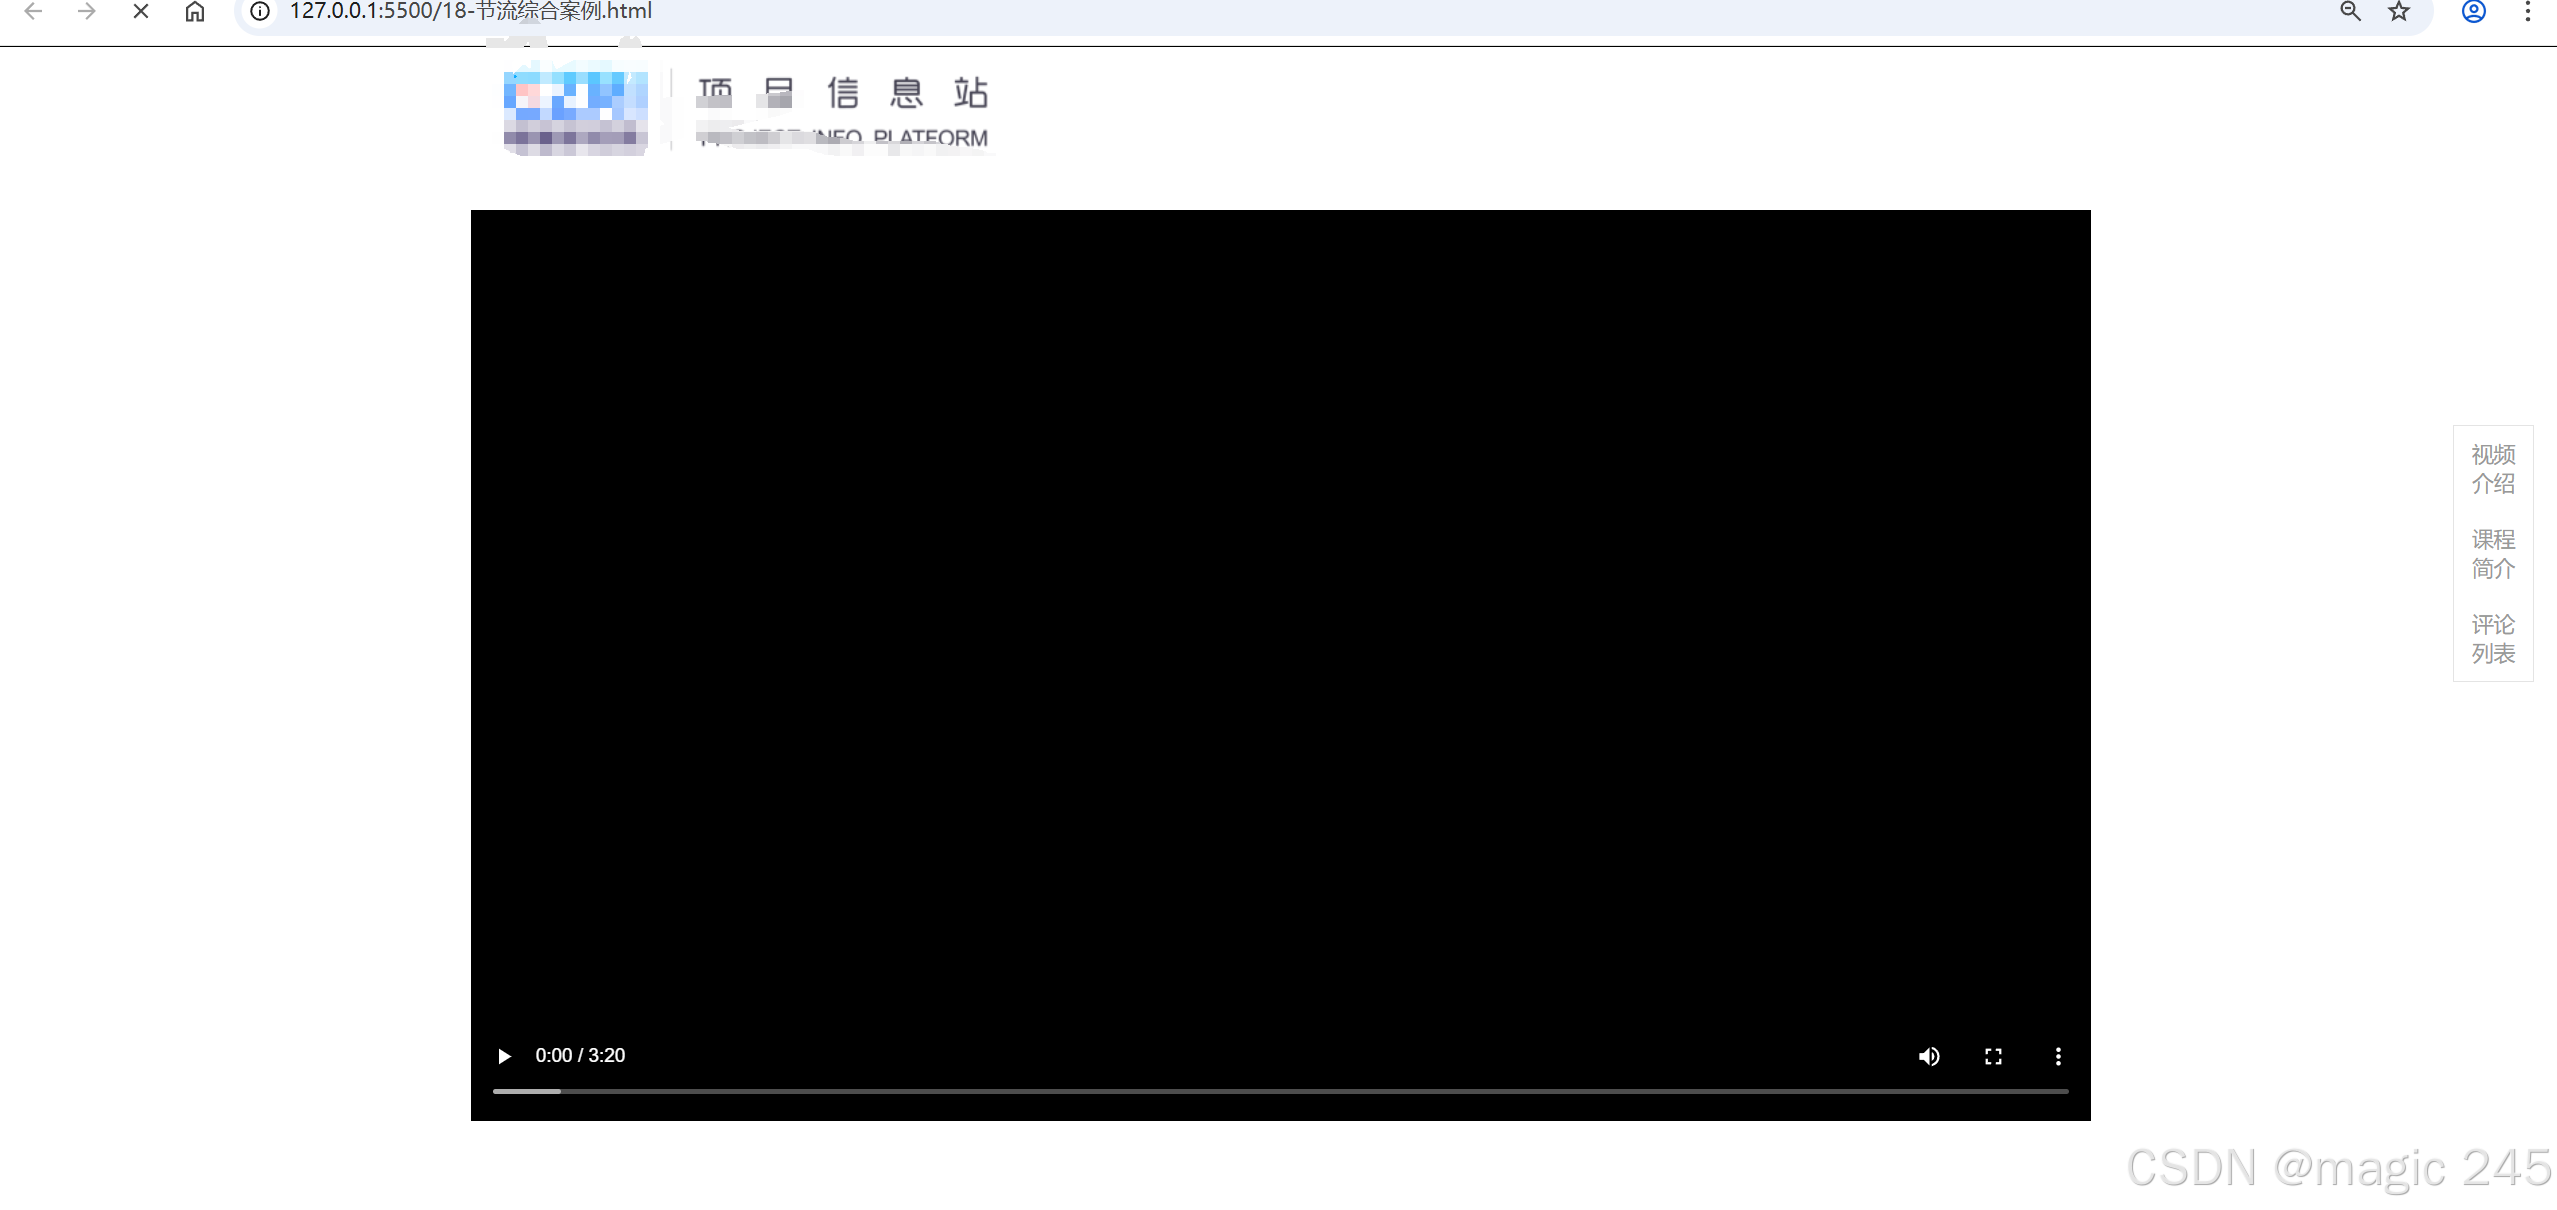
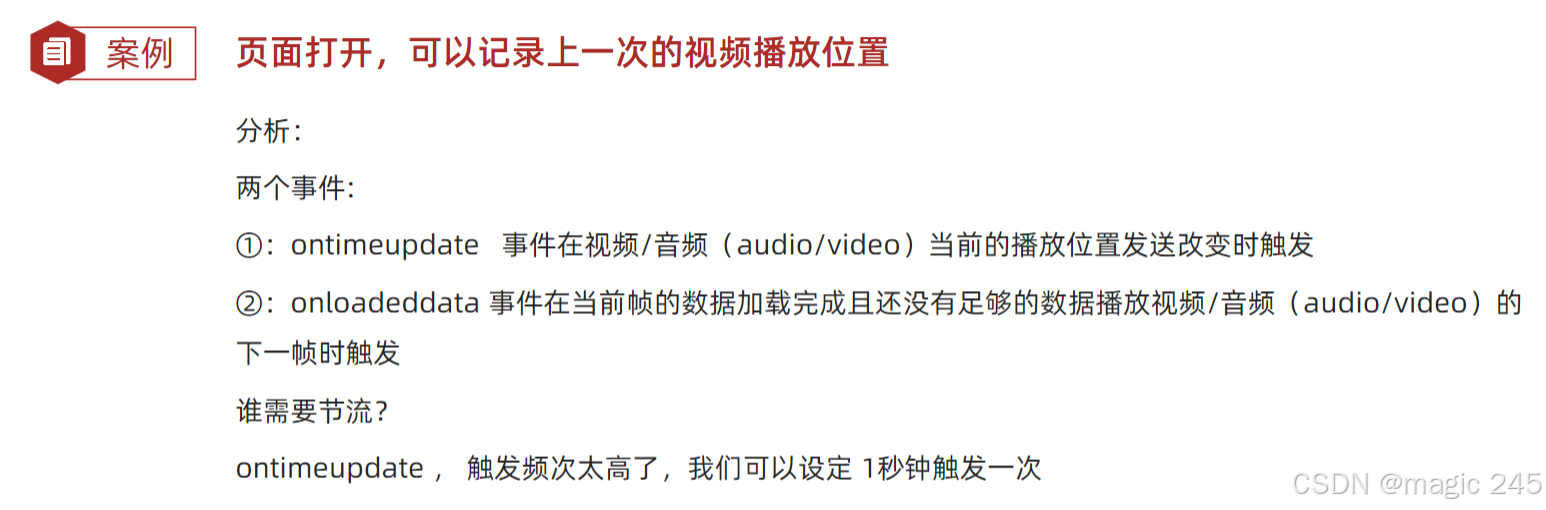
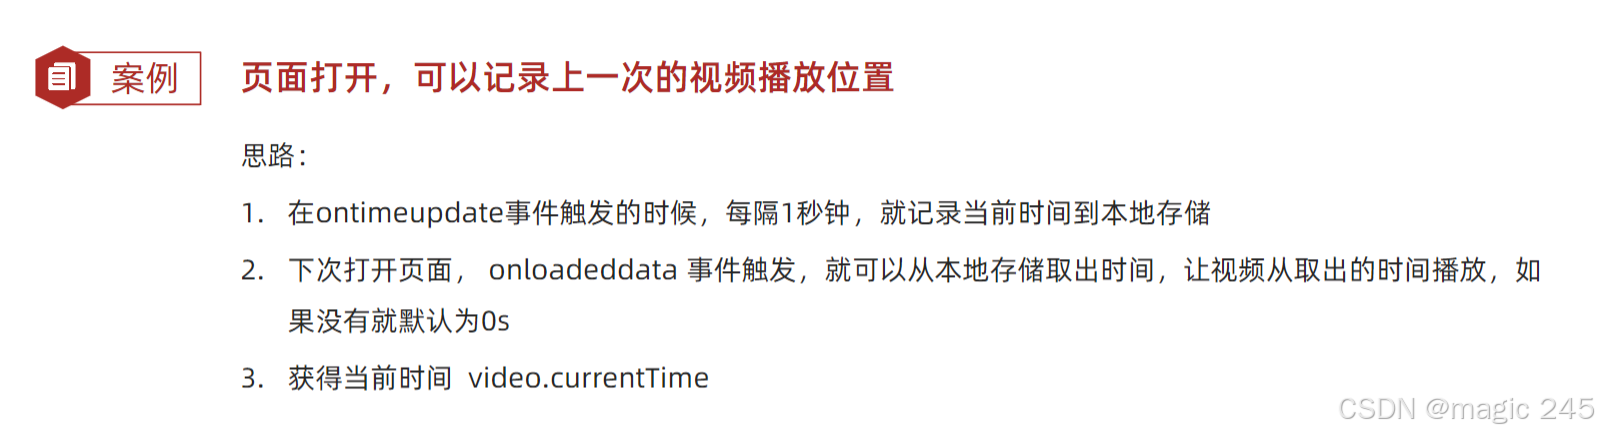
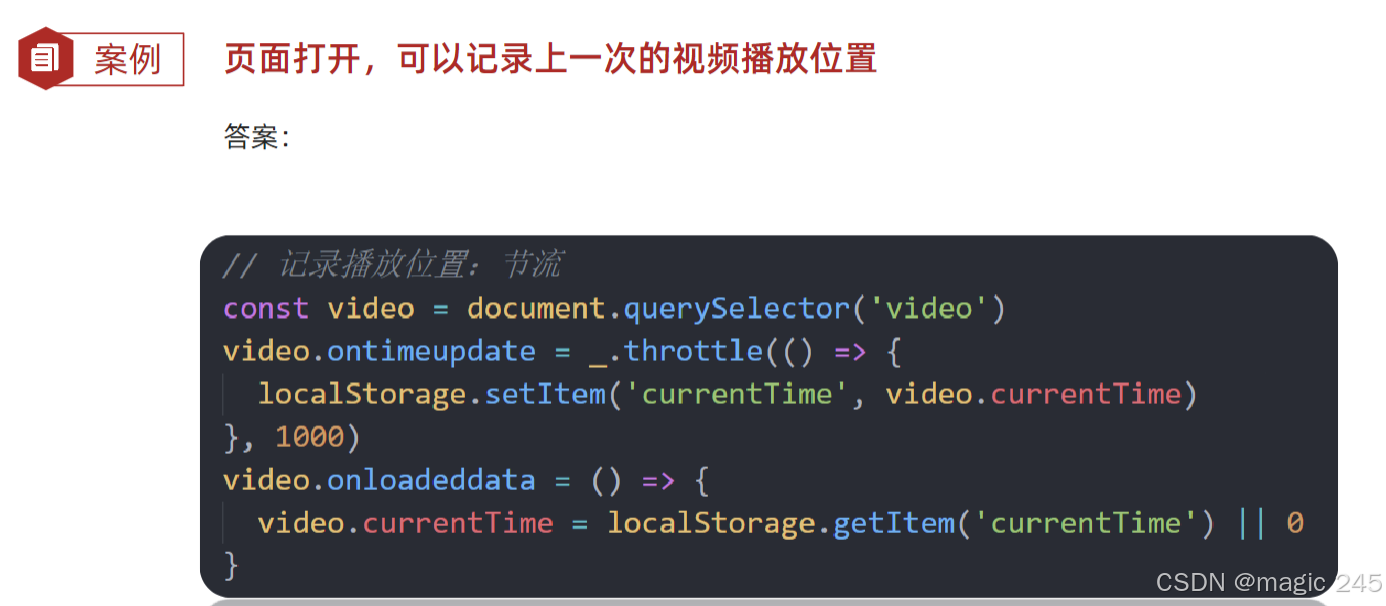
五、案例:页面打开,可以记录上一次的视频播放位置
<!DOCTYPE html>
<html lang="en">

<head>
  <meta charset="UTF-8" />
  <meta http-equiv="X-UA-Compatible" content="IE=edge" />
  <meta name="viewport" content="width=device-width, initial-scale=1.0" />
  <meta name="referrer" content="never" />
  <title>综合案例</title>
  <style>
    * {
      padding: 0;
      margin: 0;
      box-sizing: border-box;
    }

    .container {
      width: 1200px;
      margin: 0 auto;
    }

    .video video {
      width: 100%;
      padding: 20px 0;
    }

    .elevator {
      position: fixed;
      top: 280px;
      right: 20px;
      z-index: 999;
      background: #fff;
      border: 1px solid #e4e4e4;
      width: 60px;
    }

    .elevator a {
      display: block;
      padding: 10px;
      text-decoration: none;
      text-align: center;
      color: #999;
    }

    .elevator a.active {
      color: #1286ff;
    }

    .outline {
      padding-bottom: 300px;
    }
  </style>
</head>

<body>
  <div class="container">
    <div class="header">
      <a href="http://pip.itcast.cn">
        <img src="https://pip.itcast.cn/img/logo_v3.29b9ba72.png" alt="" />
      </a>
    </div>
    <div class="video">
      <video src="https://v.itheima.net/LapADhV6.mp4" controls></video>
    </div>
    <div class="elevator">
      <a href="javascript:;" data-ref="video">视频介绍</a>
      <a href="javascript:;" data-ref="intro">课程简介</a>
      <a href="javascript:;" data-ref="outline">评论列表</a>
    </div>
  </div>
  <script src="https://cdn.jsdelivr.net/npm/lodash@4.17.21/lodash.min.js"></script>
  <script>
    // 1. 获取元素  要对视频进行操作
    const video = document.querySelector('video')
    video.ontimeupdate = _.throttle(() => {
      // console.log(video.currentTime) 获得当前的视频时间
      // 把当前的时间存储到本地存储
      localStorage.setItem('currentTime', video.currentTime)
    }, 1000)

    // 打开页面触发事件,就从本地存储里面取出记录的时间, 赋值给  video.currentTime
    video.onloadeddata = () => {
      // console.log(111)
      video.currentTime = localStorage.getItem('currentTime') || 0
    }

  </script>
</body>

</html>