Vue基础
伪类与伪元素
伪类:用于向某些选择器添加特殊效果的元素,给元素添加不同的状态
如选中、悬停、聚焦
<!DOCTYPE html>
<html lang="en">
<head>
<meta charset="UTF-8">
<meta name="viewport" content="width=device-width, initial-scale=1.0">
<title>BFC to Solve Parent-Child Margin Collapsing</title>
<style>
a:link{
color: blue;
}
a:hover{
color: red;
}
input:focus{
border-color: orange;
}
</style>
</head>
<body>
<a href="#">www.baidu.com</a><br>
<input type="input" placeholder="聚焦">
</body>
</html>
伪元素
用于选择元素的一部分,而不是整个元素,用于给元素添加修饰性内容,在元素前后添加内容,或者修改元素的首行和首字母
<!DOCTYPE html>
<html lang="en">
<head>
<meta charset="UTF-8">
<meta name="viewport" content="width=device-width, initial-scale=1.0">
<title>BFC to Solve Parent-Child Margin Collapsing</title>
<style>
.element::before{
content: "before";
color: red;
}
.element::after{
content: "after";
color: green;
}
/* 选择元素的第一个字母 */
.element::first-line{
font-weight: bold;
}
</style>
</head>
<body>
<p class="element">这是一个段落</p>
</body>
</html>

事件的基本使用
<!DOCTYPE html>
<html lang="en">
<head>
<meta charset="UTF-8">
<meta name="viewport" content="width=device-width, initial-scale=1.0">
<title>Document</title>
<script type="text/javascript" src="../js/vue.js"></script> <!-- 引入Vue.js -->
</head>
<body>
<div id="root">
<h2>欢迎来到:{{name}} 学习</h2>
<!-- <button v-on:click="showInfo">点我提示信息</button> -->
<button @click="showInfo1">点我提示信息1</button> <!-- 简写方法 -->
<button @click="showInfo2(66,$event)">点我提示信息2</button> <!-- 简写方法 -->
</div>
<script type="text/javascript">
const vm= new Vue({
el:'#root',
data:{
name:'尚硅谷'
},
methods: {
showInfo1(event){
console.log(this)// 此时就是mv
alert('你好1')
},
showInfo2(number,a){
console.log(number,a)// 此时就是mv
alert('你好')
},
}
})
</script>
</body>
</html>
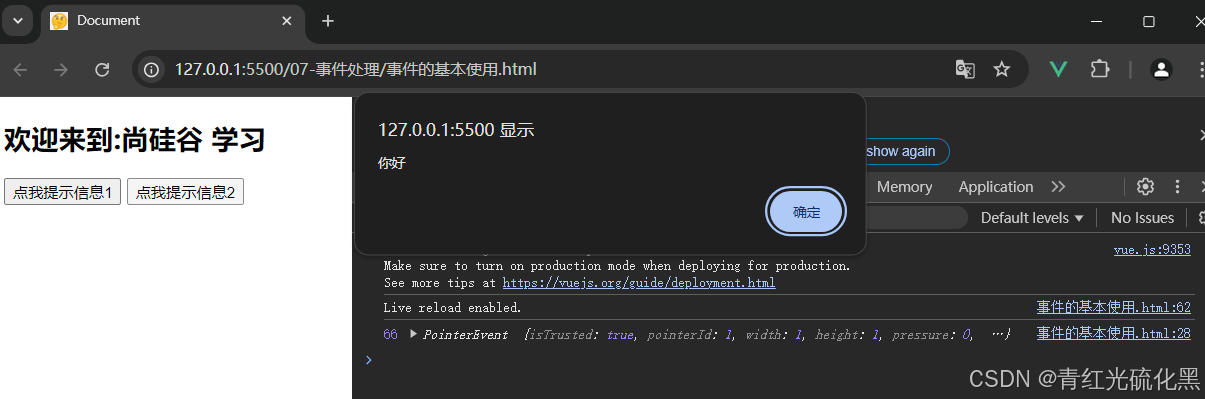
需要使用v-on:xxx来绑定事件,回调函数需要在methods中来定义,最终都是在vm中
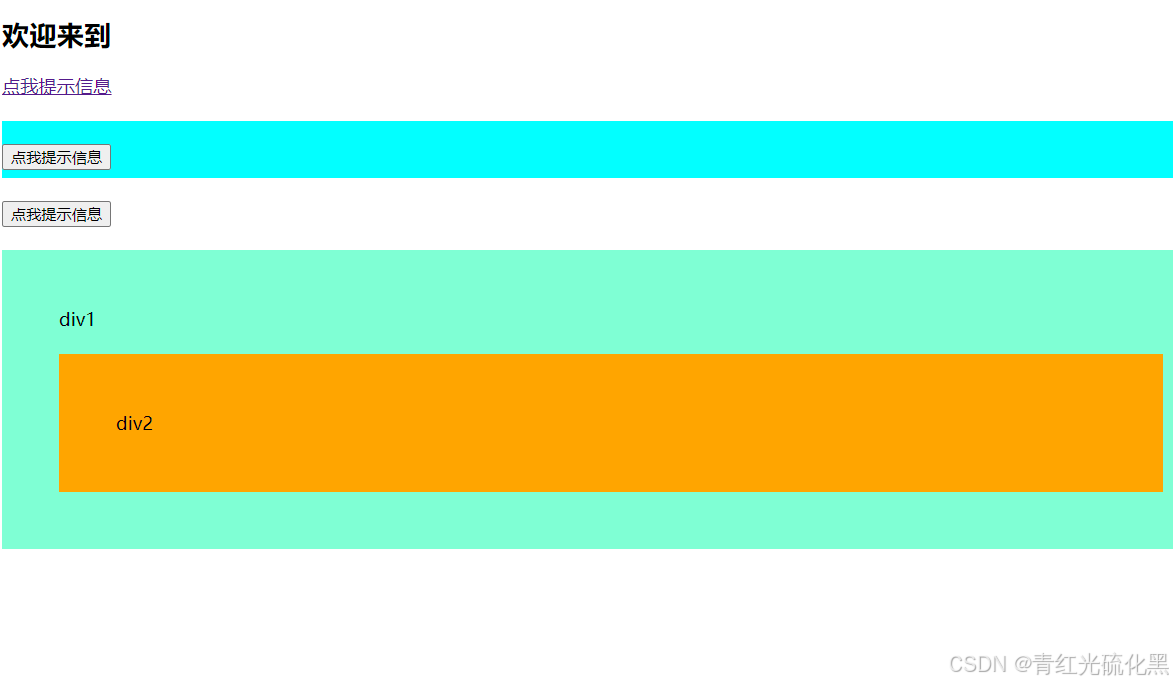
事件修饰符
<!DOCTYPE html>
<html lang="en">
<head>
<meta charset="UTF-8">
<meta name="viewport" content="width=device-width, initial-scale=1.0">
<title>Document</title>
<script type="text/javascript" src="../js/vue.js"></script> <!-- 引入Vue.js -->
<style>
*{
margin-top: 20px;
}
.demo1{
height: 50px;
background-color: aqua;
}
.box1{
padding: 50px;
background-color: aquamarine;
}
.box2{
padding: 50px;
background-color: orange;
}
</style>
</head>
<body>
<div id="root">
<h2>欢迎来到</h2>
<!-- prevent 阻止默认事件,如这里阻止跳转 -->
<a href="http://www.atguigu.com" @click.prevent="showInfo">点我提示信息</a>
<!-- stop 阻止事件冒泡 -->
<div class="demo1" @click="showInfo">
<button @click.stop="showInfo">点我提示信息</button>
</div>
<!-- once 事件只触发一次-->
<button @click.once="showInfo">点我提示信息</button>
<!-- capture 事件捕获模式 捕获阶段就开始处理事件,如这里变为点击div2 先出现1然后是2 -->
<div class="box1" @click.capture="showMsg(1)">
div1
<div class="box2" @click="showMsg(2)">
div2
</div>
</div>
</div>
<script type="text/javascript">
const vm= new Vue({
el:'#root',
data:{
name:'尚硅谷'
},
methods: {
showInfo(){
alert('你好')
},
showMsg(msg){
console.log(msg)
}
}
})
</script>
</body>
</html>
键盘事件
<!DOCTYPE html>
<html lang="en">
<head>
<meta charset="UTF-8">
<meta name="viewport" content="width=device-width, initial-scale=1.0">
<title>Document</title>
<script type="text/javascript" src="../js/vue.js"></script> <!-- 引入Vue.js -->
</head>
<body>
<div id="root">
<h2>欢迎来到:{{name}} 学习</h2>
<input type="text" placeholder="按下回车提示输入" @keyup.enter="showInfo">
</div>
<script type="text/javascript">
const vm= new Vue({
el:'#root',
data:{
name:'尚硅谷'
},
methods: {
showInfo(e){
console.log(e.target.value) //此时只有回车之后才会在控制台中输出
}
}
})
</script>
</body>
</html>
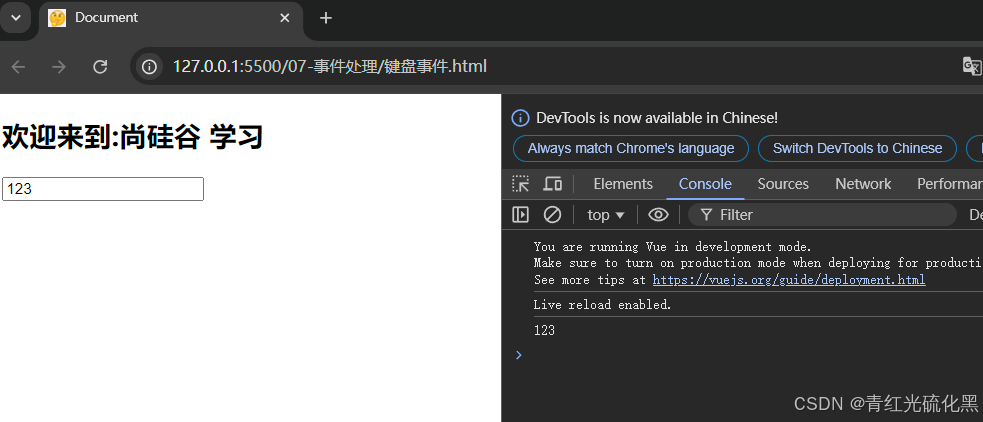
注意:
tab键必须使用keydown来使用
还有四个系统修饰键,ctrl、alt、shift、meta也必须使用keydown
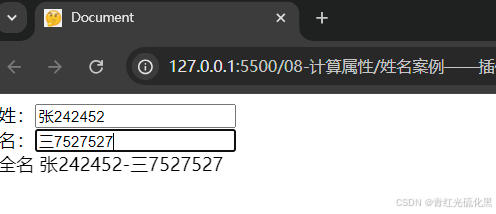
计算属性
<!DOCTYPE html>
<html lang="en">
<head>
<meta charset="UTF-8">
<meta name="viewport" content="width=device-width, initial-scale=1.0">
<title>Document</title>
<script type="text/javascript" src="../js/vue.js"></script> <!-- 引入Vue.js -->
</head>
<body>
<div id="root">
姓:<input type="text" v-model="firstName"><br>
名:<input type="text" v-model="lasttName"><br>
全名 <span>{{fullName()}}</span>
</div>
<script type="text/javascript">
const vm= new Vue({
el:'#root',
data:{
firstName:'张',
lasttName:'三',
},methods: {
fullName(){
return this.firstName+'-'+this.lasttName;
}
}
})
</script>
</body>
</html>
使用methods方法实现案例
<!DOCTYPE html>
<html lang="en">
<head>
<meta charset="UTF-8">
<meta name="viewport" content="width=device-width, initial-scale=1.0">
<title>Document</title>
<script type="text/javascript" src="../js/vue.js"></script> <!-- 引入Vue.js -->
</head>
<body>
<div id="root">
姓:<input type="text" v-model="firstName"><br>
名:<input type="text" v-model="lasttName"><br>
全名 <span>{{fullName}}</span>
</div>
<script type="text/javascript">
const vm= new Vue({
el:'#root',
data:{
firstName:'张',
lasttName:'三',
},
computed: {
fullName:{
//Get的作用:当读取fullName,Get就会被调用,并且返回
//Get调用的时机:1.初次被调用,之后调用走缓存 2.数值发生变化再次调用
get(){
return this.firstName+'-'+this.lasttName
},
//当fullName被修改时,调用set,并且将两个属性进行修改
set(value){
console.log(value)
const arr=value.split('-')
this.firstName=arr[0]
this.lasttName=arr[1]
}
}
}
})
</script>
</body>
</html>
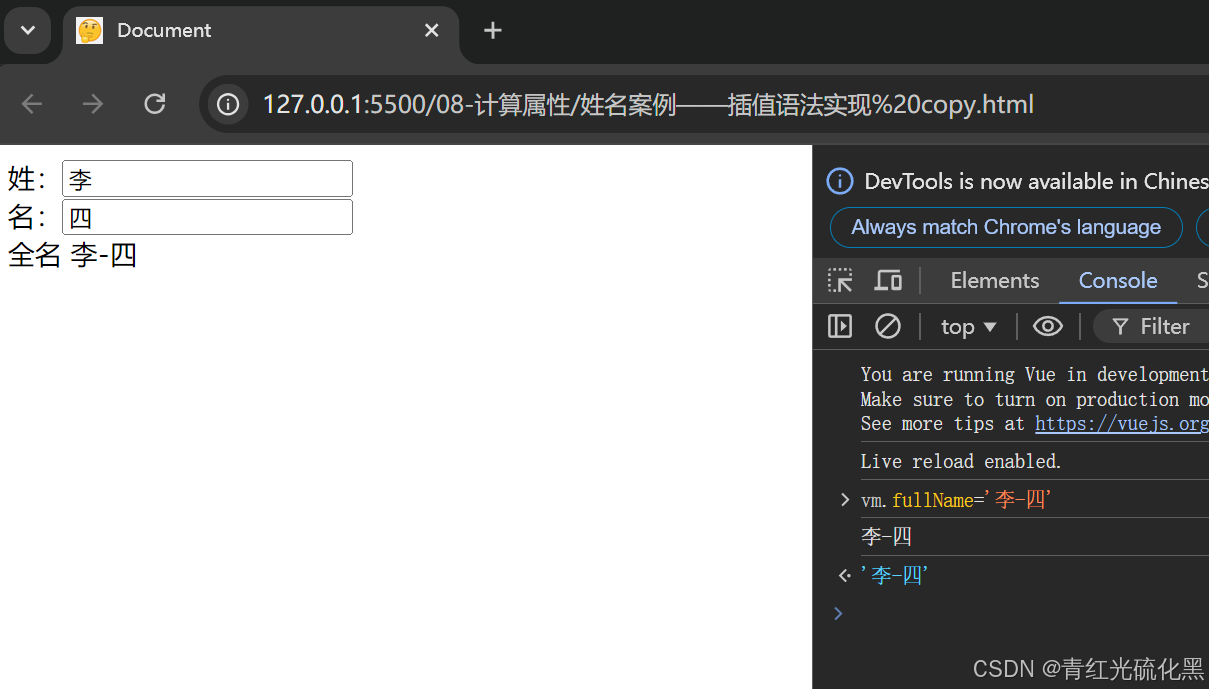
与methods相比,使用计算属性存在一个缓存
监视属性
<!DOCTYPE html>
<html lang="en">
<head>
<meta charset="UTF-8">
<meta name="viewport" content="width=device-width, initial-scale=1.0">
<title>Document</title>
<script type="text/javascript" src="../js/vue.js"></script> <!-- 引入Vue.js -->
</head>
<body>
<div id="root">
<h2>今天天气很{{info}}</h2>
<button @click="changeWeather">切换天气</button>
</div>
<script type="text/javascript">
const vm= new Vue({
el:'#root',
data:{
isHot:true
},
computed: {
info(){
return this.isHot?'热':'冷';
}
},
methods: {
changeWeather(){
this.isHot=!this.isHot
}
},
// 第一种写法
watch: {
isHot:{
immediate:true, //初始化时调用
//当isHost发生变化就调用
handler(newValue,oldValue){
console.log('isHot发生了变化',newValue,oldValue)
}
}
},
})
/* 第二种写法 */
vm.$watch('isHot',{
immediate:true, //初始化时调用
//当isHost发生变化就调用
handler(newValue,oldValue){
console.log('isHot发生了变化',newValue,oldValue)
}
})
</script>
</body>
</html>
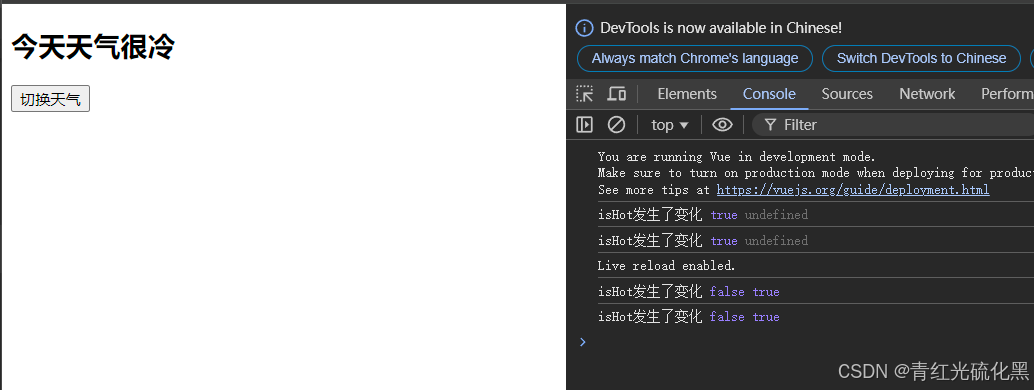
当被监视的属性变化时,回调函数自动调用并进行相关的操作
深度监测
<!DOCTYPE html>
<html lang="en">
<head>
<meta charset="UTF-8">
<meta name="viewport" content="width=device-width, initial-scale=1.0">
<title>Document</title>
<script type="text/javascript" src="../js/vue.js"></script> <!-- 引入Vue.js -->
</head>
<body>
<div id="root">
<h2>今天天气很{{info}}</h2>
<button @click="changeWeather">切换天气</button>
<hr>
<h3>a的值是{{numbers.a}}</h3>
<button @click="numbers.a++">点我让a++</button>
<hr>
<h3>b的值是{{numbers.b}}</h3>
<button @click="numbers.b++">点我让b++</button>
</div>
<script type="text/javascript">
const vm= new Vue({
el:'#root',
data:{
isHot:true,
numbers:{
a:1,
b:1
}
},
computed: {
info(){
return this.isHot?'热':'冷';
}
},
methods: {
changeWeather(){
this.isHot=!this.isHot
}
},
// 第一种写法
watch: {
isHot:{
//当isHost发生变化就调用
handler(newValue,oldValue){
console.log('isHot发生了变化',newValue,oldValue)
}
},
// 监视多级结构中某个属性的变化
'numbers.a':{
handler(){
console.log('a变化了')
}
},
//监视多级结构中所有属性的变化
numbers:{
deep:true,
handler(){
console.log('number改变了')
}
}
},
})
</script>
</body>
</html>
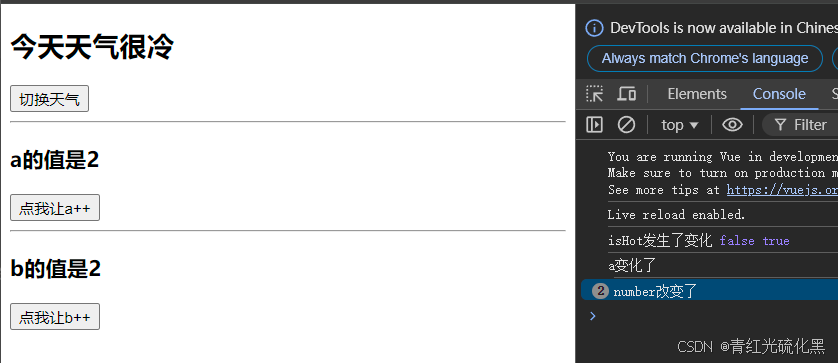
Vue能监视到对象内部值的变化,也就是说如果这里的numbers的a发生了变化,vue是可以监测的,但是如果我们直接使用watch来对numbers种发生变化的a进行监测,此时是watch是无法进行直接监测的,需要开启deep深度监测才能实现,如果number我们直接重新赋值为{a:100,b:200},此时是能监测到的
监视简写
监视能够简写的前提是不再需要使用immediate与deep
<!DOCTYPE html>
<html lang="en">
<head>
<meta charset="UTF-8">
<meta name="viewport" content="width=device-width, initial-scale=1.0">
<title>Document</title>
<script type="text/javascript" src="../js/vue.js"></script> <!-- 引入Vue.js -->
</head>
<body>
<div id="root">
<h2>今天天气很{{info}}</h2>
<button @click="changeWeather">切换天气</button>
</div>
<script type="text/javascript">
const vm= new Vue({
el:'#root',
data:{
isHot:true,
},
computed: {
info(){
return this.isHot?'热':'冷';
}
},
methods: {
changeWeather(){
this.isHot=!this.isHot
}
},
watch: {
// isHot:{
// handler(newValue,oldValue){
// console.log('isHot发生了变化',newValue,oldValue)
// }
// }
/* 不需要是哦那个immediete与deep的时候可以简写 */
isHot(newValue,oldValue){
console.log('isHot发生了变化',newValue,oldValue)
}
},
})
// 正常写法
// vm.$watch('isHot',{
// immediate:true,
// deep:true,
// handler(newValue,oldValue){
// console.log('isHot发生了变化',newValue,oldValue)
// }
// })
vm.$watch('isHot',function(newValue,oldValue){
console.log('isHot发生了变化',newValue,oldValue)
})
</script>
</body>
</html>