前端基础之脚手架
脚手架结构
目录结构
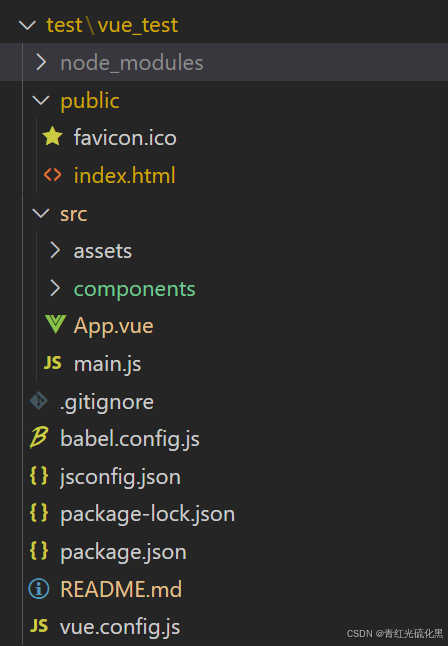
这里的package.json,存放着我们去执行npm run serve 或是npm run build的脚本文件
package-lock.json中存放着我们使用的外部包的版本类型,相当于maven
src下的main.js是整个项目的入口文件
src下的components用于存放组件,这里的assets用于存放静态图片资源
在public中.ico就是页签图标,这里的index.html就是页面的html
其中的代码为
使用命令行使用vue inspect > output.js,就会生成一个含全部配置文件中的js文件
在vue.config.js中,我们可以配置一些相关的配置项
const { defineConfig } = require('@vue/cli-service')
module.exports = defineConfig({
transpileDependencies: true
})
module.exports = {
page:{
index:{
//配置入口
entry:'src/main.js'
},
},
//关闭语法检查
lintOnSave:false
}
red属性
<template>
<div>
<h1 v-text="msg" ref="title"></h1>
<button @click="showDom" ref="btn">点我输出上面的Dom</button>
<School ref="sch"></School>
<school id="sch1"></school>
</div>
</template>
<script>
import School from './components/School.vue'
export default {
name:'App',
components:{School},
data(){
return{
msg:'欢迎'
}
},
methods:{
showDom(){
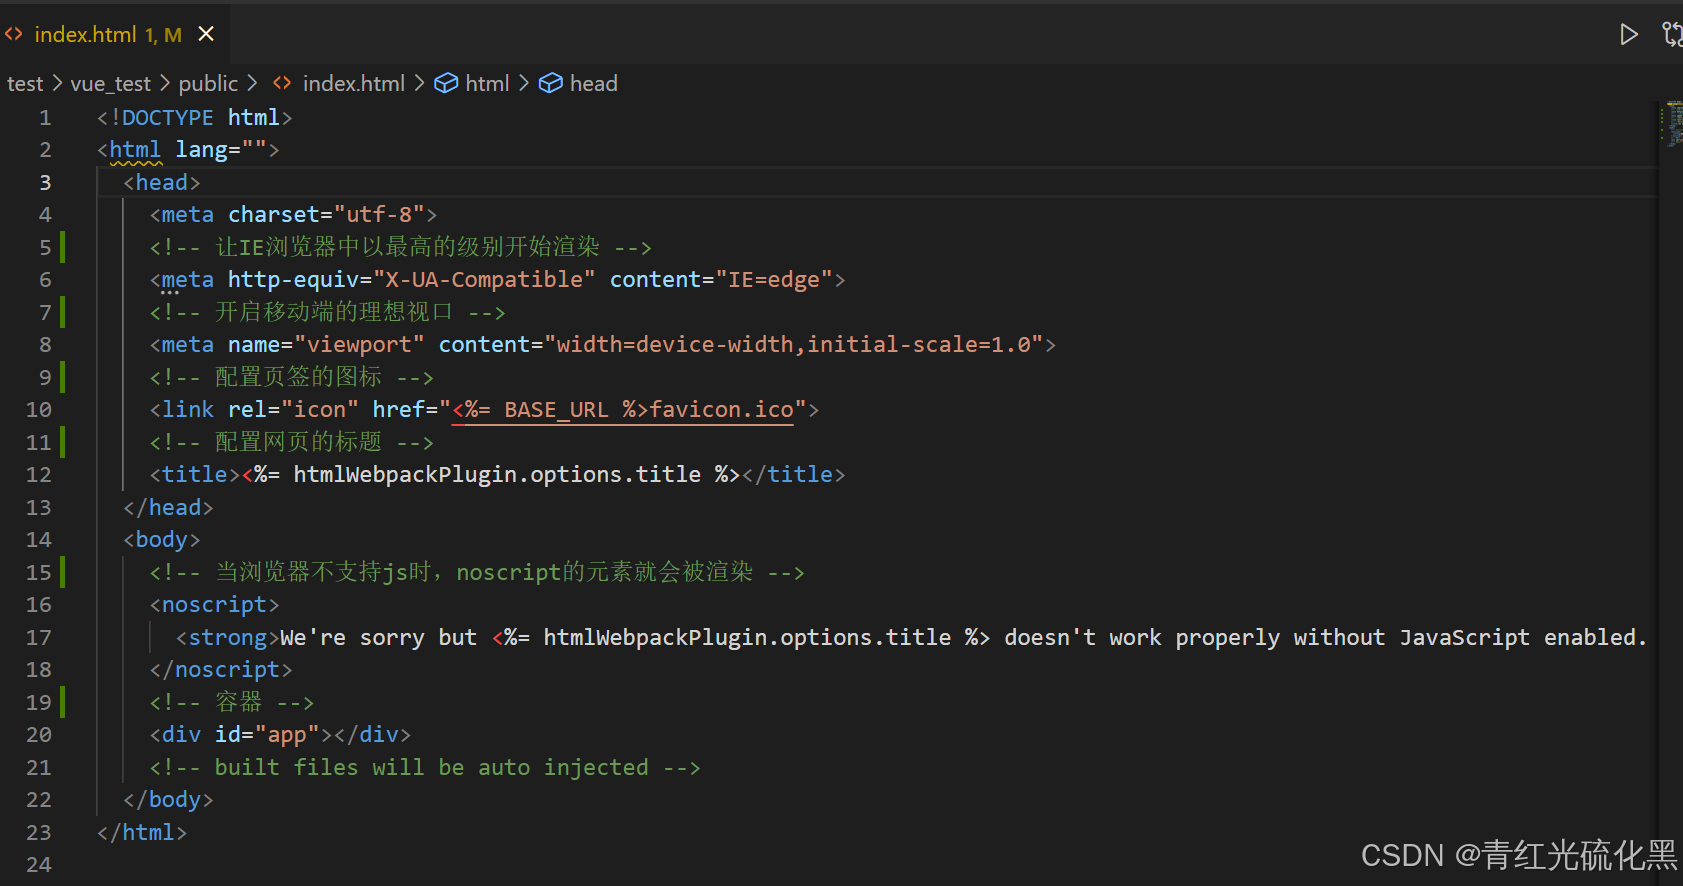
console.log(this.$refs) //App所有的带有ref的标签
console.log(this.$refs.title) //获得title的标签
console.log(this.$refs.sch) //获得School这个组件的Dom
console.log(document.getElementById('sch1')) //获得School组件的里面的<div>元素
}
}
}
</script>
<style>
</style>
输出为
--------------------------------------------------------------------------------------------------------------------------------------------------------------------------------------------------------------------------------------------------------------------------------------------------------------------------------------------------------------------------------------------------------------------------------------------------------------------------------------------------------------------------------------------------------------------------------------------------------------------------------------------------------------------------------------------------------------------------------------------------------------------------------------------------------------------------------------------------------------------------------------------------------------------------------------------------------------
Props使用
如果我们需要对组件内的值进行手动传输而不是使用{{}},就需要使用props进行接收
App.vue进行数据传入
<template>
<div>
<student name="李四" sex="女" :age="18"></student>
<hr>
</div>
</template>
<script>
import Student from './components/Student.vue'
export default {
name:'App',
components:{Student},
}
</script>
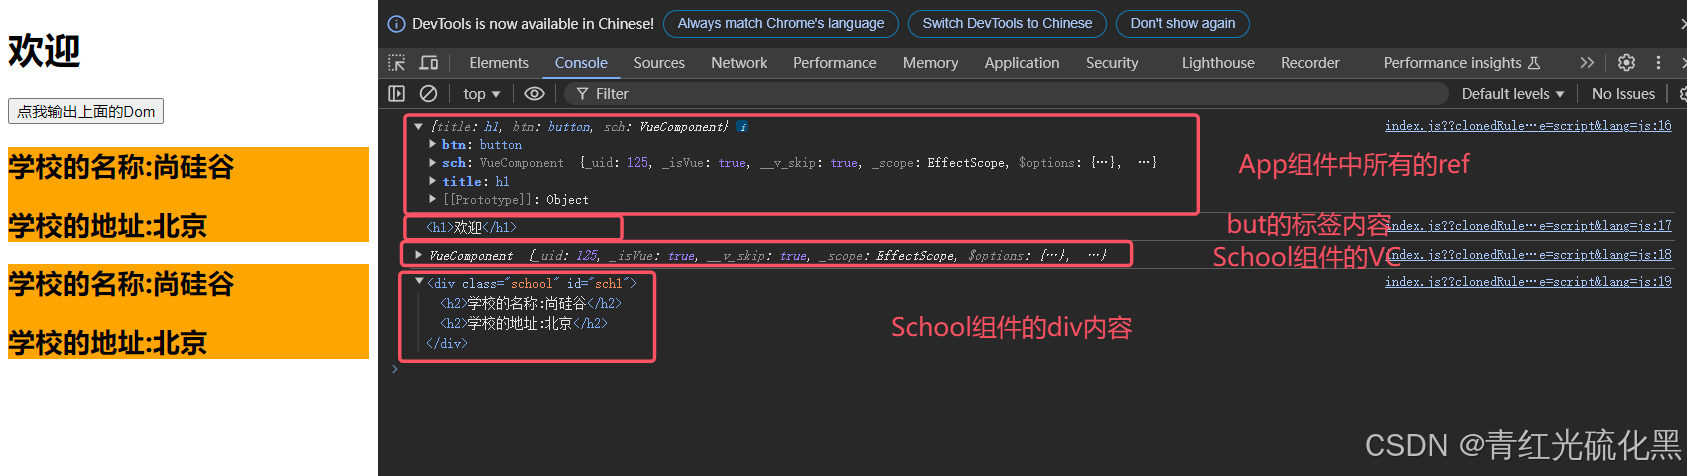
使用Student.vue进行数据接收
<template>
<div >
<h1>{{msg}}</h1>
<h2>学生姓名:{{name}}</h2>
<h2>学生性别:{{sex}}</h2>
<h2>学生年龄:{{age+1}}</h2>
</div>
</template>
<script>
export default {
name:'School',
data(){
return{
msg:'hello',
}
},
// // props:["name","sex","age"] 简单接收
// props:{ //接受的同时对类型限制
// name:String,
// age:Number,
// sex:String
// }
props:{ //接收的同时对数据进行类型的限制+默认值的指定+必要性的指定
name:{
type:String, //name的类型是字符串
required:true //数据是必须的
},
age:{
type:Number, //age的类型是数字
default:99 //如果不传,默认就是99
},
sex:{
type:String, //sex的类型是字符串
required:true //数据是必须的
},
}
}
</script>
<style>
</style>
最终的效果为
--------------------------------------------------------------------------------------------------------------------------------------------------------------------------------------------------------------------------------------------------------------------------------------------------------------------------------------------------------------------------------------------------------------------------------------------------------------------------------------------------------------------------------------------------------------------------------------------------------------------------------------------------------------------------------------------------------------------------------------------------------------------------------------------------------------------------------------------------------------------------------------------------------------------------------------------------------------
mixin混合
如果组件中有一部分代码说是结构是通用的,我们就可以使用混合,将一致的配置或数据添加到一个mimix.js中来作为使用
混合分为局部混合与全局混合,局部混合在组件内引入即可,全局混合在main.js中配置即可

如mixin.js混合文件中
export const hunhe={
methods:{
showName(){
alert(this.name)
}
},
mounted () {
console.log('混合中的mounted')
}
}
export const hunhe2={
data(){
return {
x:100,
y:200
}
}
}
在两个有相同配置类的组件中
Student.vue
<template>
<div >
<h2 @click="showName">学生姓名:{{name}}</h2>
<h2>学生性别:{{sex}}</h2>
</div>
</template>
<script>
//引入一个局部混合
// import {hunhe,hunhe2} from '../mixin'
export default {
name:'Student',
data(){
return{
name:'李四',
sex:"男"
}
},
mounted(){
console.log('Student组件中的mouted')
},
// mixins:[hunhe,hunhe2] //将其加入到组件中
}
</script>
<style>
</style>
在School.vue中
<template>
<div >
<h2 @click="showName">学校名称:{{name}}</h2>
<h2>学校地址:{{addr}}</h2>
</div>
</template>
<script>
//引入一个局部混合
// import {hunhe,hunhe2} from '../mixin'
export default {
name:'School',
data(){
return{
name:'尚硅谷',
addr:'北京'
}
},
// mixins:[hunhe,hunhe2] 将其加入到组件中
}
</script>
<style>
</style>
在能配置统一的混合main.js配置类中
import Vue from 'vue'
import App from './App.vue'
import { hunhe,hunhe2 } from './mixin' //引入全局混合
Vue.config.productionTip=false
Vue.mixin(hunhe) //配置全局混合
Vue.mixin(hunhe2) //配置全局混合
new Vue({
el:'#app',
render:h=>h(App)
})
--------------------------------------------------------------------------------------------------------------------------------------------------------------------------------------------------------------------------------------------------------------------------------------------------------------------------------------------------------------------------------------------------------------------------------------------------------------------------------------------------------------------------------------------------------------------------------------------------------------------------------------------------------------------------------------------------------------------------------------------------------------------------------------------------------------------------------------------------------------------------------------------------------------------------------------------------------------
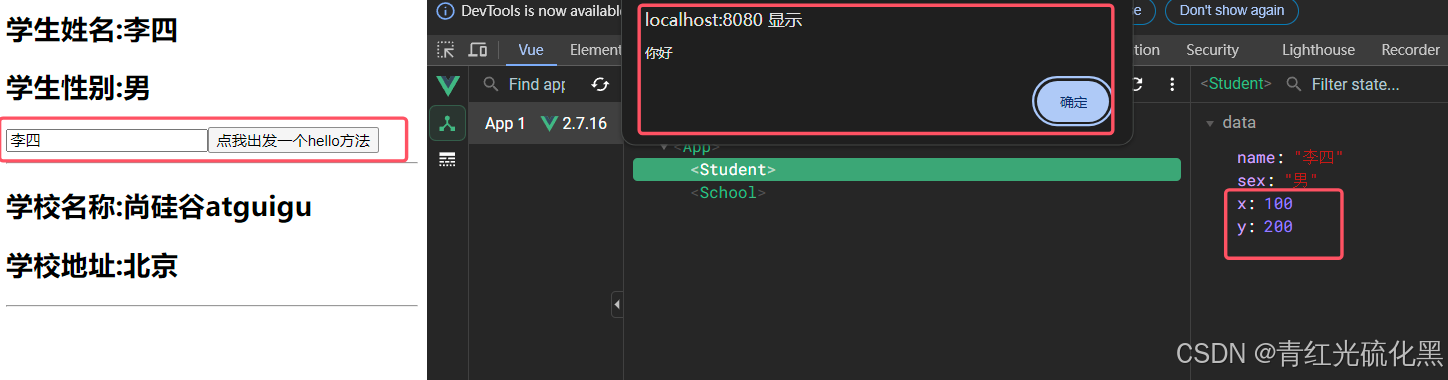
自定义插件
我们可以自己定义一个插件,来起到一个插件就能实现Vue功能的增强,通过引入插件之后,整个项目就都会具备插件中定义的功能或使用其中的方法
pligins.js插件代码
export default{
install(Vue){
//全局过滤器
Vue.filter('mySlice',function(value){
return value.slice(0,4)
})
//自定义指令
Vue.directive('fbind',{
//指令与元素成功绑定时
bind(element,binding){
console.log('bind')
element.value=binding.value
},
//指令所在元素被插入页面时
inserted(element,binding){
console.log('inserted')
element.focus();
},
//指令所在的模板被重新解析时
update (element,binding) {
console.log('updated')
element.value=binding.value
}
})
//自定义混入
Vue.mixin({
data(){
return {
x:100,
y:200
}
}
})
//给vue原型上添加一个方法(vm和vc就能使用了)
Vue.prototype.hello = ()=>{alert('你好')}
}
}
在main.js中引入插件
import Vue from 'vue'
import App from './App.vue'
Vue.config.productionTip=false
//引入插件
import pligins from './pligins'
//应用插件
Vue.use(pligins)
new Vue({
el:'#app',
render:h=>h(App)
})
在Student.vue中使用插件
<template>
<div >
<h2 >学生姓名:{{name}}</h2>
<h2>学生性别:{{sex}}</h2>
<input type="text" v-fbind:value="name">
<button @click="test">点我出发一个hello方法</button>
</div>
</template>
<script>
export default {
name:'Student',
data(){
return{
name:'李四',
sex:"男"
}
},
methods:{
test(){
this.hello()
}
}
}
</script>
<style>
</style>
--------------------------------------------------------------------------------------------------------------------------------------------------------------------------------------------------------------------------------------------------------------------------------------------------------------------------------------------------------------------------------------------------------------------------------------------------------------------------------------------------------------------------------------------------------------------------------------------------------------------------------------------------------------------------------------------------------------------------------------------------------------------------------------------------------------------------------------------------------------------------------------------------------------------------------------------------------------
Scoped样式
我们在多个组件中配置样式的时候,如果出现样式同名的情况下,就会出现样式相串的情况
就需要在不同的样式下使用scoped来进行修饰
Student.vue中的代码
<template>
<div class="demo">
<h2 class="title">学生姓名:{{name}}</h2>
<h2>学生性别:{{sex}}</h2>
</div>
</template>
<script>
export default {
name:'Student',
data(){
return{
name:'李四',
sex:"男"
}
}
}
</script>
<style scoped>
.demo{
background-color: orange;
}
</style>
School.vue代码
<template>
<div class="demo">
<h2 class="title">学校名称:{{name }}</h2>
<h2>学校地址:{{addr}}</h2>
</div>
</template>
<script>
export default {
name:'School',
data(){
return{
name:'尚硅谷atguigu',
addr:'北京'
}
}
}
</script>
<style scoped>
.demo{
background: skyblue;
}
</style>
如果我们有整个项目都要使用的样式,将其配置到App.vue中即可
<template>
<div>
<student ></student>
<hr>
<school></school>
<hr>
</div>
</template>
<script>
import Student from './components/Student.vue'
import School from './components/School.vue'
export default {
name:'App',
components:{Student, School},
}
</script>
<style >
/* 配置全局样式 */
.title{
color:red
}
</style>
效果为
