【小程序websocket前后端交互】uniapp写微信小程序聊天功能功能,websocket交互功能,心跳重连【详细注释,复制即用】
前言
这几天在做的一个需求,就是要写一个小程序端的页面,用于跟客服聊天。
然后就用到了websocket技术,以前我做过网页版的,但是做小程序后发现网页版的逻辑放过来没问题,但是很多的方法和api是不生效的,所以又查文档专门看了一下对于的api,踩了一些坑后来记录一下,方便下次复制!
pc端聊天功能模板(自带websocket,复制可直接用)
点击这里跳转
效果图
功能简介
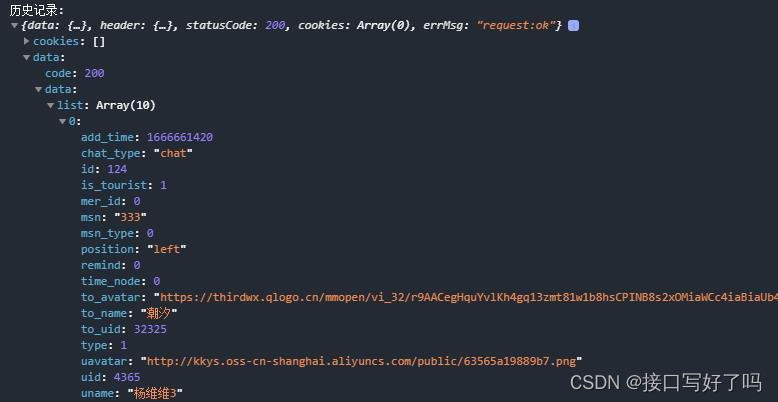
1,页面信息展示,根据后台返回字段,分左边和右边展示
2,输入后点击发送按钮,可以发送消息,通过websocket传给后台
3,进入页面后链接websocket
4,websocket自带心跳重连设置,如果异常或者断开会一直重连,直到连上为止
5,离开页面时可以断开连接,并终止重连请求
6,登录和离线会给后端发送type为online的信息,0代表离线,1代表在线
7,页面滚动事件监听,当滚动条滚动到顶部时会触发方法
8,历史数据功能,进入页面后拉取历史数据
9,发送信息时滚动条永远保持在最底部
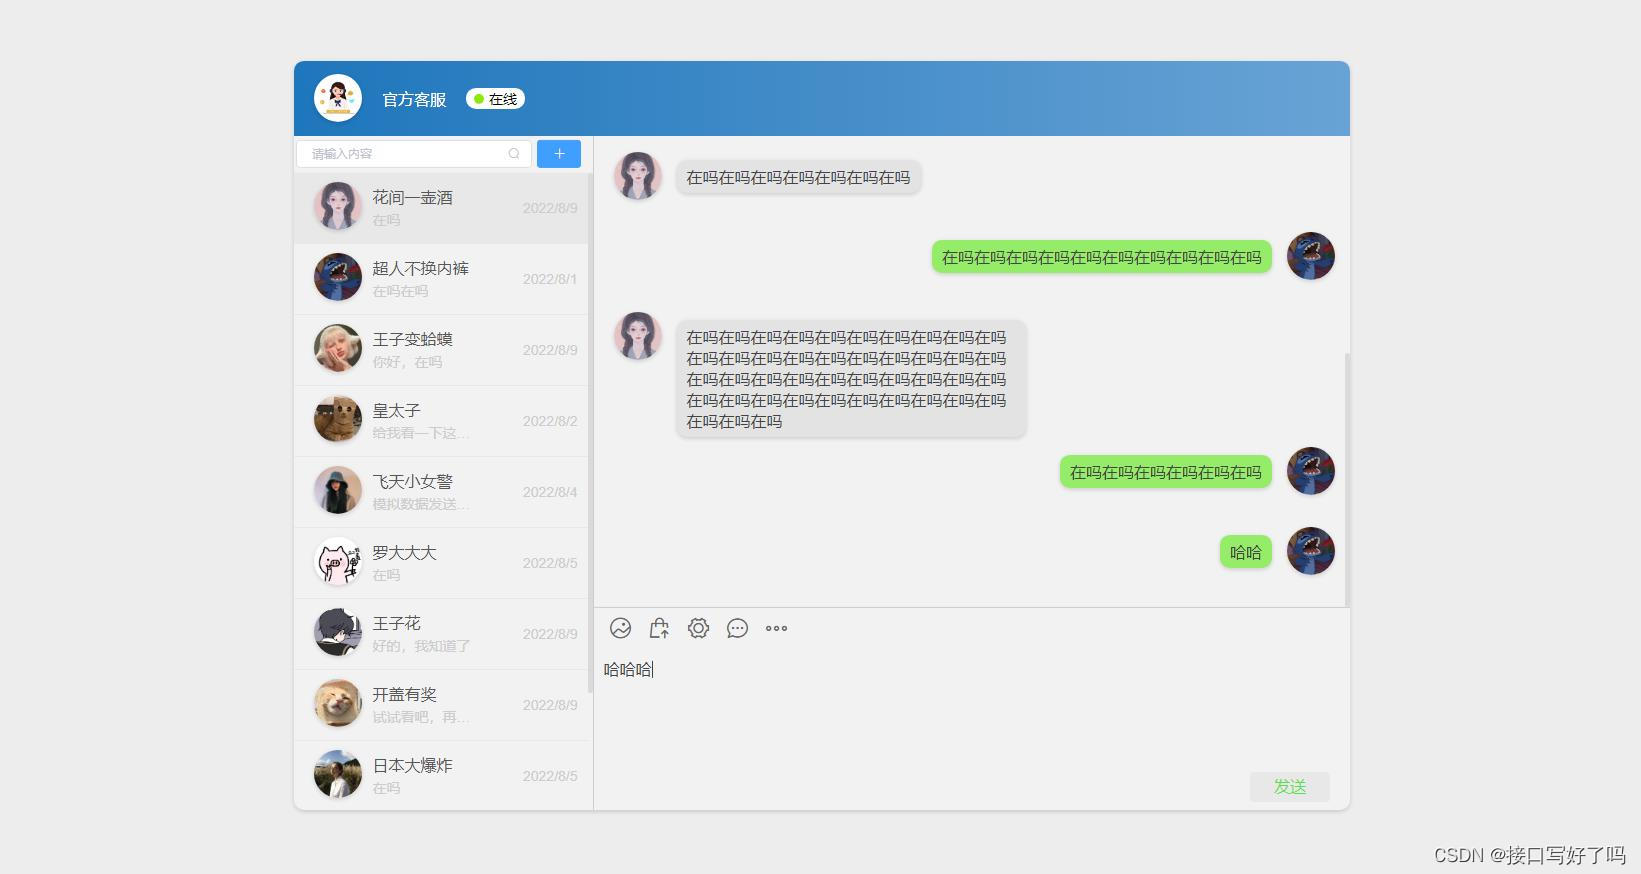
效果图
这是链接后台websocket,聊天的页面样式

后端历史记录的数据结构,分左右

代码(整体代码放上)
放下翻,有写注意事项和逻辑,里面详细解释了一下这个代码的功能实现逻辑和注意项
<template>
	<view>
		<view class="wrap">
			<view class="title">
				<view>{{ userName }}</view>
			</view>
			<view class="content_box" id="box" ref="scrollBox">
				<view class="timer">2022-08-02 11:08:07</view>
				<view :class="item.position == 'left' ? 'userbox2' : 'userbox'" v-for="(item, index) in chatList"
					:key="index" :id='"item"+index'>
					<view :class="item.position == 'left' ? 'nameInfo2' : 'nameInfo'">
						<view style="font-size: 14px">{{ item.position == 'left' ?item.uname:item.to_name  }}</view>
						<view :class="item.position == 'left' ? 'contentText2' : 'contentText'">
							{{ item.msn }}
						</view>
					</view>
					<view>
						<image class="touxiang" :src="item.position == 'left' ?item.uavatar:item.to_avatar" />
					</view>
				</view>
			</view>
			<view class="bottom">
				<textarea name="输入框" id="1" cols="20" rows="5" class="areaBox" v-model="inputValue"></textarea>
				<button style="height: 30px;color:#58df4d;font-size: 14px;line-height: 30px;"
					@click="sendOut">发送</button>
			</view>
		</view>
	</view>
</template>

<script>
	export default {
		data() {
			return {
				page: 1,//聊天历史记录分页
				chatList: [],//聊天信息
				userName: "",//用户名
				inputValue: "",//输入内容
				scrollTop: 0,//滚动条距离顶部距离
				infoList: null,//用户信息

				path: "wss://test.jskwsx.com/msg", //websocket链接地址
				ws: null, //建立的连接
				lockReconnect: false, //是否真正建立连接
				timeout: 10 * 1000, //30秒一次心跳
				timeoutObj: null, //心跳心跳倒计时
				serverTimeoutObj: null, //心跳倒计时
				timeoutnum: null, //断开 重连倒计时
				closeType:1,//断开判断:0代表不重连,1代表重连
			}
		},
		onShow() {
			this.initWebpack();//初始化
			this.closeType=1//进入改为1,代表如果断开链接自动重连
			this.getlishiList()//历史记录
			this.userName=uni.getStorageSync("userinfo").nickname//拿到缓存中的用户信息
		},
		onLoad(options) {
			this.infoList = JSON.parse(options.urlee)//拿到上一个页面传过来的参数,内容是选中客服信息
			console.log('选中客服信息', this.infoList);
		},
		onPageScroll(e) {
			//监听滚动事件,如果滚动条等于0,代表滚动到最顶部,把分页加一,然后历史记录拉第二页数据,以此类推
			if (e.scrollTop == 0) {
				this.page++
				this.getlishiList(1)
				console.log('到顶部了')
			}
		},
		beforeDestroy() {
			this.closeType=0 //离开页面前改为0,代表离开后断开链接不再重连
			this.ws.send({
				data: JSON.stringify({
					type: "online",
					data: {
						online: 0,
						user_type: 'user',
						is_tourist: uni.getStorageSync("userinfo").id?0:1
					}
				})
			})
			// 离开页面后关闭连接
			this.ws.close();
			// 清除时间
			clearTimeout(this.timeoutObj);
			clearTimeout(this.serverTimeoutObj);
		},
		methods: {
			//获取历史记录
			getlishiList(type) {
				uni.request({
					url: 'https://zz.api.asdwqs.com/gzh/crmebchat/chatMessageList', //仅为示例,并非真实接口地址。
					method: 'POST',
					data: {
						accept_id: this.infoList.kf_id,
						page: this.page,
						limit: 10,
					},
					header: {
						token: uni.getStorageSync('token') //拿到缓存中的token
					},
					success: (res) => {
						console.log('历史记录:', res);
						let a = res.data.data.list
						this.chatList = a.concat(this.chatList)//用拿到的数据合并现有的数据,这样当加载第二页历史记录时,顺序不会乱
						if (type == 1) {//滚动到顶部触发方法会传入1,此时不需要调用滚动到最底部的方法
							return
						}
						this.setPageScrollTo()//滚动到最底部
					}
				});
			},
			//滚动条默认滚动到最底部
			setPageScrollTo(s, c) {
				let that = this
				this.$nextTick(() => {
					const query = uni.createSelectorQuery().in(this);
					query
						.select("#box")
						.boundingClientRect((rect) => {
							let height = rect.height;//拿到聊天框的高度
							console.log("聊天信息框高度: ", height);
							wx.pageScrollTo({
								scrollTop: height,//把距离顶部距离设置成聊天框高度,以此把滚动条顶到最底部
								duration: 100 // 滑动速度
							})
						})
						.exec();
				});
			},

			//发送消息
			sendOut() {
				this.chatList.push({
					msn: this.inputValue,
					position: "right",
					to_avatar: uni.getStorageSync("userinfo").avatar,
					to_name: uni.getStorageSync("userinfo").nickname
				})
				let parms = {
					content: this.inputValue,
					uid: uni.getStorageSync("userinfo").id,
					uname: uni.getStorageSync("userinfo").nickname,
					uavatar: uni.getStorageSync("userinfo").avatar,
					to_uid: this.infoList.kf_id,
					to_name: this.infoList.kfname,
					to_avatar: this.infoList.kf_avatar,
					type: 'text',
					channel_type: 'wechat',
				}
				//通过websocket发送信息到后台
				this.ws.send({
					data: JSON.stringify({
						type: "chat",
						data: parms
					})
				})
				this.inputValue = ''//点击发送后清空输入框
				this.setPageScrollTo()//滚动到最底部
				console.log('发送成功', this.inputValue);
			},

			// 初始化websocket链接
			initWebpack() {
				//实例
				this.ws = wx.connectSocket({
					url: this.path
				})
				//链接成功
				this.ws.onOpen((res) => {
					let that = this
					console.log("连接成功", that.ws.readyState);
					if (that.ws.readyState == 1) {
						wx.sendSocketMessage({ //发送消息到后台,和send一样,这是微信的写法
							data: JSON.stringify({
								type: "login",
								data: {
									id: uni.getStorageSync("userinfo").wechatUsers.id,
									channel_type: 'wechat',
									uid: uni.getStorageSync("userinfo").id,
									openid: 'ojV4k6tnkv4_F1dddc3VwLeJ_QLs'
								}
							})
						})
						this.ws.send({
							data: JSON.stringify({
								type: "online",
								data: {
									online: 1,
									user_type: 'user',
									is_tourist: uni.getStorageSync("userinfo").id?0:1
								}
							})
						})
					}
					that.start(); //链接成功后开启心跳
				})
				//链接异常
				this.ws.onError((res) => {
					console.log("出现错误");
					this.reconnect(); //重连
				})
				//链接断开
				this.ws.onClose((res) => {
					console.log("连接关闭");
					//断开链接时判断
					if(this.closeType==0){
						return
					}
					this.reconnect(); //重连
				})
				//后台返回消息
				this.ws.onMessage((res) => {
					let type = JSON.parse(res.data)
					//后台返回消息,通过type字段判断是不是别人发送给我的消息
					if (type.type == 'chat') {
						this.chatList.push(type.data)//把消息添加到信息列表渲染
						this.setPageScrollTo() //滚动到最底部
						console.log("收到后台信息:", JSON.parse(res.data));
					}

					this.reset(); //收到服务器信息,心跳重置
				})

			},
			//重新连接
			reconnect() {
				var that = this;
				//防止重复链接
				if (that.lockReconnect) {
					return;
				}
				that.lockReconnect = true;
				//没连接上会一直重连,设置延迟避免请求过多
				that.timeoutnum && clearTimeout(that.timeoutnum);
				that.timeoutnum = setTimeout(function() {
					that.initWebpack(); //新连接
					that.lockReconnect = false;
				}, 5000);
			},
			//重置心跳
			reset() {
				var that = this;
				clearTimeout(that.timeoutObj); //清除心跳倒计时
				clearTimeout(that.serverTimeoutObj); //清除超时关闭倒计时
				that.start(); //重启心跳
			},
			//开启心跳
			start() {
				var self = this;
				self.timeoutObj && clearTimeout(self.timeoutObj); //心跳倒计时如果有值就清除掉,防止重复
				self.serverTimeoutObj && clearTimeout(self.serverTimeoutObj); //超时关闭倒计时如果有值就清除掉,防止重复
				self.timeoutObj = setTimeout(function() {
					if (self.ws.readyState == 1) {
						wx.sendSocketMessage({
							data: JSON.stringify({
								type: "ping"
							})
						})
					} else {
						self.reconnect();//重连
					}

					//如果超时了就关闭连接
					self.serverTimeoutObj = setTimeout(function() {
						self.ws.close();
					}, self.timeout);
				}, self.timeout);
			},
			//连接成功
		}
	}
</script>

<style scoped>
	.wrap {
		height: 100%;
		width: 100%;
		position: relative;
	}

	.touxiang {
		width: 50px;
		height: 50px;
		border-radius: 50%;
	}

	.areaBox {
		height: 40px;
	}

	.title {
		height: 40px;
		width: 100%;
		background-color: #eaeaea;
		display: flex;
		justify-content: center;
		align-items: center;
	}

	.bottom {
		min-height: 50px;
		width: 100%;
		border-top: 1px solid #eaeaea;
		background-color: #F1F1F1;
		position: fixed;
		bottom: 0;
		display: flex;
		justify-content: space-between;
		align-items: center;
		padding: 0 5px;
		border-radius: 10px;
	}

	.content_box {
		/*
  中间栏计算高度,110是包含了上下固定的两个元素高度90
  这里padding:10px造成的上下够加了10,把盒子撑大了,所以一共是20要减掉
  然后不知道是边框还是组件的原因,导致多出了一些,这里再减去5px刚好。不然会出现滚动条到顶或者底部的时候再滚动的话就会报一个错,或者出现滚动条变长一下的bug
  */
		height: calc(100% - 115px);
		overflow: auto;
		padding: 10px 10px 50px 10px;
	}

	.timer {
		text-align: center;
		color: #c2c2c2;
	}

	/* 发送的信息样式 */
	/*
右边消息思路解释:首先大盒子userbox内放两个盒子,一个放头像,一个放用户名和发送的内容,我们先用flex让他横向排列。
然后把写文字的大盒子设置flex:1。这个属性的意思就是让这个元素撑满父盒子剩余位置。然后我们再把文字盒子设置flex,并把他对齐方式设置为尾部对齐就完成了基本的结构,然后微调一下就可以了
*/
	.userbox {
		width: 100%;
		display: flex;
		margin-bottom: 10px;
	}

	.nameInfo {
		/* 用flex:1把盒子撑开 */
		flex: 1;
		margin-right: 10px;
		/* 用align-items把元素靠右对齐 */
		display: flex;
		flex-direction: column;
		align-items: flex-end;
	}

	.contentText {
		background-color: #9eea6a;
		/* 把内容部分改为行内块元素,因为盒子flex:1把盒子撑大了,所以用行内块元素让内容宽度不根据父盒子来 */
		display: inline-block;
		/* 这四句是圆角 */
		border-top-left-radius: 10px;
		border-top-right-radius: 0px;
		border-bottom-right-radius: 10px;
		border-bottom-left-radius: 10px;
		/* 最大宽度限定内容输入到百分61换行 */
		max-width: 61%;
		padding: 5px 10px;
		/* 忽略多余的空白,只保留一个空白 */
		white-space: normal;
		/* 换行显示全部字符 */
		word-break: break-all;
		margin-top: 3px;
		font-size: 14px;
	}

	/* 接收的信息样式 */
	/*
左边消息思路解释:跟上面一样,就是换一下位置,首先通过把最外层大盒子的排列方式通过flex-direction: row-reverse;属性翻转,也就是头像和文字盒子换位置
然后删除掉尾部对齐方式,因为不写这个默认是左对齐的。我们写的左边就没必要再写了。
*/
	.userbox2 {
		width: 100%;
		display: flex;
		flex-direction: row-reverse;
		margin-bottom: 10px;
	}

	.nameInfo2 {
		/* 用flex:1把盒子撑开 */
		flex: 1;
		margin-left: 10px;
	}

	.contentText2 {
		background-color: #9eea6a;
		/* 把内容部分改为行内块元素,因为盒子flex:1把盒子撑大了,所以用行内块元素让内容宽度不根据父盒子来 */
		display: inline-block;
		/* 这四句是圆角 */
		border-top-left-radius: 0px;
		border-top-right-radius: 10px;
		border-bottom-right-radius: 10px;
		border-bottom-left-radius: 10px;
		/* 最大宽度限定内容输入到百分61换行 */
		max-width: 61%;
		padding: 5px 10px;
		/* 忽略多余的空白,只保留一个空白 */
		white-space: normal;
		/* 换行显示全部字符 */
		word-break: break-all;
		margin-top: 3px;
		font-size: 14px;
	}
</style>
注意点
1,点击发送时,我们看到的并不是后台传过来的信息,是我们自己push进去的,然后信息通过websockt传给后台了,这样就不需要再获取一次消息了。
2,我这里后台的数据结构时分左右的,然后左右的不同也会有不同的字段,所以我标签上有判断,如果你们后端不这么传,自行更改
3,这里用css保留了空格等格式,如果不生效,可以直接用vue自带的v-html来把文字放进去
聊天功能逻辑简介
简单来说就是,我们前端的页面渲染是通过写两个style样式。一个是靠左边,一个靠右边。然后通过后台的数据内有一个position字段,是left我们就调用左边的样式,是right的就调用右边的样式。这样,页面就出来了。
然后我们通过websocket链接交互。
逻辑是,刚连接上时发送给后台当前用户的信息(type=login)和这个用户上线了的状态(type=online),然后发送消息的时候type=chat,并带上参数。参数为我的信息和我要发送的人的信息。然后接收的时候我们通过判断后台websocket传过来的数据内type等于什么来处理不同的数据。这一点需要你自行和后端商量什么type。然后离开页面的时候也发送一下type=online的消息,表示用户离线了。然后关闭链接
拓展项
【用户登录状态,在线离线】
这里我写了一个pc版的在线和离线。代码放上来讲解一下。
这里是截取的代码,是用来渲染用户列表的,是pc端截取出来的。大家看逻辑就行,这里用户列表自带状态显示上下线,所以我分了两个盒子来判断。
逻辑很简单,就是两个盒子,先判断当前这个用户的id和后台websocket发来的id是否一致。如果不一致,那么我们使用上面的盒子,也就是用户列表内自带的字段来判断上下线。
如果后台发了一个上下线的状态过来,我们就赋值给online_uid。这时候再判断,就会发现用户列表内某一个用户id是一致的,这时候这个用户就会使用下面的盒子,判断就变成了后台发送过来的状态来判断上下线了。
html
<!-- 用户状态判断:列表拉状态时,判断每一个用户id和ws推送的id是否一致,不一致的默认显示列表内的状态 -->
<div v-show="item.user_id!==online_uid">
    <div class="statebox" v-if="item.online_user==1"> 在线</div>
    <div class="statebox2" v-else> 离线</div>
</div>
<!-- 如果判断该用户id和ws传的uid一致,那么使用ws推送的状态 -->
<div v-show="item.user_id==online_uid">
   <div class="statebox" v-show="online_type==1&&item.user_id==online_uid"> 在线</div>
   <div class="statebox2" v-show="online_type==0&&item.user_id==online_uid"> 离线</div>
</div>
data
data() {
            return {
                online_type:0,//0是离线,1是在线
                online_uid:0,//用于判断uid是否一致
            };
        },
methods
            //接受后台信息回调
            onmessage(e) {
                let type = JSON.parse(e.data)
                if (type.type == 'reply') {//reply代表用户发送的消息
                    this.userInfoList.push(type.data)//把发送的消息添加进信息列表渲染
                }else if(type.type == 'online'){//online代表用户上下线
                    this.online_type=type.data.online//用户状态
                    this.online_uid=type.data.uid//用户id
                }
                console.log("收到后台信息:", JSON.parse(e.data));
            },
【发送图片,视频,商品详情等信息】
这里是很多聊天功能会拓展的部分,不可能只发送文字,目前我还没有写代码,先记录逻辑。
还记得我们上面代码里面发送消息的时候是有type=text这个属性吗,我们就通过这个type来区分。
比如我点击上传图片时,方法内给type改成img。那么后端发给我们,也就是img类型的,我们通过这个判断来完成功能,简单描述一下
消息分类:
1,text:文字信息
2,img:图片信息
3,shop:购物信息
4,video:视频信息
逻辑:position分左右不用动,创建四个div。用v-if来判断type类型属于哪一个就显示哪个div。同时,每个div内对应获取信息列表中该对象的一些字段渲染出来,比如type等于text就代表是文字信息,拿msn字段的文字去渲染。如果type等于img。就是图片信息,图片的这个div内获取url字段的图片地址去渲染。如果是shop字段。那么就对应获取比如名称,描述,价格,图片等字段渲染出来一个小卡片形式的结构。