QML 状态机 与 动画
状态机在QT中是一个很重要的概念,部件可以通过状态去处理相应的操作!
举个例子,以前的做法是,鼠标点击一个矩形,通过获取到鼠标按下状态后,在槽函数中处理相应操作,而这些操作是放在鼠标事件槽函数中处理的,不是很好;
使用状态机的话,可以将这些操作封装在部件本身里面,通过设置不同的状态去处理不同的的事情,很好的避开了耦合性!
一、状态机
在Rectangle中有一个state属性,标识当前部件的状态;
在通过states: [ ] 给部件声明一个一个状态,即可在这些状态内部出处理操作;
例如:
定义了三个状态,分别是,normal,mouse_press,mouse_release
并且在mouse_press状态中处理将颜色设置为red,宽度设置为300;
在mouse_release状态中处理将颜色设置为blue,高度设置为300;
states: [
    State {
        name: "normal"
        PropertyChanges {
            target: root
            color: "black"
        }
    },
    State {
        name: "mouse_press"
        PropertyChanges {
            target: root
            color: "red"
            width: 300
        }
    },
    State {
        name: "mouse_release"
        PropertyChanges {
            target: root
            color: "blue"
            height: 300
        }
    }
]
之后只需要设置部件的 state 矩形即可进去相应的状态;
例如:state = "mouse_press"
可以通过鼠标点击切换状态:
MouseArea {
    anchors.fill:  parent
    onPressed: {
        root.state = "mouse_press"
    }
    onReleased: {
        root.state = "mouse_release"
    }
}
代码:
// 状态机的使用
// 可通过设置相应的状态去调整某些属性值,或者其他操作
Rectangle {
    id: root
    width: 200
    height: 100

    state: "normal"
    states: [
        State {
            name: "normal"
            PropertyChanges {
                target: root
                color: "black"
            }
        },
        State {
            name: "mouse_press"
            PropertyChanges {
                target: root
                color: "red"
                width: 300
            }
        },
        State {
            name: "mouse_release"
            PropertyChanges {
                target: root
                color: "blue"
                height: 300
            }
        }
    ]

    MouseArea {
        anchors.fill:  parent
        onPressed: {
            root.state = "mouse_press"
        }
        onReleased: {
            root.state = "mouse_release"
        }
    }
}
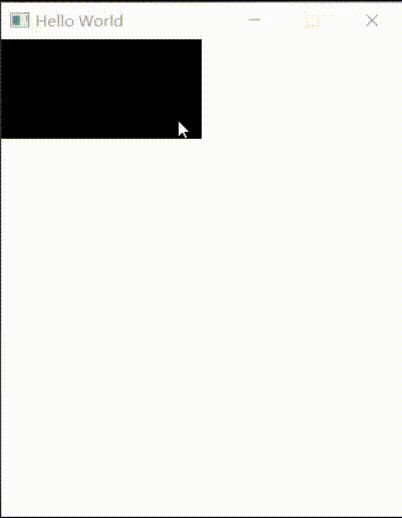
运行效果
二、动画
以下介绍项目中比较常用的动画用法!
1. Transition
通过transition可处理状态,根据不同状态切换处理不一样的动画效果;
继续在上面代码中添加如下动画效果代码;
ColorAnimation {
        target: root        // 目标id
        duration: 1000        // 处理时间为1秒
}
// 颜色切换时的动画效果
transitions: [
    Transition {
        from: "mouse_press"
        to: "mouse_release"

        ColorAnimation {
            target: root
            duration: 1000
        }
        NumberAnimation {
            properties: "width"
            from: 300  // 确保与mouse_press状态的宽度一致
            to: 200    // 回到normal状态的宽度或您希望的其他值
            duration: 1000
        }
    },
    Transition {
        from: "mouse_release"
        to: "mouse_press"

        ColorAnimation {
            target: root
            duration: 1000
        }
        NumberAnimation {
            properties: "height"
            from: 300  // 或当前width值
            to: 100
            duration: 1000
        }
    }
]
运行效果

2. PropertyAnimation 与 NumberAnimation
PropertyAnimation 是设置特殊属性,例如color等非数值的属性;
NumberAnimation 是设置数值类属性;
prorerties 设置需要操作的属性名字;
from 设置起始数值
to 设置目标数值
duration 设置处理时常
target 设置处理的目标id
最后通过.start() 方法启动动画;
代码:
    // 动画
Rectangle {
    id: flashingblob
    width: 100
    height: 50
    color: "yellow"

    MouseArea {
        anchors.fill: parent
        onClicked: {
            // 通过start()方法开启动画效果
            animateColor.start()
            animateWidth.start()
            animateY.start()
        }
    }

    // 属性
    // 将颜色设置为绿色,2s
    PropertyAnimation {
        id: animateColor
        target: flashingblob
        properties: "color"
        from: "yellow"
        to: "green"
        duration: 2000
    }

    // 数值
    // 将宽度由100改为300,1s
    NumberAnimation {
        id: animateWidth
        target: flashingblob
        properties: "width"
        from: 100
        to: 300
        duration: 1000
    }

    // 数值
    // 将y由10改为100,1s
    NumberAnimation {
        id: animateY
        target: flashingblob
        properties: "y"
        from: 10
        to: 100
        duration: 1000
    }
}
运行效果
3. PropertyAnimation
立刻执行的动画
通过后面加上 on 关键字,标记需要处理的属性是什么
PropertyAnimation on x 需要处理的是x属性
to 设置目标数值
duration 设置处理时常
代码:
Rectangle {
    id: rect
    width: 100
    height: 100
    color: "red"

    PropertyAnimation on x {
        to: 100
        duration: 1000
    }
    PropertyAnimation on height {
        to: 300
        duration: 1000
    }
    PropertyAnimation on color {
        to: "green"
        duration: 1000
    }
}
运行效果

完!