无外接物理显示器的Ubuntu系统的远程桌面连接(升级版)
文章目录
- 操作步骤
- 实践截图
- 配置 Xorg 的虚拟显示界面(升级版)
操作步骤
“远程连接”,在设置里直接打开就可以.进行配置就行.
1.配置 GRUB 以支持无显示器启动
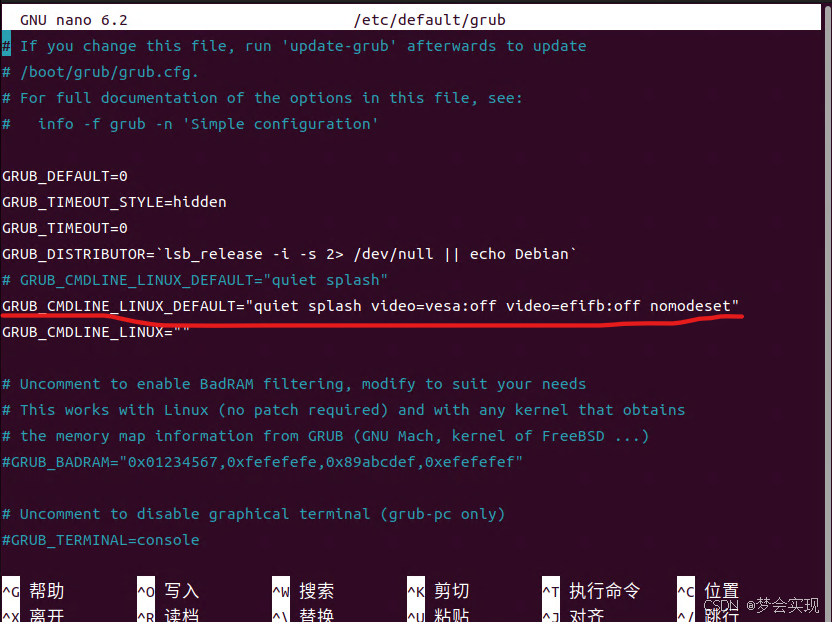
sudo nano /etc/default/grub
(里面有一行改为:
GRUB_CMDLINE_LINUX_DEFAULT="quiet splash video=vesa:off video=efifb:off nomodeset")2.保存后更新 grub
sudo update-grub3.设置自动登录
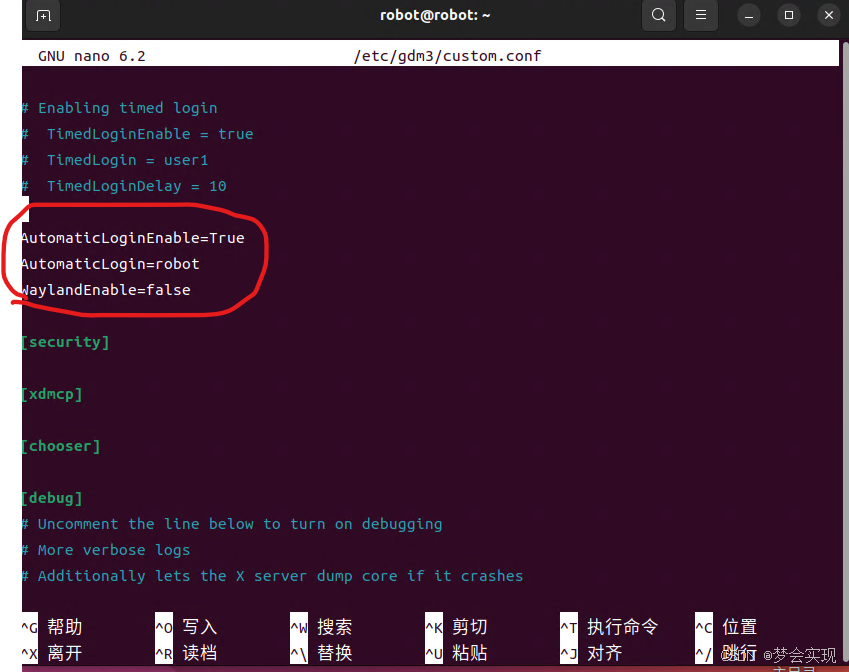
sudo nano /etc/gdm3/custom.conf
(修改添加:
AutomaticLoginEnable=True
AutomaticLogin=robot
WaylandEnable=false)4.重启 GDM 服务
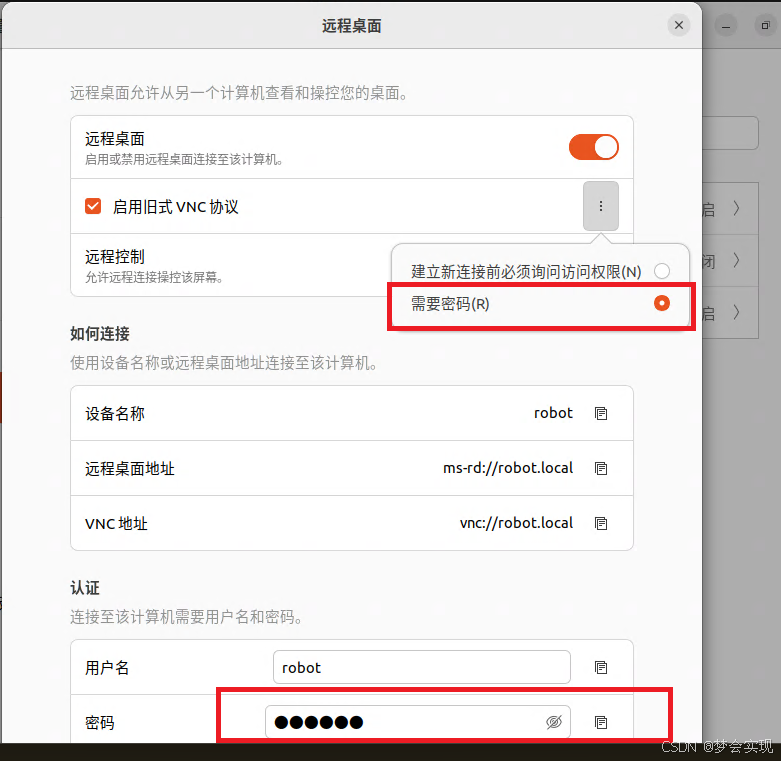
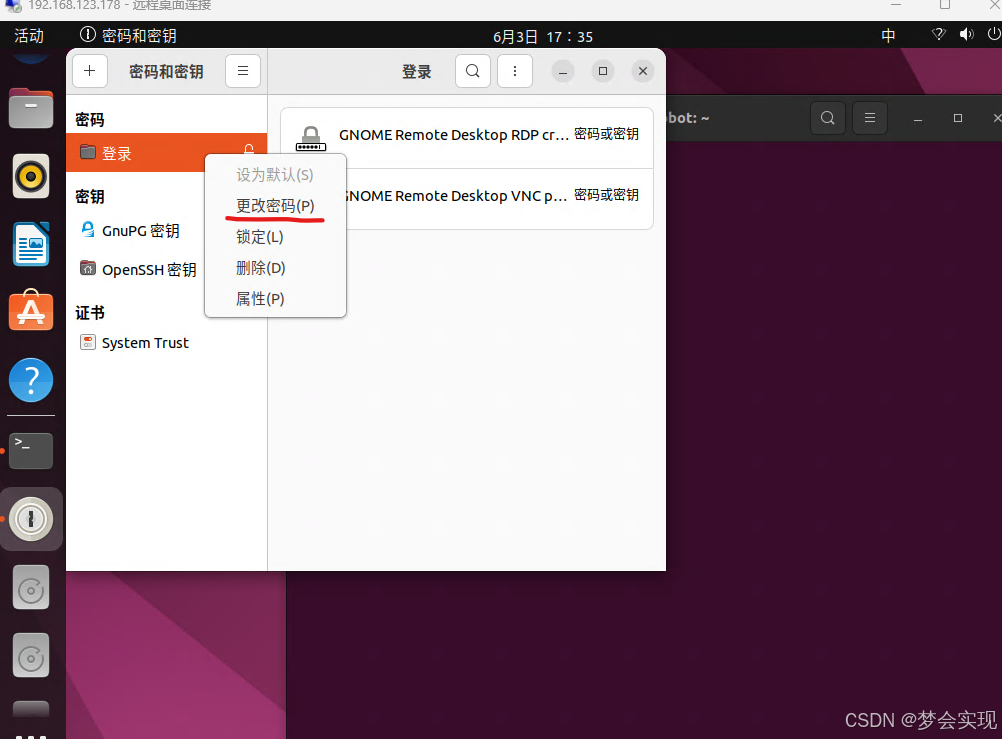
sudo systemctl restart gdm35.打开"密码和密钥" 应用程序
seahorse
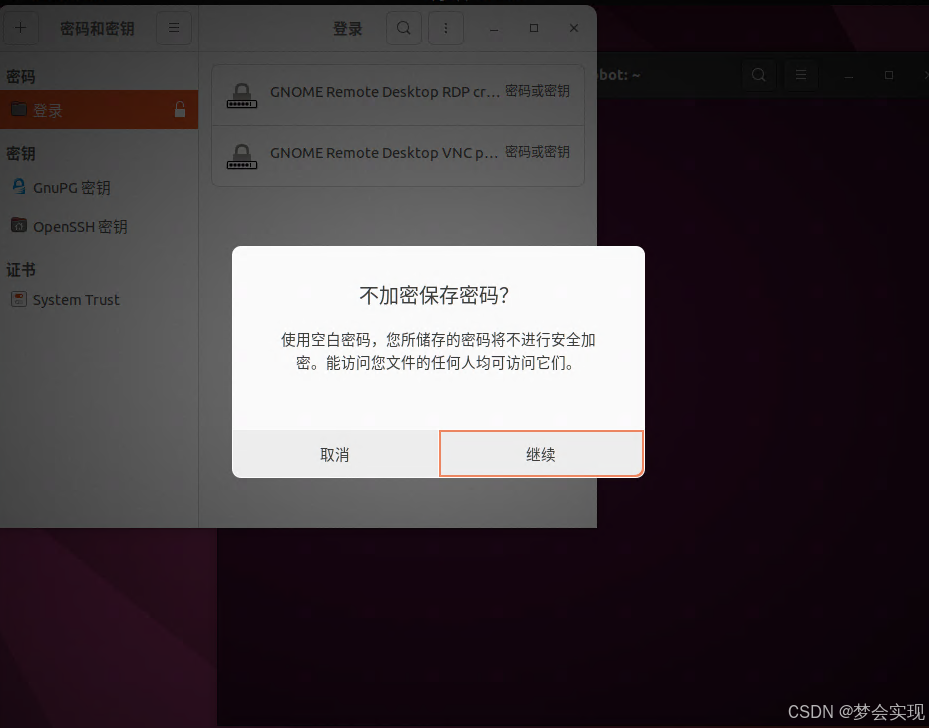
(右击 "登录" ,单击 "更改密码",输入原密码后,空着密码行不输入,点击确定继续)实践截图
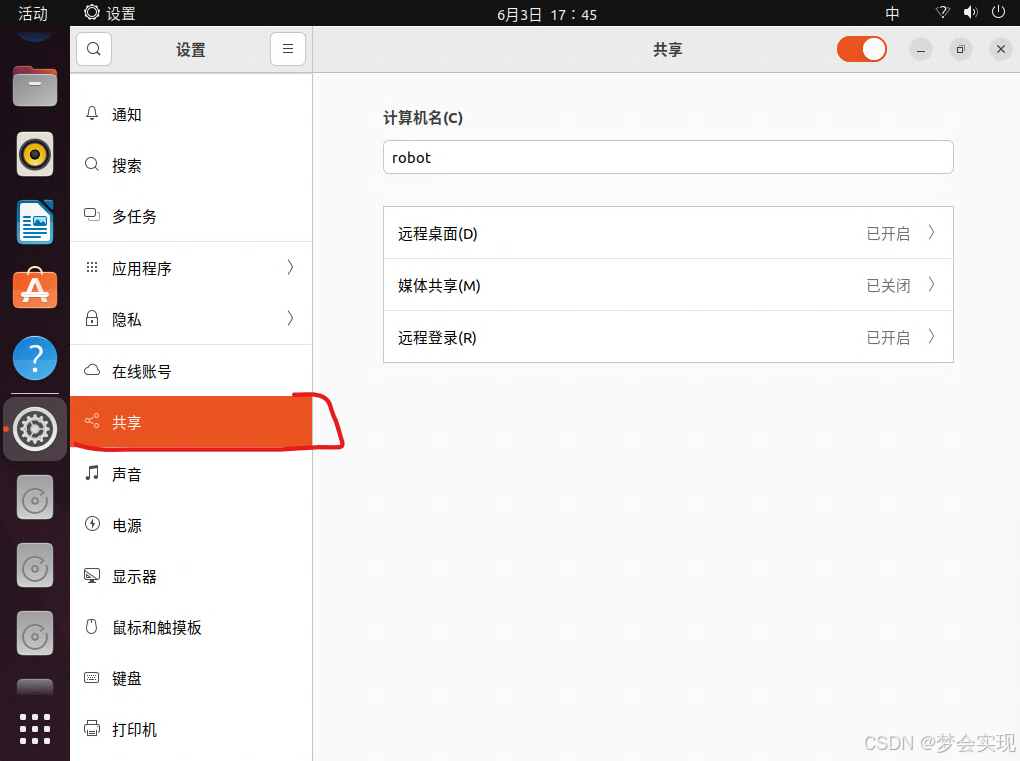
这样就可以在局域网内其他电脑上,远程桌面连接访问无外接显示器的Ubuntu22.04系统的计算机.
配置 Xorg 的虚拟显示界面(升级版)
上面的配置完成后,显示的界面分辨率仅为 1080×738 .
此升级版就是想要将虚拟显示界面分辨率设置为 1920×1080 .
此配置的前提是禁用 Wayland 的界面,显示界面系统为 Xorg(X11).
查看界面:
echo $XDG_SESSION_TYPE
输出 x11 -> Xorg .
输出 wayland -> Wayland .
首先是 “/etc/default/grub” 文件更改为:
# If you change this file, run 'update-grub' afterwards to update
# /boot/grub/grub.cfg.
# For full documentation of the options in this file, see:
#   info -f grub -n 'Simple configuration'GRUB_DEFAULT=0
GRUB_TIMEOUT_STYLE=hidden
GRUB_TIMEOUT=0
GRUB_DISTRIBUTOR=`lsb_release -i -s 2> /dev/null || echo Debian`
GRUB_CMDLINE_LINUX_DEFAULT="quiet splash video=vesa:1920x1080 video=efifb:off"
GRUB_CMDLINE_LINUX=""# Uncomment to enable BadRAM filtering, modify to suit your needs
# This works with Linux (no patch required) and with any kernel that obtains
# the memory map information from GRUB (GNU Mach, kernel of FreeBSD ...)
#GRUB_BADRAM="0x01234567,0xfefefefe,0x89abcdef,0xefefefef"# Uncomment to disable graphical terminal (grub-pc only)
#GRUB_TERMINAL=console# The resolution used on graphical terminal
# note that you can use only modes which your graphic card supports via VBE
# you can see them in real GRUB with the command `vbeinfo'
GRUB_GFXMODE=1920x1080# Uncomment if you don't want GRUB to pass "root=UUID=xxx" parameter to Linux
#GRUB_DISABLE_LINUX_UUID=true# Uncomment to disable generation of recovery mode menu entries
#GRUB_DISABLE_RECOVERY="true"# Uncomment to get a beep at grub start
#GRUB_INIT_TUNE="480 440 1"
安装虚拟显示器驱动(xserver-xorg-video-dummy):
安装虚拟显示器驱动,强制系统识别 “虚拟屏幕” ,支持分辨率(如1920×1080).
1.
sudo apt install xserver-xorg-video-dummy2.
sudo nano /etc/X11/xorg.conf.d/10-dummy.conf
添加内容:
Section "Device"Identifier "DummyDevice"Driver "dummy"VideoRam 256000
EndSectionSection "Monitor"Identifier "DummyMonitor"HorizSync 5.0-75.0VertRefresh 50.0-75.0Modeline "1920x1080_60.00"  173.00  1920 2048 2248 2576  1080 1083 1088 1120 -hsync +vsync
EndSectionSection "Screen"Identifier "Default Screen"Device "DummyDevice"Monitor "DummyMonitor"DefaultDepth 24SubSection "Display"Depth 24Modes "1920x1080"EndSubSection
EndSection
重新启动后,就不会在外接显示器上显示界面了,只有通过虚拟界面进行显示,若要恢复的话,只需要删除 “/etc/X11/xorg.conf.d/10-dummy.conf” 文件即可.