Spring 框架(1)
目录
一、核心容器注解:
1、@RestController :
二、spring MVC 注解:
1、@RequestMapping :
2、@RequestParam:
3、@RequestBody:
4、@PathVariable:
5、@RequestPart:
三、第三方库的类:
1、ObjectMapper:
四、HttpServletRequest 和 HttpServletResponse:
五、Cookie 和 Session:
1、Cookie:
2、Session:
设置和获取 Session:
另外两种获取sessionID方式:
六、访问路径返回静态页面:
七、返回JSON格式的数据:
在学习 Spring 框架过程中,此文章不定期总结内容。
一、核心容器注解:
1、@RestController :
@RestController = @Controller + @ResponseBody。
@RestController 和 @ResponseBody 都是用于处理 HTTP 请求并返回数据。但是使用 @RestController较多。
如果类需要跳转页面(返回视图),必须用@Controller,不能用@RestController。
所以,就可以灵活使用了,如果一个类使用@Controller注解,那么该类其方法里可选择性加上@ResponseBody,加上@ResponseBody注解的方法就是返回数据了。没加上@ResponseBody 就是单纯返回页面(视图)了。
二、spring MVC 注解:
1、@RequestMapping :
通用请求映射(支持路径、方法、参数等)
比如:
@RequestMapping("/hello")
public class test {@RequestMapping("/v1")public String v1() {return "hello v1 ~~";}
这样,启动代码后,通过 postman软件:
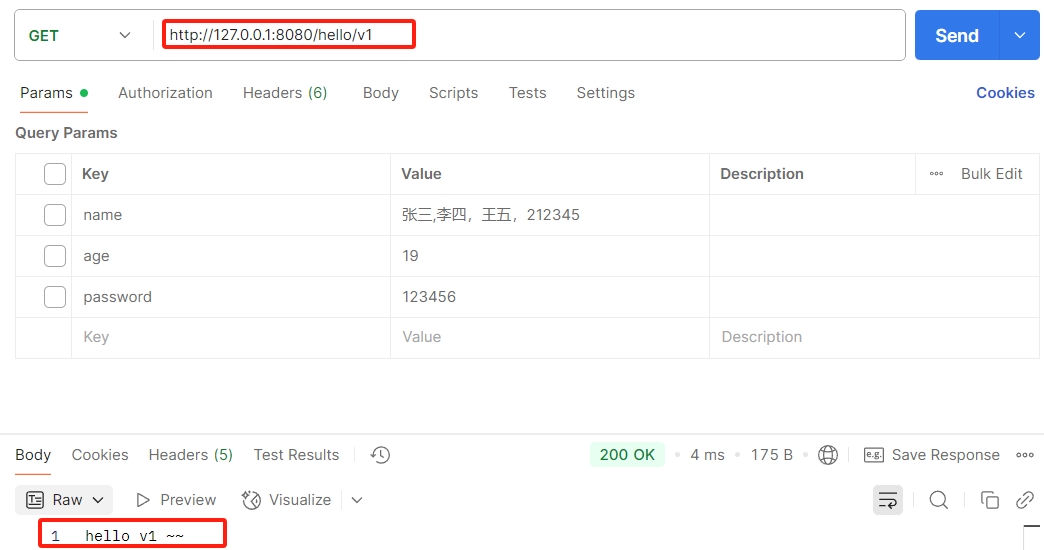
我在 postman 的 url 输入框输入 环回ip和对应端口后,/hello就是类上@RequestMapping的路径,/v1 是这个类中的方法的@RequestMapping的路径,前端(postman)就得到方法里返回的值。
@RequestMapping 默认支持POST ,GET , 等等这些方法,如果只需要单独的某个方法,有:
@GetMapping:只处理 GET 请求。
类似于:
@RequestMapping(value = "/v1" ,method = RequestMethod.GET)@PostMapping:只处理 POST 请求。
类似于:
@RequestMapping(value = "/v1" ,method = RequestMethod.POST)只需要GET和POST请求,则:
@RequestMapping(value = "/v1" ,method = { RequestMethod.GET , RequestMethod.POST })2、@RequestParam:
这个注解可以获取 http 请求的查询参数,也就是url 上的query string。这个方法可以处理前端返回的参数名和和后端参数名不一致的情况。
如果前端传递http请求的 url 上的参数名和后端接收参数名字一致:
@RequestMapping("/parameter")
public class test_two {@RequestMapping("/r1")public String r1(String username , String password , String age) {return "接收到参数:username = " + username + " password = " + password + " age = " + age;}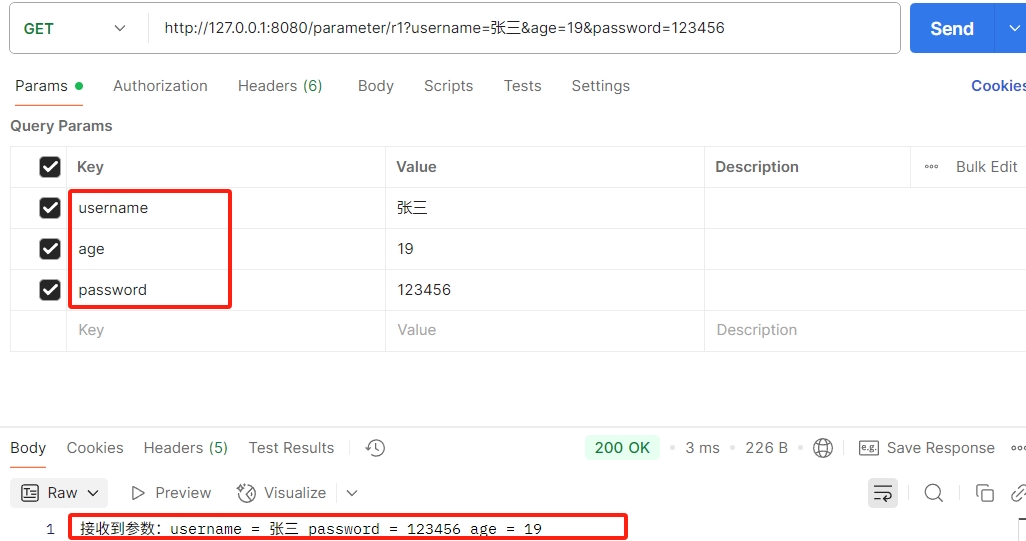
后端可以正常接收并返回结果,且前端传递参数的顺序不要求。
如果前端传递http请求的 url 上的参数名和后端接收参数名字不一致:
 @RequestMapping("/parameter")
public class test_two {@RequestMapping("/r3")public String r3(@RequestParam("username") String recourse) {return recourse;}}
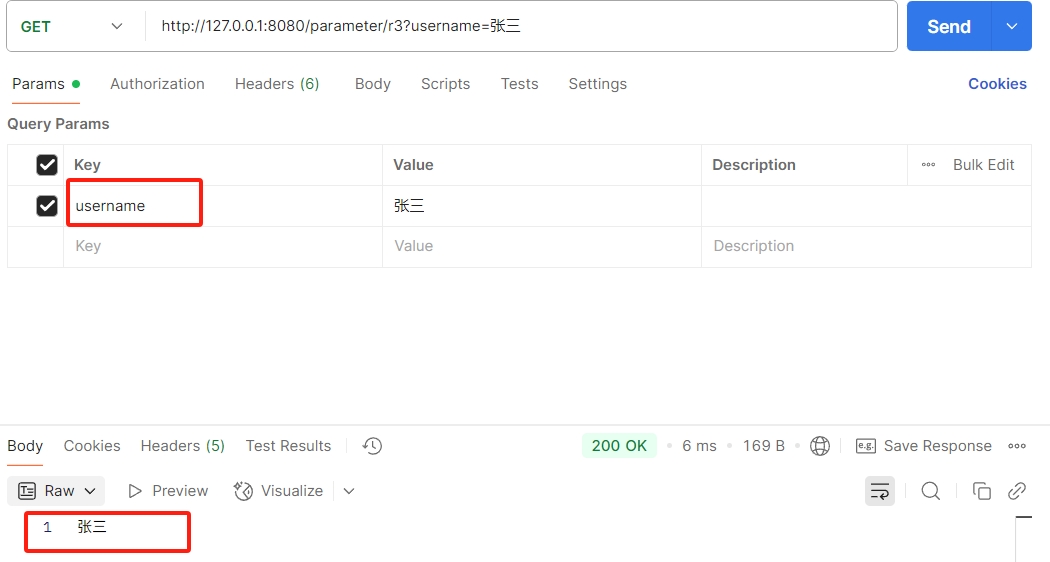
可以看到,通过@RequestParam(“username”),可以把 username 参数的数据 给到 recoursse。
并且,@RequestParam还有个选项能表示这个参数是不是必传参数:
 @RequestMapping("/parameter")
public class test_two {@RequestMapping("/r3")public String r3(@RequestParam(value = "username" , required = false) String recourse) {return recourse;}}
其中的 required 字段默认是 true ,表示 value 中的 username 的数据是前端必须传给后端的意思,如果 required 字段改成false,表示非必传参数。
@RequestParam 还可以传递前端的复选框参数列表。
@RequestMapping("/parameter")
public class test_two {@RequestMapping("/r4")public String r4(@RequestParam("names") String[] arr) {return "接收到参数 arr : " + Arrays.toString(arr);}}
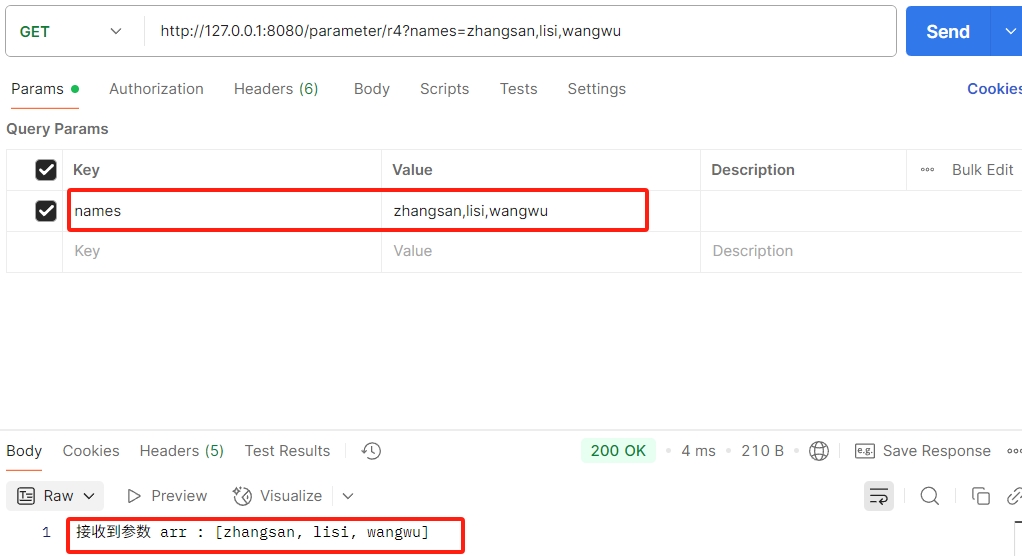
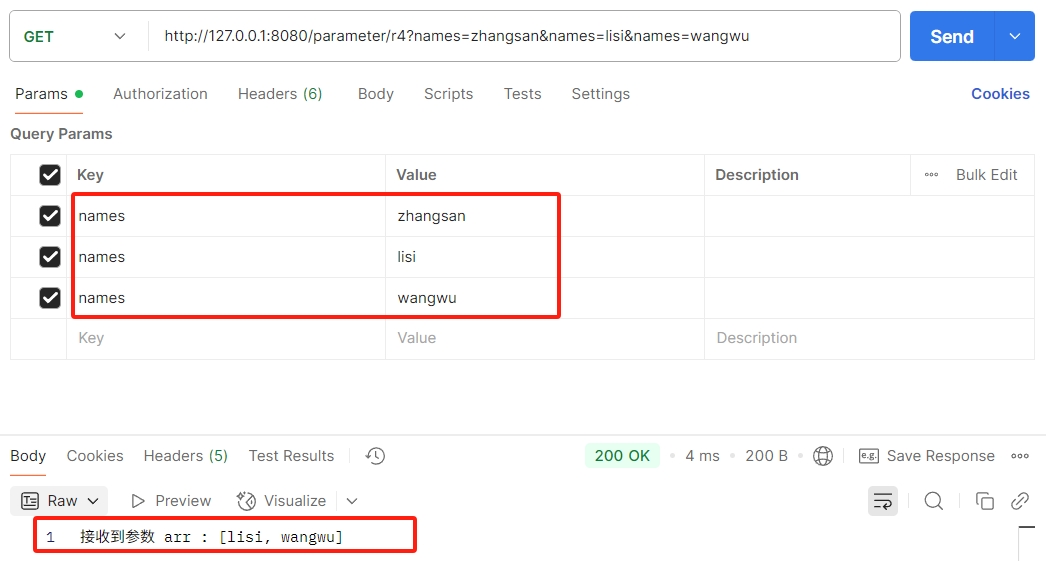
可以看到,postman的这两种传递方式参数列表数据都是可以的。如果把@RequestParam的required 字段改成false,此时前端什么数据都不传递过去,得到的是arr为 null 。
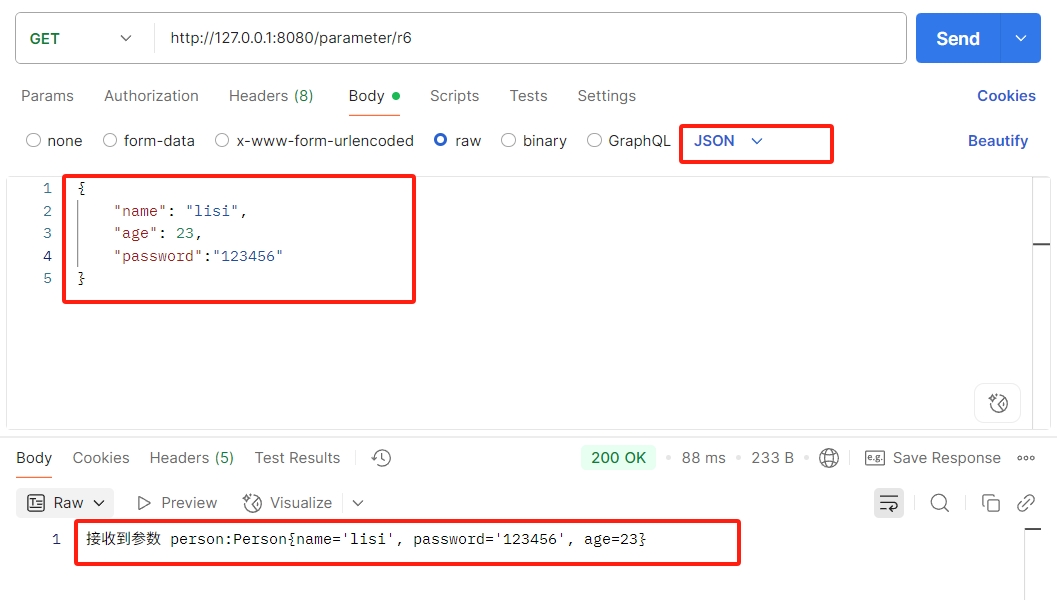
3、@RequestBody:
@RequestBody是可以将 http 请求的 json 数据格式转换成 java 对象。
Person对象:
public class Person {String name;String password;Integer age;public void setName(String name) {this.name = name;}public void setAge(Integer age) {this.age = age;}public void setPassword(String password) {this.password = password;}public String getName() {return name;}public String getPassword() {return password;}public Integer getAge() {return age;}@Overridepublic String toString() {return "Person{" +"name='" + name + '\'' +", password='" + password + '\'' +", age=" + age +'}';}
}
@RequestMapping("/parameter")
public class test_two {@RequestMapping("/r6")public String r6(@RequestBody Person person) {return "接收到参数 person:" + person;}
}
4、@PathVariable:
@PathVariable 用于从 URL 路径中获取参数。
   @RequestMapping("/parameter")
public class test_two {@RequestMapping("/r7/{type}")public String r7(@PathVariable String type) {return "接收到参数: type = " + type;}
}
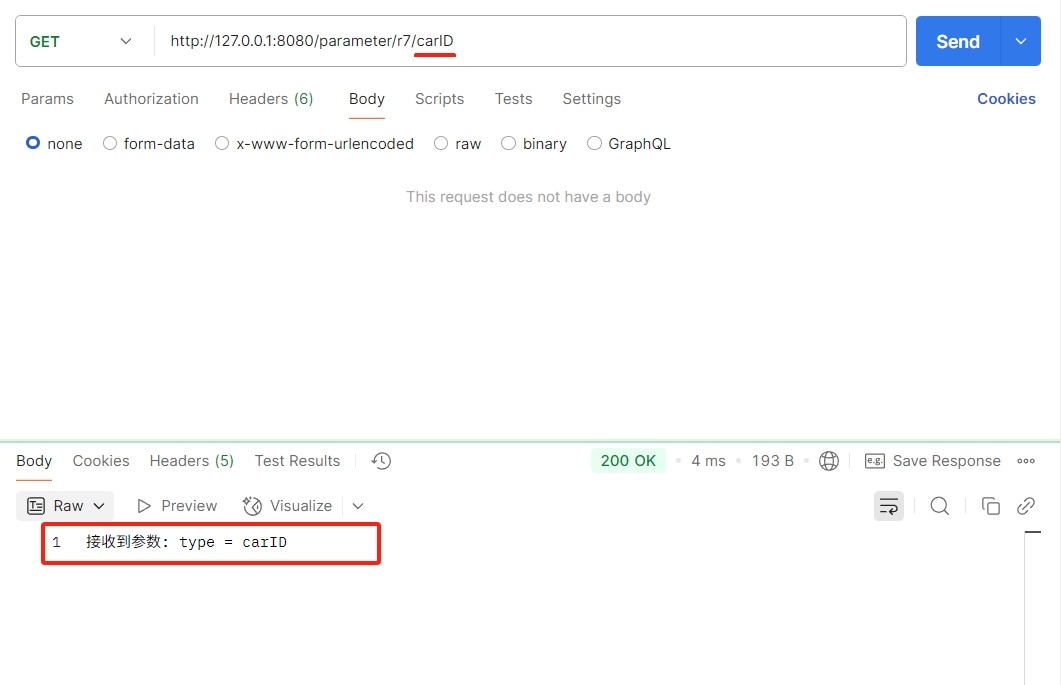
可以看到,postman url上的参数 carID 被作为数据传递给到后端代码被 type 参数名接收了。此时, @RequestMapping 中的路径参数需要 { } 把需要从 url 得到的参数括起来了,也就是说,需要 url 路径上哪个参数,就将其 用 { } 括起来。
如果 { } 里的参数名与方法里的参数名不一致时:
 @RequestMapping("/parameter")
public class test_two {@RequestMapping("/r7/{fortype}/{ids}")public String r8(@PathVariable("fortype") String type , @PathVariable("ids") Integer id) {return "接收到参数: fortype = " + type + ", ids = " + id;}
}
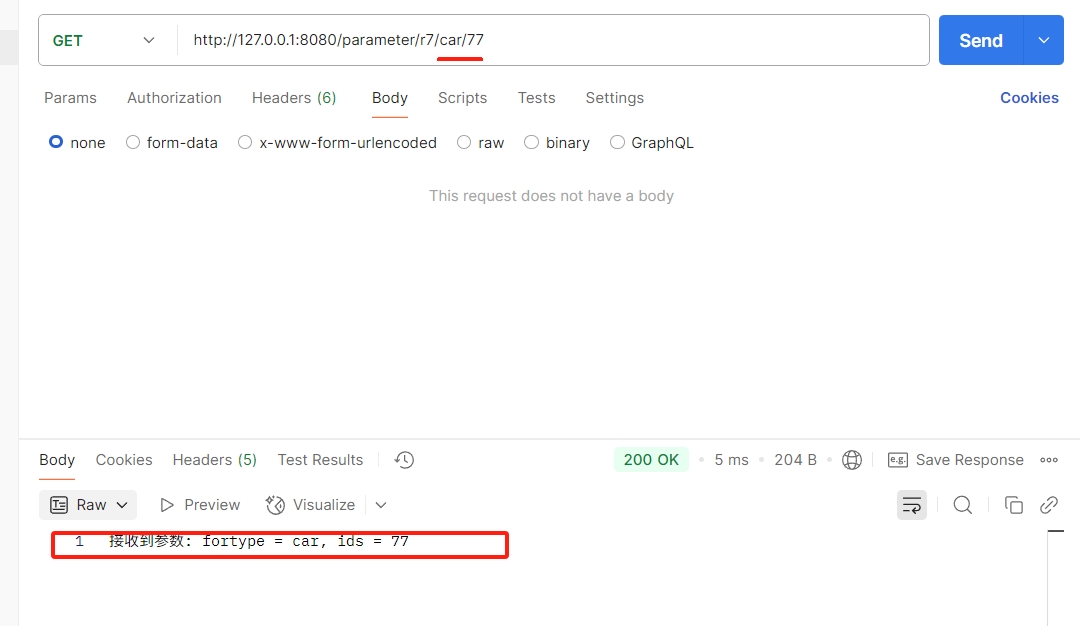
也可以通过@PathVariable(“fortype”)的方式,把参数名给到方法里的参数名 type。
5、@RequestPart:
@RequestPart 可以对上传文件的名字进行重命名,类似于上面讲到的@RequestParam。
正常上传文件:
@RequestMapping("/parameter")
public class test_two {@RequestMapping("/r8")public String r8(MultipartFile file) throws IOException {//获取文件的信息System.out.println(file.getName());System.out.println(file.getContentType());System.out.println(file.getOriginalFilename());//把文件传到服务器(本机)的d盘(要注意文件的大小,文件太大会上传失败)File file1 = new File("D:/testfor/" + file.getOriginalFilename());file.transferTo(file1);return "接收到文件";}}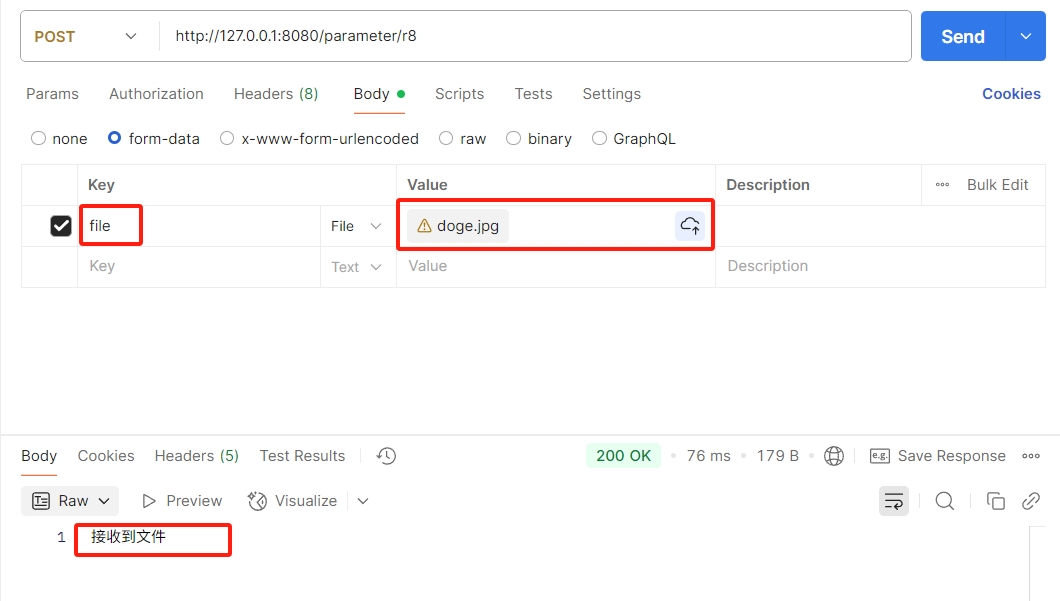
此时,在我们服务器(本机)就会会得到客户端(postman)上传的一张图片。查看 postman 里的上传文件的 key 值是 “ file ” 。
如果,客户端的上传文件的 key 值与后端代码的接收文件流名不同的时:
@RequestMapping("/parameter")
public class test_two {@RequestMapping("/r8")public String r8(@RequestPart("filename")MultipartFile file) throws IOException {//获取文件的信息,打印日志在控制台显示System.out.println(file.getName());System.out.println(file.getContentType());System.out.println(file.getOriginalFilename());//把文件传到服务器(本机)的d盘(要注意文件的大小,文件太大会上传失败)File file1 = new File("D:/testfor/" + file.getOriginalFilename());file.transferTo(file1);return "接收到文件";}}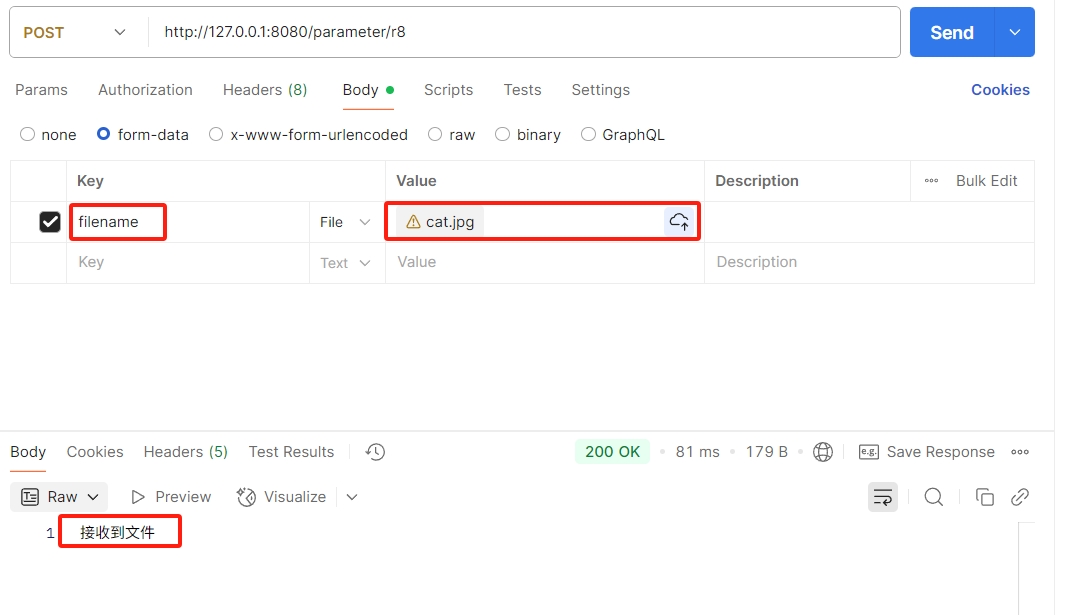
此时,文件也正常接收。
三、第三方库的类:
1、ObjectMapper:
这个类可以实现 json 与 java对象 数据格式的相互转换。
public class JSON_Duixiang {private static ObjectMapper objectmapper = new ObjectMapper();public static void main(String[] args) throws JsonProcessingException {//前提说明,Person这个类有下面三个成员变量,//初始化对象设置好成员属性参数Person person = new Person();person.setAge(30);person.setName("张三");person.setPassword("123456");//对象转 json 字符串String s = objectmapper.writeValueAsString(person);System.out.println(s);//json 字符串转对象String json = "{\"name\":\"张三\",\"password\":\"123456\",\"age\":15}";Person person1 = objectmapper.readValue(json,Person.class);System.out.println(person1);}
}
控制台打印结果:

可以看到,通过 ObjcetMapper 类的 writeValueAsString()方法,可以实现 java 对象转换 json 格式的数据,通过 readValue()方法,可以实现 json 格式数据转换成 java对象。
四、HttpServletRequest 和 HttpServletResponse:
在java中,有 HttpServletRequest 和 HttpServletResponse 这两个类是分别获取http请求和响应的全部内容。包括请求行,请求头,请求正文;状态行,响应头,响应正文。
这些类里面有一系列的方法,能单独获取或设置http中的某个数据信息,比如返回的数据格式,状态码, url ,cookie,请求头(Header)中的某个信息等等。
五、Cookie 和 Session:
http 协议自身是属于“无状态”协议,这里的“无状态”指的是默认情况下,http协议的客户端和服务器之间的这次通信,和下次通信之间是没有直接联系的,但是在实际的开发中,我们很多时候是需要知道请求之间的关联关系的,比如在一个网站登录成功后,第二次访问服务器就能知道该请求是否已经登录过了。 所以,在此过程,网站登陆后,服务器会发送一个“令牌(SessionID)”表明此http请求已经登录过了。之后访问服务器就不会提示要求用户登录了。
通过sessionID这个“令牌”,服务器也可以区分当前的访问请求是来自哪个用户,就能区分不同的用户来进行处理请求了(比如用户个性化的喜好)。
以下是大致的过程:
1、当用户登陆的时候,服务器会在 Session 中新增一个记录,并把 SessionID 返回给客户端。(通过 http 响应的 set-Cookie 字段返回)
2、客户端后续再给服务器发送请求的时候,需要在请求中带上 sessionID。(通过 http 请求中的 cookie 字段带上)
3、服务器收到请求后,根据请求中的 sessionID 在 session 信息中获取到对应的用户信息,再进行后续操作,找不到则重新创建 session ,并把sessionID返回。
Cookie 和 SessionID 的区别:
1、Cookie 是客户端保存(本地文件存储)用户信息的一种机制,Session 是服务器端保存(服务器端的内存中存储)用户信息的一种机制。
2、Cookie 和 Session 之间主要是通过 SessionID 关联起来的,SessionID 是 Cookie 和 Session 之间的桥梁。
3、Cookie 和 Session 会经常配合在一起使用,但不是必须配合的。(比如,完全可以用Cookie 来保存一些数据在客户端,这些数据不一定是 SessionID,也可以是其他类型的数据)
1、Cookie:
获取所有的cookie:
@RestController
@RequestMapping("/testkkk")
public class ReuestConteoller1 {@RequestMapping("/getcookie")public String getcookie(HttpServletRequest request) {Cookie[] cookies = request.getCookies();if(cookies != null) {for (Cookie cookie : cookies) {System.out.println(cookie.getName() + ":" + cookie.getValue());}}return "获取cookie成功";}
}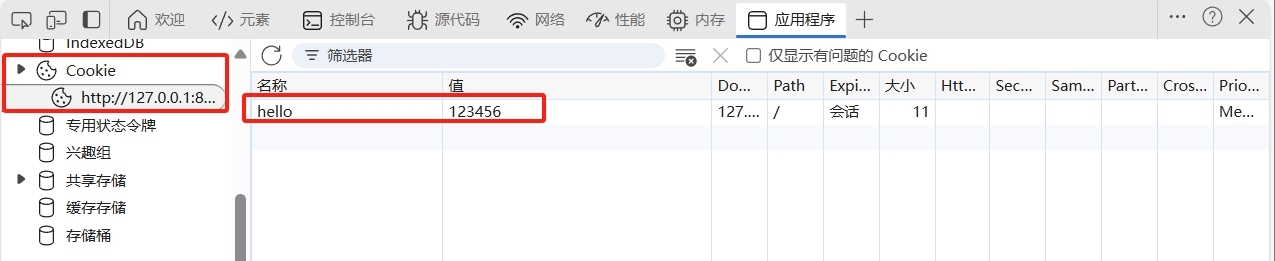
在浏览器按 F12 ,点击应用程序,在左边找到 cookie ,自己设置cookie的 key-value,回到 java代码运行控制台查看打印的日志: 
这种方式是获取所有的 cookie。
获取特定 cookie :
可以通过@CookieValue 的注解的方式,获取指定的 cookie :
@RequestMapping("/getcookie2")public String getcookie2(@CookieValue("name") String request) {return "获取cookie成功,CookieName:" + request;}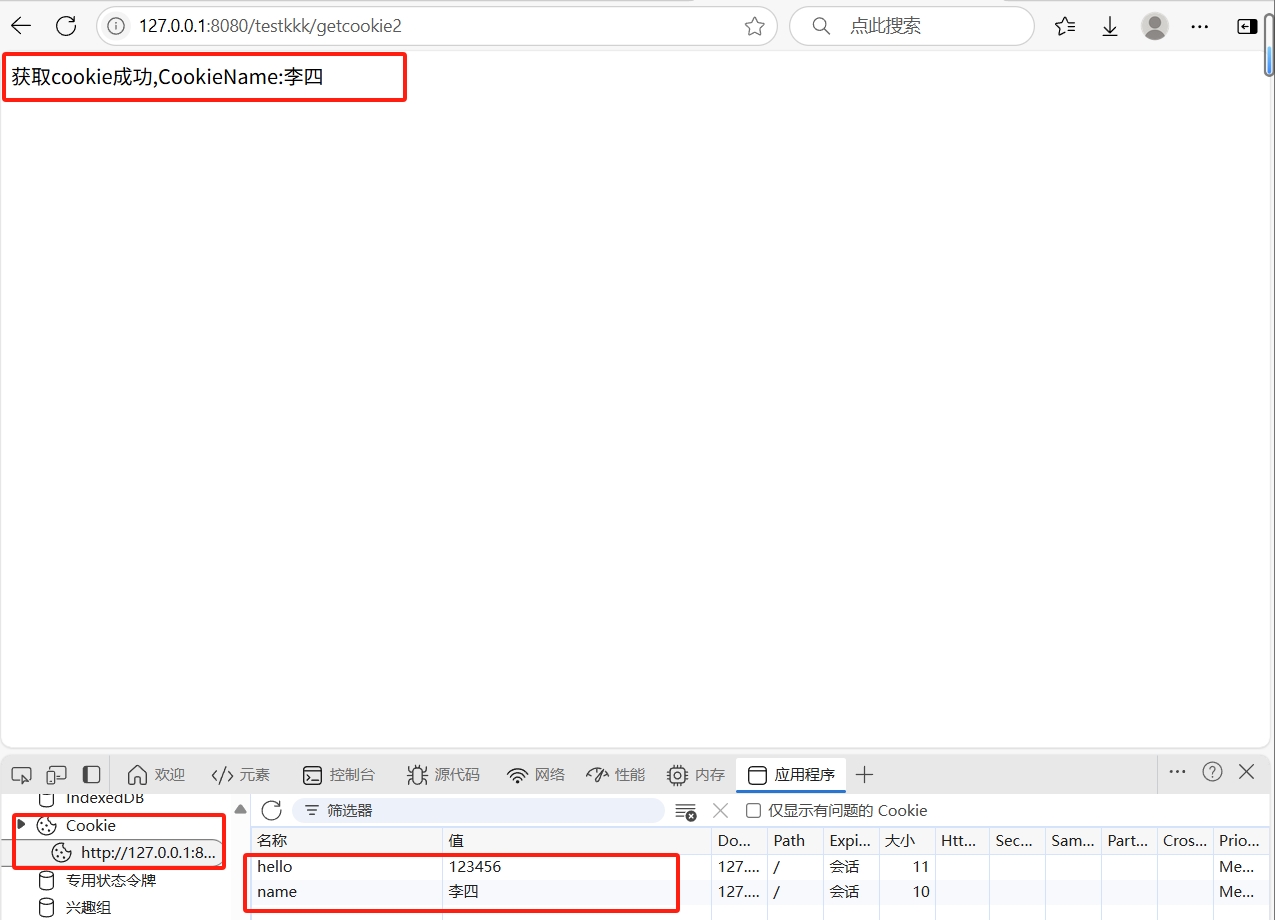
可以看到,这里cookie有两个,只获取了其中名称为 name 的cookie。
2、Session:
设置和获取 Session:
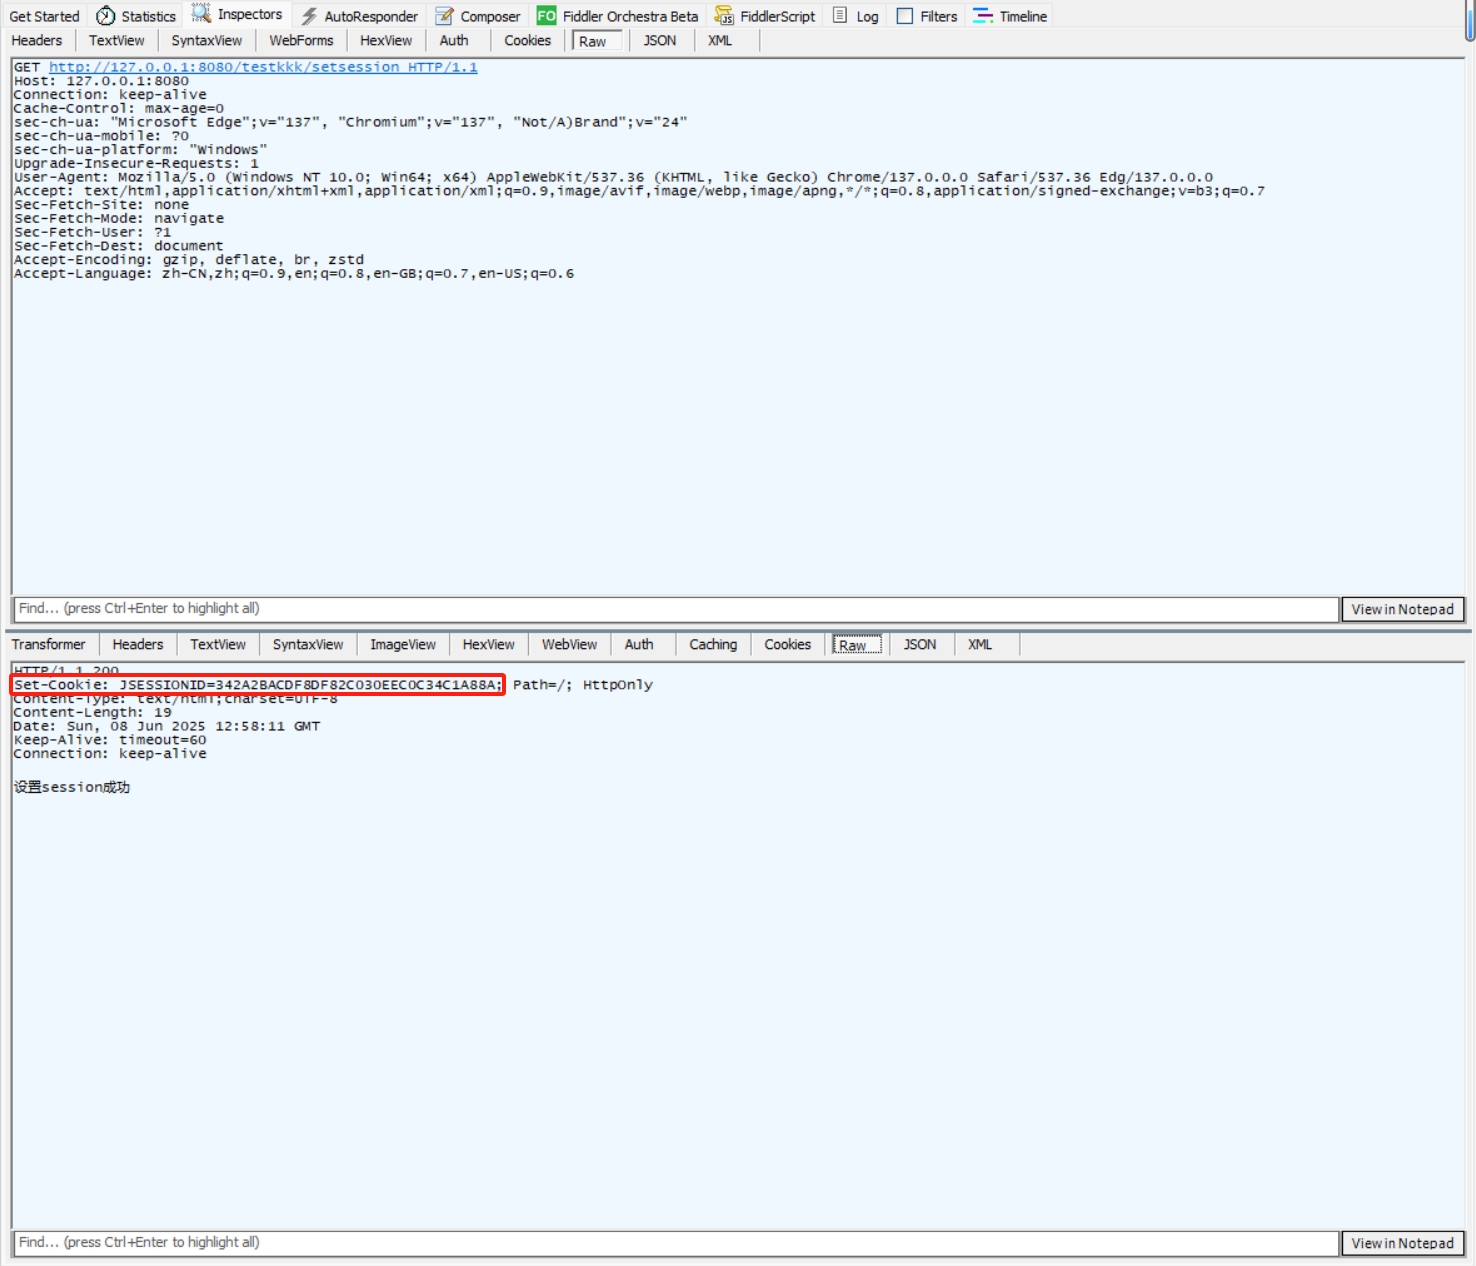
@RequestMapping("/setsession")public String setsession(HttpServletRequest request) {//从cookie中获取sessionid, 并根据sessionID获取httpSession对象//没有session时, 就会创建一个sessionHttpSession session = request.getSession();//设置用户信息session.setAttribute("name","李四");session.setAttribute("age",22);return "设置session成功";}@RequestMapping("/getsession")public String getSession(HttpServletRequest request){//从cookie中获取sessionid, 并根据sessionID获取httpSession对象//没有session时, 就会创建一个sessionHttpSession session = request.getSession();//获取用户信息String name = (String)session.getAttribute("name");Integer age = (Integer) session.getAttribute("age");return "从session中获取数据, name:"+ name + ",age:"+ age;}每一个sessionID对应一个 HttpSession对象,先访问 /setsession 接口,通过fidder抓包得到客户端返回的sessionID。
再访问 /getsession 接口,同过fidder抓包得到:
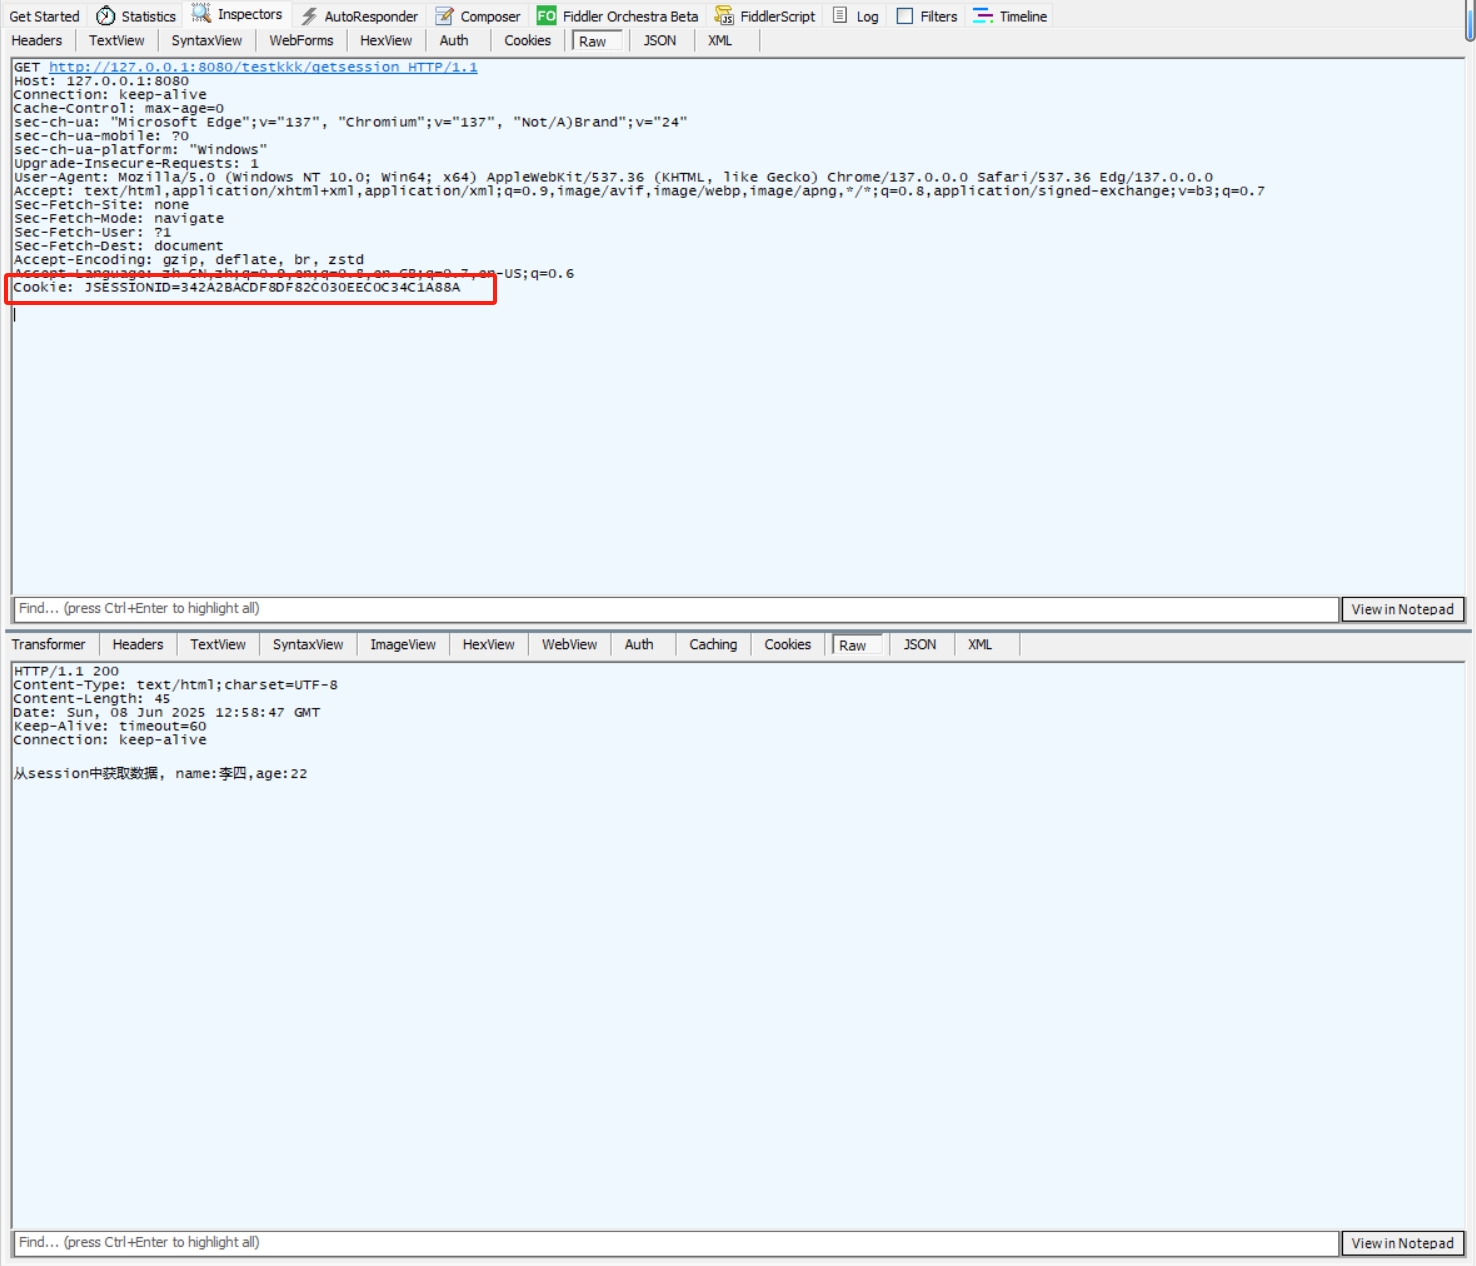
仔细观察发现,红色去圈起来的这两个sessionID是同一样的。客户端第一次访问 /setsession 接口,由于cookie中没有sessionID, 就会创建一个session并返回了一个sessionID,并设置了用户信息;第二次访问 /getsession 接口的时候,由于客户端cookie有sessionID了,客户端接收到对应的sessionID,返回对应session的用户数据:
值得注意的是,这种方式的 request.getSession( ) 括号中的值默认是 true,表示如果sessionID没有获取到对应的session,就会创建一个session;如果括号中的值是 false,如果sessionID没有获取到对应的session,直接返回null。所以代码要注意加上判空处理逻辑。
另外两种获取sessionID方式:
//方式二@RequestMapping("/getsession2")public String getsession2(HttpSession session) {//获取用户信息String name = (String)session.getAttribute("name");Integer age = (Integer) session.getAttribute("age");return "从session中获取数据, name:"+ name + ",age:"+ age;}//方式三(通过sessionID获取特定session中的信息)@RequestMapping("/getsession3")public String getSession3(@SessionAttribute("name") String name){//获取用户信息return "从session中获取数据, name:"+ name;}方式二直接从cookie中获取sessionID对应的 session ,没有session时, 就会创建一个session。(类似与第一种方法 request.getSession( ) 括号里默认是true)。
六、访问路径返回静态页面:
在resources包里的static包,可以保存html文件,也可以创建多个包嵌套起来,访问的时候,默认是以相对路径从static路径开始的。

在static包里有hello包和index.html文件,hello包里也有index.html文件, 这个代码,返回的是hello包里的index.html文件,路径是 /hello/index.html ;如果想要返回 static 包里的index.html文件,写成 /index.html 即可。
七、返回JSON格式的数据:
当使用了 @RestControlle 或 @ResponseBody,当返回的是对象,List,Map这些会自动解析成JSON格式的数据再返回。
例如:
@ResponseBody@RequestMapping("/returnjson")public Person r2() {Person person = new Person();person.setName("zhangsan");person.setAge(30);person.setPassword("123456");return person;}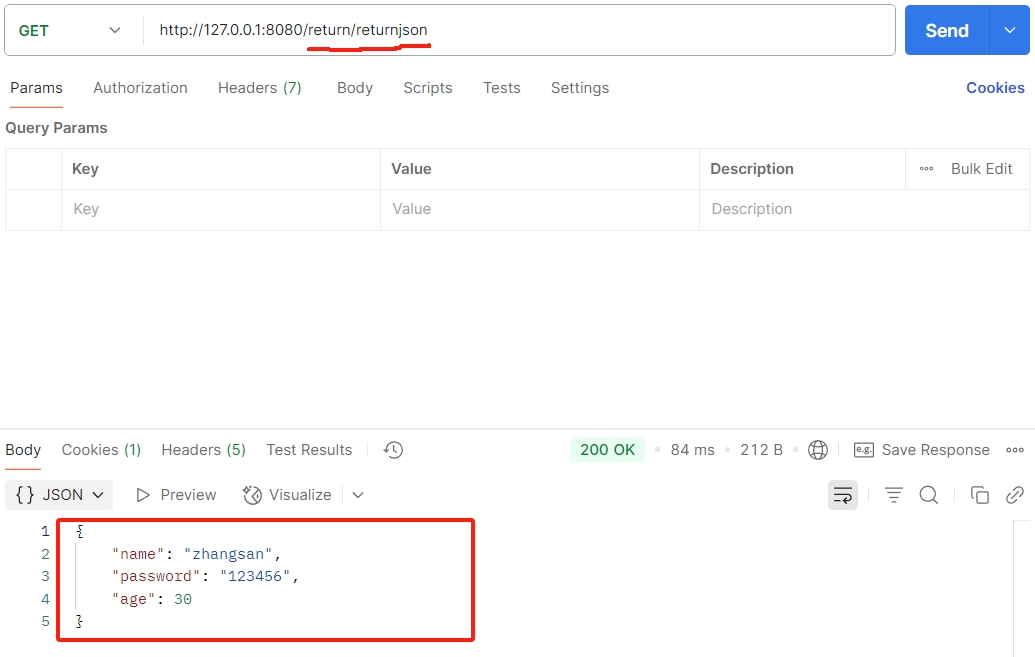
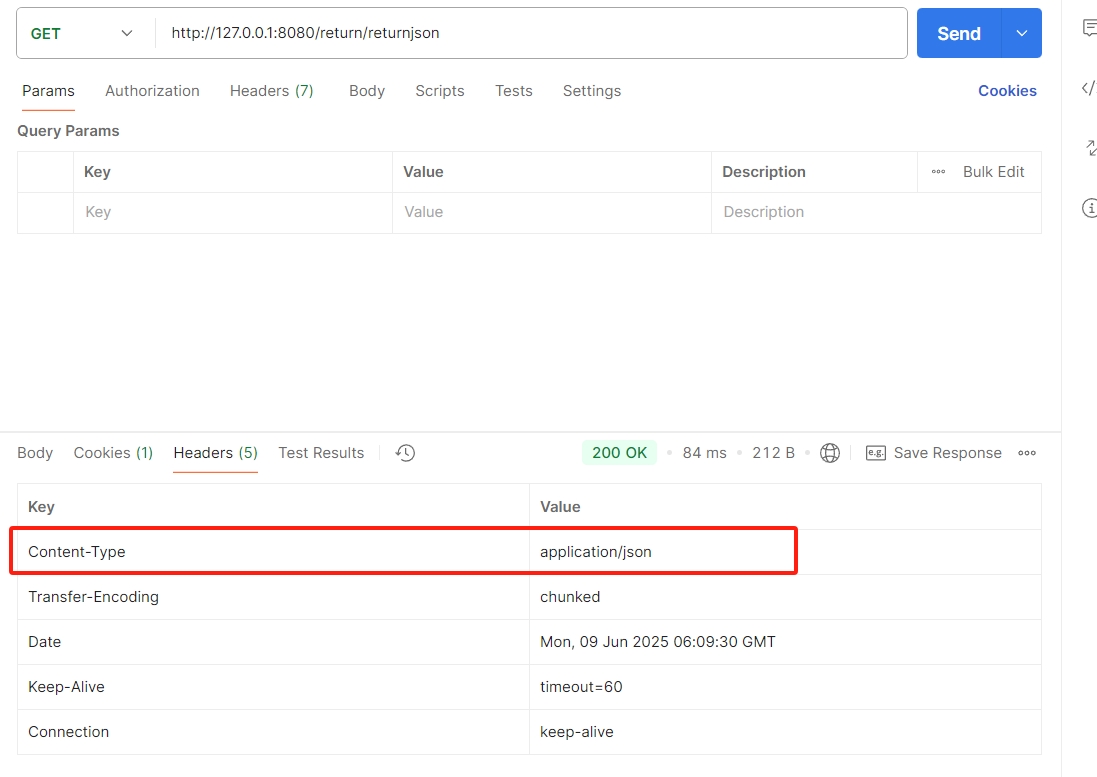
通过postman可以看到,返回的数据类型是 json 格式的。