Spring框架学习day4--Spring集成Mybatis(IOC)
- Spring集成Mybatis
- 1.添加jar包(pom.xml)
- 2.配置sqlSessionFactiory(spring.xml)
- 3.再service类中注入Dao代理接口
- 4.测试类
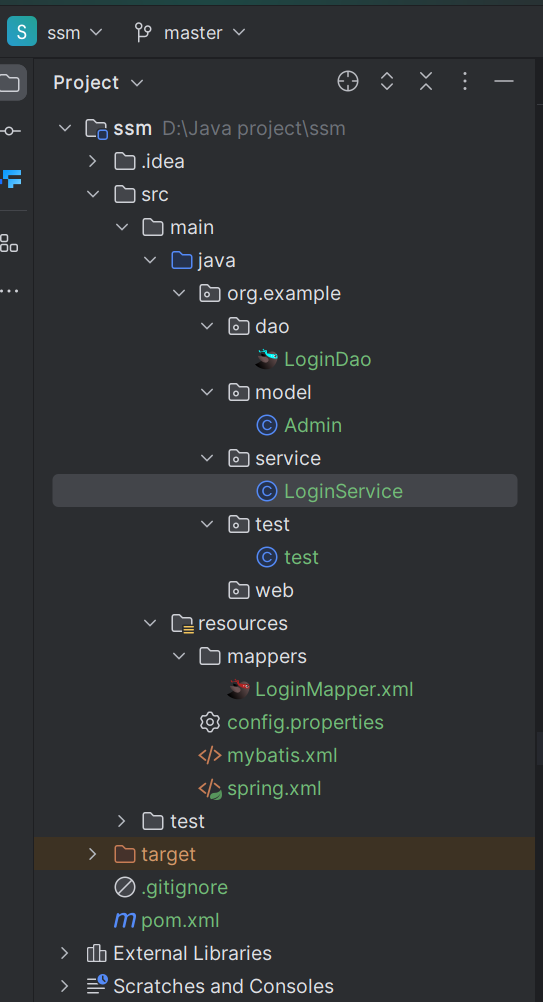
- 5文件结构
Spring集成Mybatis
Spring集成Mybatis其核心是将SqlSessionFactory交由Spring管理,并由 Spring管理对dao接口的代理实现。 导入mybatisjar包
创建新的ssm项目为例文件结构如下
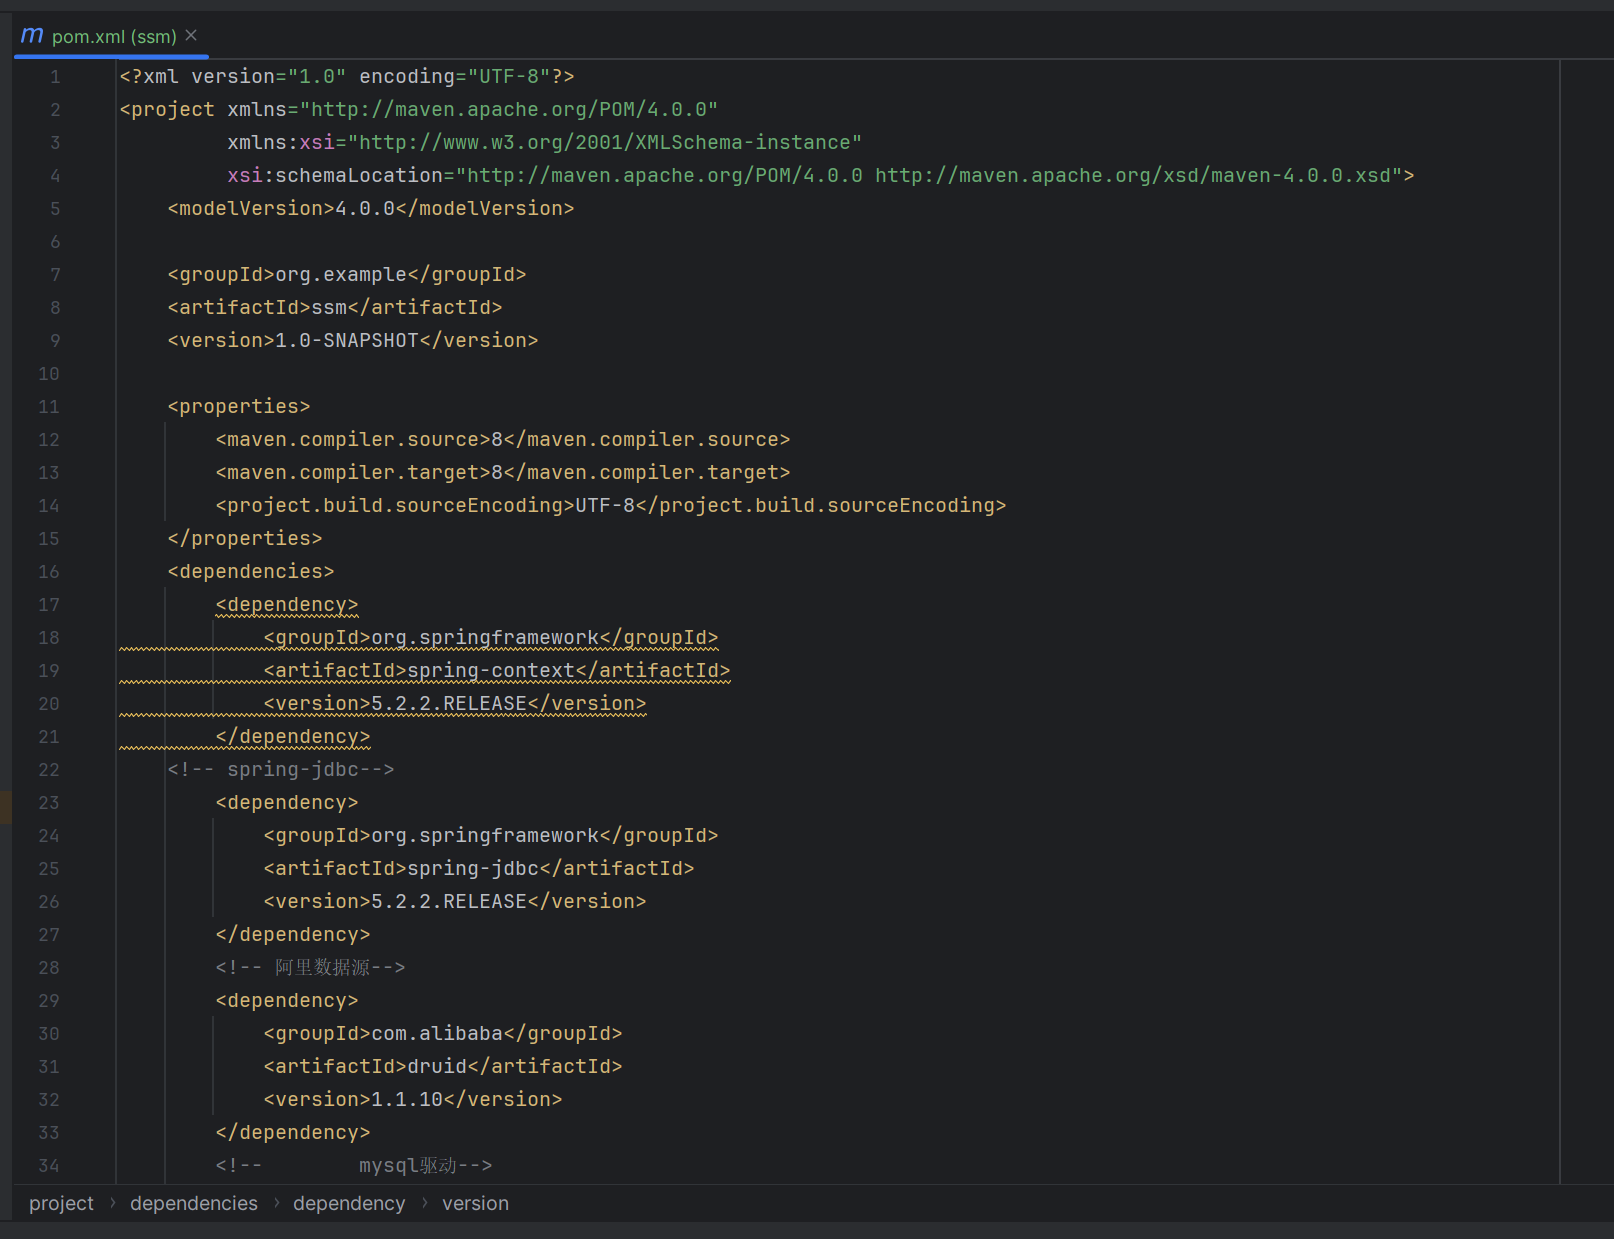
1.添加jar包(pom.xml)
<?xml version="1.0" encoding="UTF-8"?>
<project xmlns="http://maven.apache.org/POM/4.0.0"xmlns:xsi="http://www.w3.org/2001/XMLSchema-instance"xsi:schemaLocation="http://maven.apache.org/POM/4.0.0 http://maven.apache.org/xsd/maven-4.0.0.xsd"><modelVersion>4.0.0</modelVersion><groupId>org.example</groupId><artifactId>ssm</artifactId><version>1.0-SNAPSHOT</version><properties><maven.compiler.source>8</maven.compiler.source><maven.compiler.target>8</maven.compiler.target><project.build.sourceEncoding>UTF-8</project.build.sourceEncoding></properties><dependencies><dependency><groupId>org.springframework</groupId><artifactId>spring-context</artifactId><version>5.2.2.RELEASE</version></dependency><!-- spring-jdbc--><dependency><groupId>org.springframework</groupId><artifactId>spring-jdbc</artifactId><version>5.2.2.RELEASE</version></dependency><!-- 阿里数据源--><dependency><groupId>com.alibaba</groupId><artifactId>druid</artifactId><version>1.1.10</version></dependency><!--        mysql驱动--><dependency><groupId>mysql</groupId><artifactId>mysql-connector-java</artifactId><version>8.0.16</version></dependency><dependency><groupId>org.mybatis</groupId><artifactId>mybatis</artifactId><version>3.4.2</version></dependency><dependency><groupId>org.mybatis</groupId><artifactId>mybatis-spring</artifactId><version>1.3.1</version></dependency></dependencies>
</project>
2.配置sqlSessionFactiory(spring.xml)
<!--    spring管理生成SqlSessionFactory--><bean id="sqlSessionFactory" class="org.mybatis.spring.SqlSessionFactoryBean"><property name="dataSource" ref="dataSource"></property><property name="configLocation" value="classpath:mybatis.xml"></property>
<!--        指定配置文件--><property name="mapperLocations" value="classpath:mappers/*Mapper.xml">
<!--            指定文件地址--></property></bean>
生成接口代理(spring.xml)
<!--    spring管理生成接口代理对象--><bean id="mapperFactory" class="org.mybatis.spring.mapper.MapperScannerConfigurer"><property name="basePackage" value="org.example.dao"></property>
<!--        对指定包下的接口进行扫描,并生成接口代理的对象--><property name="sqlSessionFactoryBeanName" value="sqlSessionFactory"></property></bean>
完整spring.xml配置如下
<?xml version="1.0" encoding="UTF-8"?>
<beans xmlns="http://www.springframework.org/schema/beans"xmlns:xsi="http://www.w3.org/2001/XMLSchema-instance"xmlns:context="http://www.springframework.org/schema/context"xsi:schemaLocation="http://www.springframework.org/schema/beanshttps://www.springframework.org/schema/beans/spring-beans.xsdhttp://www.springframework.org/schema/contexthttp://www.springframework.org/schema/context/spring-context.xsd
"><!--        开启注解扫描  对指定包下的注解进行扫描 ,检查添加spring类注解标签的类--><context:component-scan base-package="org.example" ></context:component-scan><context:property-placeholder location="config.properties"/><bean id="dataSource" class="com.alibaba.druid.pool.DruidDataSource"><!--       方法一:通过配置文件配置数据源--><!--                <property name="driverClassName" value="com.mysql.jdbc.cj.Driver"/>--><!--        <property name="url" value="数据库连接/>--><!--        <property name="username" value="root"/>--><!--        <property name="password" value="root"/>--><!--        <property name="initialSize" value="1"/>--><!--        <property name="maxActive" value="1"/>--><!-- 方法二:通过注解配置数据源--><property name="driverClassName" value="${driverClassName}"/><property name="url" value="${url}"/><property name="username" value="${username}"/><property name="password" value="${password}"/><property name="initialSize" value="${initialSize}"/><property name="maxActive" value="${maxActive}"/></bean>
<!--    spring管理生成SqlSessionFactory--><bean id="sqlSessionFactory" class="org.mybatis.spring.SqlSessionFactoryBean"><property name="dataSource" ref="dataSource"></property><property name="configLocation" value="classpath:mybatis.xml"></property>
<!--        指定配置文件--><property name="mapperLocations" value="classpath:mappers/*Mapper.xml">
<!--            指定文件地址--></property></bean>
<!--    spring管理生成接口代理对象--><bean id="mapperFactory" class="org.mybatis.spring.mapper.MapperScannerConfigurer"><property name="basePackage" value="org.example.dao"></property>
<!--        对指定包下的接口进行扫描,并生成接口代理的对象--><property name="sqlSessionFactoryBeanName" value="sqlSessionFactory"></property></bean>
</beans>
注:对应的mybatis.xml文件有所变化
<?xml version="1.0" encoding="UTF-8"?>
<!DOCTYPE configuration PUBLIC "-//mybatis.org//DTD Config 3.0//EN""http://mybatis.org/dtd/mybatis-3-config.dtd">
<configuration><settings><!--        打印日志--><setting name="logImpl" value="STDOUT_LOGGING"/><!--            开启驼峰命名规则--><setting name="mapUnderscoreToCamelCase" value="true"/></settings><!--    为类配置起别名--><typeAliases><!--        下面别名怎么引用呢?  直接在xml文件中使用别名就可以了--><typeAlias type="org.example.model.Admin" alias="Admin"/></typeAliases>
</configuration>
3.再service类中注入Dao代理接口
@Service("loginService")
public class LoginService {@AutowiredLoginDao loginDao;public Admin login(Admin admin){return loginDao.login(admin);}
}
4.测试类
package org.example.test;import org.example.model.Admin;
import org.example.service.LoginService;
import org.springframework.context.ApplicationContext;
import org.springframework.context.support.ClassPathXmlApplicationContext;public class test {public static void main(String[] args) {ApplicationContext context = new ClassPathXmlApplicationContext("spring.xml");Admin admin = context.getBean("admin", Admin.class);admin.setAccount("admin");admin.setPassword("111");LoginService loginService = context.getBean("loginService", LoginService.class);Admin result = loginService.login(admin);System.out.println(result);}
}
5文件结构