vue+threeJs 根据屏幕调整gltf模型的大小、重心、并更换骑车整体颜色
嗨,我是小路。今天主要和大家分享的主题是“vue+threeJs 根据屏幕调整gltf模型的大小、重心、并更换骑车整体颜色”。
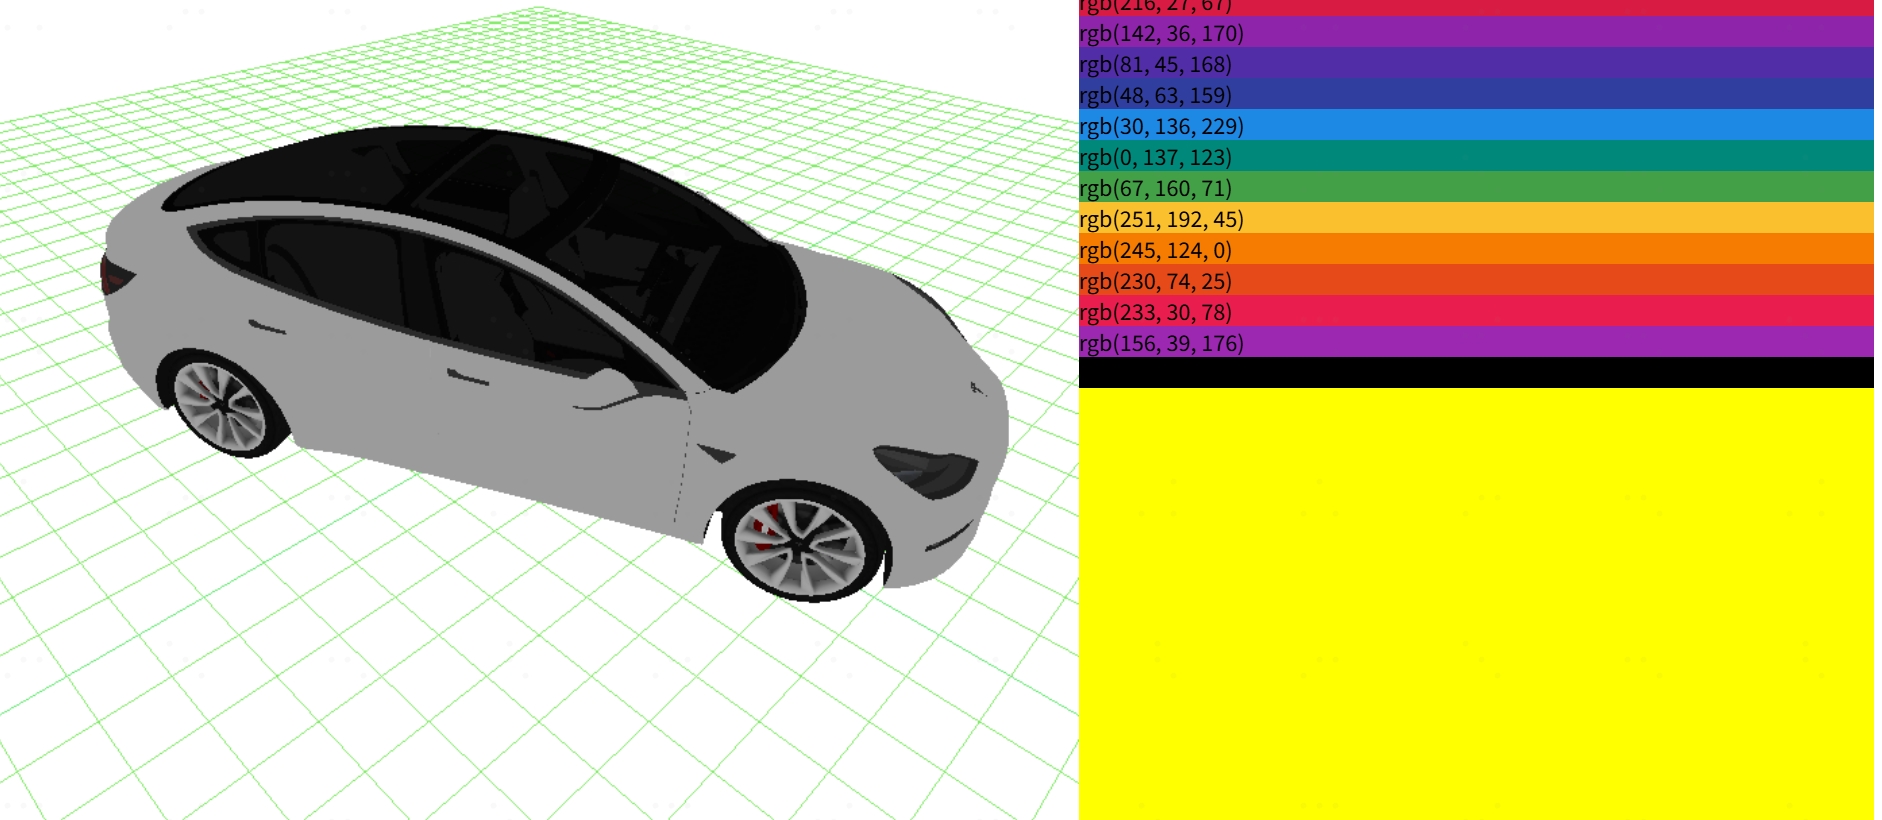
项目案例示意图
1.整体更换gltf模型的颜色
定义:整体代码如下。颜色是事先设定的
const colorAry = reactive(["rgb(216, 27, 67)", "rgb(142, 36, 170)", "rgb(81, 45, 168)", "rgb(48, 63, 159)", "rgb(30, 136, 229)", "rgb(0, 137, 123)","rgb(67, 160, 71)", "rgb(251, 192, 45)", "rgb(245, 124, 0)", "rgb(230, 74, 25)", "rgb(233, 30, 78)", "rgb(156, 39, 176)","rgb(0, 0, 0)"])
//设置车身颜色
const setCarColor = (index) => {const currentColor = new THREE.Color(colorAry[index]);scene.traverse(child => {if (child.isMesh) {console.log(child.name)if (child.name.includes('door_')) {child.material.color.set(currentColor)}}})
}2.计算gltf模型大小,进行缩放
二、实例代码
<template><div class="pageBox"><div class="leftBox" ref="leftRef"></div><div class="rightBox" ref="rightRef" :style="{ background: bgColor }"><div @click="setCarColor(index)" v-for="(item,index) in colorAry":style="{backgroundColor : item}">{{item}}</div></div></div>
</template>
<script setup>
import { onMounted, reactive, ref } from 'vue';
import * as THREE from 'three';
// 引入轨道控制器扩展库OrbitControls.js
import { OrbitControls } from 'three/addons/controls/OrbitControls.js';
// 设置相机控件轨道控制器OrbitControls// 引入gltf模型加载库GLTFLoader.js
import { GLTFLoader } from 'three/addons/loaders/GLTFLoader.js';
import { getRandomColor } from '../utils/commonThree';const bgColor = ref("")
//实例化一个gui对象
// const gui = new GUI();const leftRef = ref();
const rightRef = ref()
// 定义相机输出画布的尺寸(单位:像素px)
let width = 800; //宽度
let height = window.innerHeight; //高度
// 创建3D场景对象Scene
const scene = new THREE.Scene();
//设置背景色
scene.background = new THREE.Color("#ffffff");// 实例化一个透视投影相机对象
const camera = new THREE.PerspectiveCamera(50, width / height, 2, 6000);//=======================================================
const spotLight = new THREE.SpotLight(0xffffff, 1.0);const clock = new THREE.Clock();//===============================================
// 创建GLTF加载器对象
const loader = new GLTFLoader();// 创建渲染器对象
const renderer = new THREE.WebGLRenderer();const modelObj = reactive({ index: 1, url: './models/3d/tesla_2018_model_3/scene.gltf' });//车身颜色数组onMounted(() => {initData()render();//添加相机空间const controls = new OrbitControls(camera, renderer.domElement);controls.maxPolarAngle = 0.9 * Math.PI / 2controls.enableZoom = true// 如果OrbitControls改变了相机参数,重新调用渲染器渲染三维场景controls.addEventListener('change', function () {renderer.render(scene, camera); //执行渲染操作});//监听鼠标、键盘事件})
const initData = () => {//环境光:没有特定方向,整体改变场景的光照明暗const ambient = new THREE.AmbientLight(0xffffff, 0.4);scene.add(ambient);scene.add(spotLight);//光源添加到场景中// 根据需要设置相机位置具体值camera.position.set(200, 200, 200);//const gridHelper = new THREE.GridHelper(1000,50,getRandomColor(),getRandomColor());scene.add(gridHelper);loadGltfData();renderer.setSize(width, height); //设置three.js渲染区域的尺寸(像素px)//将innerHTML置空,避免append重复添加渲染leftRef.value.innerHTML = ''leftRef.value.append(renderer.domElement);
}let mixer = "";const colorAry = reactive(["rgb(216, 27, 67)", "rgb(142, 36, 170)", "rgb(81, 45, 168)", "rgb(48, 63, 159)", "rgb(30, 136, 229)", "rgb(0, 137, 123)","rgb(67, 160, 71)", "rgb(251, 192, 45)", "rgb(245, 124, 0)", "rgb(230, 74, 25)", "rgb(233, 30, 78)", "rgb(156, 39, 176)","rgb(0, 0, 0)"])
//设置车身颜色
const setCarColor = (index) => {const currentColor = new THREE.Color(colorAry[index]);scene.traverse(child => {if (child.isMesh) {console.log(child.name)if (child.name.includes('door_')) {child.material.color.set(currentColor)}}})
}
//加载gltf模型
const group = new THREE.Group();
const loadGltfData = () => {modelObj.url && loader.load(modelObj.url, function (gltf) {console.log(gltf)//加载完成//设置模型的位置// 计算几何体中心//获取模型的长、宽、高let scale = getScale(gltf.scene)//同比例放大,模型不变形gltf.scene.scale.set(scale,scale,scale);const box = new THREE.Box3().setFromObject(gltf.scene);const center = box.getCenter(new THREE.Vector3());// 将模型几何顶点平移到中心点位置gltf.scene.position.set(-center.x, -center.y, -center.z);gltf.scene.position.x = 10;group.add(gltf.scene);group.position.y = 50;scene.add(group);}, function (xhr) {//加载时console.log((xhr.loaded / xhr.total * 100) + '% loaded');}, function (error) {console.log('加载失败', error);})
}
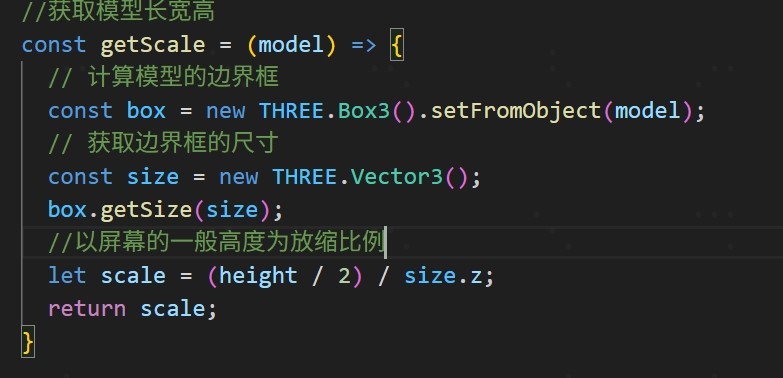
//获取模型长宽高
const getScale = (model) => {// 计算模型的边界框const box = new THREE.Box3().setFromObject(model);// 获取边界框的尺寸const size = new THREE.Vector3();box.getSize(size);//以屏幕的一般高度为放缩比例let scale = (height / 2) / size.z;return scale;
}//渲染
const render = () => {//解决加载gltf格式模型纹理贴图和原图不一样问题renderer.outputEncoding = THREE.sRGBEncoding;mixer ? mixer.update(clock.getDelta()) : null;group.rotation.y += 0.01;renderer.render(scene, camera); //执行渲染操作//重复渲染requestAnimationFrame(render);//请求再次执行渲染函数render,渲染下一帧
}</script>
<style scoped lang="less">
.pageBox {width: 100%;height: 100vh;padding: 0;margin: 0;display: flex;justify-content: space-between;align-items: center;.rightBox {width: 100%;height: 100%;background: yellow;}
}
</style>
三、总结
1、后面需要向更复杂的3D展厅进行调整。
2、自动计算模型和模型的重心,并调整模型的大小,已经重心的位置。自适应屏幕调整。
3、这些方法都很适合在实际项目中开发运用。
最后一句,自我勉励:宁可十年不将军,不可一日不拱卒!
都看到这里了,记得【点赞】+【关注】哟。