QT聊天项目DAY07
1.Win配置和使用GRPC
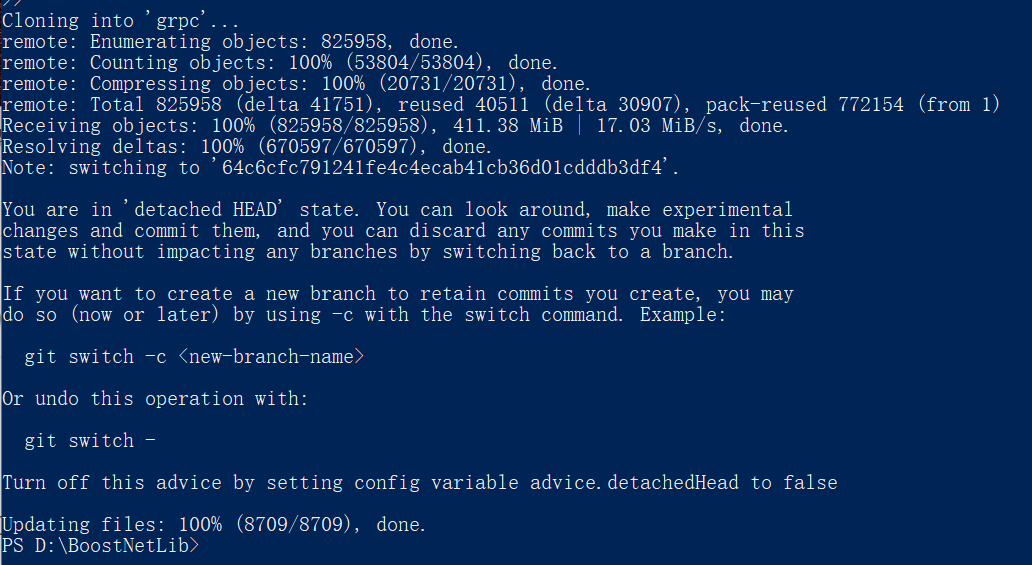
1.1 克隆GRPC库

克隆GRPC
git clone -b v1.34.0 https://gitee.com/mirrors/grpc-framework.git
查看Git有没有安装
没有安装
1.1.1 安装Git
https://git-scm.com/
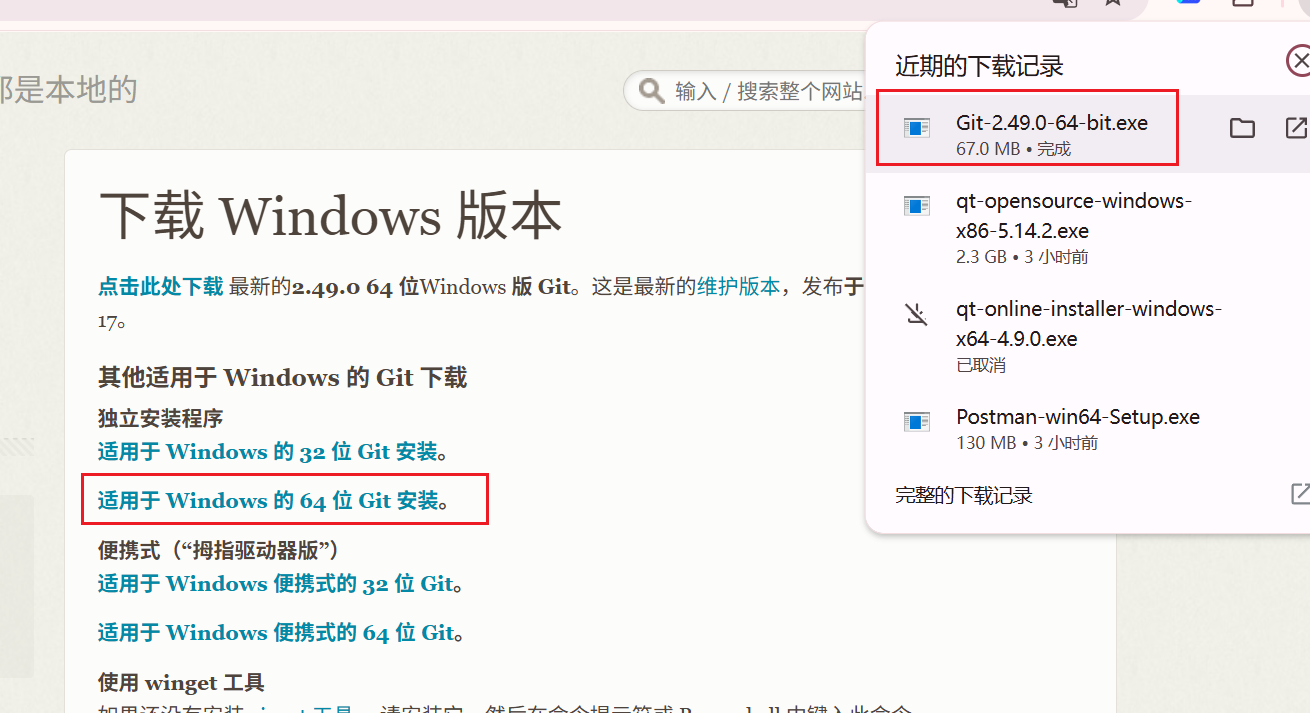
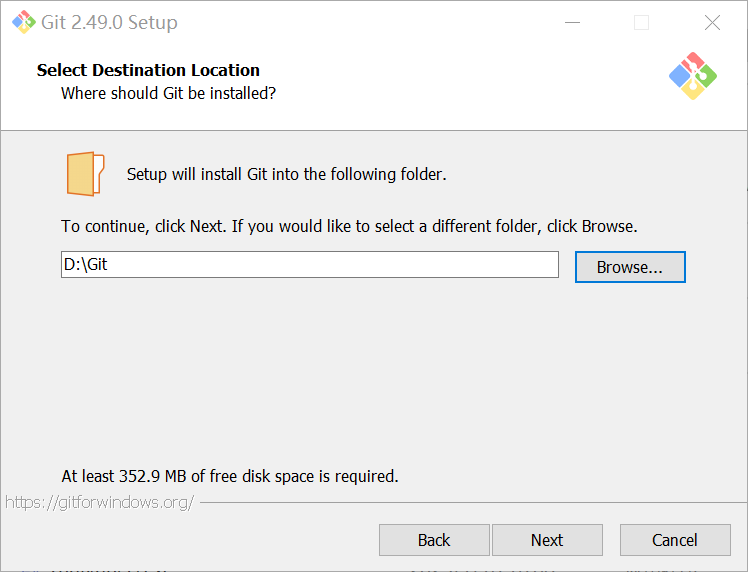
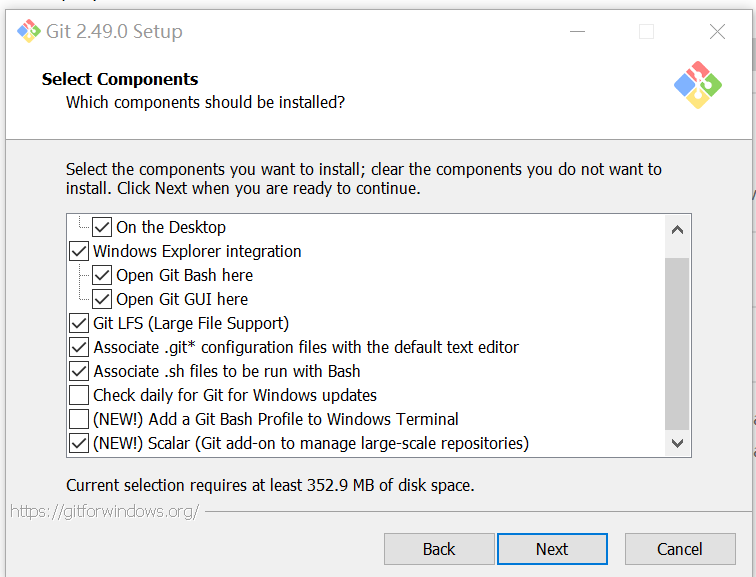
一路next
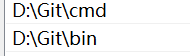
添加Git的路径到系统环境变量下
我这次没用管理员权限,并且也没有创建grpc文件夹,直接调用下面这个git指令
git clone -b v1.34.0 https://gitee.com/mirrors/grpc-framework.git grpc


1.1.2 修改.gitmodules文件
全部修改成.Gitee上面的
[submodule "third_party/zlib"]path = third_party/zlib#url = https://github.com/madler/zliburl = https://gitee.com/mirrors/zlib.git# When using CMake to build, the zlib submodule ends up with a# generated file that makes Git consider the submodule dirty. This# state can be ignored for day-to-day development on gRPC.ignore = dirty
[submodule "third_party/protobuf"]path = third_party/protobuf#url = https://github.com/google/protobuf.giturl = https://gitee.com/local-grpc/protobuf.git
[submodule "third_party/googletest"]path = third_party/googletest#url = https://github.com/google/googletest.giturl = https://gitee.com/local-grpc/googletest.git
[submodule "third_party/benchmark"]path = third_party/benchmark#url = https://github.com/google/benchmarkurl = https://gitee.com/mirrors/google-benchmark.git
[submodule "third_party/boringssl-with-bazel"]path = third_party/boringssl-with-bazel#url = https://github.com/google/boringssl.giturl = https://gitee.com/mirrors/boringssl.git
[submodule "third_party/re2"]path = third_party/re2#url = https://github.com/google/re2.giturl = https://gitee.com/local-grpc/re2.git
[submodule "third_party/cares/cares"]path = third_party/cares/cares#url = https://github.com/c-ares/c-ares.giturl = https://gitee.com/mirrors/c-ares.gitbranch = cares-1_12_0
[submodule "third_party/bloaty"]path = third_party/bloaty#url = https://github.com/google/bloaty.giturl = https://gitee.com/local-grpc/bloaty.git
[submodule "third_party/abseil-cpp"]path = third_party/abseil-cpp#url = https://github.com/abseil/abseil-cpp.giturl = https://gitee.com/mirrors/abseil-cpp.gitbranch = lts_2020_02_25
[submodule "third_party/envoy-api"]path = third_party/envoy-api#url = https://github.com/envoyproxy/data-plane-api.giturl = https://gitee.com/local-grpc/data-plane-api.git
[submodule "third_party/googleapis"]path = third_party/googleapis#url = https://github.com/googleapis/googleapis.giturl = https://gitee.com/mirrors/googleapis.git
[submodule "third_party/protoc-gen-validate"]path = third_party/protoc-gen-validate#url = https://github.com/envoyproxy/protoc-gen-validate.giturl = https://gitee.com/local-grpc/protoc-gen-validate.git
[submodule "third_party/udpa"]path = third_party/udpa#url = https://github.com/cncf/udpa.giturl = https://gitee.com/local-grpc/udpa.git
[submodule "third_party/libuv"]path = third_party/libuv#url = https://github.com/libuv/libuv.giturl = https://gitee.com/mirrors/libuv.git
拉取grpc的所有依赖
git submodule update --init
1.1.3 下载CMake
去恋恋风辰老师的网盘下载cmake
https://pan.baidu.com/s/1Yg9Usdc3T-CYhyr9GiePCw?pwd=ng6x
1.1.4 下载nasm 2.16.01
由于nasm网站打不开,自己也编译不了,索性直接用恋恋风辰老师编译好的
2. 从网盘获取编译好的GRPC
https://pan.baidu.com/s/1BBaAZ8-R-GSxxcy2s7TRWA?pwd=ybno
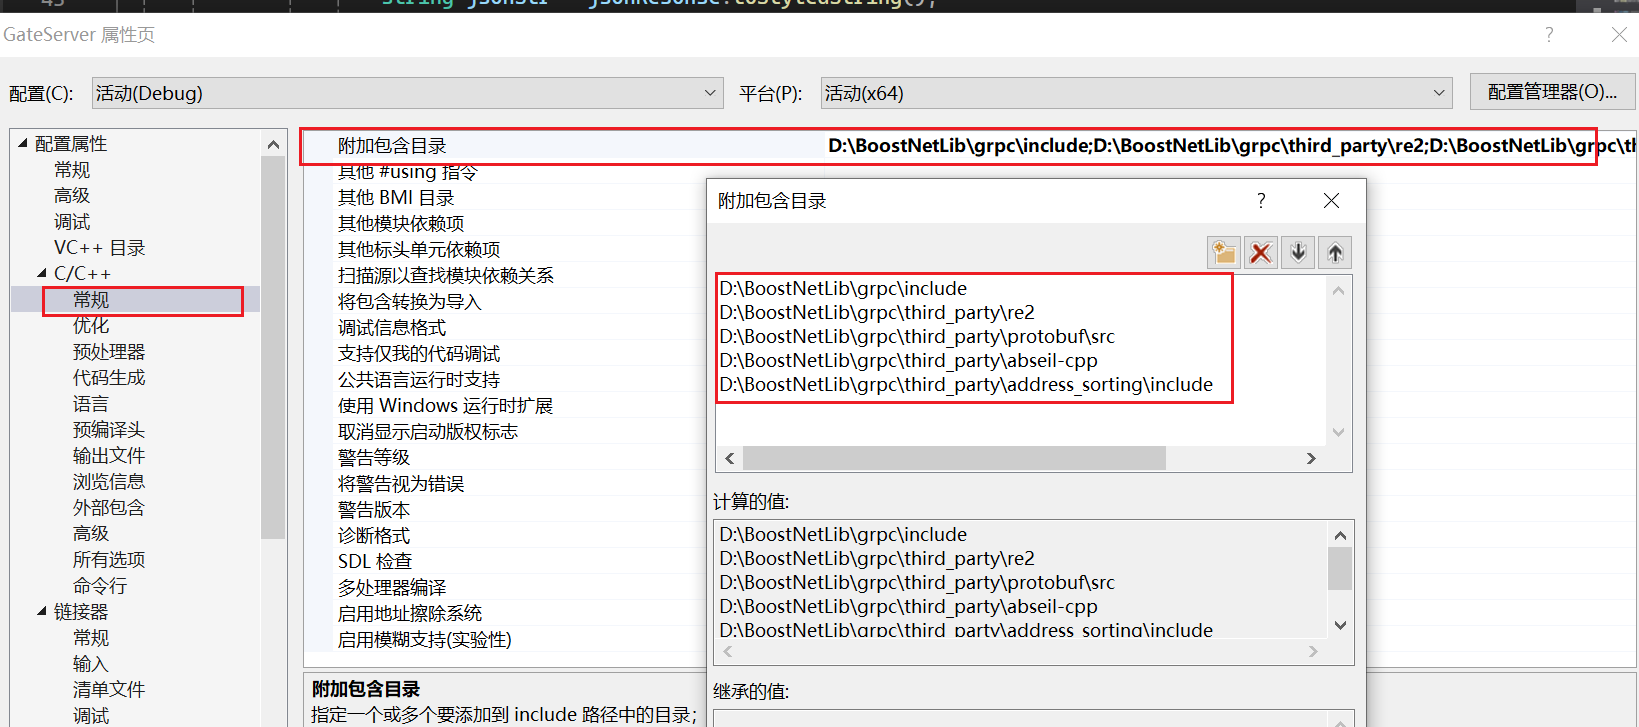
3. 配置编译好的GRPC环境
我不使用属性管理器,直接配,我怕自己忘记怎么配置环境的
配置头文件
配置库文件
D:\BoostNetLib\grpc\visualpro\third_party\re2\Debug
D:\BoostNetLib\grpc\visualpro\third_party\abseil-cpp\absl\types\Debug
D:\BoostNetLib\grpc\visualpro\third_party\abseil-cpp\absl\synchronization\Debug
D:\BoostNetLib\grpc\visualpro\third_party\abseil-cpp\absl\status\Debug
D:\BoostNetLib\grpc\visualpro\third_party\abseil-cpp\absl\random\Debug
D:\BoostNetLib\grpc\visualpro\third_party\abseil-cpp\absl\flags\Debug
D:\BoostNetLib\grpc\visualpro\third_party\abseil-cpp\absl\debugging\Debug
D:\BoostNetLib\grpc\visualpro\third_party\abseil-cpp\absl\container\Debug
D:\BoostNetLib\grpc\visualpro\third_party\abseil-cpp\absl\hash\Debug
D:\BoostNetLib\grpc\visualpro\third_party\boringssl-with-bazel\Debug
D:\BoostNetLib\grpc\visualpro\third_party\abseil-cpp\absl\numeric\Debug
D:\BoostNetLib\grpc\visualpro\third_party\abseil-cpp\absl\time\Debug
D:\BoostNetLib\grpc\visualpro\third_party\abseil-cpp\absl\base\Debug
D:\BoostNetLib\grpc\visualpro\third_party\abseil-cpp\absl\strings\Debug
D:\BoostNetLib\grpc\visualpro\third_party\protobuf\Debug
D:\BoostNetLib\grpc\visualpro\third_party\zlib\Debug
D:\BoostNetLib\grpc\visualpro\Debug
D:\BoostNetLib\grpc\visualpro\third_party\cares\cares\lib\Debug
添加库
libprotobufd.lib
gpr.lib
grpc.lib
grpc++.lib
grpc++_reflection.lib
address_sorting.lib
ws2_32.lib
cares.lib
zlibstaticd.lib
upb.lib
ssl.lib
crypto.lib
absl_bad_any_cast_impl.lib
absl_bad_optional_access.lib
absl_bad_variant_access.lib
absl_base.lib
absl_city.lib
absl_civil_time.lib
absl_cord.lib
absl_debugging_internal.lib
absl_demangle_internal.lib
absl_examine_stack.lib
absl_exponential_biased.lib
absl_failure_signal_handler.lib
absl_flags.lib
absl_flags_config.lib
absl_flags_internal.lib
absl_flags_marshalling.lib
absl_flags_parse.lib
absl_flags_program_name.lib
absl_flags_usage.lib
absl_flags_usage_internal.lib
absl_graphcycles_internal.lib
absl_hash.lib
absl_hashtablez_sampler.lib
absl_int128.lib
absl_leak_check.lib
absl_leak_check_disable.lib
absl_log_severity.lib
absl_malloc_internal.lib
absl_periodic_sampler.lib
absl_random_distributions.lib
absl_random_internal_distribution_test_util.lib
absl_random_internal_pool_urbg.lib
absl_random_internal_randen.lib
absl_random_internal_randen_hwaes.lib
absl_random_internal_randen_hwaes_impl.lib
absl_random_internal_randen_slow.lib
absl_random_internal_seed_material.lib
absl_random_seed_gen_exception.lib
absl_random_seed_sequences.lib
absl_raw_hash_set.lib
absl_raw_logging_internal.lib
absl_scoped_set_env.lib
absl_spinlock_wait.lib
absl_stacktrace.lib
absl_status.lib
absl_strings.lib
absl_strings_internal.lib
absl_str_format_internal.lib
absl_symbolize.lib
absl_synchronization.lib
absl_throw_delegate.lib
absl_time.lib
absl_time_zone.lib
absl_statusor.lib
re2.lib
编译
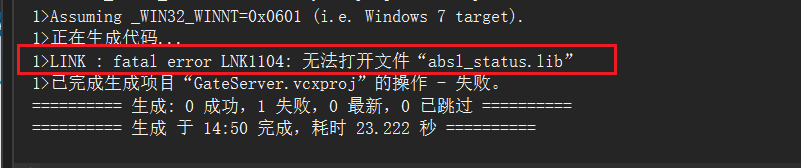

D:\BoostNetLib\grpc\visualpro\third_party\abseil-cpp\absl\status\Debug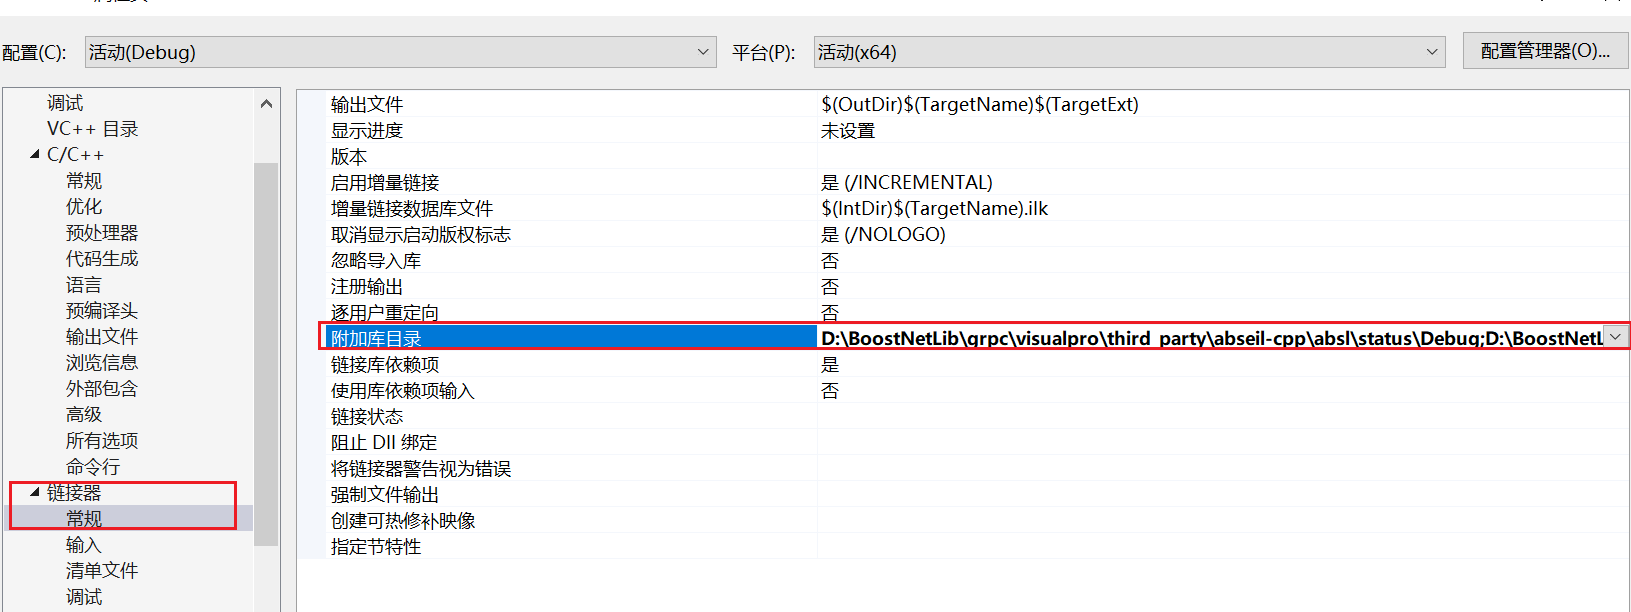
添加上,在编译,编译成功
4.定义通信协议Protobuf
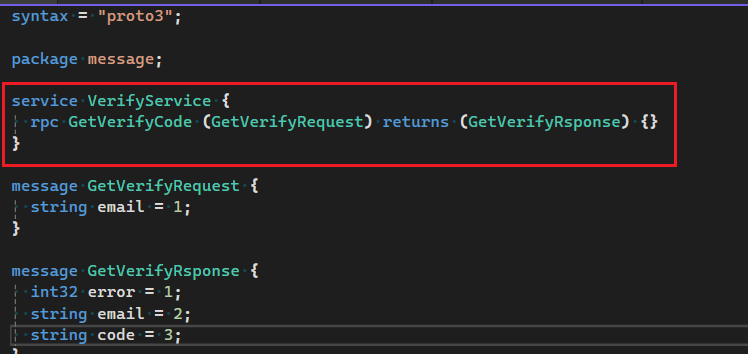
protobuf的语法版本 为 proto3
定义当前的包名为message
定义一个服务 VerifyService
输入参数类型为 GetVerifyRequest
返回值类型为 GetVarifyRsponse
请求的参数结构为
string email = 1;
返回的参数结构为
错误码 邮箱 和 验证码
也就是这个.proto文件定义了一个基于gRpc的邮箱验证码服务接口,前端调用GetVerifyCode发起验证码请求,后端通过邮箱发出并返回结果,通信数据用Protobuf编码
syntax = "proto3";package message;service VerifyService {rpc GetVerifyCode (GetVerifyRequest) returns (GetVerifyRsponse) {}
}message GetVerifyRequest {string email = 1;
}message GetVerifyRsponse {int32 error = 1;string email = 2;string code = 3;
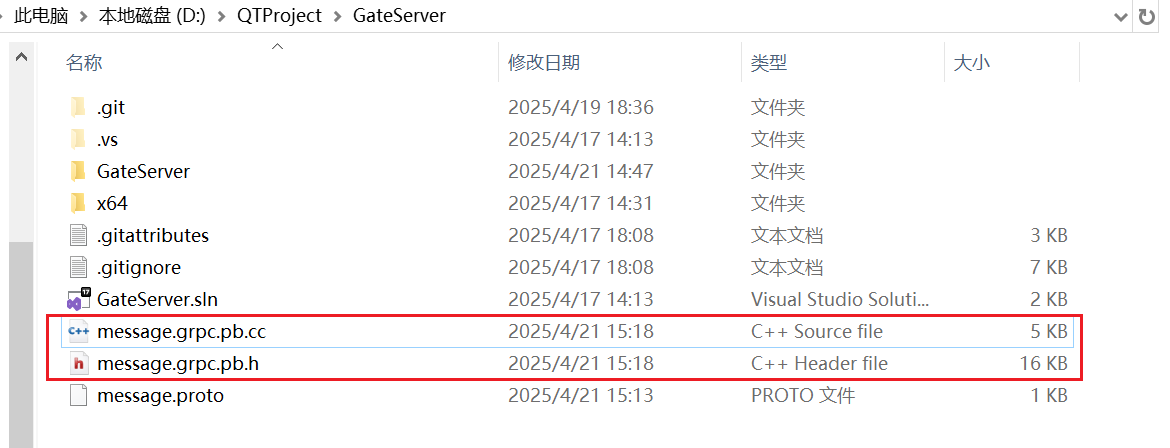
}5. 编译通信协议

D:\BoostNetLib\grpc\visualpro\third_party\protobuf\Debug\protoc.exe -I="." --grpc_out="." --plugin=protoc-gen-grpc="D:\BoostNetLib\grpc\visualpro\Debug\grpc_cpp_plugin.exe" "message.proto"
你们需要更换BoostNetLib
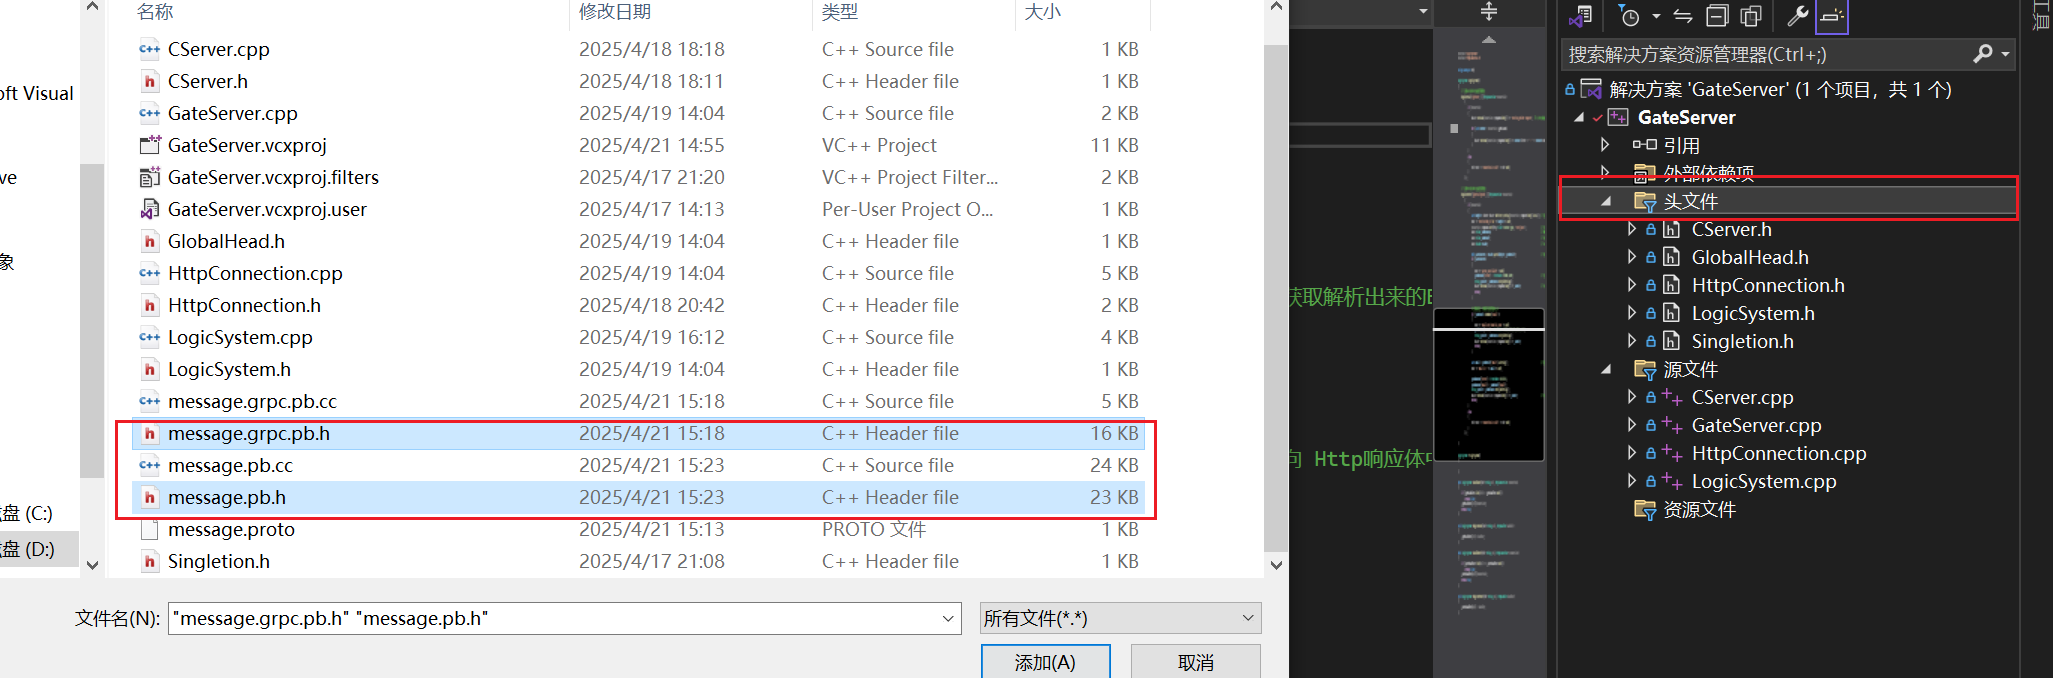
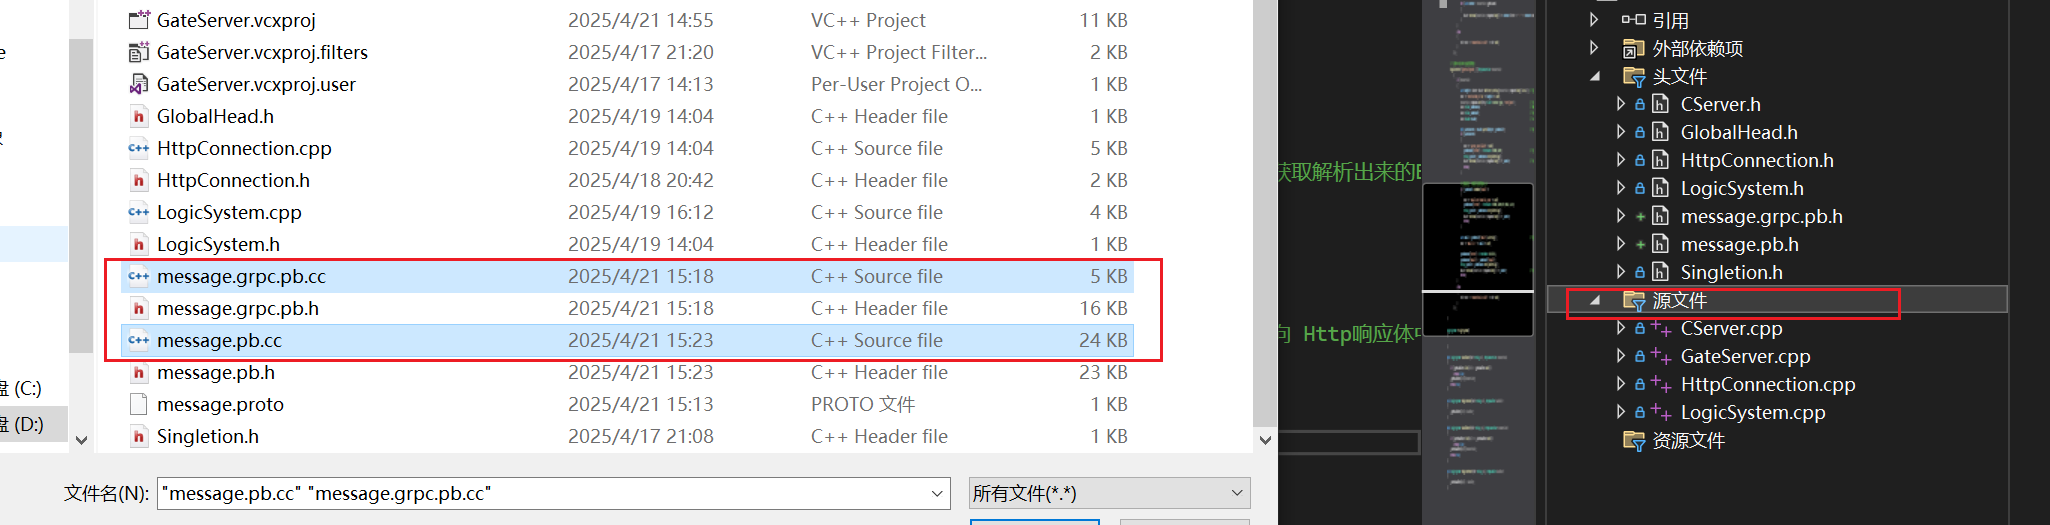
5.2 生成用于序列化和反序列化的文件
D:\BoostNetLib\grpc\visualpro\third_party\protobuf\Debug\protoc.exe --cpp_out=. "message.proto"

5.3 添加到服务器的解决方案中
编译一下,编译成功
6. 创建GRPC通信客户端
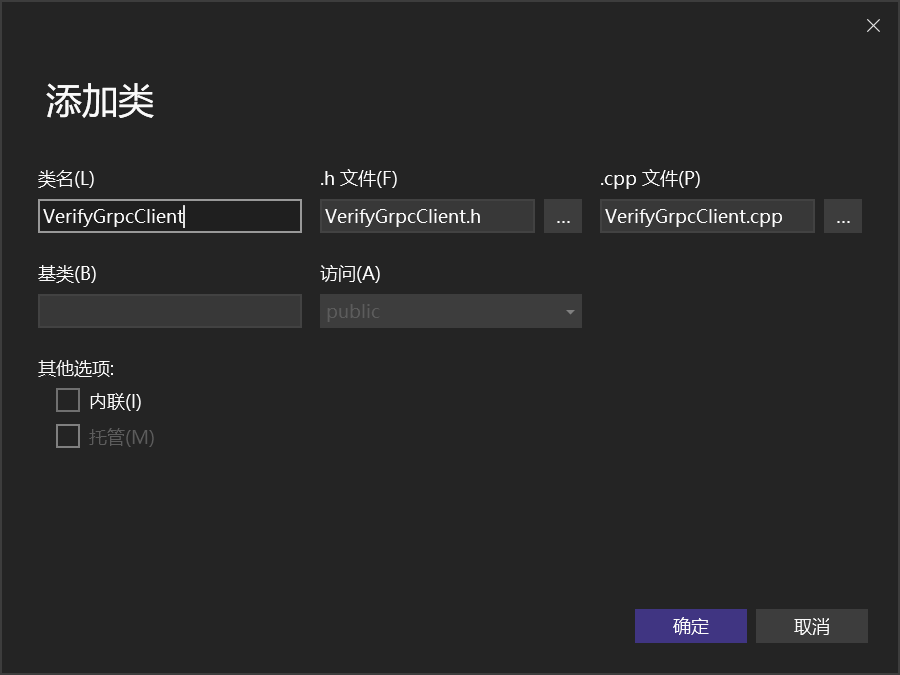
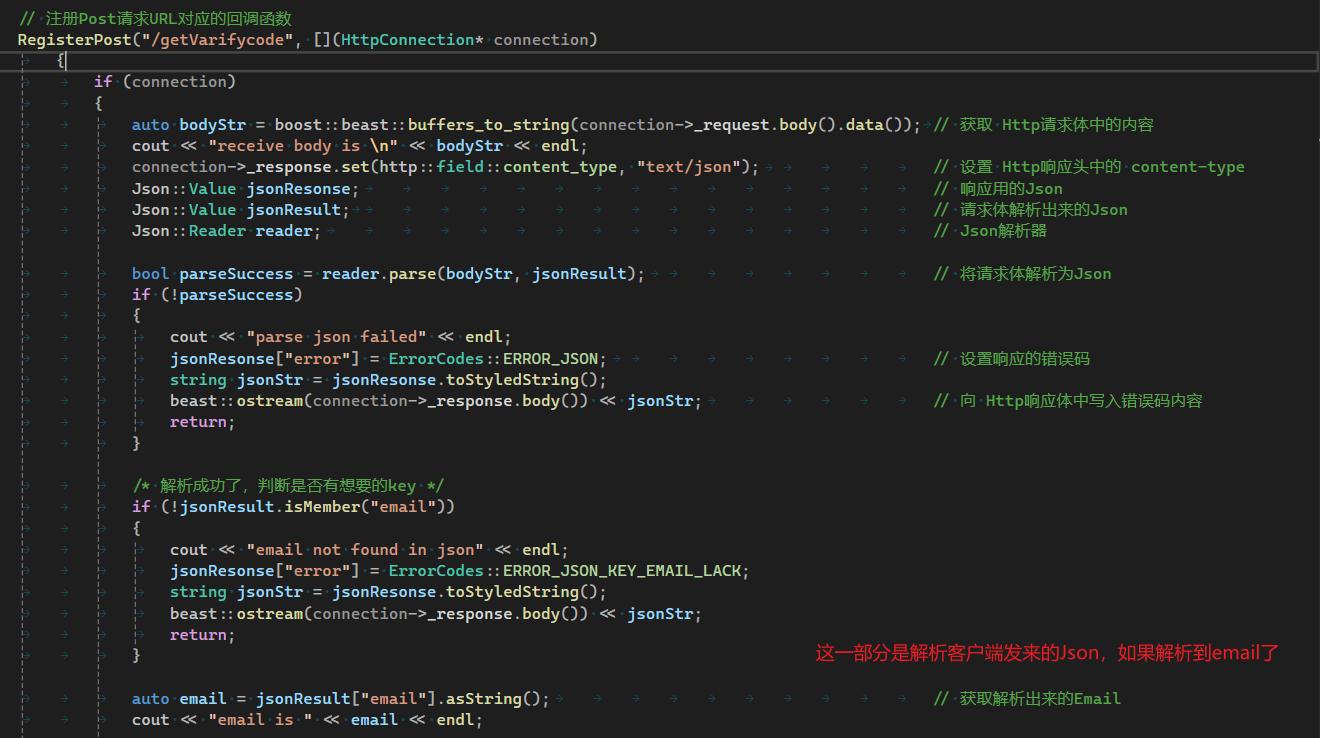
当客户端向我们自己写的服务器里发送Post请求时,根据客户端发来的邮箱然后向GRPC服务器去请求
#ifndef VERIFYGRPCCLIENT_H
#define VERIFYGRPCCLIENT_H#include <grpcpp/grpcpp.h>
#include "message.grpc.pb.h"
#include "GlobalHead.h"using grpc::Channel;
using grpc::ClientContext;
using grpc::Status;using message::VerifyService;
using message::GetVerifyRequest;
using message::GetVerifyRsponse;class VerifyGrpcClient : public Singletion<VerifyGrpcClient>
{friend class Singletion<VerifyGrpcClient>;
public:~VerifyGrpcClient();/* 向GRPC服务器请求验证码 */GetVerifyRsponse GetVerifyCode(string email);private:VerifyGrpcClient();unique_ptr<VerifyService::Stub> stub_;
};
#endif // VERIFYGRPCCLIENT_H
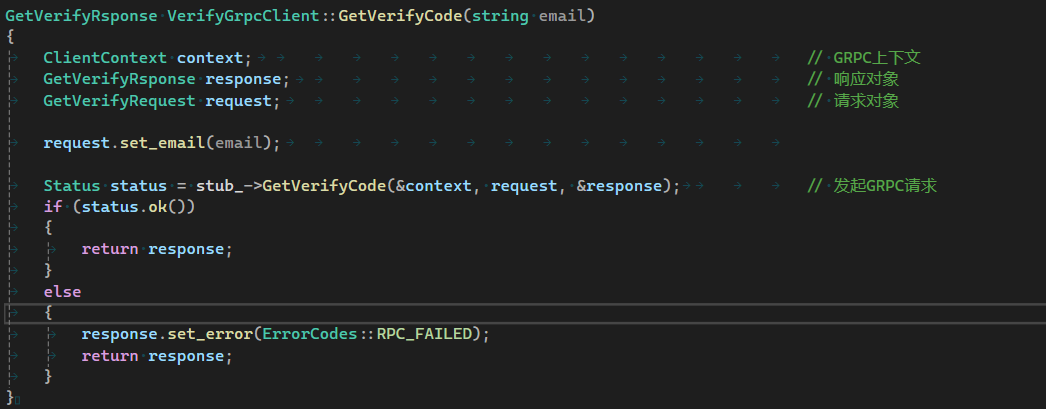
#include "VerifyGrpcClient.h"VerifyGrpcClient::VerifyGrpcClient()
{shared_ptr<Channel> channel = grpc::CreateChannel("localhost:50051", grpc::InsecureChannelCredentials()); // 创建GRPC通道stub_ = VerifyService::NewStub(channel); // 创建Stub
}VerifyGrpcClient::~VerifyGrpcClient()
{}GetVerifyRsponse VerifyGrpcClient::GetVerifyCode(string email)
{ClientContext context; // GRPC上下文GetVerifyRsponse response; // 响应对象GetVerifyRequest request; // 请求对象request.set_email(email); Status status = stub_->GetVerifyCode(&context, request, &response); // 发起GRPC请求if (status.ok()){return response;}else{response.set_error(ErrorCodes::RPC_FAILED);return response;}
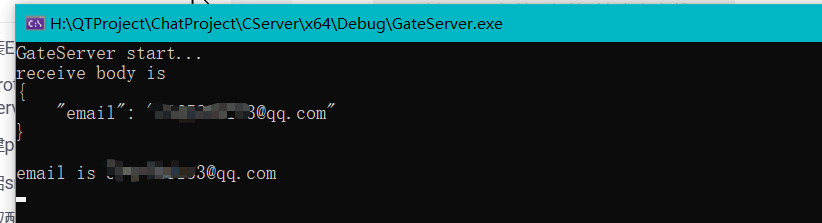
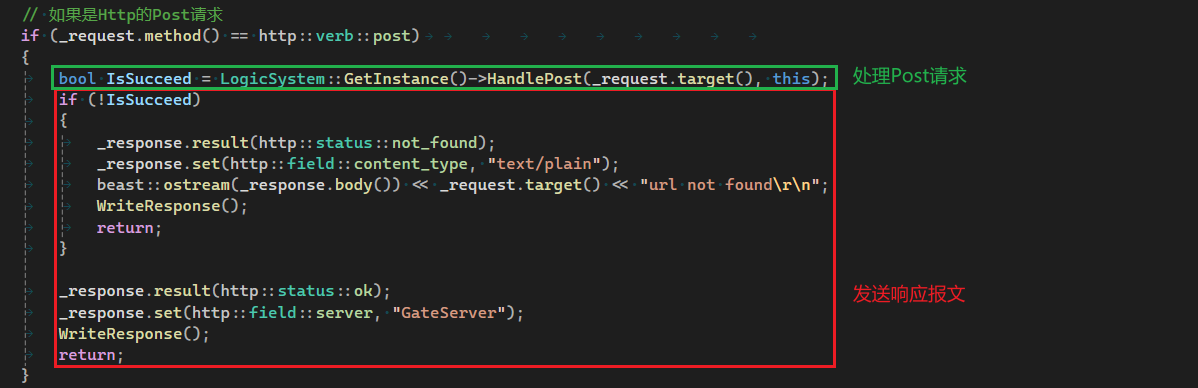
}所以在服务器处理客户端post请求中,获取到邮箱后立即向grpc服务器获取验证码
/* 向grpc 服务器获取验证码 */
GetVerifyRsponse verifyRsponse = VerifyGrpcClient::GetInstance()->GetVerifyCode(email);/* 返回响应报文给客户端 */
jsonResonse["error"] = verifyRsponse.error();编译一下,编译成功
7. 为服务器创建配置文件

{"GateServer": {"Port": 8080},"VerifyServer": {"Port": 50051}
}
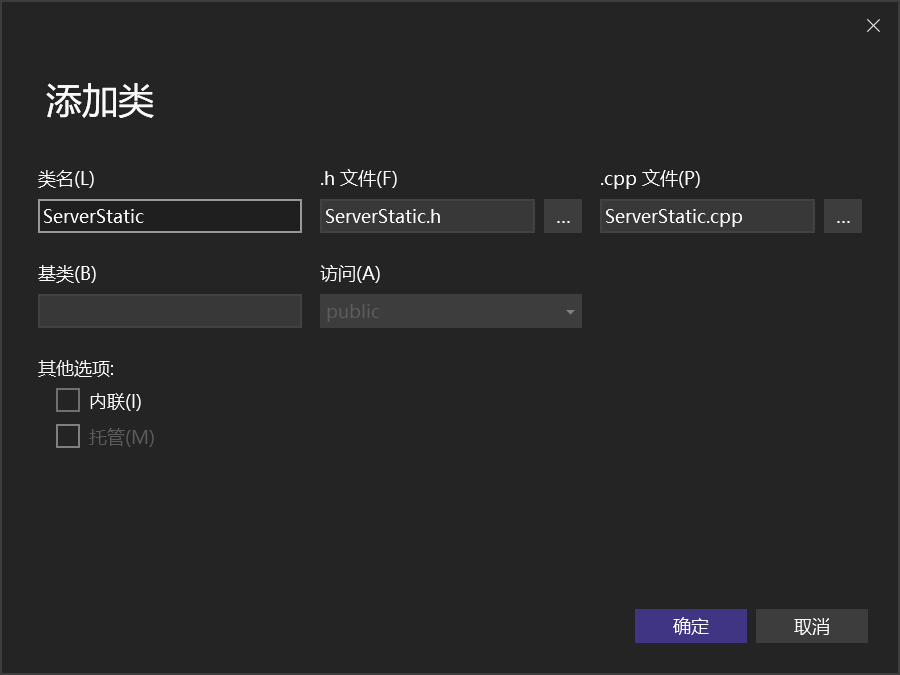
创建静态函数库,来解析json
函数实现
#ifndef SERVERSTATIC_H
#define SERVERSTATIC_H#include "GlobalHead.h"class ServerStatic
{
public:/* 解析配置文件 */static int ParseConfig(string configPath, string blockName, string key);
};
#endif // SERVERSTATIC_H
#include "ServerStatic.h"#include <fstream>/* 解析配置文件 */
int ServerStatic::ParseConfig(string configPath, string blockName, string key)
{ifstream file(configPath, ifstream::binary);if (!file.is_open()){cerr << "Failed to open config file: " << configPath << endl;return -1;}Json::Value jsonResult;Json::Reader reader;if (!reader.parse(file, jsonResult)){cout << "Failed to parse config file: " << configPath << endl;return -1;}if (!jsonResult.isMember(blockName)){cout << "Failed to find block: " << blockName << endl;return -1;}return jsonResult[blockName][key].asInt();
}
8. 邮箱验证服务
https://nodejs.org/en
一路安装下去
8.1 初始化Nodejs库的配置
报错
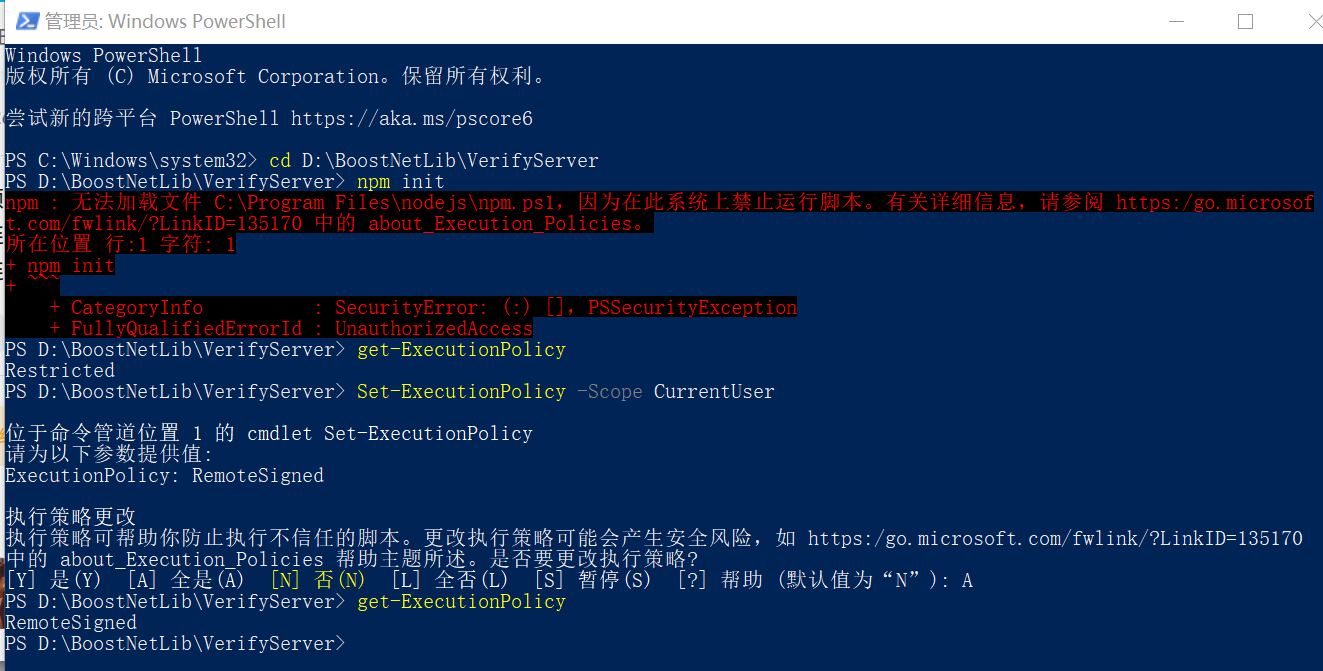
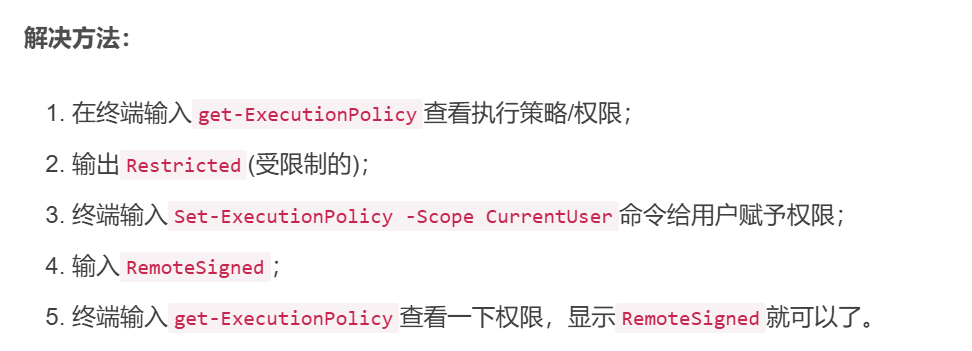
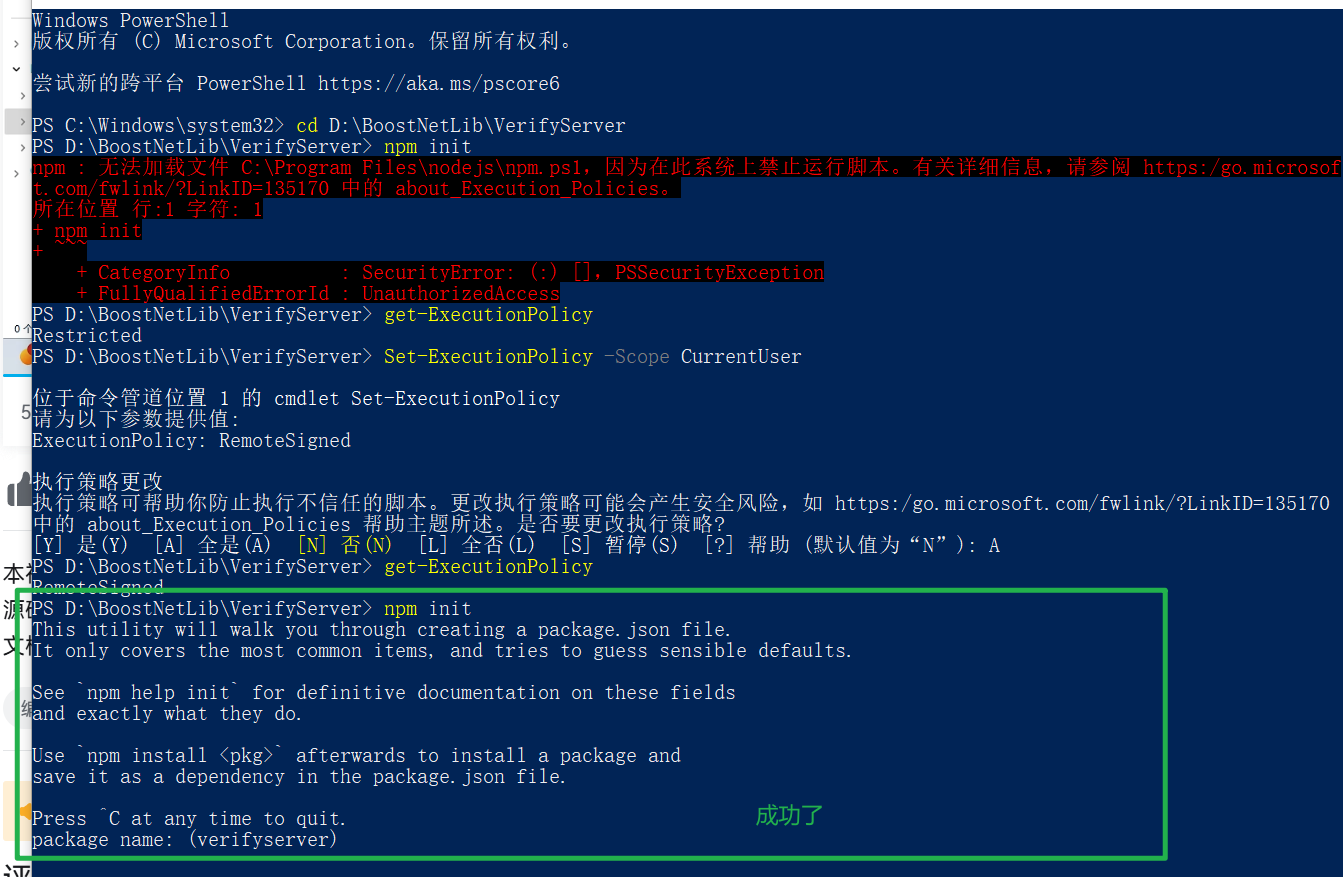
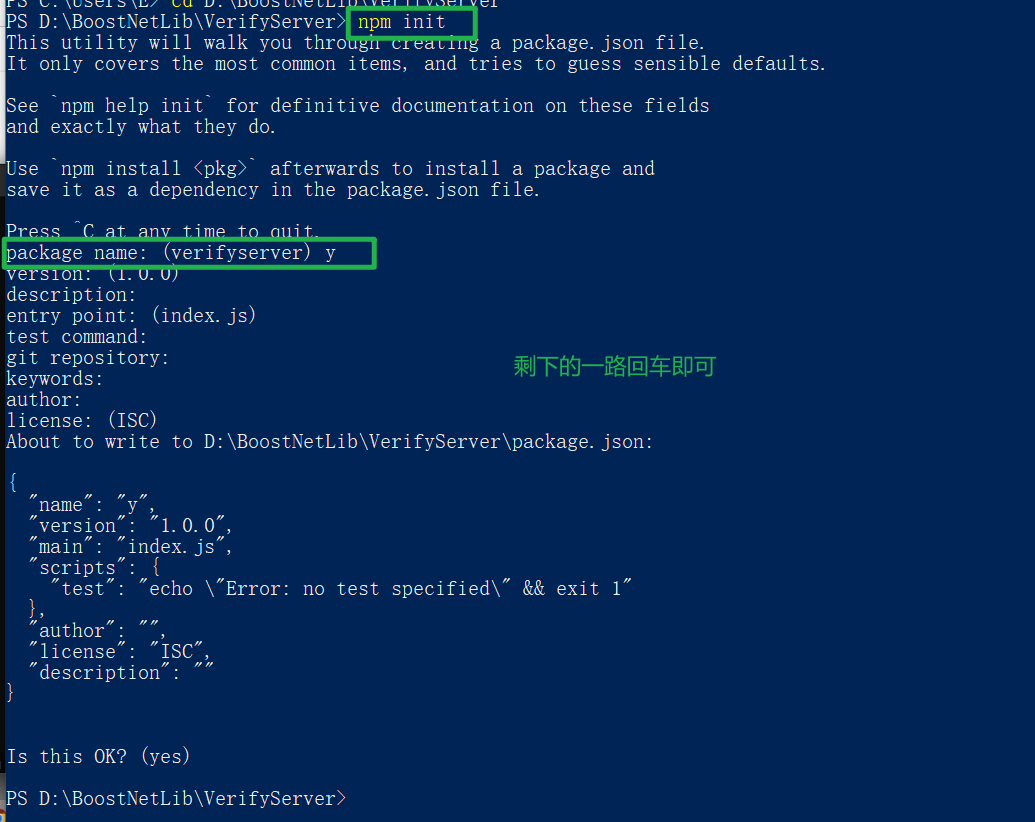
找到生成的包,修改命名
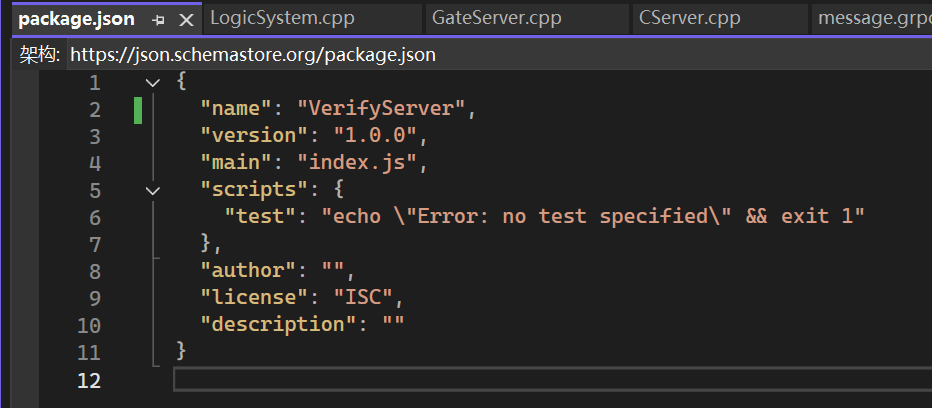
{"name": "VerifyServer","version": "1.0.0","main": "index.js","scripts": {"test": "echo \"Error: no test specified\" && exit 1"},"author": "","license": "ISC","description": ""
}
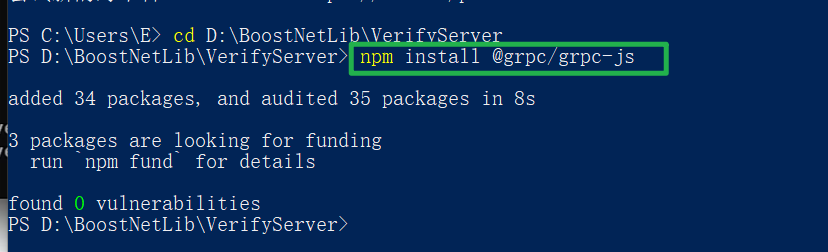
8.2 安装GRPC-JS库
npm install @grpc/grpc-js
8.3 安装proto库
npm install @grpc/proto-loader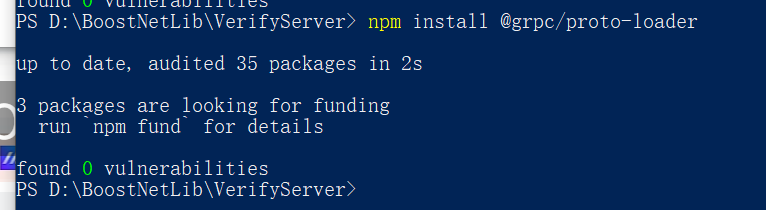
8.4 安装Email处理的库
npm install nodemailer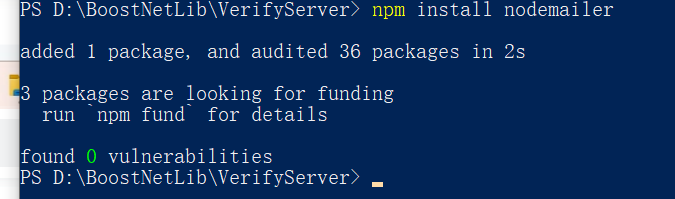
8.5 将protobuf协议复制到VerifyServer文件夹下
8.6 新建proto.js解析proto文件
加载 message.proto 定义的 gRPC 服务或消息结构,并将其暴露出去供其他文件使用
首先导入库,然后获取当前目录下的message.proto文件,加载.proto文件,保持原始字段名,将int类型当作字符串进行处理,枚举类型也当作字符串处理;
然后将加载好的json对象转换成真正可用的gRpc服务对象
提取message包的内容,把提取到的内容暴露给其他文件使用
const path = require('path')
const grpc = require('@grpc/grpc-js')
const protoLoader = require('@grpc/proto-loader')
const PROTO_PATH = path.join(__dirname, 'message.proto')
const packageDefinition = protoLoader.loadSync(PROTO_PATH, { keepCase: true, longs: String, enums: String, defaults: true, oneofs: true })
const protoDescriptor = grpc.loadPackageDefinition(packageDefinition)
const message_proto = protoDescriptor.message
module.exports = message_proto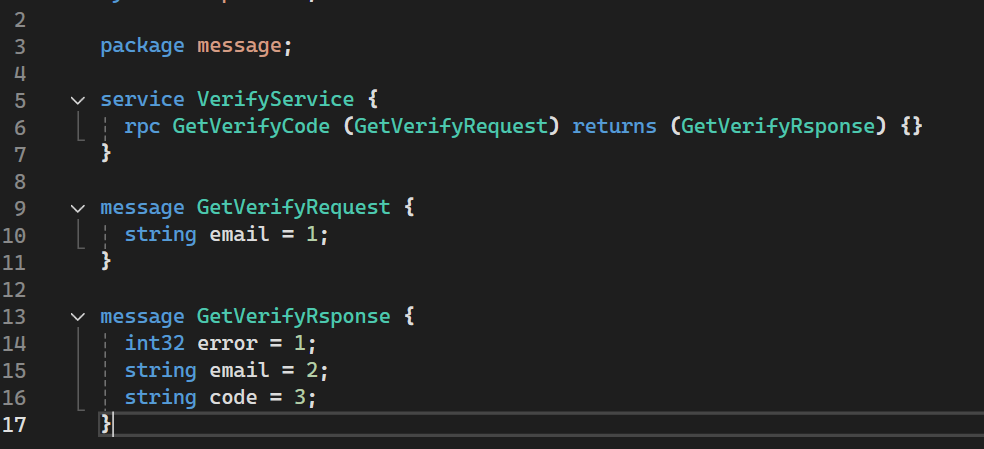
最终会被解析成下面这样
const message_proto = {VerifyService: class {constructor(address, credentials, options) { ... }GetVerifyCode(request, callback) {// 发起 gRPC 调用,request 是 { email: 'xxx@example.com' }// callback 是 (err, response) => { ... }}},GetVerifyRequest: class {constructor({ email }) {this.email = email}},GetVerifyRsponse: class {constructor({ error, email, code }) {this.error = errorthis.email = emailthis.code = code}}
}
8.7 开启smtp服务

8.8 读取配置
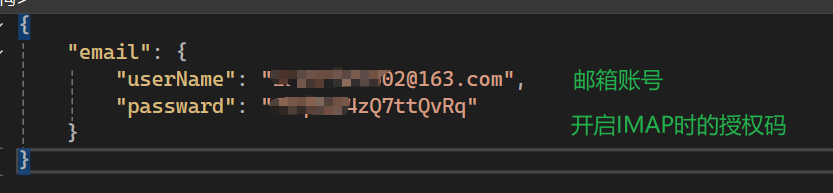
8.8.1 新建config.json
8.8.2 新建Global.js
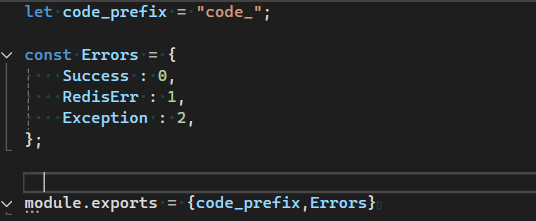
let code_prefix = "code_";const Errors = {Success : 0,RedisErr : 1,Exception : 2,
};module.exports = {code_prefix,Errors}
8.8.3 新建config.js 读取config.json
读取配置文件config.json中的配置信息,并将这些信息导出以供其他模块使用
const fs = require('fs');
let config = JSON.parse(fs.readFileSync('config.json', 'utf8'));
let email_userName = config.email.userName;
let email_passward = config.email.passward;
let mysql_host = config.mysql.host;
let mysql_port = config.mysql.port;
let redis_host = config.redis.host;
let redis_port = config.redis.port;
let redis_passwd = config.redis.passwd;
let code_prefix = "code_";
module.exports = { email_passward, email_userName, mysql_host, mysql_port, redis_host, redis_port, redis_passwd, code_prefix }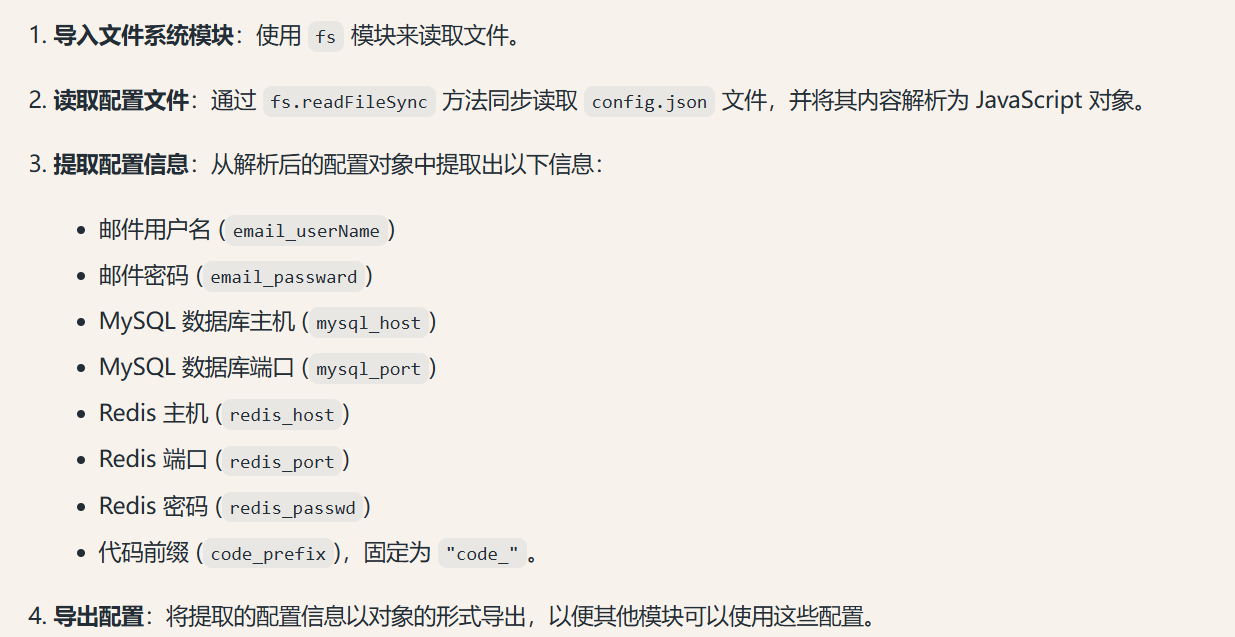
8.8.4 新建emial.js
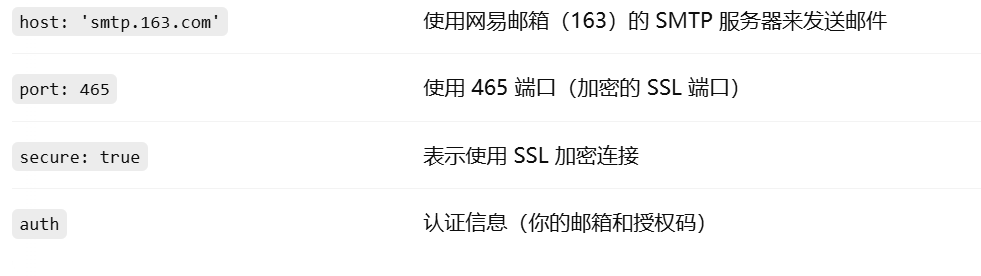
const nodemailer = require('nodemailer');
const config_module = require("./config")
/*** 创建发送邮件的代理*/
let transport = nodemailer.createTransport({host: 'smtp.163.com',port: 465,secure: true,auth: {user: config_module.email_userName,                     // 发送方邮箱地址pass: config_module.email_passward                      // 邮箱授权码或者密码}
});
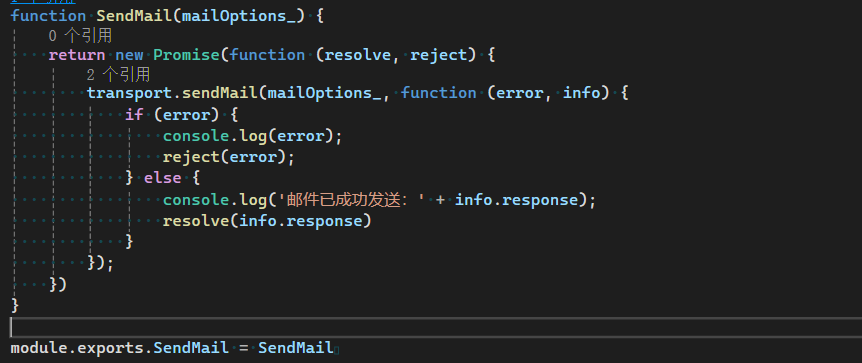
实现发送邮件的函数
/*** 发送邮件的函数* @param {*} mailOptions_ 发送邮件的参数* @returns */
function SendMail(mailOptions_) {return new Promise(function (resolve, reject) {transport.sendMail(mailOptions_, function (error, info) {if (error) {console.log(error);reject(error);} else {console.log('邮件已成功发送:' + info.response);resolve(info.response)}});})
}
module.exports.SendMail = SendMail上面全部修改成password,我写错了
8.8.5 新建server.js
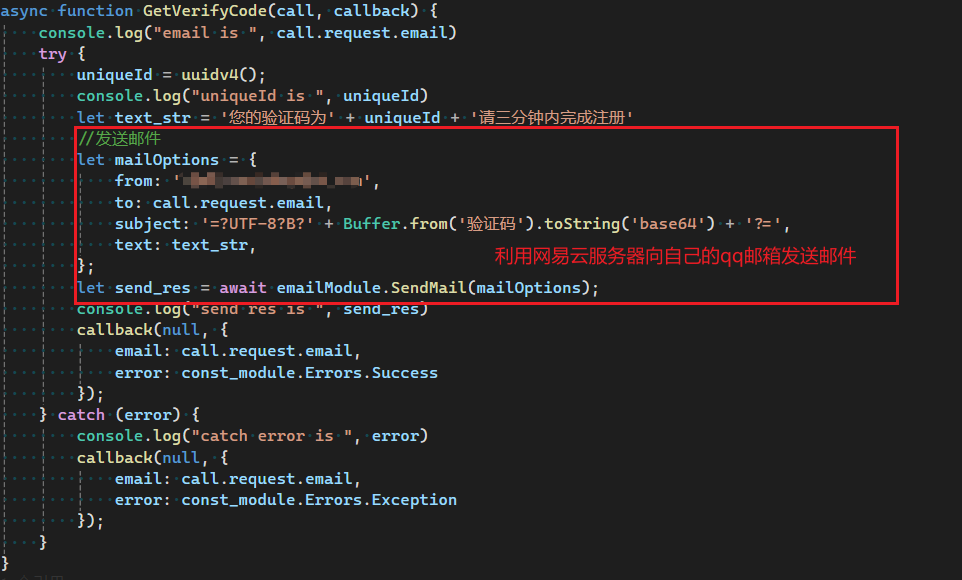
gRPC 服务端,提供一个叫 GetVerifyCode 的接口,接收一个邮箱地址,生成验证码并发邮件给这个地址
填写自己的邮箱账号
const grpc = require('@grpc/grpc-js')
const message_proto = require('./proto')
const const_module = require('./global')
const { v4: uuidv4 } = require('uuid');
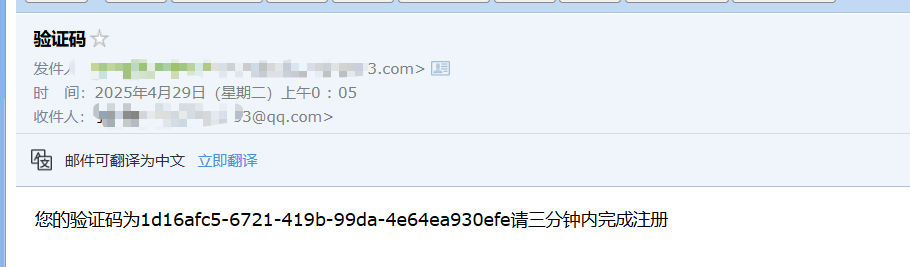
const emailModule = require('./email');async function GetVerifyCode(call, callback) {console.log("email is ", call.request.email)try {uniqueId = uuidv4();console.log("uniqueId is ", uniqueId)let text_str = '您的验证码为' + uniqueId + '请三分钟内完成注册'//发送邮件let mailOptions = {from: '******@163.com',to: call.request.email,subject: '验证码',text: text_str,};let send_res = await emailModule.SendMail(mailOptions);console.log("send res is ", send_res)callback(null, {email: call.request.email,error: const_module.Errors.Success});} catch (error) {console.log("catch error is ", error)callback(null, {email: call.request.email,error: const_module.Errors.Exception});}
}
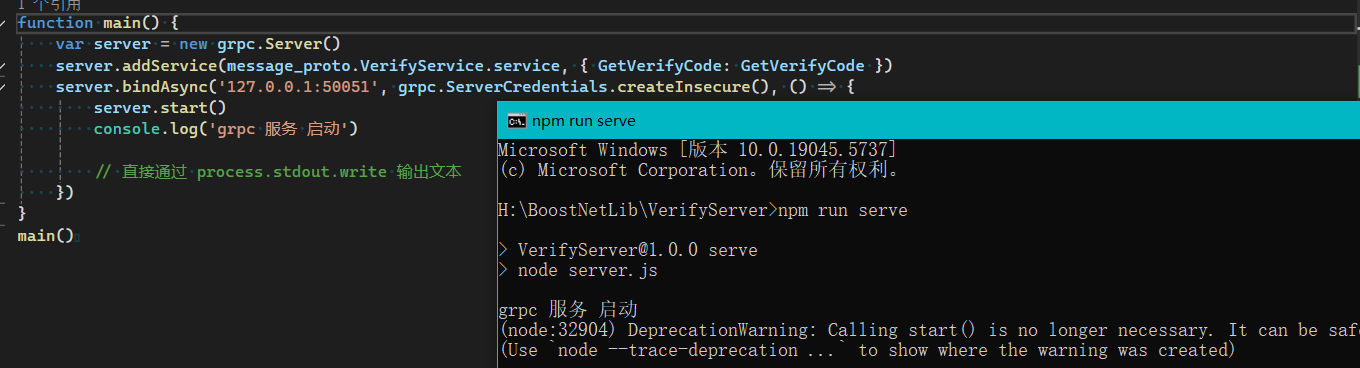
function main() {var server = new grpc.Server()server.addService(message_proto.VerifyService.service, { GetVerifyCode: GetVerifyCode })server.bindAsync('0.0.0.0:50051', grpc.ServerCredentials.createInsecure(), () => {server.start()console.log('grpc server started')})
}
main()Java看不懂,只会c++,这些代码已经脱离我的掌控了,难崩
8.8.6 修改package.json
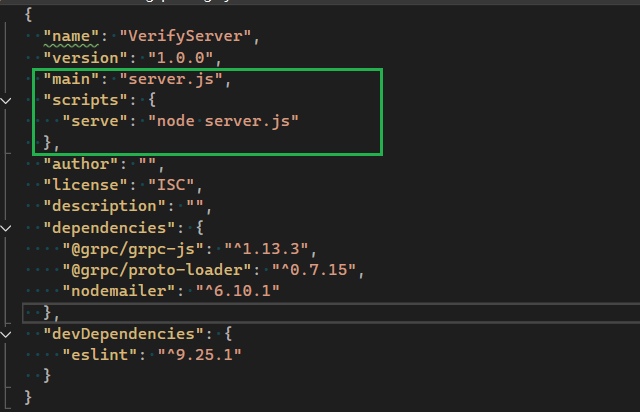
{"name": "VerifyServer","version": "1.0.0","main": "server.js","scripts": {"serve": "node server.js"},"author": "","license": "ISC","description": "","dependencies": {"@grpc/grpc-js": "^1.13.3","@grpc/proto-loader": "^0.7.15","nodemailer": "^6.10.1"},"devDependencies": {"eslint": "^9.25.1"}
}
8.8.7 卸载MySql并重装
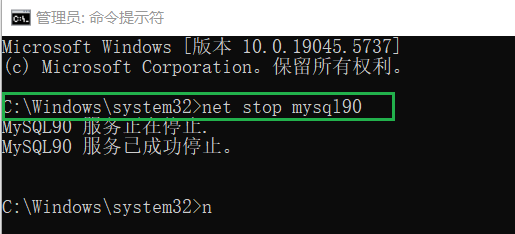
1. 首先查看自己的Mysql的服务名,并停止服务
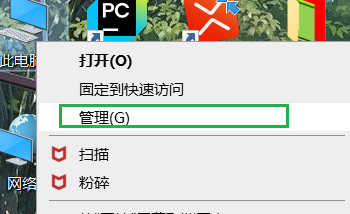
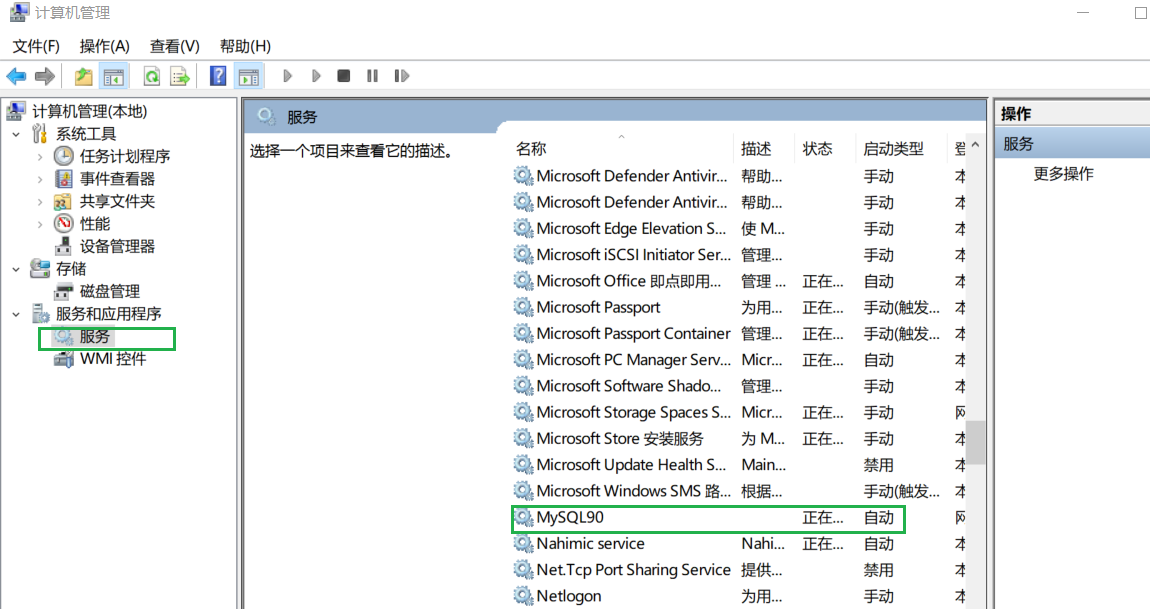
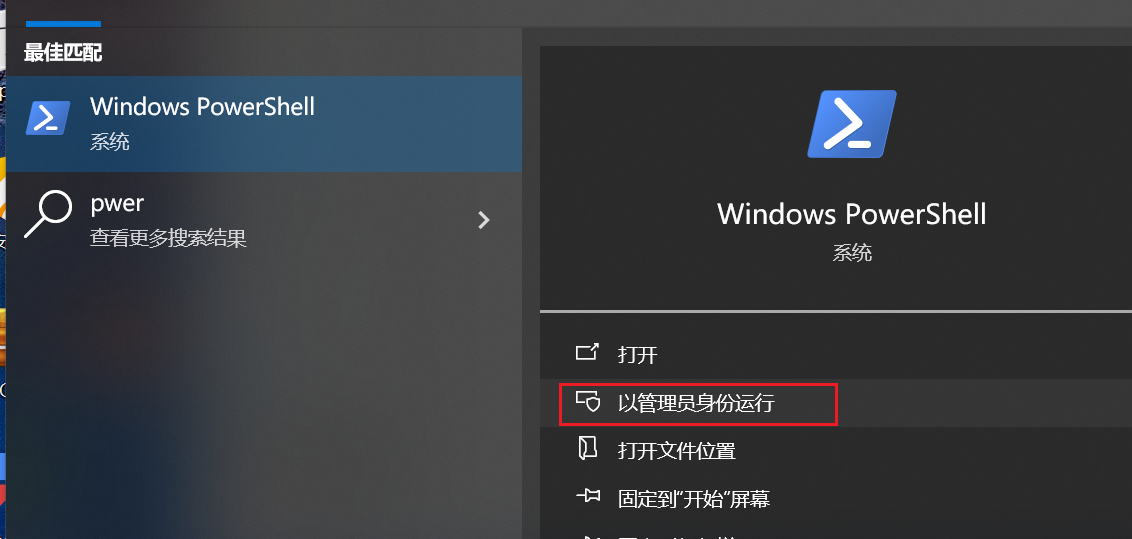
2. 以管理员权限运行cmd
彻底卸载Mysql的博客
https://blog.csdn.net/m0_52861000/article/details/131354710?ops_request_misc=%257B%2522request%255Fid%2522%253A%25227ed0e707bd1102a74fef6f16d6b0d3e5%2522%252C%2522scm%2522%253A%252220140713.130102334..%2522%257D&request_id=7ed0e707bd1102a74fef6f16d6b0d3e5&biz_id=0&utm_medium=distribute.pc_search_result.none-task-blog-2~all~top_positive~default-1-131354710-null-null.142^v102^pc_search_result_base4&utm_term=mysql%E6%80%8E%E4%B9%88%E5%8D%B8%E8%BD%BD%E5%B9%B2%E5%87%80&spm=1018.2226.3001.4187重新安装MySql的博客
https://blog.csdn.net/m0_52559040/article/details/121843945我的MySql密码 123456
我是因为忘了密码才选择重新安装的
8.8.8 修改config.json
  "mysql": {"host": "localhost","port": 3306,"password": "123456"},"redis": {"host": "81.68.86.146","port": 6380,"passwd": "123456"}
}
9. 测试
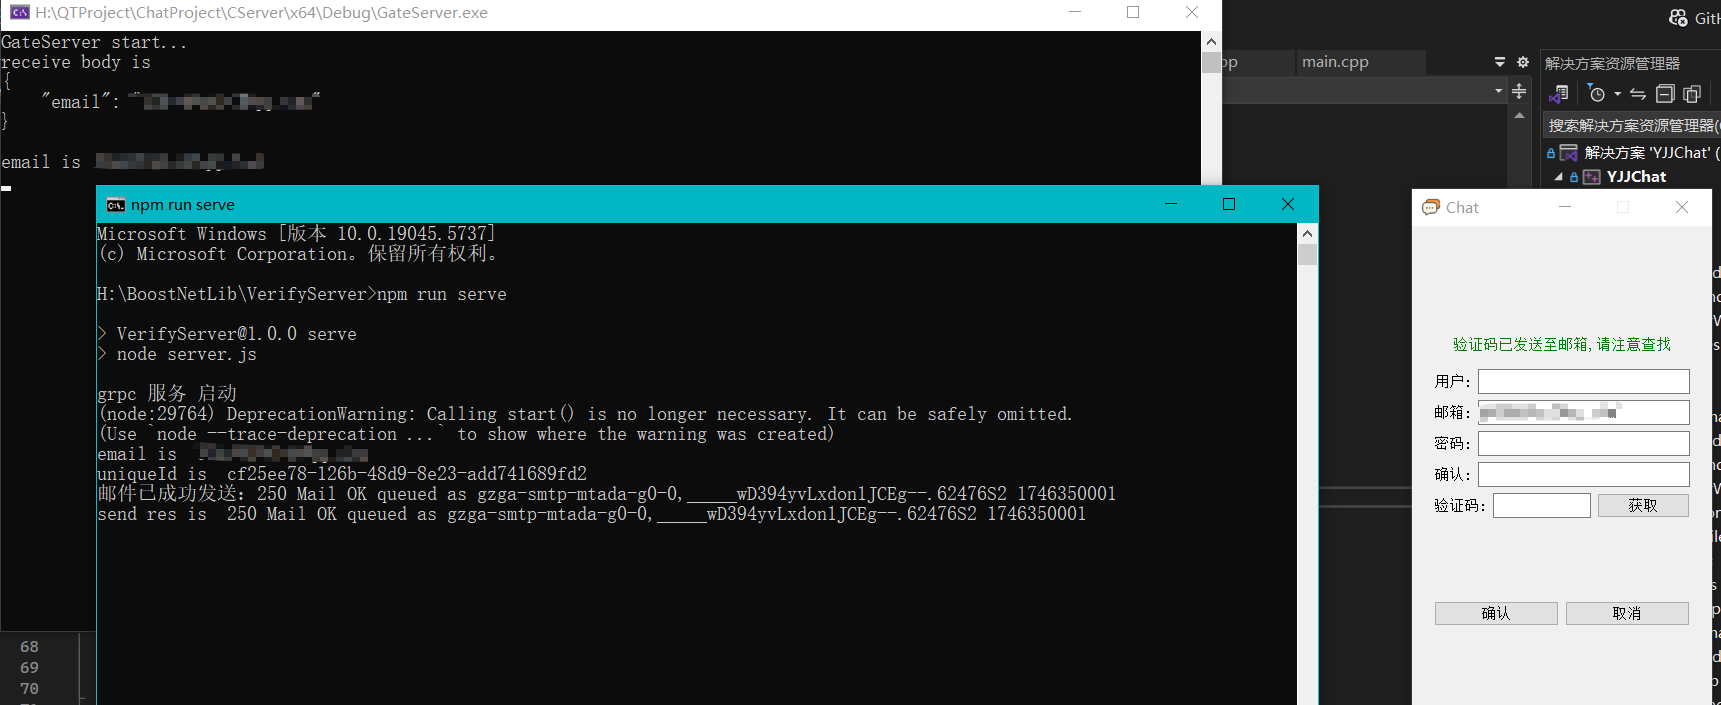
9.1 启动GRPC服务器,通过GRPC服务去发送邮件到注册的邮箱里面
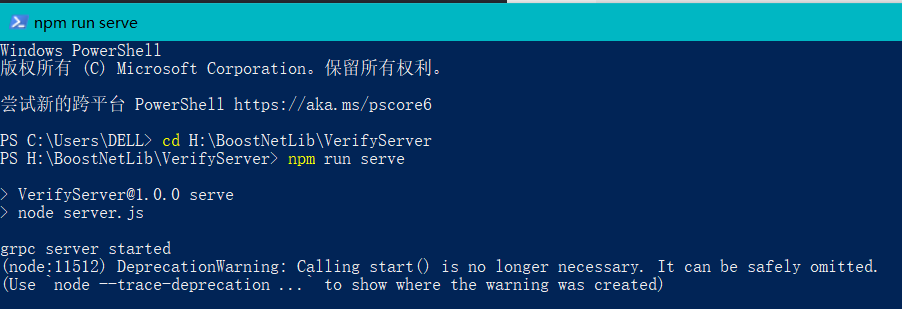
9.2 服务器启动
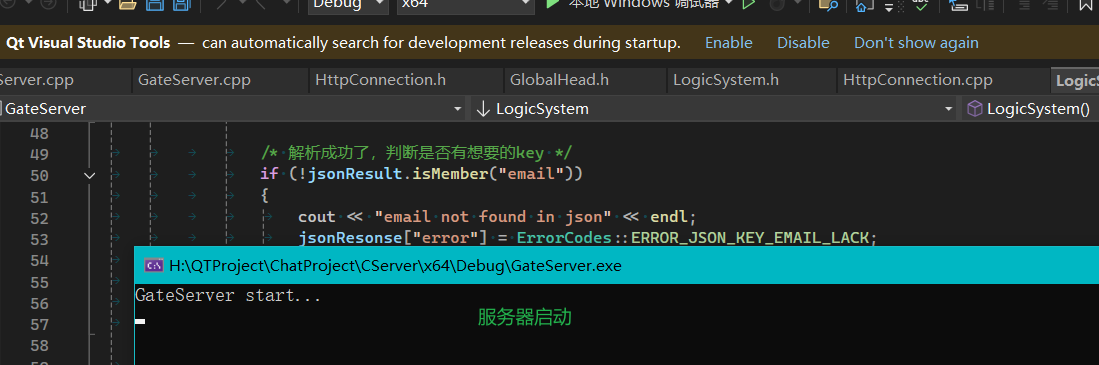
9.3 QT客户端启动
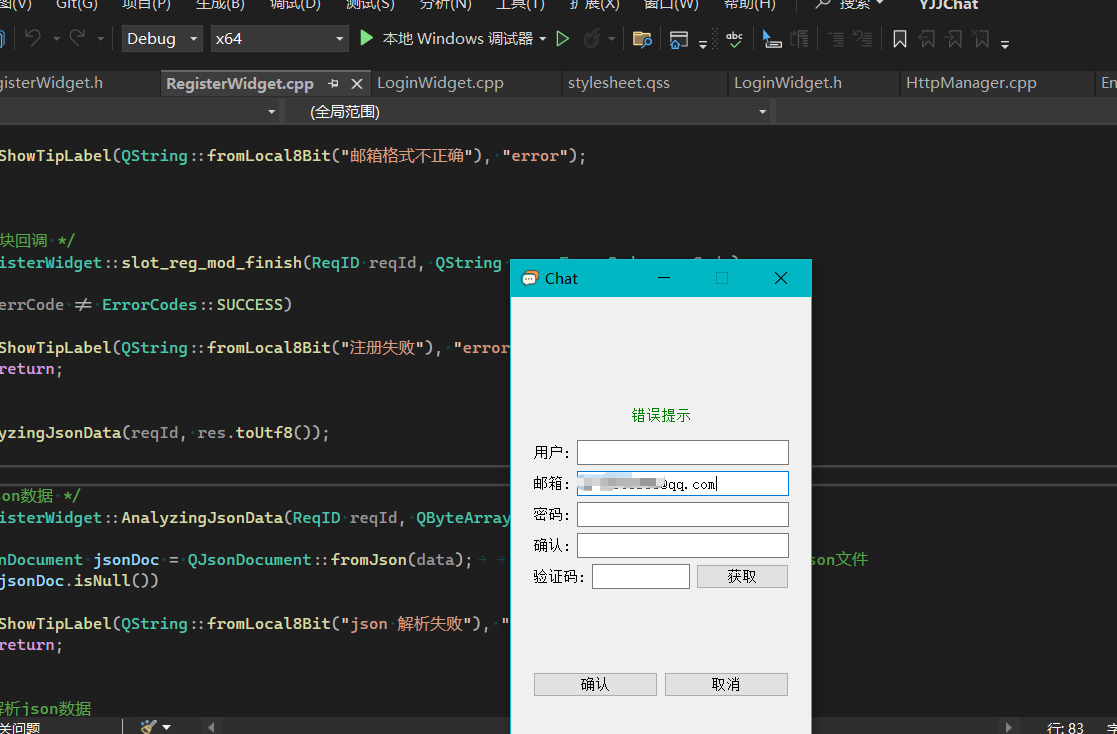
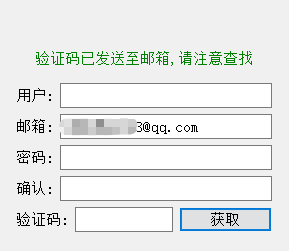
9.4 获取验证码

已证实发送,从结果反推过程
10. 从结果反推过程
10.1 解决乱码问题
首先验证到底是哪里出了问题
查看自己的VS编码形式,不知道在哪里查的看这篇文章
https://blog.csdn.net/qq_41868108/article/details/105750175改成UTF-8编码试试看
没有问题,所以是编码形式出错了,需要将中文按照utf-8编码
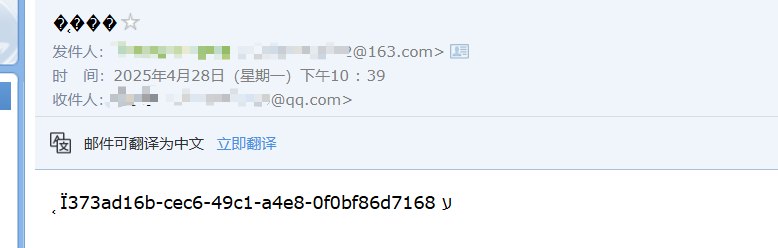
由于对JavaScript的语法不熟悉,放弃尝试,最后获取到的邮件
已解决
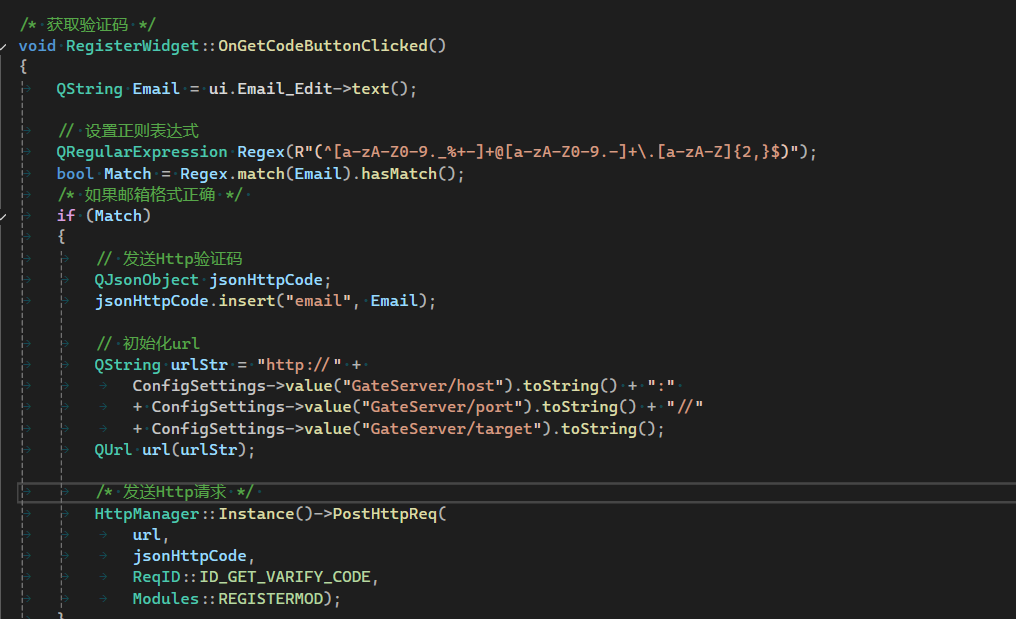
10.2 注册验证一条龙
当注册按钮点击时,将Email中的信息和URL都填充进去,然后发送Post请求给服务器,因为URL的格式如下
http://localhost:8080//getVarifycode,所以本地开启服务器后就能够收到客户端发来的请求了

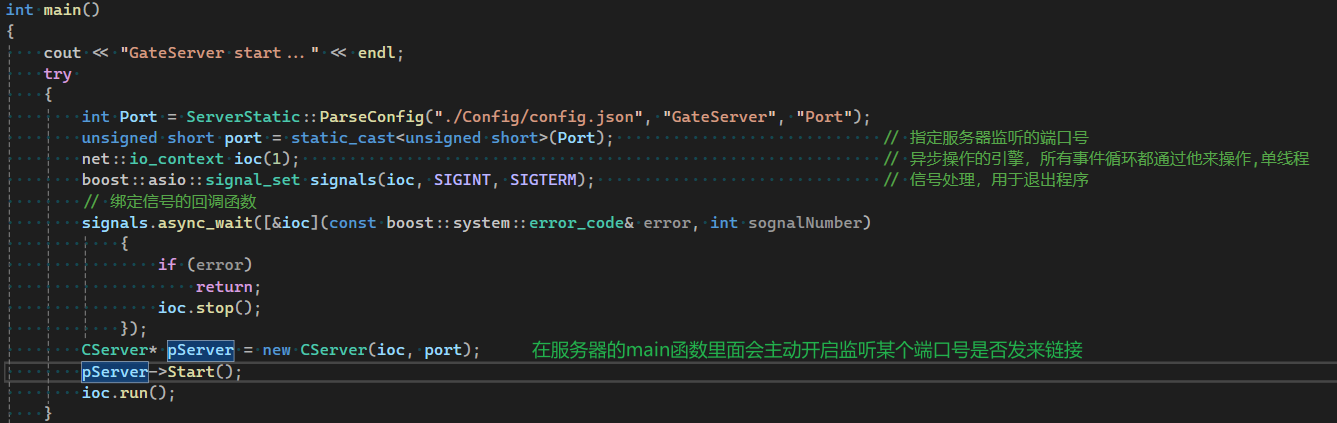
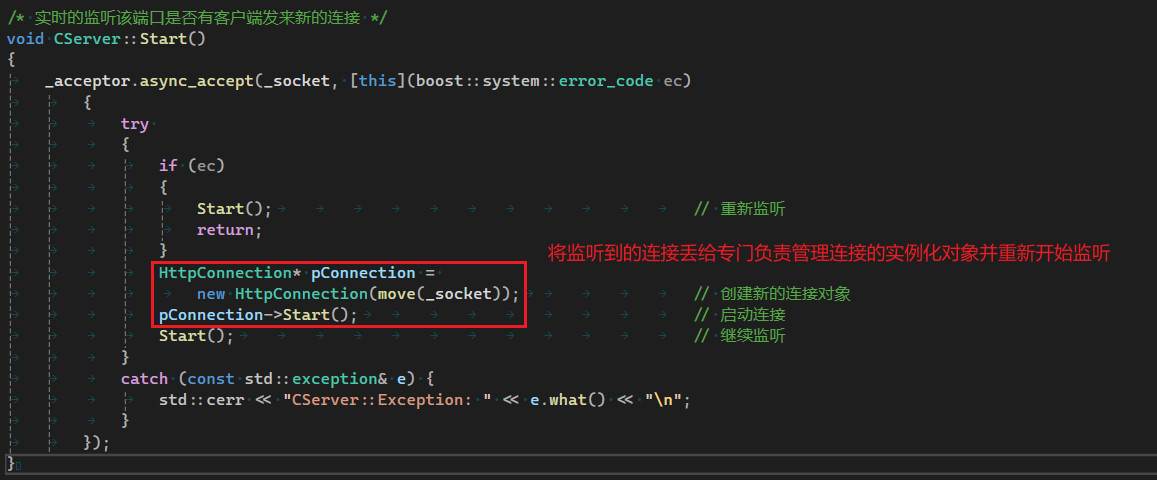
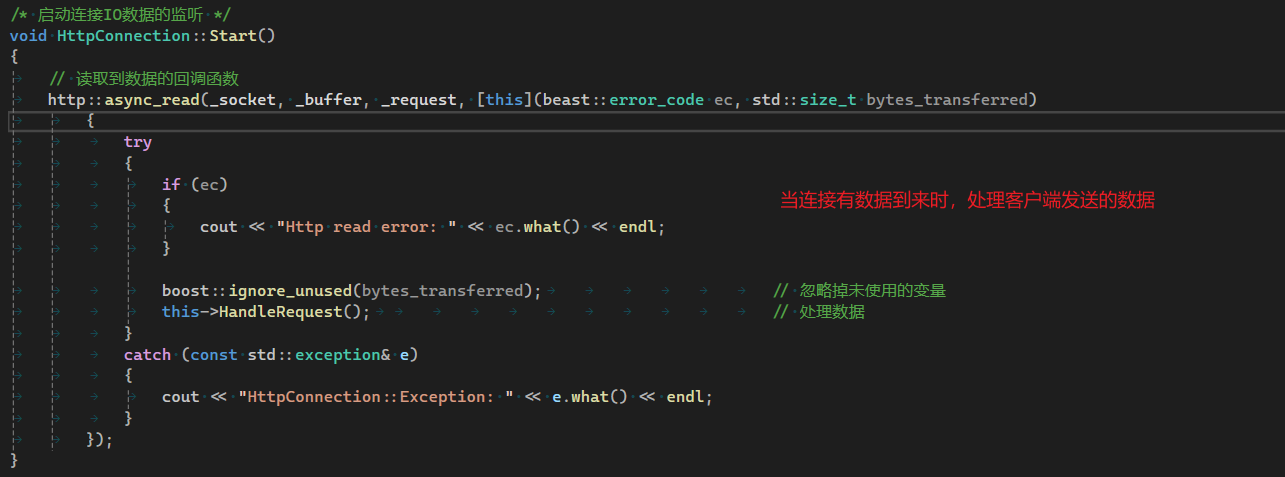
服务端:


在这里是向GRPC服务器发送请求
在JavaScript中启动grpc服务器,监听本机是否有连接
在我们的message_proto中定义了一个名为VerifyService的服务
服务器会监听VerifyService.GetVerifyCode方法,一旦客户端调用这个方法,服务端就会进入实现的GetVerifyCode函数中去处理请求,然后把响应结果通过callback返回

客户端调用这个方法时(GetVerifyCode)会发送一个GetVerifyRequest服务器返回一个GetVerifyResponse,后续就是通过uuid生成为唯一的验证码去返回给c++调用GRPC中的GetVerifyCode的客户端,然后再qt的前端中输入自己qq邮箱中接收到的验证码,跟c++服务器中的验证码对比,就注册成功了