【首款ARMv9开源芯片“星睿“O6测评】在“周易”NPU上部署Yolov8l模型并实现实时目标检测
博主未授权任何人或组织机构转载博主任何原创文章,感谢各位对原创的支持!
博主链接
博客内容主要围绕:
5G/6G协议讲解
高级C语言讲解
Rust语言讲解
文章目录
- 在"星睿"O6的“周易”NPU上部署Yolov8l模型并实现实时目标检测
- 一、准备基础运行环境
- 二、下载NPU SDK
- 2.1 安装NPU驱动和UMD
- 三、下载CIX AI Model HUb
- 3.1 下载项目
- 3.2 创建虚拟环境
- 3.3 安装依赖库
- 四、执行推理任务
- 4.1 NPU上执行推理任务
- 4.2 CPU上执行推理任务
- 4.3 运行结果
- 五、实时目标检测开发
- 5.1 使用opencv获取摄像头数据
- 5.2 将获取的视频帧传入模型进行推理
- 5.3 运行效果
- 5.4 完整代码参考
在"星睿"O6的“周易”NPU上部署Yolov8l模型并实现实时目标检测
瑞莎星睿 O6 (Radxa Orion O6) 拥有高达 28.8TOPs NPU (Neural Processing Unit) 算力,支持 INT4、INT8、INT16、FP16、BF16 和 TF32 类型的加速。

一、准备基础运行环境
安装python库,编写当前博客时最新的python版本是3.11。
sudo apt install libpython3.11-dev
sudo apt install python3.11-venv
二、下载NPU SDK
NPU SDK 包含 NOE Compiler 与 CIX AI Model Hub, 要获取 SDK 需要通过申请 CIX 早鸟计划获取。 申请链接: CIX 早鸟计划
2.1 安装NPU驱动和UMD
sudo dpkg -i ./cix-npu-driver_1.0.0_arm64.deb
sudo dpkg -i ./cix-noe-umd_1.0.0_arm64.deb
安装完成之后一定要断电重启!!!
三、下载CIX AI Model HUb
通过CIX 早鸟计划申请后,会有邮件发送到注册邮箱,请按邮件内容获取 AI Model Hub 仓库。
3.1 下载项目
git clone https://e.coding.net/g-uaqh1479/ai-model-hub/ai_model_hub.git
CIX AI Model Hub 里面涉及的例子,我们可以直接从 ModelScope 上下载 onnx 模型和预编译好的模型,无需在x86 Linux上重新编译。
3.2 创建虚拟环境
cd ~/ai_model_hub
python3 -m venv --system-site-packages .venv
3.3 安装依赖库
cd ~/ai_model_hub
.venv/bin/pip3 install -r  requirements.txt
四、执行推理任务
4.1 NPU上执行推理任务
进入项目目录,下载最新的CIX模型文件并在NPU上执行推理。
cd ~/ai_model_hub/models/ComputeVision/Object_Detection/onnx_yolov8_l
# 下载cix模型
wget https://modelscope.cn/models/cix/ai_model_hub_25_Q1/resolve/master/models/ComputeVision/Object_Detection/onnx_yolov8_l/yolov8_l.cix
# 执行NPU推理
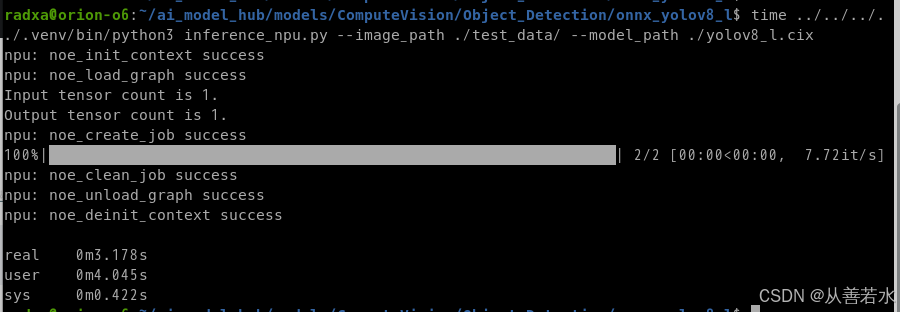
../../../../.venv/bin/python3 inference_npu.py --image_path ./test_data/ --model_path ./yolov8_l.cix
推理时间如下所示:
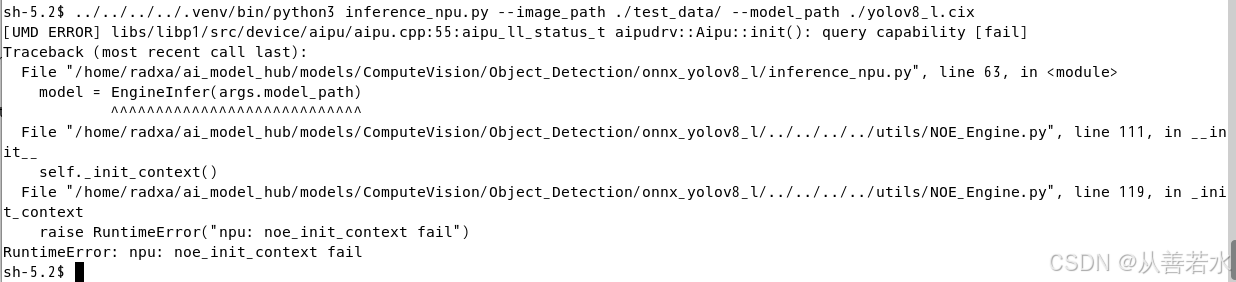
运行报错,提示
RuntimeError: npu: noe_init_context fail
可能是因为NPU Driver或者UDM版本太低,建议获取最新的NPU Driver和UDM版本,重新安装后断电重启
4.2 CPU上执行推理任务
进入项目目录,下载最新的ONNX模型文件并在CPU上执行推理,按照习惯会创建一个model目录将ONNX模型放到model目录中。
cd ~/ai_model_hub/models/ComputeVision/Object_Detection/onnx_yolov8_l
# 创建onnx模型目录
mkdir model
cd model
# 下载onnx模型
wget https://modelscope.cn/models/cix/ai_model_hub_25_Q1/resolve/master/models/ComputeVision/Object_Detection/onnx_yolov8_l/model/yolov8l.onnx
# 退回到上级目录
cd ../
# 执行CPU推理
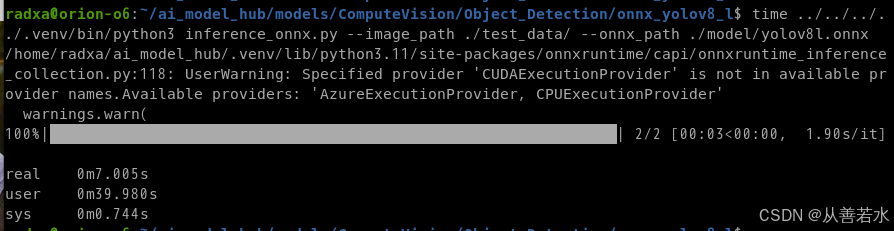
../../../../.venv/bin/python3 inference_onnx.py --image_path ./test_data/ --onnx_path ./model/yolov8l.onnx
运行时间如下所示:
4.3 运行结果
推理的结果保存在当前目录的output下:


五、实时目标检测开发
我们使用opencv获取摄像头数据,将获取的视频帧进行实时推理,将推理结果显示出来。
5.1 使用opencv获取摄像头数据
下面是具体的实现代码,仅供参考:
# 文件名 realtime_object_detection.py

import cv2
import glob


def opencv_camera_test(device_path):
    try:
        cap = cv2.VideoCapture(device_path)
        if not cap.isOpened():
            print(f"无法打开设备: {device_path}")
            return False

        # 读取测试帧
        ret, frame = cap.read()
        cap.release()

        if ret and frame is not None:
            print(f"设备 {device_path} 成功读取")
            return True
        else:
            print(f"设备 {device_path} 读取失败")
            return False
    except Exception as e:
        print(f"设备 {device_path} 异常: {str(e)}")
        return False


# 检测可用的视频设备
video_device = 0
for device in sorted(glob.glob("/dev/video*")):
    if opencv_camera_test(device) == True:
        video_device = device
        break

# 初始化摄像头
cap = cv2.VideoCapture(video_device)
if not cap.isOpened():
    print("摄像头初始化失败")
    exit()

# 设置分辨率
cap.set(cv2.CAP_PROP_FRAME_WIDTH, 1920)
cap.set(cv2.CAP_PROP_FRAME_HEIGHT, 1080)
# 设置帧率
cap.set(cv2.CAP_PROP_FPS, 30)

while True:
    # 读取一帧图像
    ret, frame = cap.read()

    # 如果正确读取帧,ret为True
    if not ret:
        print("无法获取摄像头数据")
        break

    # 显示图像
    cv2.imshow('Camera', frame)

    # 按'q'键退出循环
    if cv2.waitKey(1) == ord('q'):
        break

# 释放摄像头资源
cap.release()
cv2.destroyAllWindows()
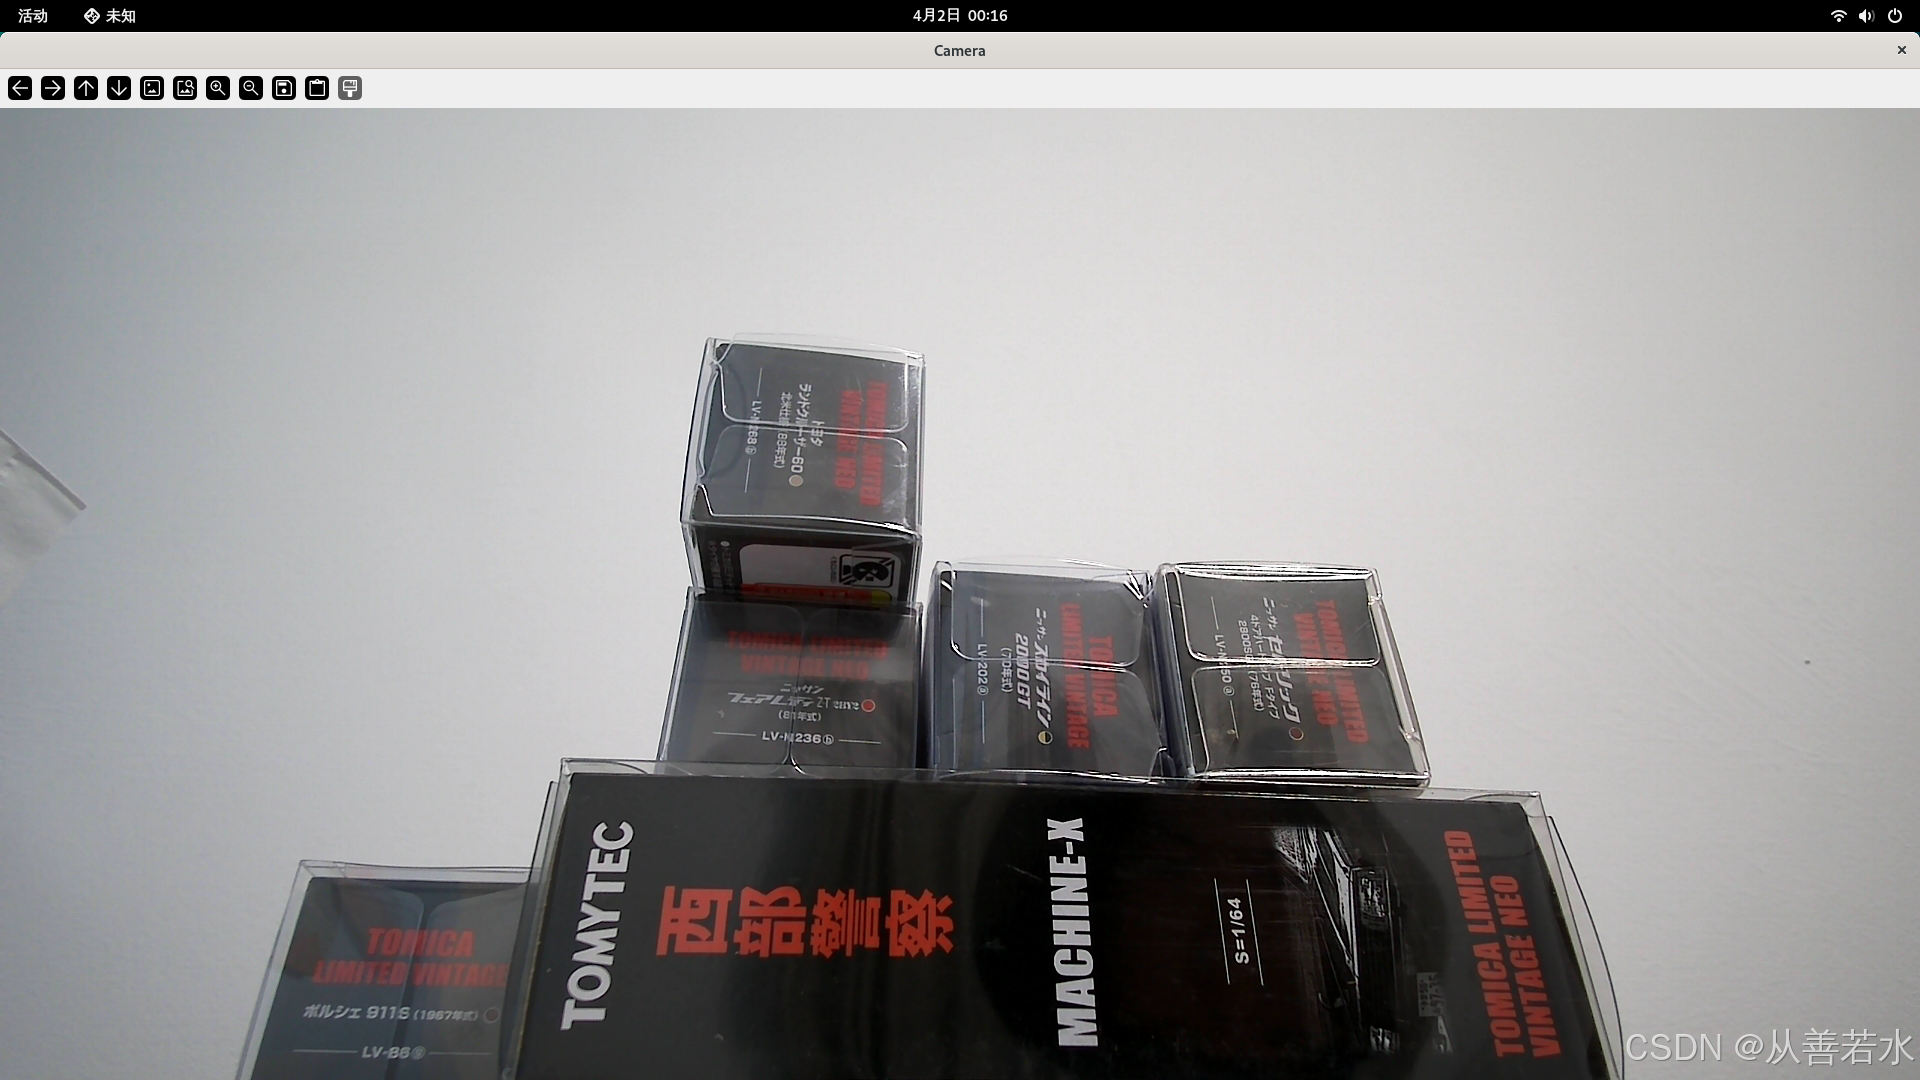
使用下面的命令运行python脚本,查看摄像头是否可以正常打开:
../../../../.venv/bin/python3realtime_object_detection.py
运行结果如下所示:

5.2 将获取的视频帧传入模型进行推理
我们将通过OpenCV获取的视频帧数据进行简单的格式转换后传入模型进行推理,并将推理地结果实时展示出来。关键参考代码如下所示:
# Preprocess the image for inference
image = np.array(frame)
show_image = copy.deepcopy(image)

# 记录原始图片shape和新图片shape
src_shape = show_image.shape[:2]
new_shape = (640, 640)

# 将原始图片shape调整为新shape
image = cv2.resize(image, dsize=new_shape)

# Normalize the image pixel values to the range [0, 1]
image = normalize_image(image).astype(np.float32)

# 调整数据结构并增加batch维度
data = np.expand_dims(image.transpose(2, 0, 1), axis=0)
5.3 运行效果
星睿O6测评-yolov8实时推理视频
5.4 完整代码参考
import cv2
import glob
import numpy as np
import argparse
import os
import sys
import time
import copy
from tqdm import tqdm

_abs_path = os.path.join(os.path.dirname(__file__), "../../../../")
sys.path.append(_abs_path)
from utils.tools import get_file_list
from utils.image_process import *
from utils.object_detect_postprocess import postprocess_yolo, xywh2xyxy
from utils.draw import draw_coco as draw
from utils.NOE_Engine import EngineInfer


def opencv_camera_test(device_path):
    try:
        cap = cv2.VideoCapture(device_path)
        if not cap.isOpened():
            print(f"无法打开设备: {device_path}")
            return False

        # 读取测试帧
        ret, frame = cap.read()
        cap.release()

        if ret and frame is not None:
            print(f"设备 {device_path} 成功读取")
            return True
        else:
            print(f"设备 {device_path} 读取失败")
            return False
    except Exception as e:
        print(f"设备 {device_path} 异常: {str(e)}")
        return False


def get_args():
    parser = argparse.ArgumentParser()
    parser.add_argument(
        "--image_path",
        default="test_data",
        help="path to the image file",
    )
    parser.add_argument(
        "--realtime",
        default=False,
        help="read data from camera.",
    )
    parser.add_argument(
        "--model_path",
        default="yolov8_l.cix",
        help="path to the quant model file",
    )
    parser.add_argument(
        "--output_dir", default="./output_npu", help="path to the result output"
    )
    parser.add_argument(
        "--conf_thr",
        type=float,
        default=0.3,
        help="Score threshould to filter the result.",
    )
    parser.add_argument(
        "--nms_thr", type=float, default=0.45, help="NMS threshould to the object."
    )
    parser.add_argument(
        "--benchmark",
        default=False,
        help="benchmark on COCO val dataset.",
    )
    args = parser.parse_args()
    return args


if __name__ == "__main__":
    args = get_args()
    benchmark = args.benchmark
    os.makedirs(args.output_dir, exist_ok=True)
    # Get list of images from the specified path

    if args.realtime:
        video_device = 0
        for device in sorted(glob.glob("/dev/video*")):
            if opencv_camera_test(device) == True:
                video_device = device
                break

        # 初始化摄像头
        cap = cv2.VideoCapture(video_device)
        if not cap.isOpened():
            print("摄像头初始化失败")
            exit()

        # 设置分辨率
        cap.set(cv2.CAP_PROP_FRAME_WIDTH, 1920)
        cap.set(cv2.CAP_PROP_FRAME_HEIGHT, 1080)
        #cap.set(cv2.CAP_PROP_FRAME_WIDTH, 640)
        #cap.set(cv2.CAP_PROP_FRAME_HEIGHT, 640)

        # 设置帧率
        cap.set(cv2.CAP_PROP_FPS, 30)

        # 加载模型
        model = EngineInfer(args.model_path)

        while True:
            # 读取一帧图像
            ret, frame = cap.read()
            # 如果正确读取帧,ret为True
            if not ret:
                print("无法获取摄像头数据")
                break

            #print("{}".format(frame.shape))

            #记录开始时间
            start_time = time.time()

            #临时保存当前视频帧
            #img_name = "frame.jpg"
            #success = cv2.imwrite(img_name, frame)
            #if not success:
            #    print(f"保存图片 {img_name} 失败")
            #    continue

            # Preprocess the image for inference
            #src_shape, new_shape, show_image, data = preprocess_object_detect_method1(
            #    img_name, target_size=(640, 640), mode="BGR"
            #)

            # Preprocess the image for inference
            image = np.array(frame)
            show_image = copy.deepcopy(image)
            src_shape = show_image.shape[:2]
            new_shape = (640, 640)
            #print(f"src_shape: {src_shape}, new_shape: {new_shape}")
            image = cv2.resize(image, dsize=new_shape)

            # Normalize the image pixel values to the range [0, 1]
            image = normalize_image(image).astype(np.float32)
            data = np.expand_dims(image.transpose(2, 0, 1), axis=0)

            # Run inference and get predictions
            pred = model.forward(data.astype(np.float32))[0]
            pred = np.reshape(pred, (84, 8400))
            pred = np.transpose(pred, (1, 0))

            # bboxes, conf, class_id
            results = postprocess_yolo(pred, args.conf_thr, args.nms_thr)

            if len(results) != 0:
                bbox_xywh = results[:, :4]
                bbox_xyxy = xywh2xyxy(bbox_xywh)
                x_scale = src_shape[1] / new_shape[1]
                y_scale = src_shape[0] / new_shape[0]
                bbox_xyxy *= (x_scale, y_scale, x_scale, y_scale)

                show_image = draw(show_image, bbox_xyxy, results[:, 5], results[:, 4])

            #统计时延ms
            latency_ms = (time.time() - start_time) * 1000

            #输出时延信息
            cv2.putText(show_image,
                        f"Inference Latency: {latency_ms} ms",
                        (10, 30), #字体位置
                        cv2.FONT_HERSHEY_SIMPLEX,
                        0.7, #字体大小
                        (0,255,0), #字体颜色
                        2) #线宽

            # 显示图像
            cv2.imshow('Camera', show_image)

            # 按'q'键退出循环
            if cv2.waitKey(1) == ord('q'):
                break

        # 释放摄像头资源
        cap.release()
        cv2.destroyAllWindows()

    else:
        image_list = get_file_list(args.image_path)
        model = EngineInfer(args.model_path)
        if benchmark:
            from utils.evaluate.coco_metric import COCO_Metric

            save_pred_json = "pred_yolov8_l_npu.json"
            coco_metric = COCO_Metric(saved_json_path=save_pred_json)
            # get all test image path
            image_list = coco_metric.get_image_ids()
        else:
            image_list = get_file_list(args.image_path)

        for img_name in tqdm(image_list):
            if benchmark:
                # image info and image path
                img_id = img_name
                img_name = coco_metric.get_image_path(img_id)

            # Preprocess the image for inference
            src_shape, new_shape, show_image, data = preprocess_object_detect_method1(
                img_name, target_size=(640, 640), mode="BGR"
            )

            # Run inference and get predictions
            pred = model.forward(data.astype(np.float32))[0]
            pred = np.reshape(pred, (84, 8400))
            pred = np.transpose(pred, (1, 0))

            # bboxes, conf, class_id
            results = postprocess_yolo(pred, args.conf_thr, args.nms_thr)
            if len(results) == 0:
                if benchmark:
                    continue
                else:
                    output_path = os.path.join(args.output_dir, os.path.basename(img_name))
                    # Save the resulting image to the output directory
                    cv2.imwrite(output_path, show_image)
                    continue

            bbox_xywh = results[:, :4]
            bbox_xyxy = xywh2xyxy(bbox_xywh)
            x_scale = src_shape[1] / new_shape[1]
            y_scale = src_shape[0] / new_shape[0]
            bbox_xyxy *= (x_scale, y_scale, x_scale, y_scale)

            if benchmark:
                coco_metric.append_bboxes(img_id, bbox_xyxy, results[:, 5], results[:, 4])
            else:
                ret_img = draw(show_image, bbox_xyxy, results[:, 5], results[:, 4])
                output_path = os.path.join(args.output_dir, os.path.basename(img_name))
                # Save the resulting image to the output directory
                cv2.imwrite(output_path, ret_img)

        if benchmark:
            coco_metric.saved_json()
            coco_metric.evaluate()

        model.clean()