支付网站技术服务费怎么做分录免费的推广网站
夜莺 v8.0.0-beta.10 部署
- 1. mariadb-server
- 2. Redis安装
- 3. 下载 n9e-v8.0.0-beta.10-linux-amd64.tar.gz
- 设置 root 用户密码
- 配置文件 配置mariadb的登录密码
- 导入数据库表结构
- 配置为 systemd 启动服务
- 重新加载 systemd
- 配置日志
- 访问夜莺
- VictoriaMetrics 时序数据库安装
- 接入数据源 Prometheus
- node_exporter 服务
- 修改 prometheus 配置文件
- 添加数据源
1. mariadb-server
sudo apt update
sudo apt install mariadb-server -y
sudo systemctl enable mariadb
sudo systemctl start mariadb
sudo mysql_secure_installation
# sudo mysql_secure_installationNOTE: RUNNING ALL PARTS OF THIS SCRIPT IS RECOMMENDED FOR ALL MariaDBSERVERS IN PRODUCTION USE!  PLEASE READ EACH STEP CAREFULLY!In order to log into MariaDB to secure it, we'll need the current
password for the root user. If you've just installed MariaDB, and
haven't set the root password yet, you should just press enter here.Enter current password for root (enter for none):
OK, successfully used password, moving on...Setting the root password or using the unix_socket ensures that nobody
can log into the MariaDB root user without the proper authorisation.You already have your root account protected, so you can safely answer 'n'.Switch to unix_socket authentication [Y/n] n... skipping.You already have your root account protected, so you can safely answer 'n'.Change the root password? [Y/n] y
New password:
Re-enter new password:
Password updated successfully!
Reloading privilege tables..... Success!By default, a MariaDB installation has an anonymous user, allowing anyone
to log into MariaDB without having to have a user account created for
them.  This is intended only for testing, and to make the installation
go a bit smoother.  You should remove them before moving into a
production environment.Remove anonymous users? [Y/n] y... Success!Normally, root should only be allowed to connect from 'localhost'.  This
ensures that someone cannot guess at the root password from the network.Disallow root login remotely? [Y/n] n... skipping.By default, MariaDB comes with a database named 'test' that anyone can
access.  This is also intended only for testing, and should be removed
before moving into a production environment.Remove test database and access to it? [Y/n] y- Dropping test database...... Success!- Removing privileges on test database...... Success!Reloading the privilege tables will ensure that all changes made so far
will take effect immediately.Reload privilege tables now? [Y/n] y... Success!Cleaning up...All done!  If you've completed all of the above steps, your MariaDB
installation should now be secure.Thanks for using MariaDB!
配置过程解析
1. 初始登录:
系统询问root用户当前密码(新安装时为空)
直接按回车
2. Unix Socket认证:
询问是否切换到unix_socket认证
你选择了n,保持当前的认证方式
3. Root密码:
询问是否更改root密码
你选择了y,并设置了新密码
系统成功更新密码并重载了权限表
4. 匿名用户:
询问是否移除匿名用户
你选择了y,成功移除了匿名用户账户
5. Root远程登录:
询问是否禁止root远程登录
你选择了n,允许root用户从远程登录
⚠️ 注意:在生产环境中,通常建议禁止root远程登录以提高安全性
6. 测试数据库:
询问是否移除测试数据库及其访问权限
你选择了y,成功删除了测试数据库及其权限
7. 重载权限表:
询问是否重载权限表使设置立即生效
你选择了y,成功应用了所有更改
2. Redis安装
sudo apt update
sudo apt install redis-server -y
sudo systemctl enable redis-server
sudo systemctl start redis-server
# redis-cli ping
PONG
3. 下载 n9e-v8.0.0-beta.10-linux-amd64.tar.gz
mkdir n9e
cd n9e
wget https://github.com/ccfos/nightingale/releases/download/v8.0.0-beta.10/n9e-v8.0.0-beta.10-linux-amd64.tar.gz
tar -zxvf n9e-v8.0.0-beta.10-linux-amd64.tar.gz
设置 root 用户密码
mysql -e "SET PASSWORD FOR 'root'@'localhost' = PASSWORD('1234');"
配置文件 配置mariadb的登录密码
# 夜莺的主配置文件是 etc/config.toml
grep "1234" etc/config.toml
导入数据库表结构
mysql -uroot -p1234 < n9e.sql
配置为 systemd 启动服务
vim /etc/systemd/system/n9e.service
[Unit]
Description=N9E Service
After=network.target[Service]
Type=simple
User=root
Group=root
WorkingDirectory=/root/n9e
ExecStart=/root/n9e/n9e
Restart=on-failure
RestartSec=10
Environment="PATH=/usr/bin:/usr/local/bin"[Install]
WantedBy=multi-user.target
重新加载 systemd
systemctl daemon-reload
systemctl enable n9e
systemctl start n9e
systemctl status n9e
journalctl -fu n9e.service
# netstat -ntlp | grep n9e
tcp        0      0 127.0.0.1:40549         0.0.0.0:*               LISTEN      27860/n9e
tcp6       0      0 :::17000                :::*                    LISTEN      27860/n9e
tcp6       0      0 :::20090                :::*                    LISTEN      27860/n9e
配置日志
把日志输出到 logs 目录下,日志级别是 INFO,日志文件大小超过 256M 时,会自动切割,保留 3 个日志文件。
cat config.toml
[Log]
# log write dir
Dir = "logs"
# log level: DEBUG INFO WARNING ERROR
Level = "INFO"
# stdout, stderr, file
Output = "file"
# # rotate by time
# KeepHours = 4
# # rotate by size
RotateNum = 3
# # unit: MB
RotateSize = 256
访问夜莺
浏览器访问夜莺的端口,即 17000,默认用户是 root,密码是 root.2020
VictoriaMetrics 时序数据库安装
wget https://github.com/VictoriaMetrics/VictoriaMetrics/releases/download/v1.21.0-victorialogs/victoria-logs-linux-amd64-v1.21.0-victorialogs.tar.gz
vim /etc/systemd/system/victoria-metrics-prod.service
[Unit]
Description=Victoria Metrics Service
After=network.target[Service]
Type=simple
ExecStart=/root/victoria-logs-prod -storageDataPath=/root/victoria-metrics-data -retentionPeriod=12
Restart=on-failure
SuccessExitStatus=0
LimitNOFILE=65536
StandardOutput=journal
StandardError=journal
SyslogIdentifier=victoriametrics[Install]
WantedBy=multi-user.target
systemctl daemon-reload
systemctl enable victoria-metrics-prod
systemctl start victoria-metrics-prod
systemctl status victoria-metrics-prod
journalctl -fu victoria-metrics-prod.service
wget https://github.com/prometheus/prometheus/releases/download/v3.3.0/prometheus-3.3.0.linux-amd64.tar.gz
wget https://github.com/prometheus/node_exporter/releases/download/v1.9.1/node_exporter-1.9.1.linux-amd64.tar.gz
接入数据源 Prometheus
- 添加参数
–web.enable-remote-write-receiver
vim /etc/systemd/system/prometheus.service
[Unit]
Description=prometheus service[Service]
User=root
ExecStart=/root/prometheus/prometheus \--config.file=/root/prometheus/prometheus.yml \--storage.tsdb.path=/root/prometheus/prometheus_data \--web.enable-lifecycle \--storage.tsdb.retention.time=90d \--web.enable-remote-write-receiverTimeoutStopSec=10
Restart=on-failure
RestartSec=5[Install]
WantedBy=multi-user.target
systemctl daemon-reload
systemctl enable prometheus.service
systemctl restart prometheus.service
node_exporter 服务
vim /etc/systemd/system/node_exporter.service
[Unit]
Description=node_exporter service[Service]
User=root
ExecStart=/root/node_exporter/node_exporter \--collector.textfile.directory=/root/node_exporter/textfileTimeoutStopSec=10
Restart=on-failure
RestartSec=5[Install]
WantedBy=multi-user.target
systemctl daemon-reload
systemctl restart node_exporter.service
systemctl enable node_exporter.service
systemctl status node_exporter.service
修改 prometheus 配置文件
cat prometheus.yml
scrape_configs:# The job name is added as a label `job=<job_name>` to any timeseries scraped from this config.- job_name: "prometheus"# metrics_path defaults to '/metrics'# scheme defaults to 'http'.static_configs:- targets: ["localhost:9090"]# 添加 node_exporter 的配置- job_name: "node_exporter"static_configs:- targets: ["localhost:9100"]
systemctl restart prometheus.service
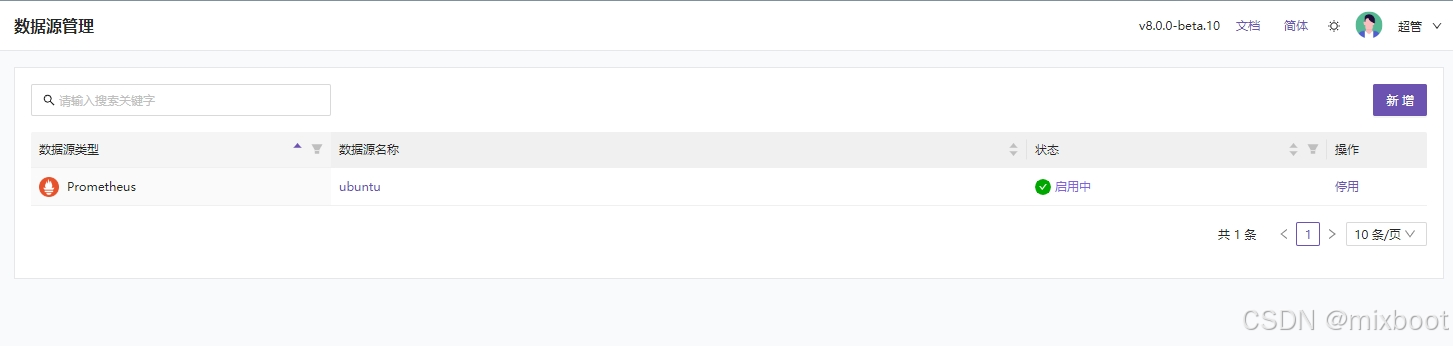
添加数据源